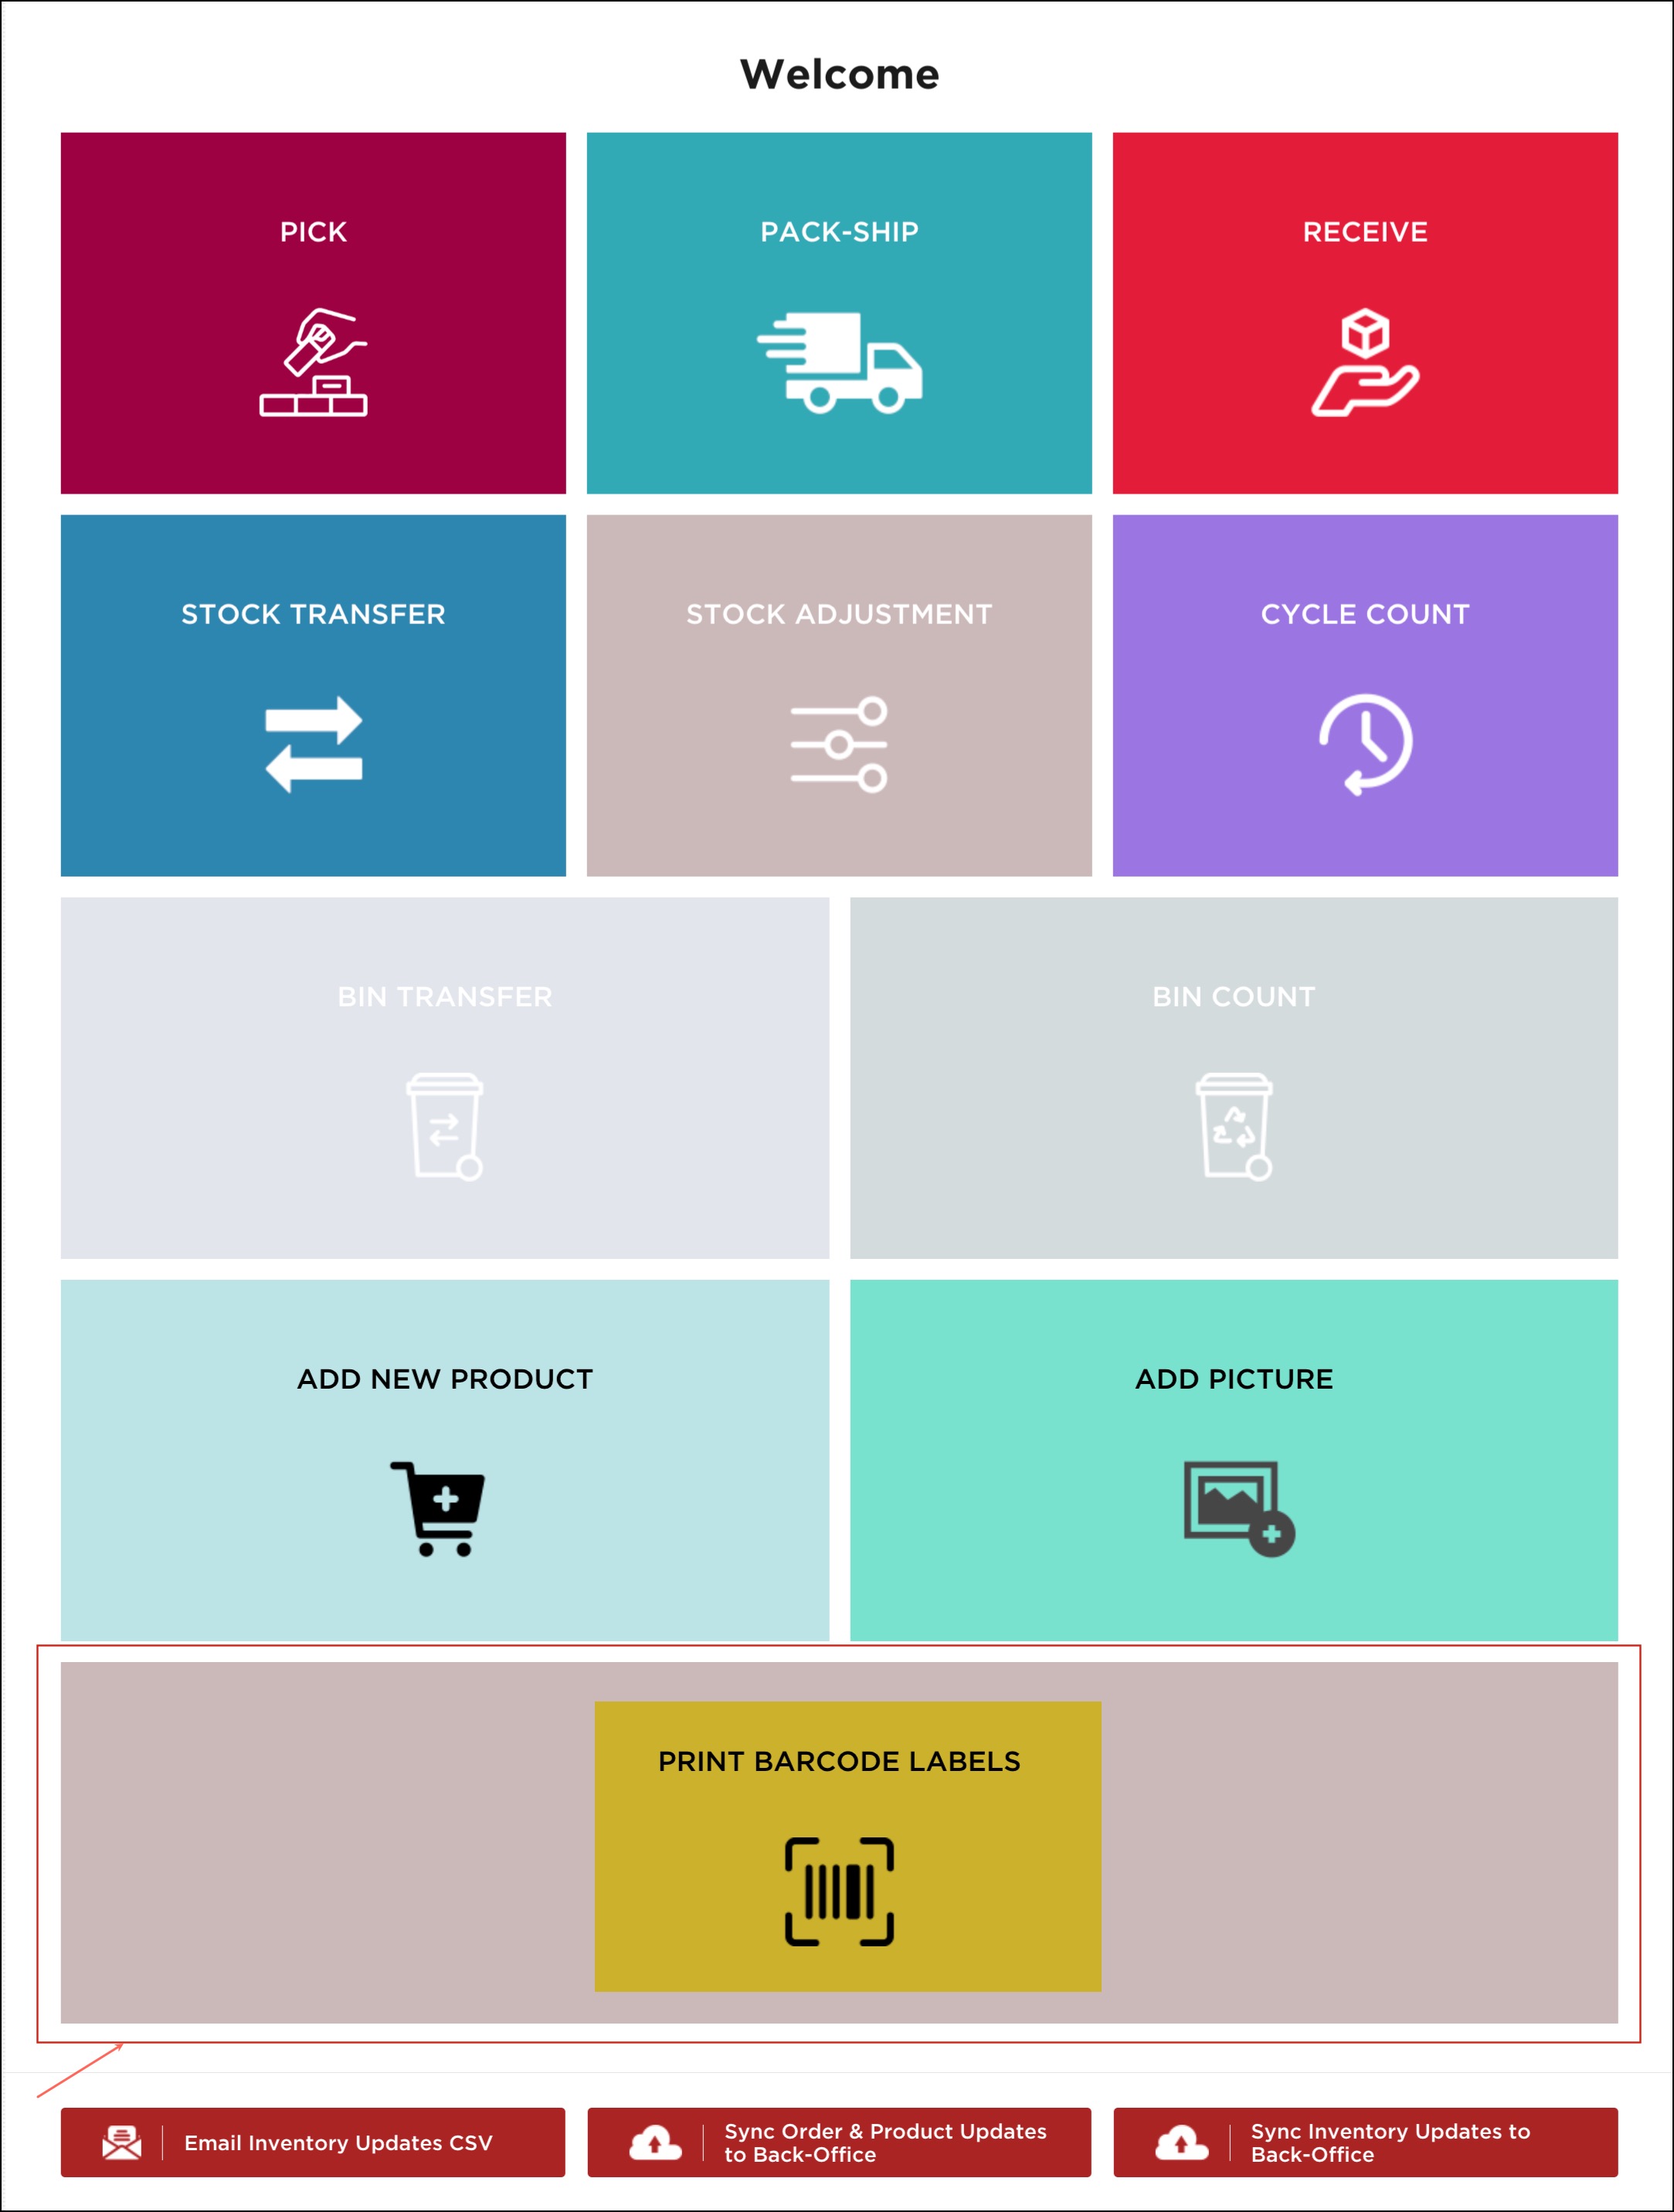
Print Barcode Labels Workflow
Just like BackOffice, barcode can now be directly printed from the warehouse management app, following the Print Barcode Labels workflow.
Let's run through the process:
- After logging in to the warehouse app, first you need to click on Settings and go to Enable or Disable Workflows and enable the Print Barcode workflow.
- Once done, close the window and go to Home.

- Click on Print Barcode Labels on the home page.
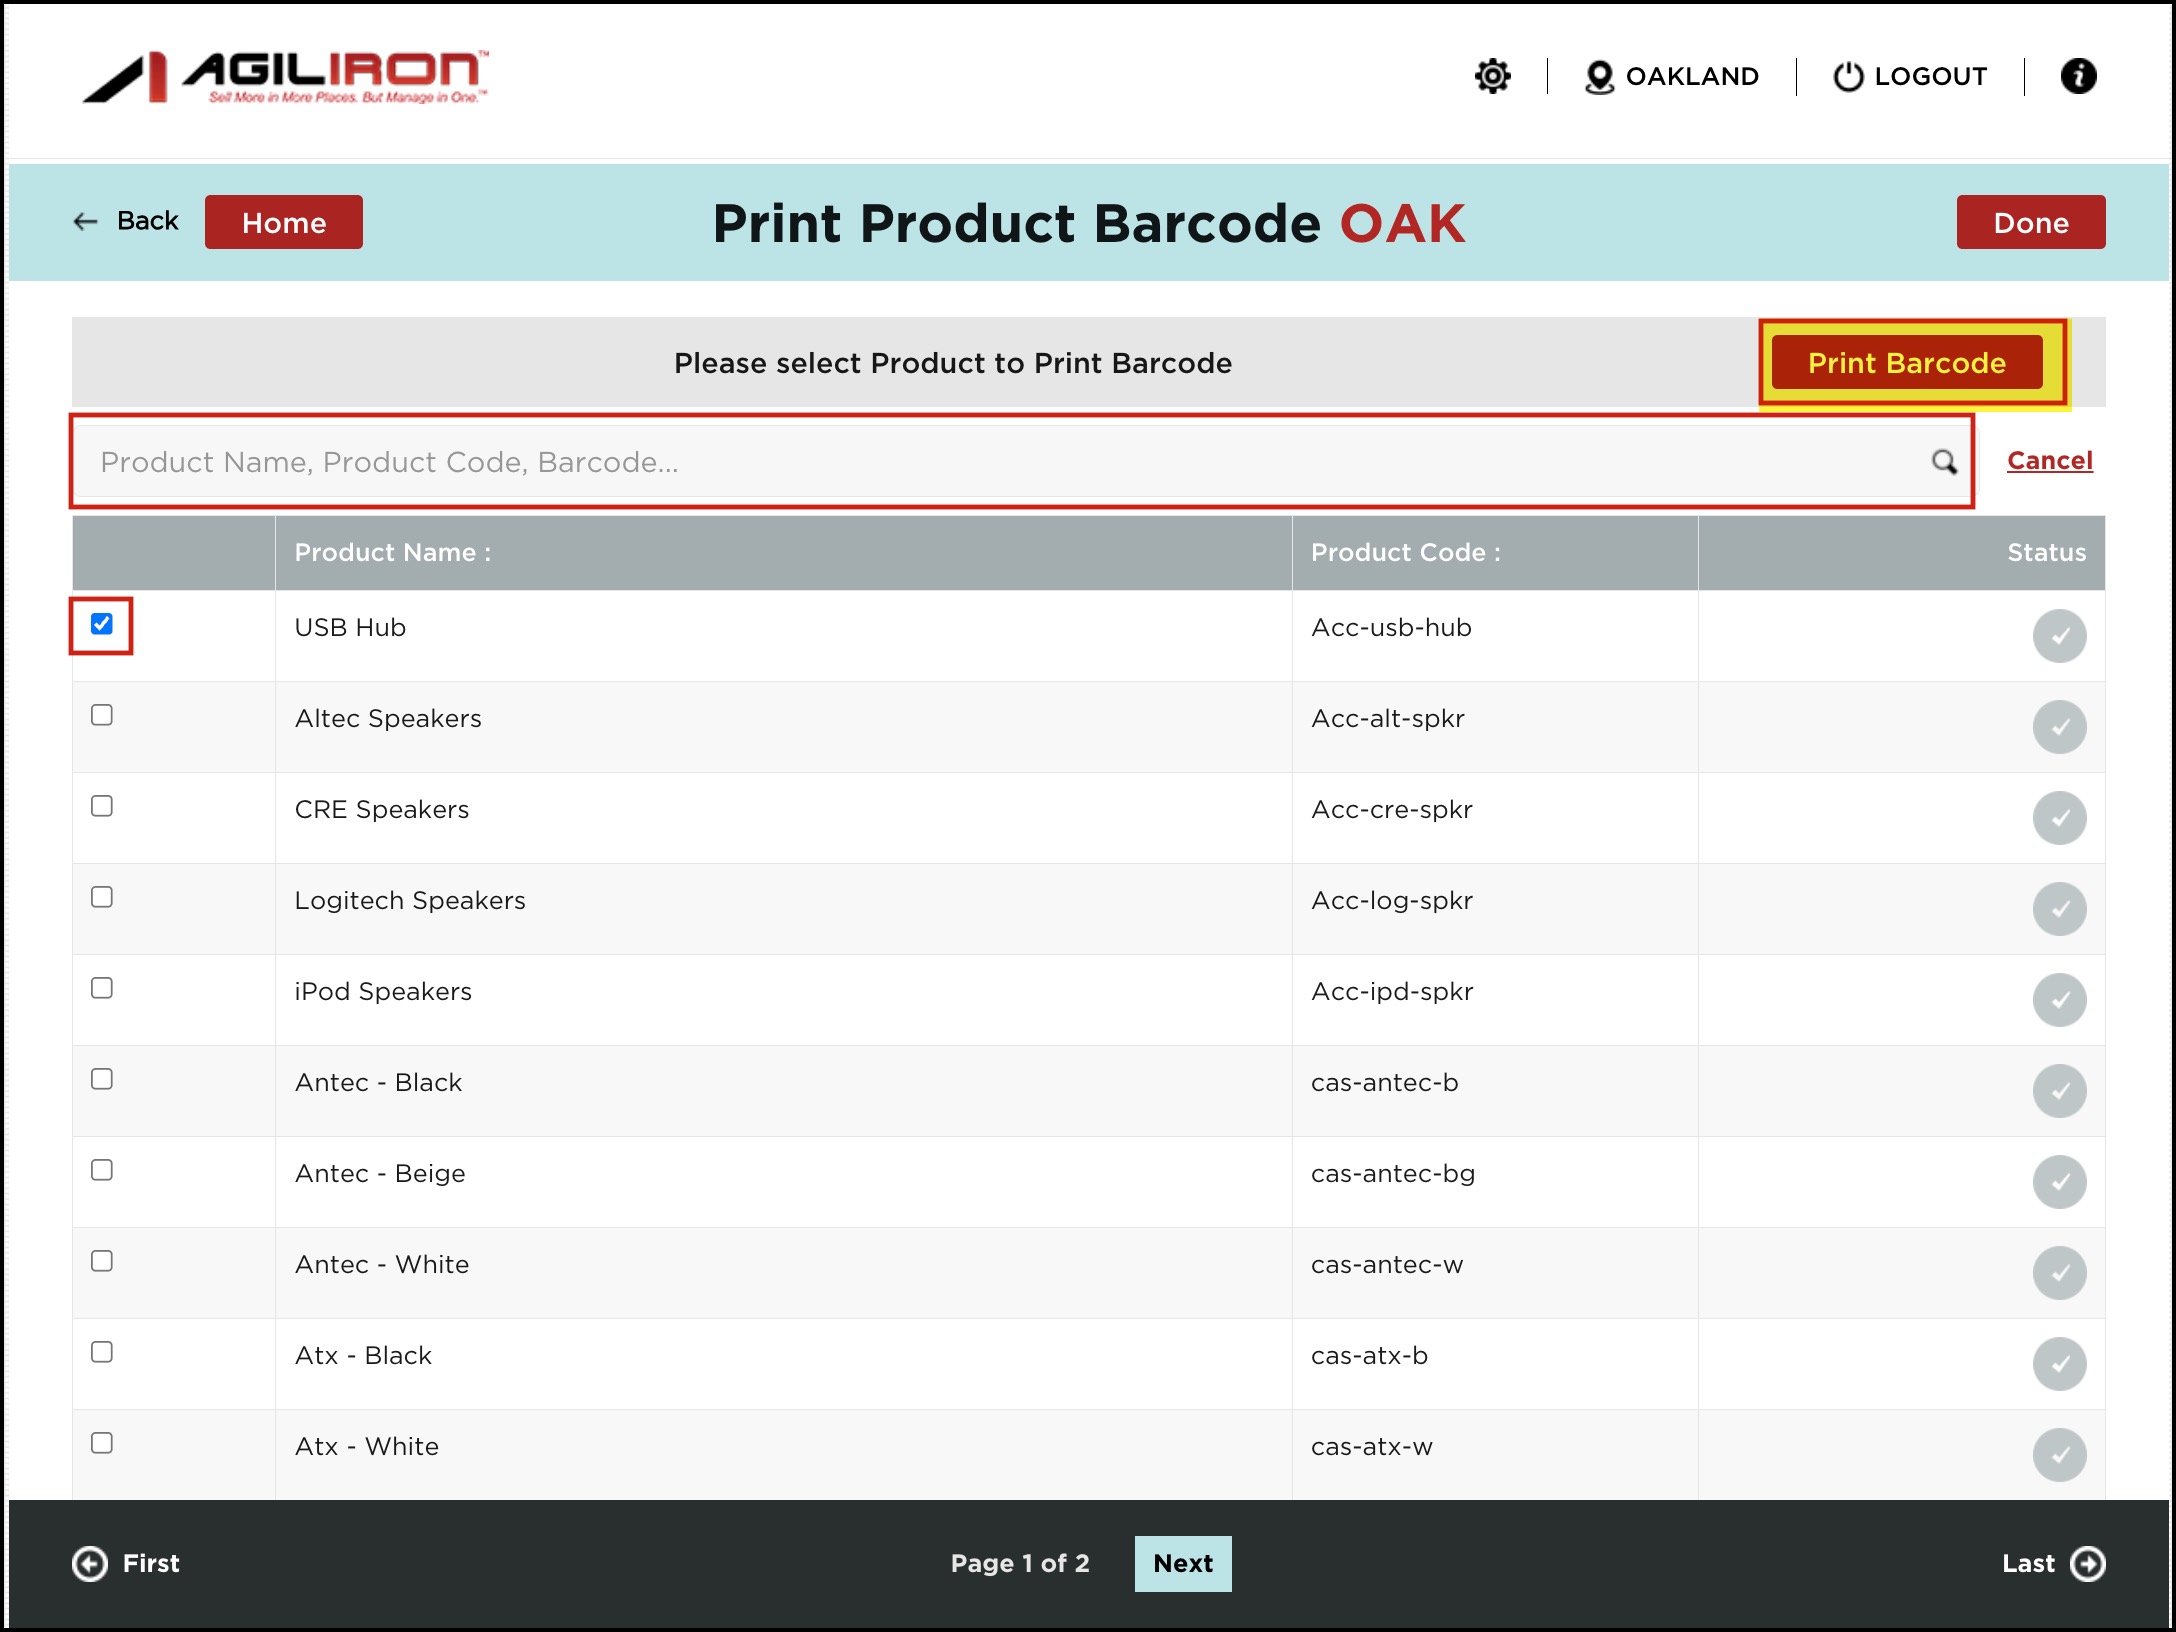
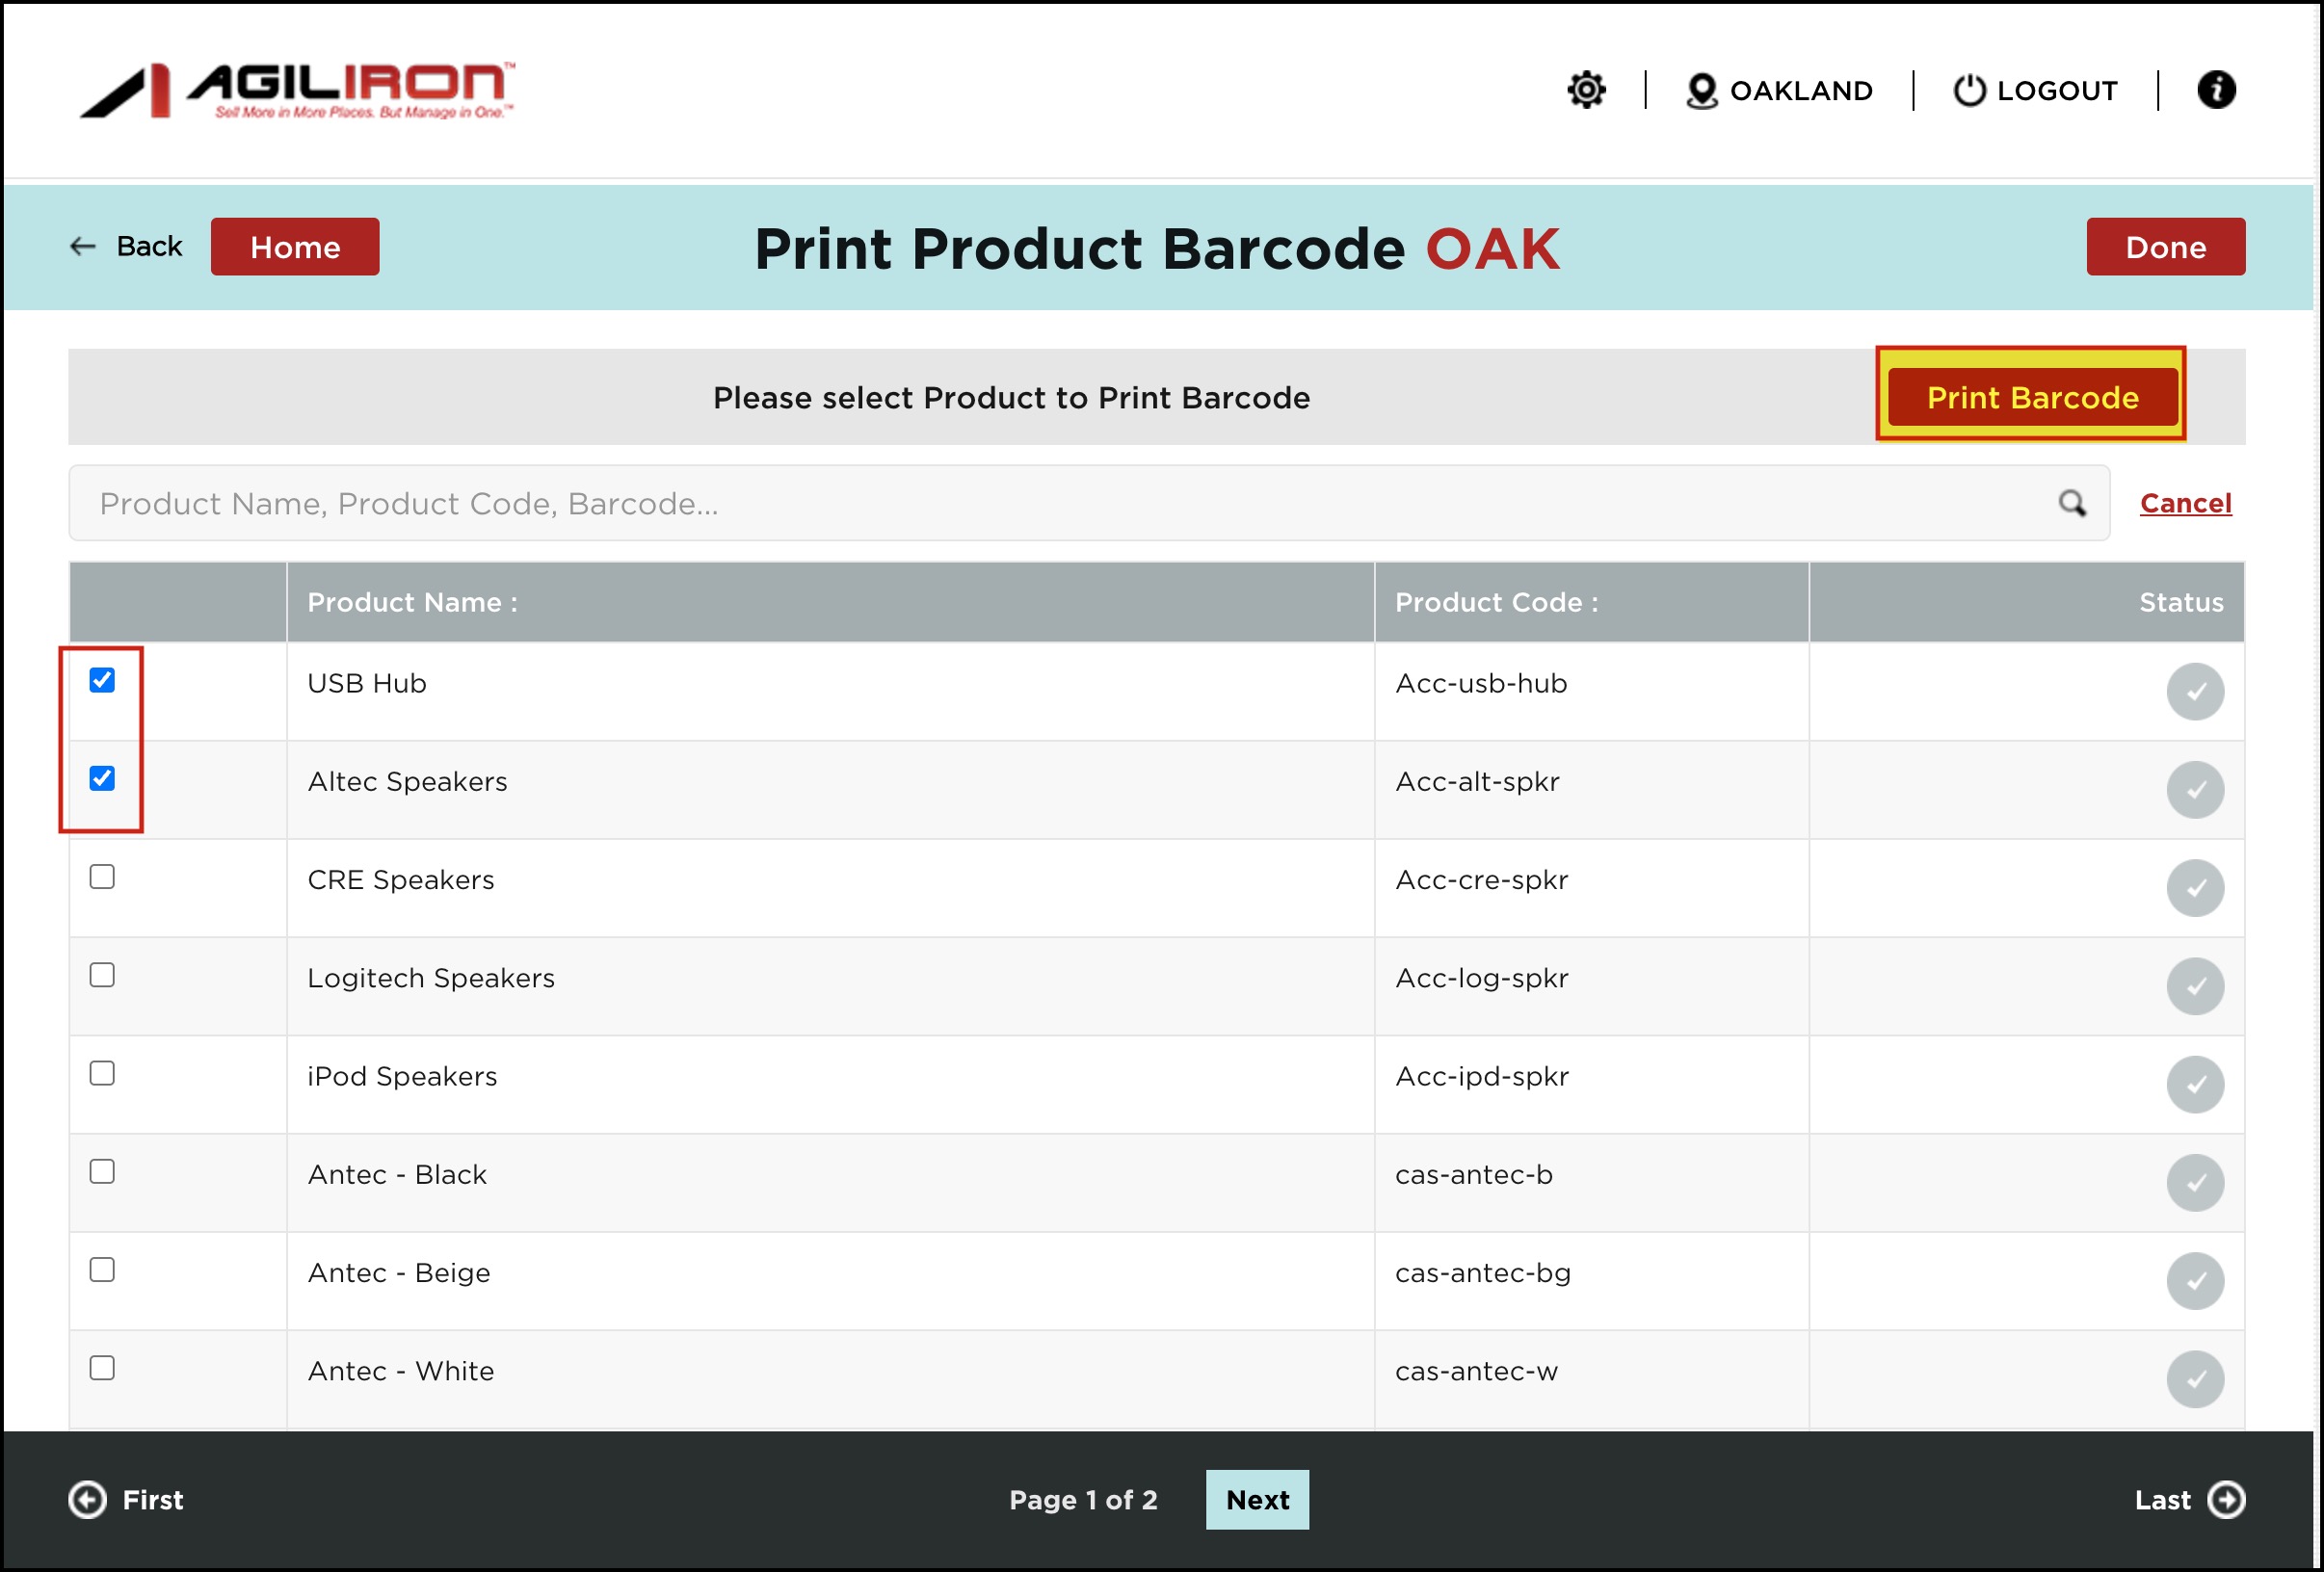
Here, you can view a list of all the products.
- Select the product for which you want to print a barcode label. If needed, search for the product by entering the product name/code/barcode in the search box
- You can even print a barcode for multiple products by clicking on the checkbox beside the products you want.
- Once selected, click on the Print Barcode button.
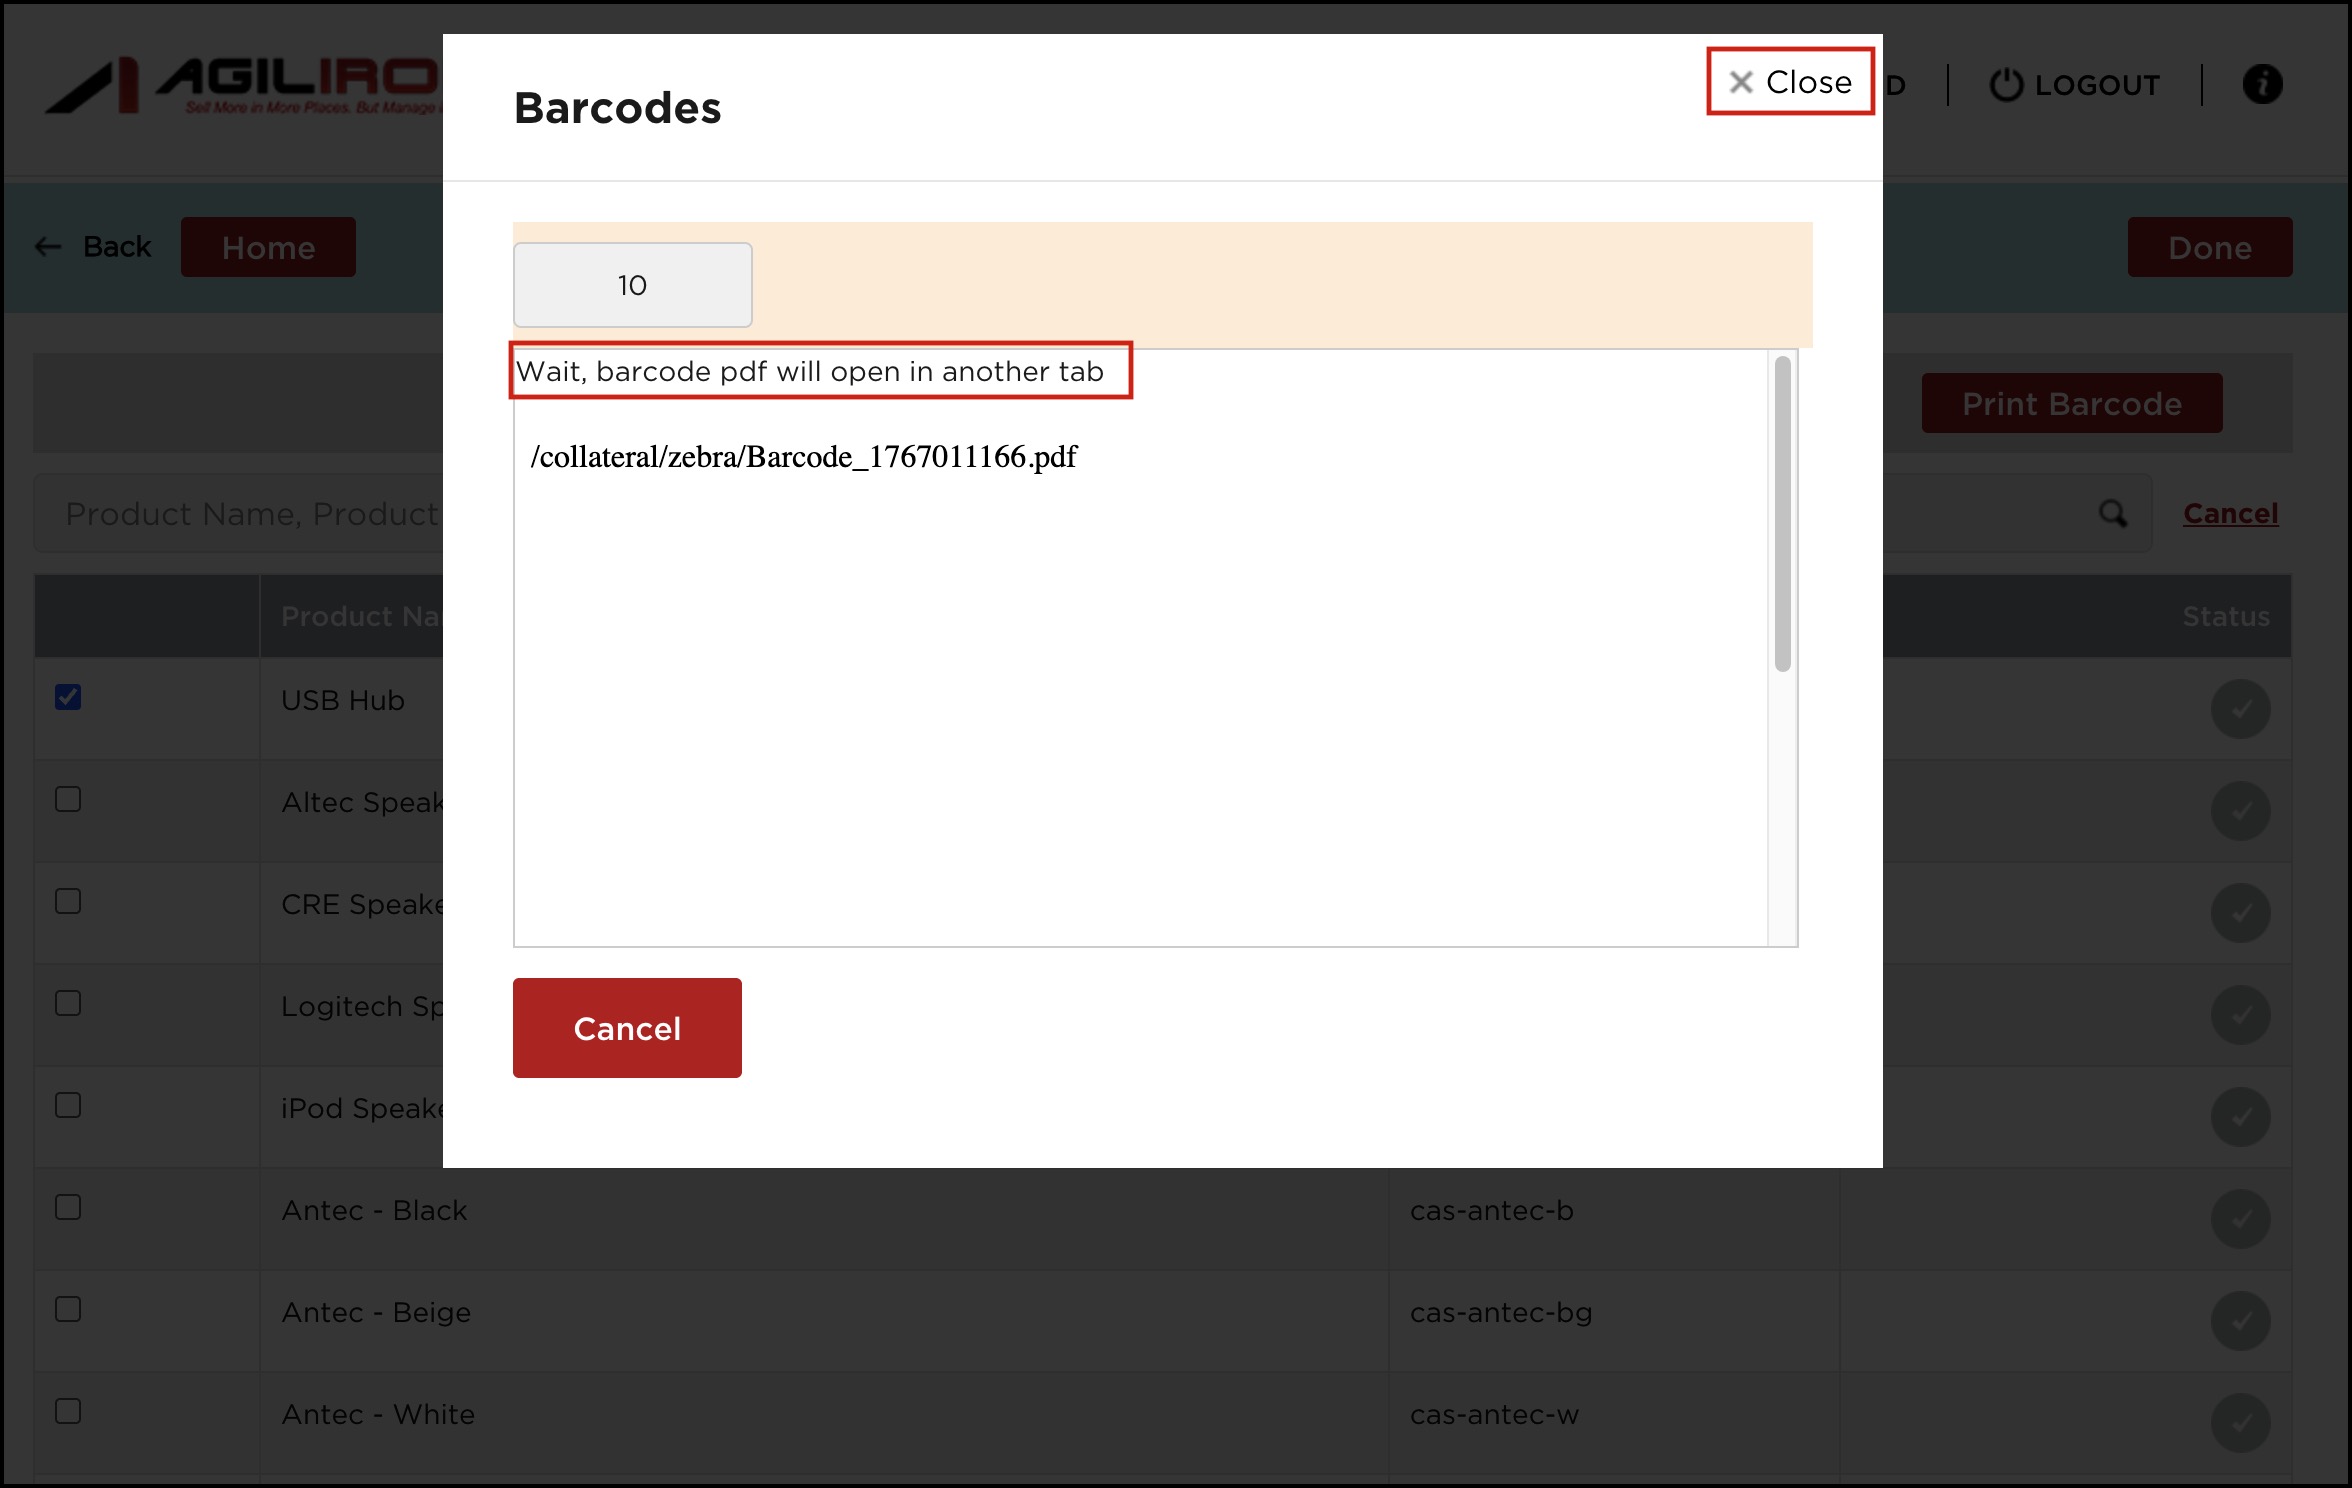
Let's proceed by selecting 1 product.
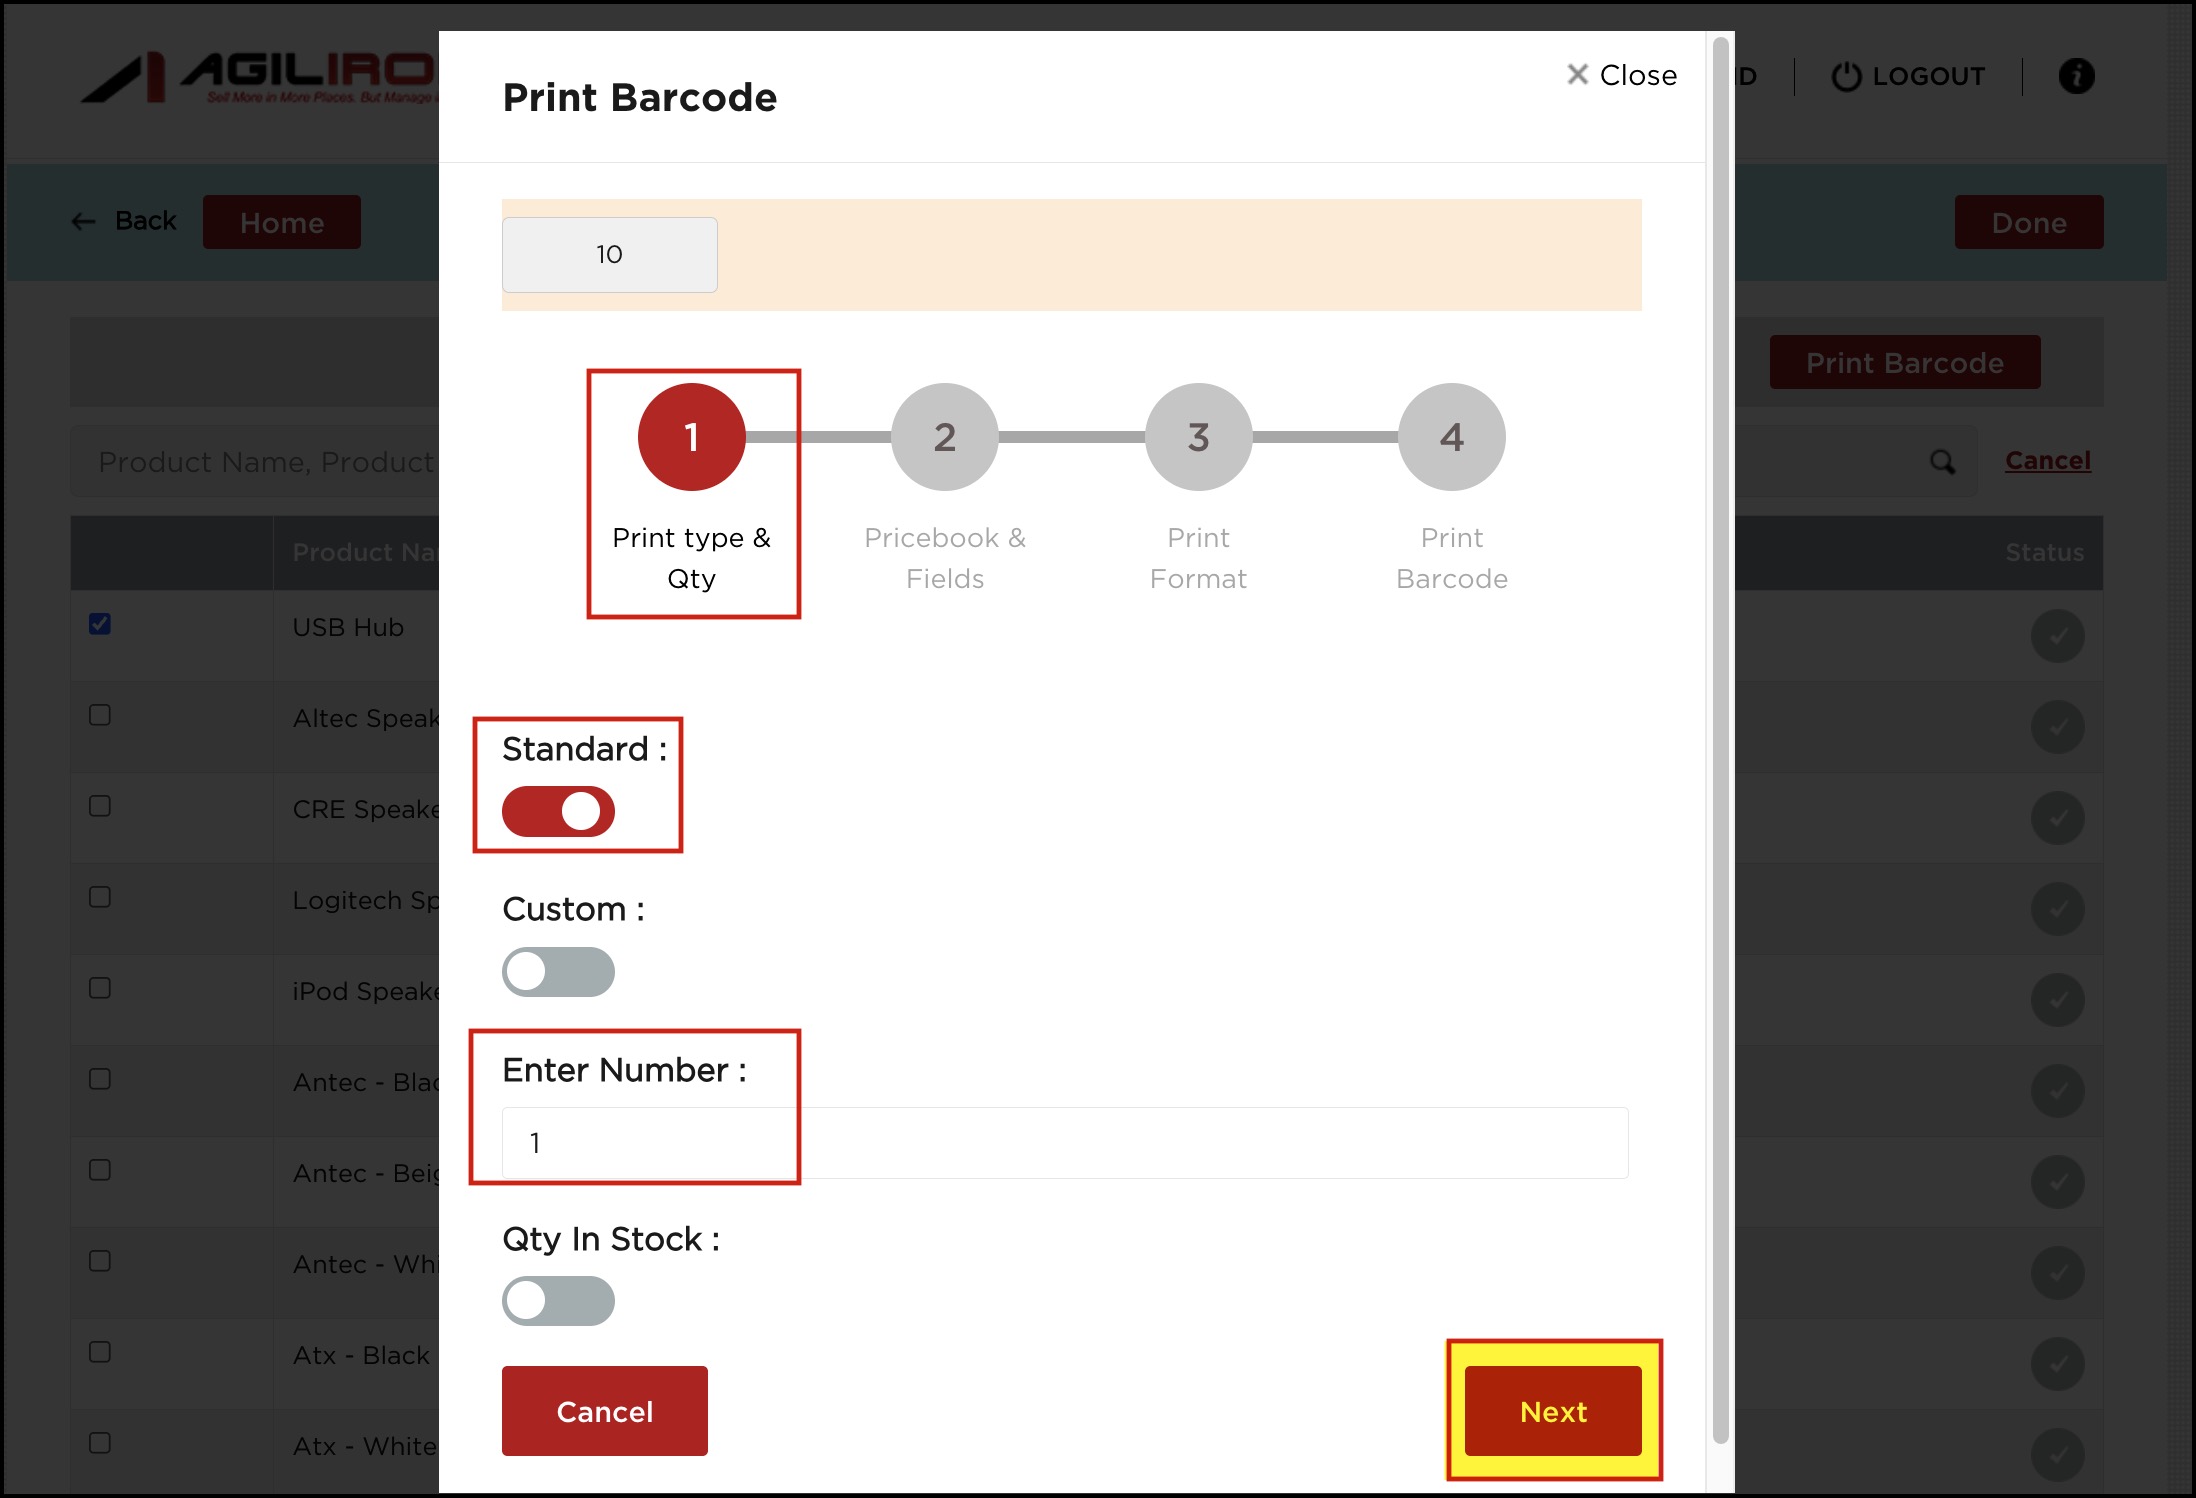
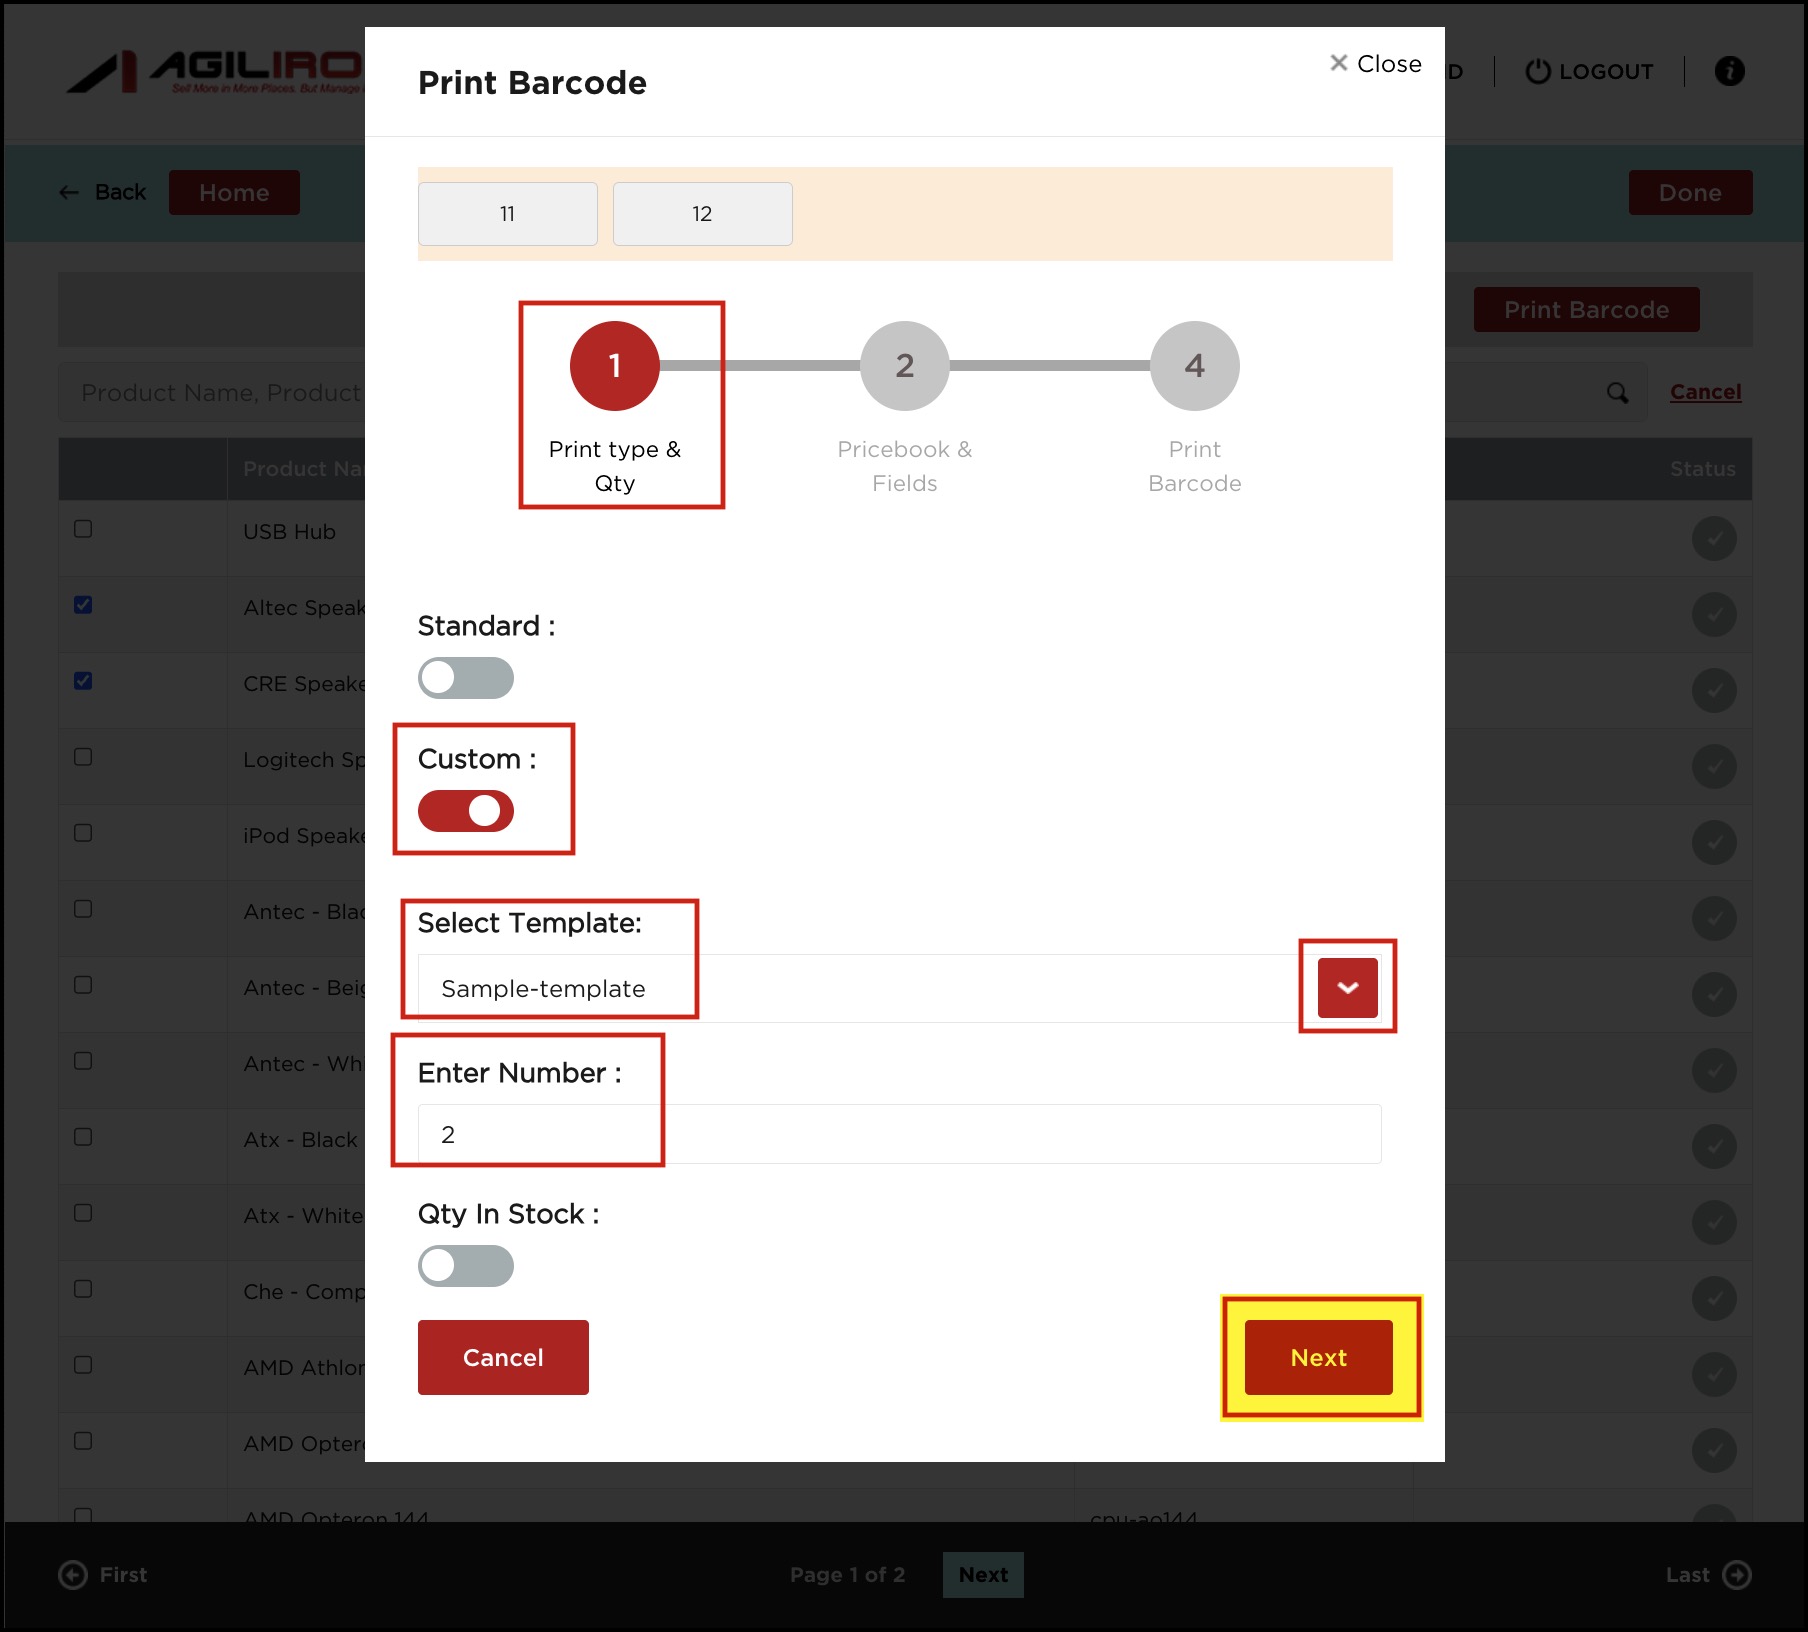
- Print Barcode pop-up screen will open, where in the first step (Print type & Qty) select the label type - Standard or Custom. Let's first view the Standard type.
- Select the number of labels to be printed. Enter a specific number of labels to print, or
Select "Qty in Stock" to print labels for the entire quantity in stock at the selected location. - Click Next to continue.
- In the next step, select the PriceBook and Special PriceBook (if any) for the products to print the selling price on the labels.
- Select the fields that should be displayed on the barcode label(s).
- Click Next to continue.

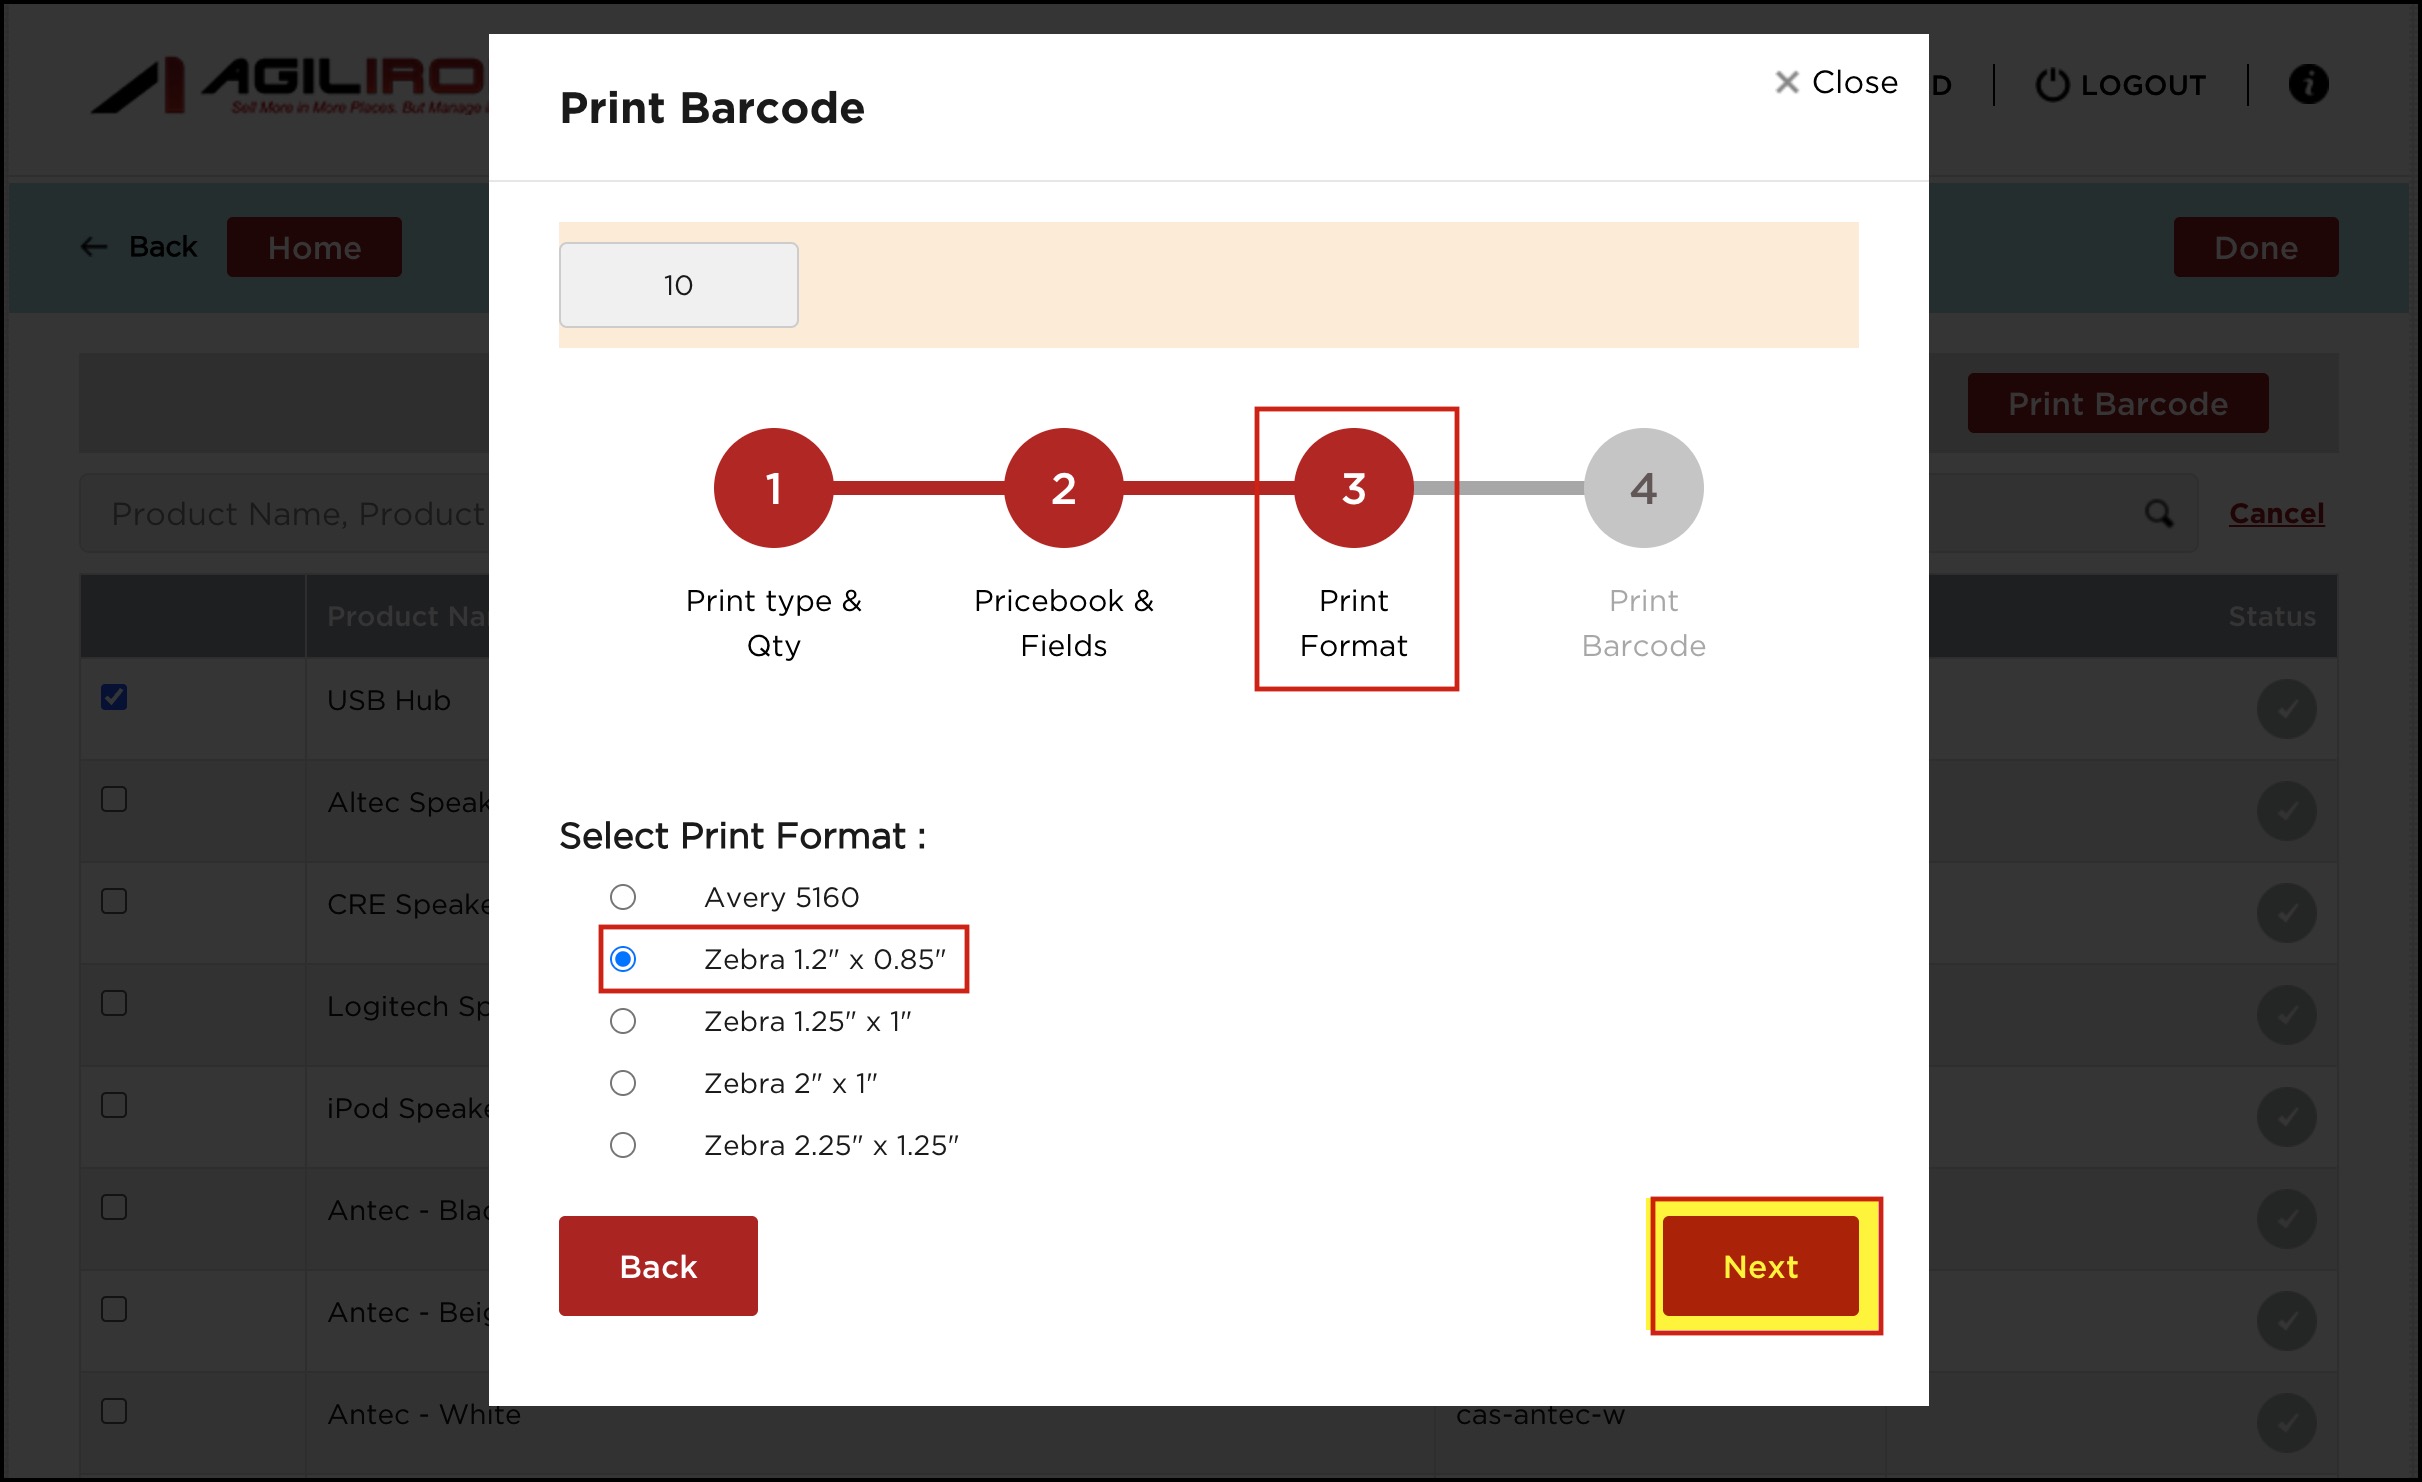
- In this step, select the label format from the list below.
- Click on "Next".
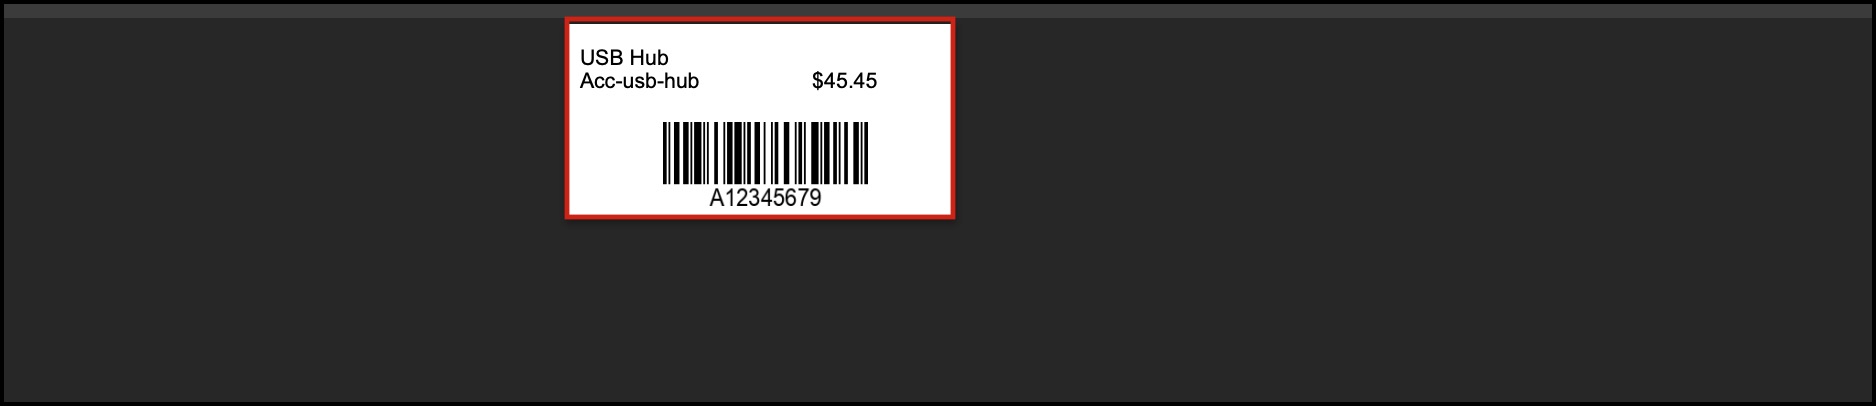
In the next step, the barcodes get printed, and the barcode PDF will open in another tab.
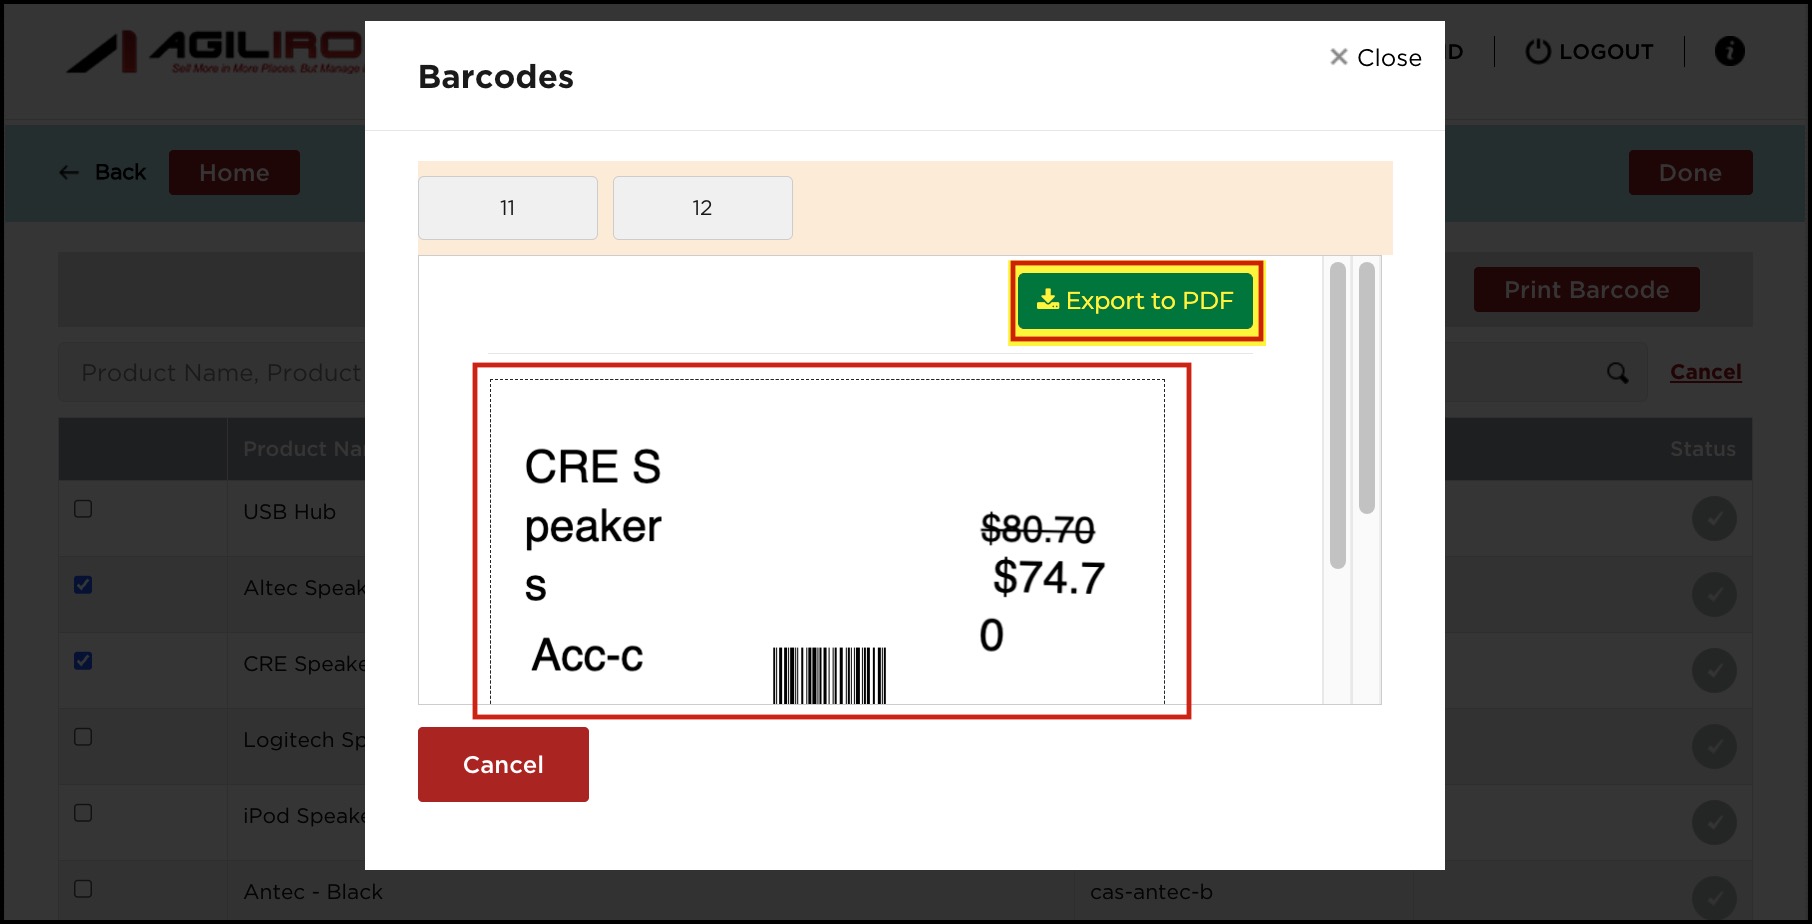
- Let's now select multiple products and proceed with the Custom label type.
- In the Custom method, you need to select the label template. The templates displayed here are the ones that you had created in the BackOffice.
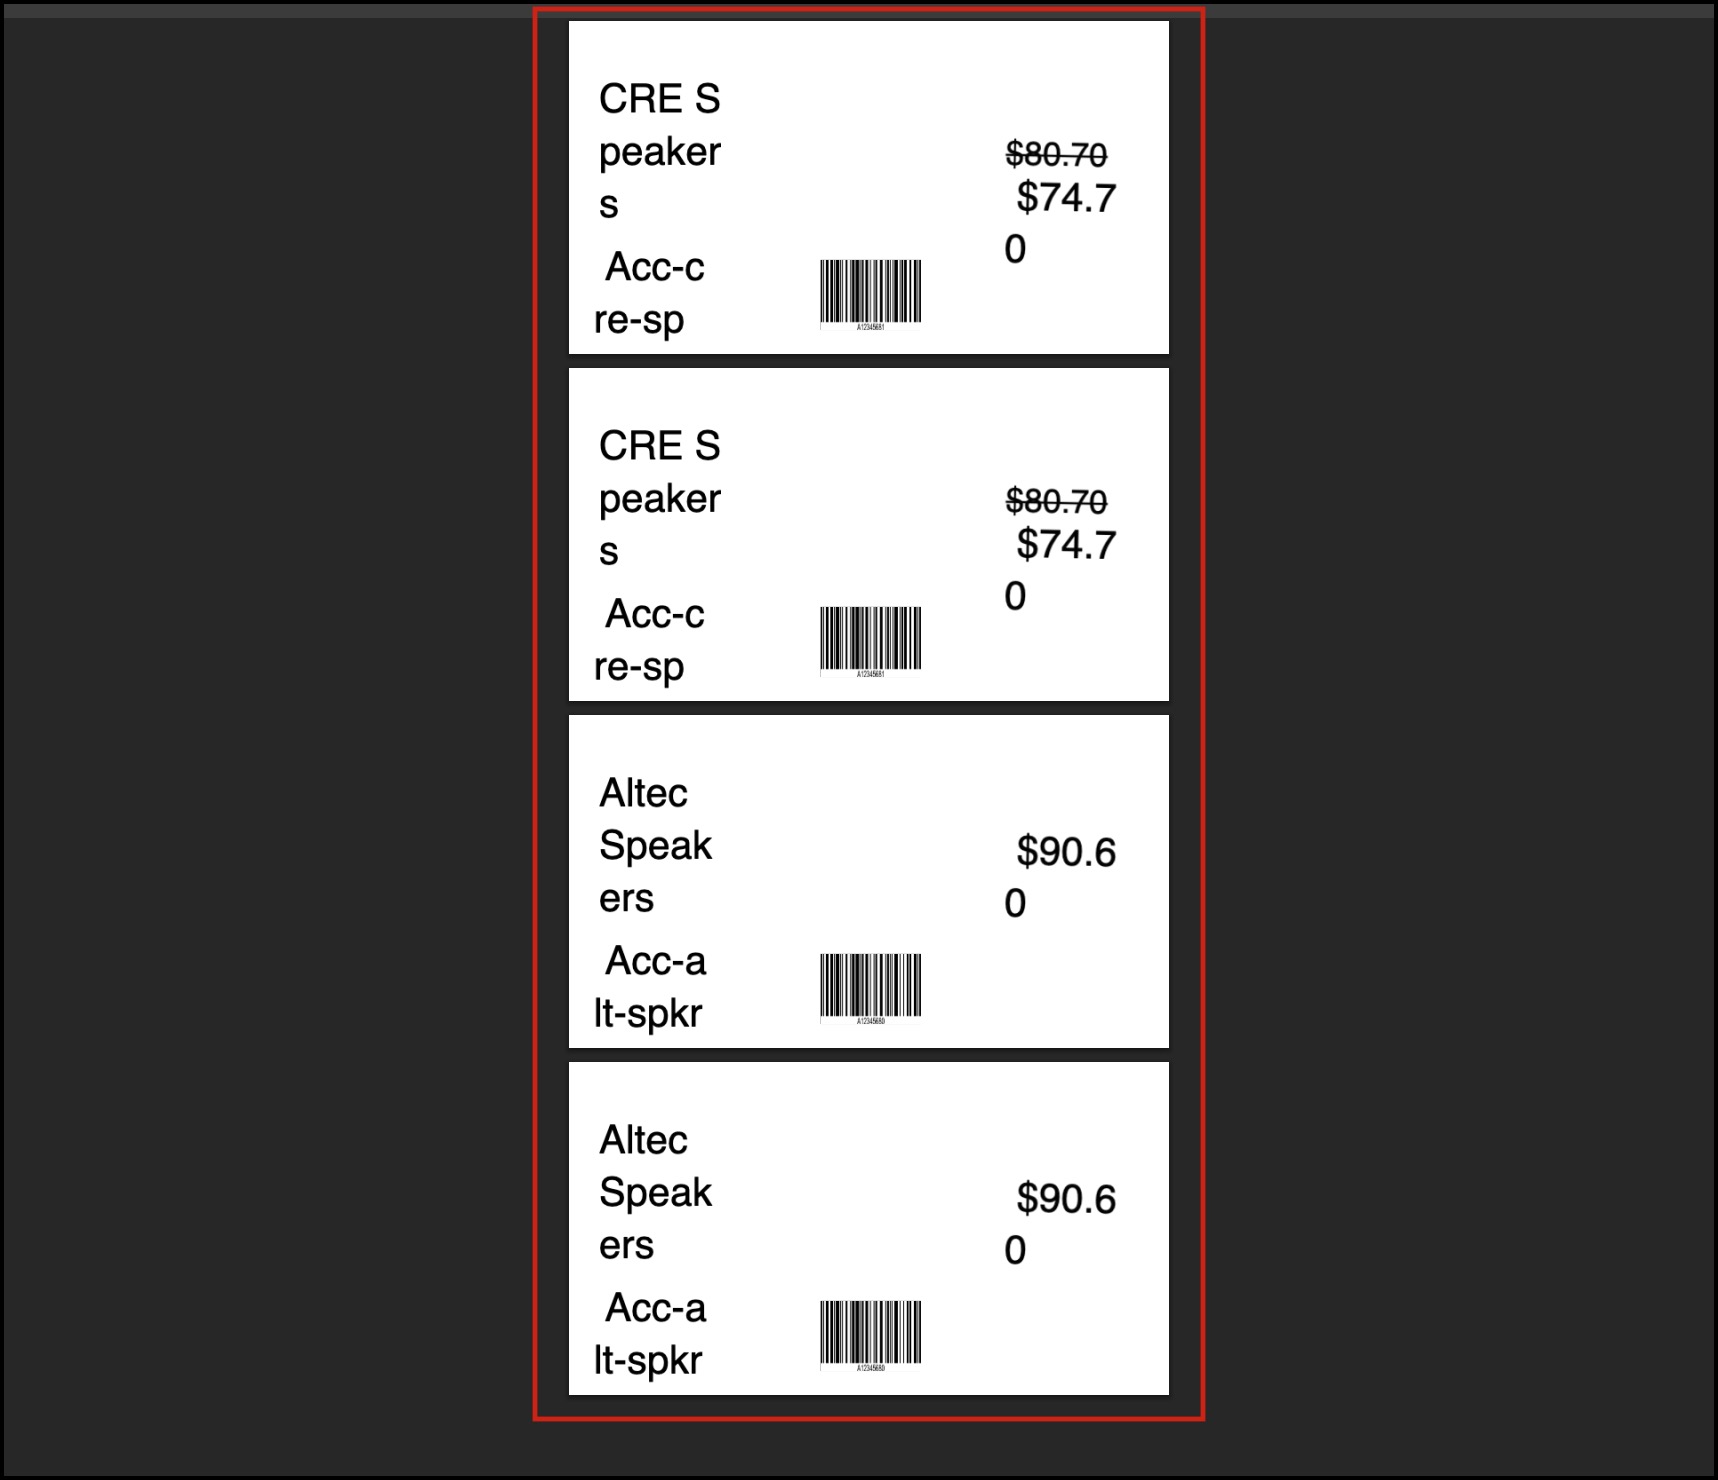
In the next step, you can see all the product barcodes printed (as per the label template you selected), which you can Export to PDF.
Updated 6 months ago