Custom Reports
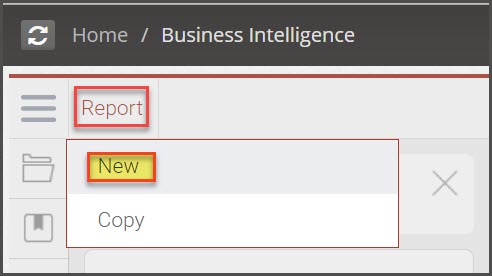
New reports can be easily created using the Plus Icon.
- Select the icon and click on Report.
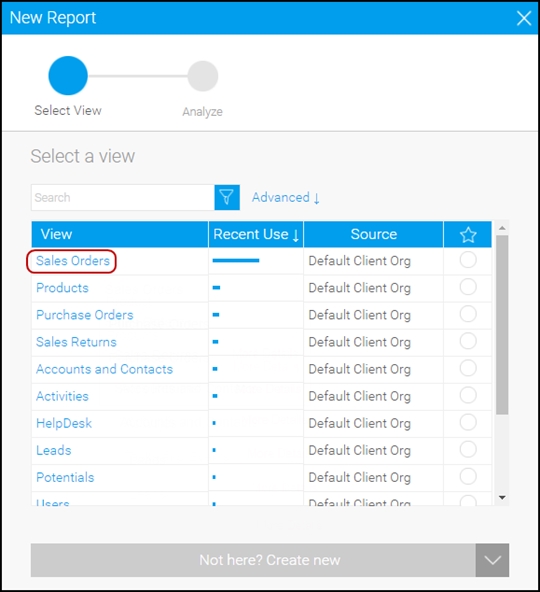
- Here you will see various views that correlate to the Agiliron Modules.
- For this example we will select Sales Orders.
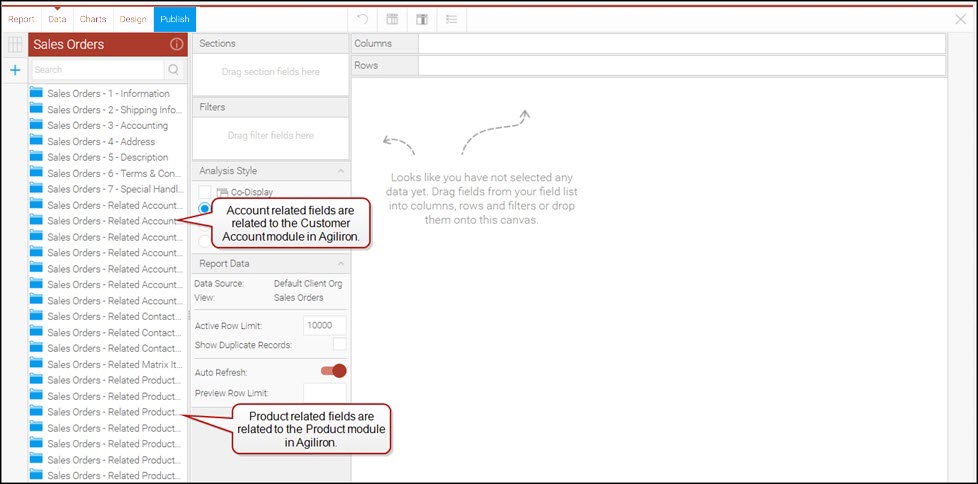
- On the next screen, you will see all the fields that are relevant to the Sales Order view in the left menu panel.
- You will see fields that are relevant to the sales order specifically along with other fields that correlate with the order such customer account and product fields.
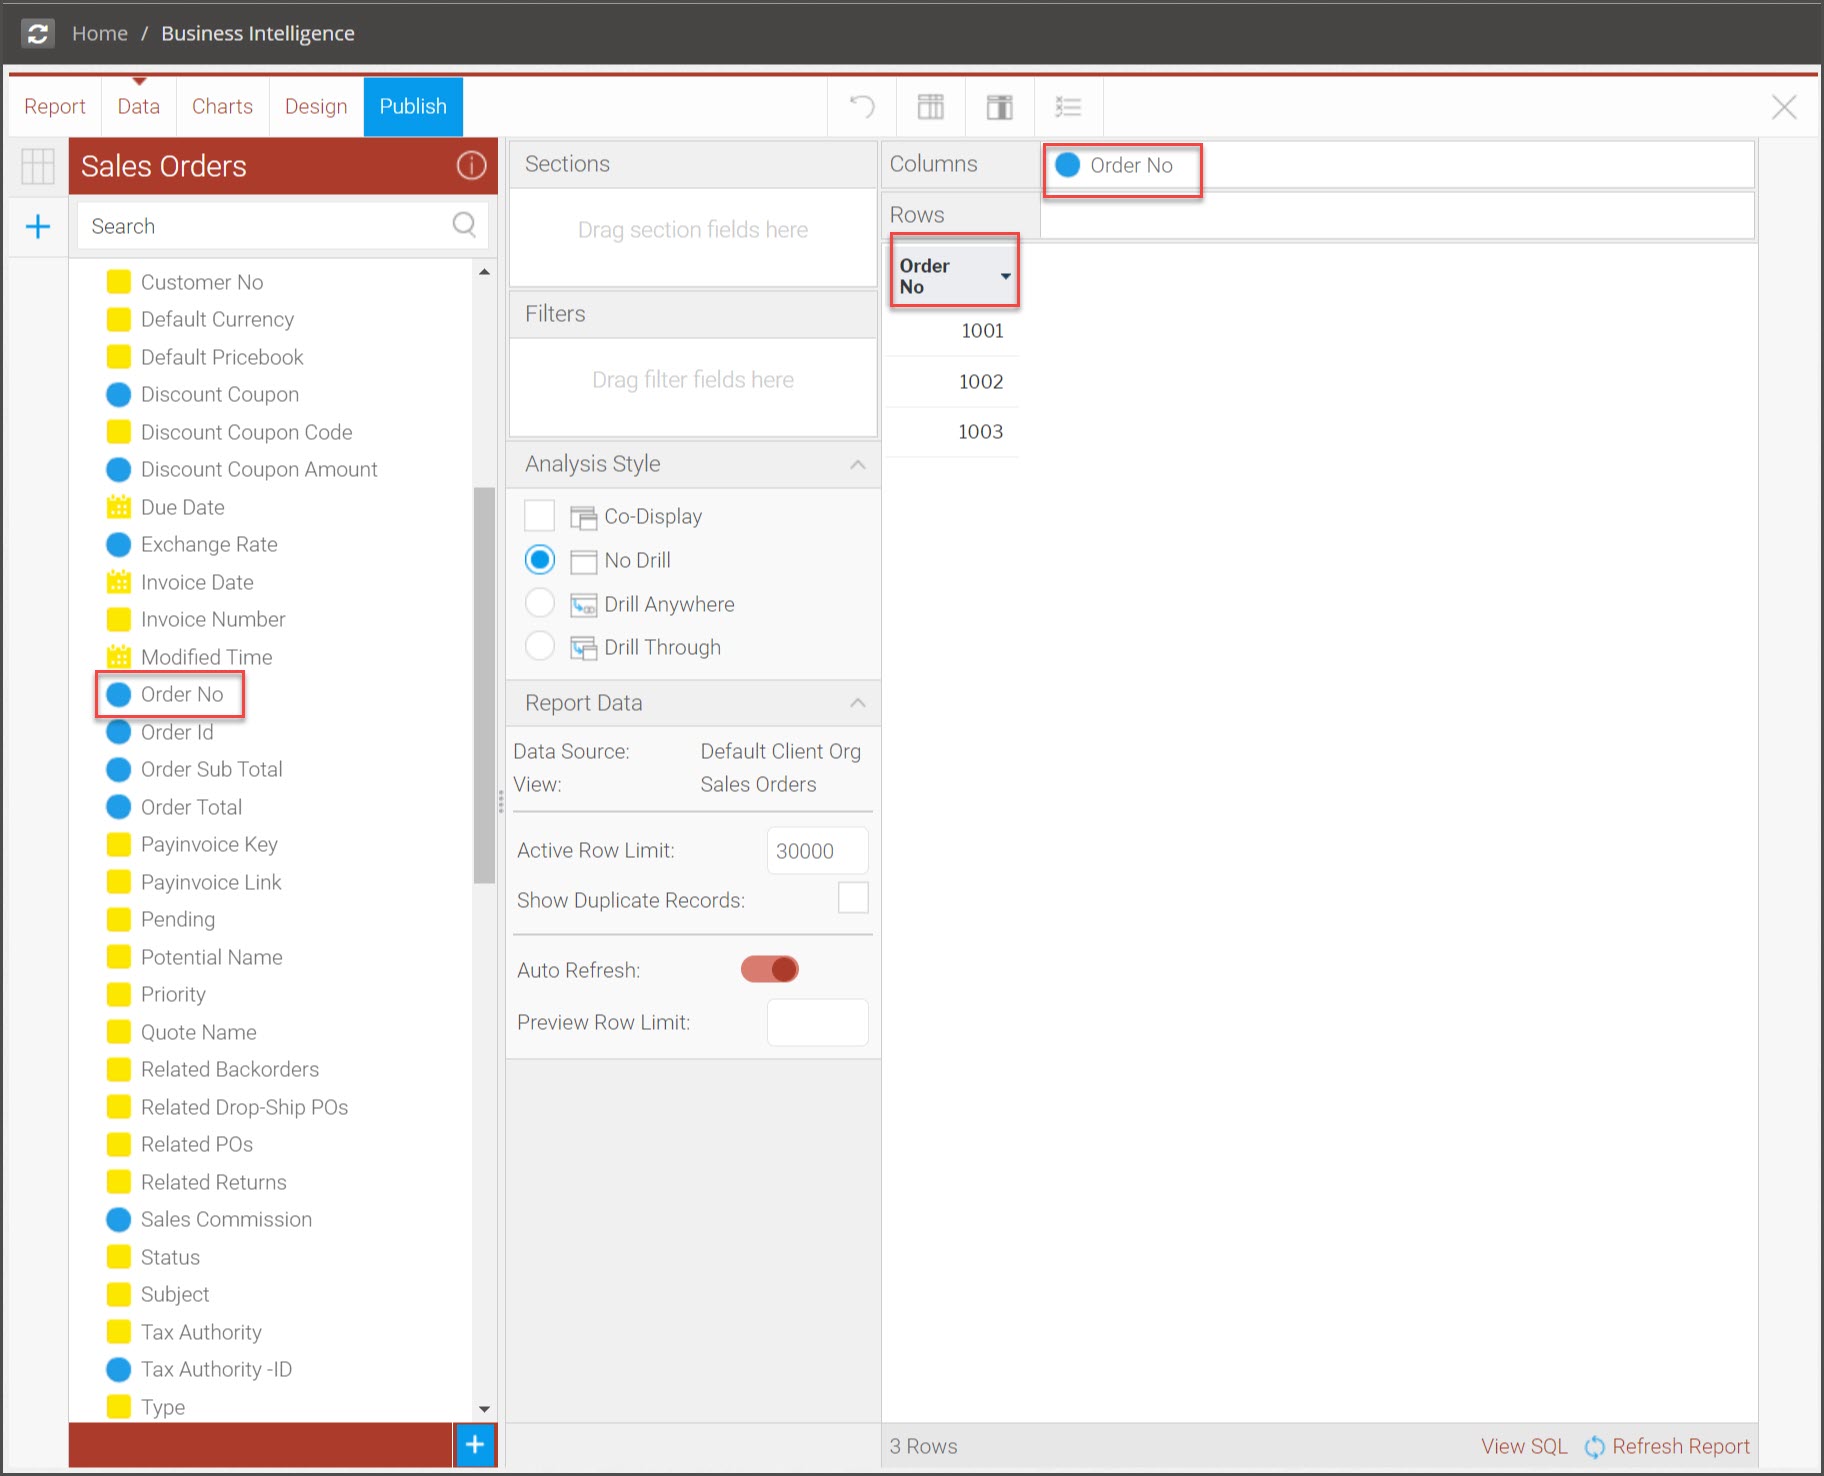
- Select a field and then drag and drop the selection to the report editor.
- In this example, we've selected Sales Orders - 1 - Information and chose "Order No" as a column in our report.
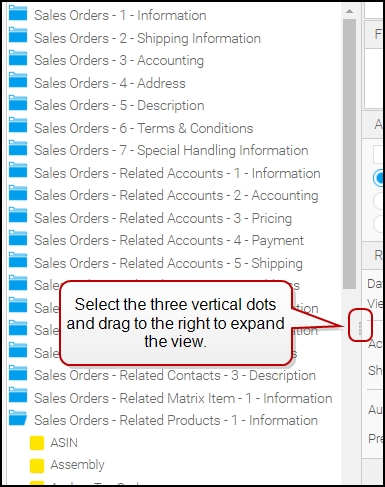
- Select another topic to add additional fields. You can drag the side of the topic box to expand the descriptions.
Report Formatting
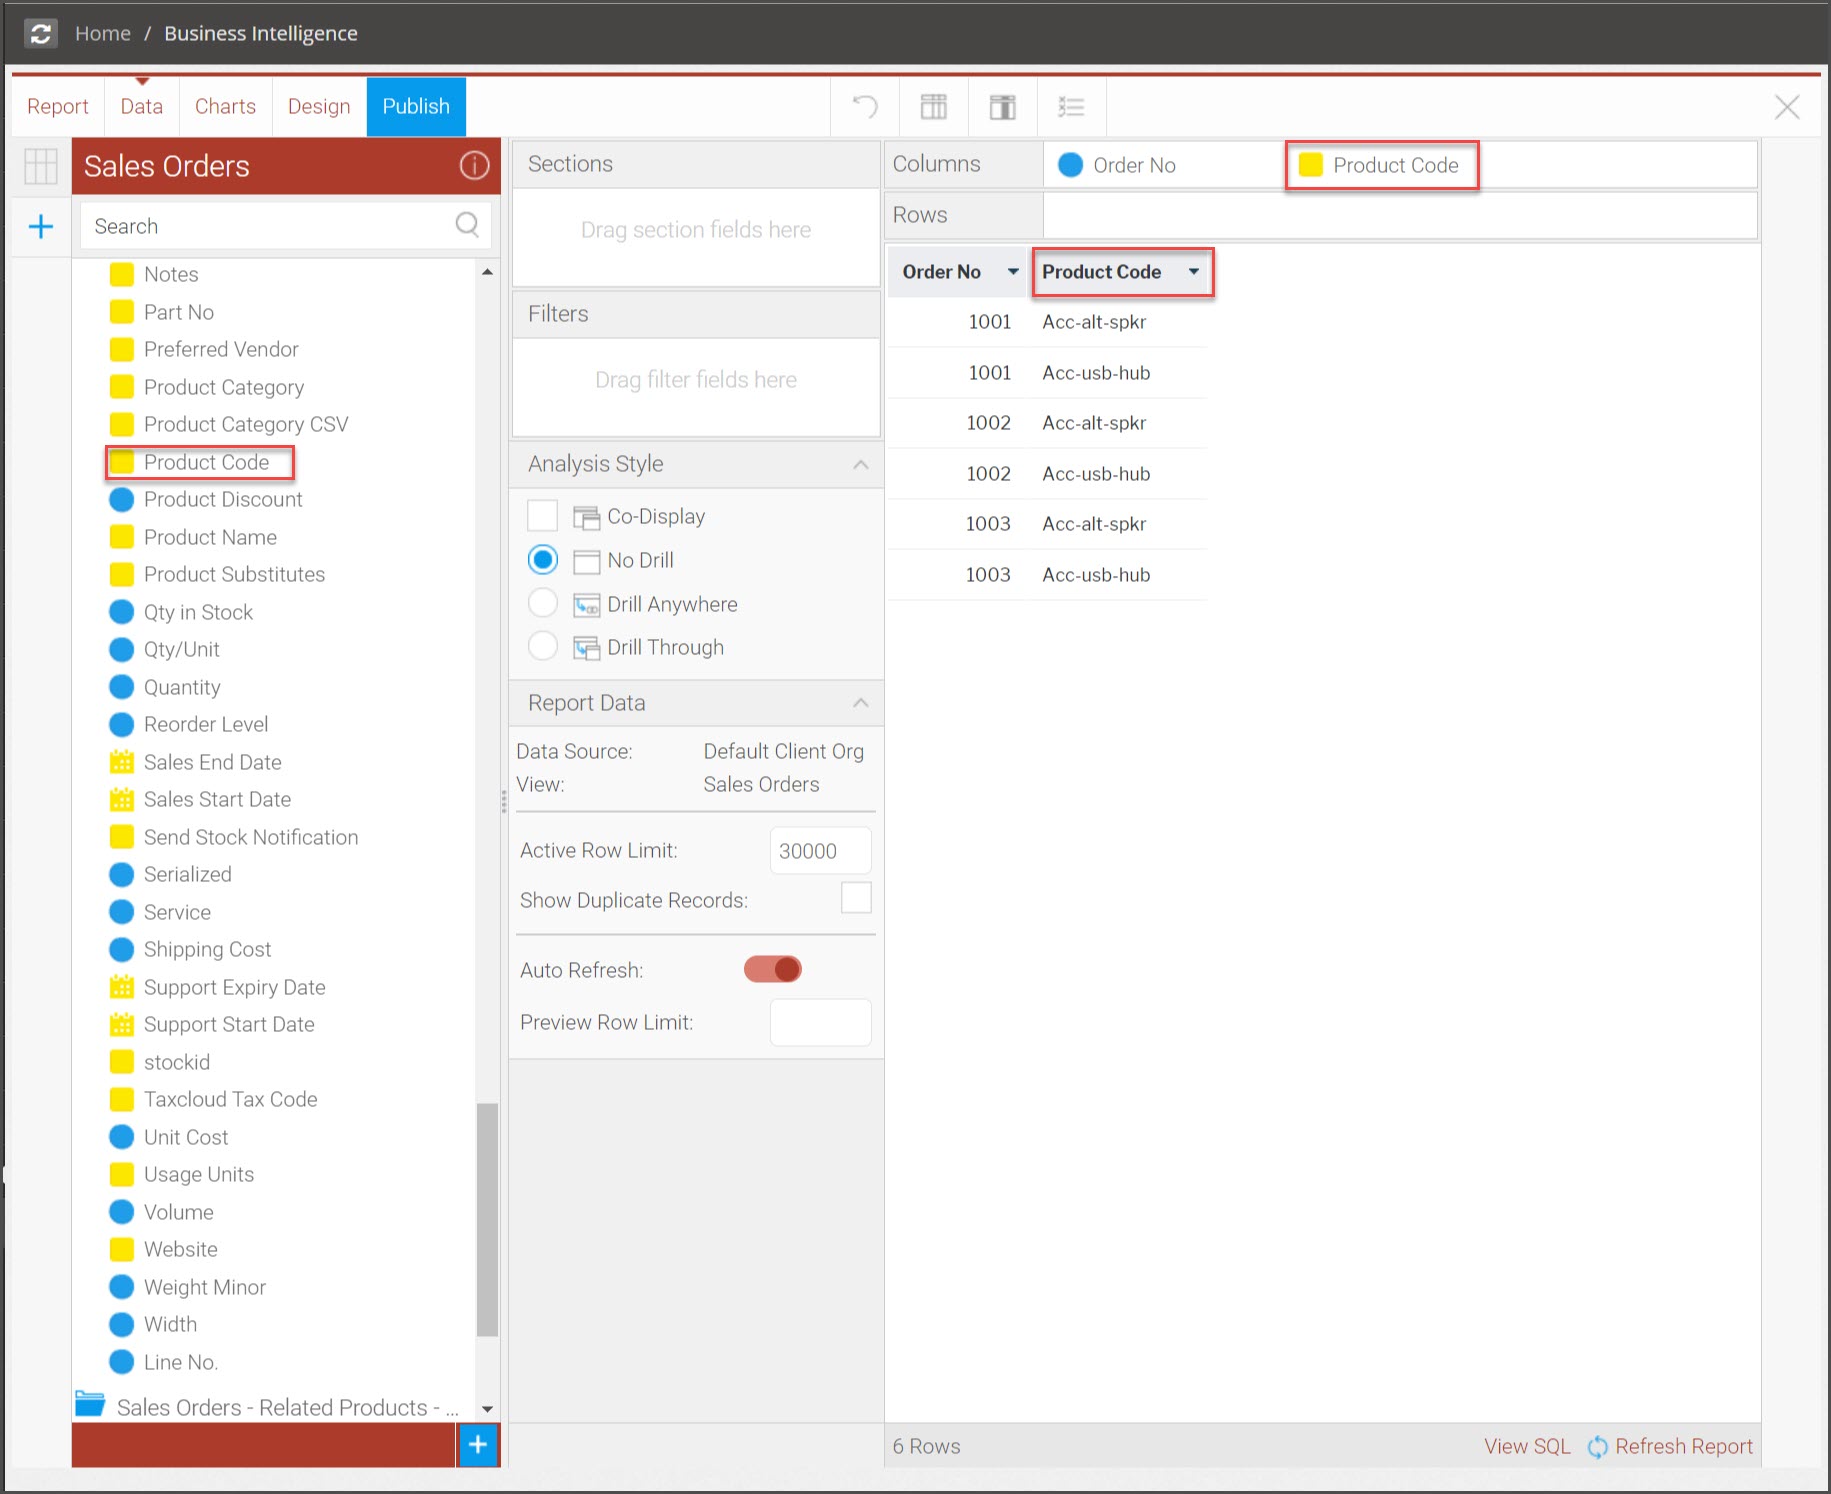
- For our next column, we've selected Sales Orders - Related Products - 1 - Information and chose "Product Code" to add to the Columns section of the report.
-
Continue adding the desired fields to the report. The fields can be rearranged by selecting either the column heading or selecting the column name in the "Columns" field (this applies to "Rows" as well).
-
Now that the report is complete, it can be further refined using the built-in formatting tools.
-
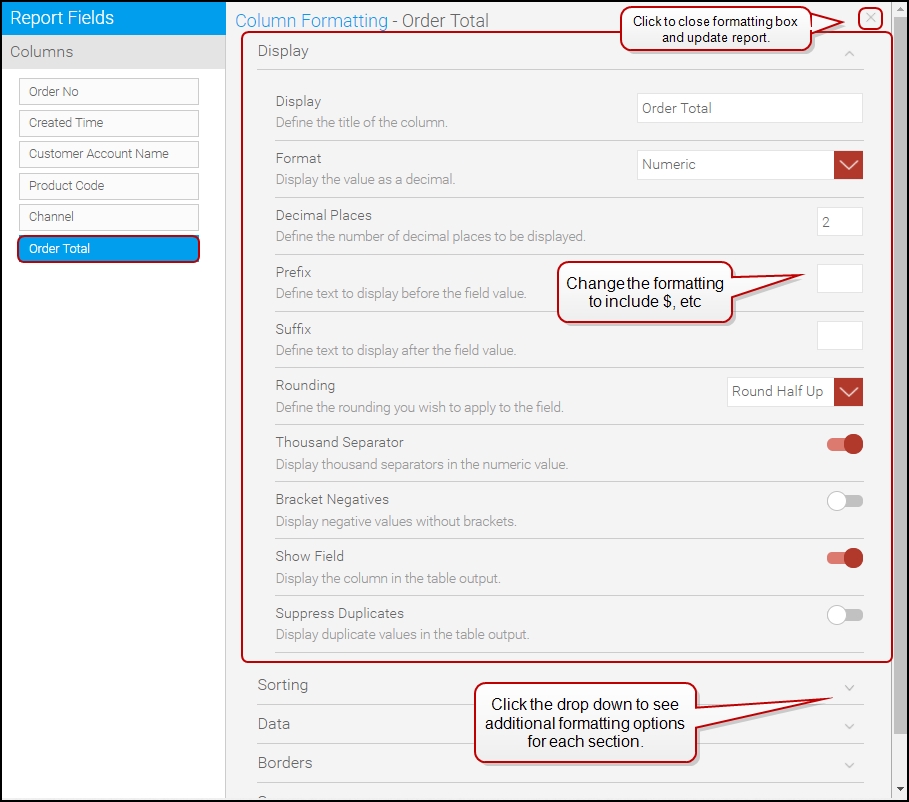
Select the drop down next to Account Name, then select Format > Edit.
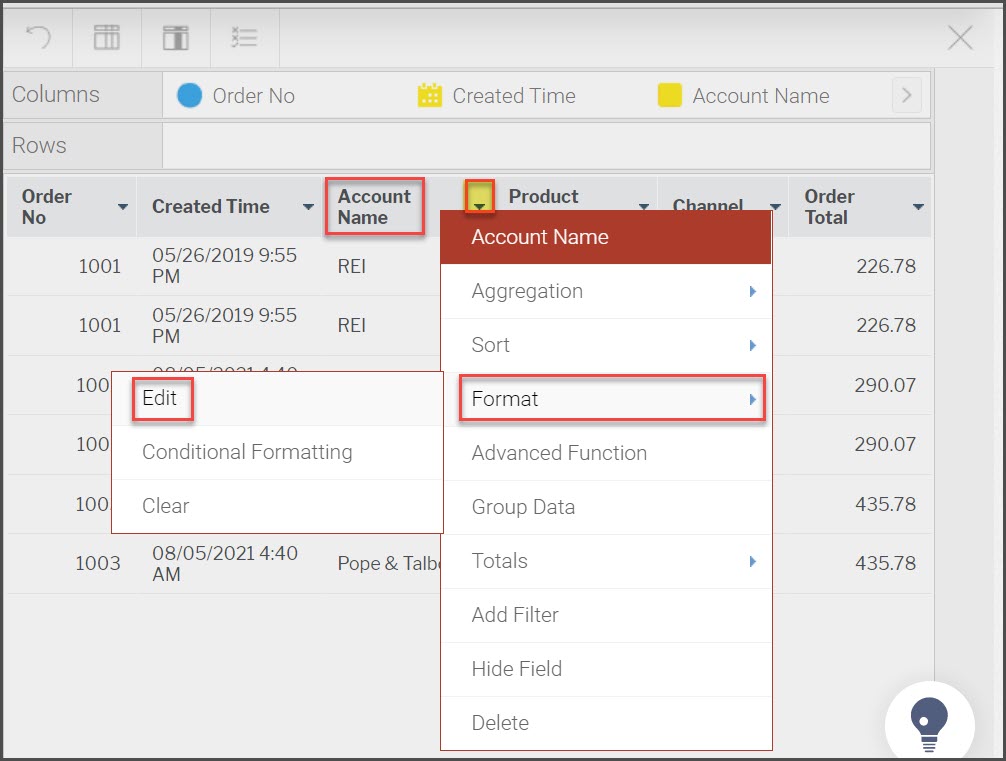
- The next screen displays a list of columns in the report and the available edits that can be made to each one.
- Click on the formatting topics to expand the list of actions that can be completed.
- Once formatting is complete, the next column can be selected from here for editing.
- Click the "X" to close the formatting box and update the report.
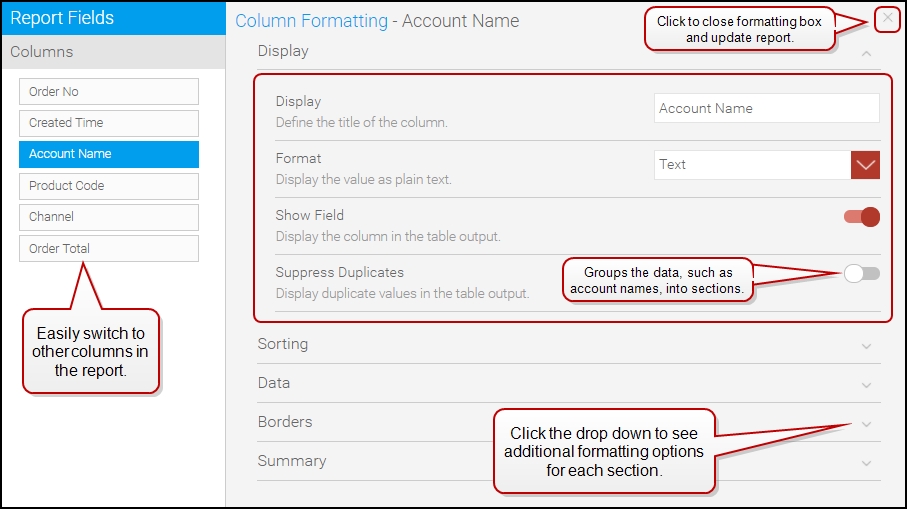
- In this example we will select the Order Total column and add the $ to the prefix of our values.
- The report can be further customized by breaking the data into separate sections.
- In this example we’ll move Customer Account Name to the Sections field then select "Design" to update the report and view all of the sections.
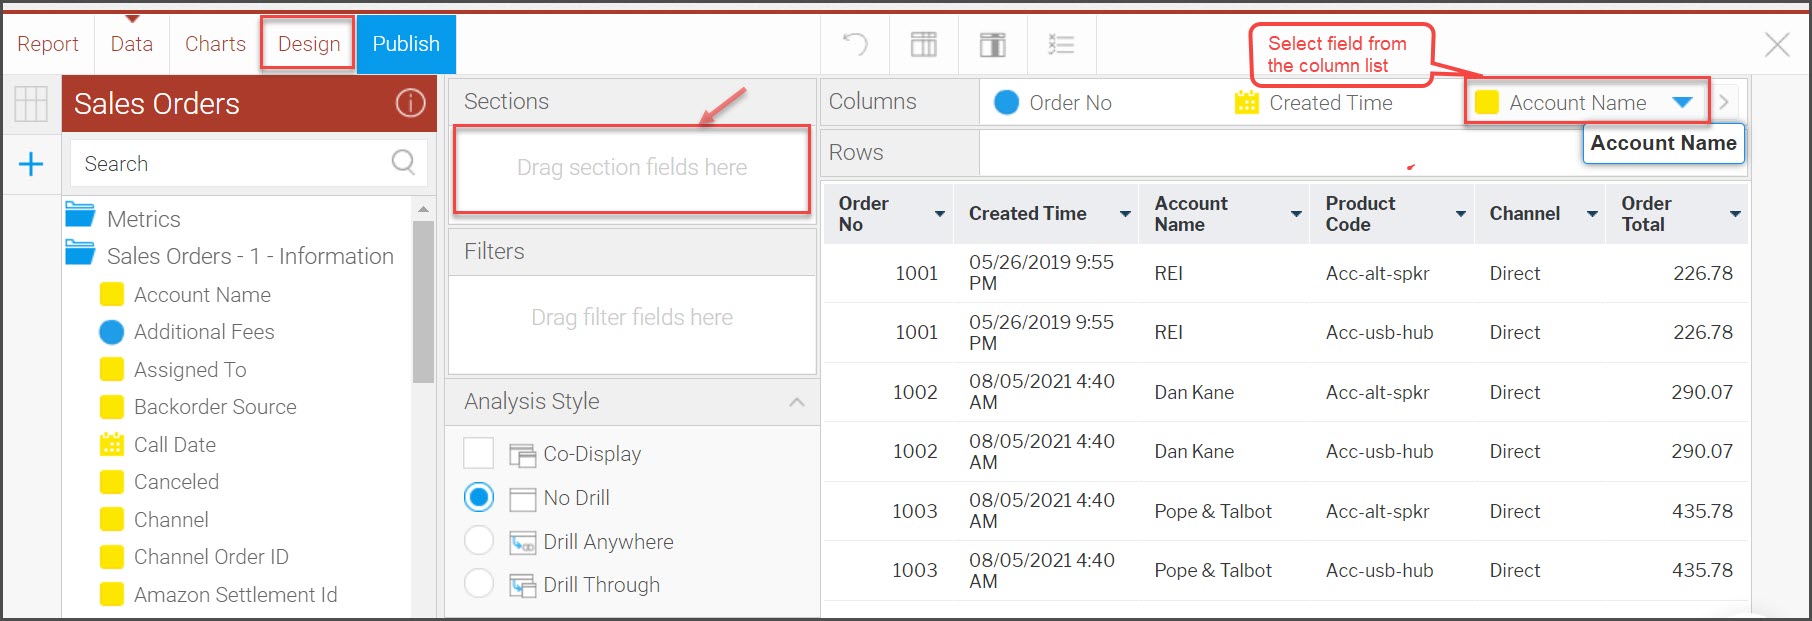
- This will now display a separate section for each customer.
- From here you can customize how the sections display by selecting any of the format icons on the top menu bar.
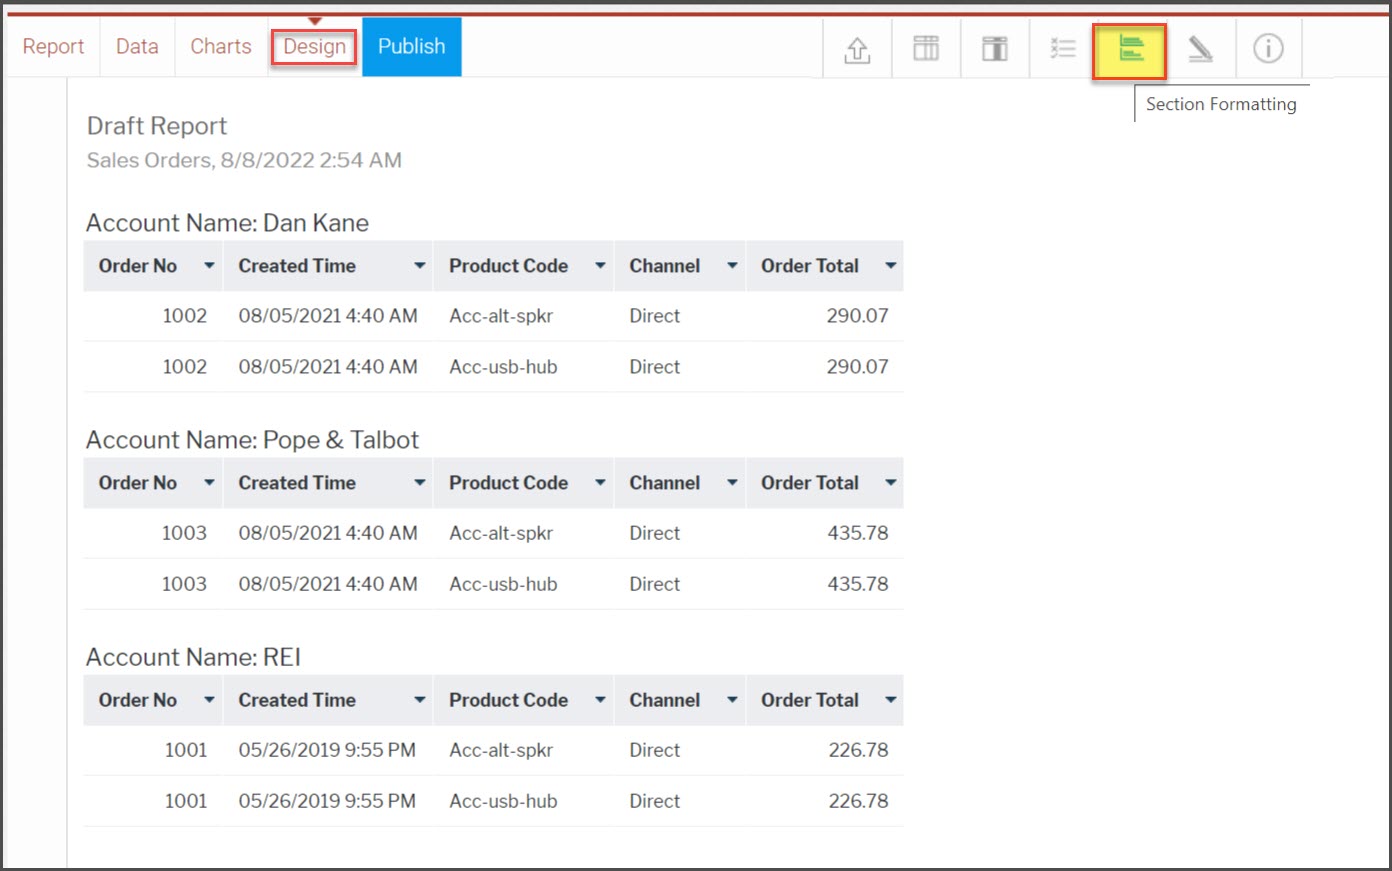
- For our example we’ll select the Section Formatting icon, select Customer Account Name, and change the Section Style to display each customer in a separate tab.
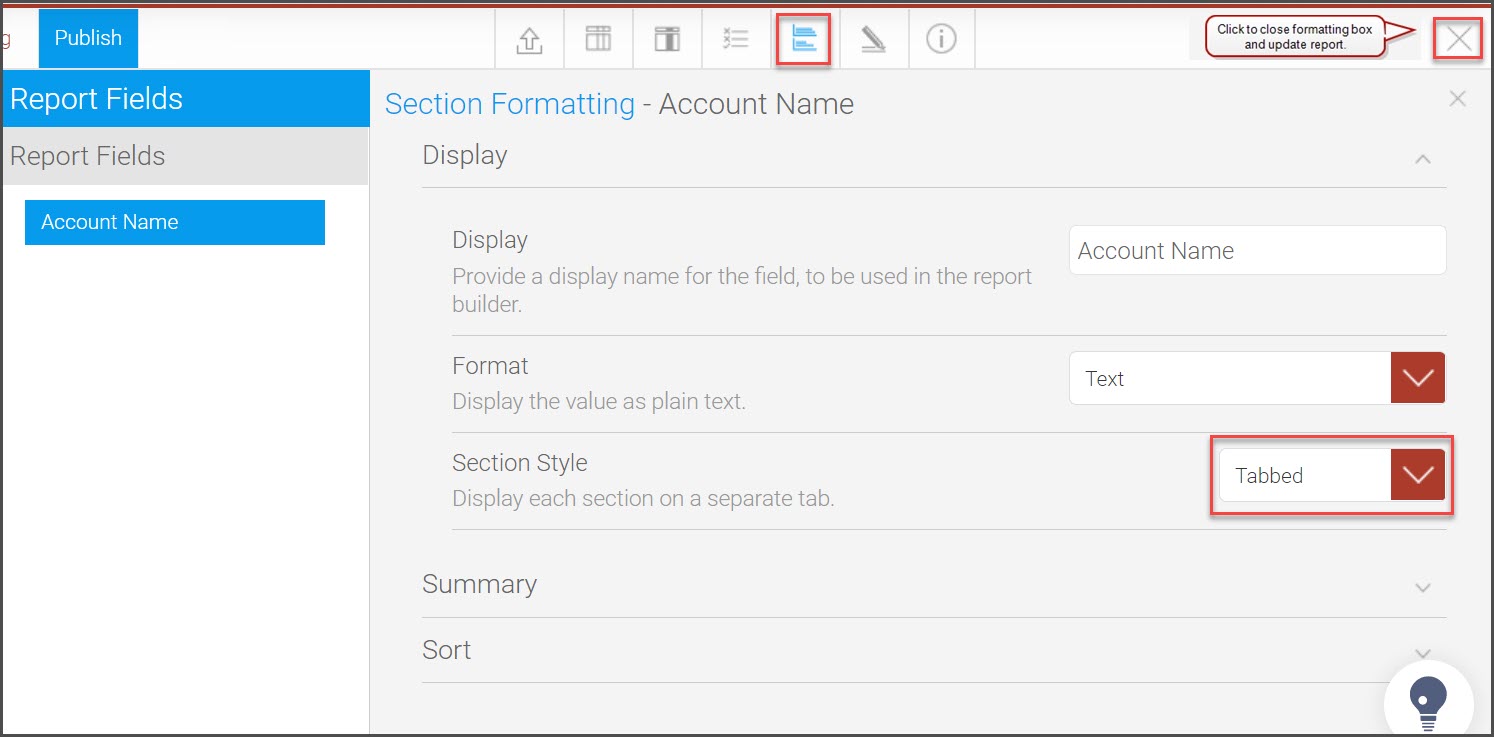
- Now we see a row of tabs that we can select for each customer.
- The page can be reformatted by following the same steps from above and changing Section Style to "Single Page".

- Once all of the desired changes have been made to the data, select "Report" in the left corner of the report and click "Save".

- Name the report and add any searchable tags to make the report easy to find. You’ll notice that you can control who views the report, so you can make it private if you don’t want other users to view the information.
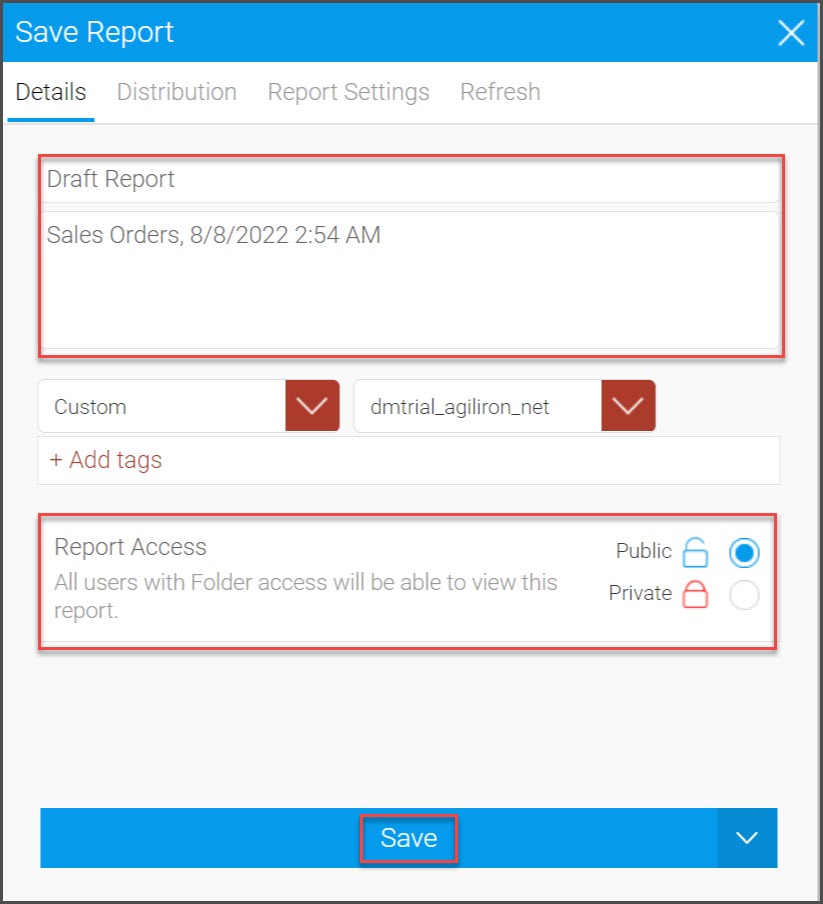
- There are also additional tabs such as Distribution which sets permissions for broadcasting and distributing the report, Report Settings which allows you to determine where to display the report, and Refresh which allows for the updating of data.
- Note: If you change the permissions to "Private", a User Access tab will appear. Here you can allow specific users access to the report.
- Once all options have been updated, click the "Save" button to finish.

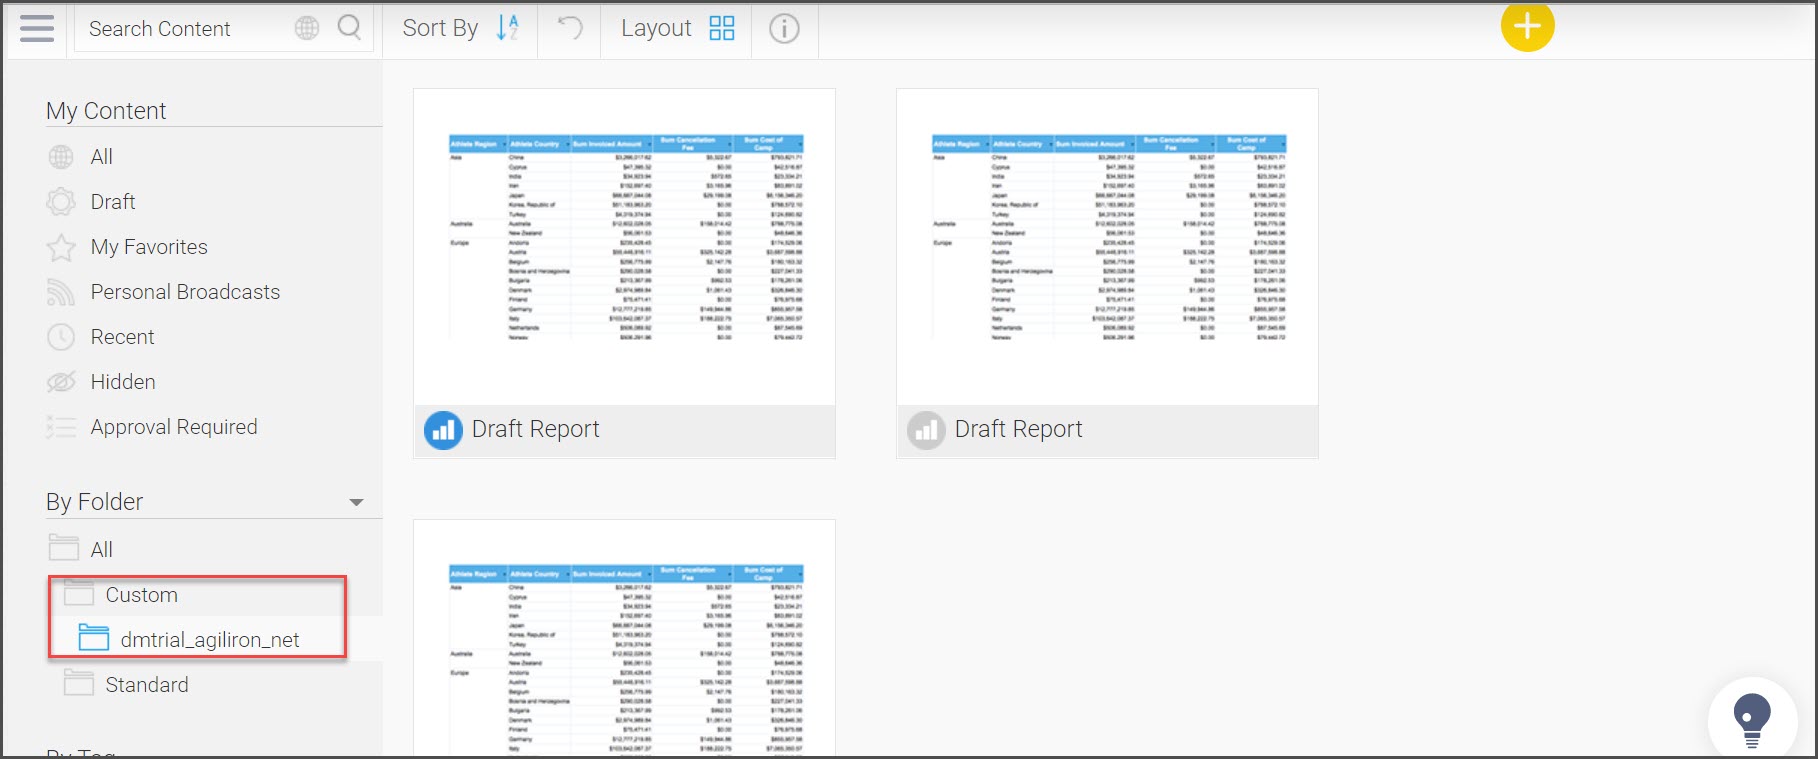
- Click the "X" button on the top right side of the screen to close the report and return to the main menu, the report will now appear in the Custom folder.
Updated about 1 year ago
