Bulk Edit - Activities List View
Updating multiple task statuses one by one can be very cumbersome, especially when there are a plethora of tasks. The new enhancement - bulk edit makes this process effortless and time-saving.
The bulk edit functionality for the Activities module allows the customers to update the status of multiple tasks at once.
Go through the step-by-step guide to get started with the bulk edit process for Activities:
- Go to the Activities tab on the left menu panel of admin.
- Activities List view will open.
- Select the Activities which you want to edit.
Either 'select all' by ticking the checkbox preceding the Type column or click on the checkboxes preceding the Activities you want to make changes.
- Click on the three vertical dots (next to the delete button).
- Next, click on the Bulk Edit Task.

Activity Bulk Edit Wizard will open.
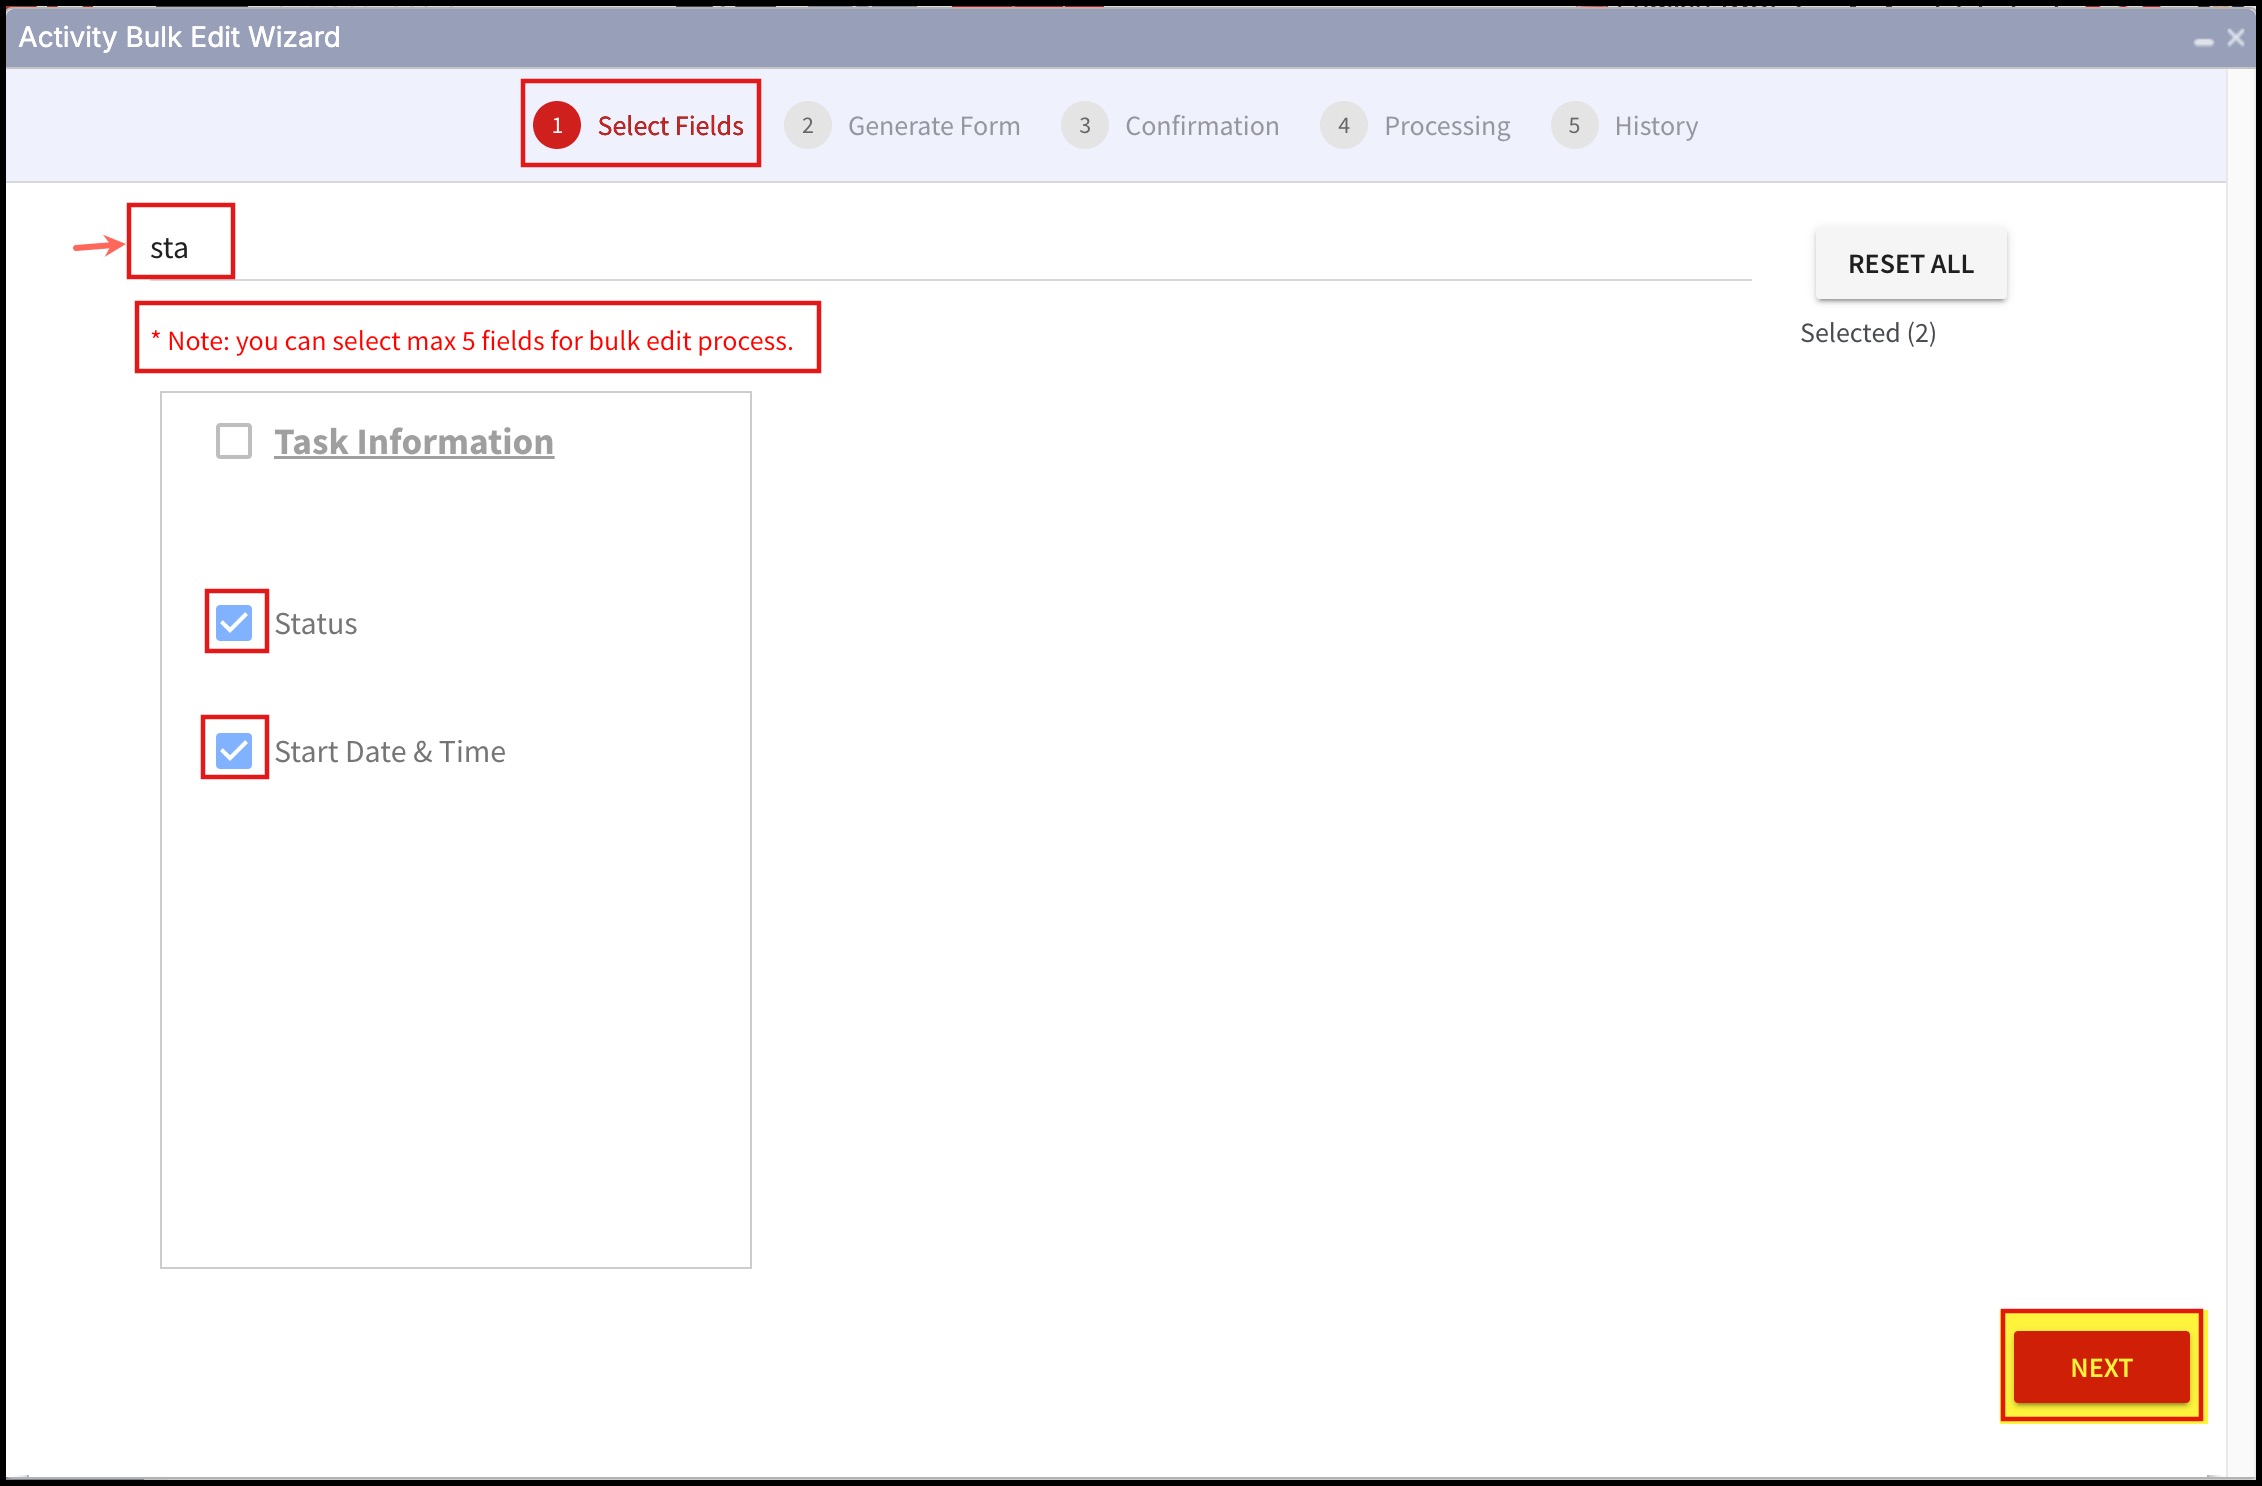
Step 1 - Select Fields
- In step 1, select the fields that need to be edited.
NOTE - You can select a maximum of 5 fields to perform bulk edit.
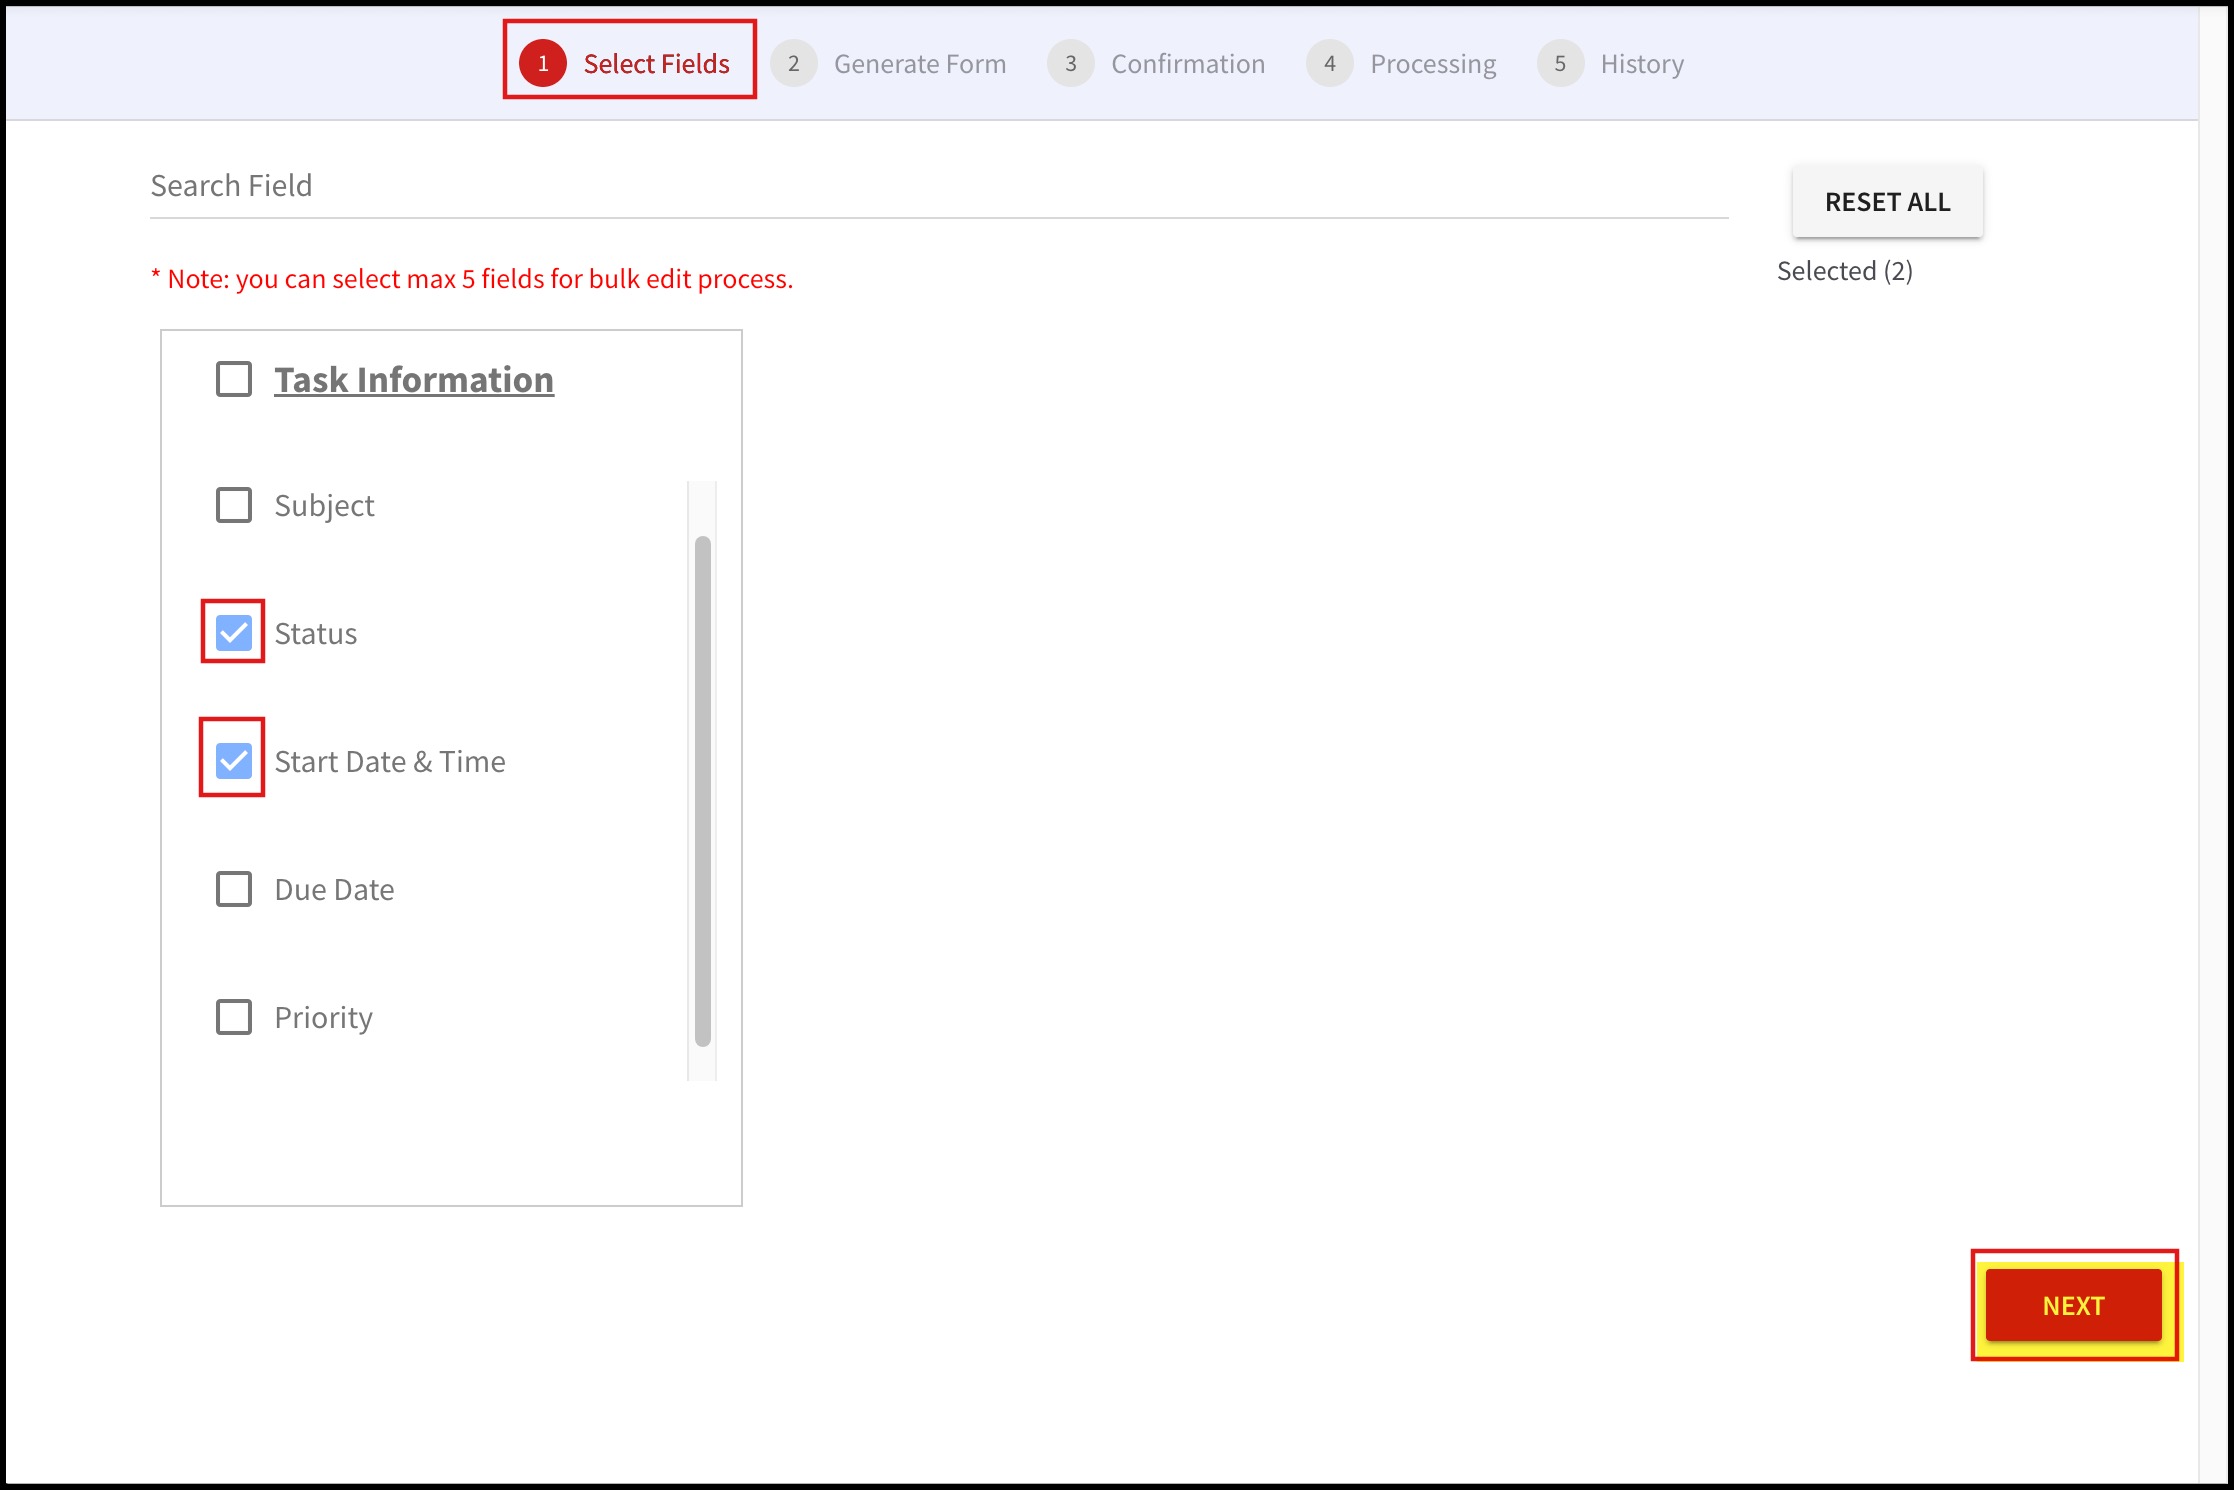
Ways to select fields:
a. Either type one by one field name in the search field and tick the checkbox as the field appears.
Or
b. Select fields as per your requirement from the list as displayed below.
Or
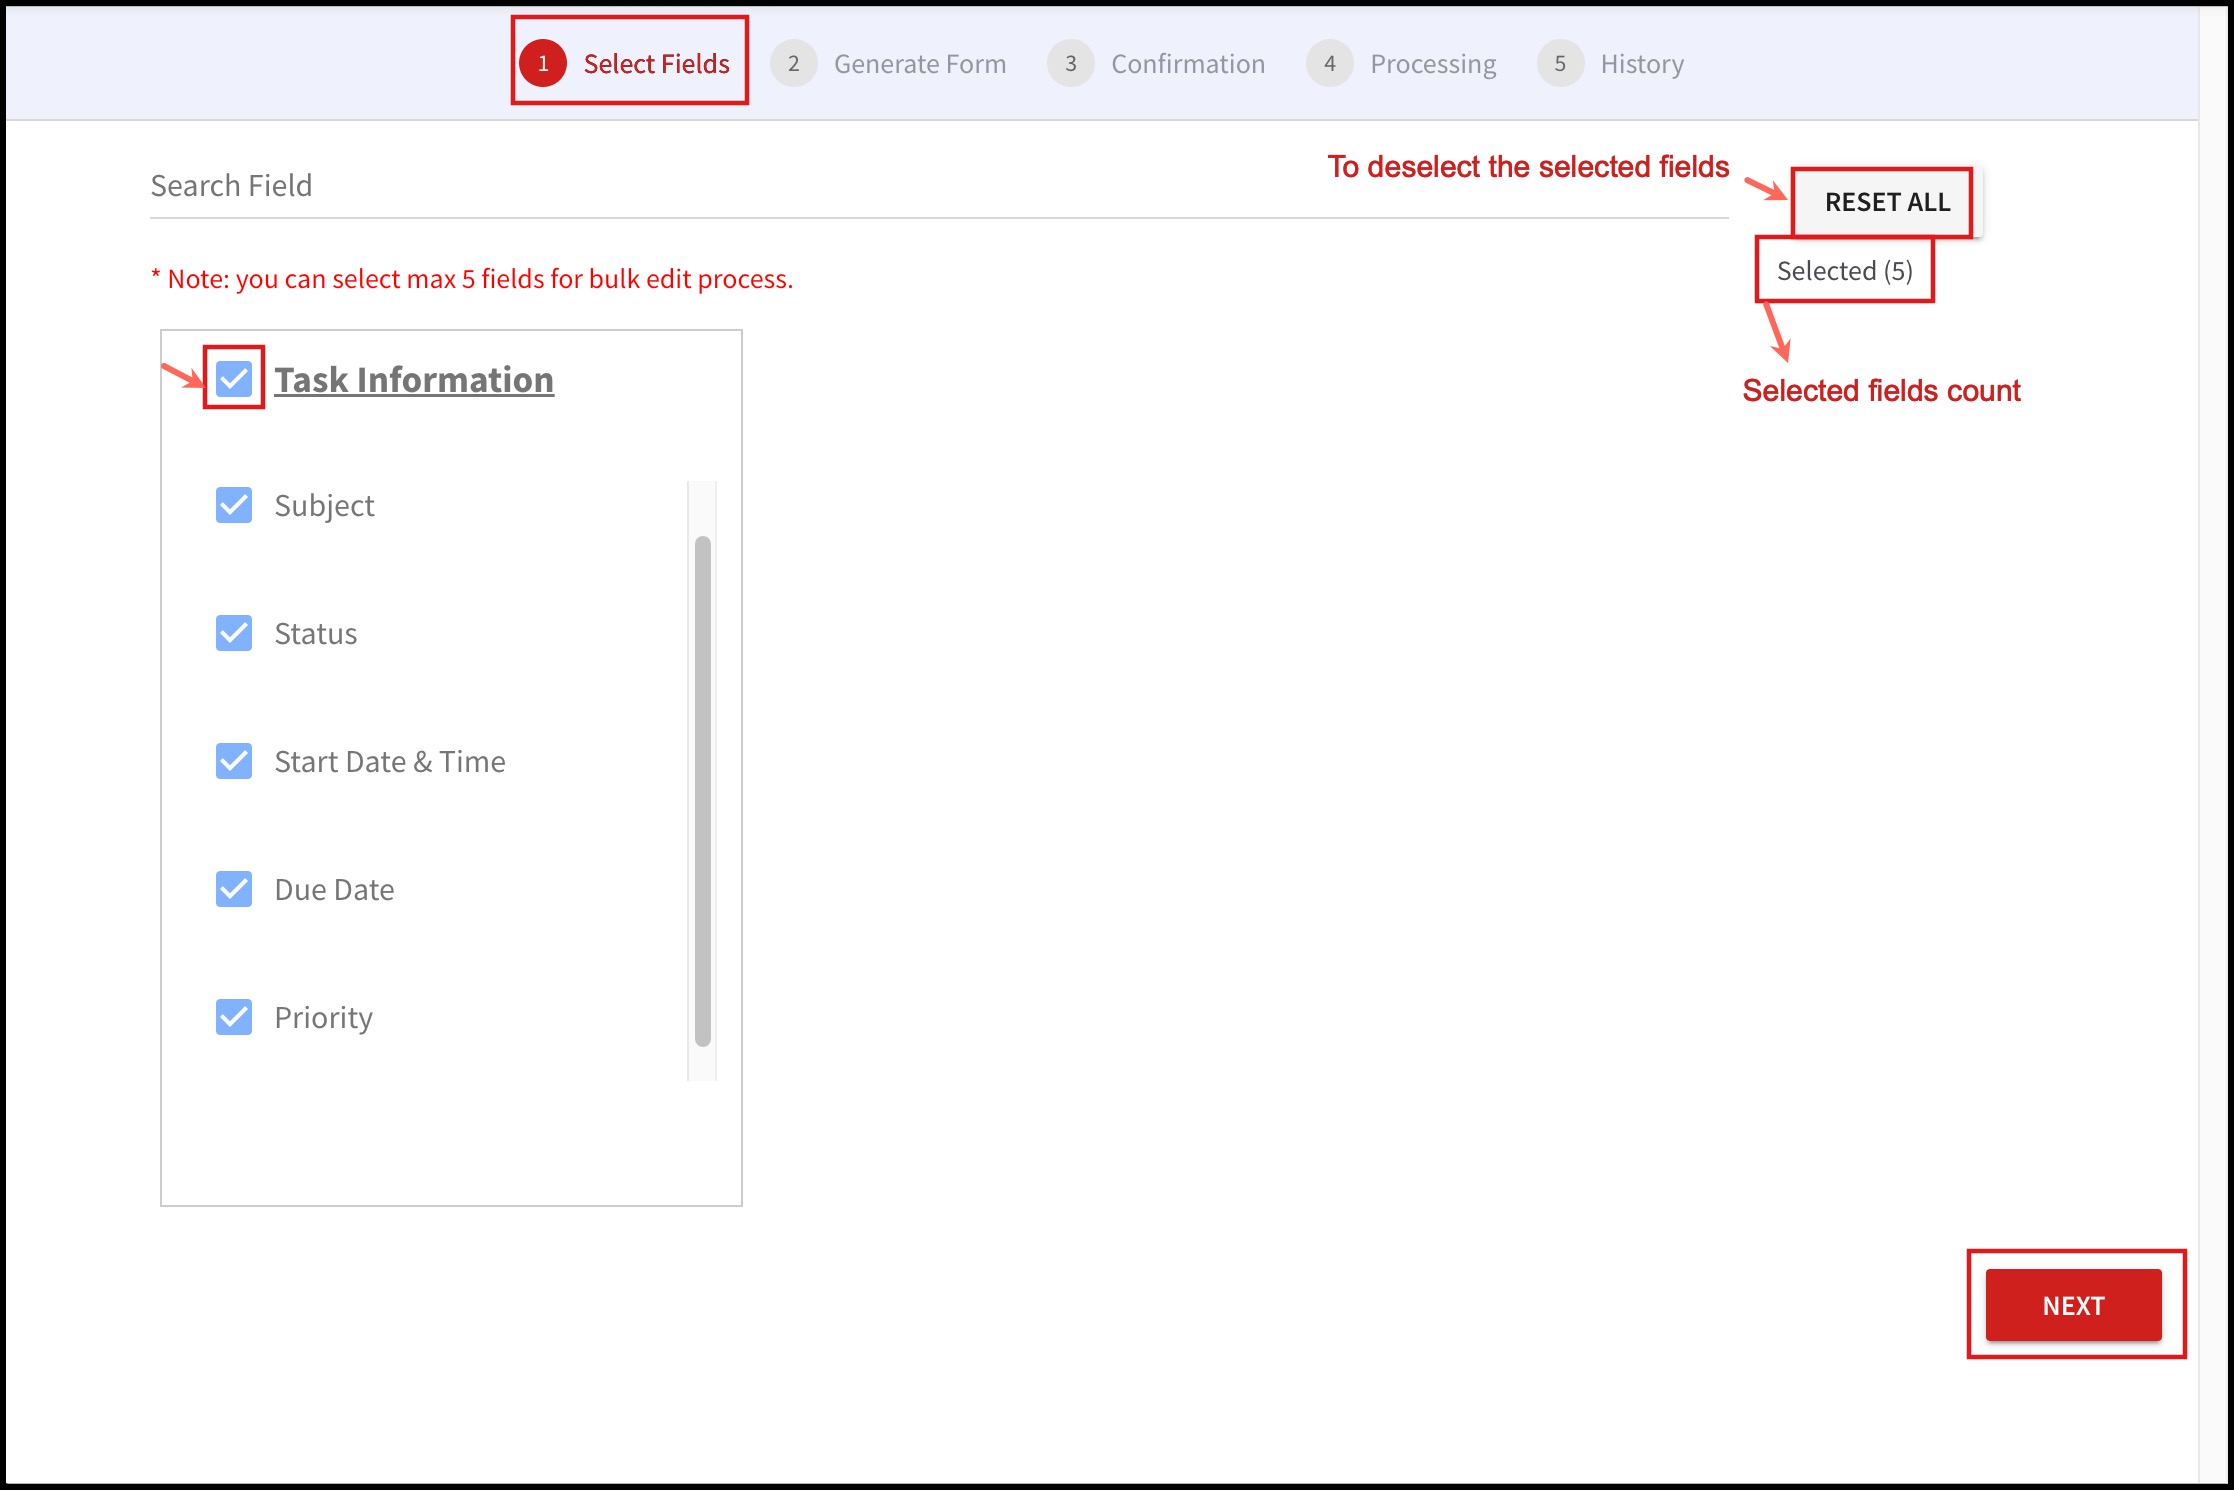
c. Select all fields at a time by clicking on the checkbox, preceding the main heading of the segment.
You can view the count of fields selected below the Reset All button.\
The Reset All button is to deselect all the fields selected. You can start again with field selection.
As an example, we are selecting fields 'Start Time and Date', and 'Status'.
- After selecting the fields and click on Next.

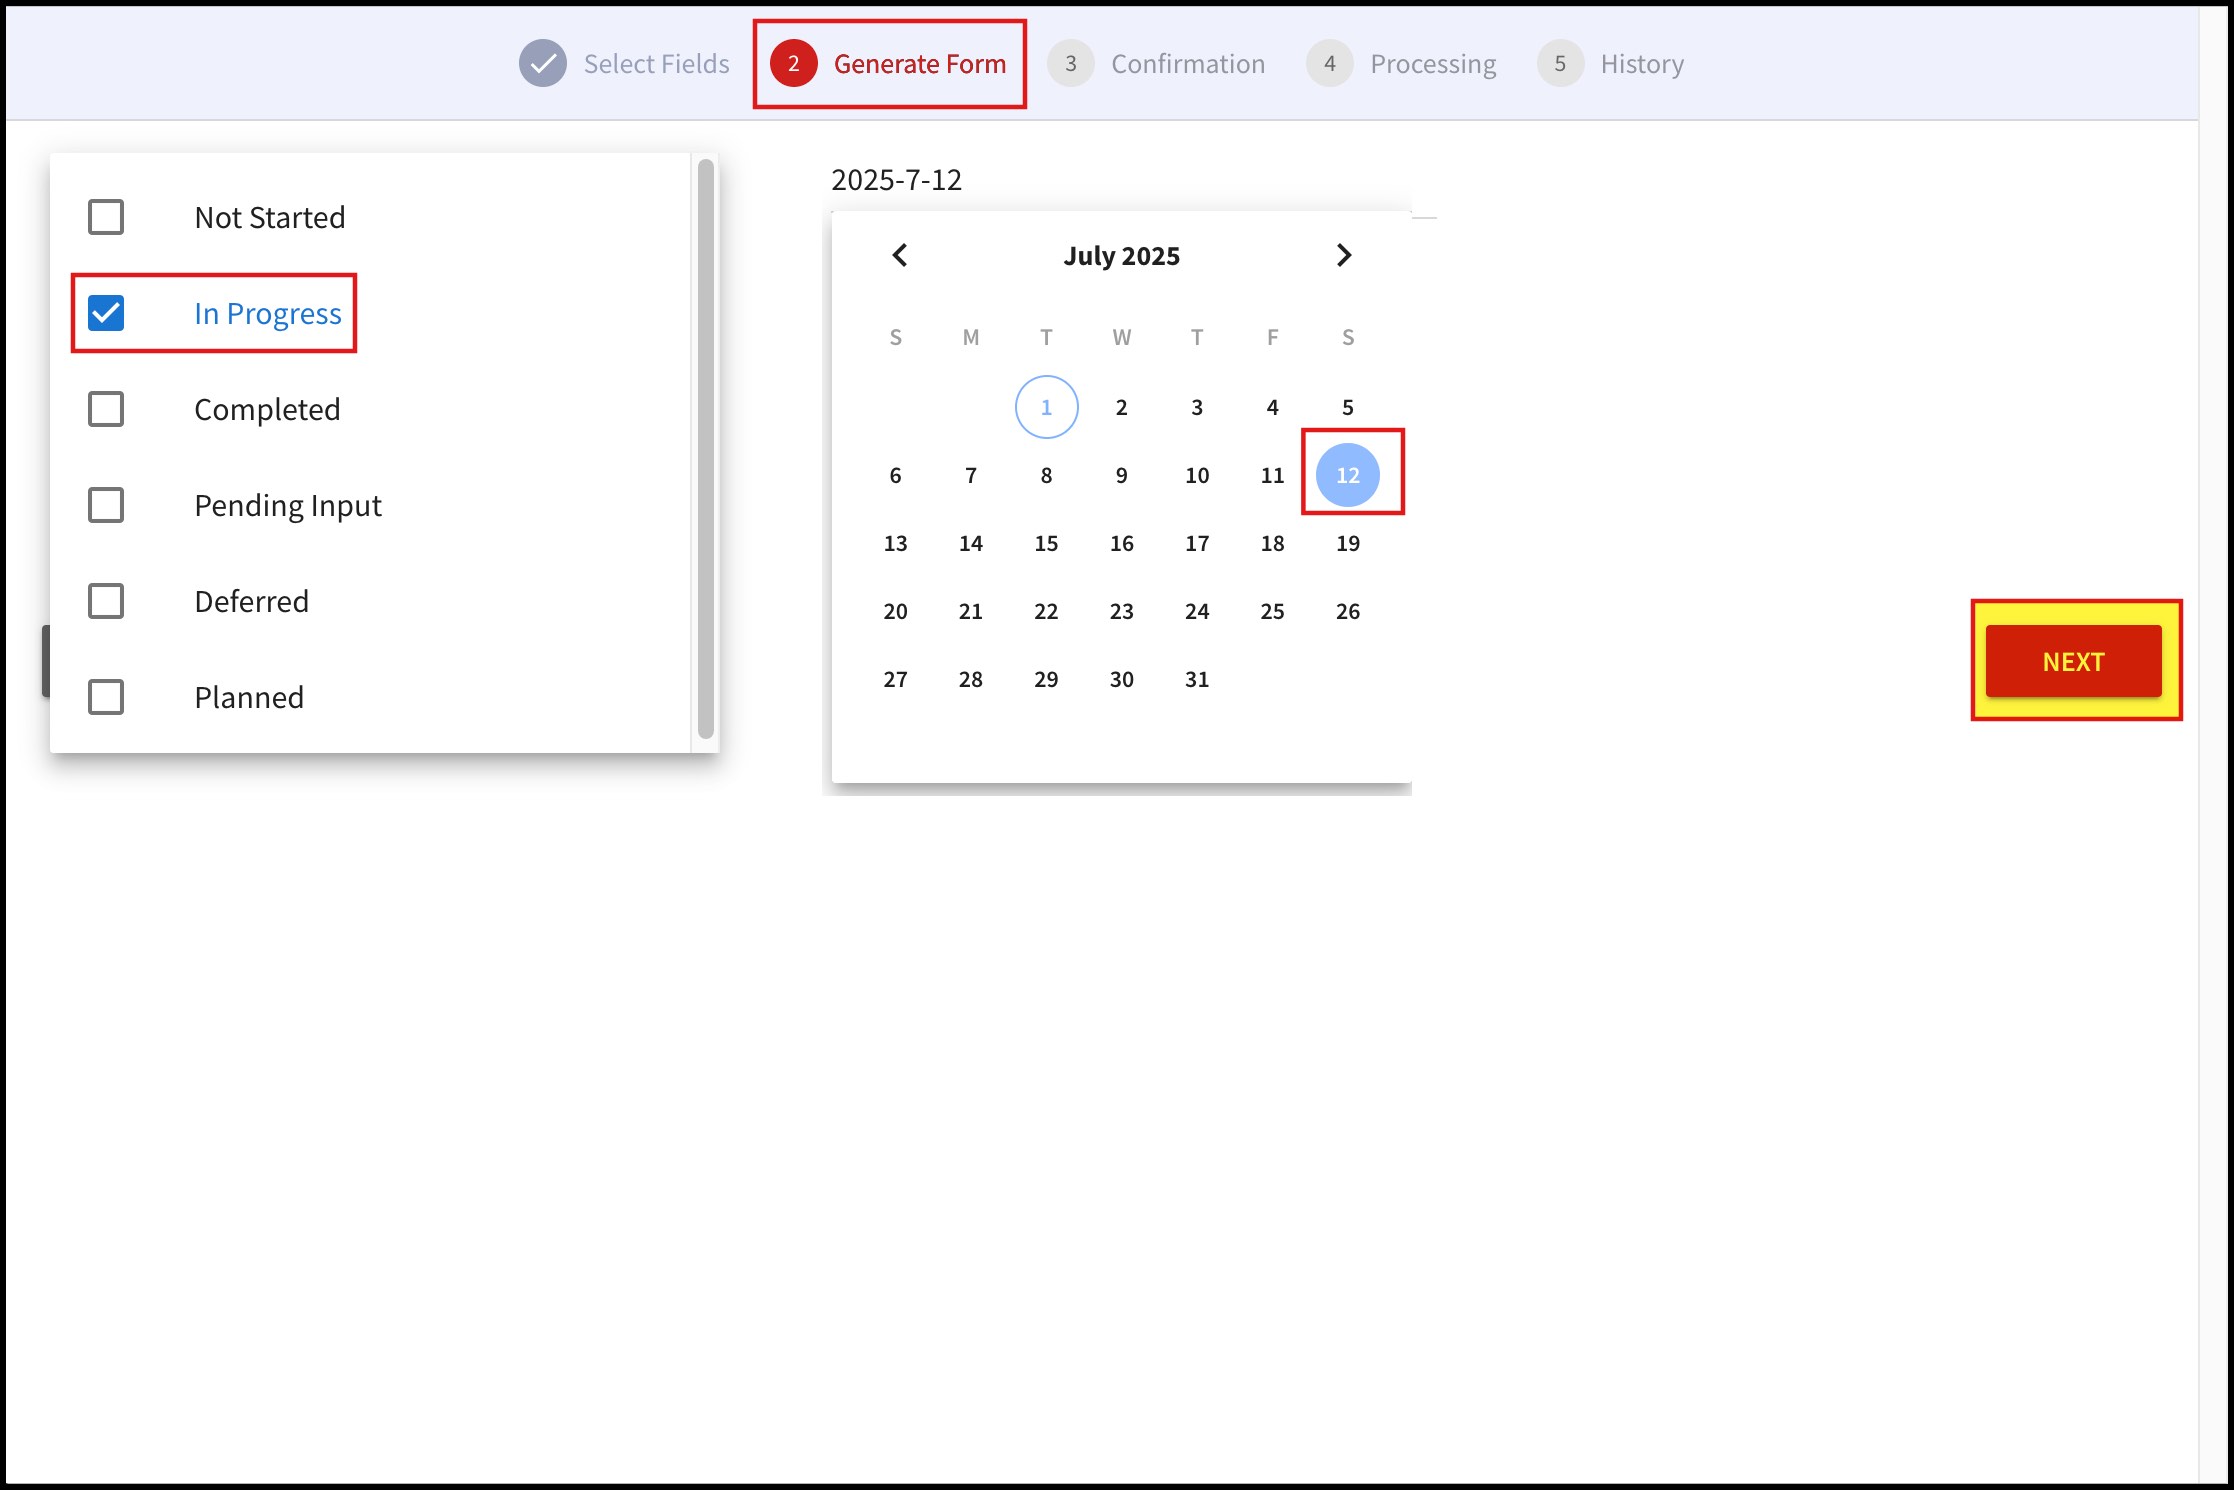
Step 2 - Generate Form
- Next comes the Generate Form.
- Enter the relevant data in the fields and click on Next.
- If it's a text field, type the necessary text.
- If it's a drop-down, select the required option from the list.
- If it's a date picker, just click on the field, and a calendar will appear, select the date you want.
- If it's a search field, start typing, and you'll get the related options.
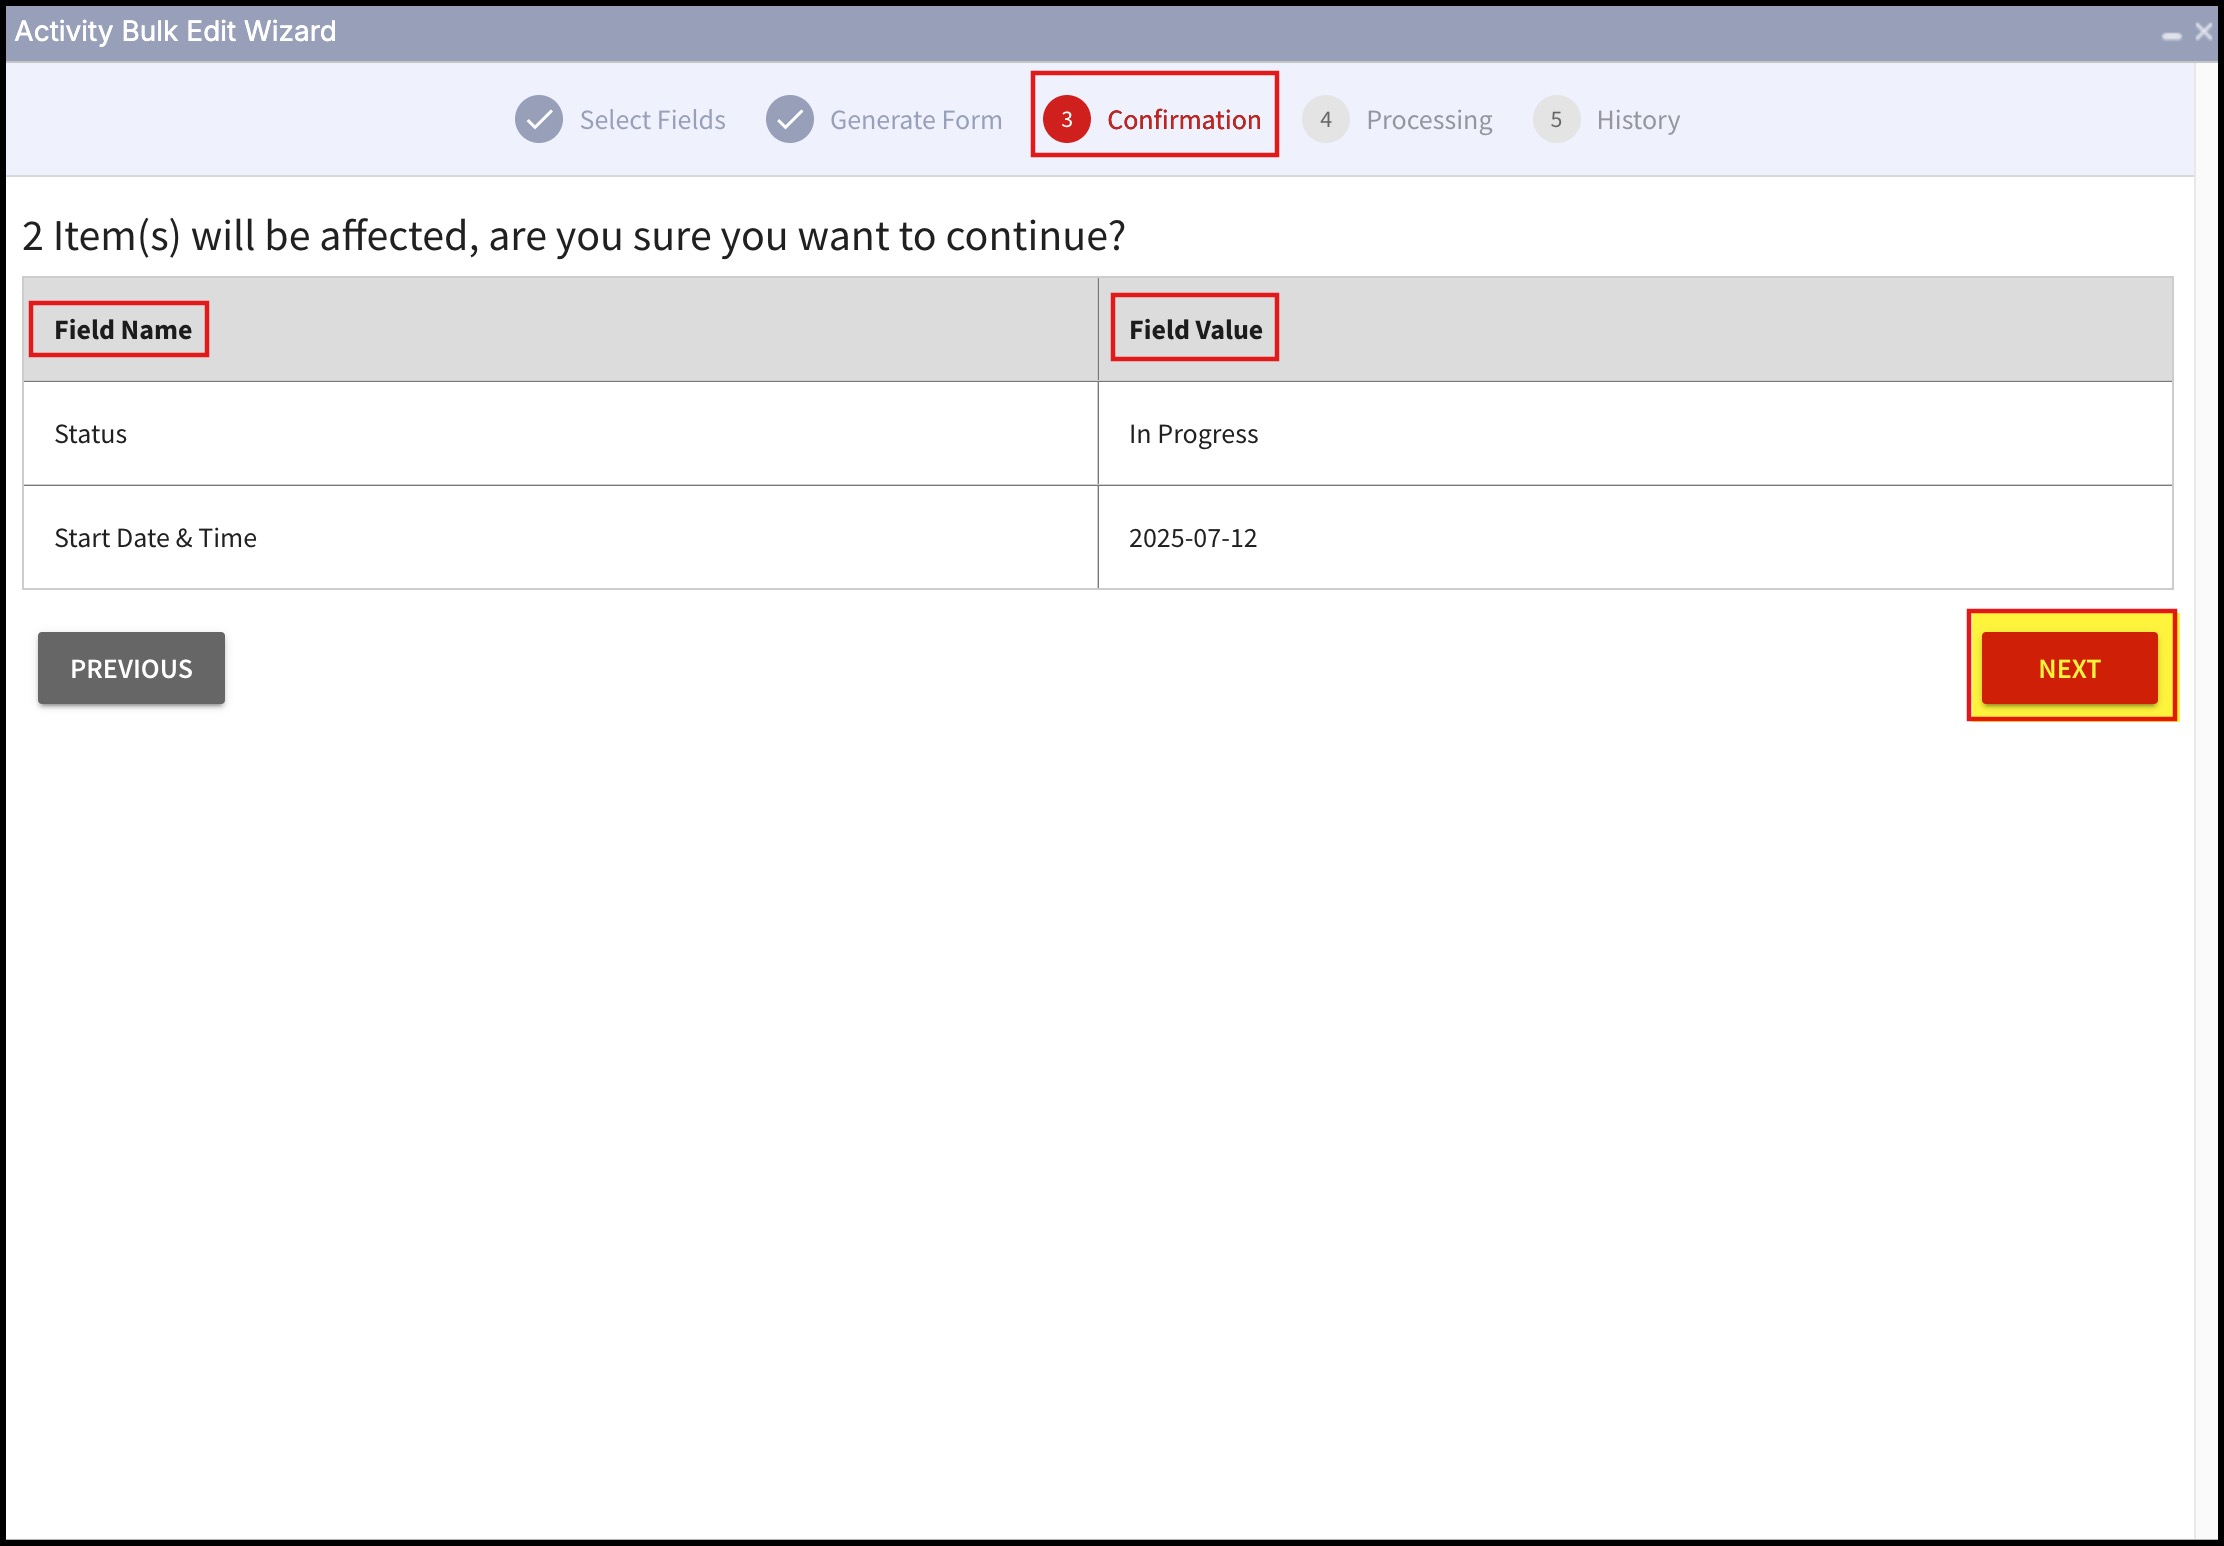
Step 3 - Confirmation
In Confirmation, you can see the Field name and Field value that you edited for the selected account names.
- To proceed, click on Next.
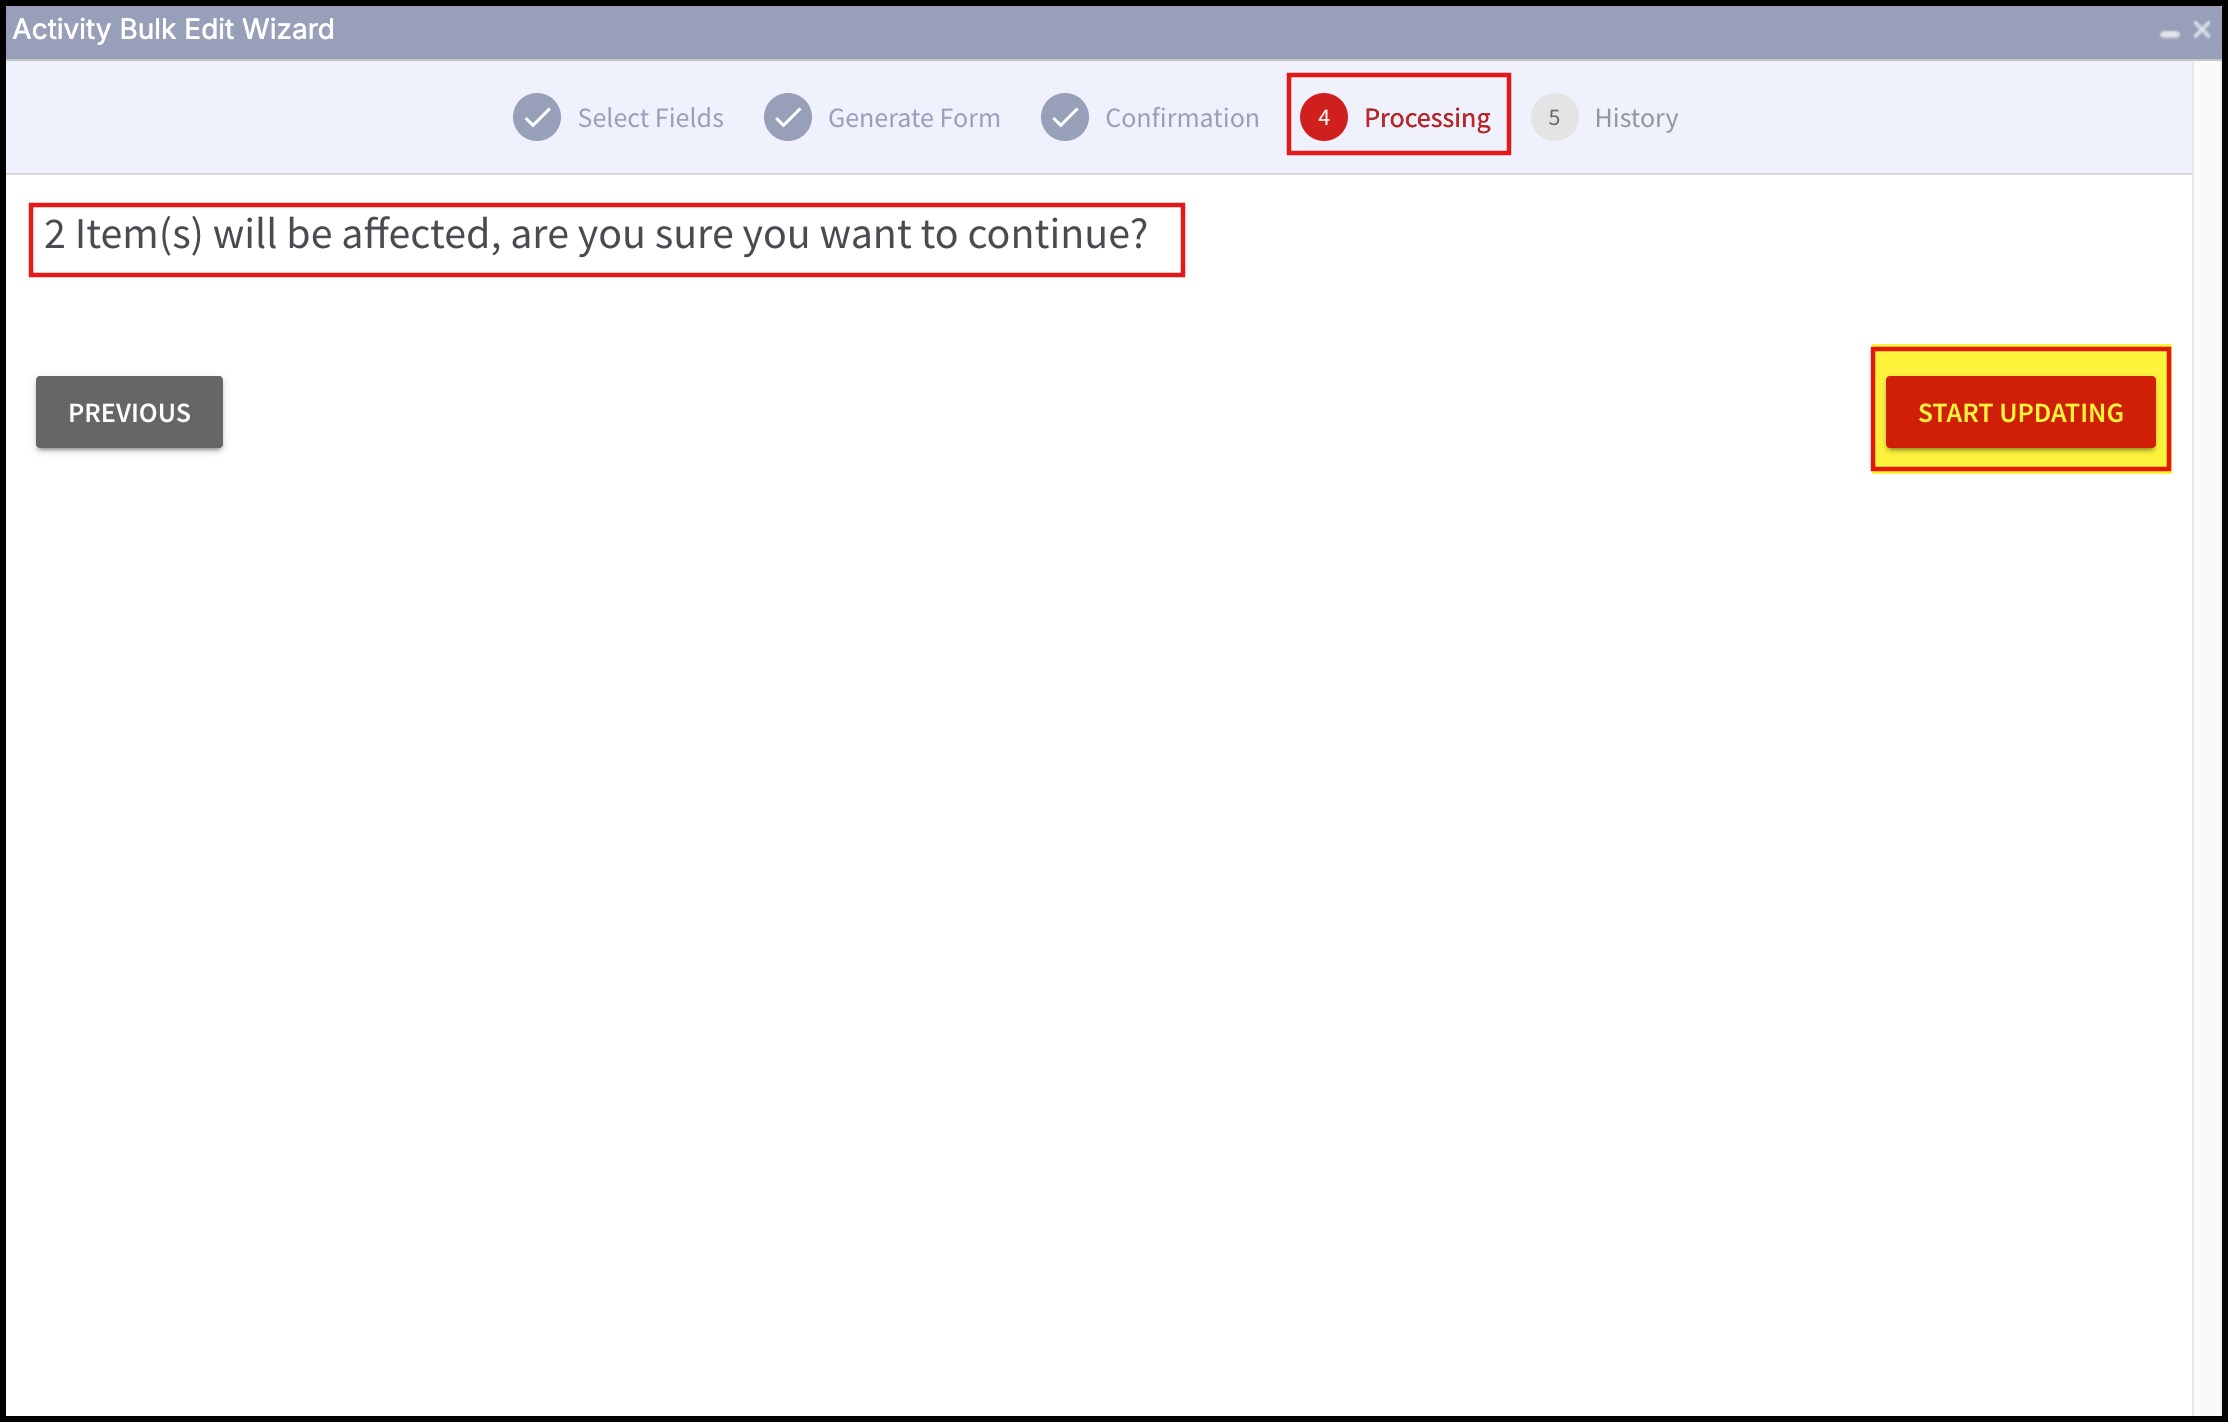
Step 4 - Processing
Then comes the Processing.
- You will be asked if you are sure to continue with the bulk edit. If yes, click on Start Updating.
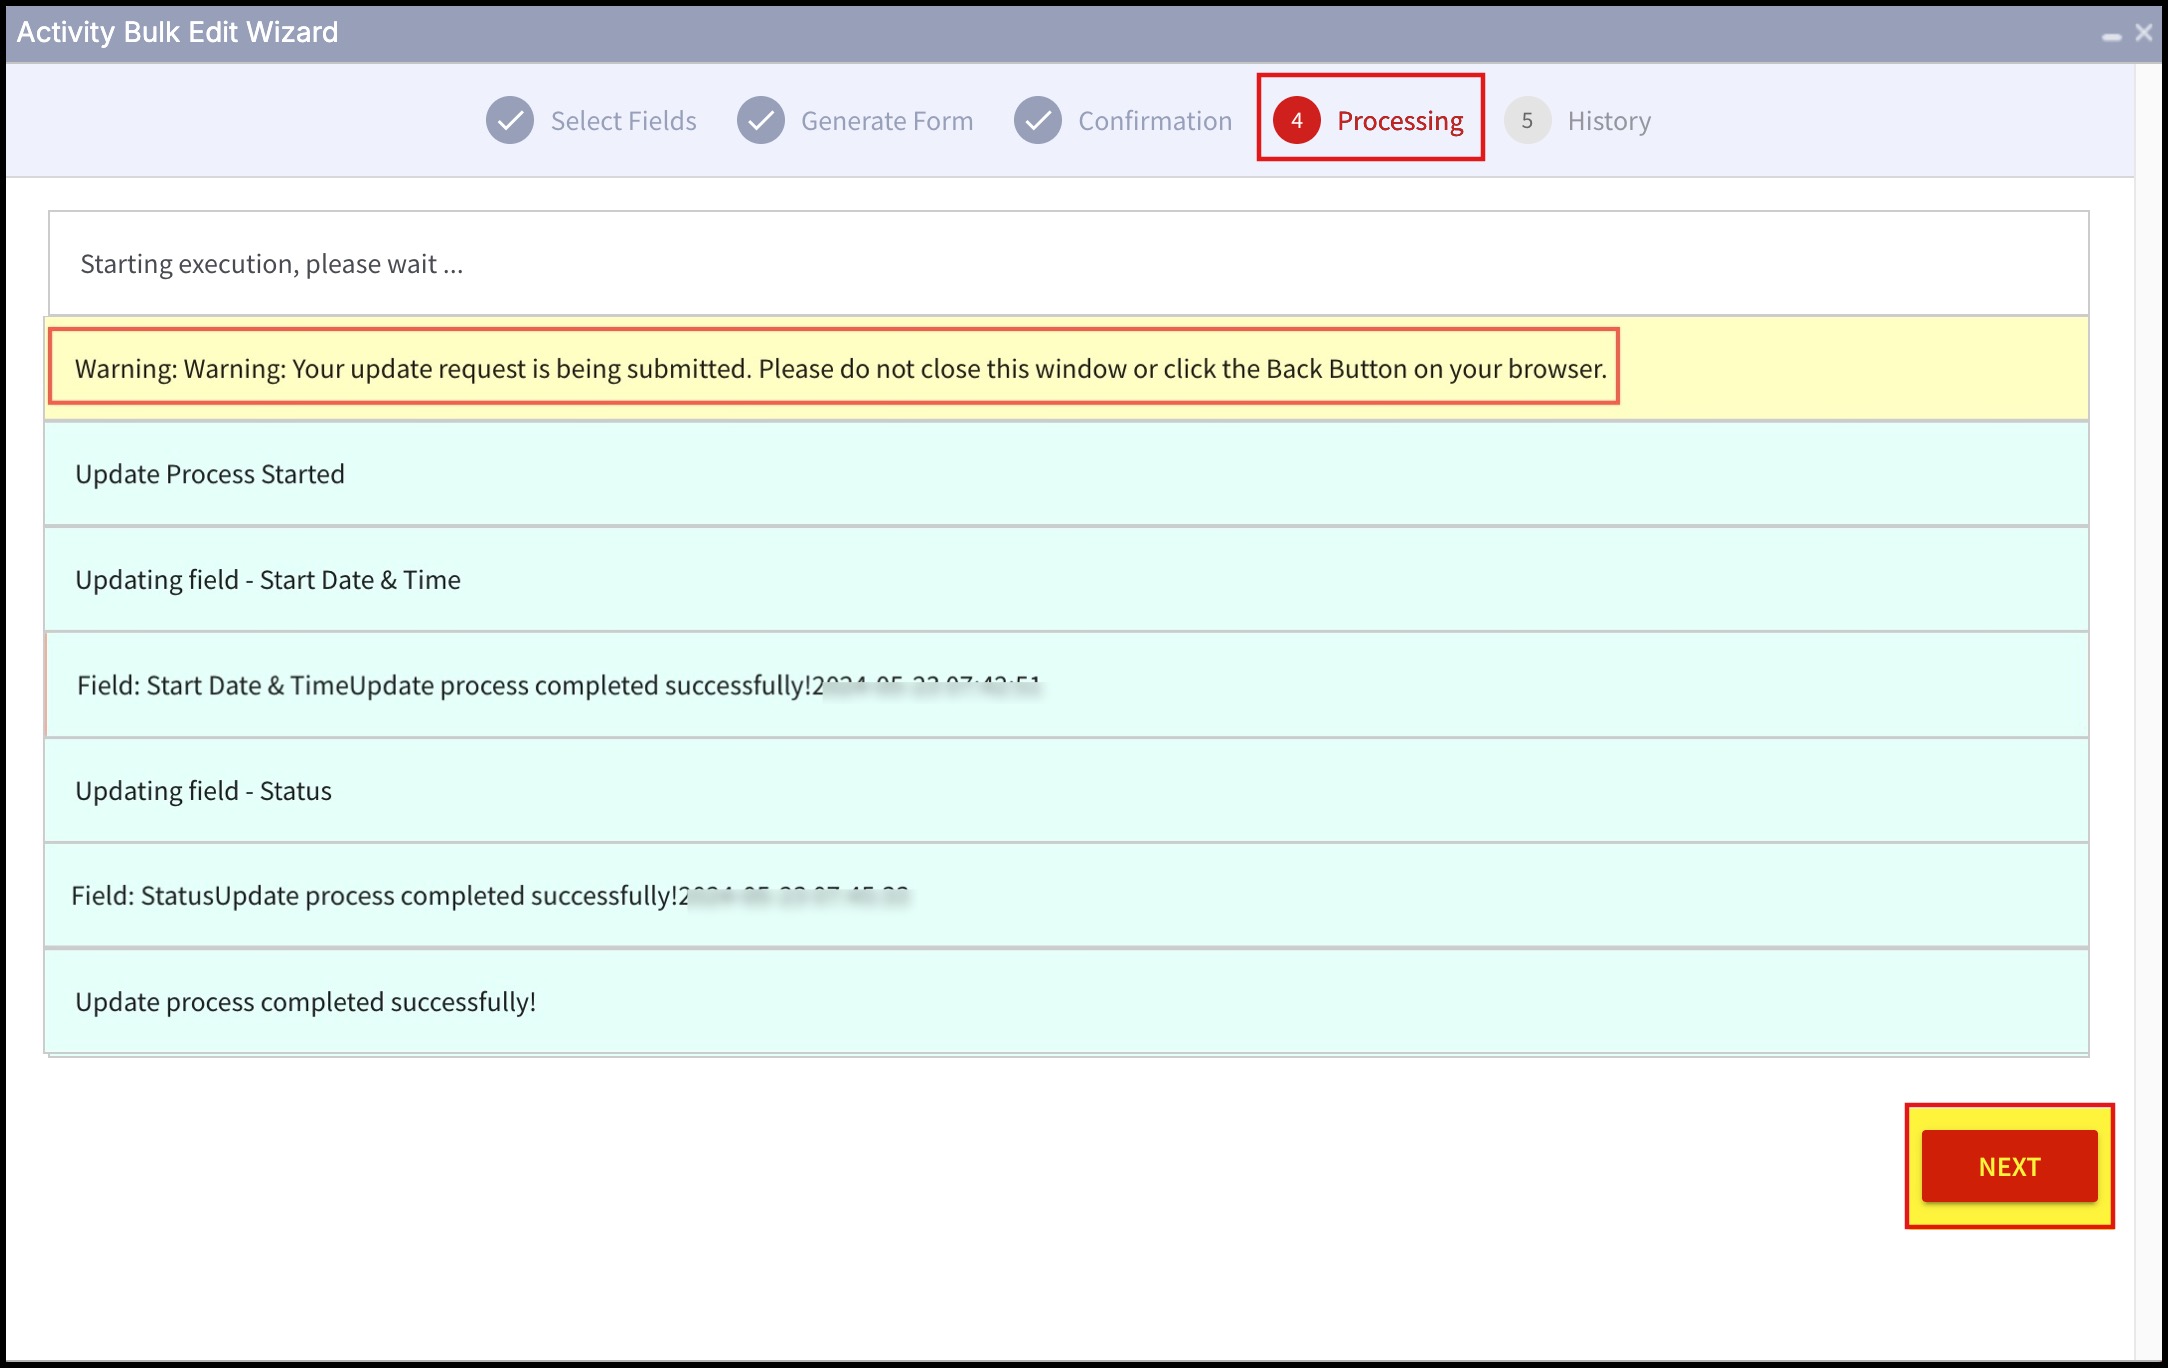
- Execution starts.
- One by one fields will be updated.
- When the updating is done, click on Next.
NOTE - When the update takes place, make sure you do not click the Back button on your browser or close the window.
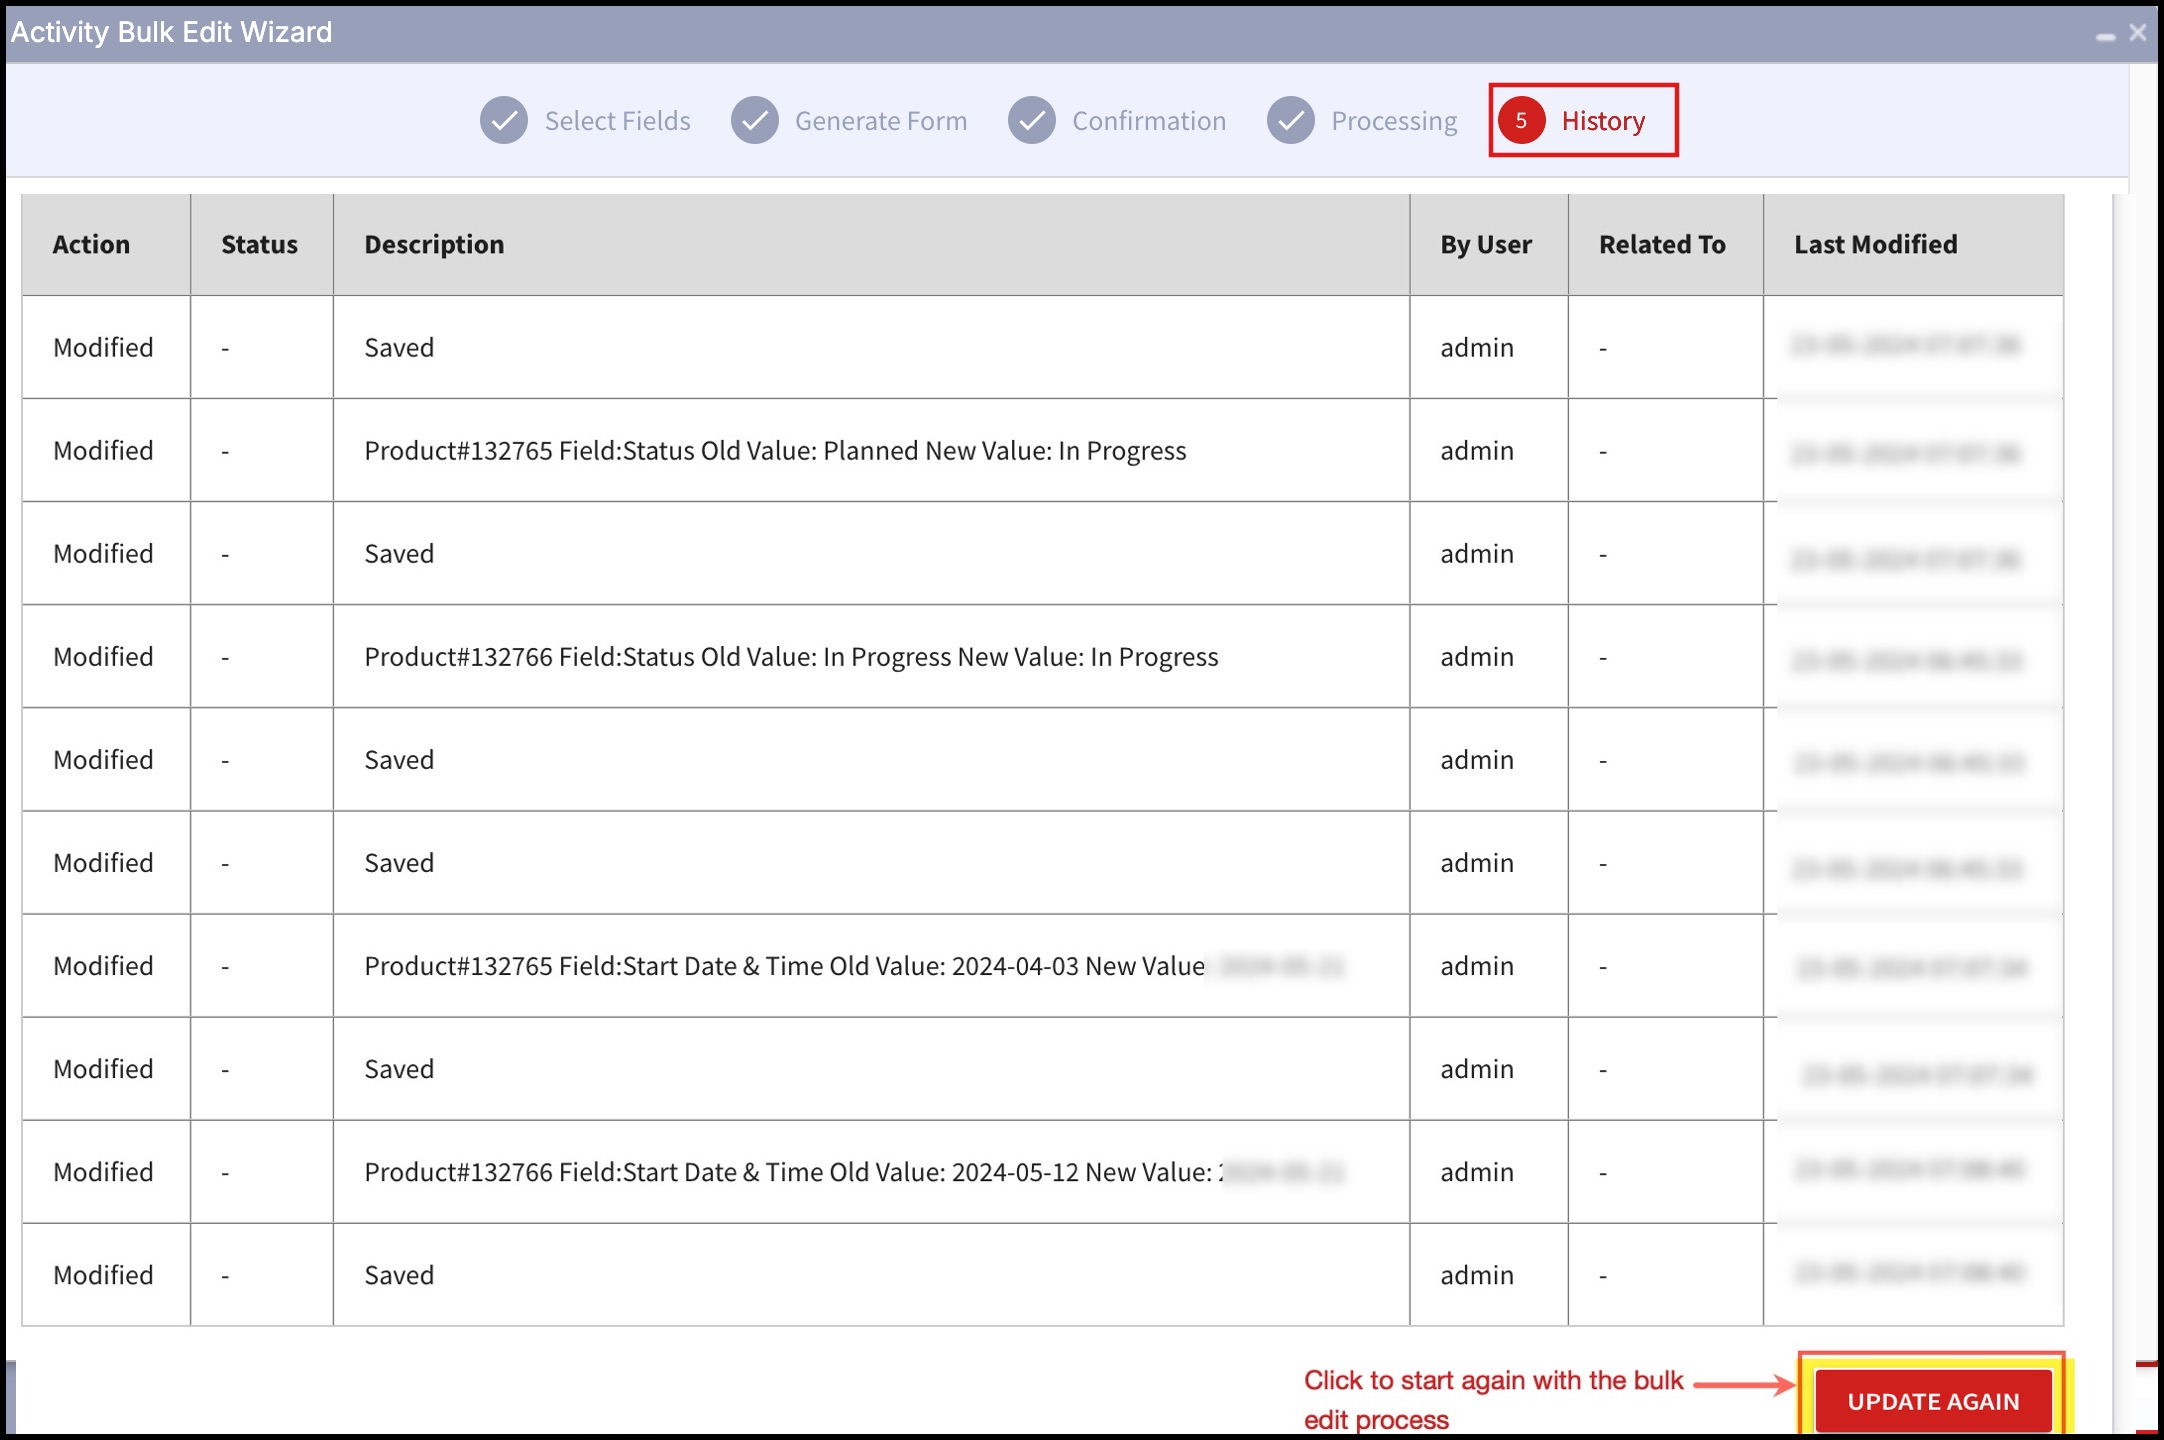
Step 5 - History
-
In History, you will see the status, the old value, and the new value of the fields edited in the description column. User name, last modified date, and timing will also be displayed.
-
To start again with the bulk edit process, click on the Update Again button or simply close the window (x) if you are done with the bulk edit.
Updated about 1 year ago