QuickBooks Integration - Transaction Synchronization
In This Chapter - Export Sales Orders, Purchase Orders, Sales Returns, and associated information (Customer, Vendors etc.) from Agiliron into QuickBooks.
For QuickBooks Desktop - please complete the setup described in the section QuickBooks Desktop Editions Setup Using Agiliron Sync Application before proceeding with this section.
For QuickBooks Online - please complete the setup described in the section QuickBooks Online Edition Setup before proceeding with this section.
When the QuickBooks setup is completed (which is a one-time activity), you will be able to sync the following entities to QuickBooks from Agiliron on an ongoing basis:
- Sales Orders - as Sales Receipts or Invoices (depending on whether they have beenPaid or not)
- Partial Payments applied to a sales order when syncing to QuickBooks Online will create an Invoice and apply for Payment against that Invoice in QuickBooks Online.
- Purchase Orders - as Bills (so you could then pay your vendors from QuickBooks)
- Sales Returns - as Refund Receipts
- Various Journal Entries - for COGS, Inventory Asset, Inventory Adjustments etc.
The process shown below allows the user of the system to export Customer, Product, and Order Information, along with Inventory Adjustments to QuickBooks for accounting and other business processes conducted through Intuit's QuickBooks product.
- The examples below also demonstrate how each view would appear if connected to QuickBooks Online.
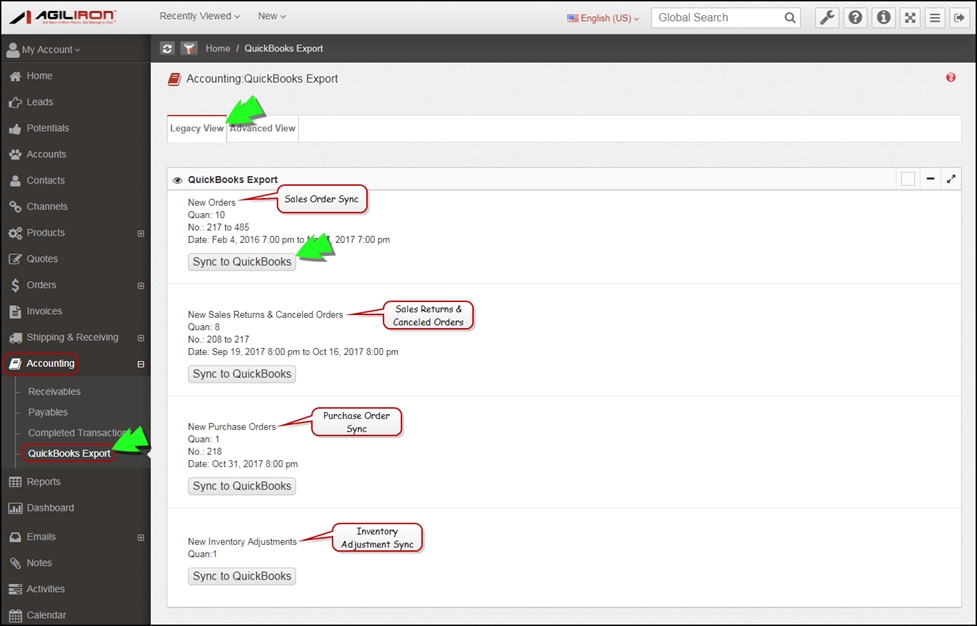
Legacy View
In this view, all of the orders in each module (that are ready for syncing) are sent to QuickBooks. The user does not have the ability to select individual orders for syncing.
The number of orders to be synced is displayed, along with the order number and date range for the orders.
- Note: It is important to note here that as orders/transactions come in, the system will recognize and keep accumulating them until you initiate the sync.
Click the "Sync to QuickBooks" button next to the module you would like synced to QuickBooks.
- The sync will transfer the first 30 orders in the list to QuickBooks.
- If more than 30 orders are in the list, the user will have to first wait for the first 30 orders to finish syncing, then click the "Sync to QuickBooks" again to send the next 30 orders over, until all orders have been synced.
- Once complete, the user can then select the "Sync to QuickBooks" button in the next module they would like to sync, repeating this process until all modules are synced to QuickBooks.

Advanced View
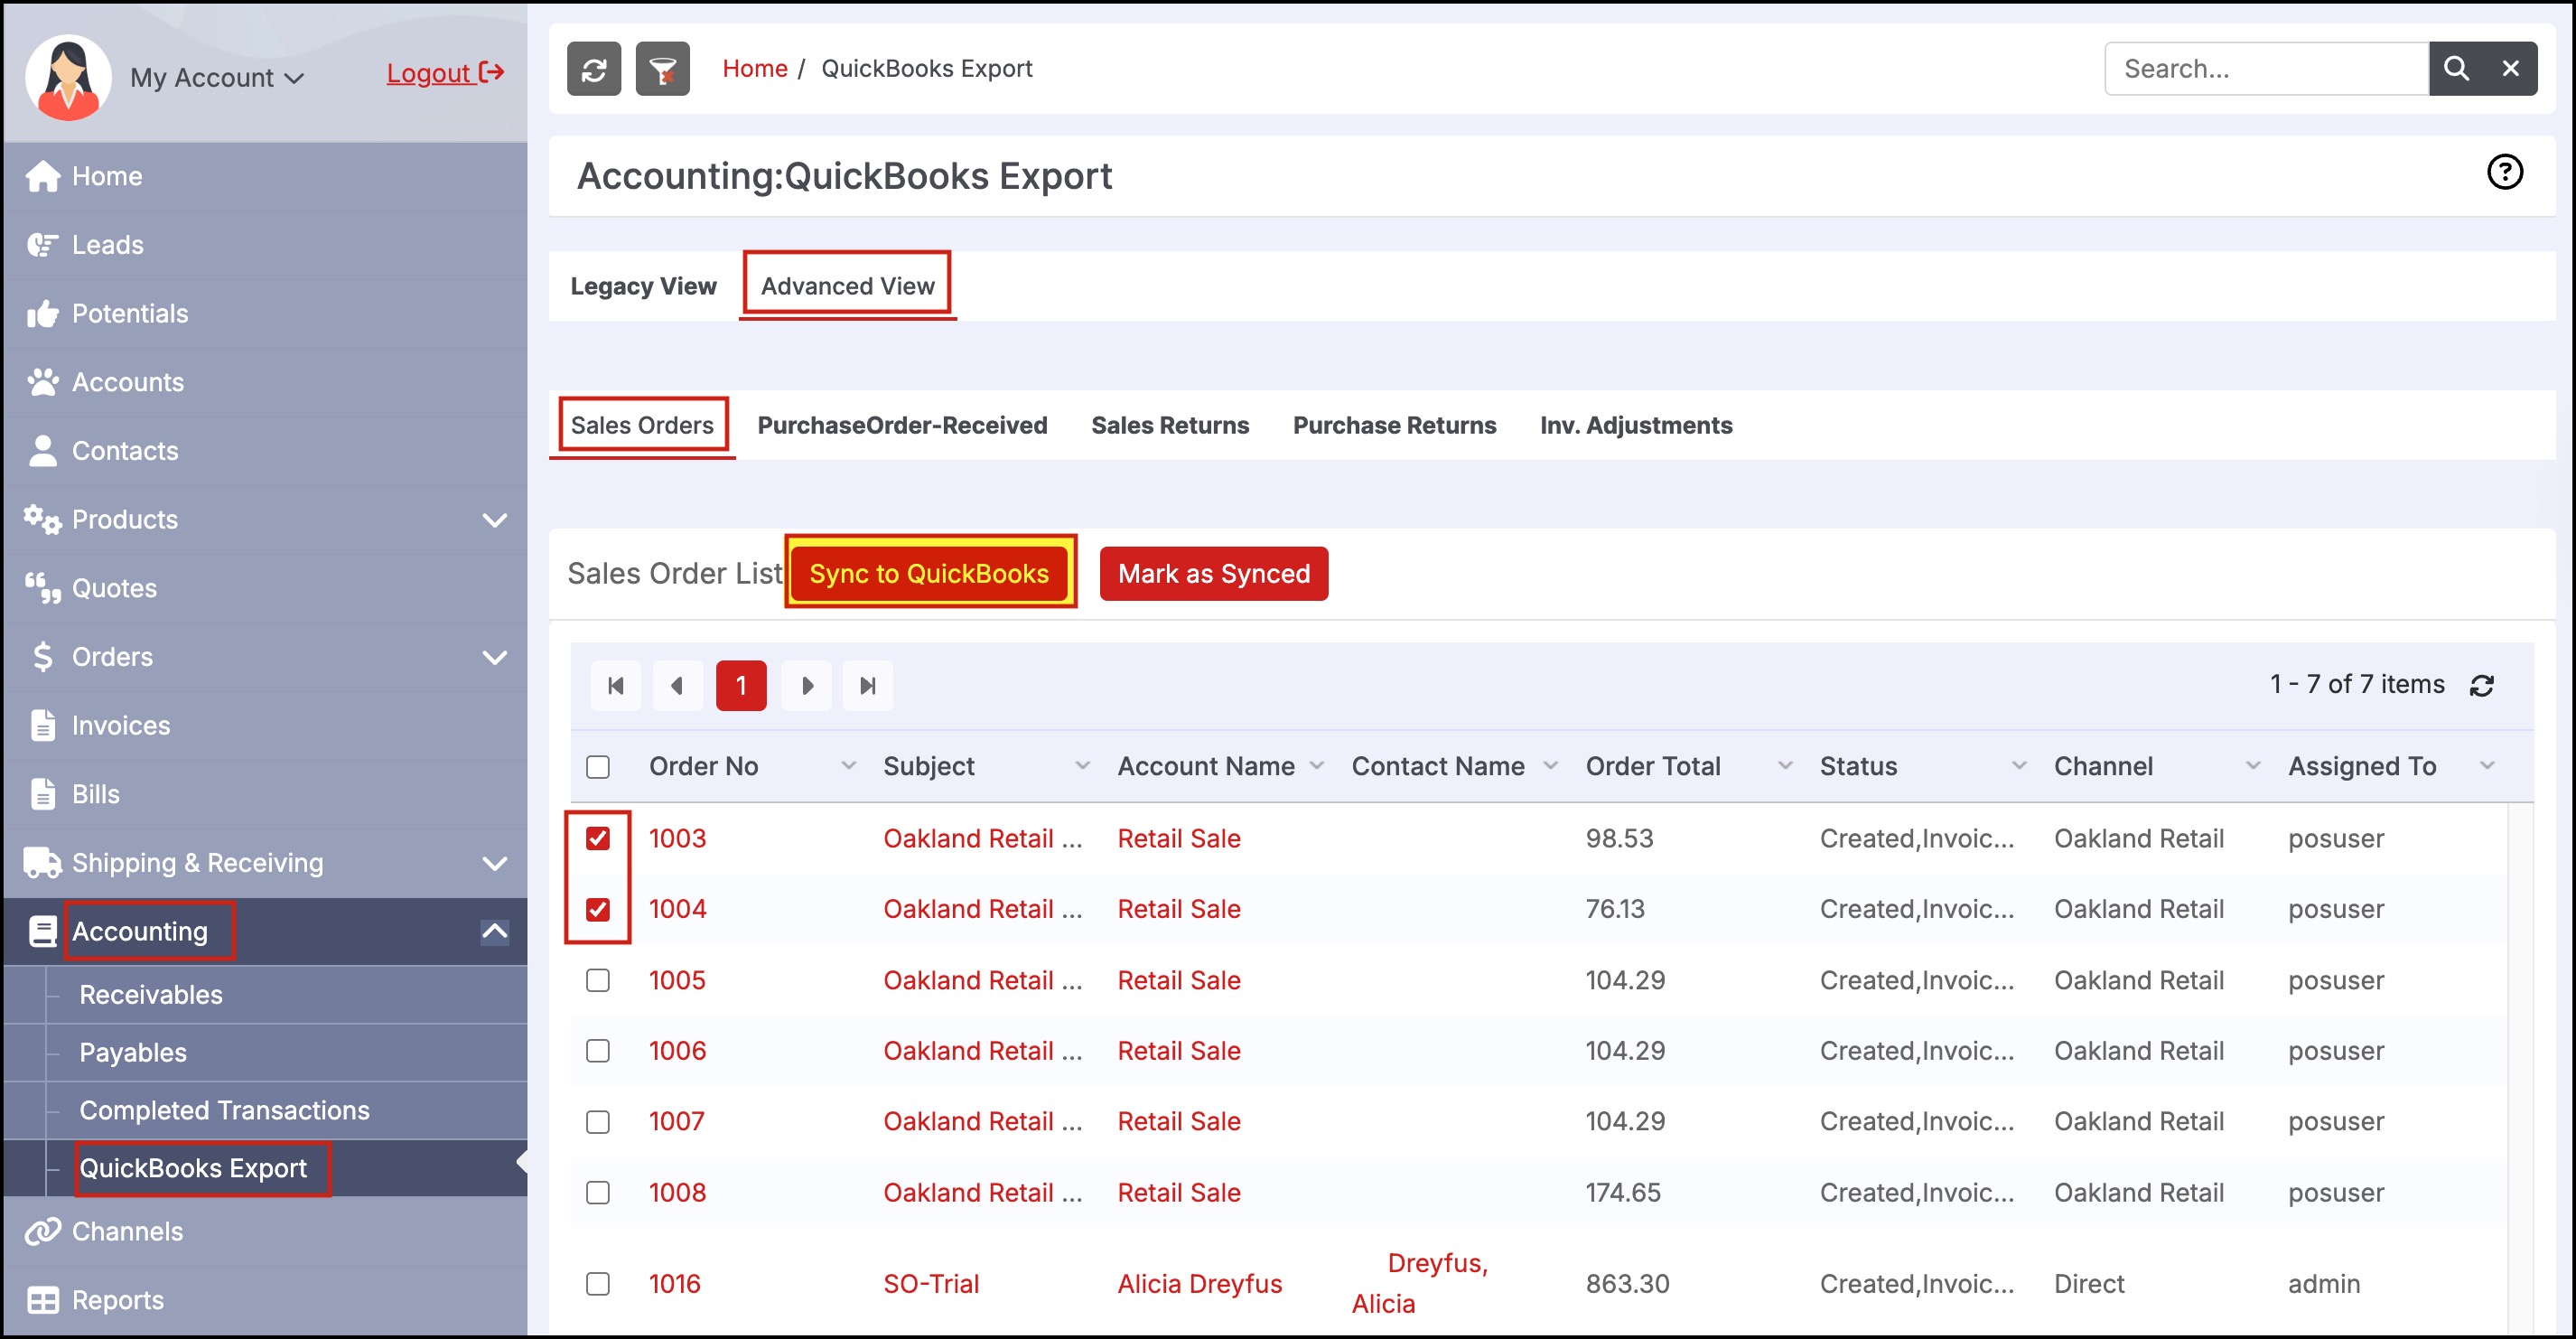
In this view, the user has complete control over the orders they want to sync to QuickBooks. The order view(s) can be customized as well.
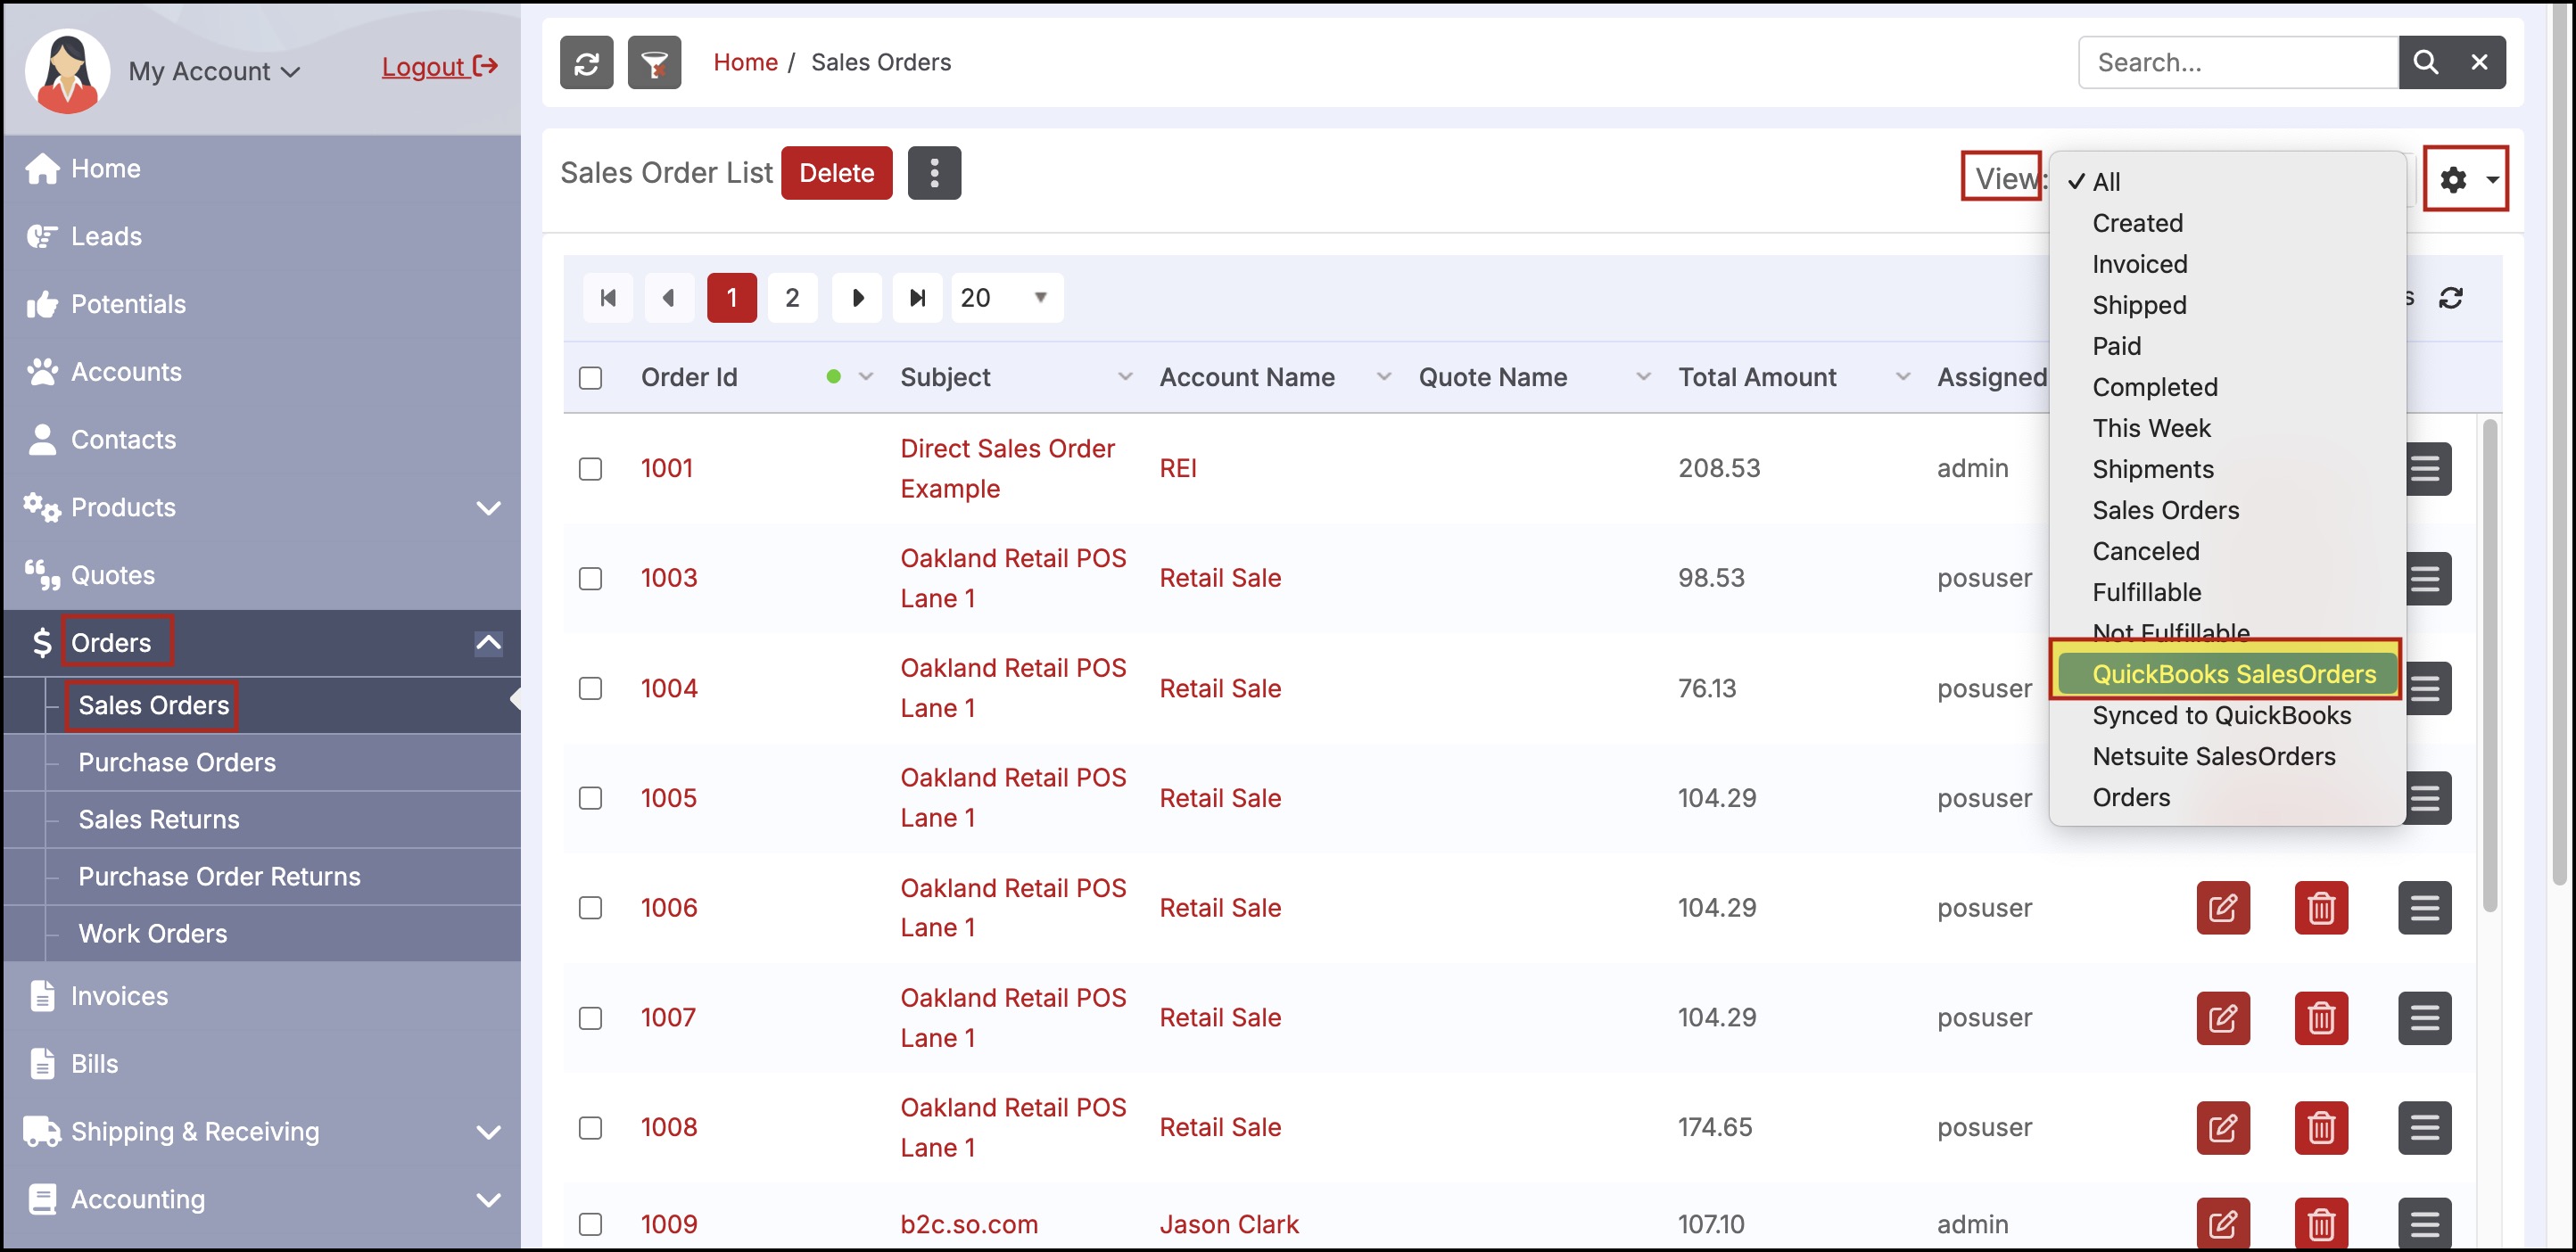
For Example in the Sales Orders tab of the Advanced View, the list here is pulled from the custom view "QuickBooks SalesOrders" located in the Sales Order module.
- Navigate to Orders > Sales Orders from the left menu panel.
- On the right side of the screen, select the drop-down next to "View".
- Select "QuickBooks SalesOrders". This will display the sales orders in the system.
- You can then click the Gear icon next to "View" and select "Edit" to customize the display.
- Once saved, the update will occur in the Sales Order tab in the Accounting > QuickBooks Export module.
- The Purchase Orders and Sales Returns Modules contain similar custom views allowing editing. Note: The view for Inventory Adjustments cannot be edited.

Each module has its own tab (Sales Orders, Purchase Orders, etc). Select the appropriate tab to begin, then select the orders in the list that will be synced.
-
Once the orders are selected, click the "Sync to QuickBooks" button to sync the orders.
-
The same 30-order sync limit applies so that the user can select up to 30 orders for sync at one time.
-
If more than 30 orders are in the list, the user will have to wait for the first 30 orders to finish syncing, then click the "Sync to QuickBooks" again to send the next 30 orders over, until all orders have been synced.
-
For orders that do not need to sync to QuickBooks, select the order(s) in the list and then click the "Mark as Synced" button. This treats the order(s) as synced and removes them from this list; they will not sync to QuickBooks.

Updated 3 months ago
