Bin Transfer Workflow
Like the back office, even the warehouse management app now provides the capability of Bin Transfer. This workflow allows products to be easily transferred from one bin to another.
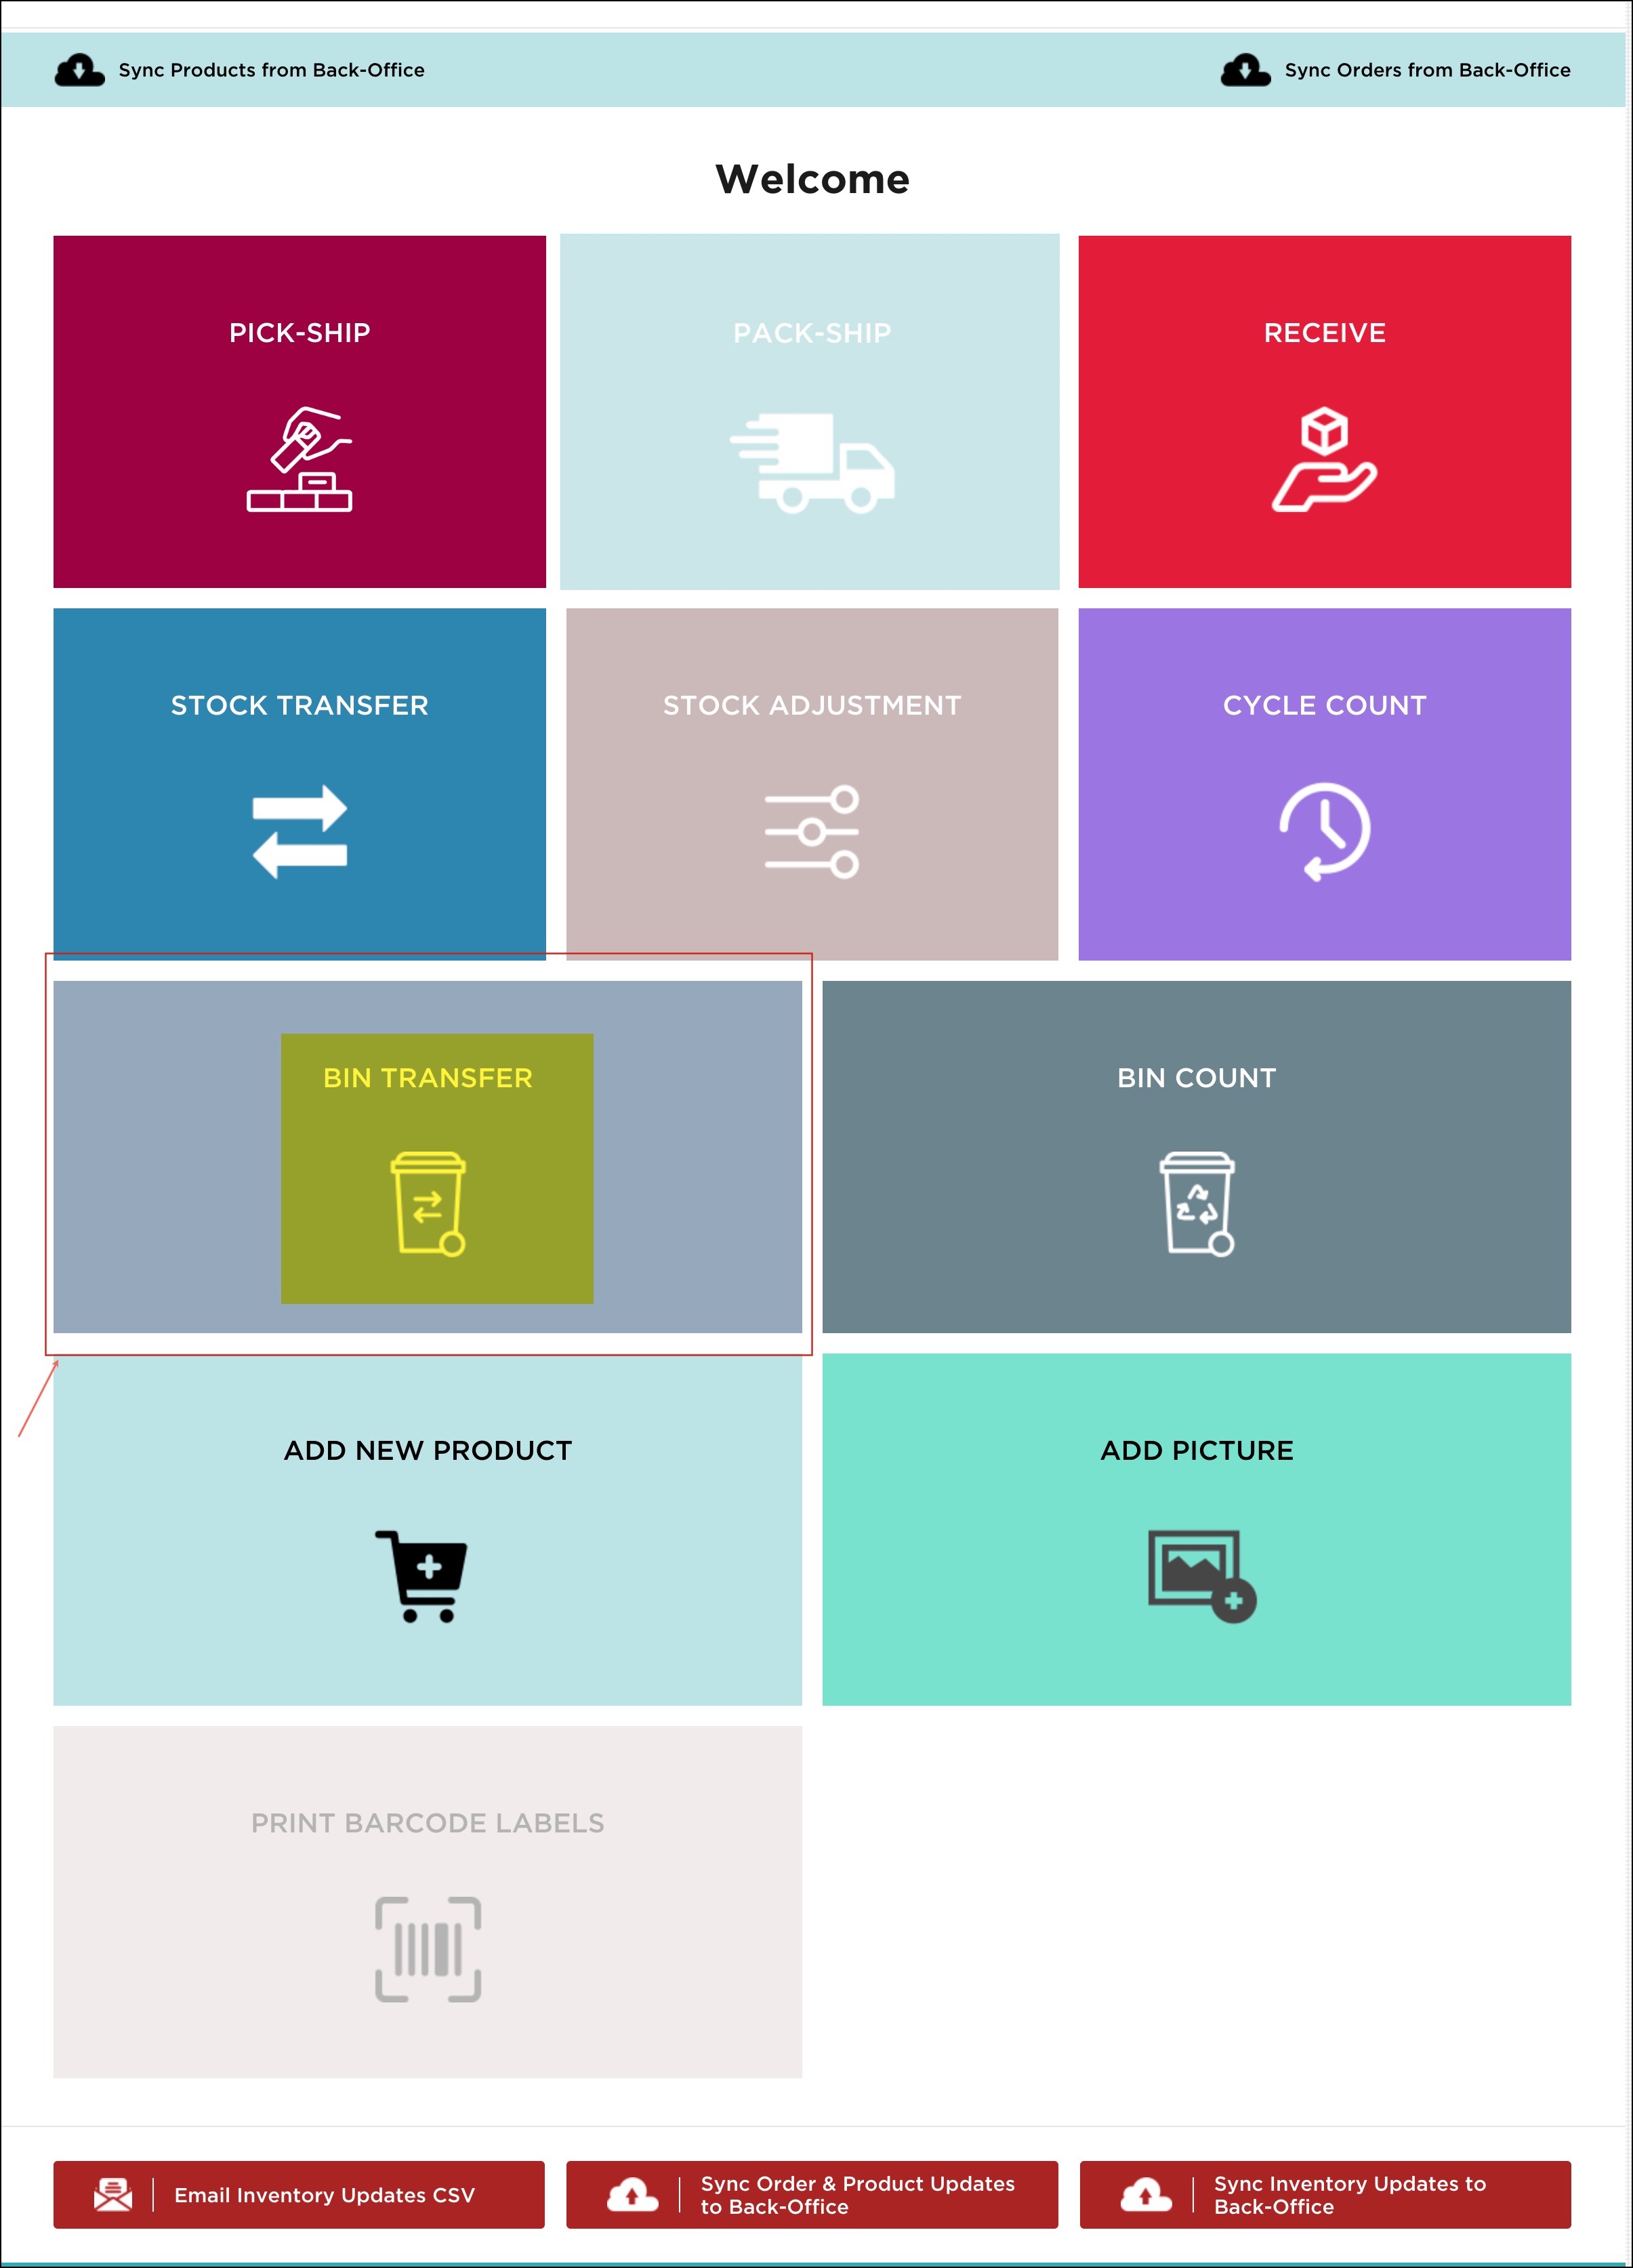
- On the warehouse management app home screen, click on the Bin Transfer workflow button.
- Here you can see products listed along with the Bin Location, if any.
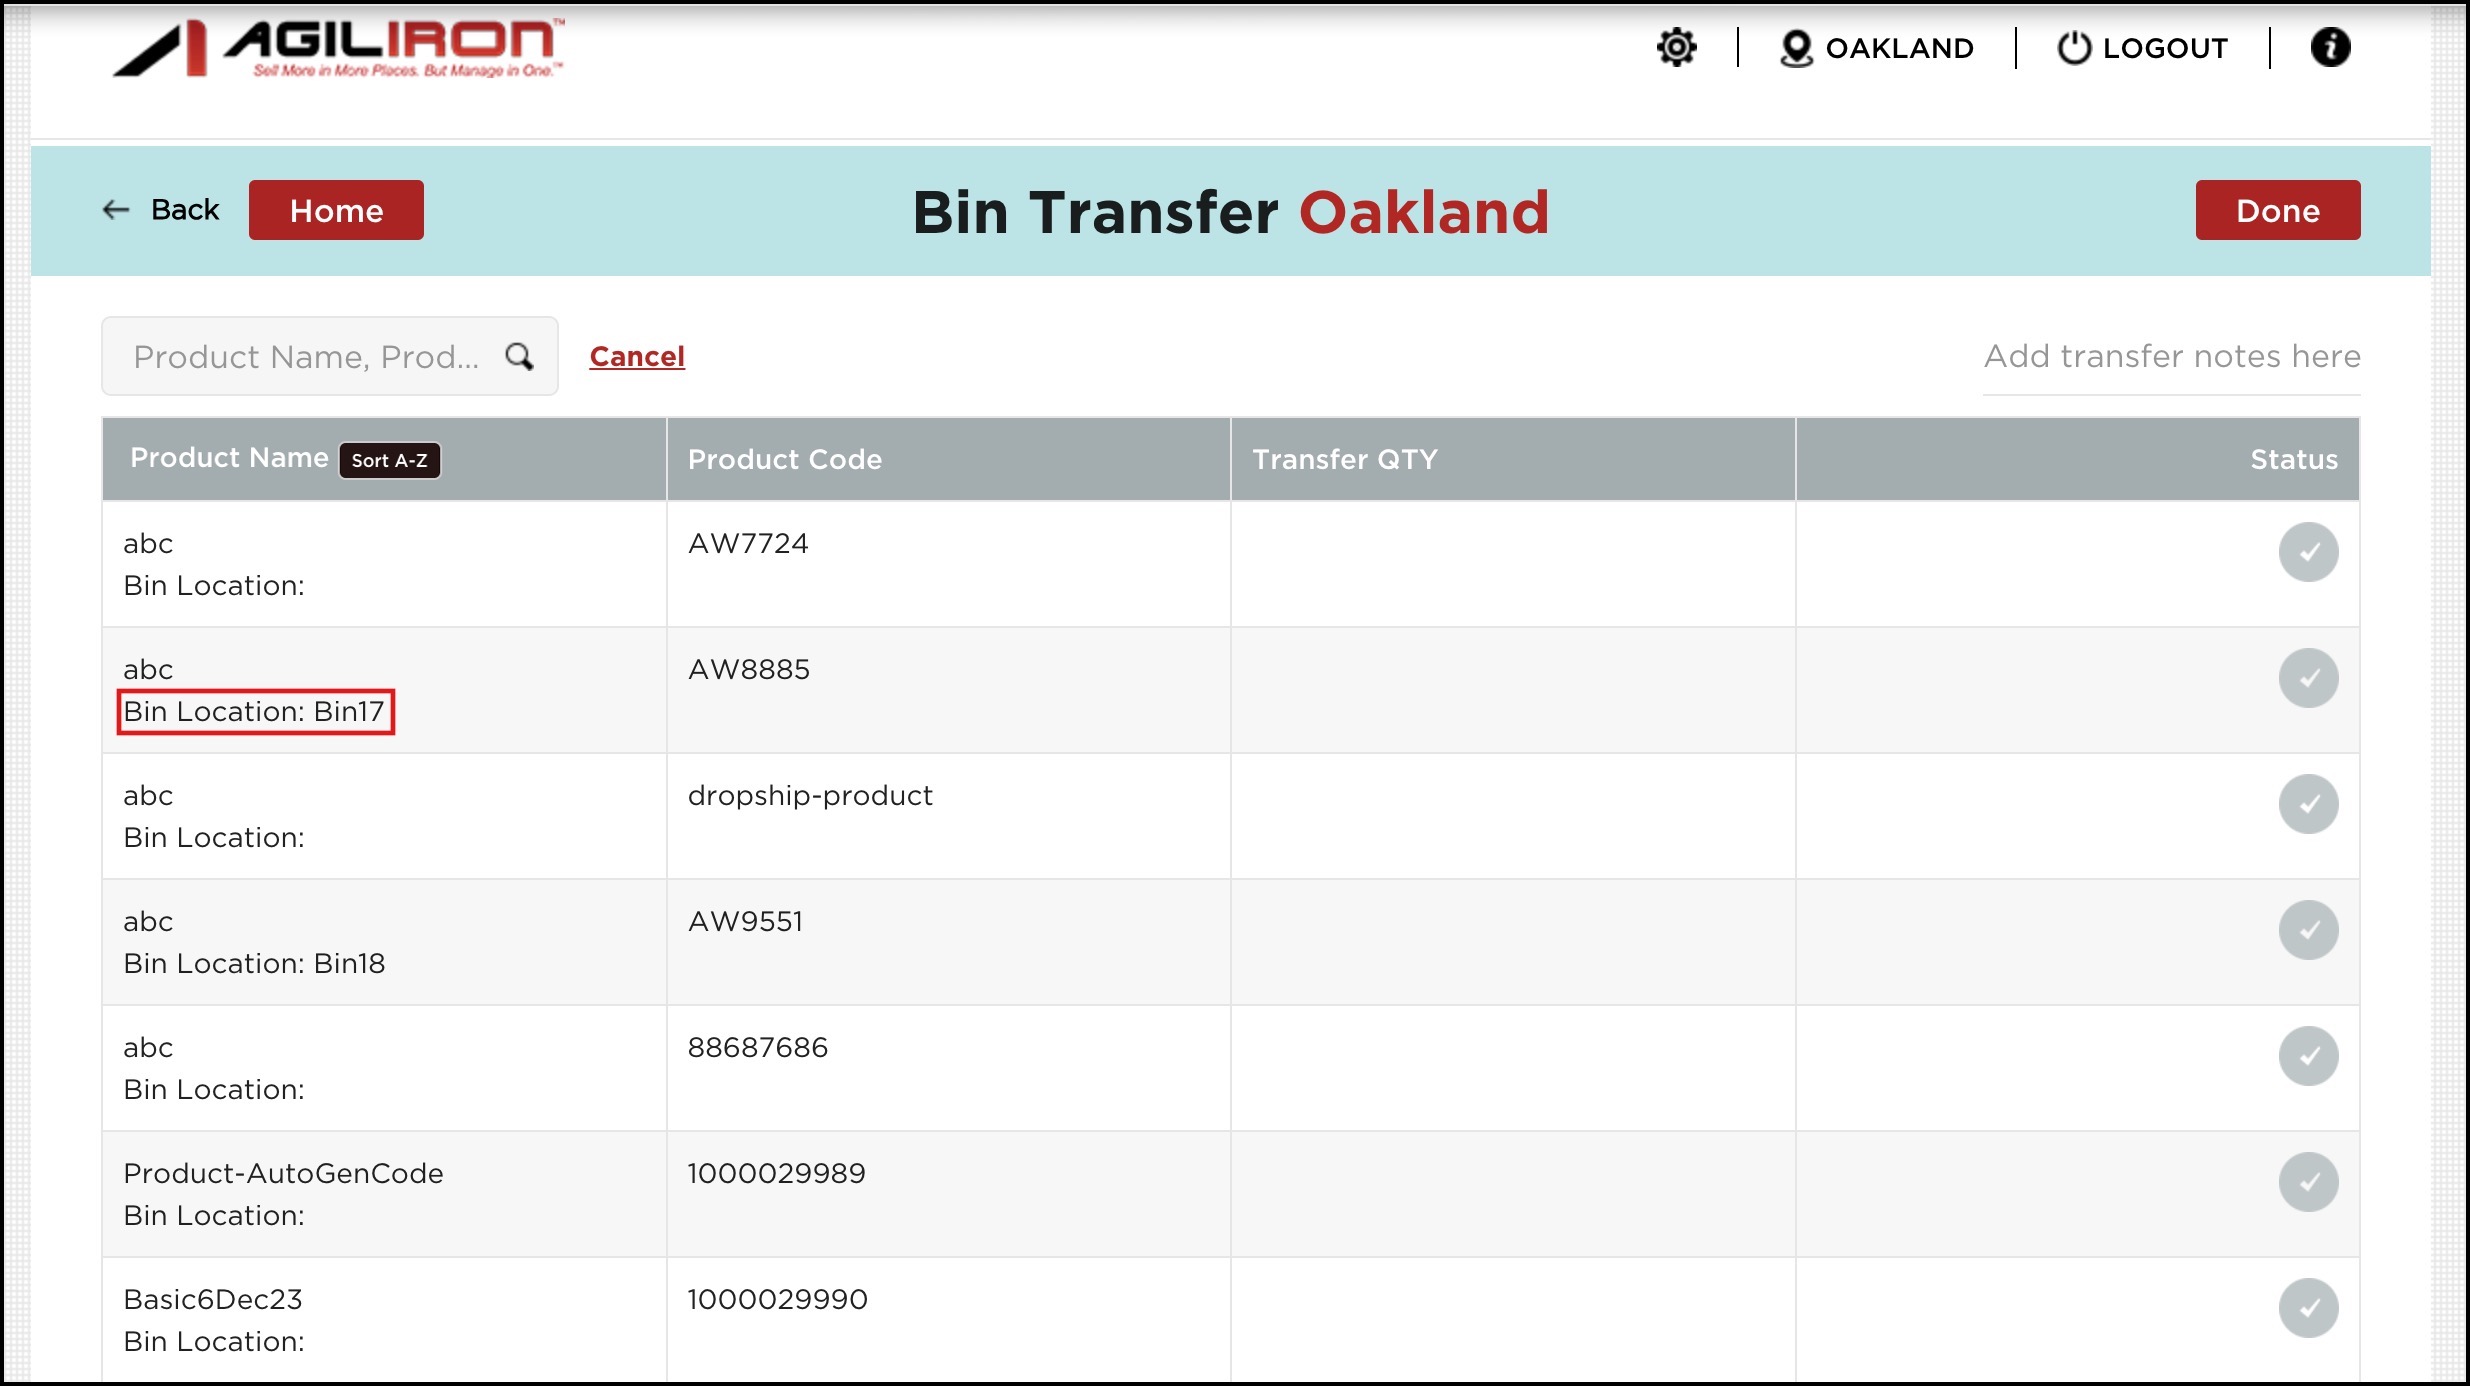
- Proceed by selecting the product.
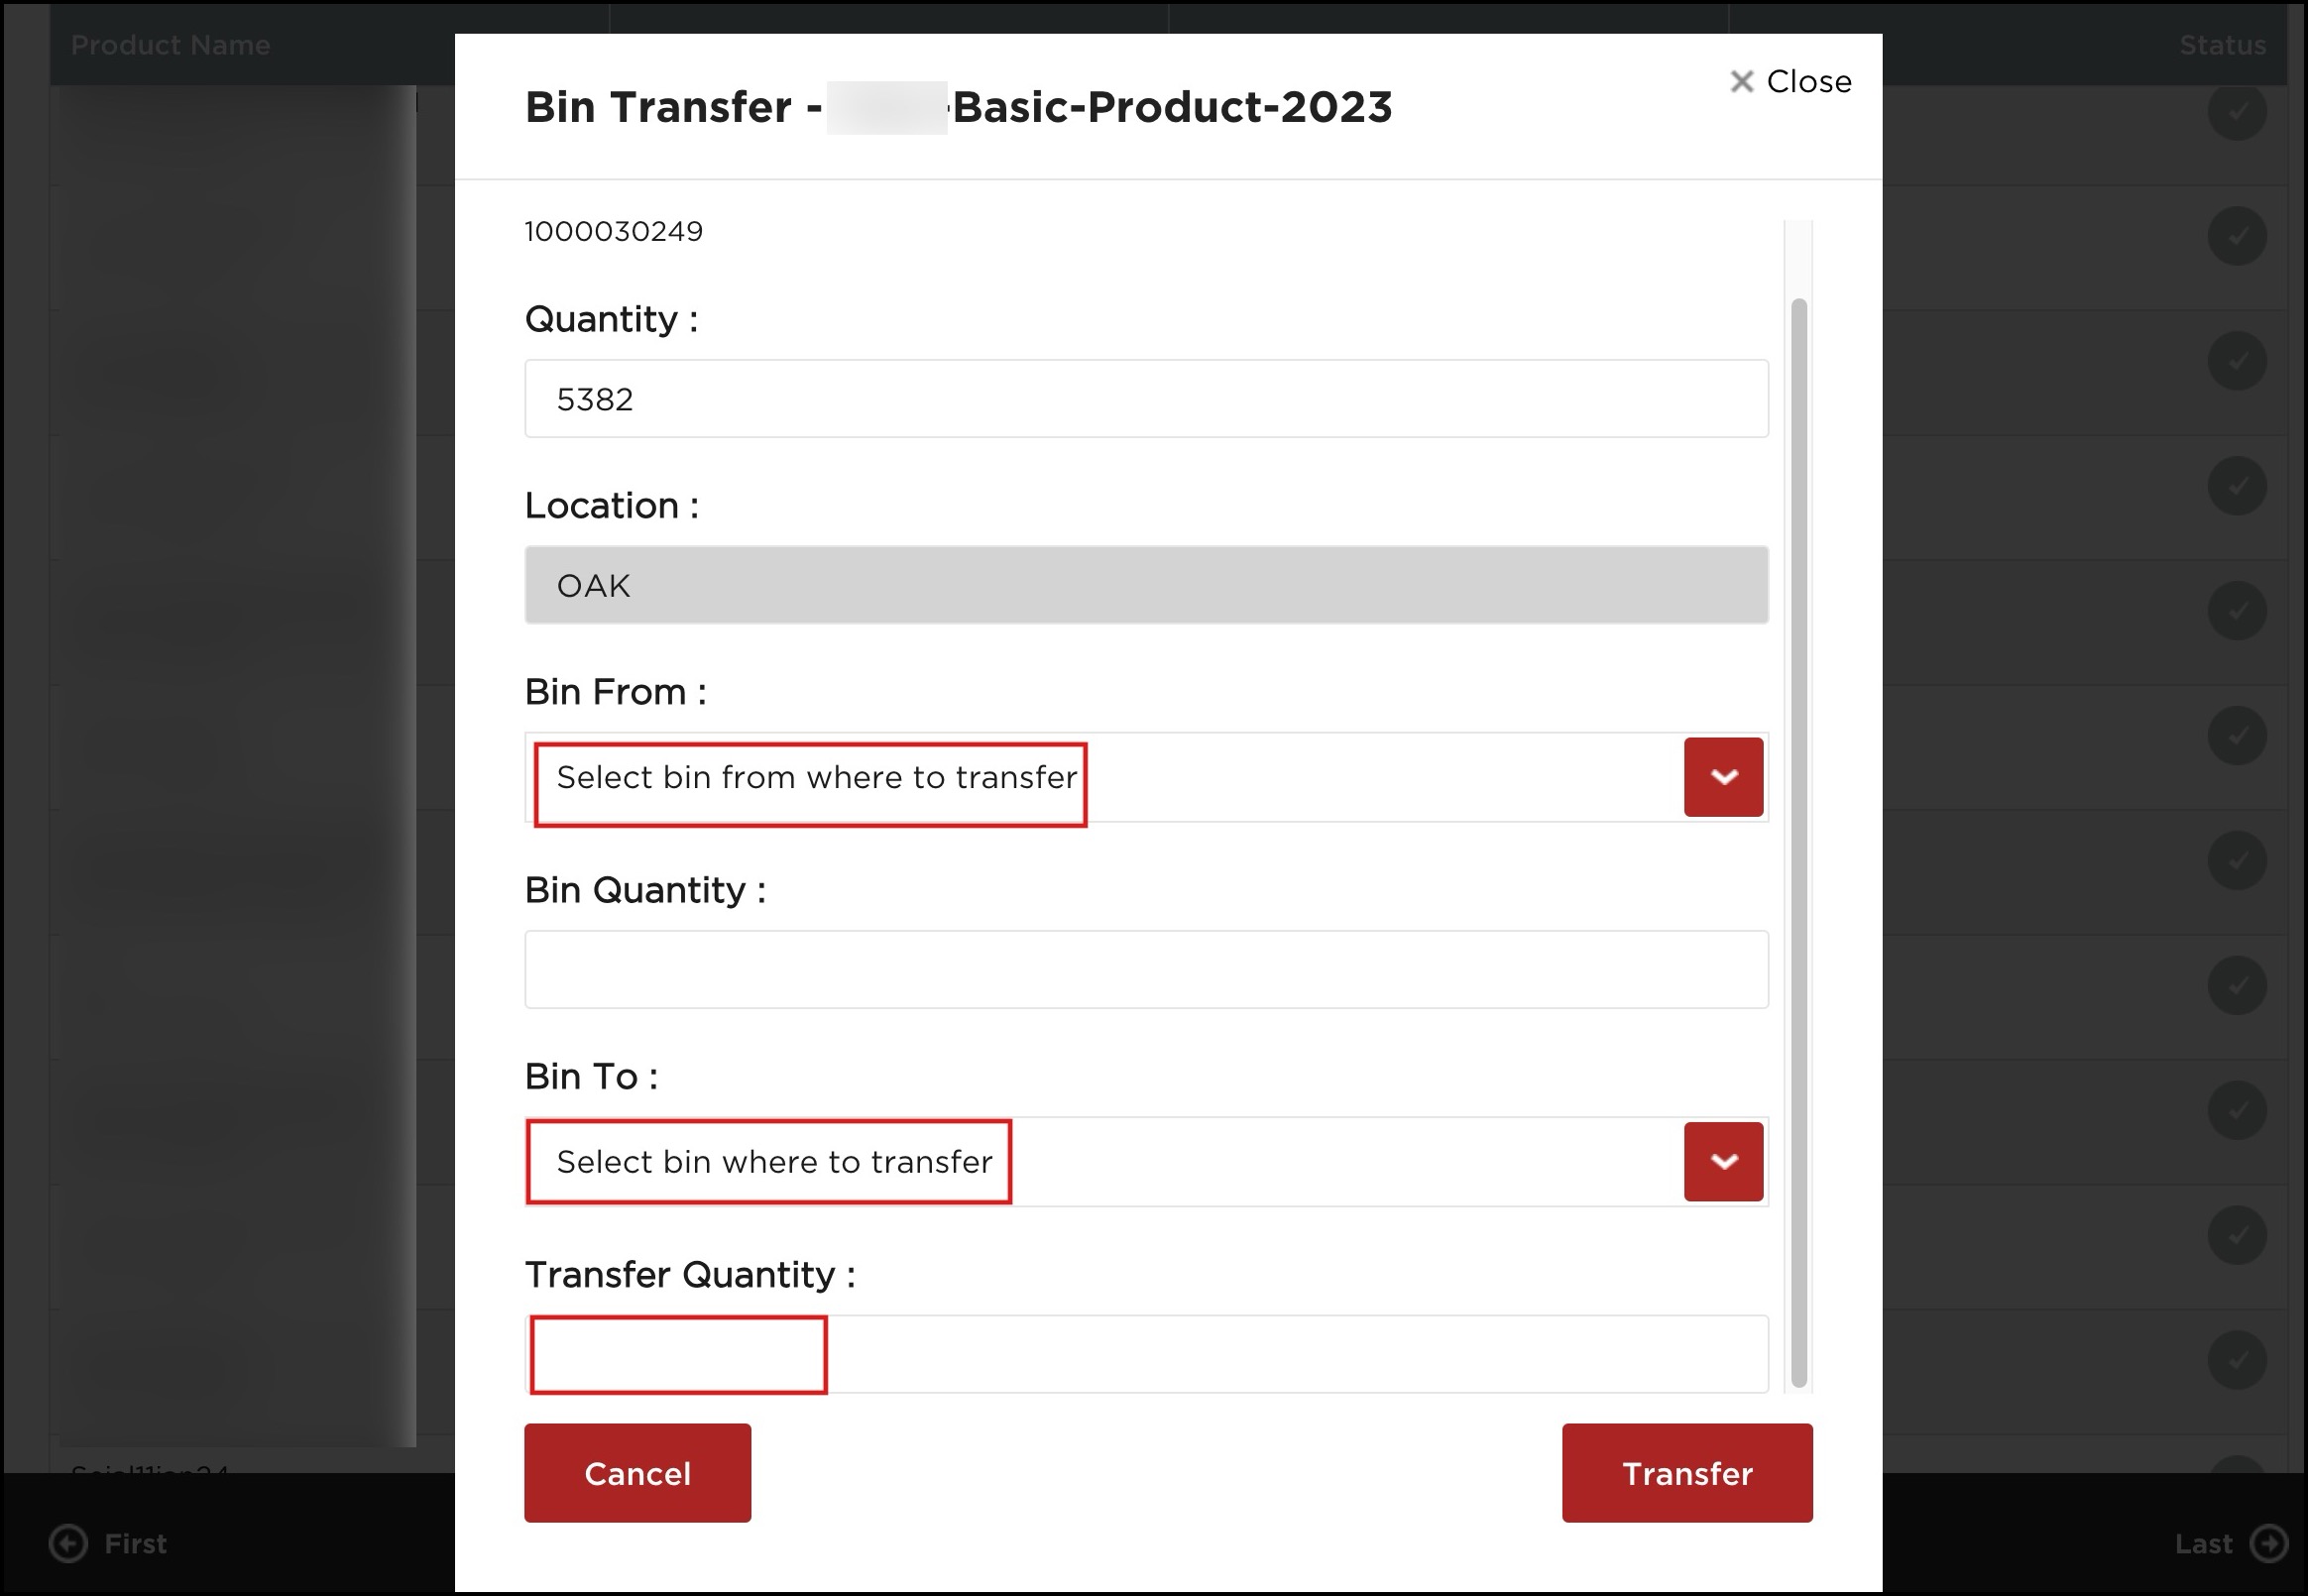
- A pop-up will appear where you need to select from which bin location, to which bin location (from the drop-down list), and enter the Transfer Quantity.
- Once done, click on Transfer.
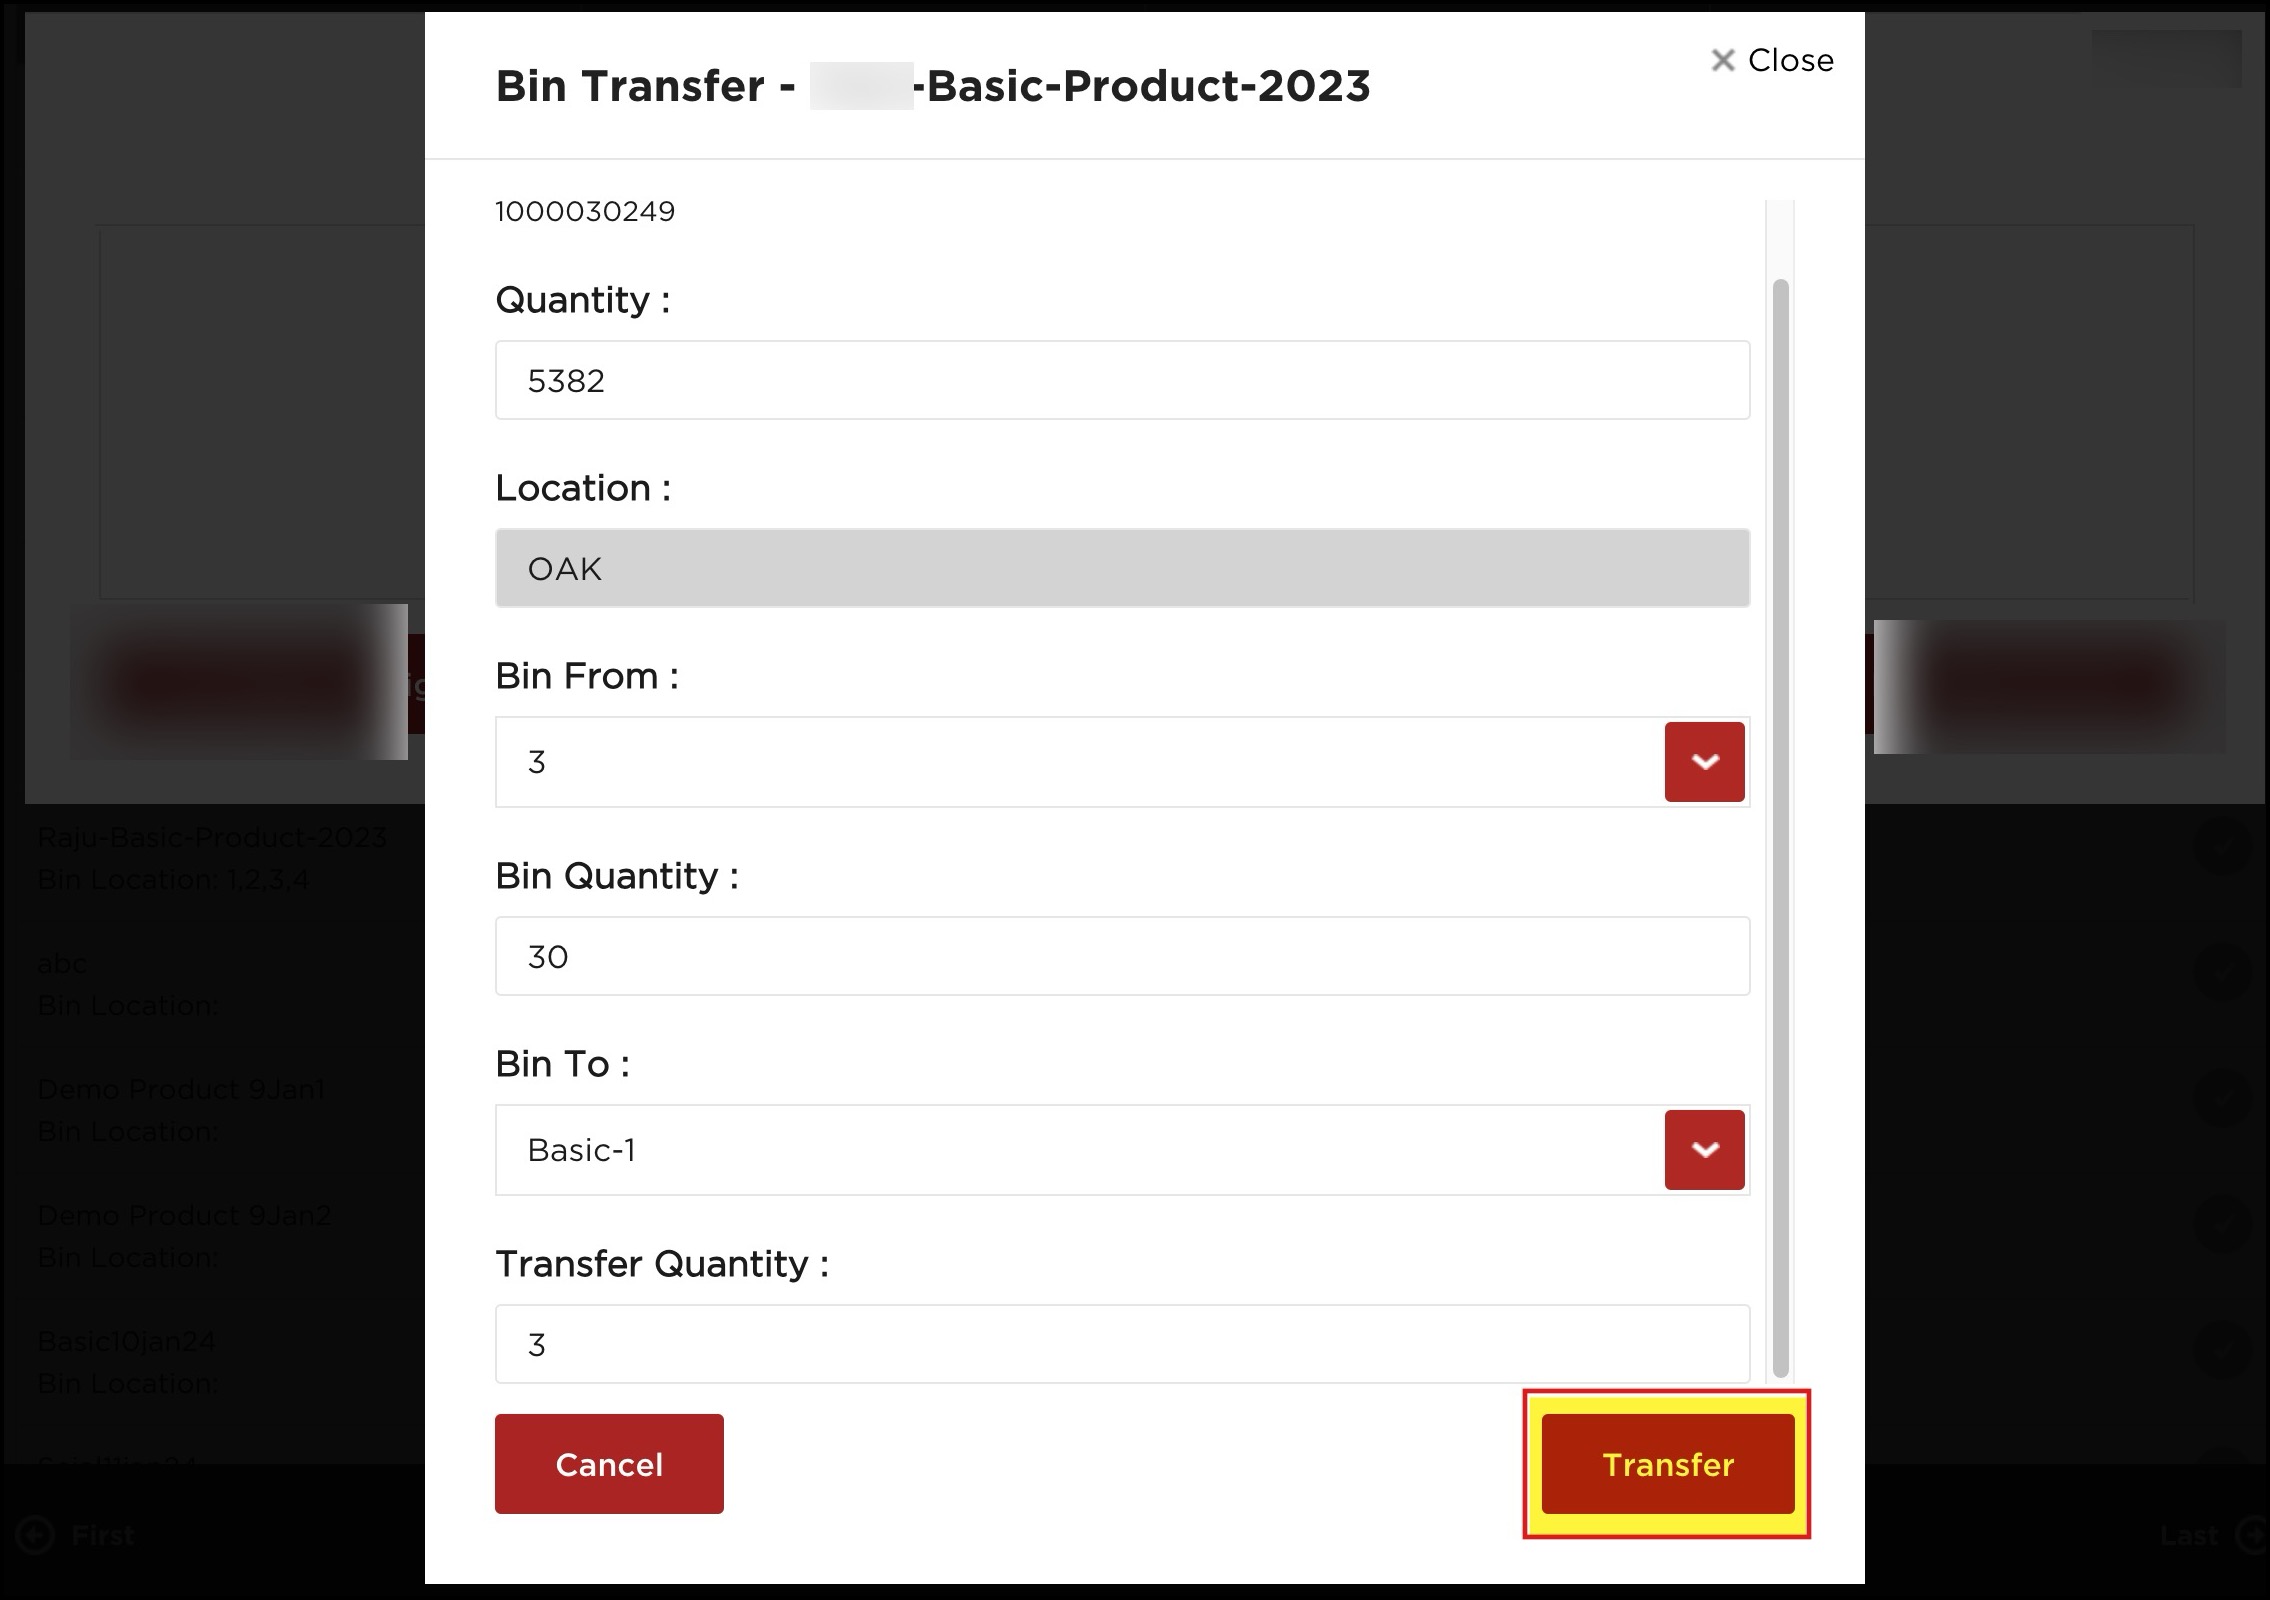
You will see the Transfer Qty added and also the Status turns Green.
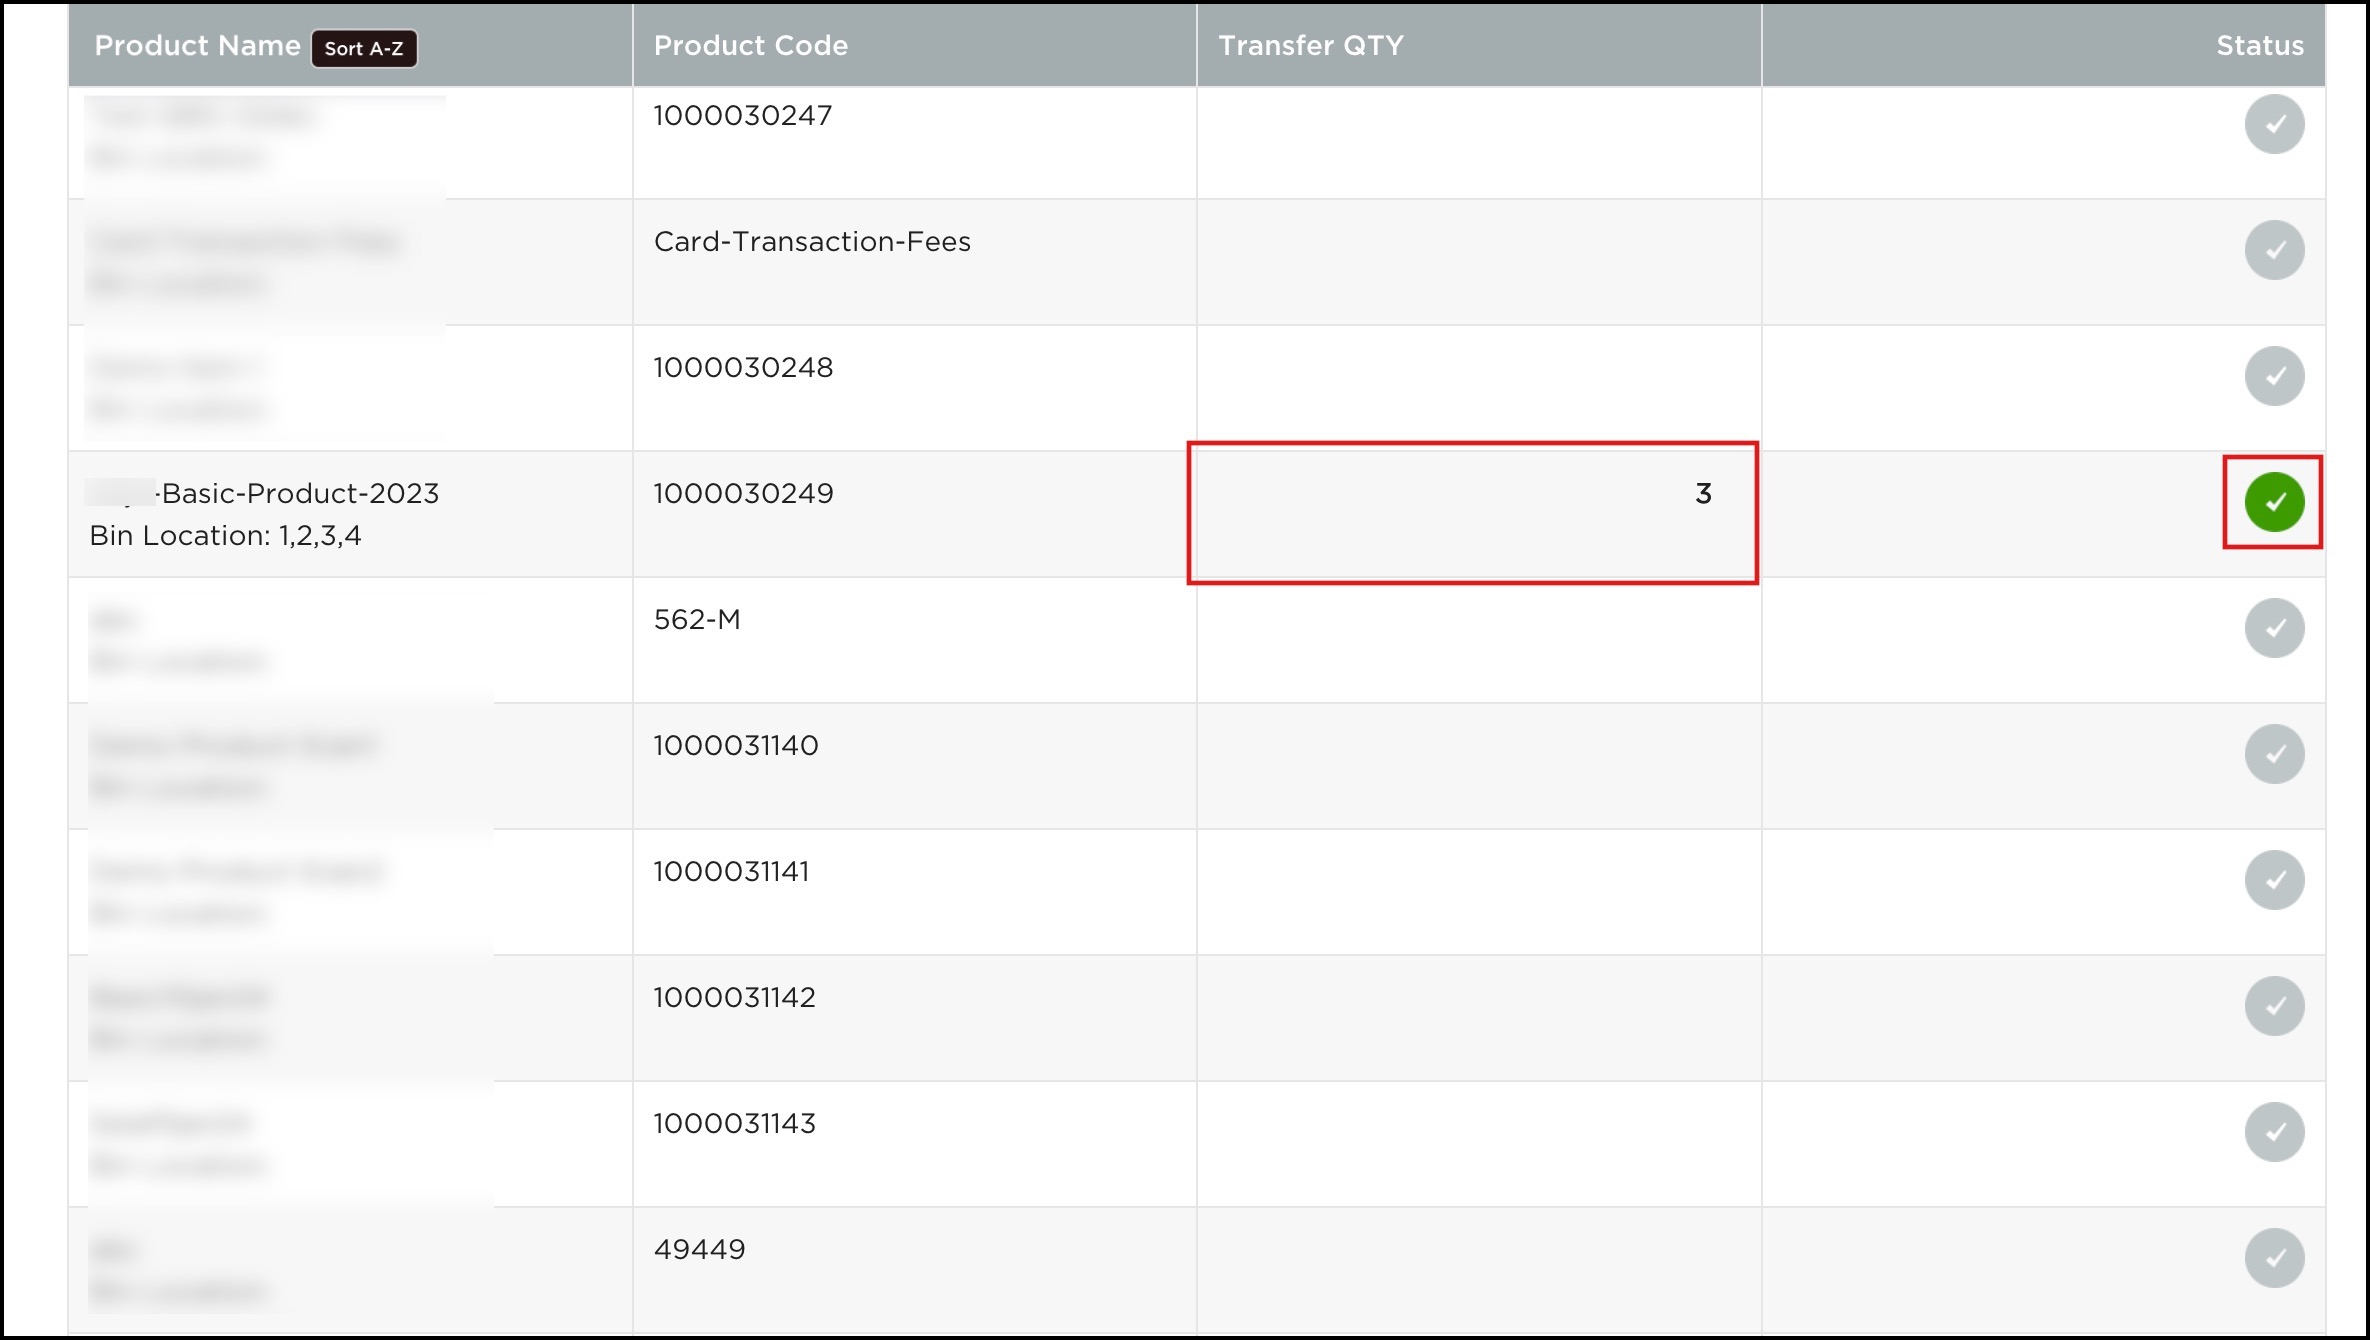
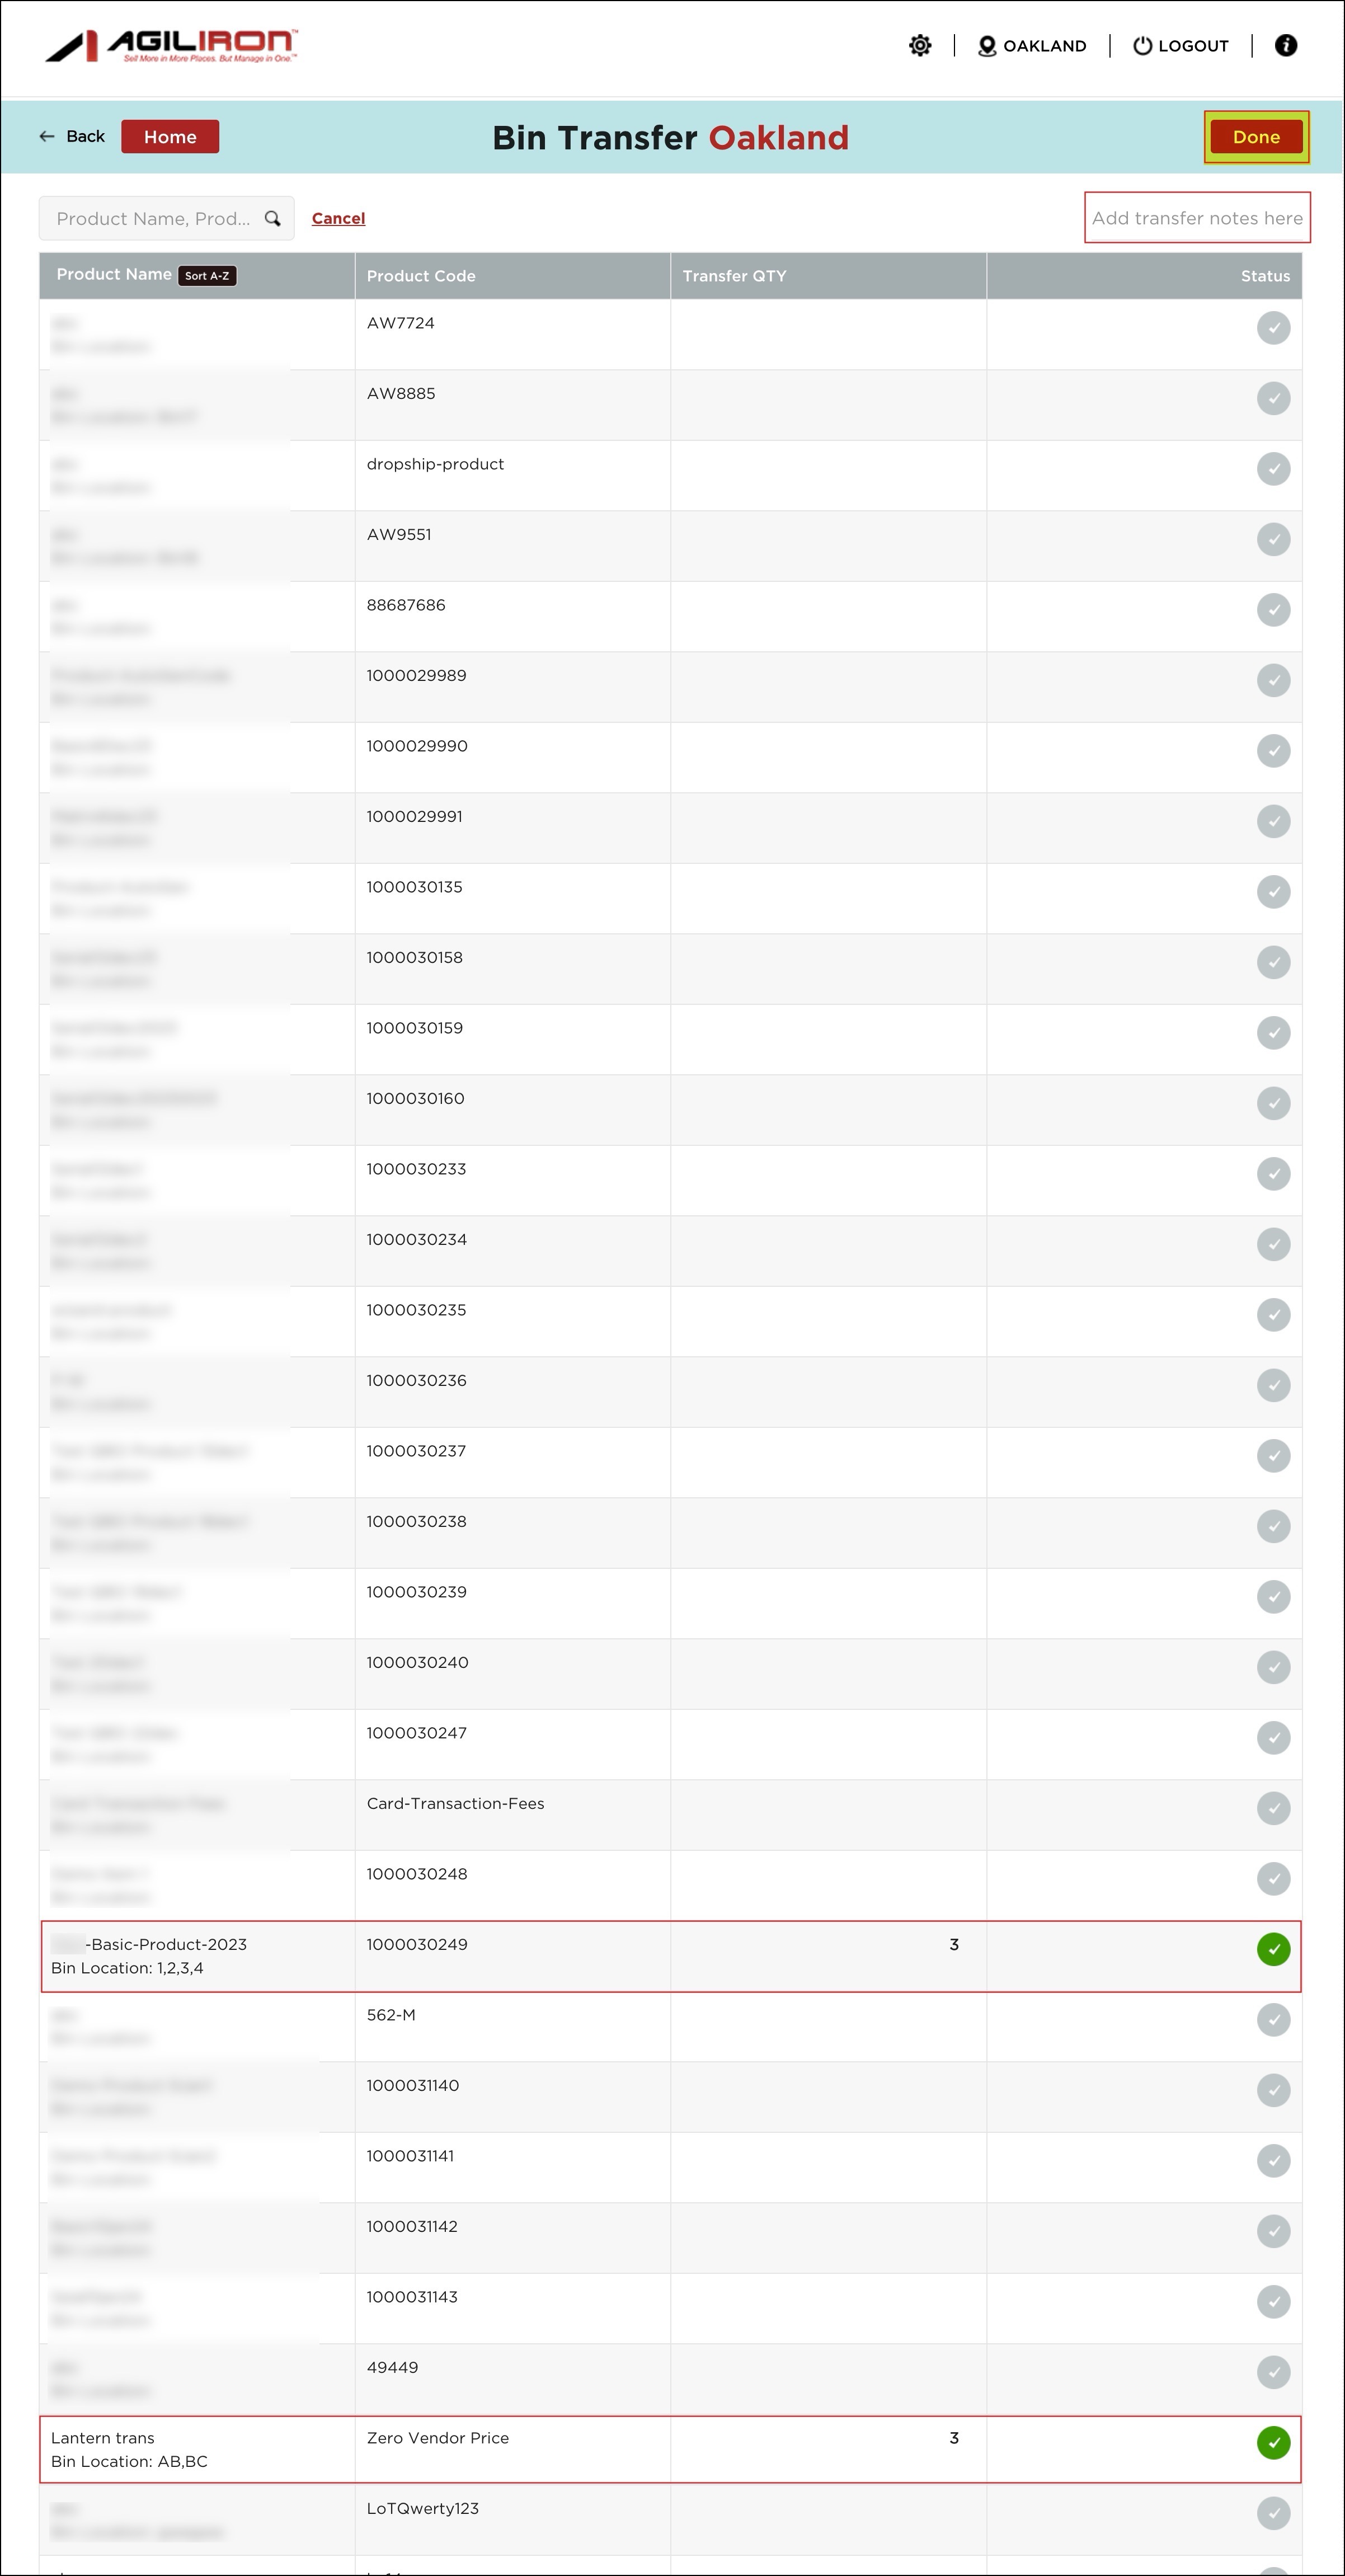
- You can perform a bin transfer for multiple products.
- Add Transfer Note (if any).
- Click on Done.
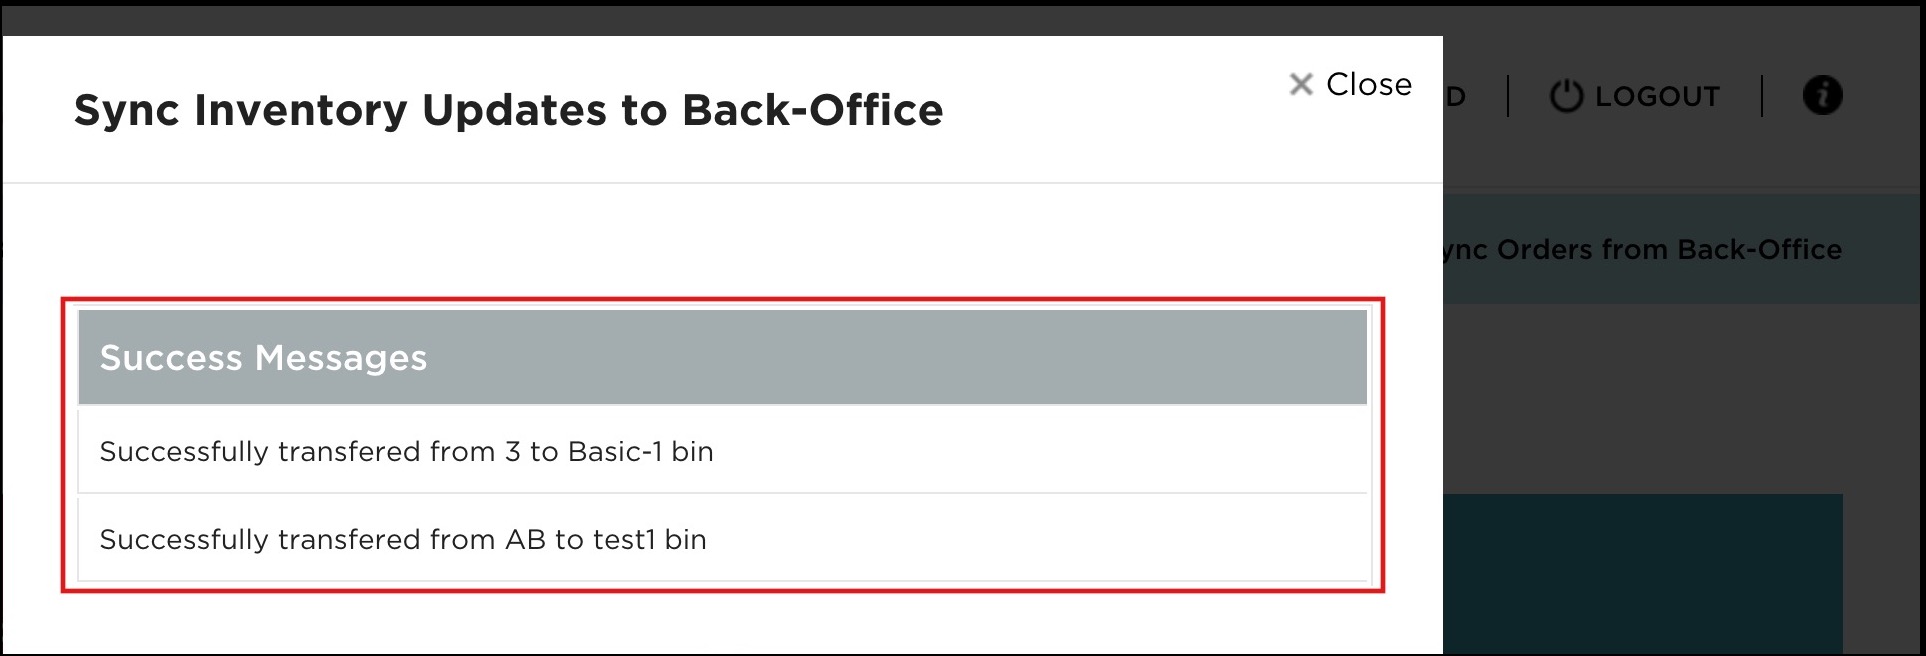
- Now on the home screen, click on Sync Inventory Updates to Back Office.
- You will see a Success message.

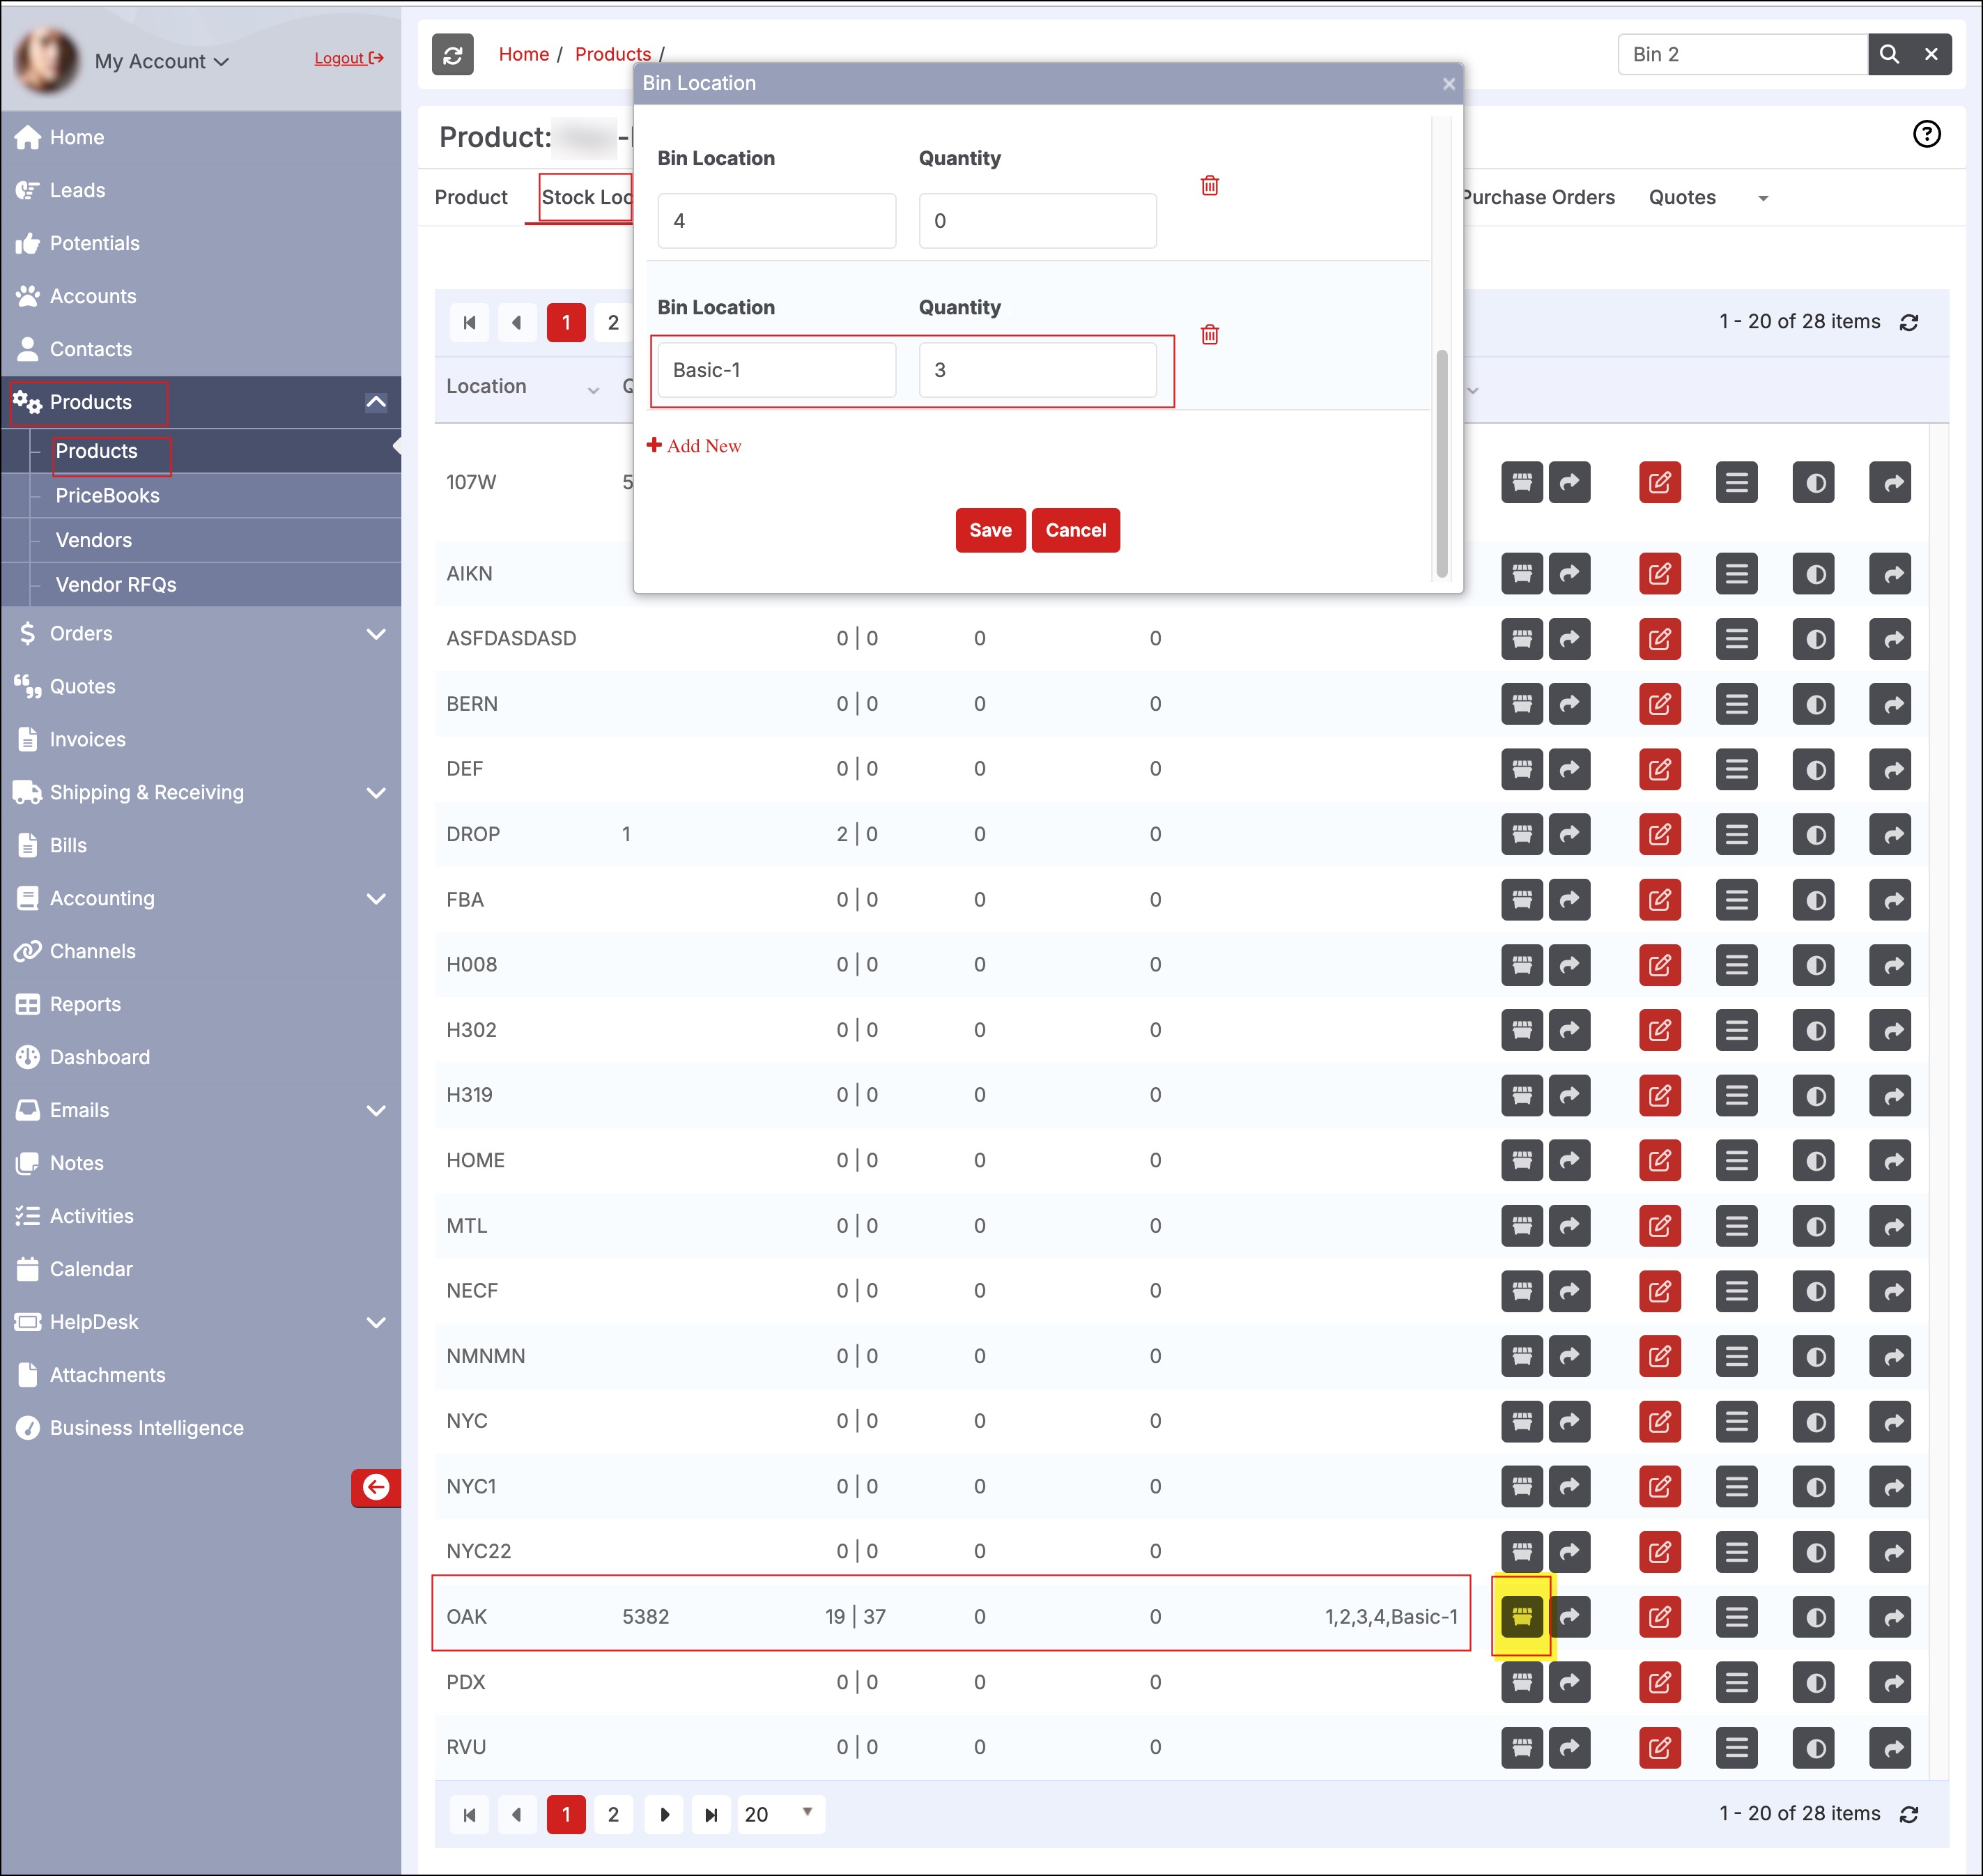
- Now, when you go to the back office -> Products -> select product -> Stock Locations tab and click on the bin icon, you will see the new bin transfer quantity (synced) for that particular product and specific bin. If you are transferring to a new bin location then that bin location gets added.
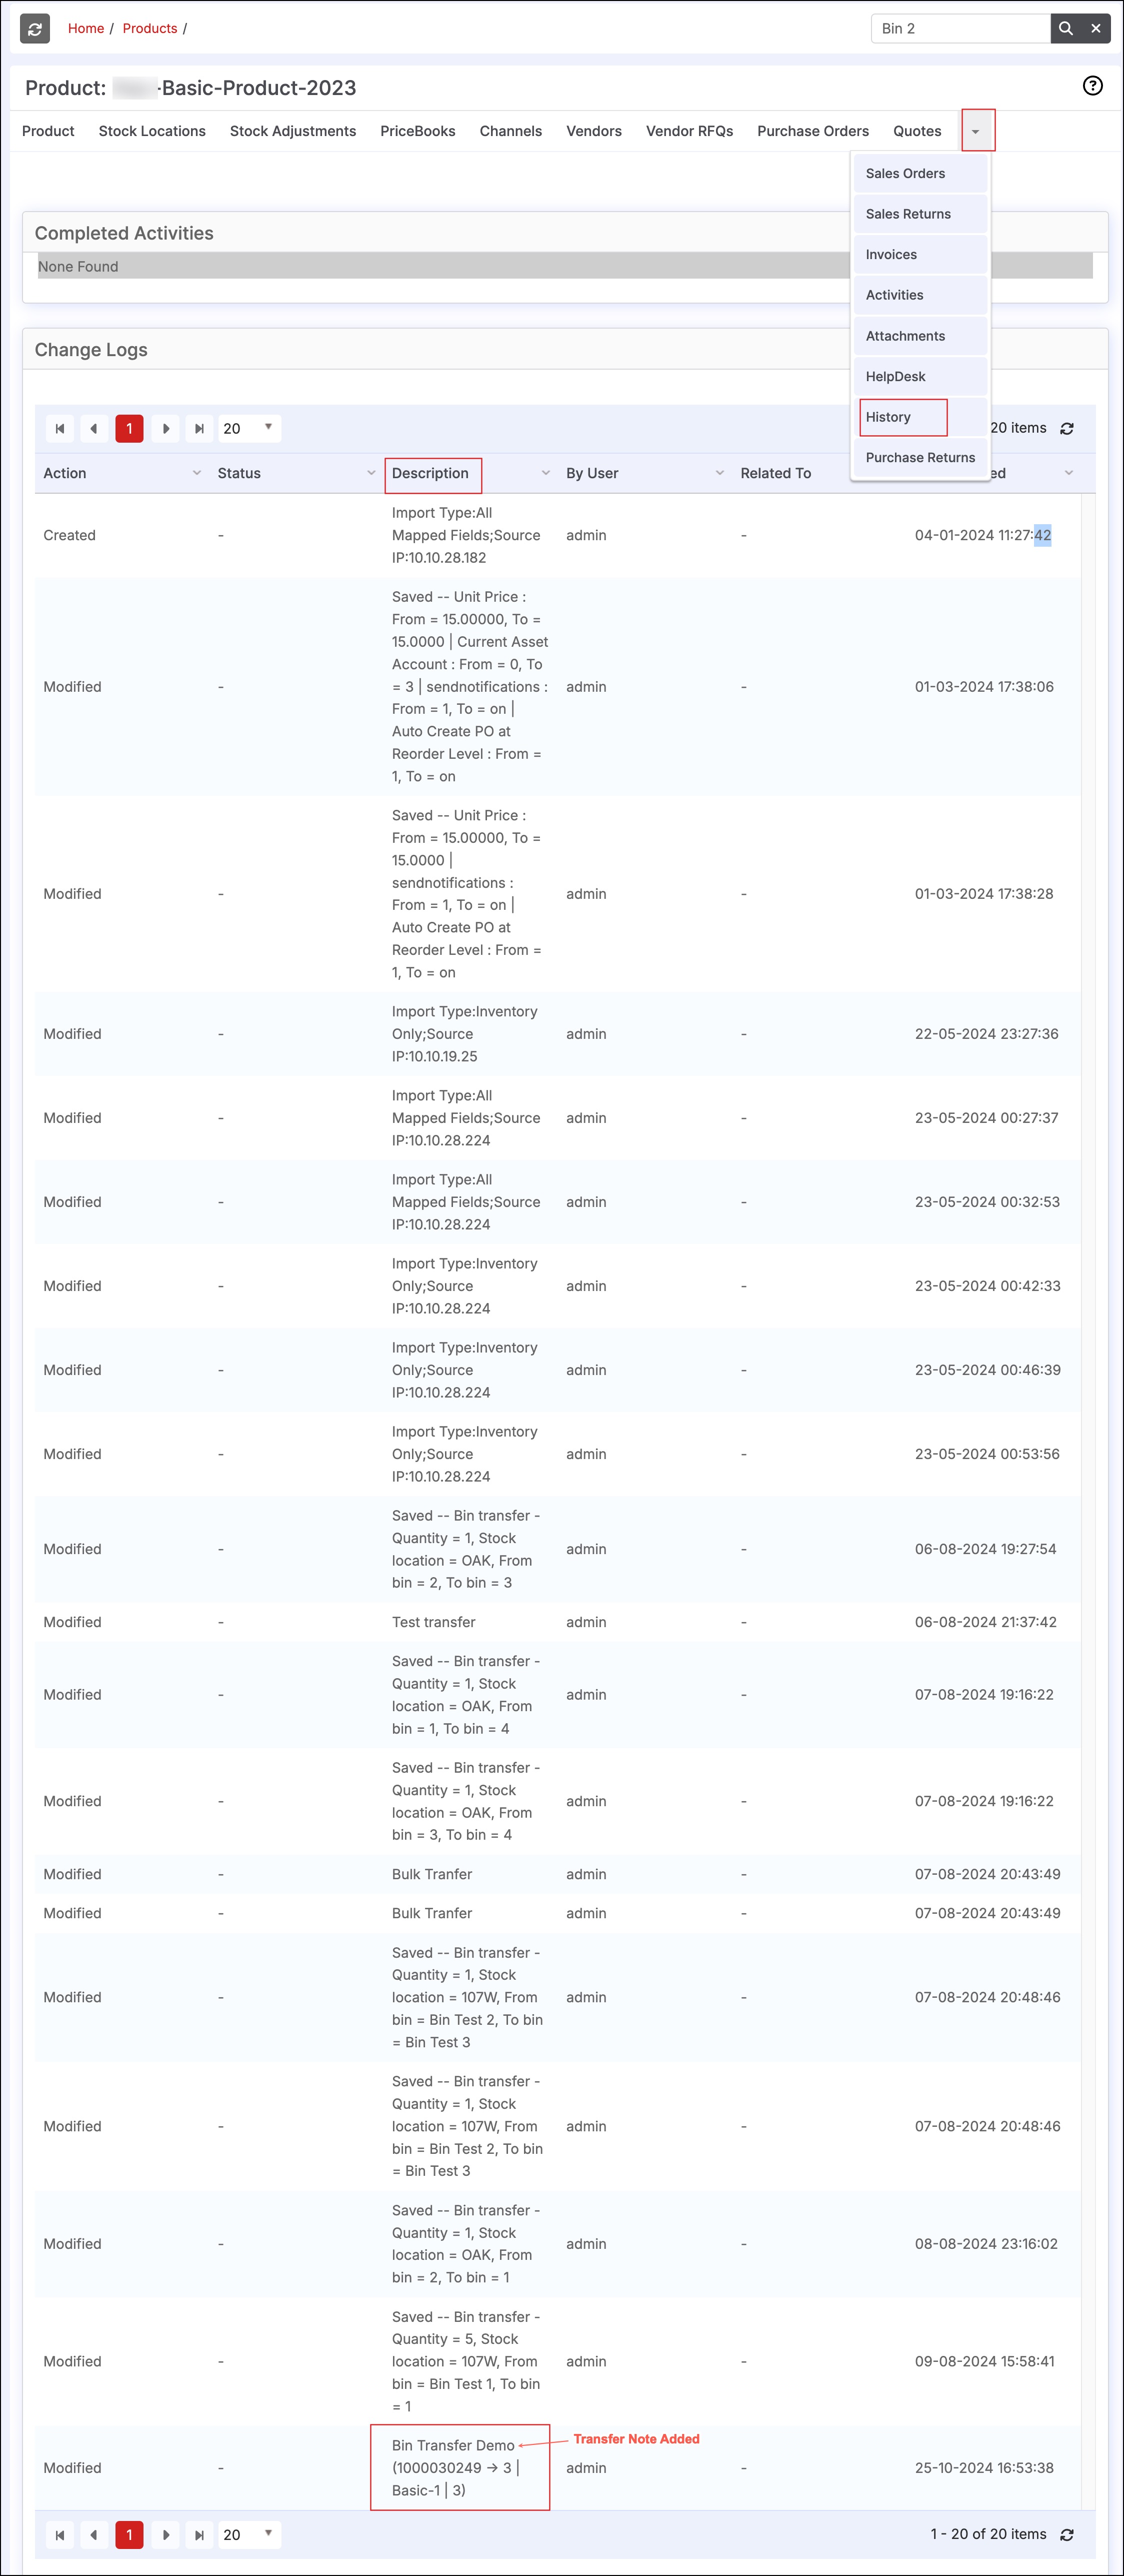
- Also, when you switch to the History tab, you can see the Transfer details along with the transfer note added, under the Description Column.
Bin Transfer for Matrix Items
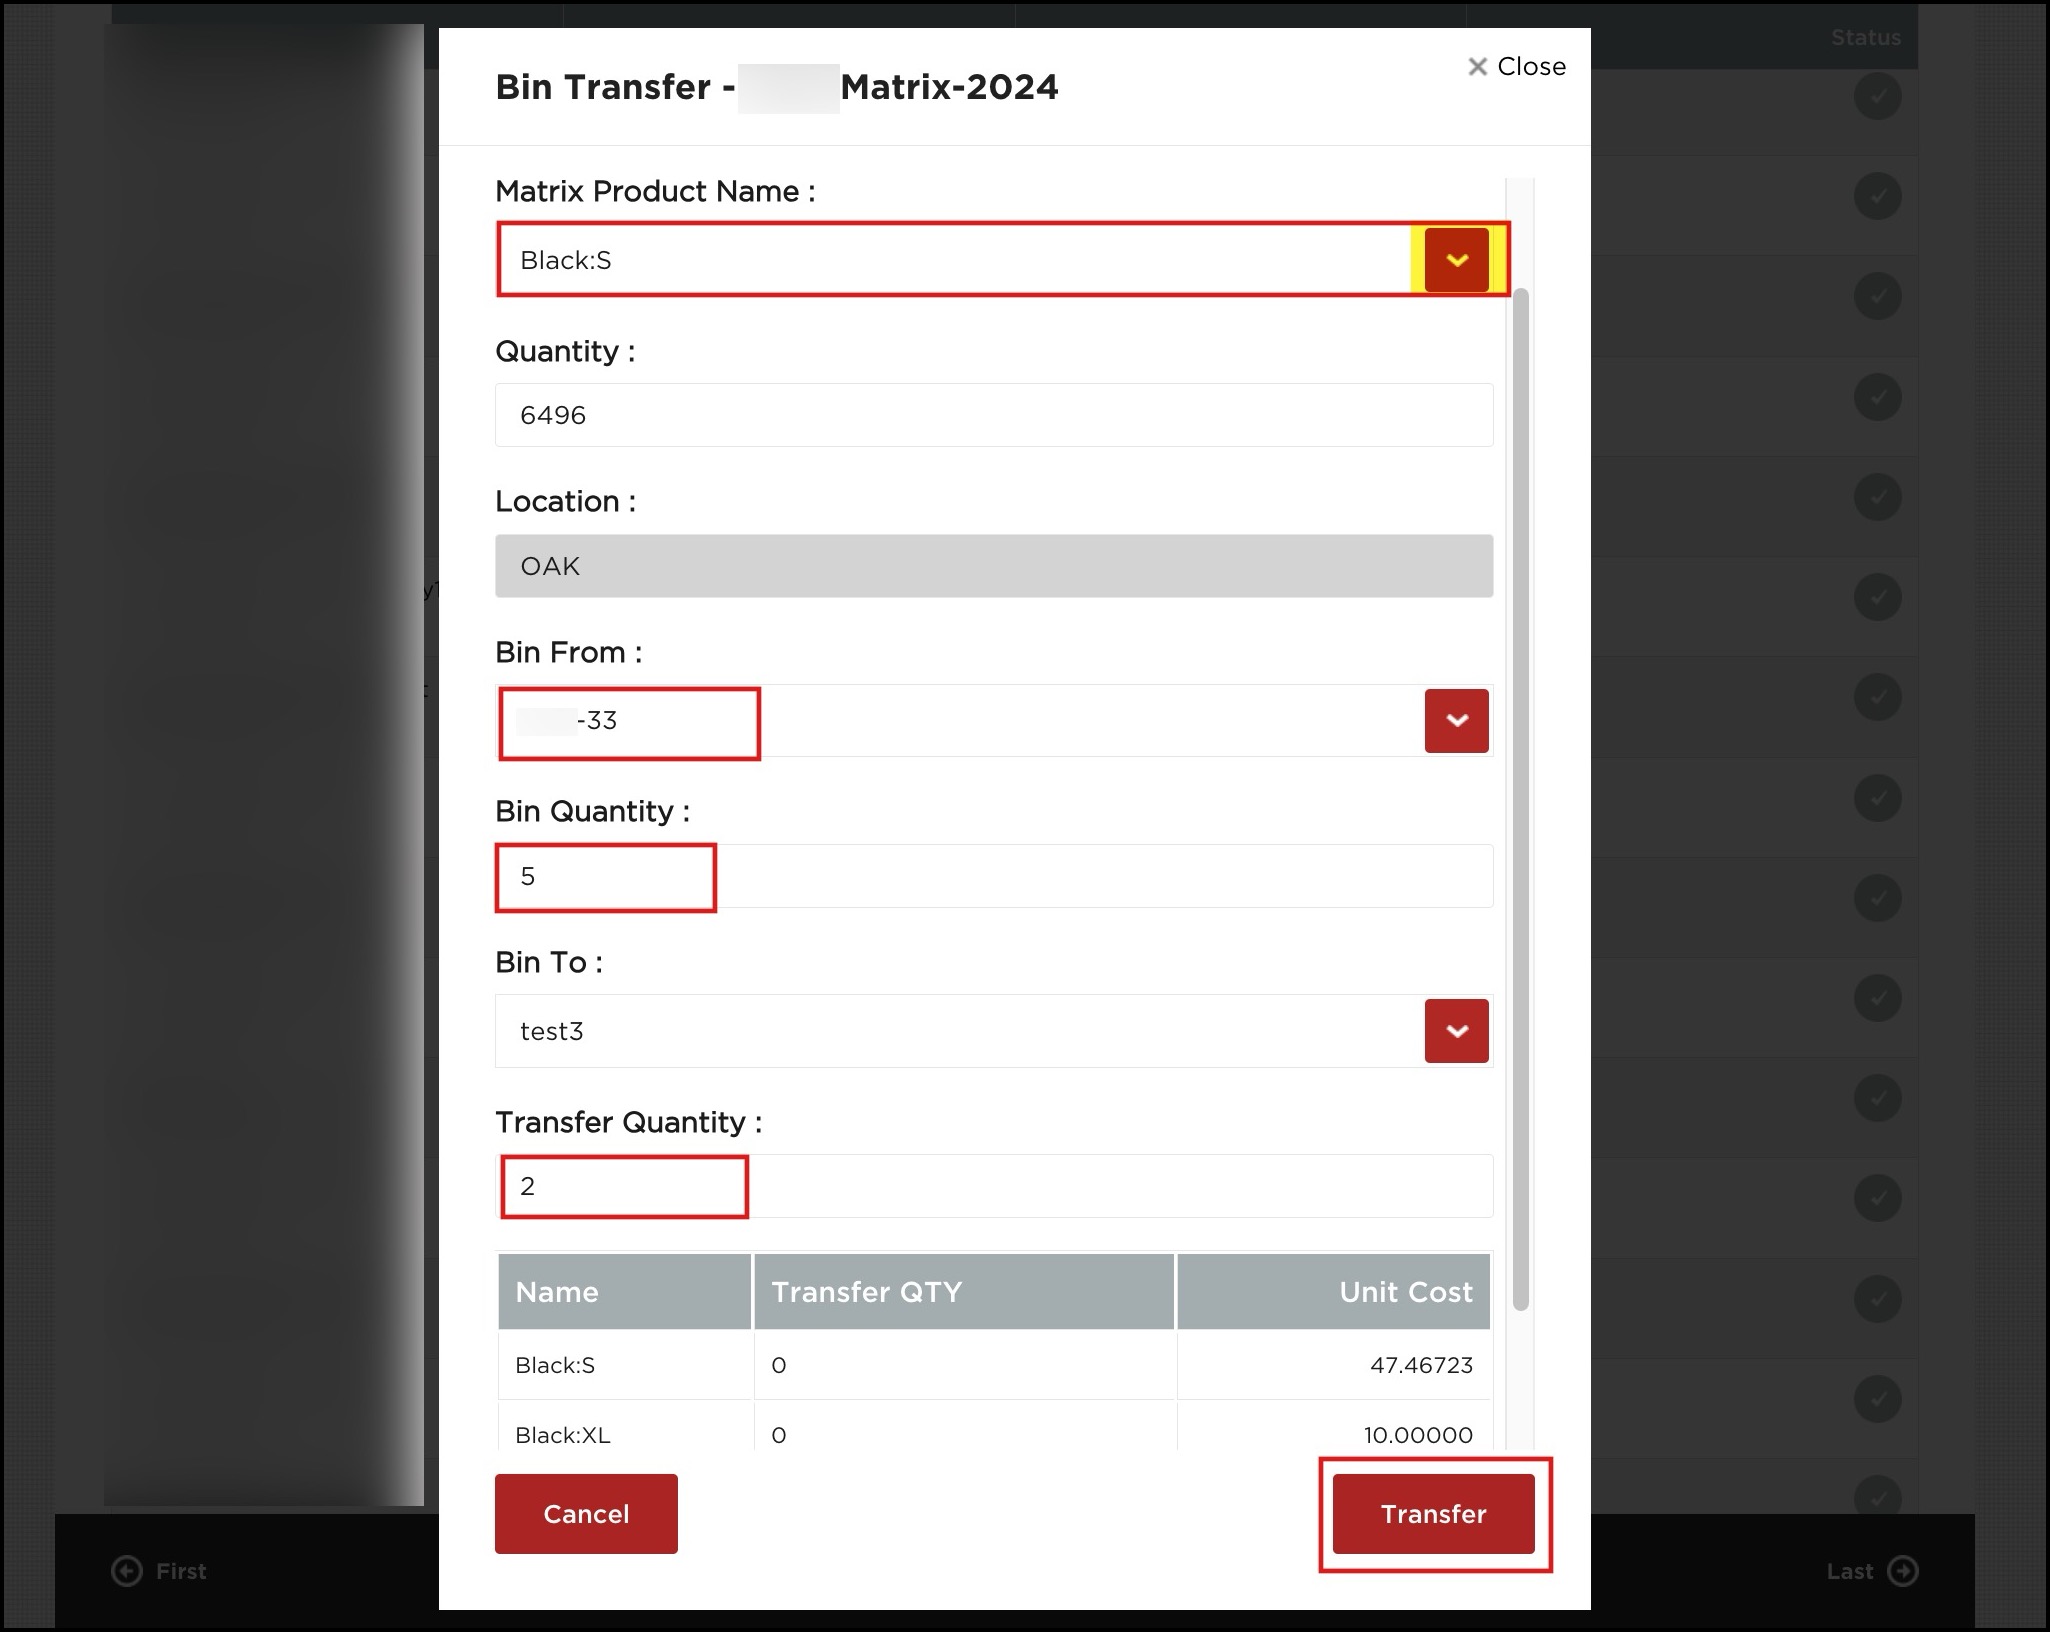
- In case of a Matrix product, you additionally need to select the Matrix Product Name for which you want to perform Bin Transfer. Bin Transfer will be done only for that particular Matrix SKU.
Updated 17 days ago
