POS Return Reason
Earlier when you loaded your Sale Order Returns in the POS channel, there was no dedicated facility to set Return reason but now Agiliron offers an additional facility to capture reason information.
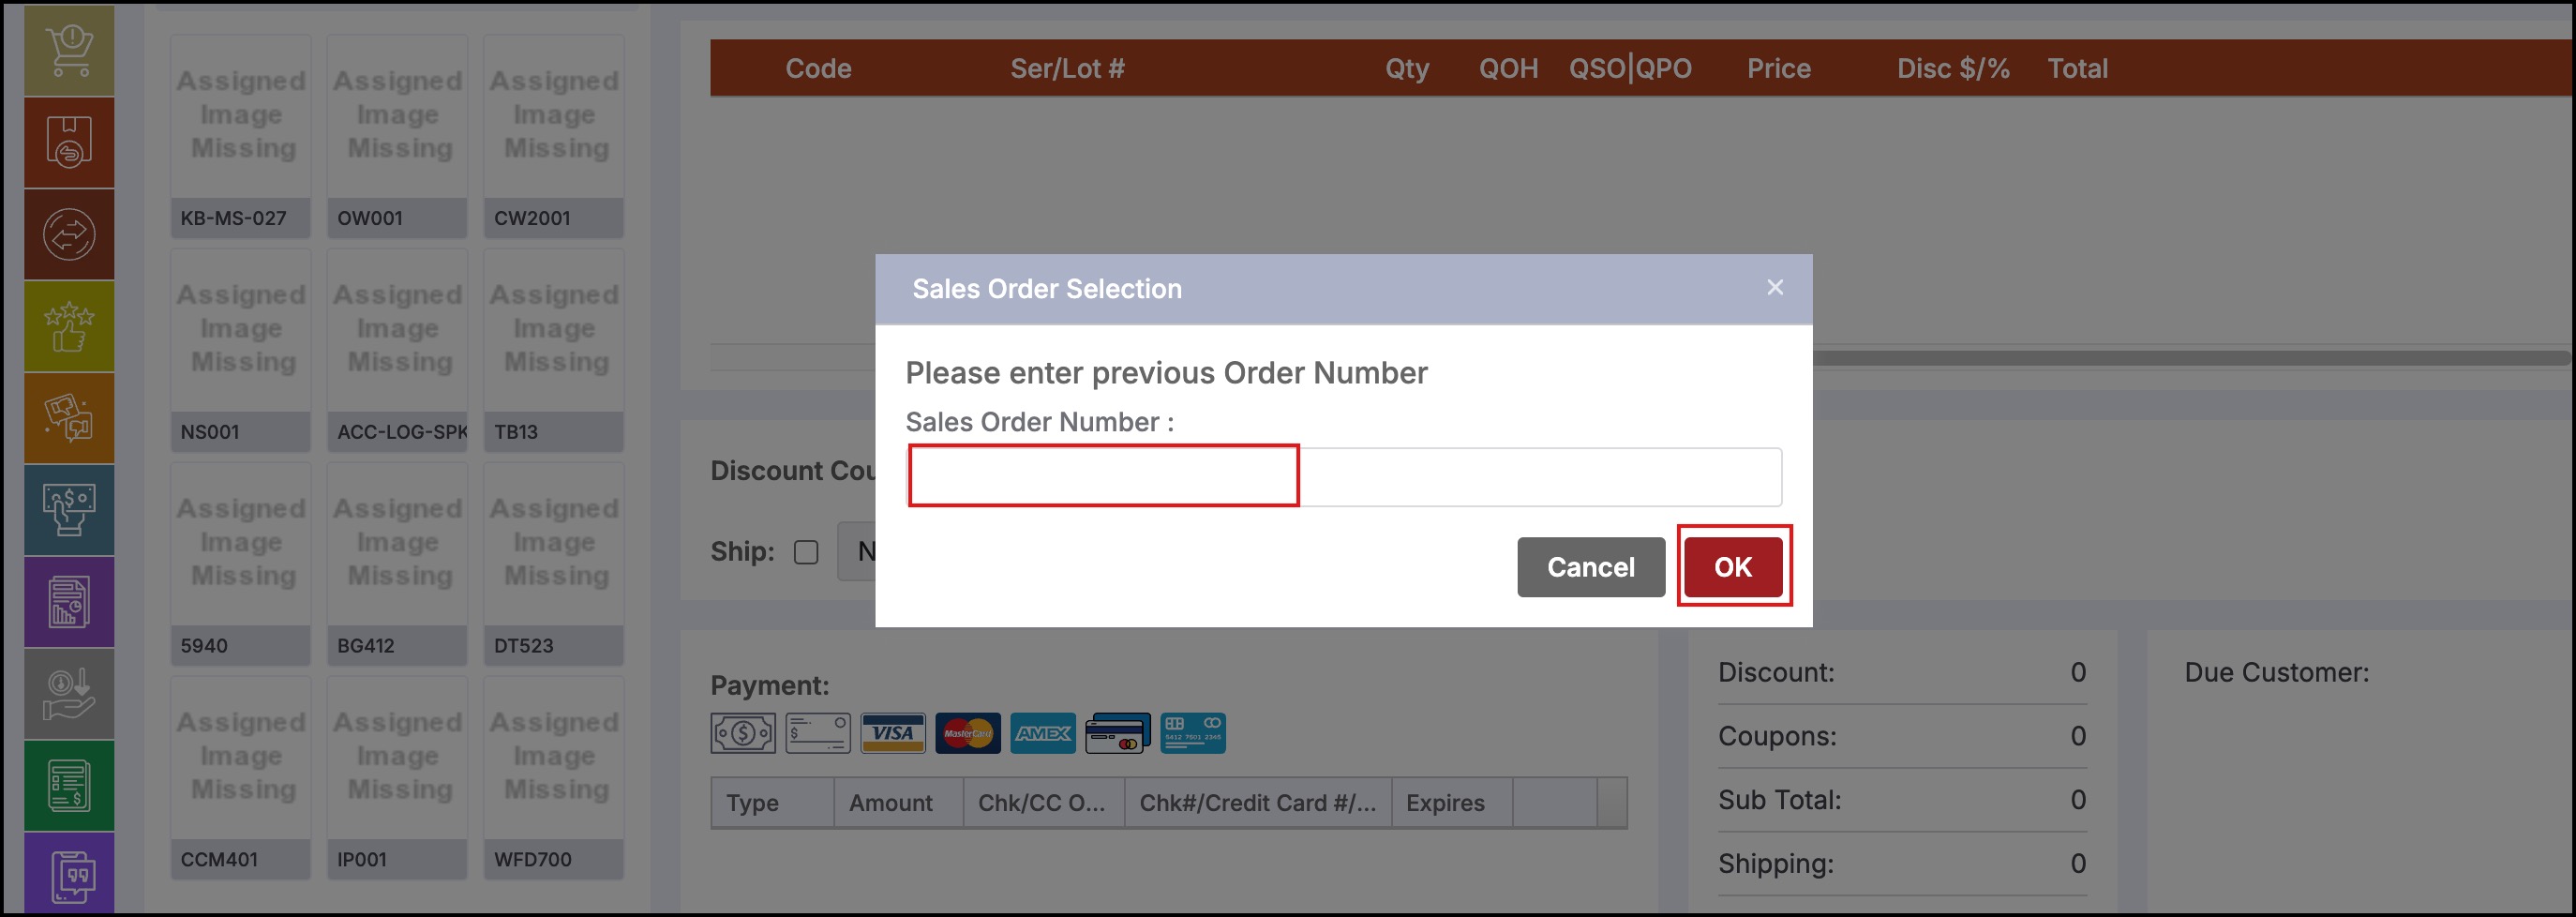
- When you log in to your POS channel and click on the Returns icon, you will be asked to enter Sales Order number for which want to create a Return. You can also proceed without entering any SO number and directly selecting the products, you want to return.
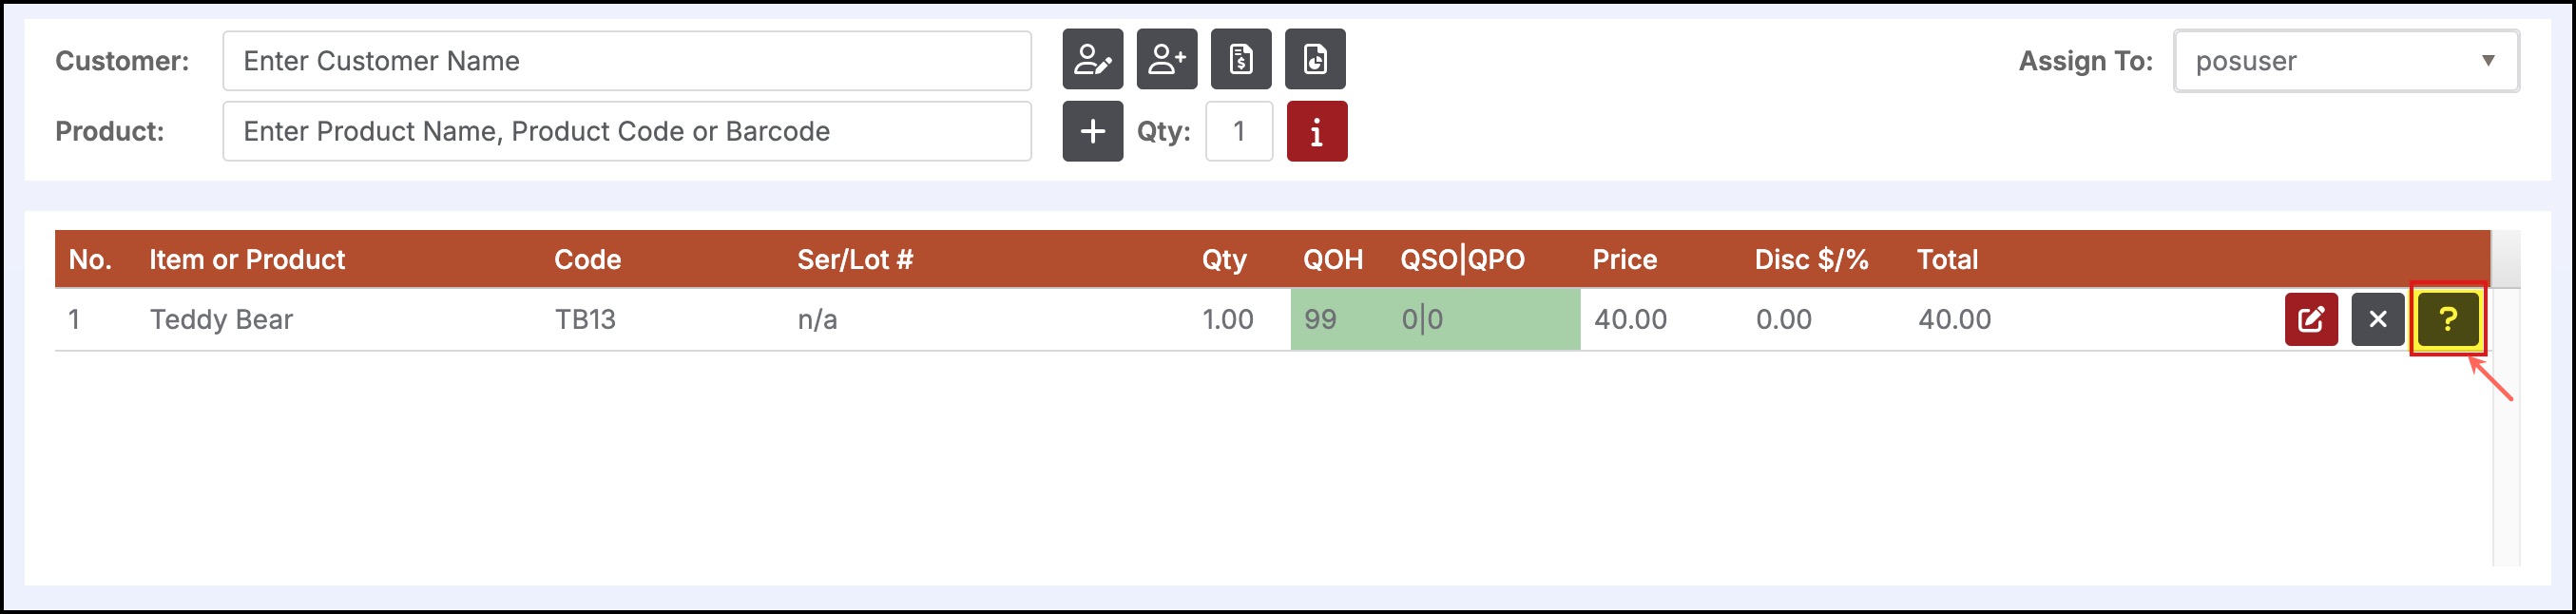
After the SO or product/products are added, you can see an additional icon enabled (? sign) on the Sales Order list column.
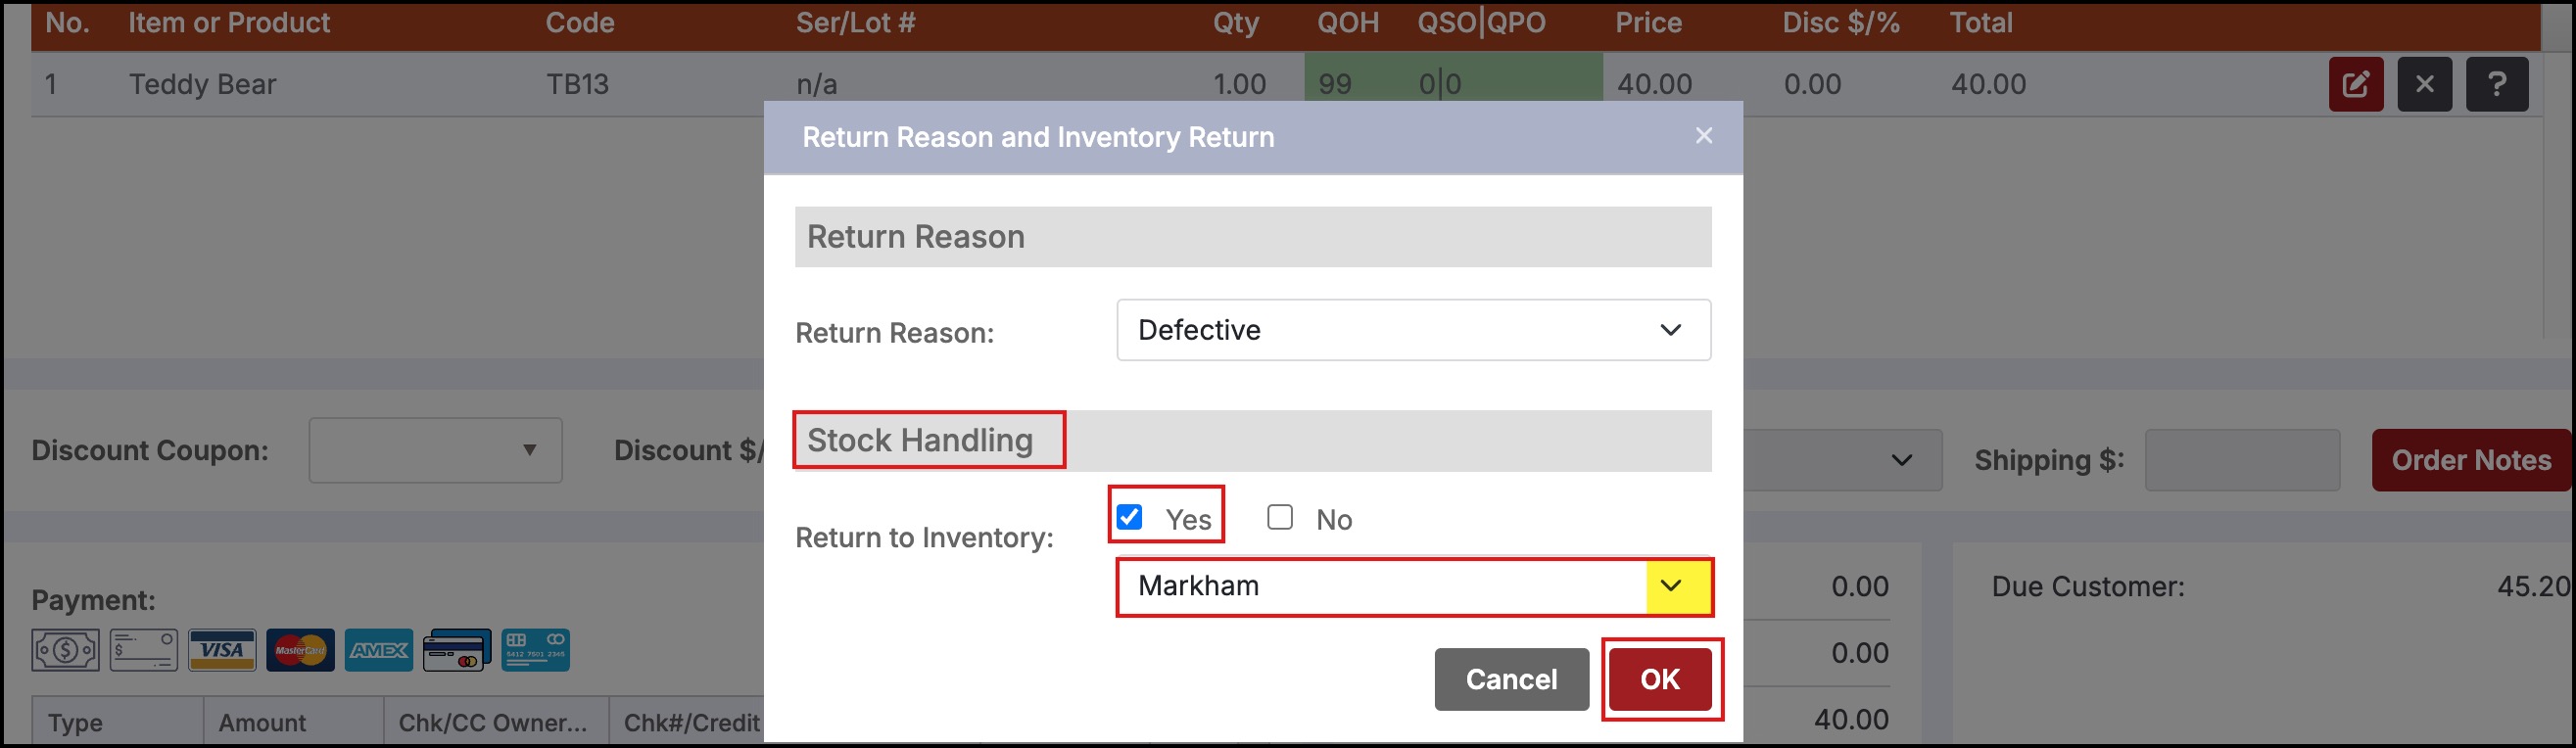
- By clicking on the "?" icon, a pop-up screen will appear where you can select the return reason and return to inventory.
- Select the suitable return reason from the drop-down list.
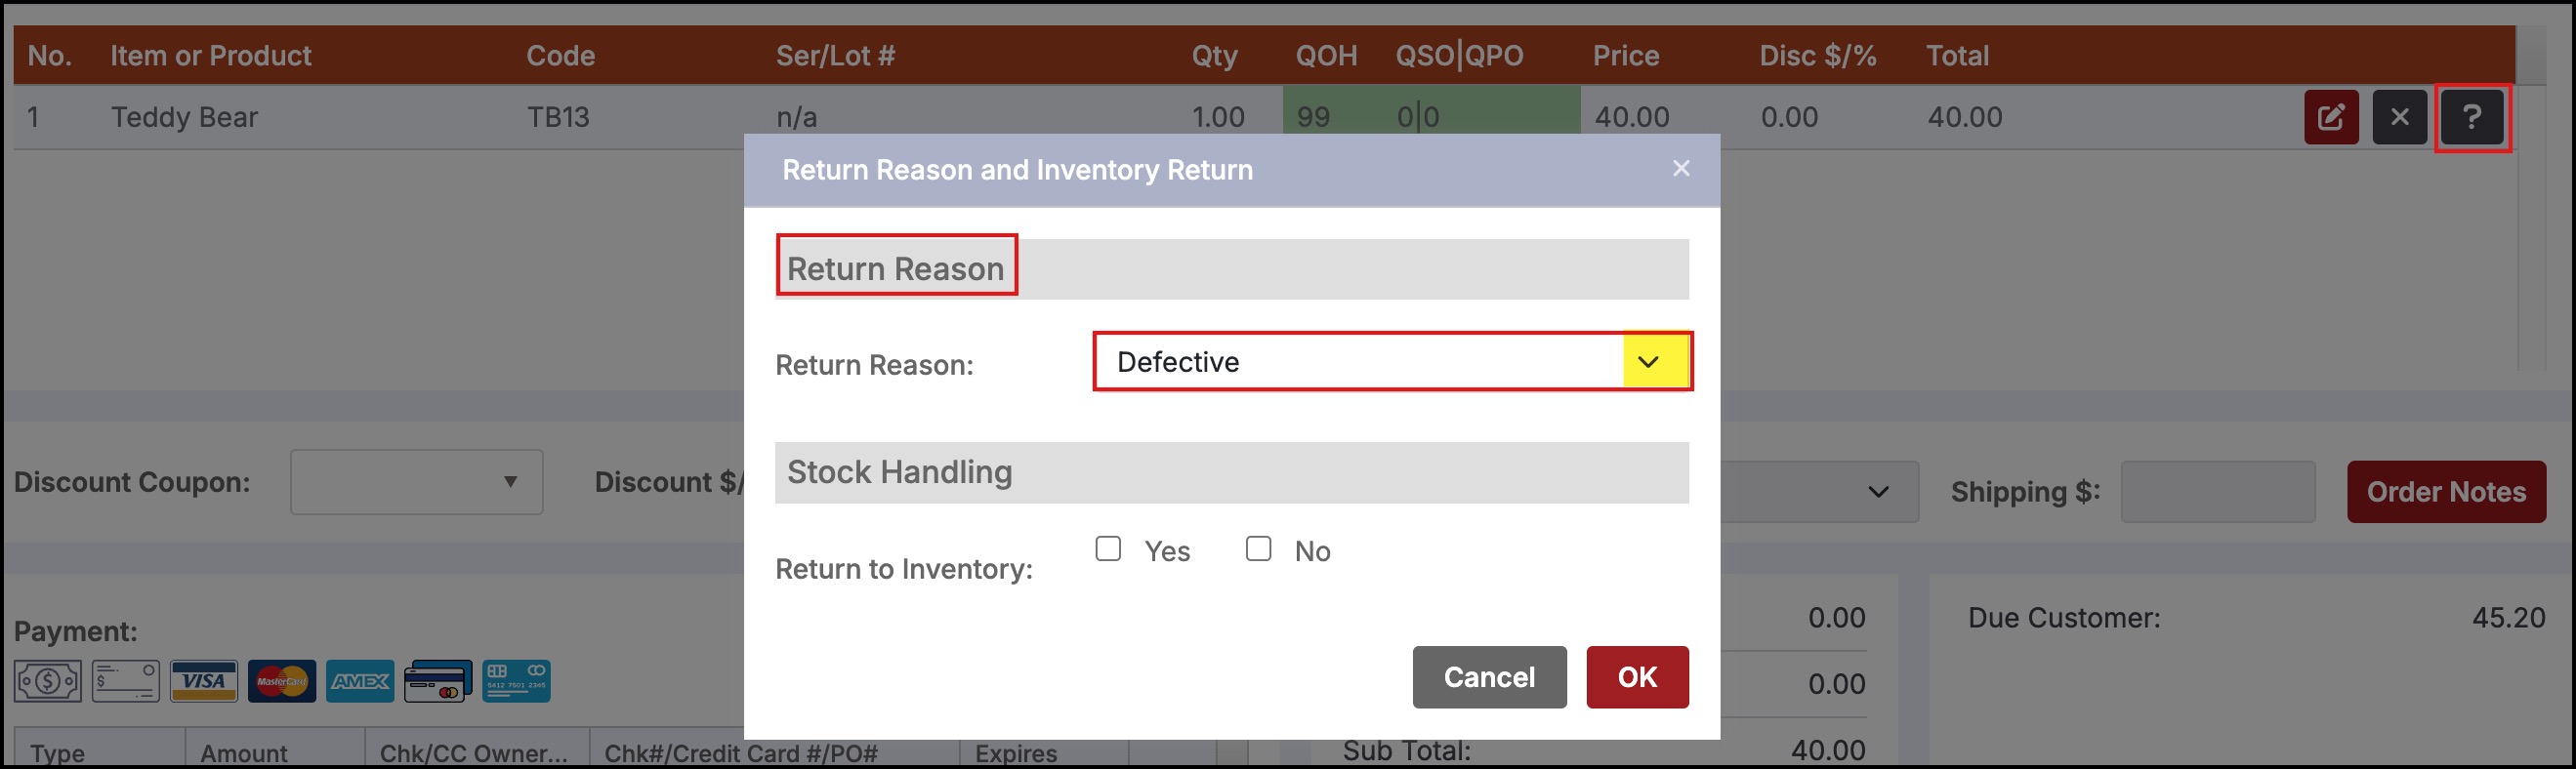
- If you want to add this up to the inventory, check the Yes box and if you don't want to make any changes then check the No box.
- You can also select the location.
- Click on OK.
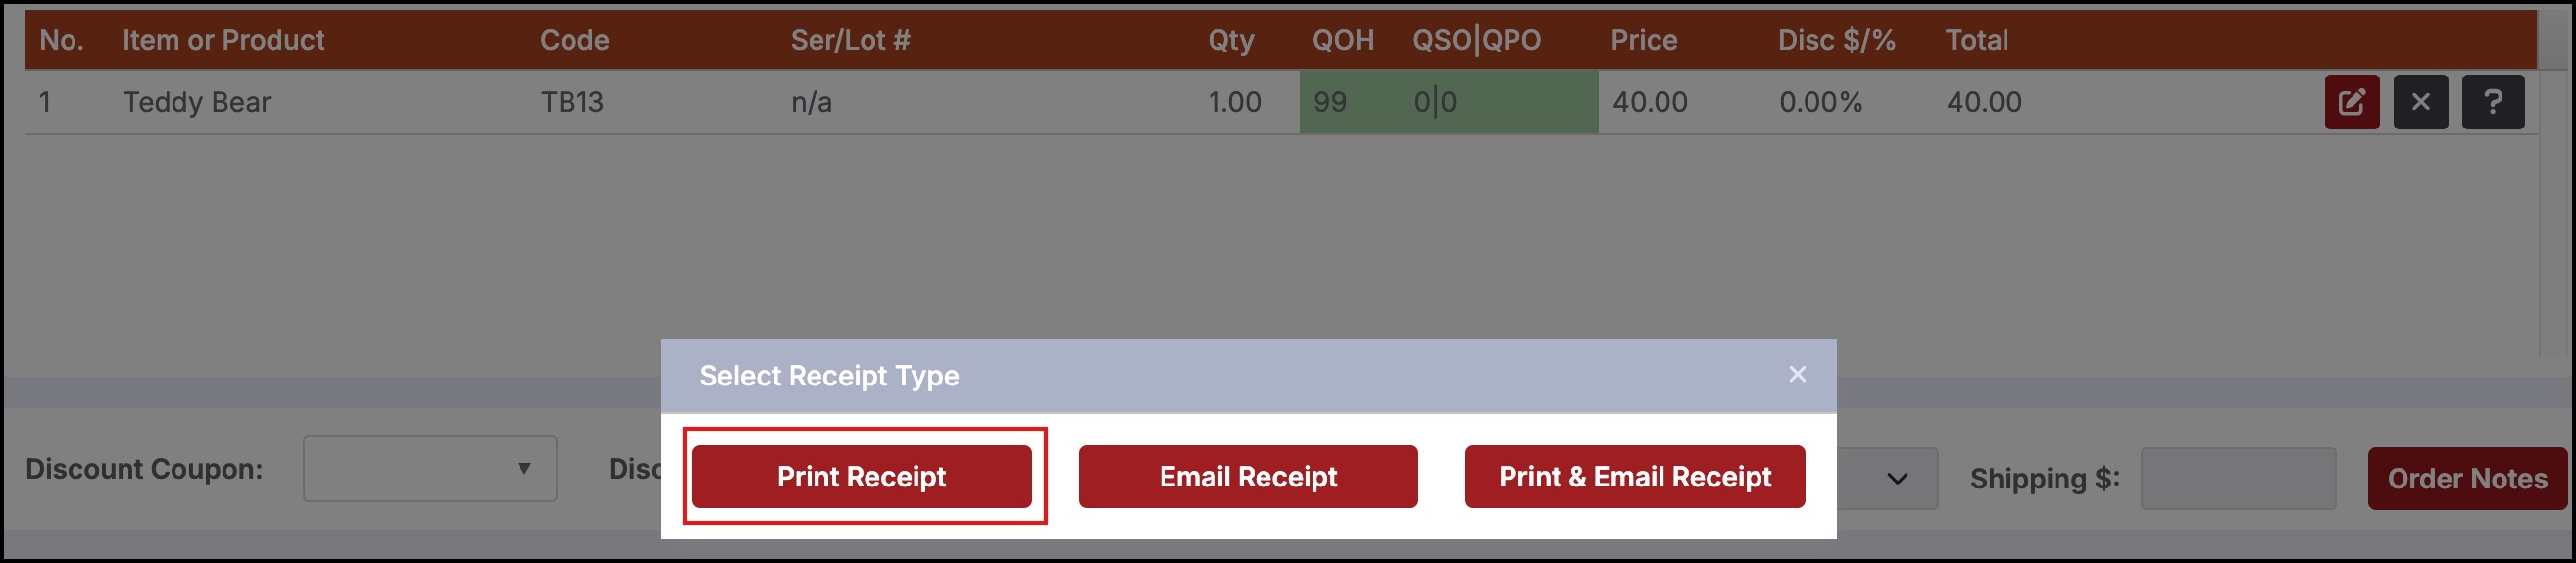
Now when you choose the payment method -> click on checkout -> click on Print Receipt
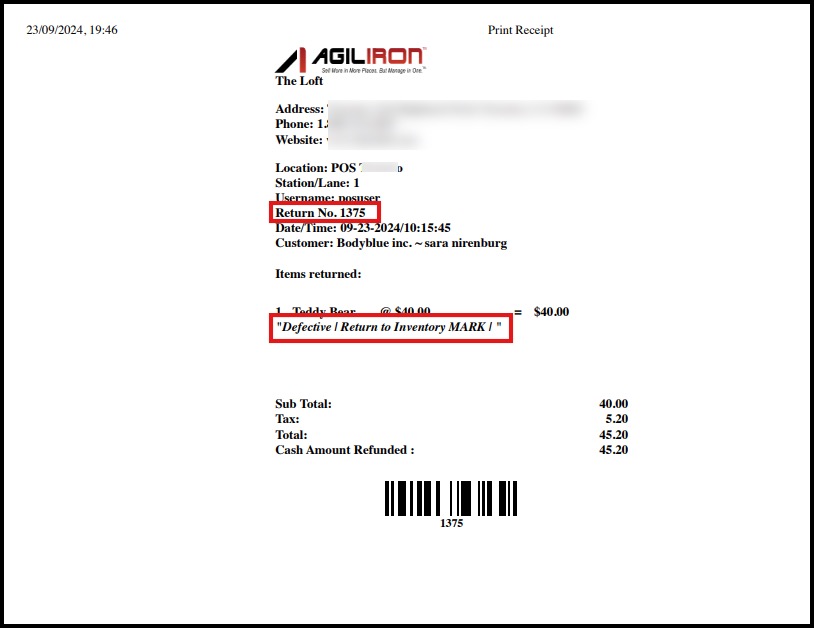
You will see in the receipt the return reason "Defective" for the product along with the stock handling info.
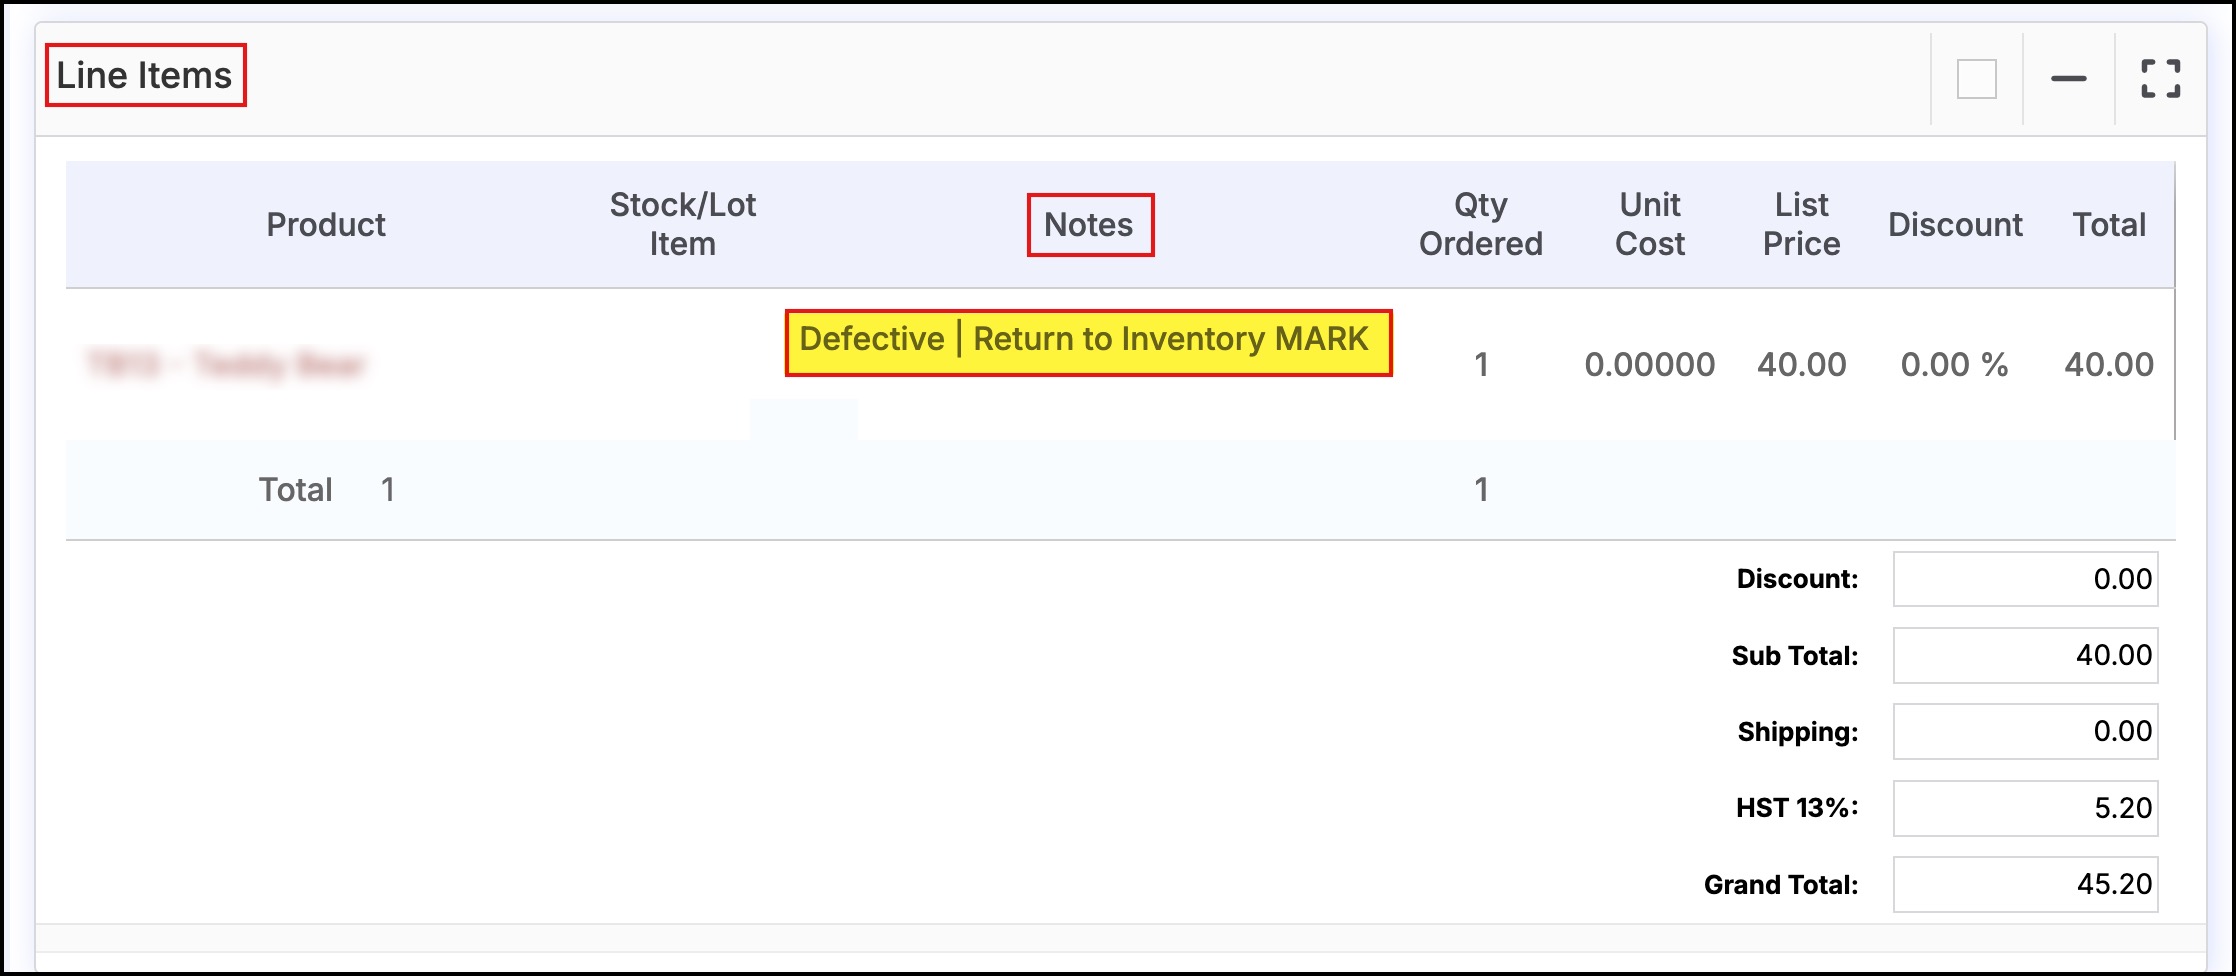
Also, when you go back to your Admin account -> Sales Returns and open that particular sales return

In the Line Items section, under the Notes column, you can see the return reason you had set for that particular product.
So quantity has been added back to the inventory for the location you had chosen.
Updated over 1 year ago