Drop-Shipped Sales Orders
If a customer places an order for products that are not in stock, a drop-ship order can be created and the products delivered to the customer directly from the vendor. A sales order is first created for the products, then a drop-ship purchase order is created and sent to the vendor for product ordering.
Note: We highly recommend creating a stock location called "Drop Ship" or "DROP" under Settings > Company settings, detailed instructions here. This will be used when creating Drop-Ship Sales and Purchase Orders. Only Enterprise and higher editions of Agiliron allow for creating multiple stock locations.
To begin, create a sales order as shown in the previous section (detailed instructions can be found here).
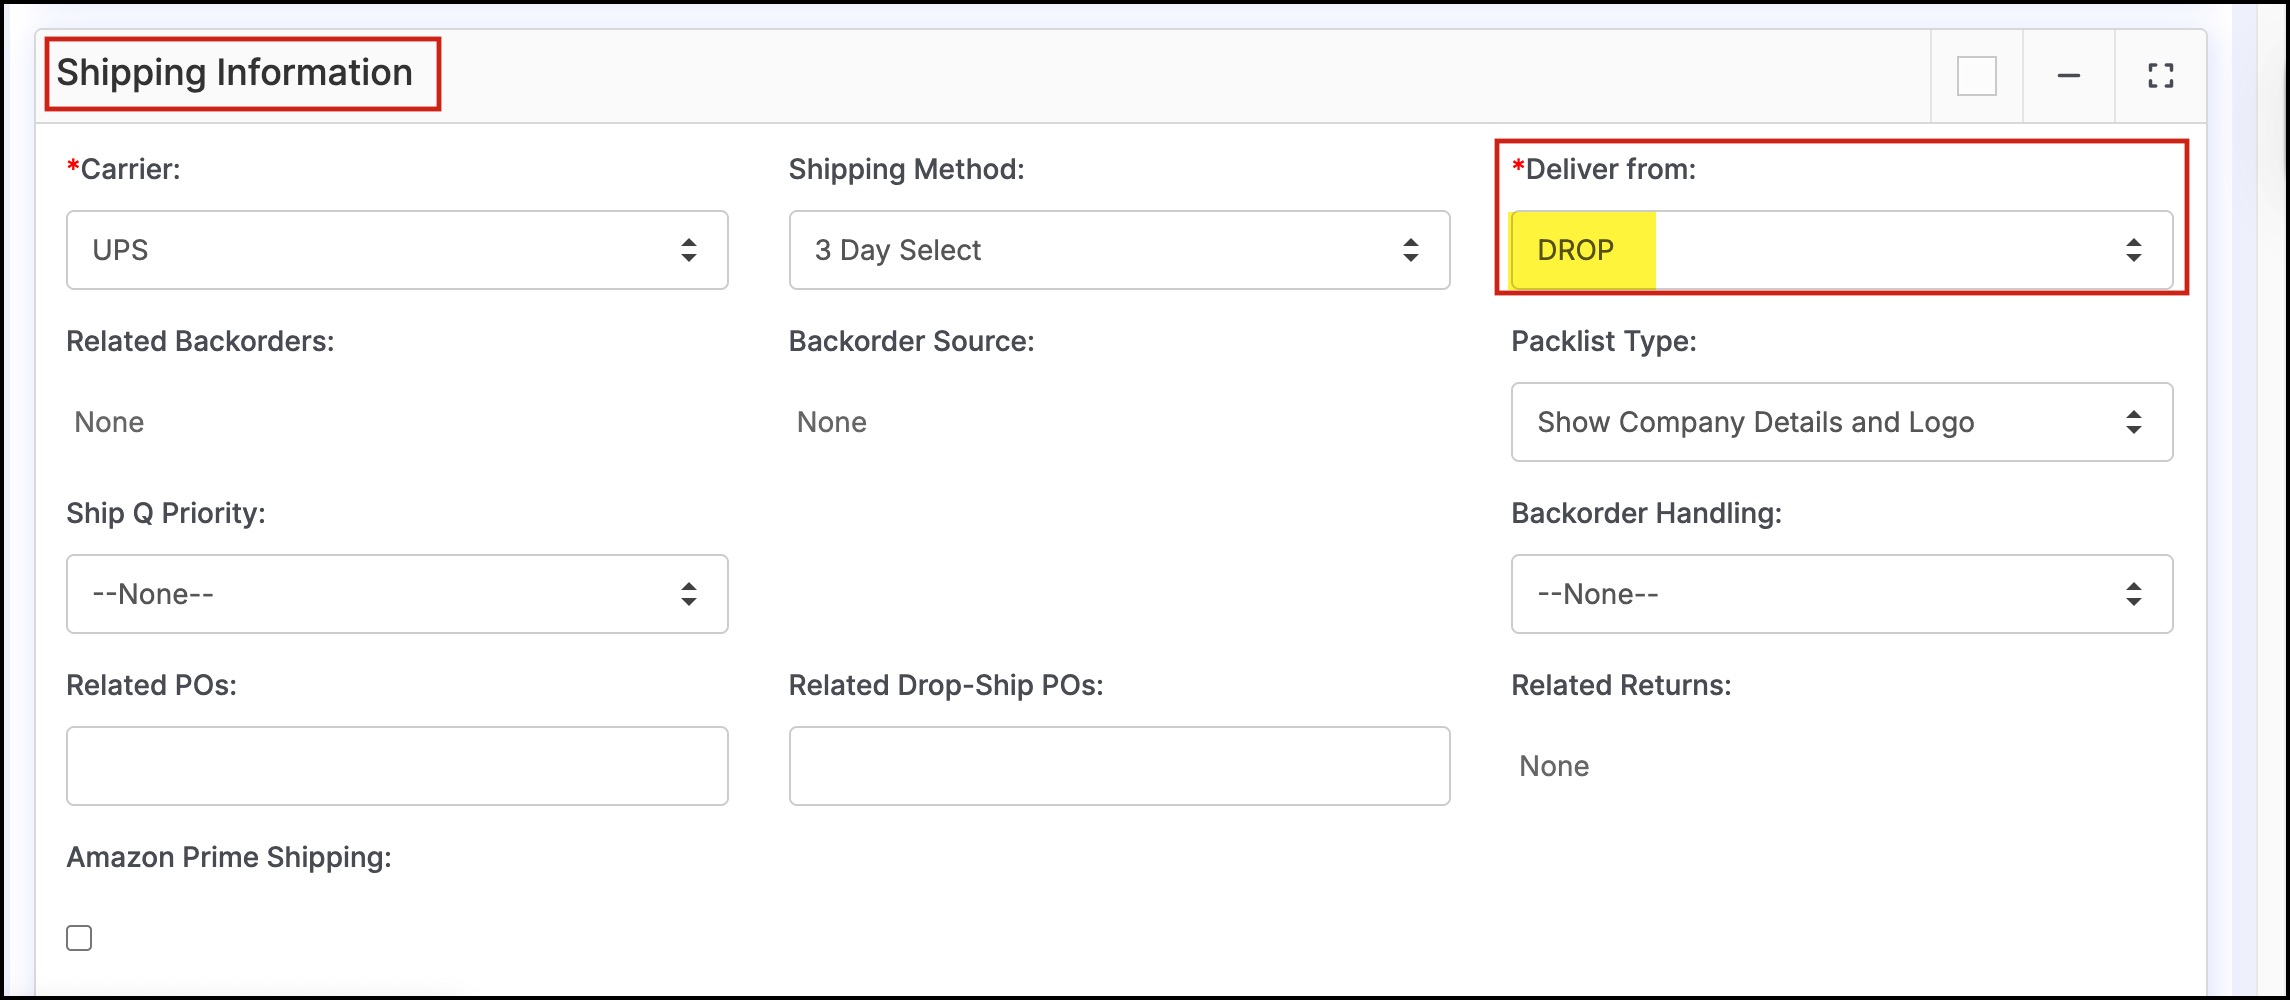
- In the "Deliver From" field, select "DROP" and save the order once all other fields have been entered.
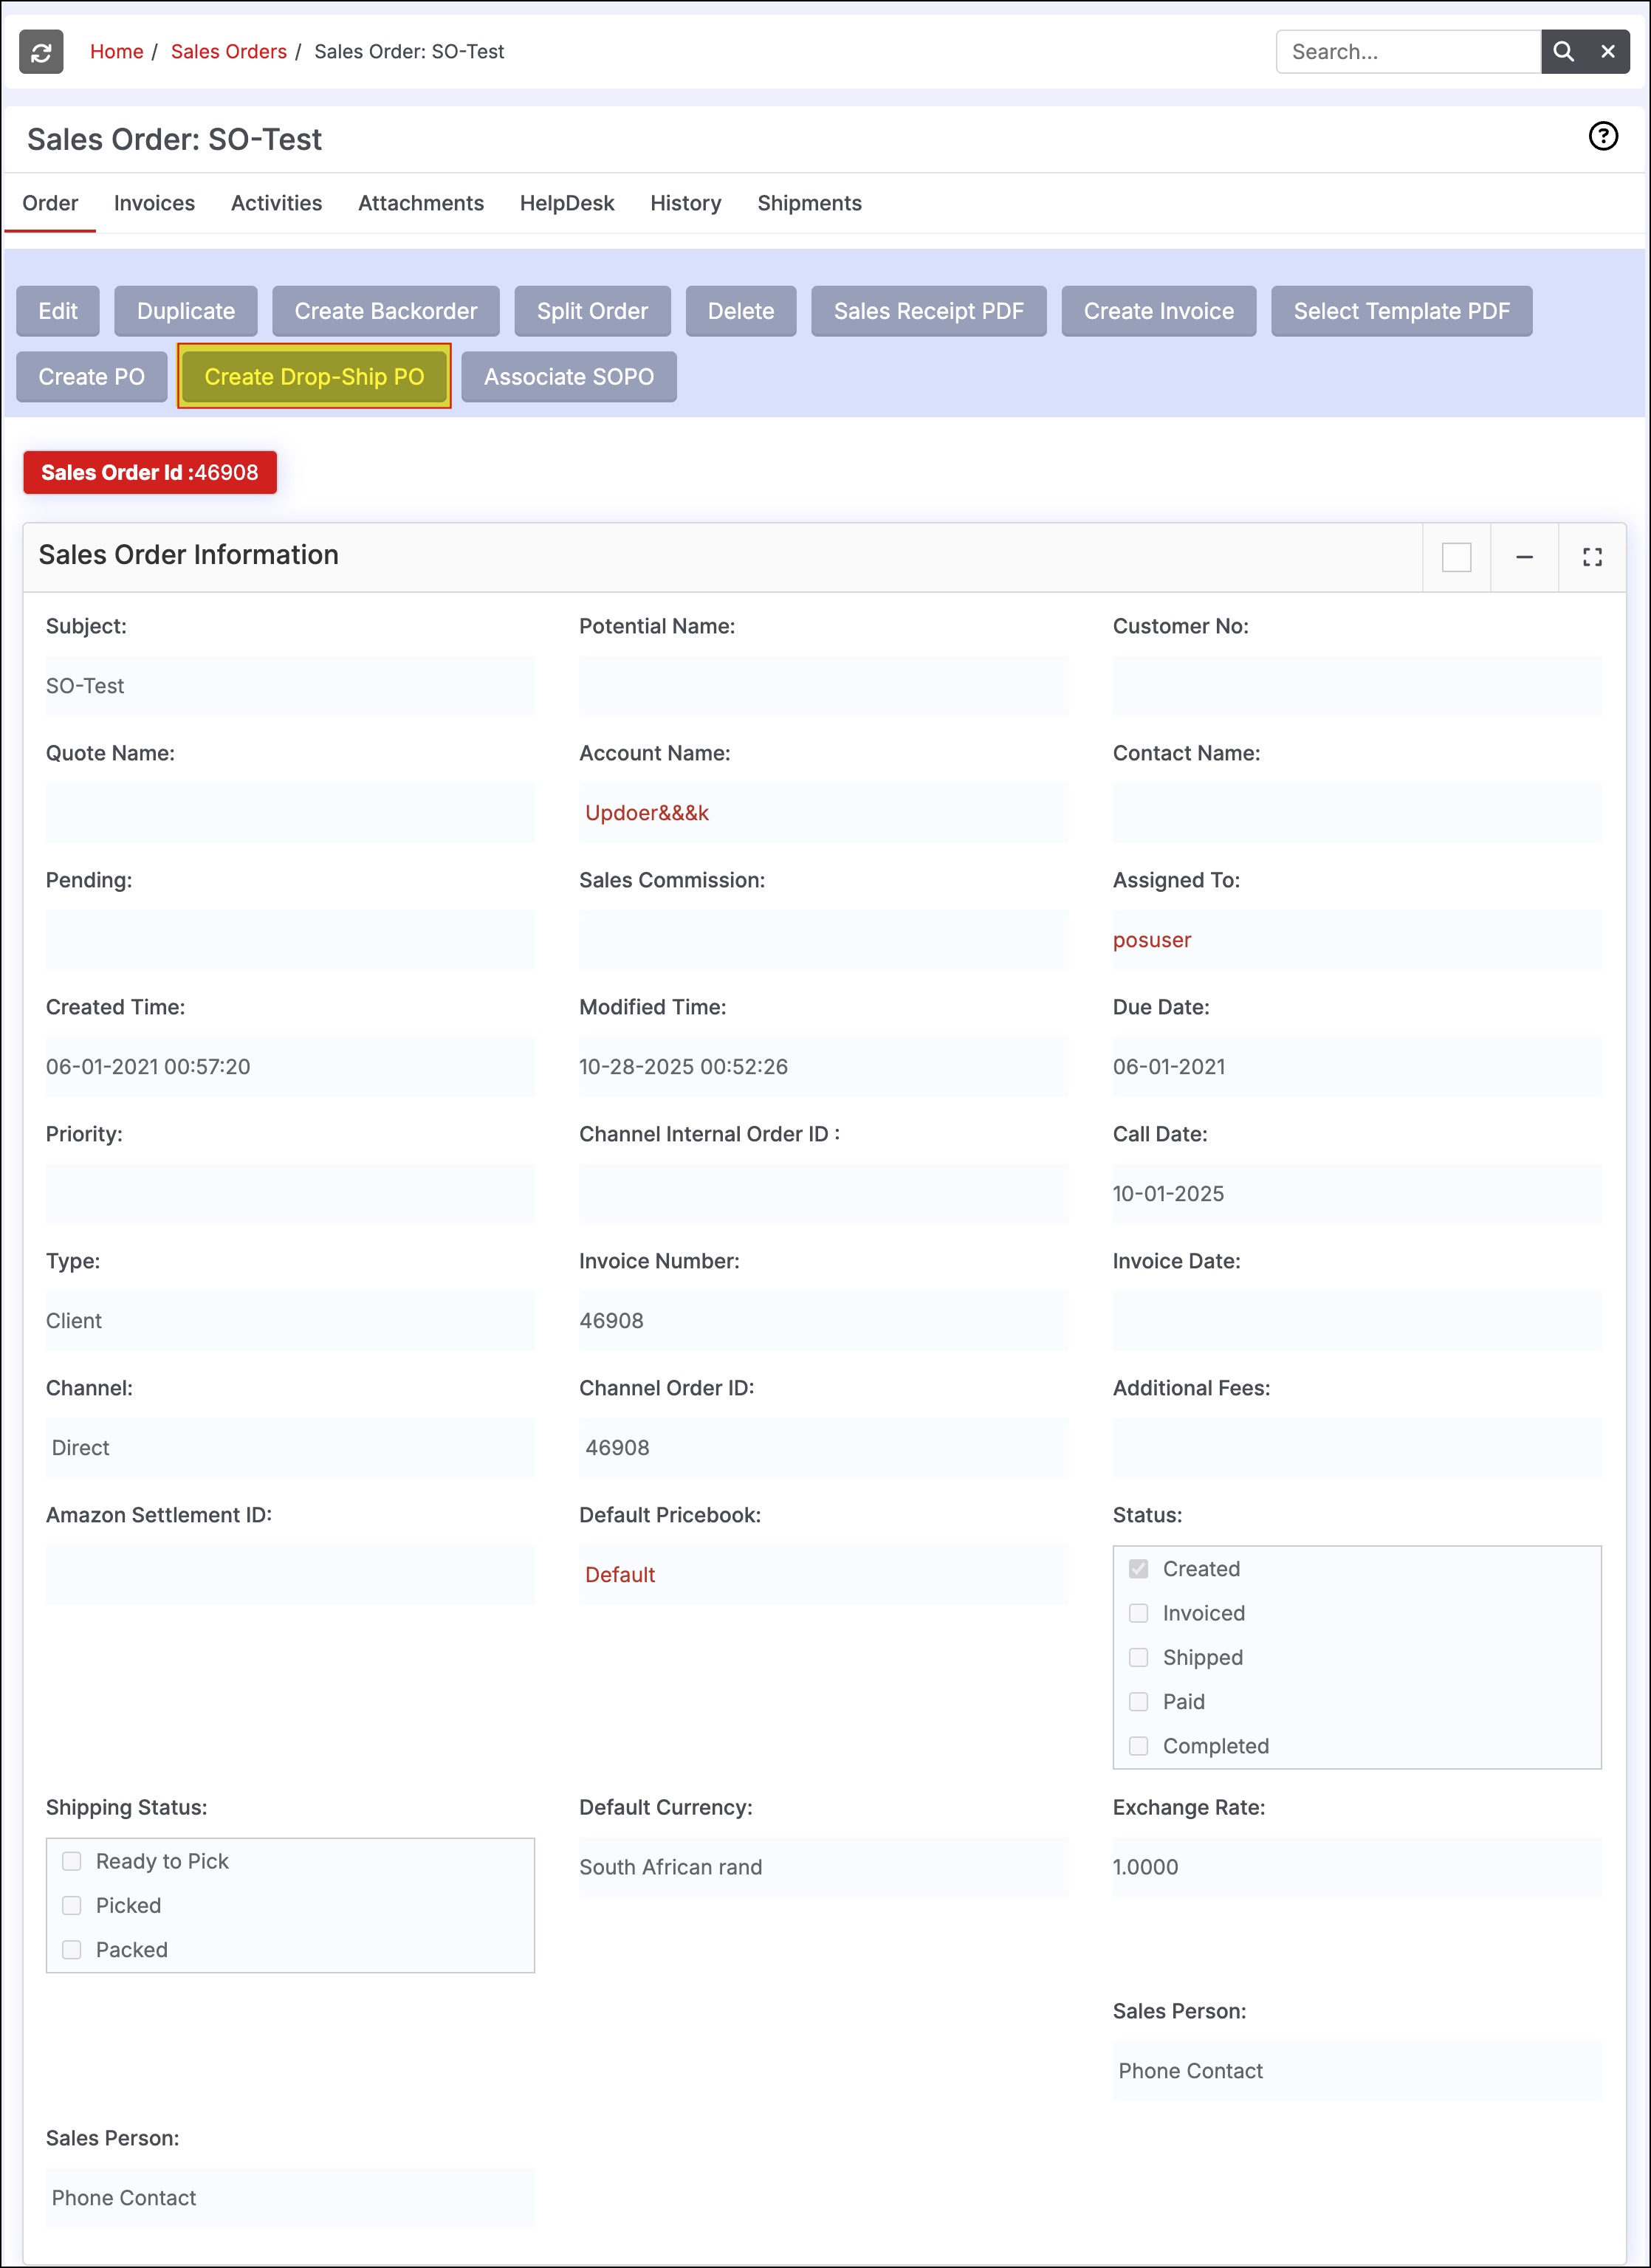
- After the order has been saved, a row of buttons will appear as shown below. Select the "Create Drop-Ship PO" button to create a purchase order in which products will be drop-shipped to the customer from the vendor.
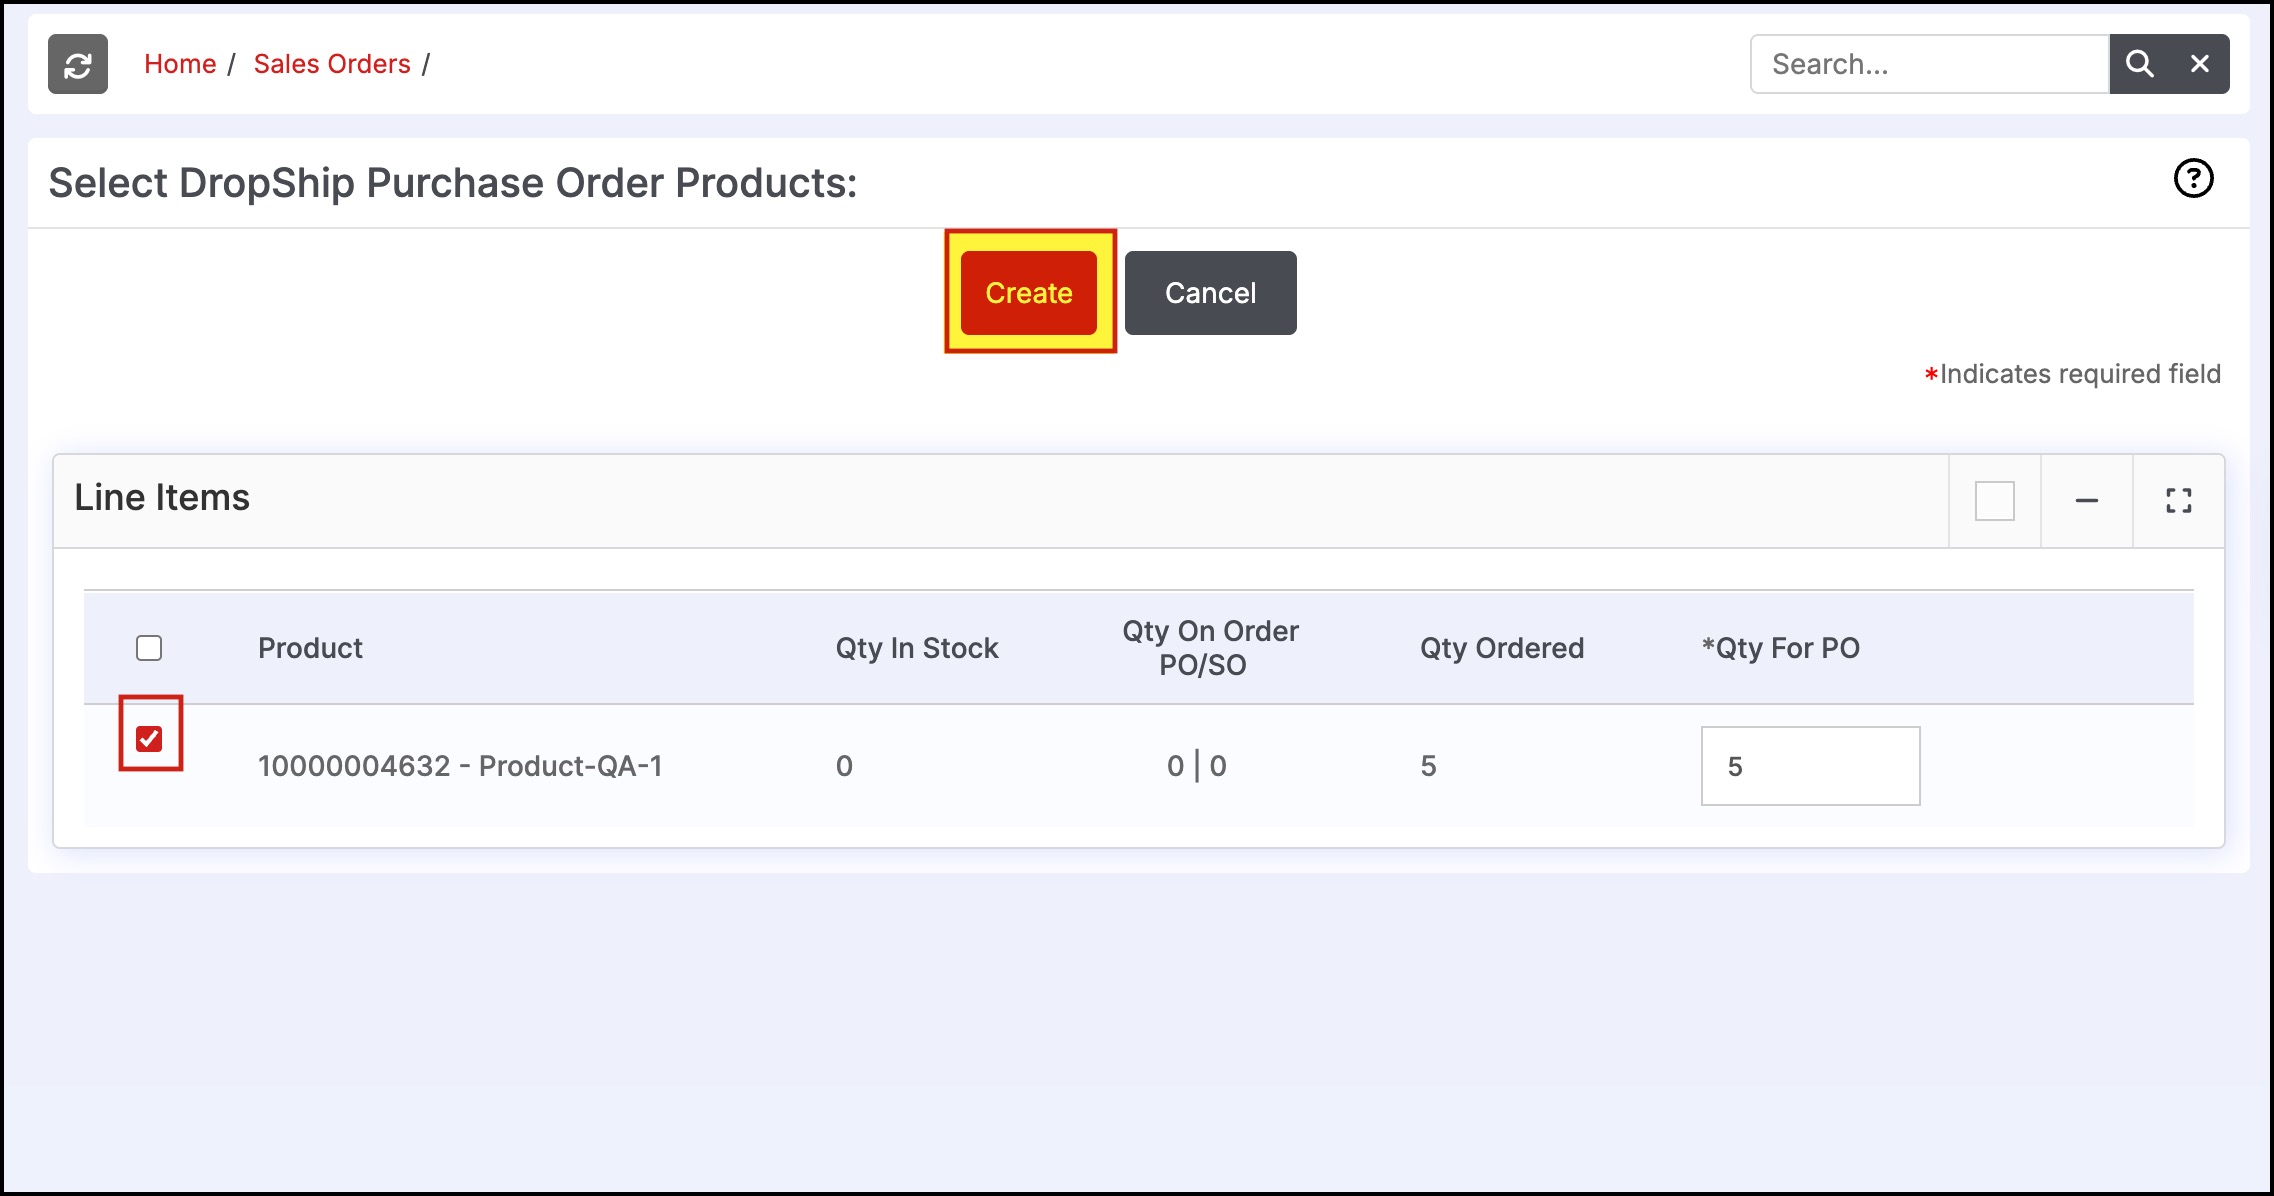
- Select the line items and click on Create.
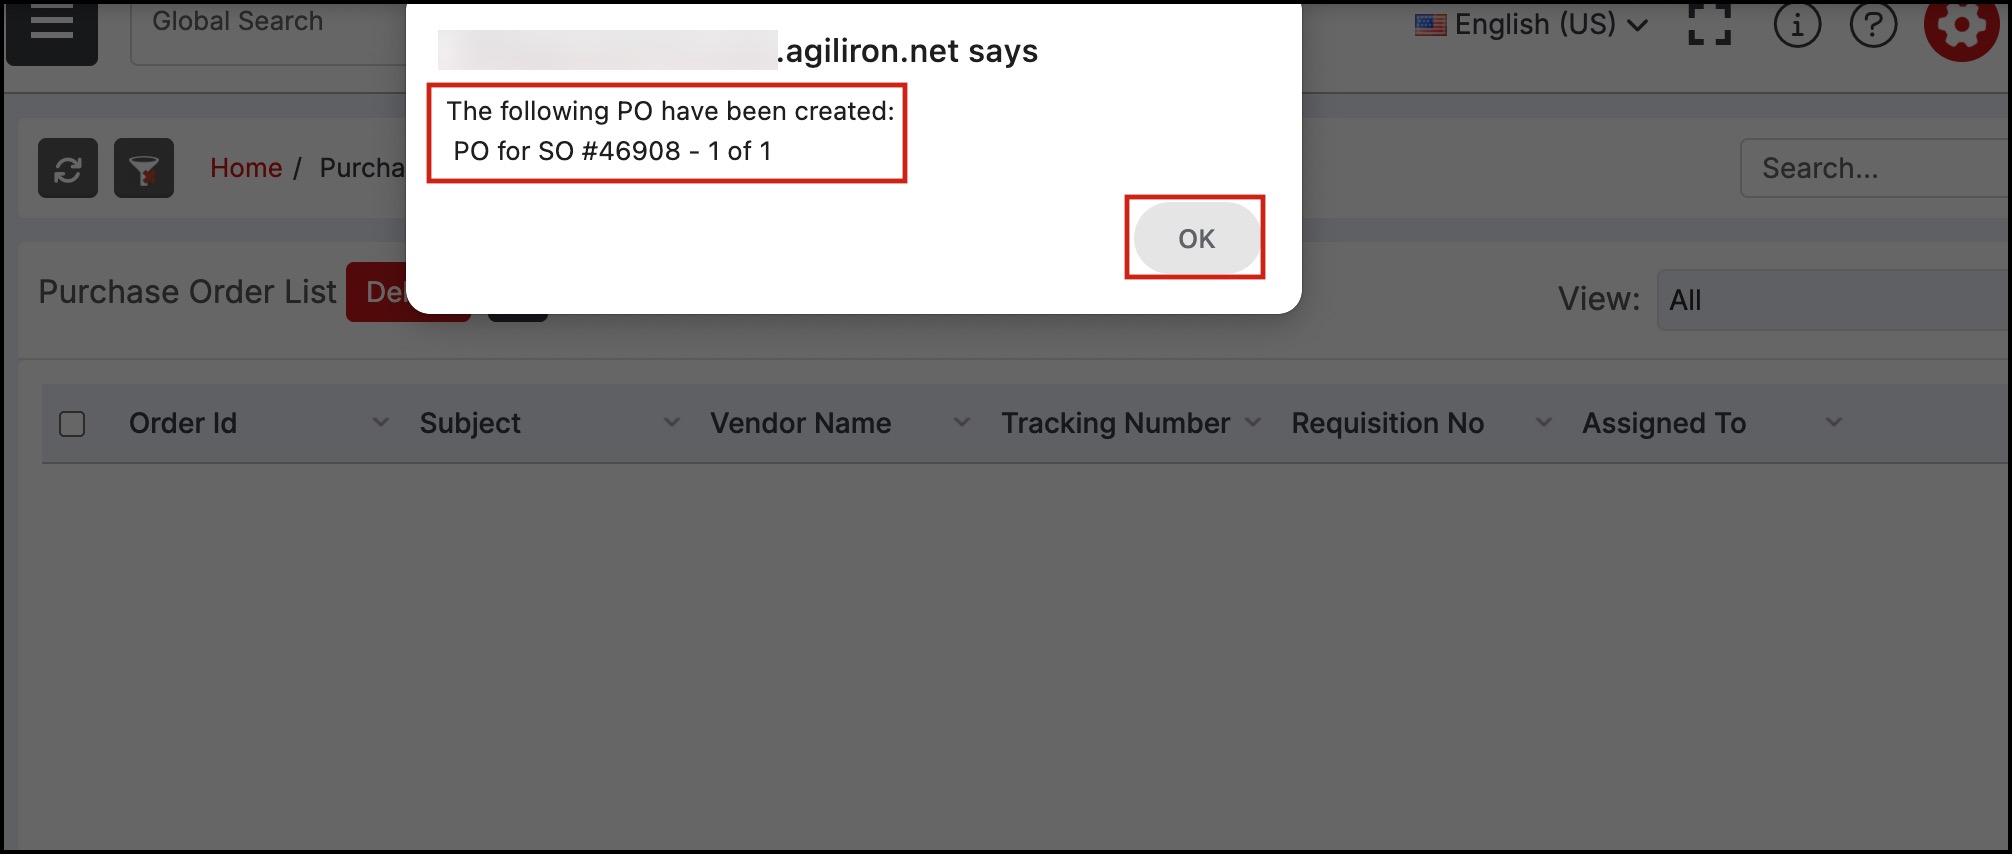
- A pop-up window will appear indicating that a PO has been created for the sales order. Click "OK" to continue.
- The purchase order appears under Orders > Purchase Orders as shown below.
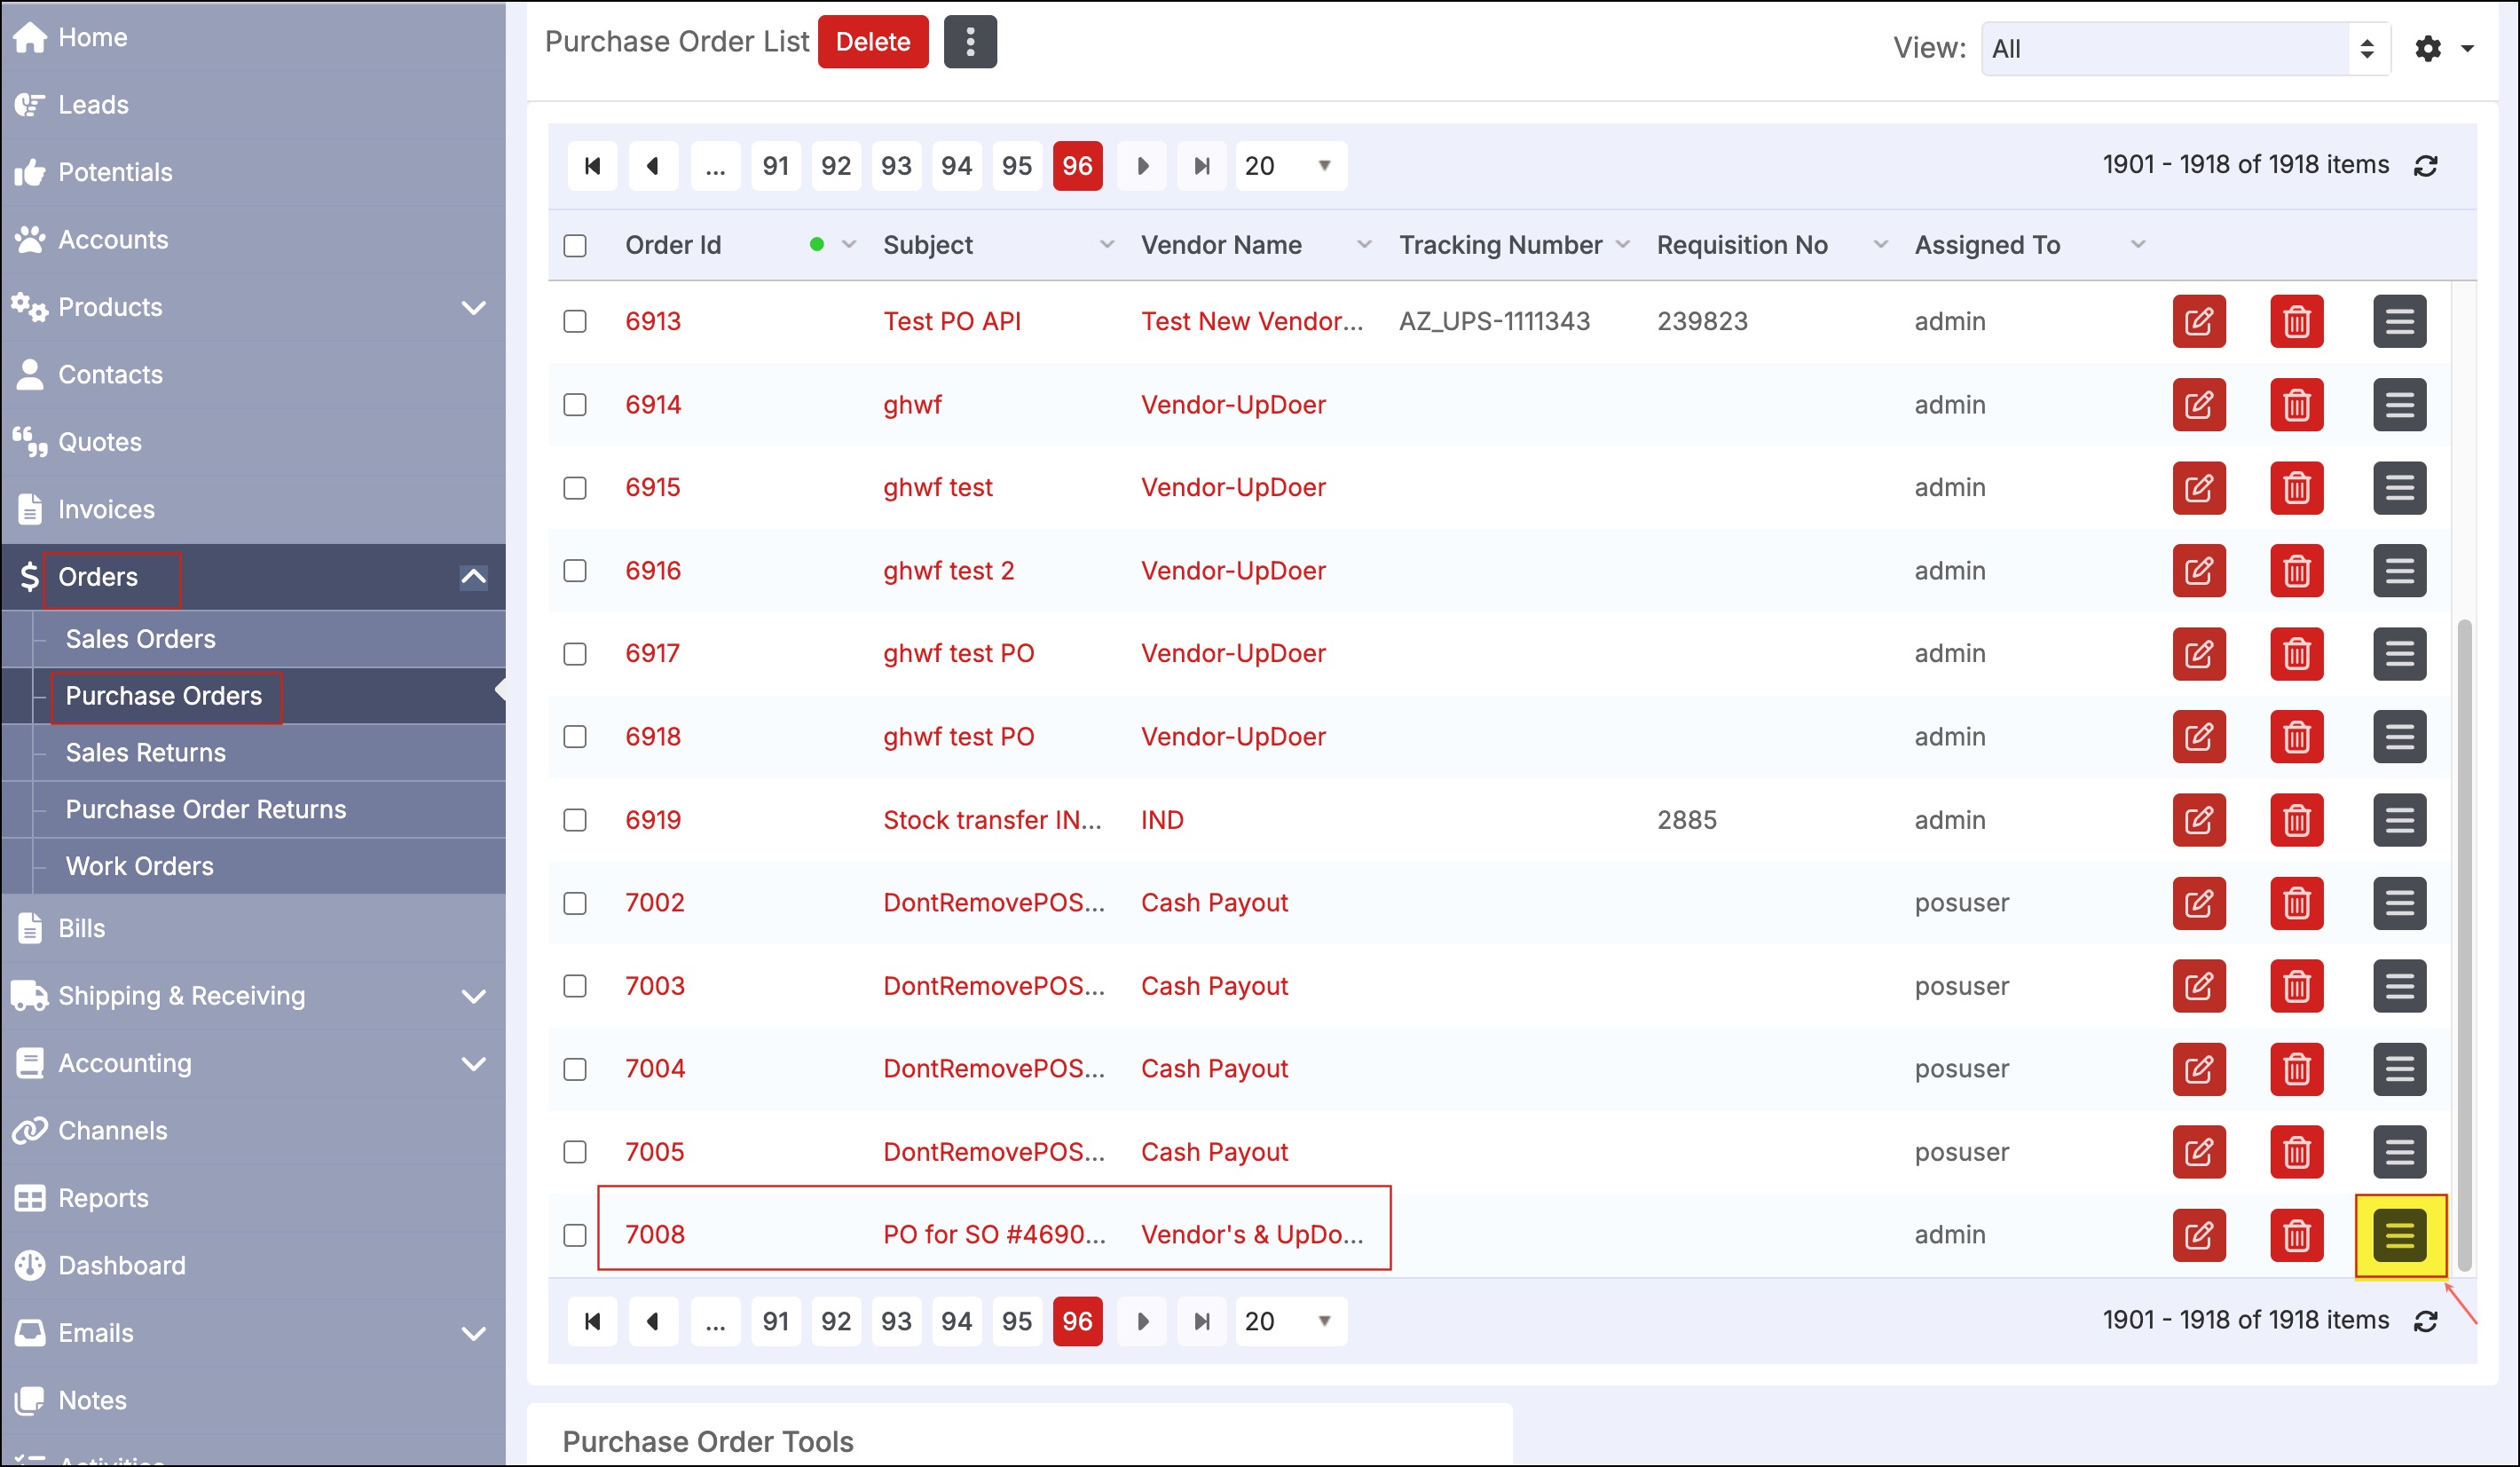
-
Select the "Edit" icon and change the "Deliver To" stock location to "Drop Ship".
-
In the Shipping Address fields, enter the shipping address in which the products should be delivered. You can use the arrow icon to copy the billing address to the shipping address fields. The Deliver To name can be edited as well.
-
Click "Save" to finish.
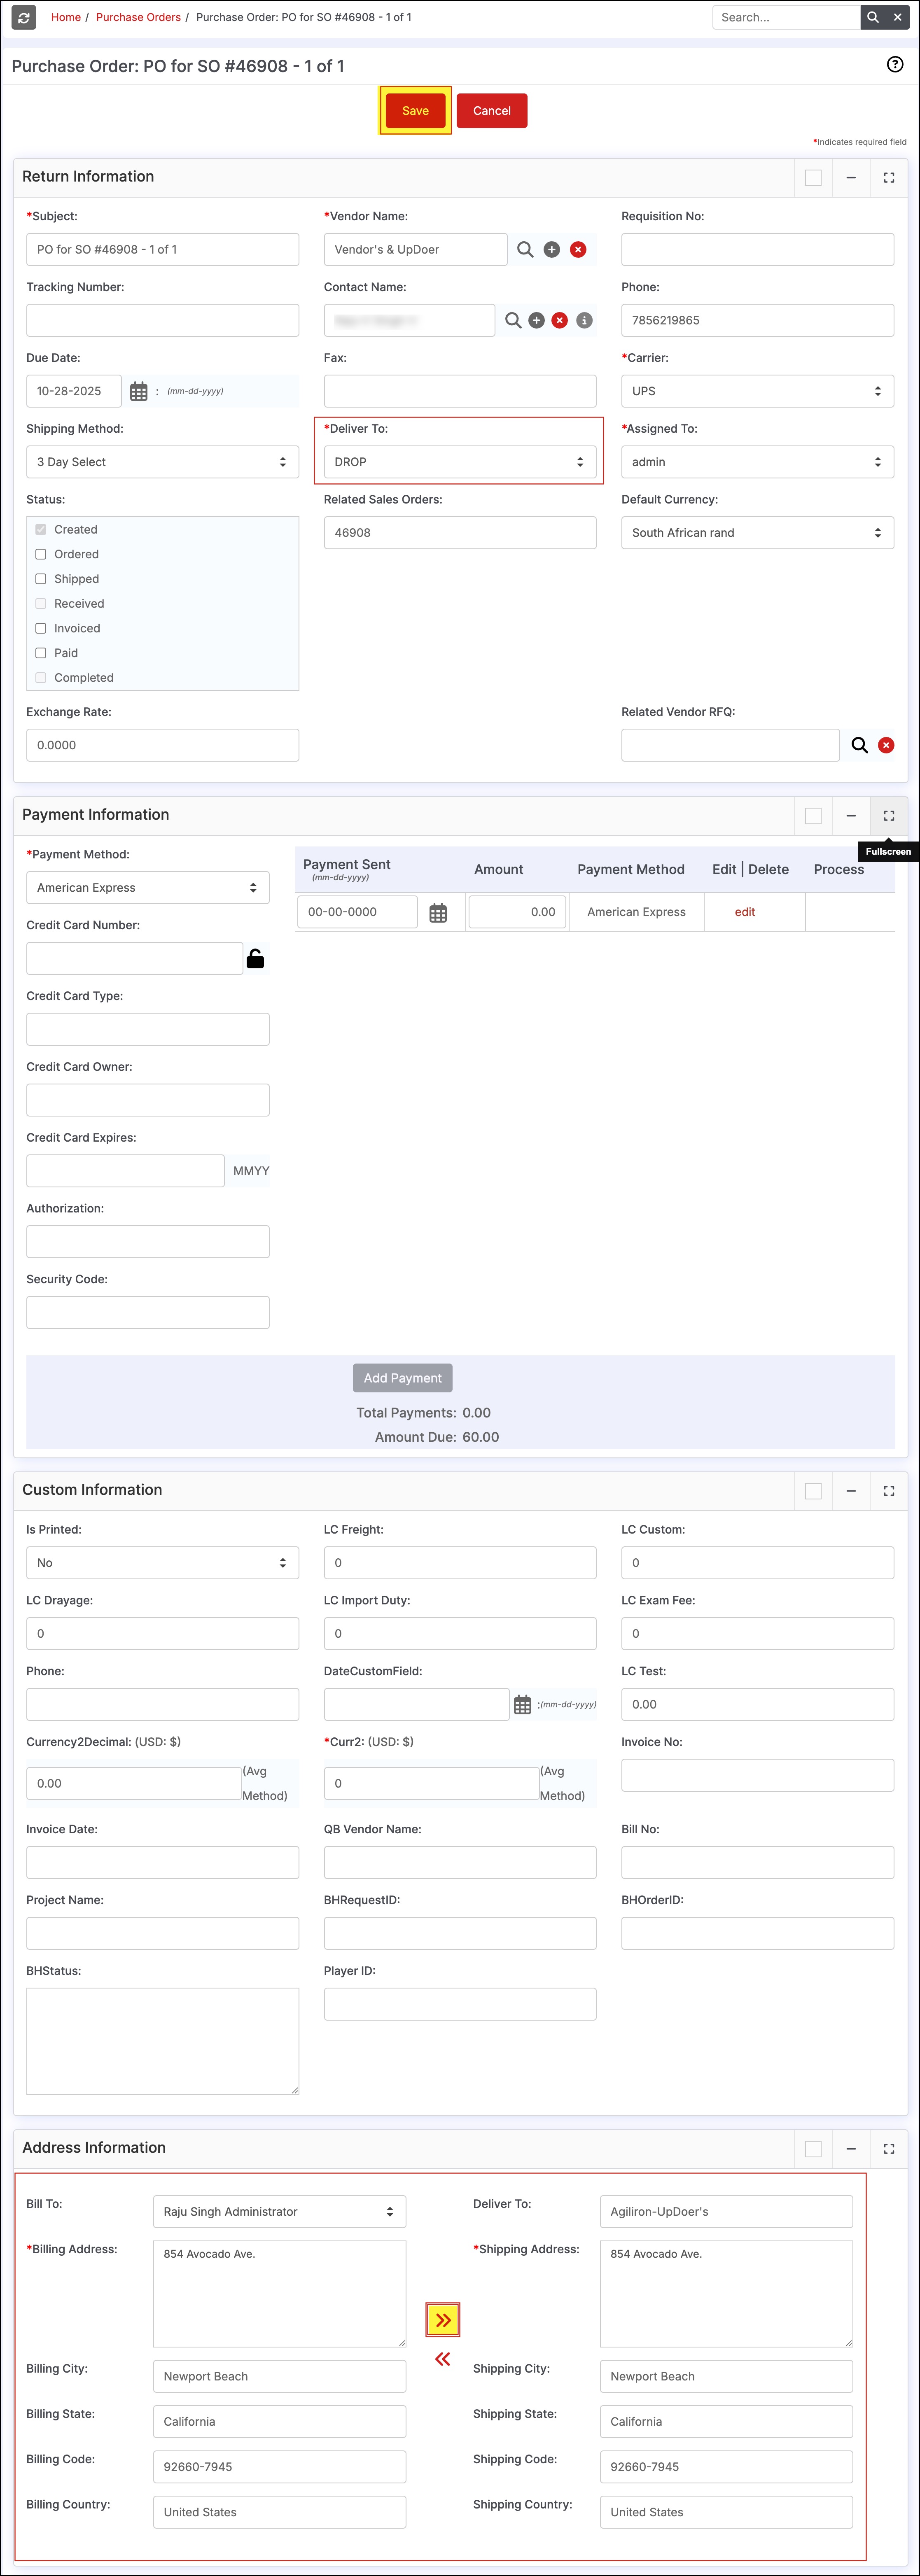
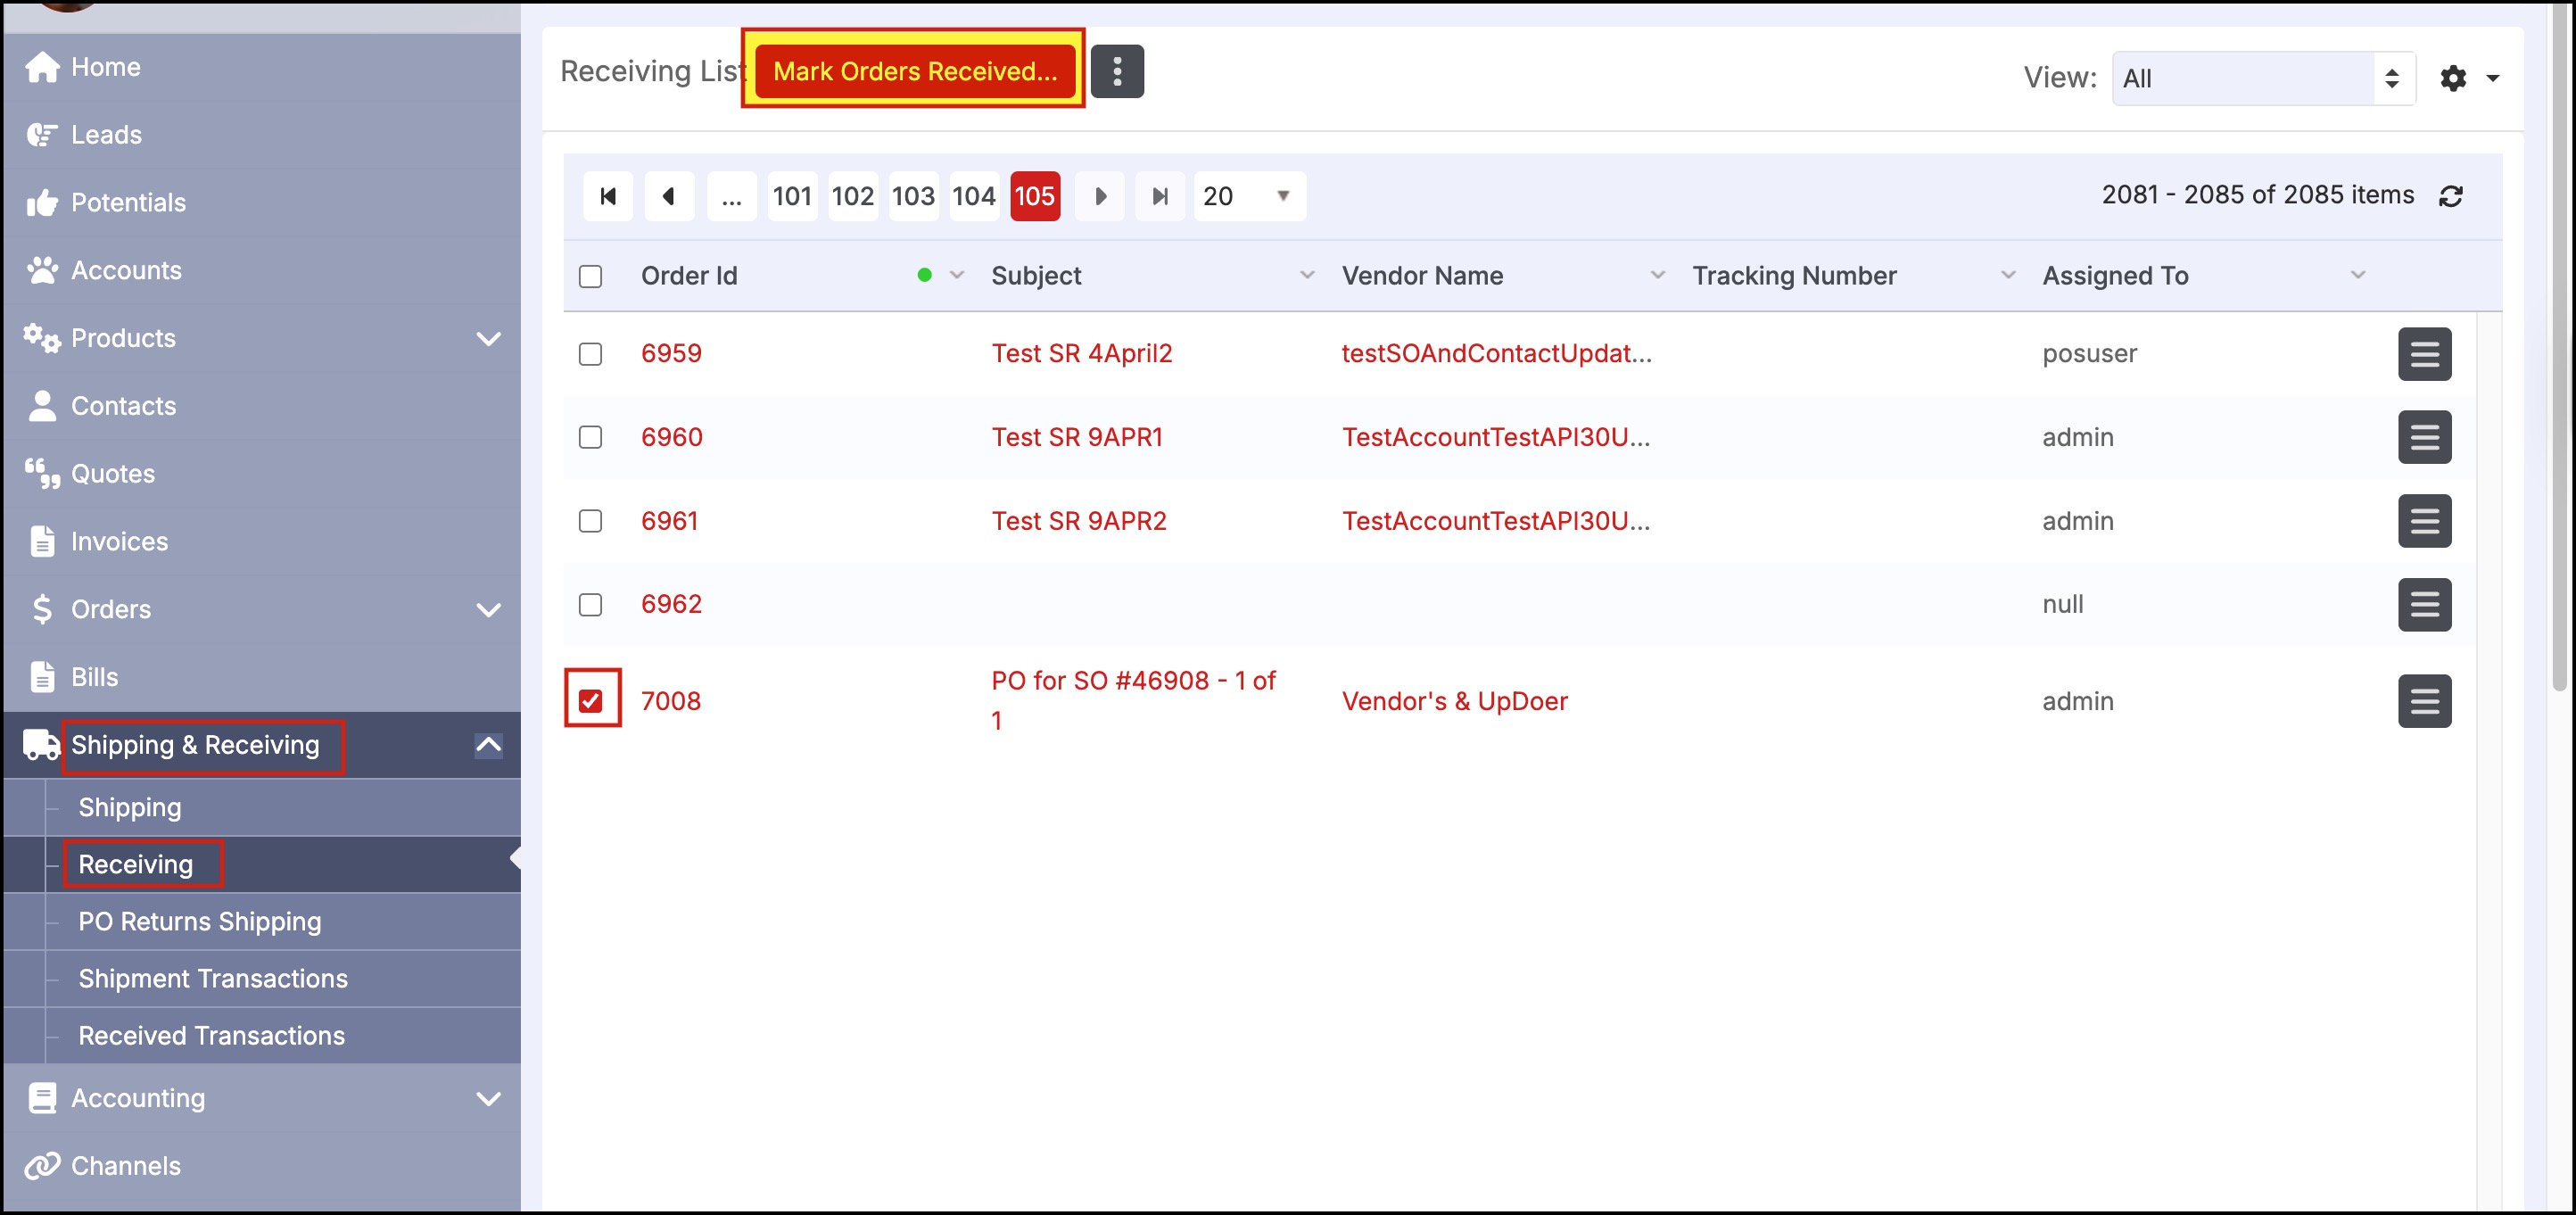
- The order can then be sent to the vendor for fulfillment. Once the product(s) have been shipped to the customer, Receive the purchase order in Agiliron to close the PO.
- Navigate to Shipping & Receiving > Receiving.
- Follow the instructions outlined here for receiving a purchase order.
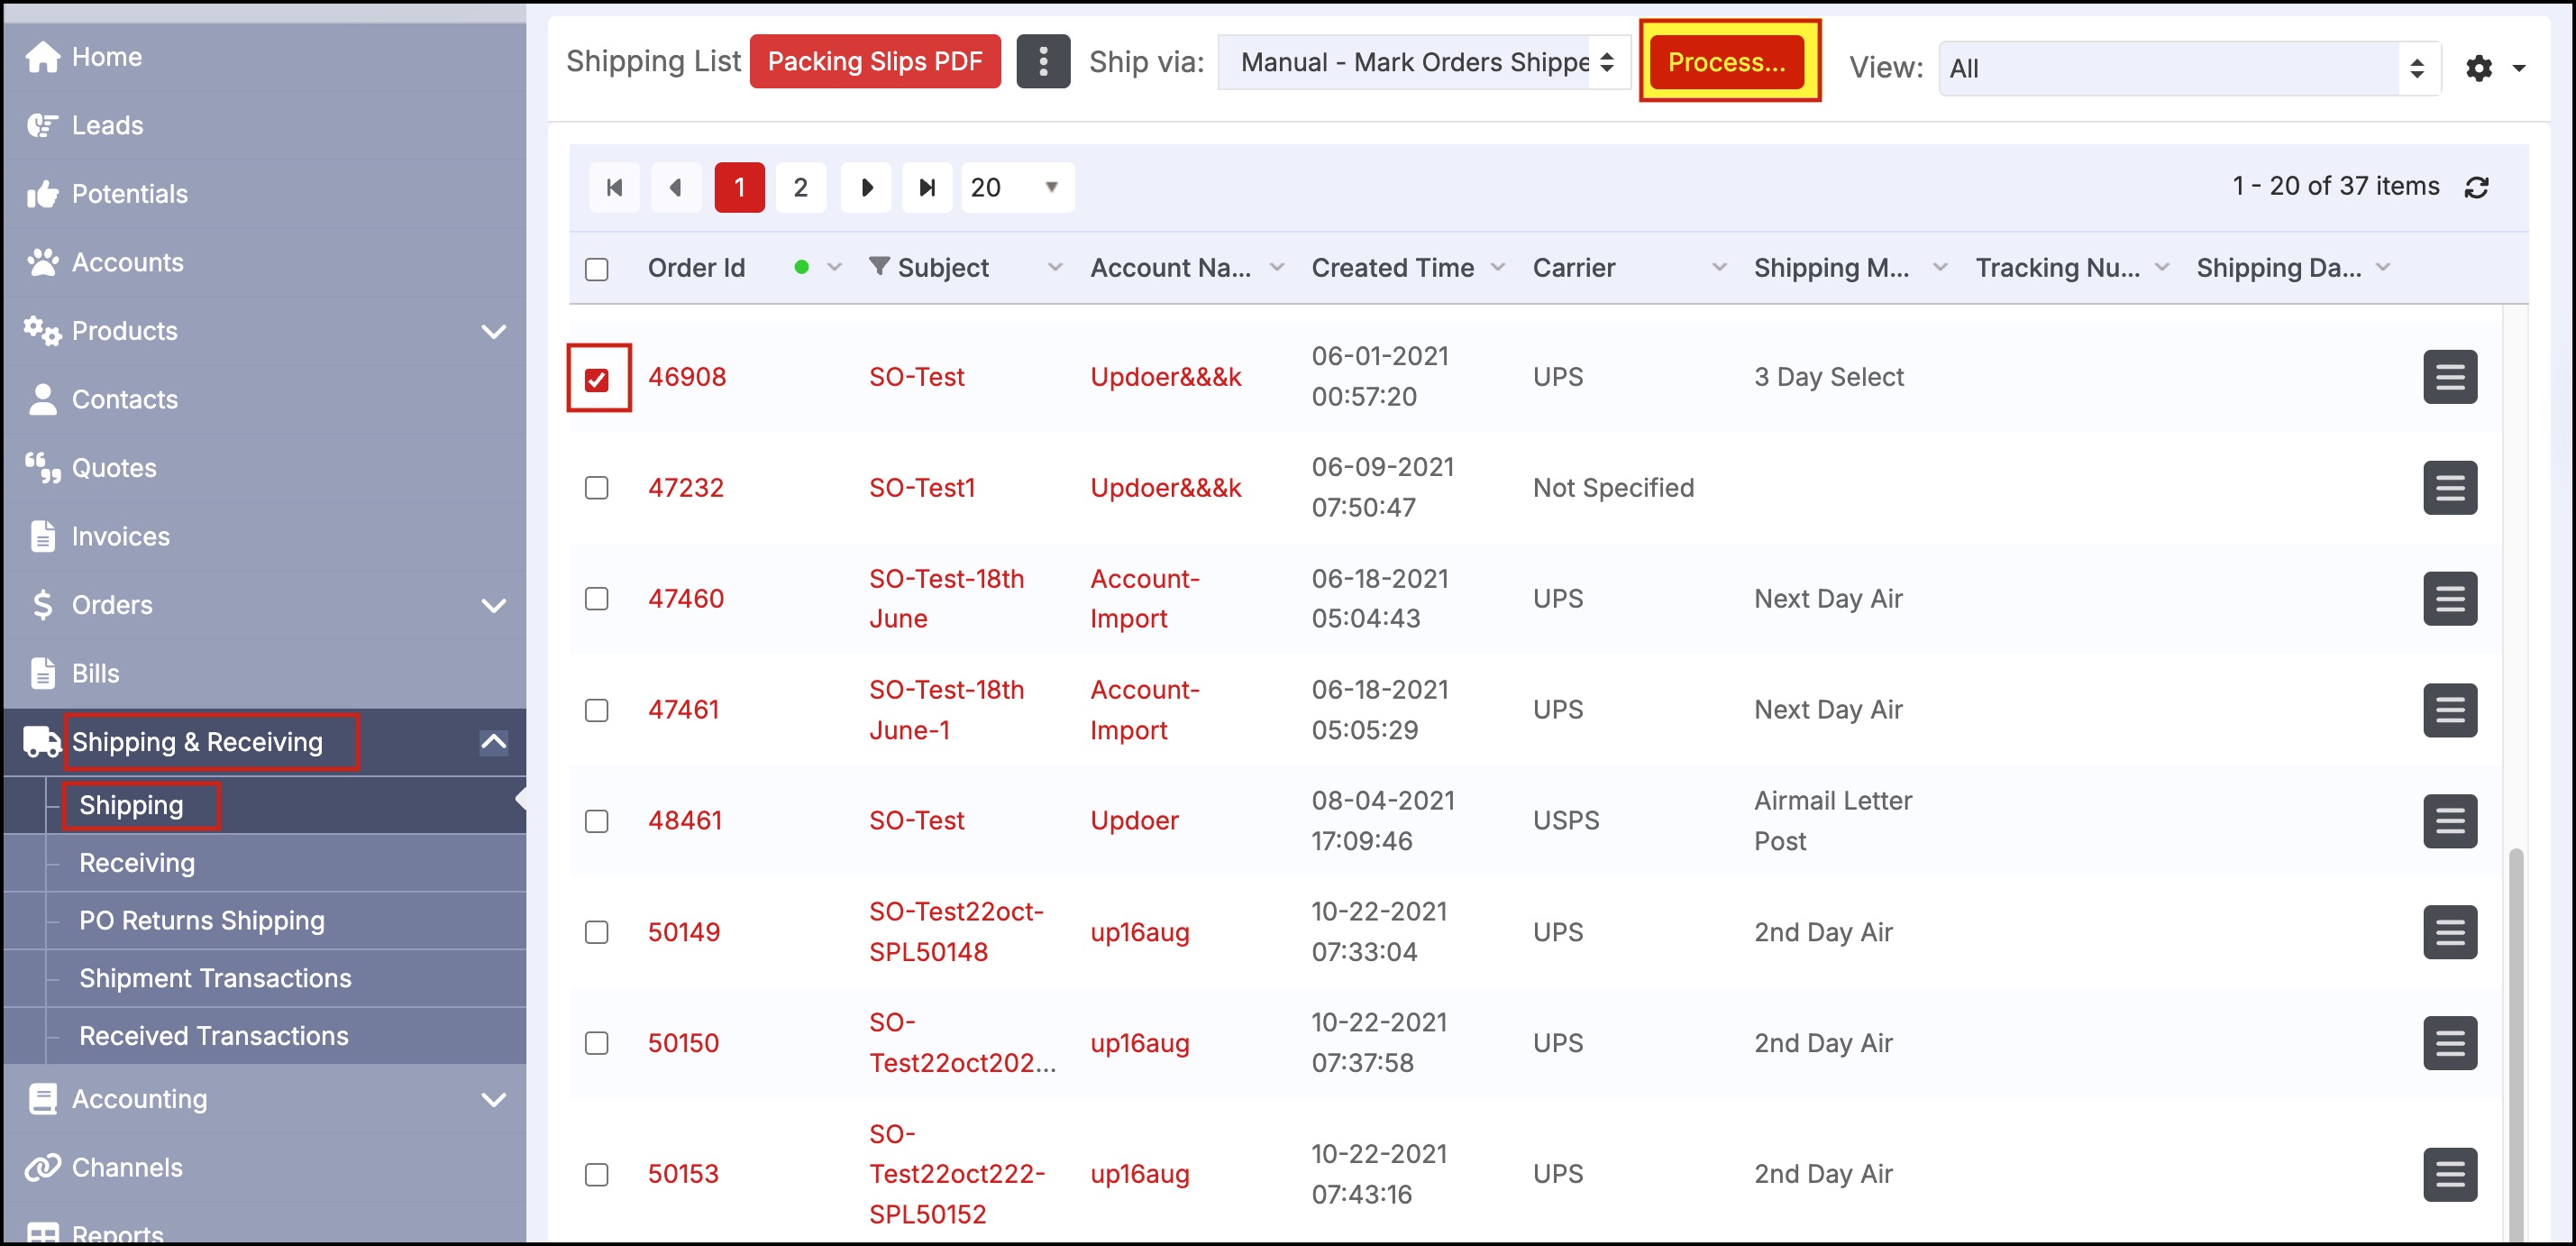
- The Sales Order should also be marked as shipped to indicate products from this order has been shipped to the customer.
- Navigate to Shipping & Receiving > Shipping. Select the checkbox next to the order and click the "Process" button to manually mark the order as shipped.
Updated 4 months ago
