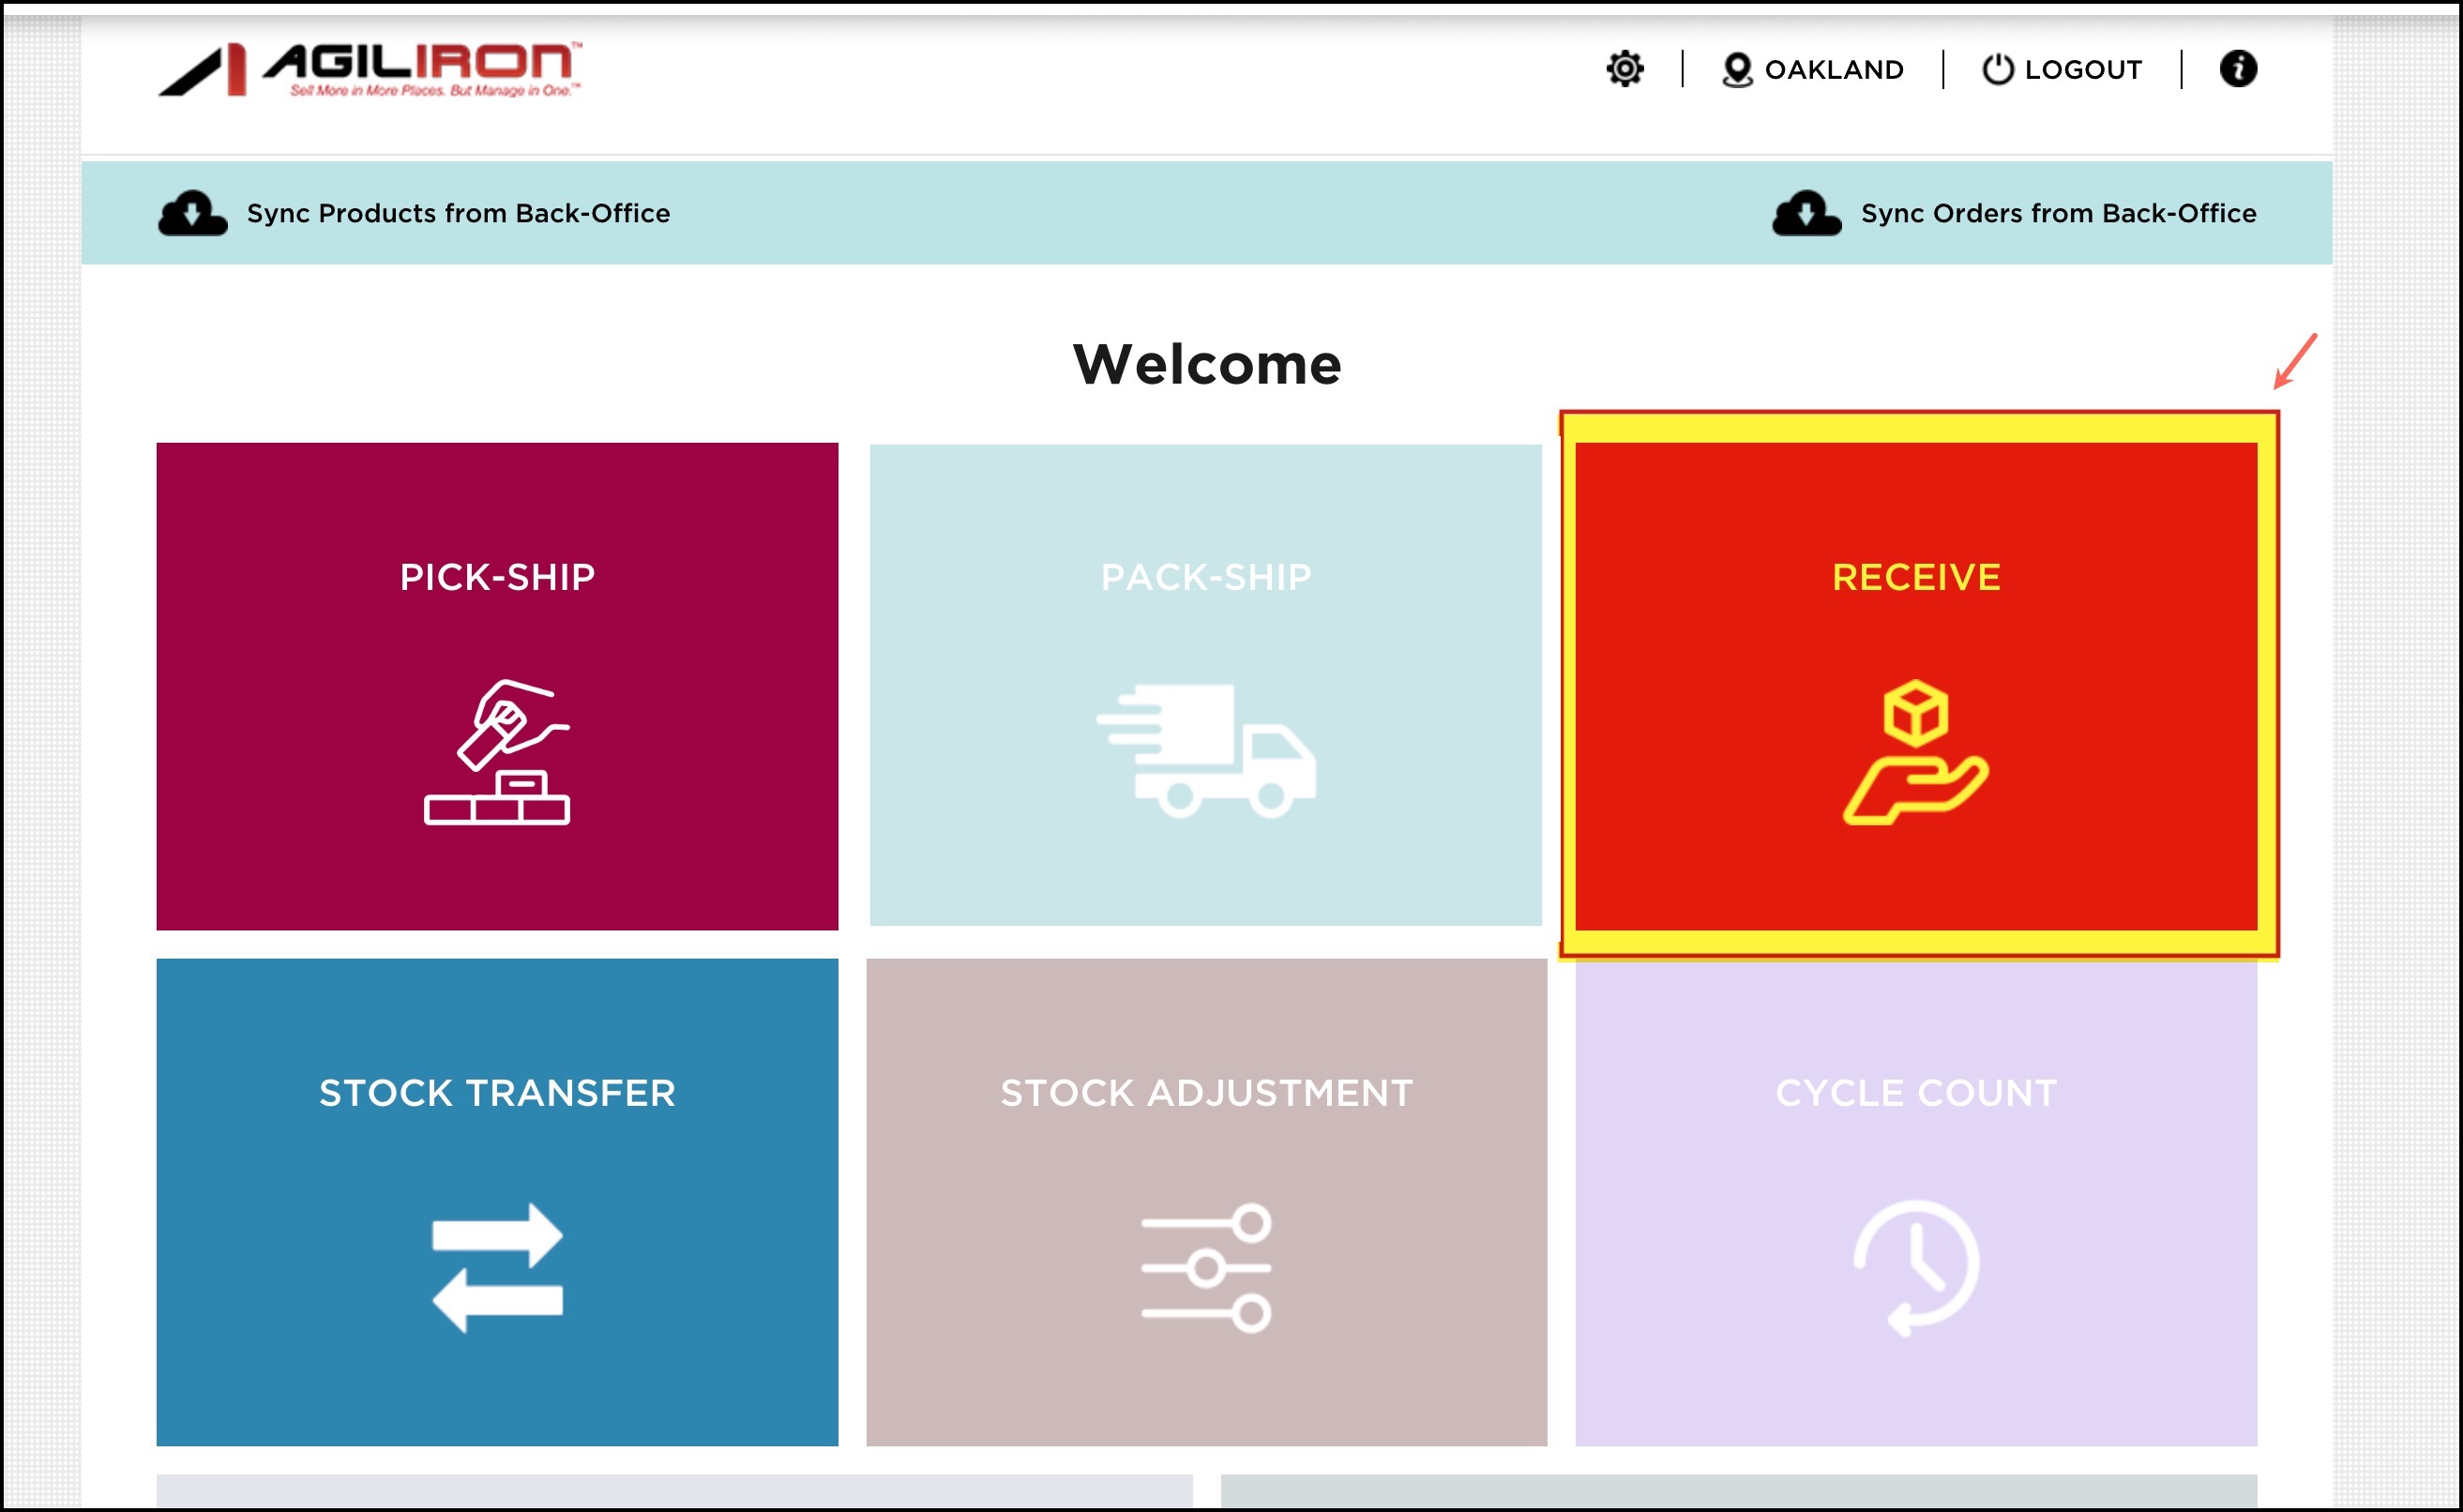
Receive Workflow
This module will demonstrate how Purchase Orders are received within the cross-platform warehouse management app.
You can control which products appear in the app for receiving by editing the custom view "WH App Receiving" in the Agiliron back office.
- Navigate to Shipping & Receiving > Receiving in the back office.
- Select the drop-down icon next to "View" and select "WH App Receiving".

- Once done, login to the warehouse app and click the "Receive" button to view the orders.
Orders can be fully or partially received. This section will demonstrate how to receive all items on the Purchase Order.
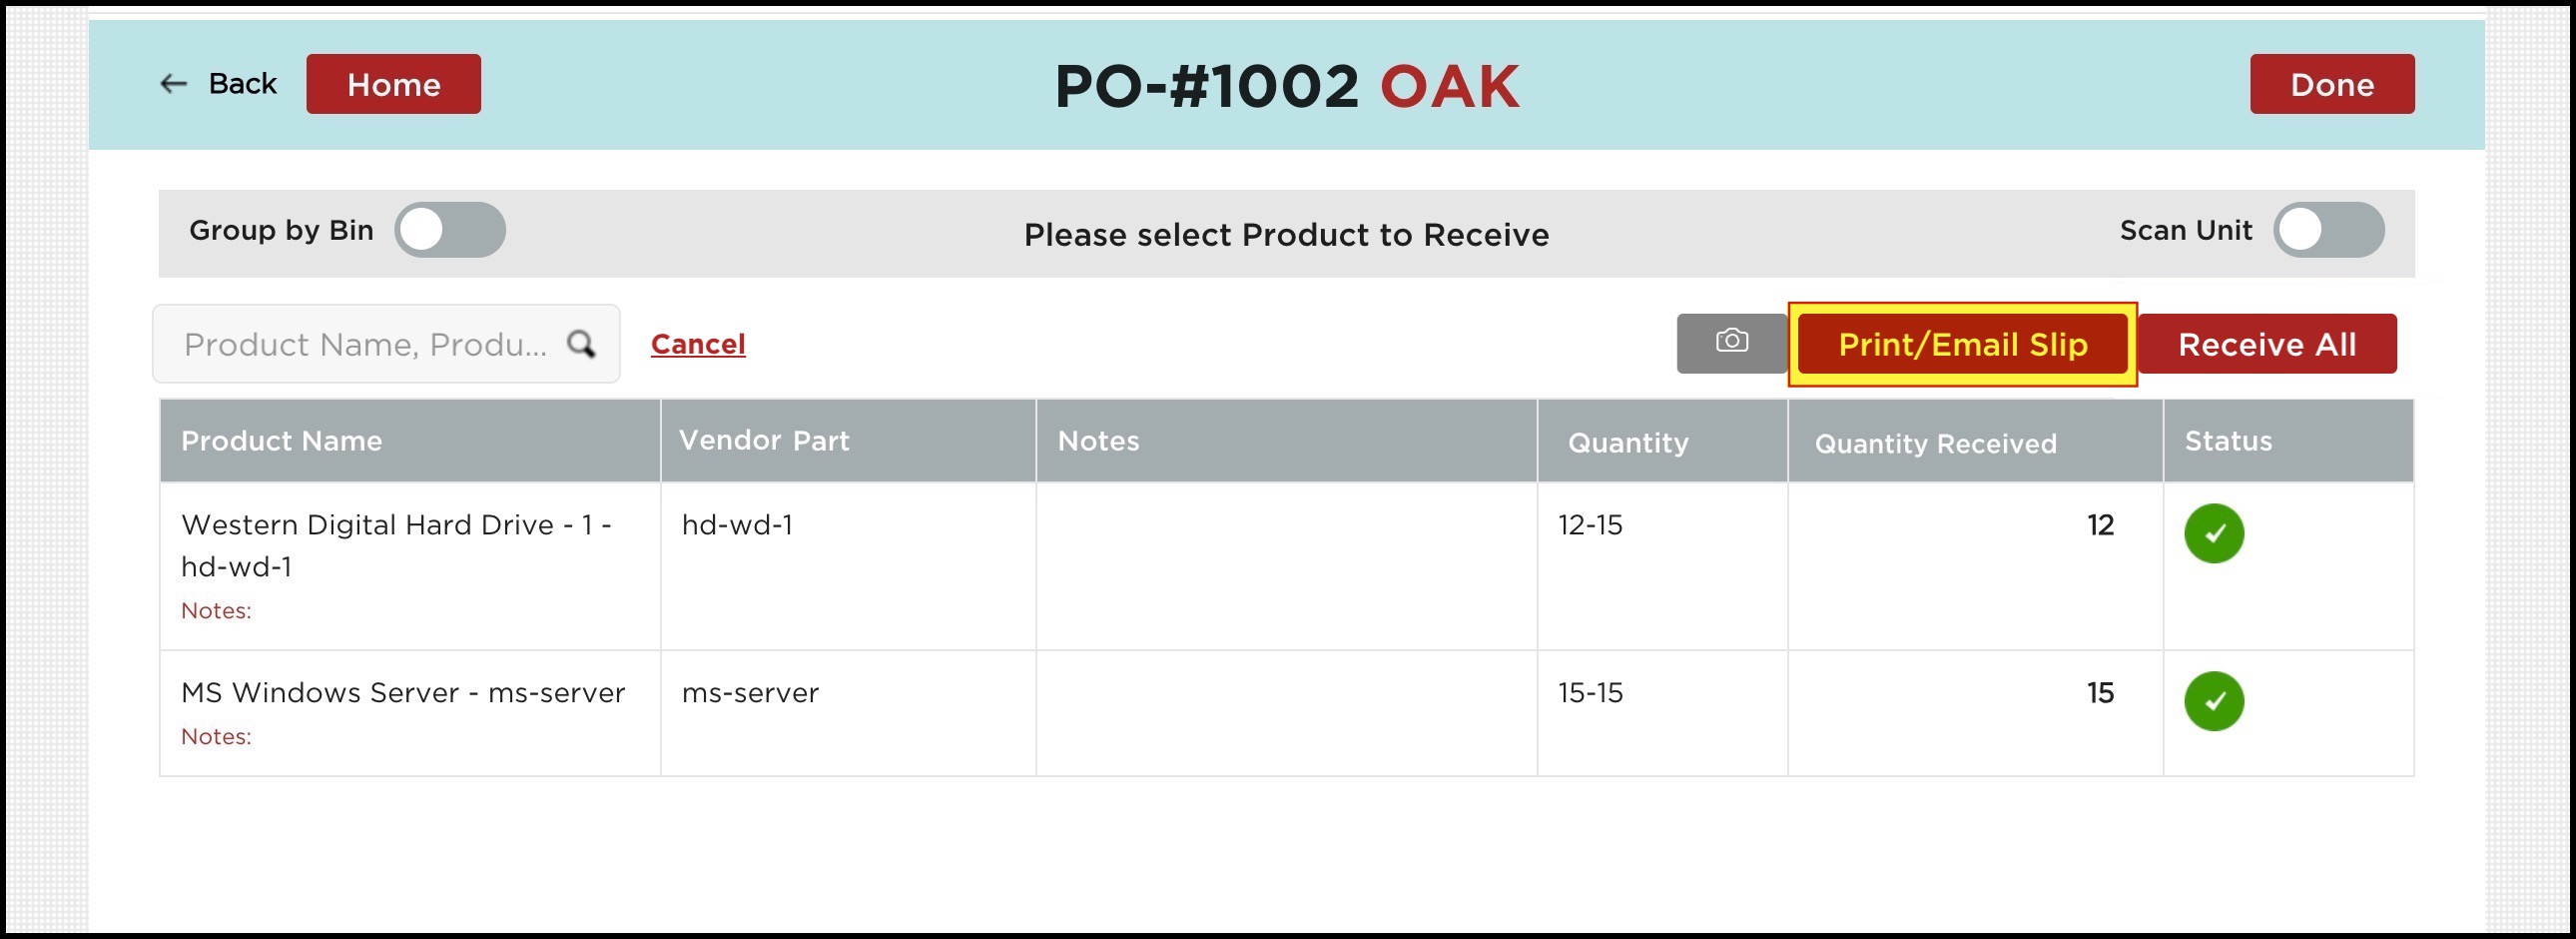
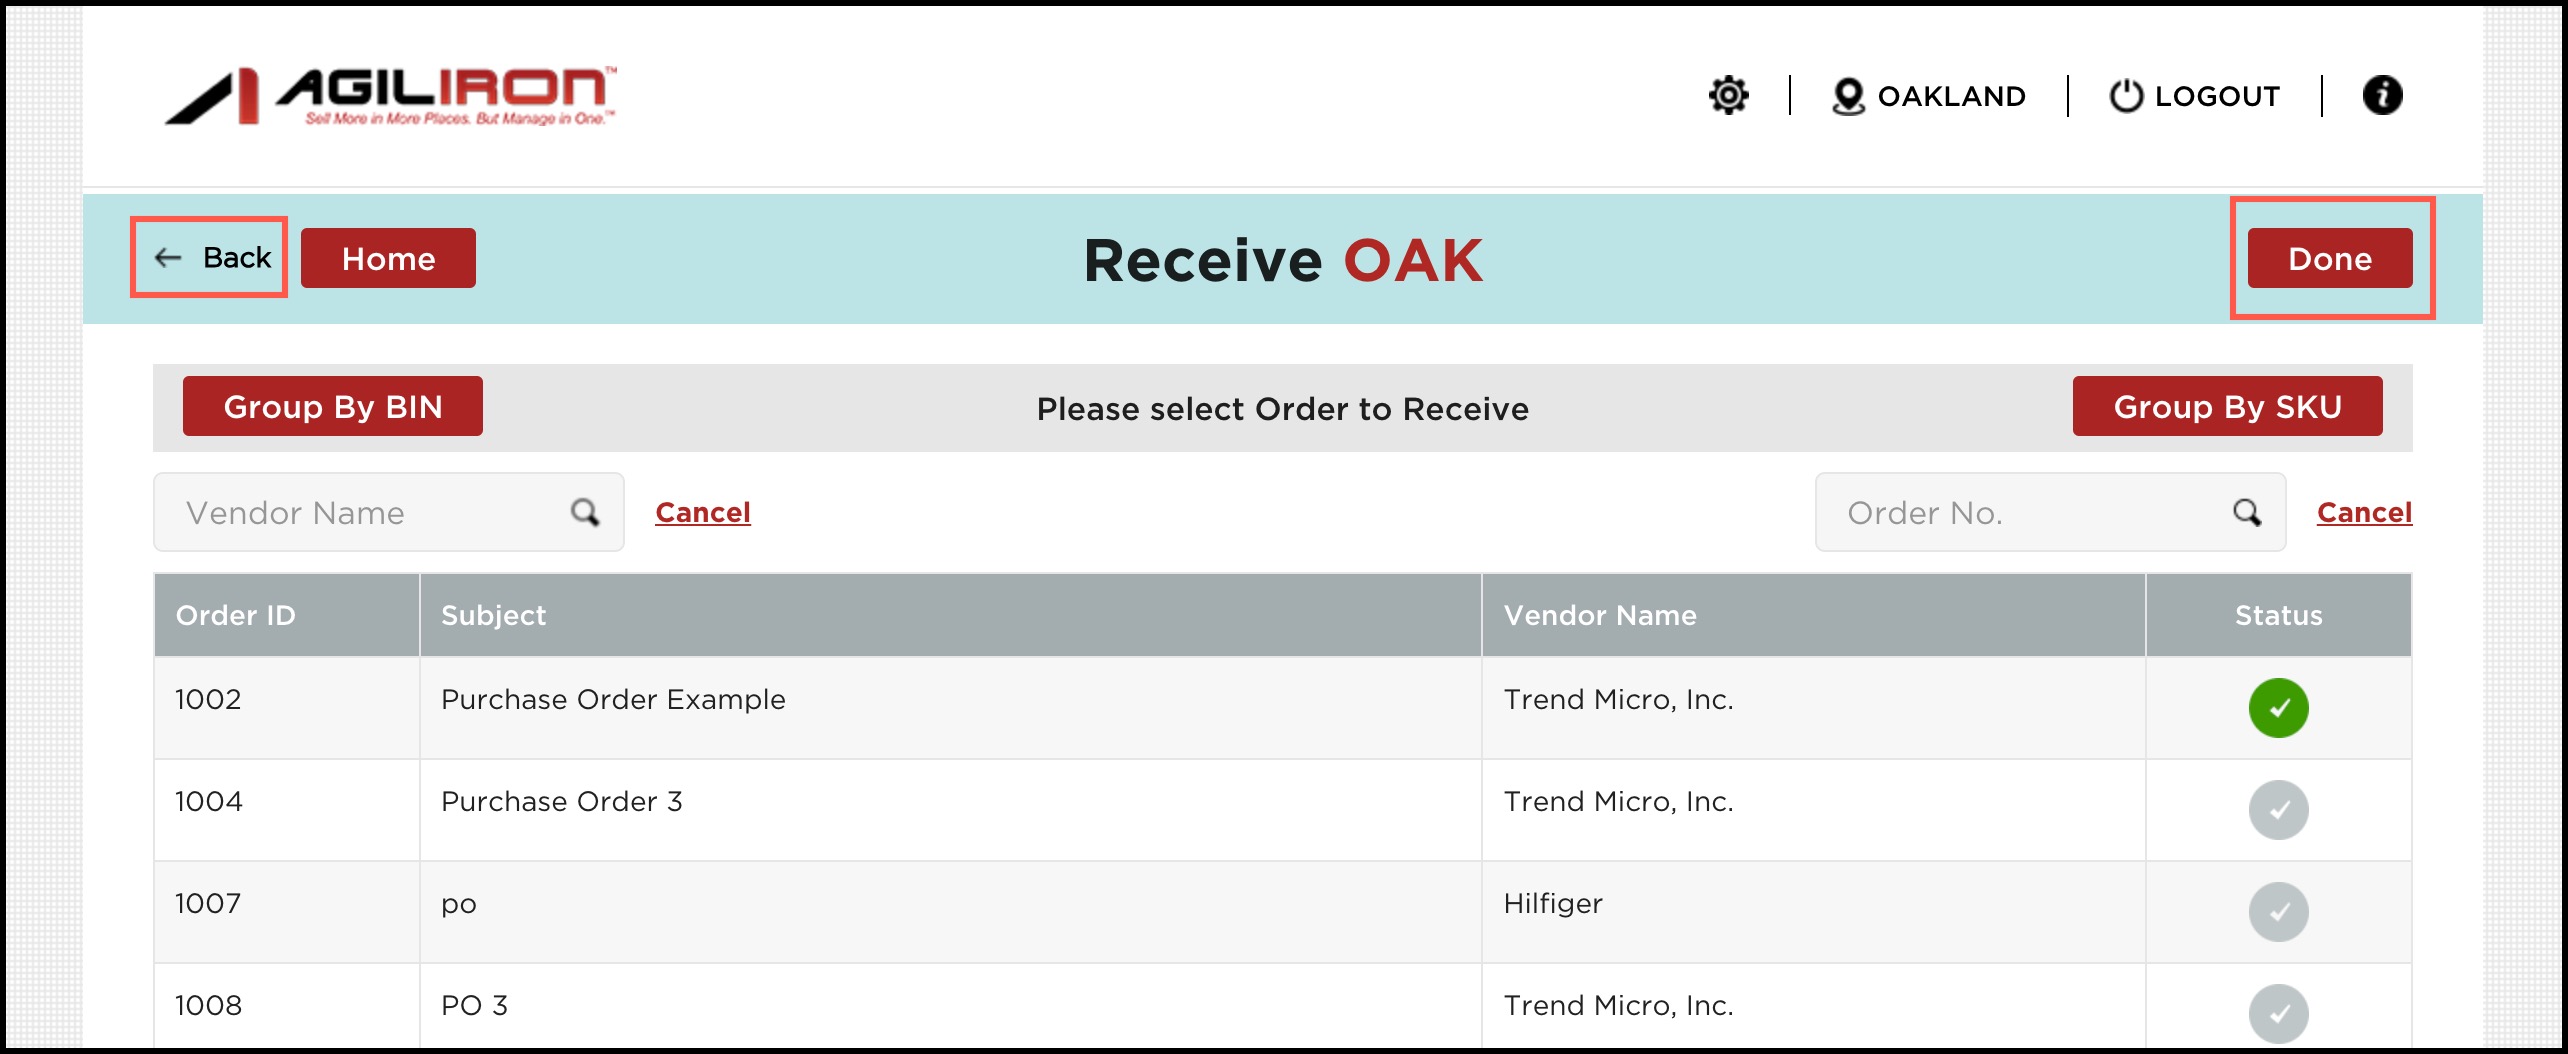
All Purchase Orders that are waiting to be received are displayed.
- The user can search for a particular Purchase Order by Vendor Name or by Order Number.
- The navigation buttons at the bottom of the screen allow for searching through multiple pages of purchase orders.
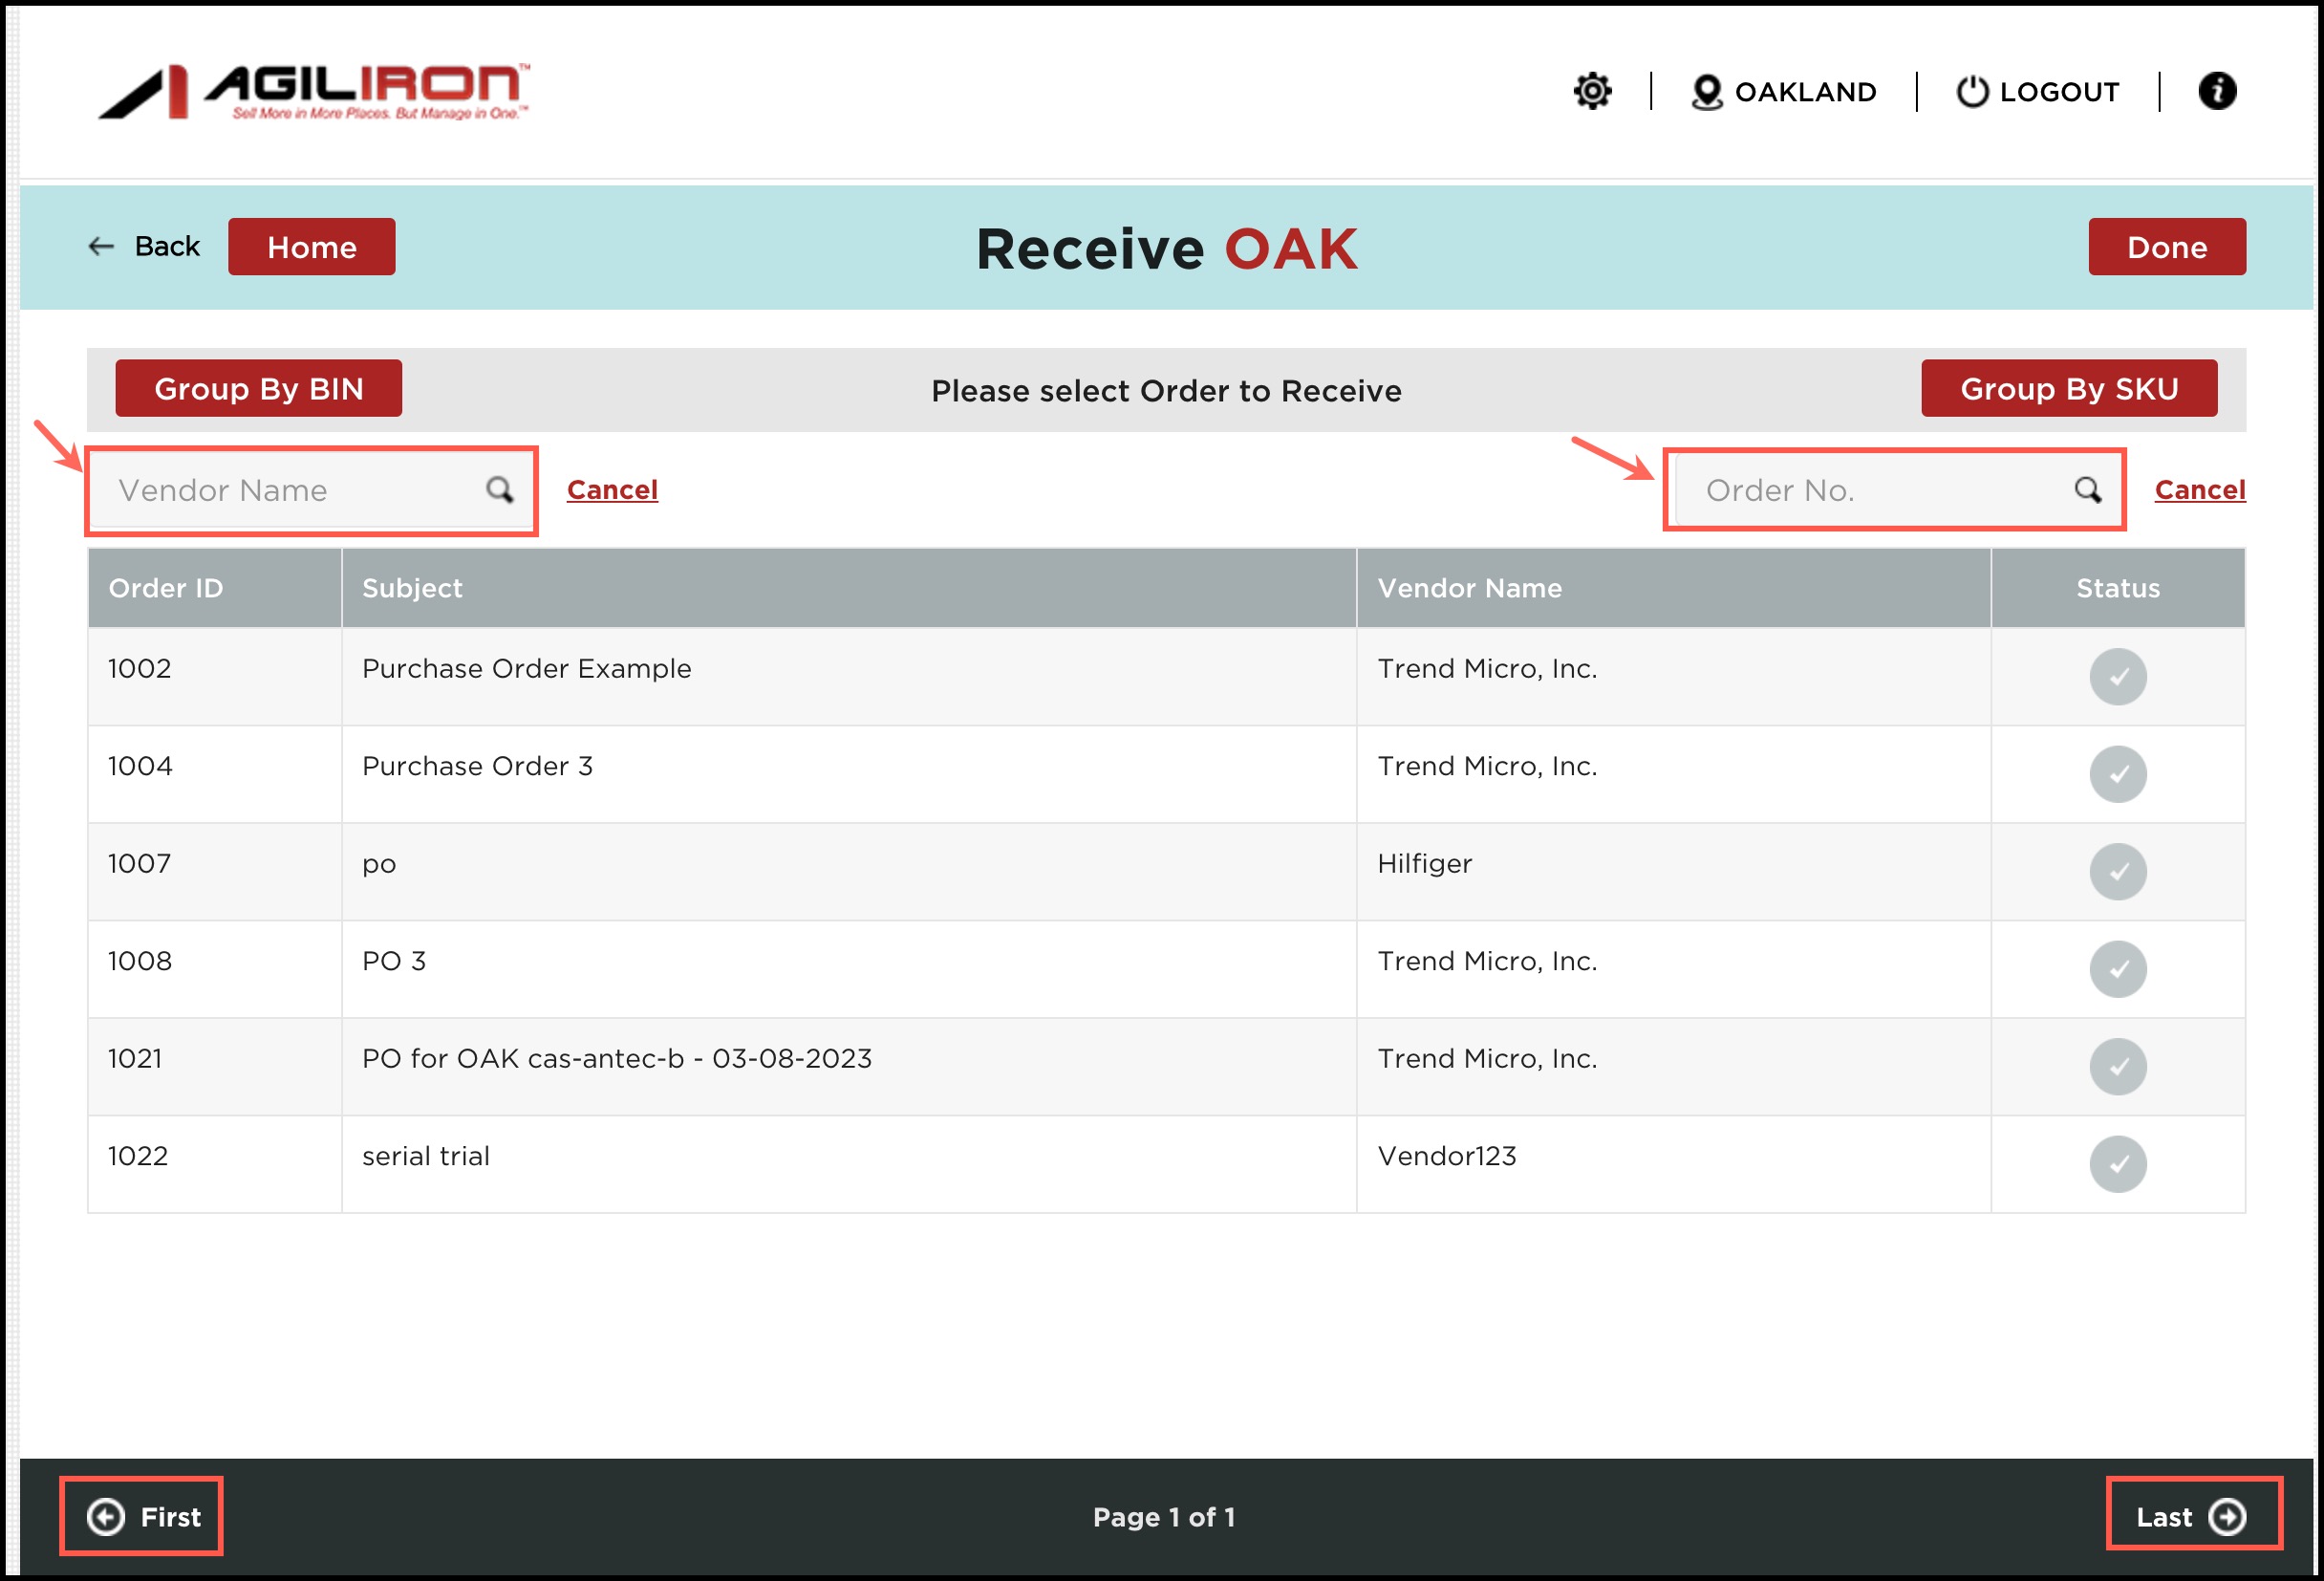
- Selecting Group By Bin allows for the grouping of products by bin location.
- Selecting Group By SKU allows for the grouping of products by SKU code.

- Select the purchase order you wish to receive.
- If the Scan Unit is enabled, when you select any Purchase Order, you will see a '+', '-' under Qty Received column of the product. It signifies that you can scan the product by a barcode scanner. As soon as you scan the product barcode, the quantity will increase by 1. You can increase or decrease the quantity with the respective + and - sign.

You can also scan the product barcode using your device camera. Just click on the camera icon and scan the barcode.

(Scan Unit Toggle set to disabled)
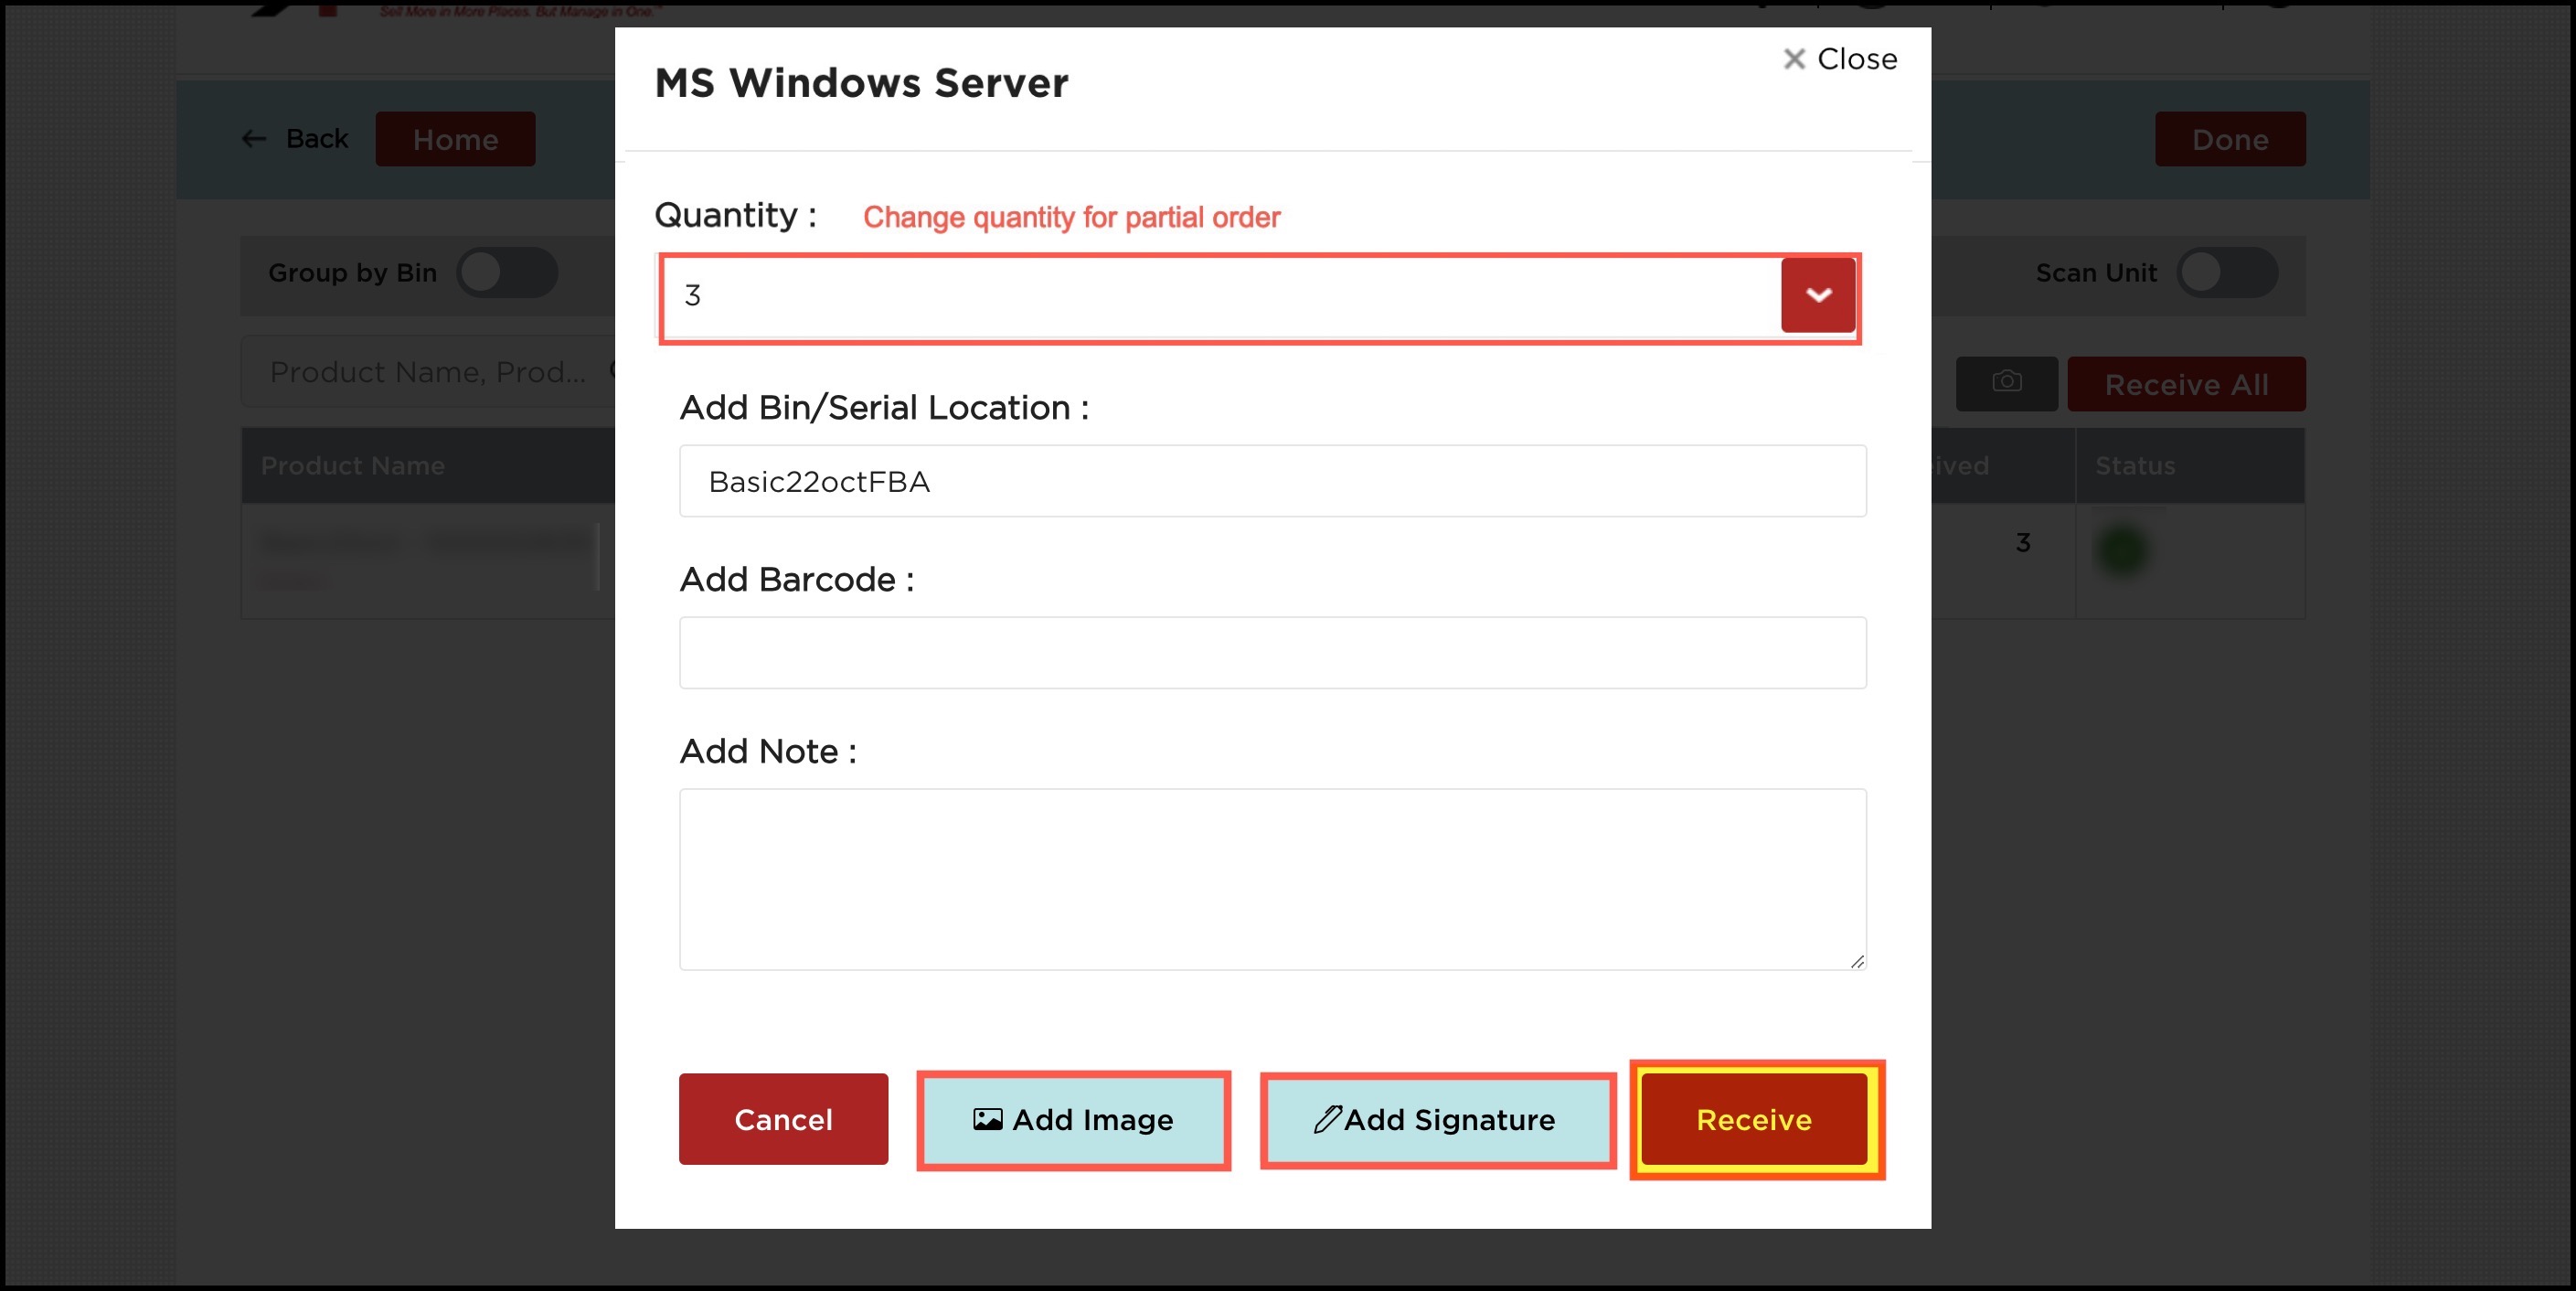
- Select the product to add Notes or Bin Location information.
- You can optionally add/edit the Barcode associated with the Product. If there is an existing barcode that will be displayed in the Barcode field.
- You can also Add images and Signature (Please refer to Add Optional Picture and Add Signature to know the complete process).
- The Quantity can be changed if receiving a partial order.
- Select the Receive button to finish.
The status column now displays color to indicate the items have now been received/partially received.
Green status signifies all orders received.
Yellow status indicates the product is not fully received.

Note: If no Bin Location, Notes information, image, and sign are needed, you can just tap the Receive All button to receive all of the products on the order.
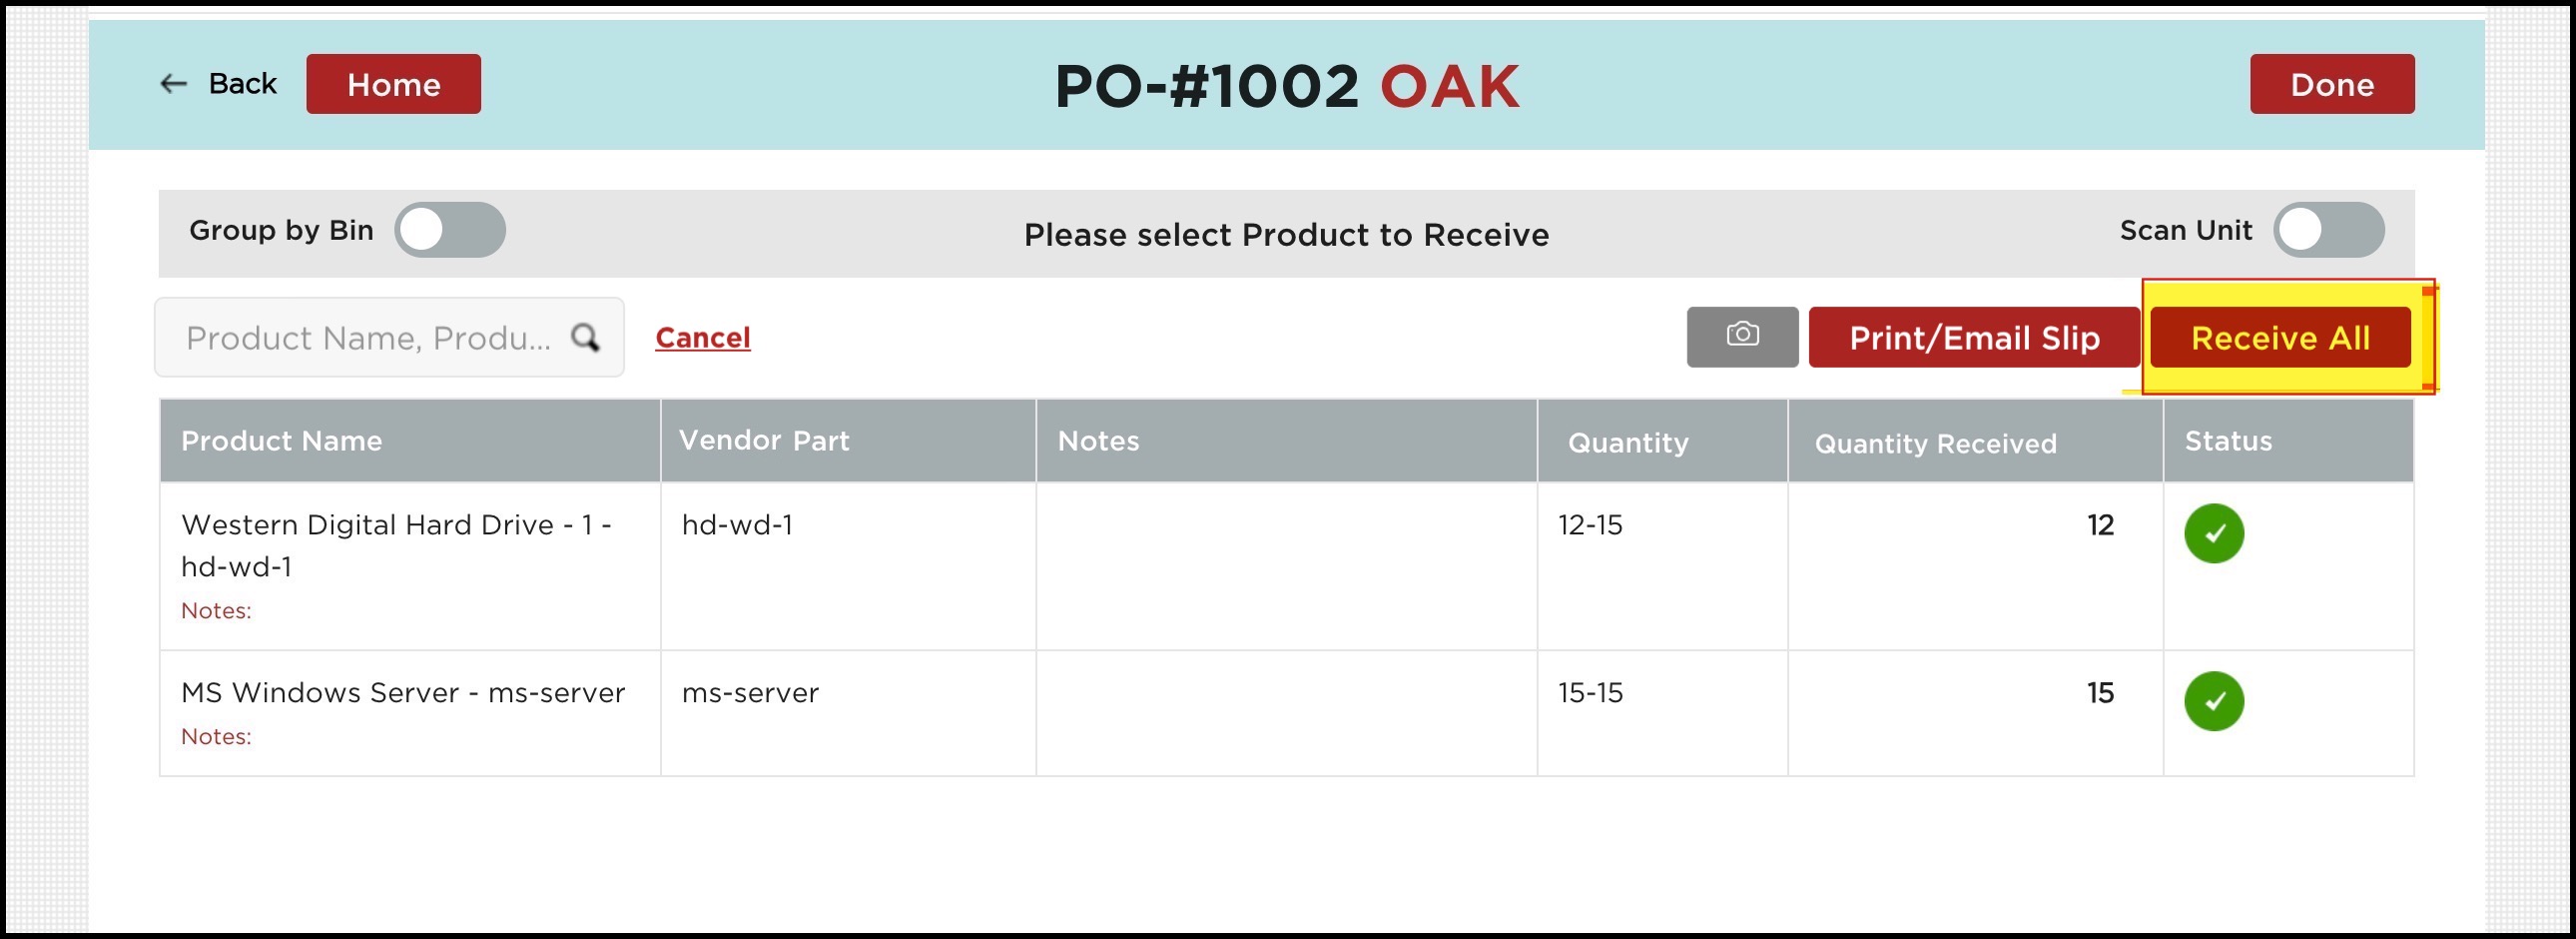
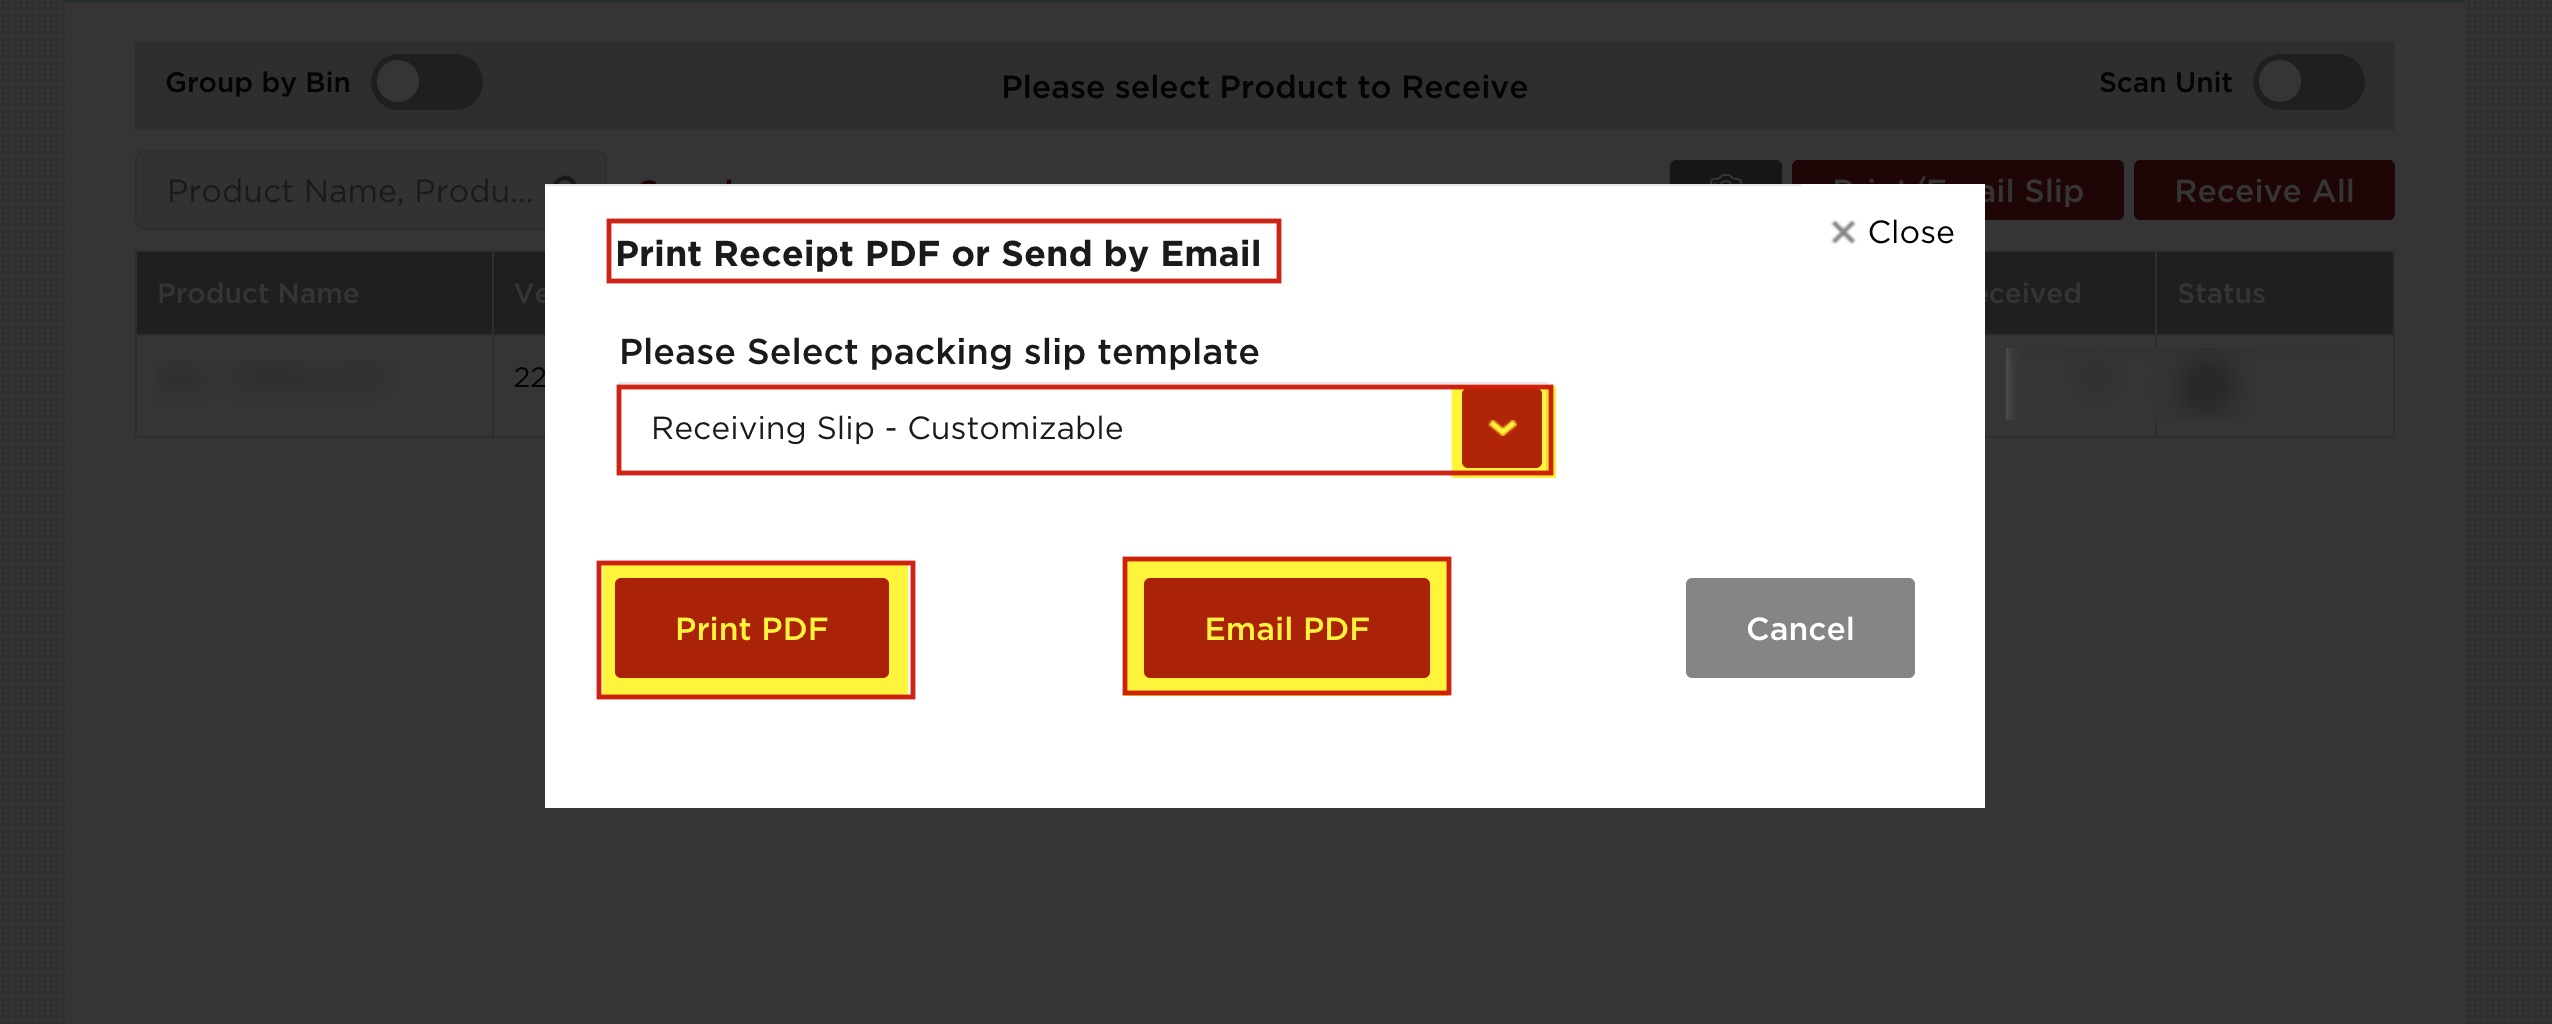
- You can also see the Print/Email Slip button. Clicking on it will allow you to print or email the receiving slip.
The Receiving Slip template options listed here are from the "Settings > Templates" in the back office.
- Select Done to return to the Purchase Order list.
Note: If a barcode scanner is available, the same results can be achieved by scanning each item.
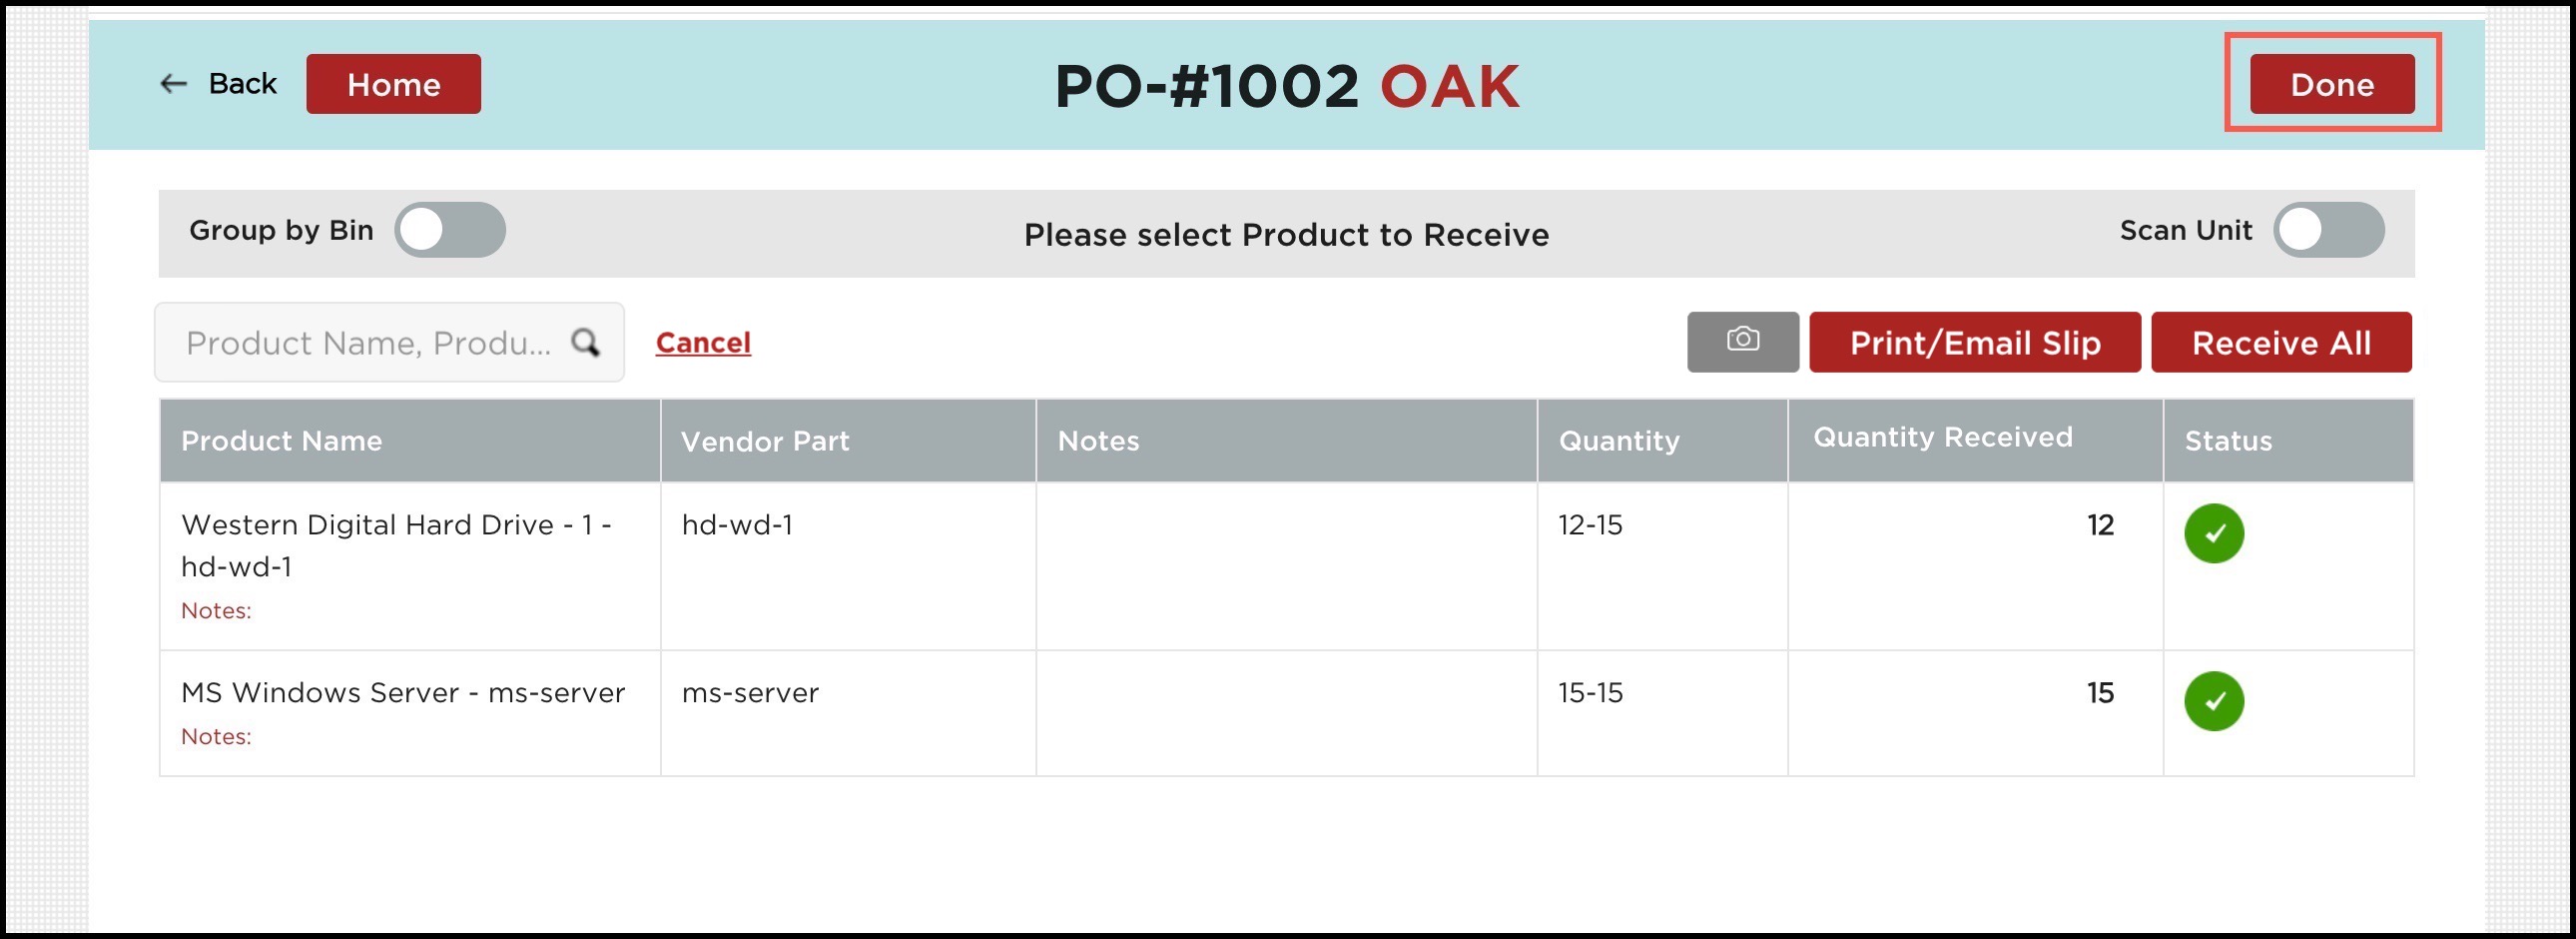
- When all orders have been received, select Done or Back to return to the home screen.
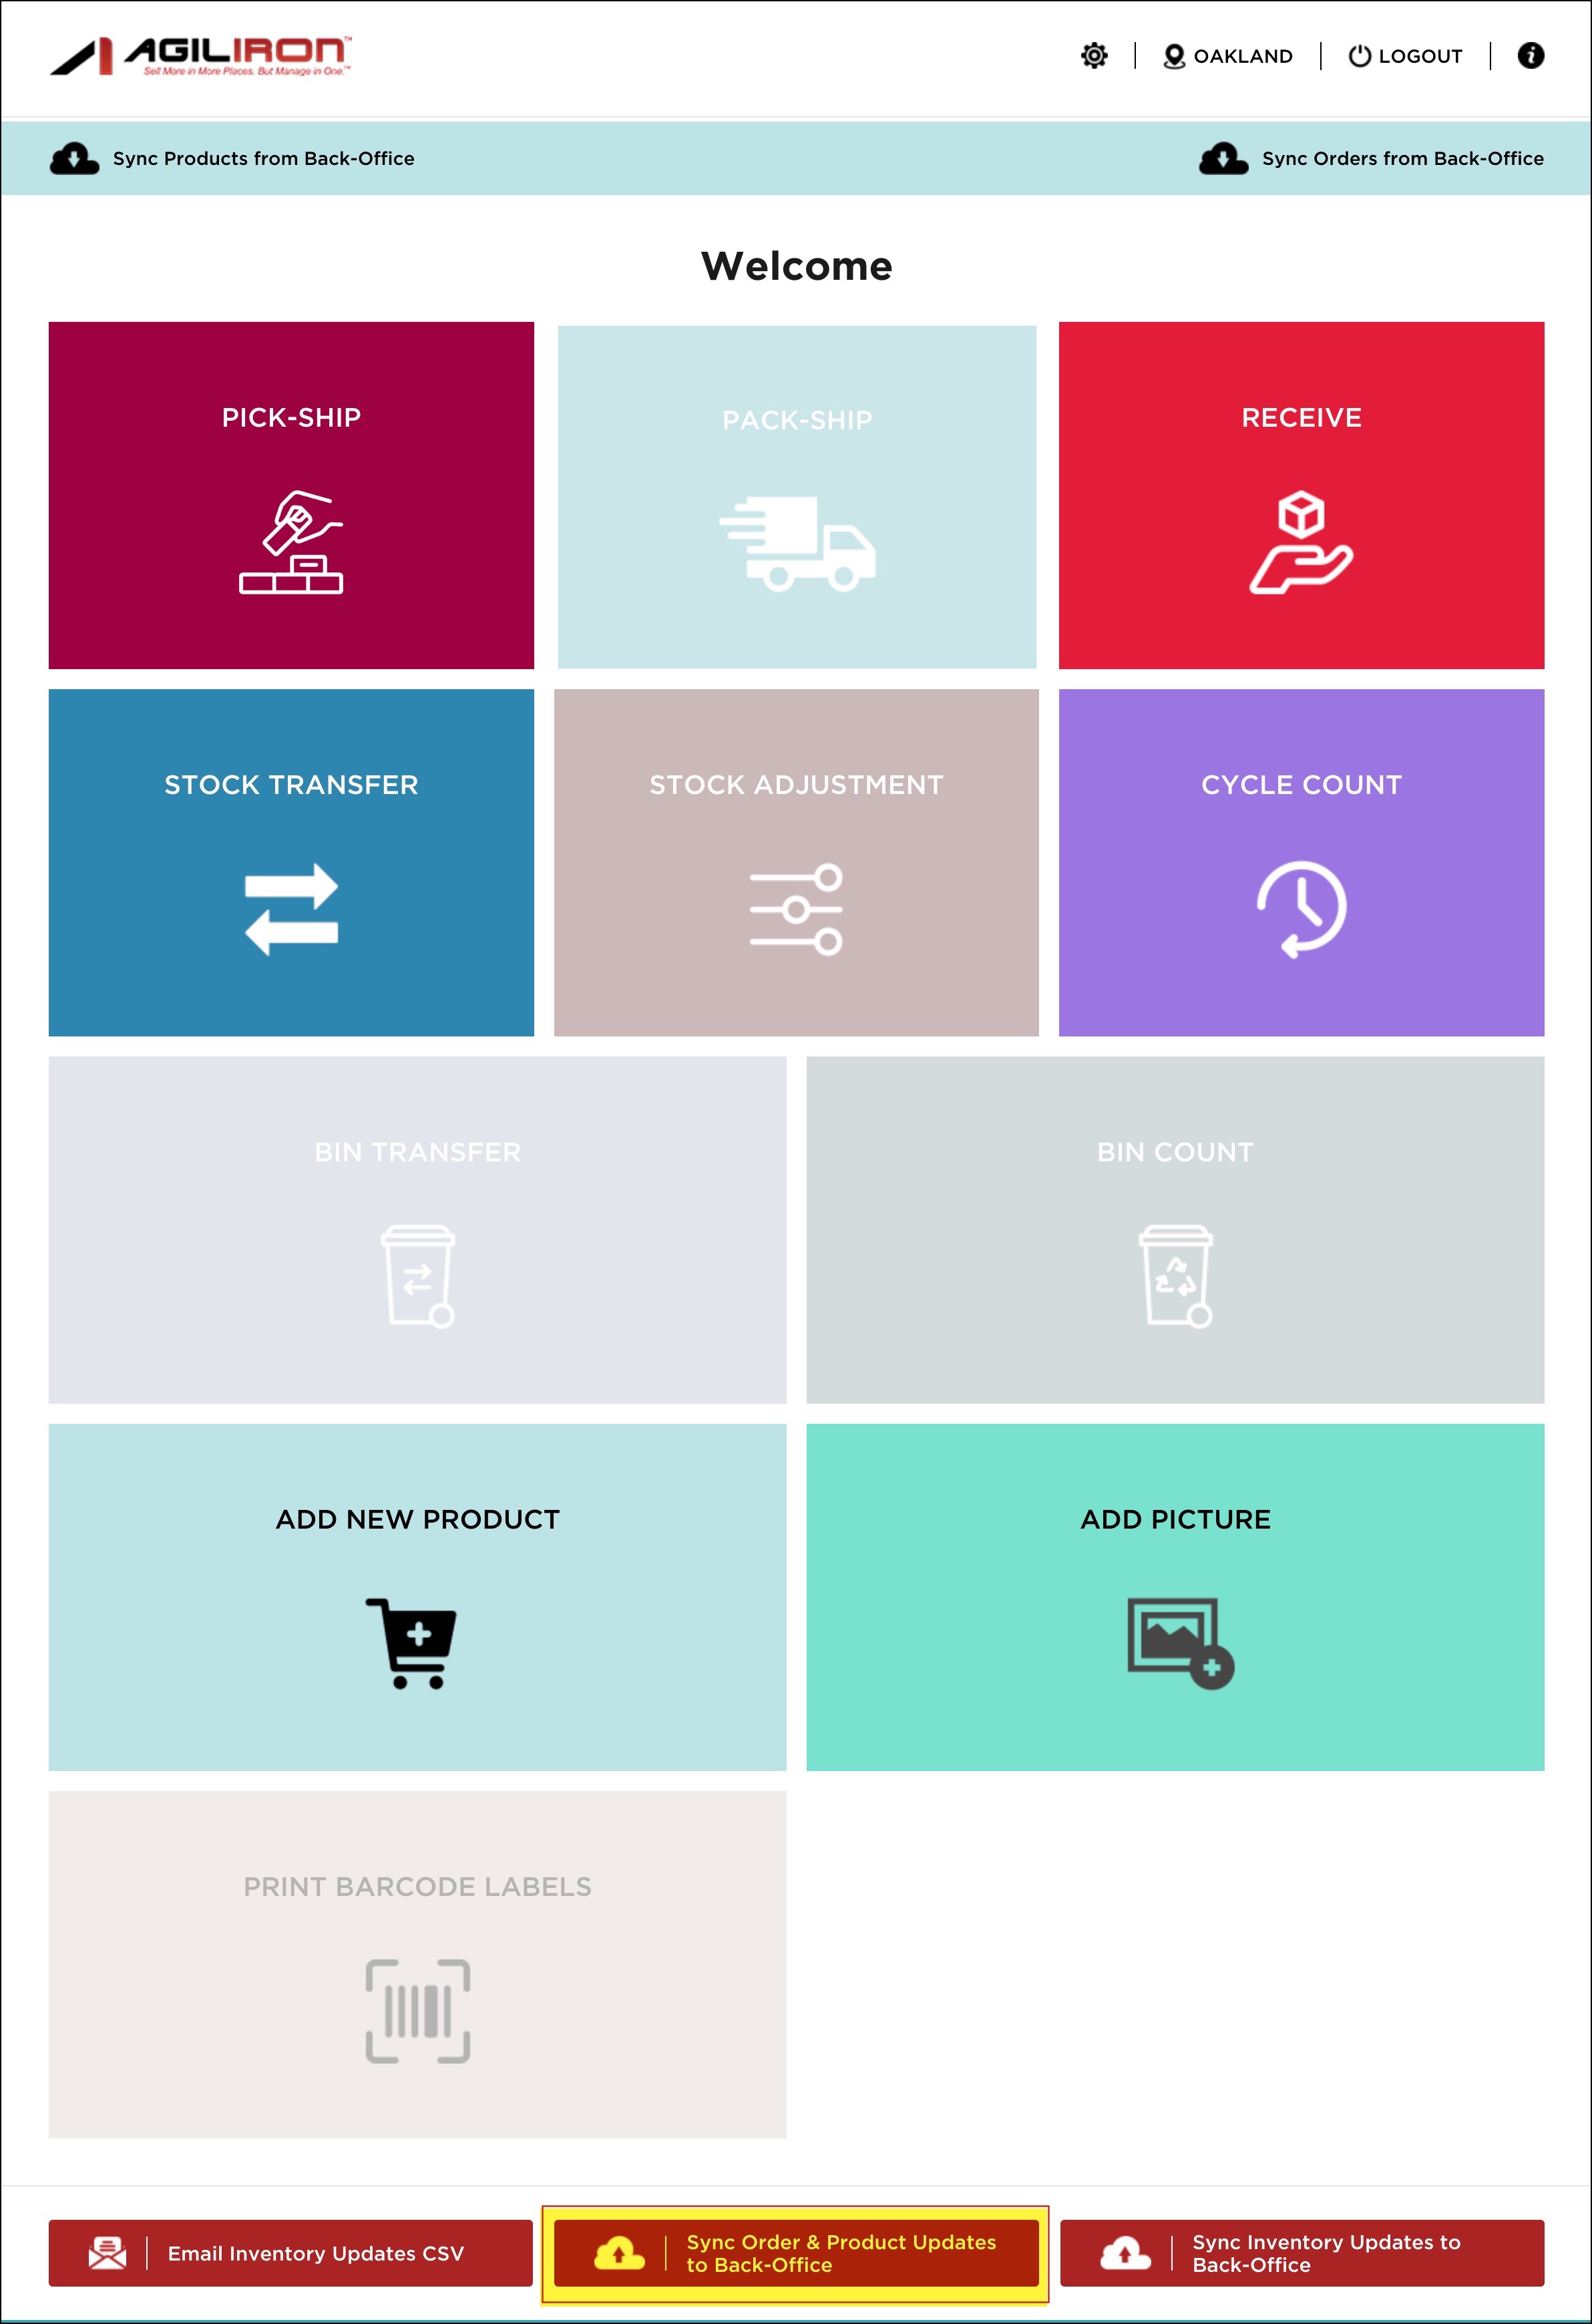
Now that the order has been received, the information must be synced back into Agiliron.
- Select the "Sync Order & Product Updates to Back-Office" button on the home screen.
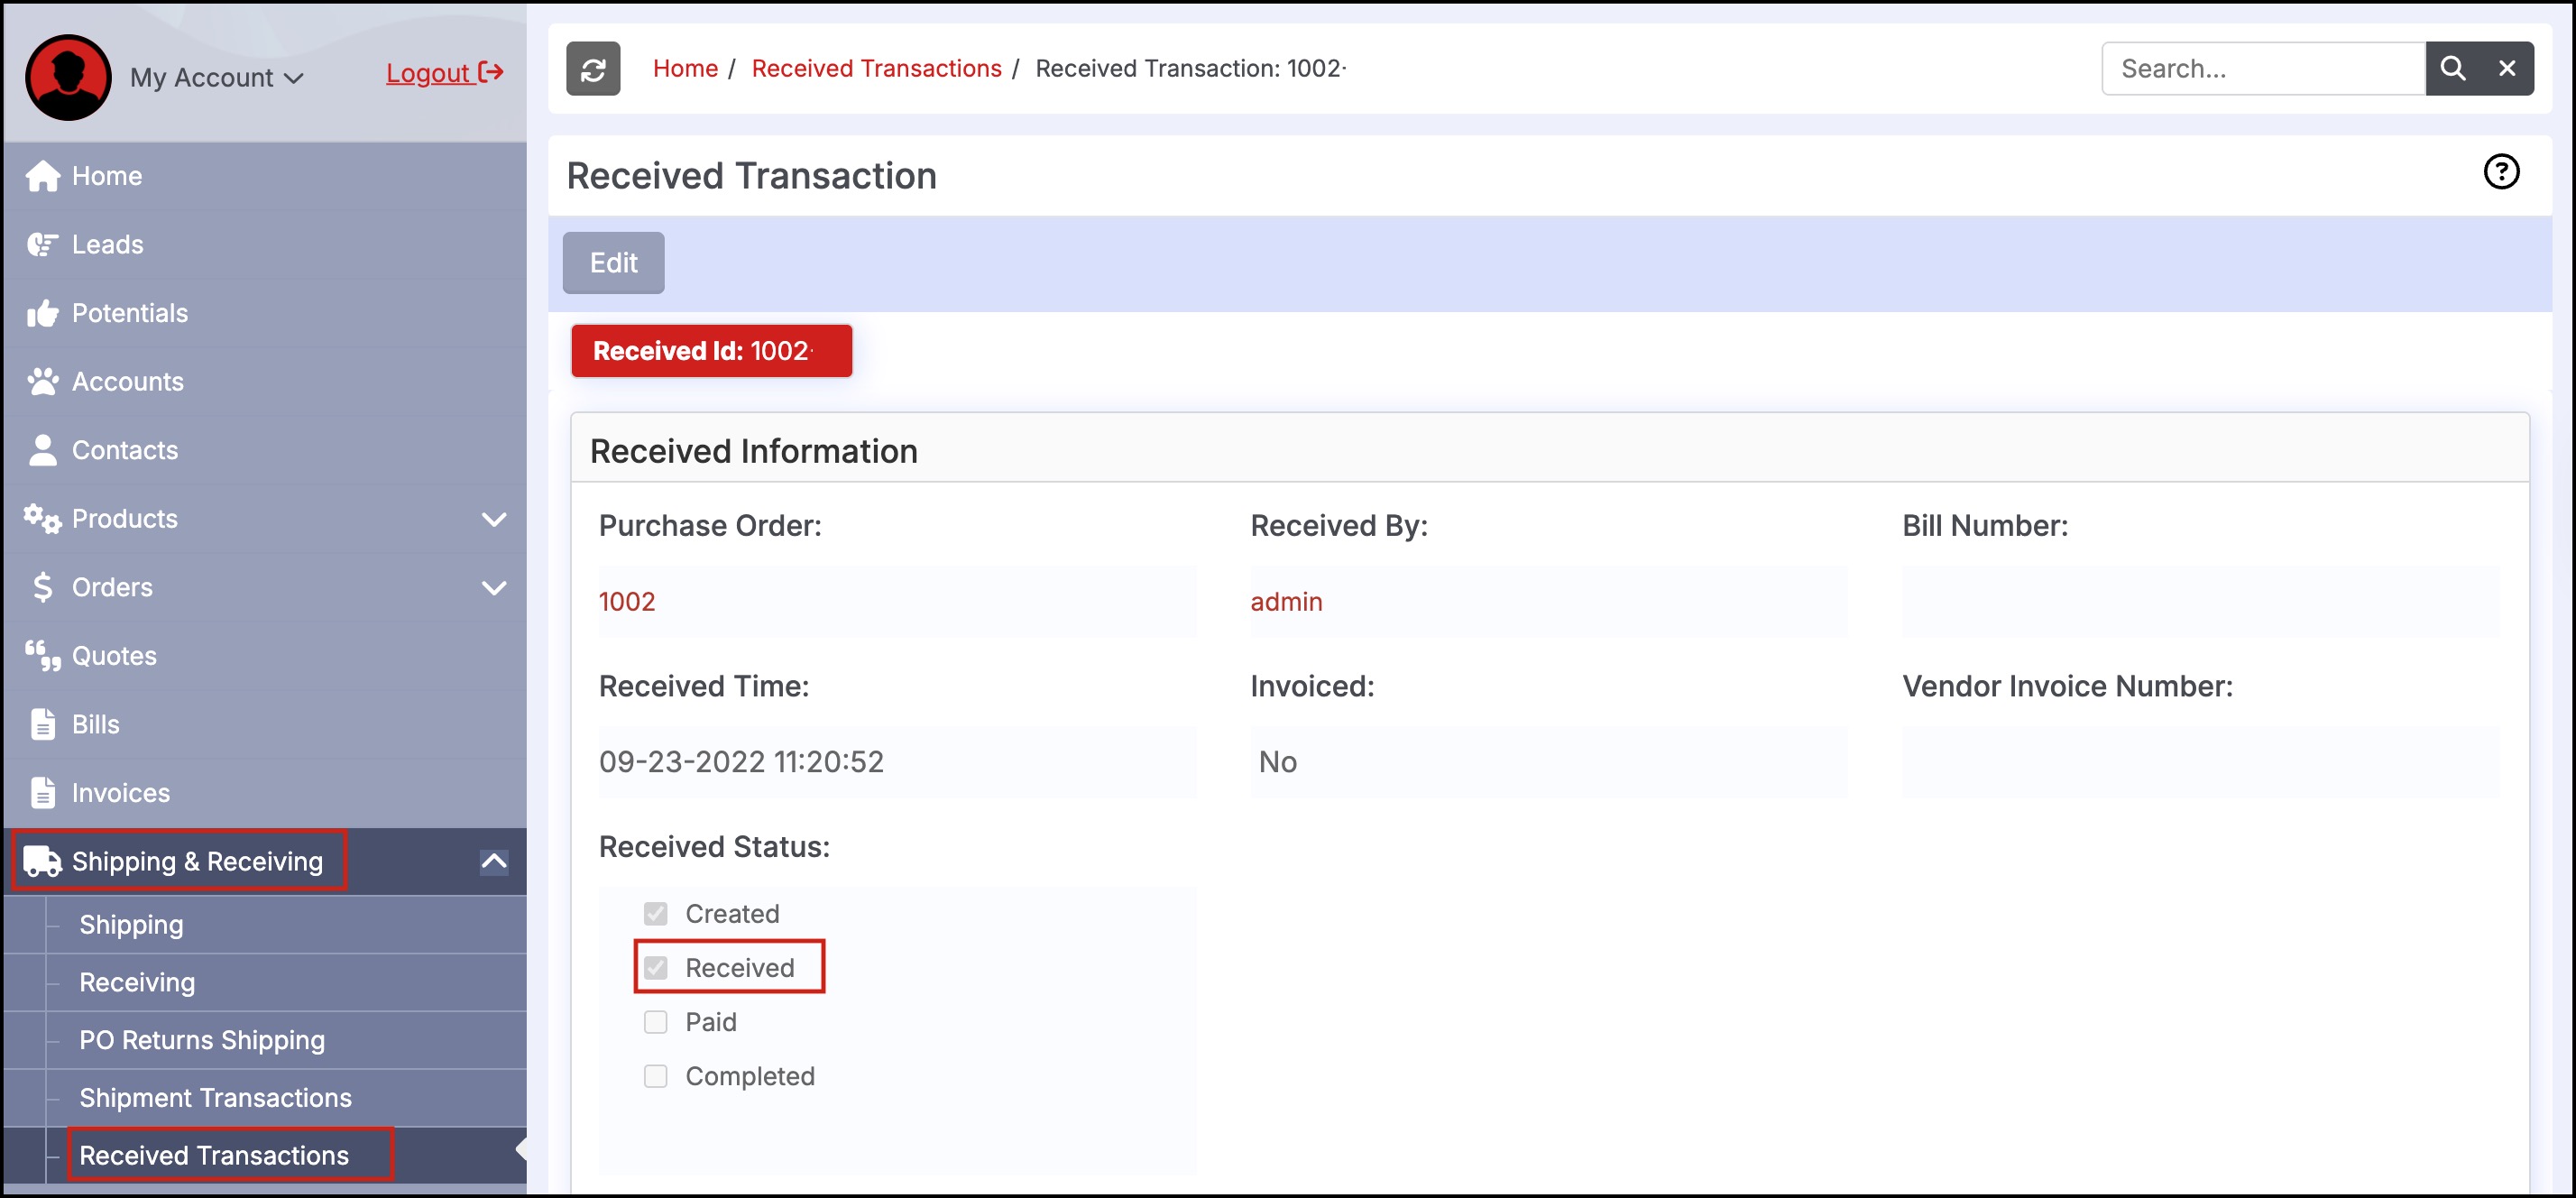
Once all of the items on the Purchase Order have been received, the order will update with a status of "Received" in the back office.
Updated 6 months ago