Cycle Count Workflow
This section will demonstrate how to cycle count inventory.
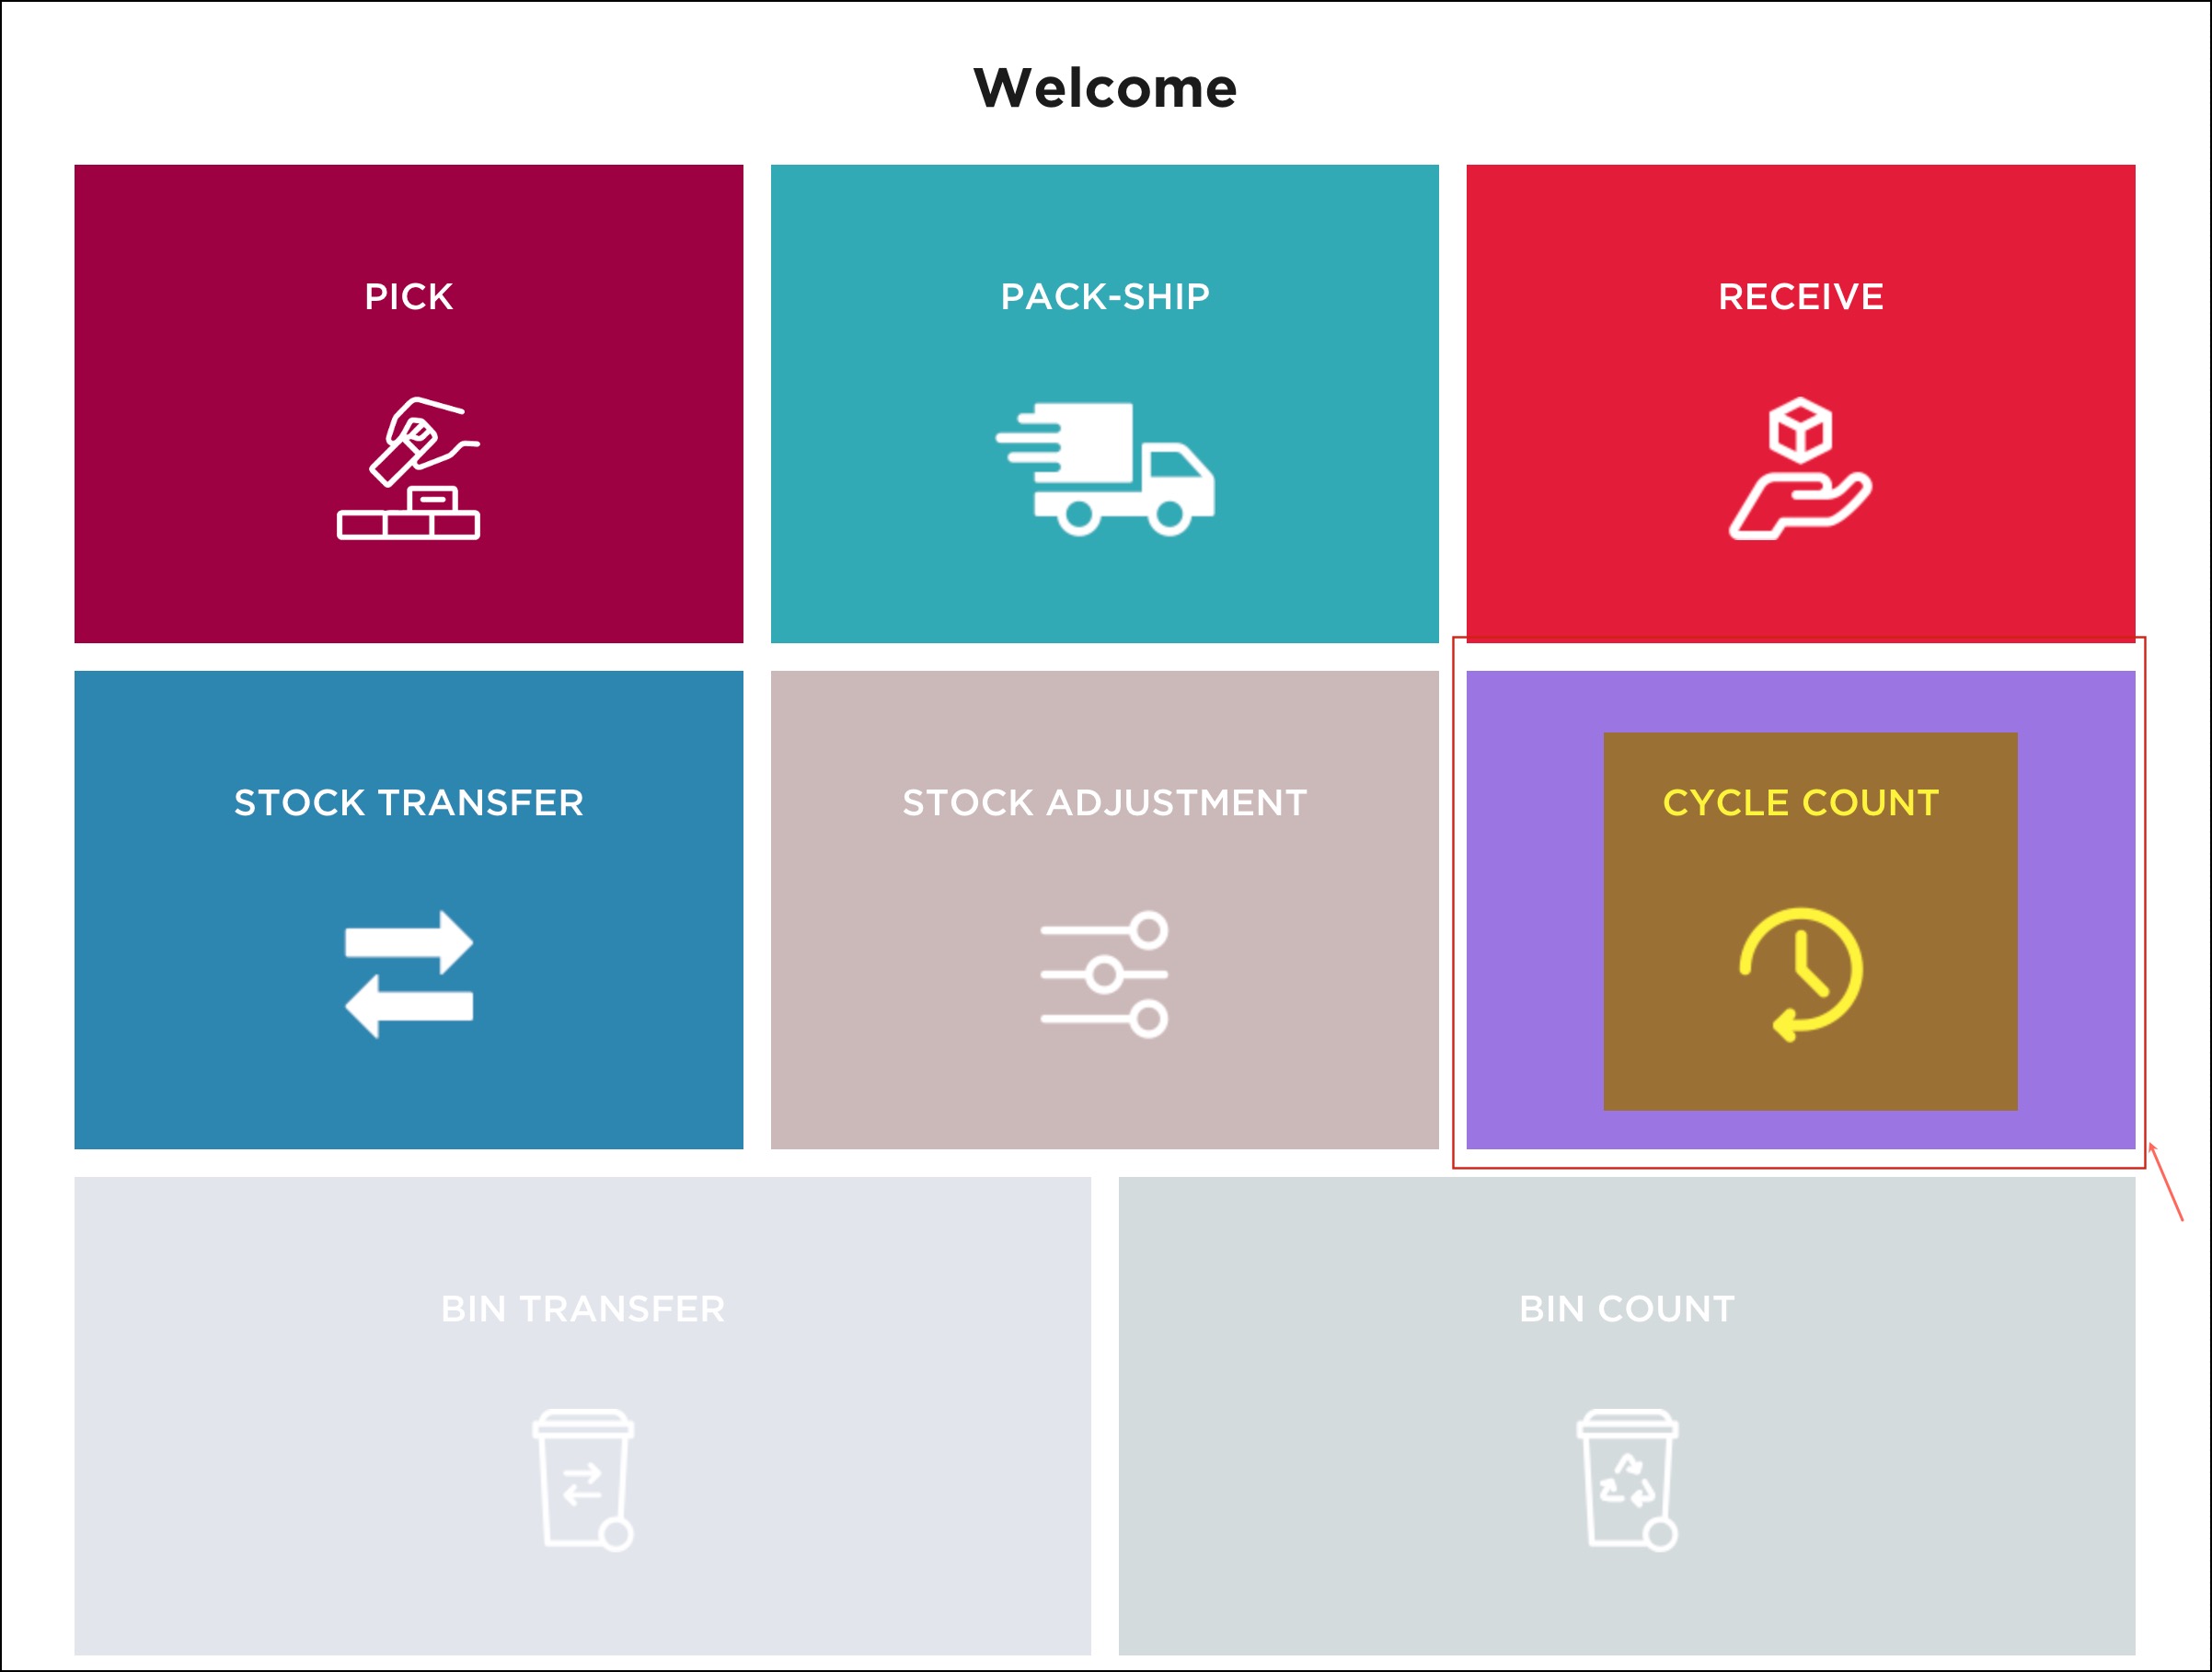
- Click on the Cycle Count button on the home screen to begin.
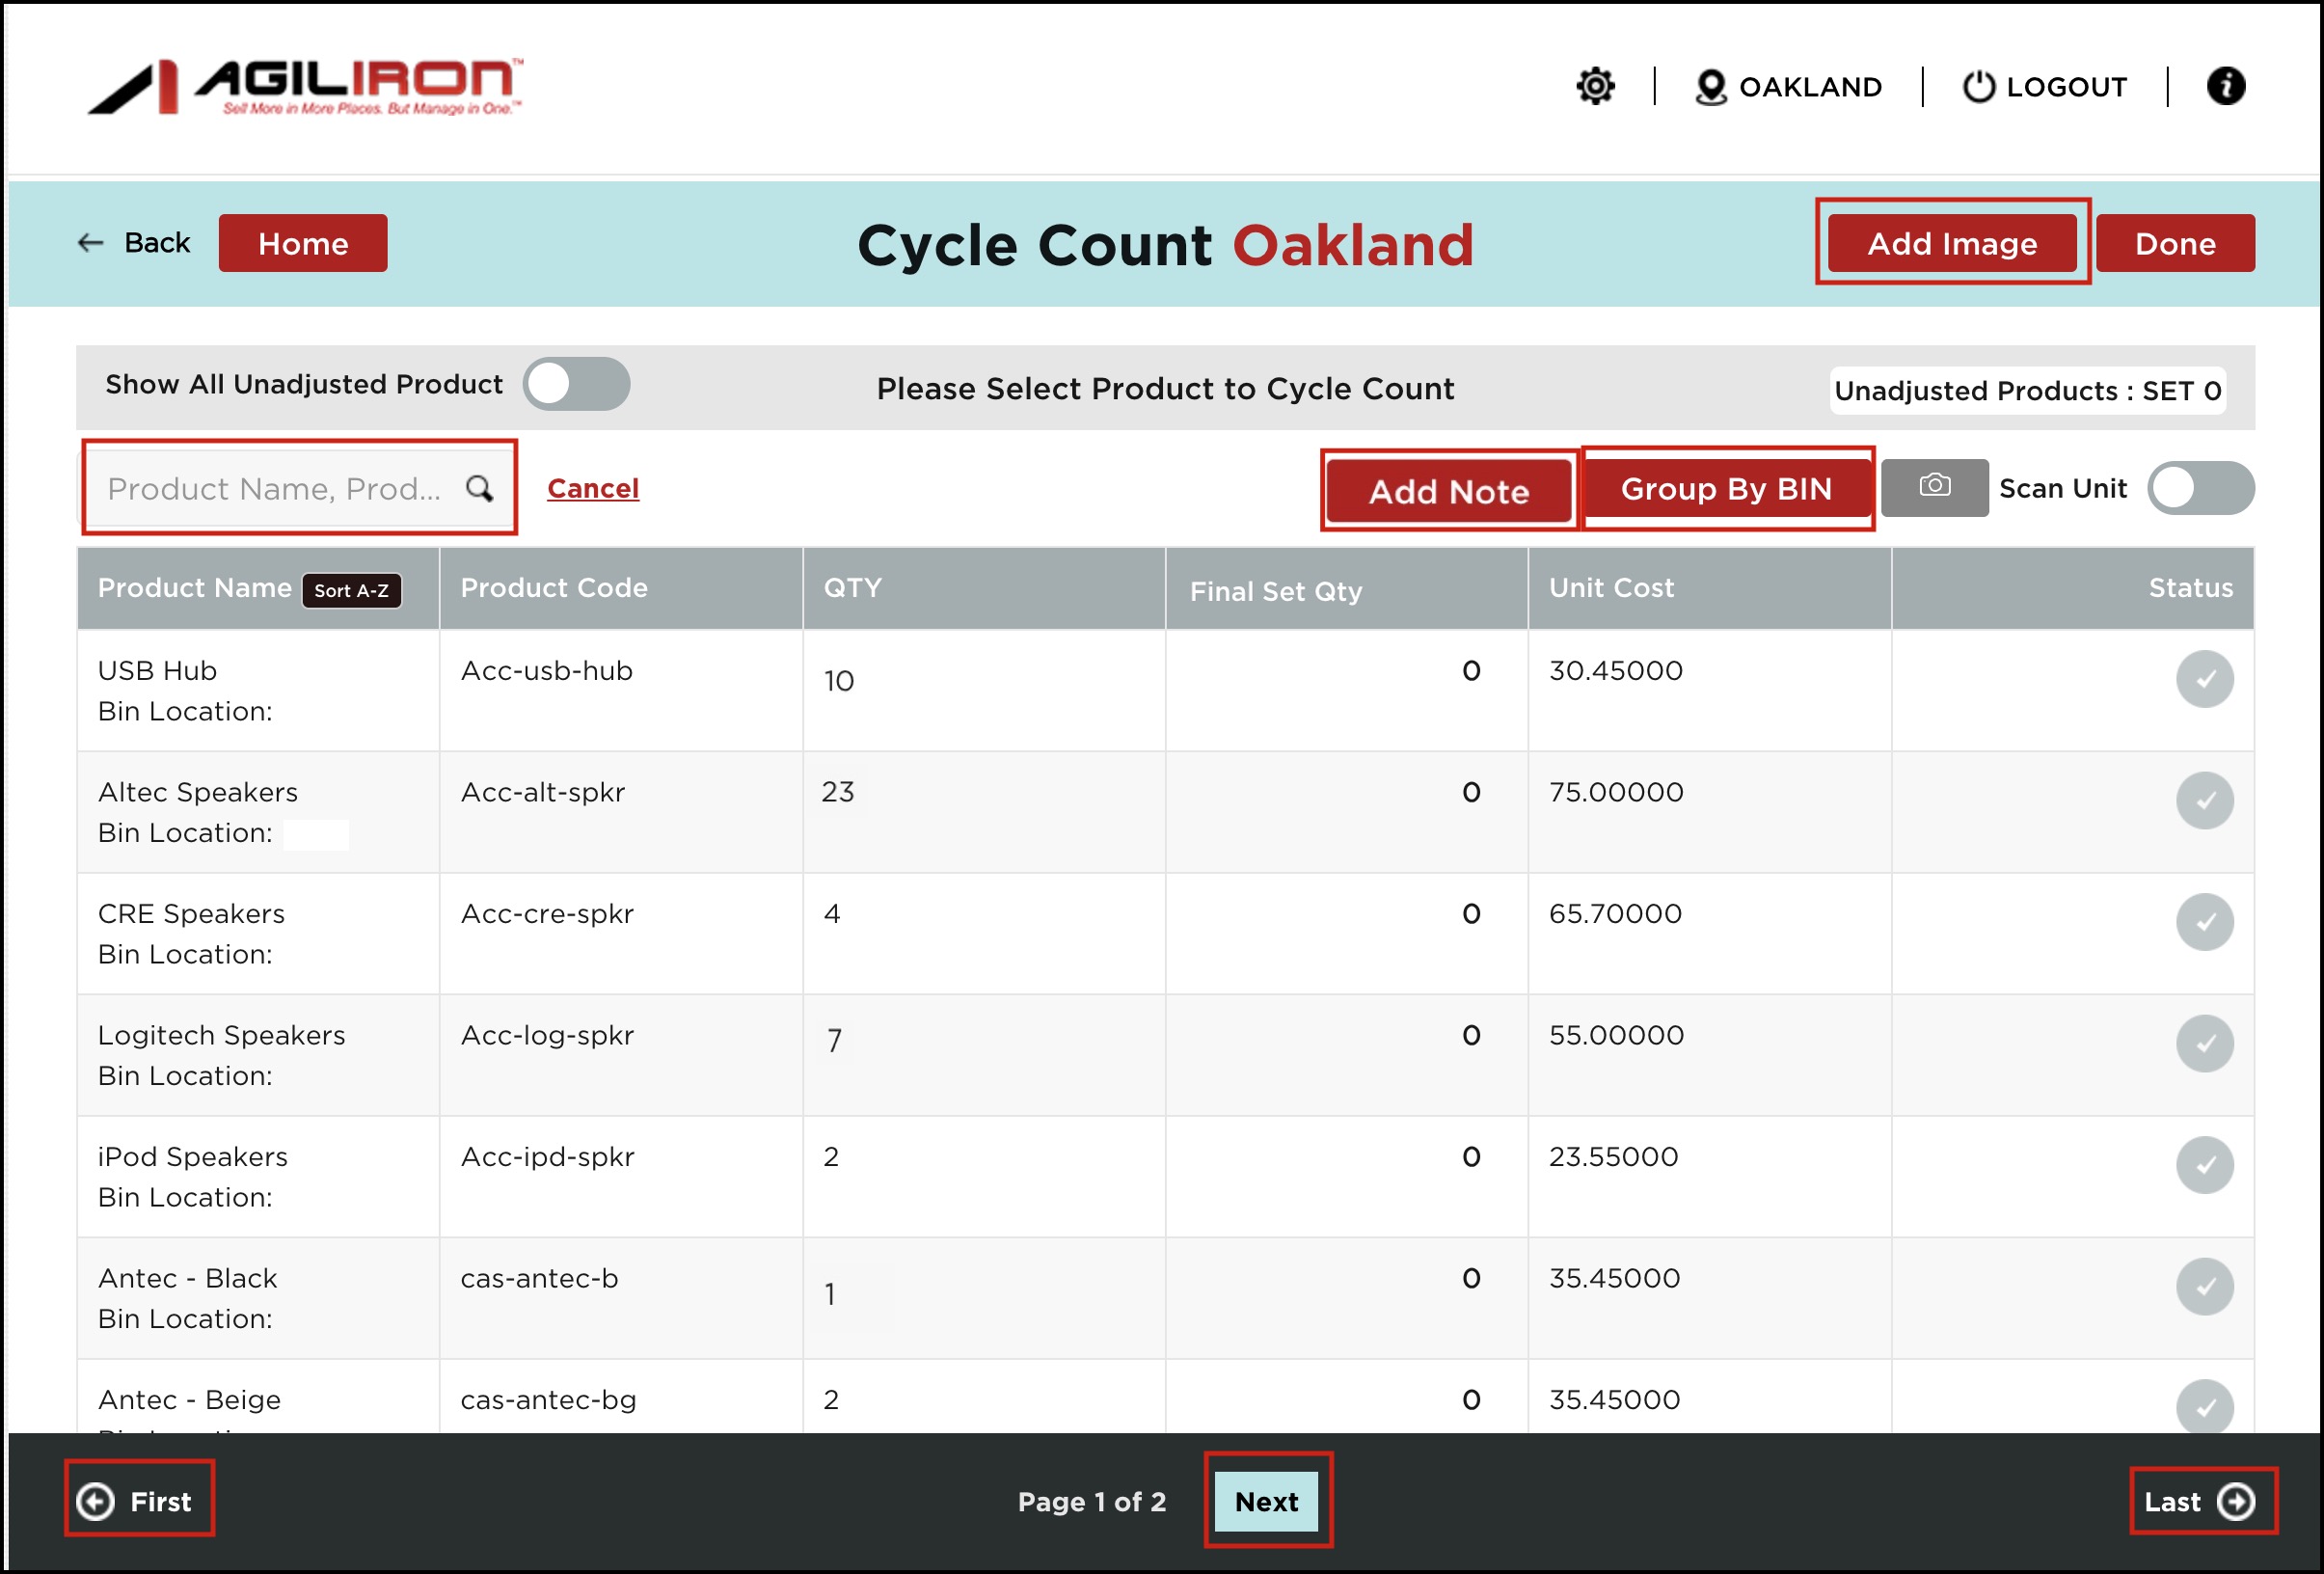
- The user can search for a product using the search box.
- You can also Sort(A-Z or Z-A) the product names alphabetically.
- The navigation buttons at the bottom of the screen allow for searching through multiple pages of the product.
- Selecting Group By Bin allows for the grouping of products by bin location.
- In case you want to add a general note, you can do that by clicking on the Add Note button.
- You can also add image/images to cycle count by clicking on the Add Image button.
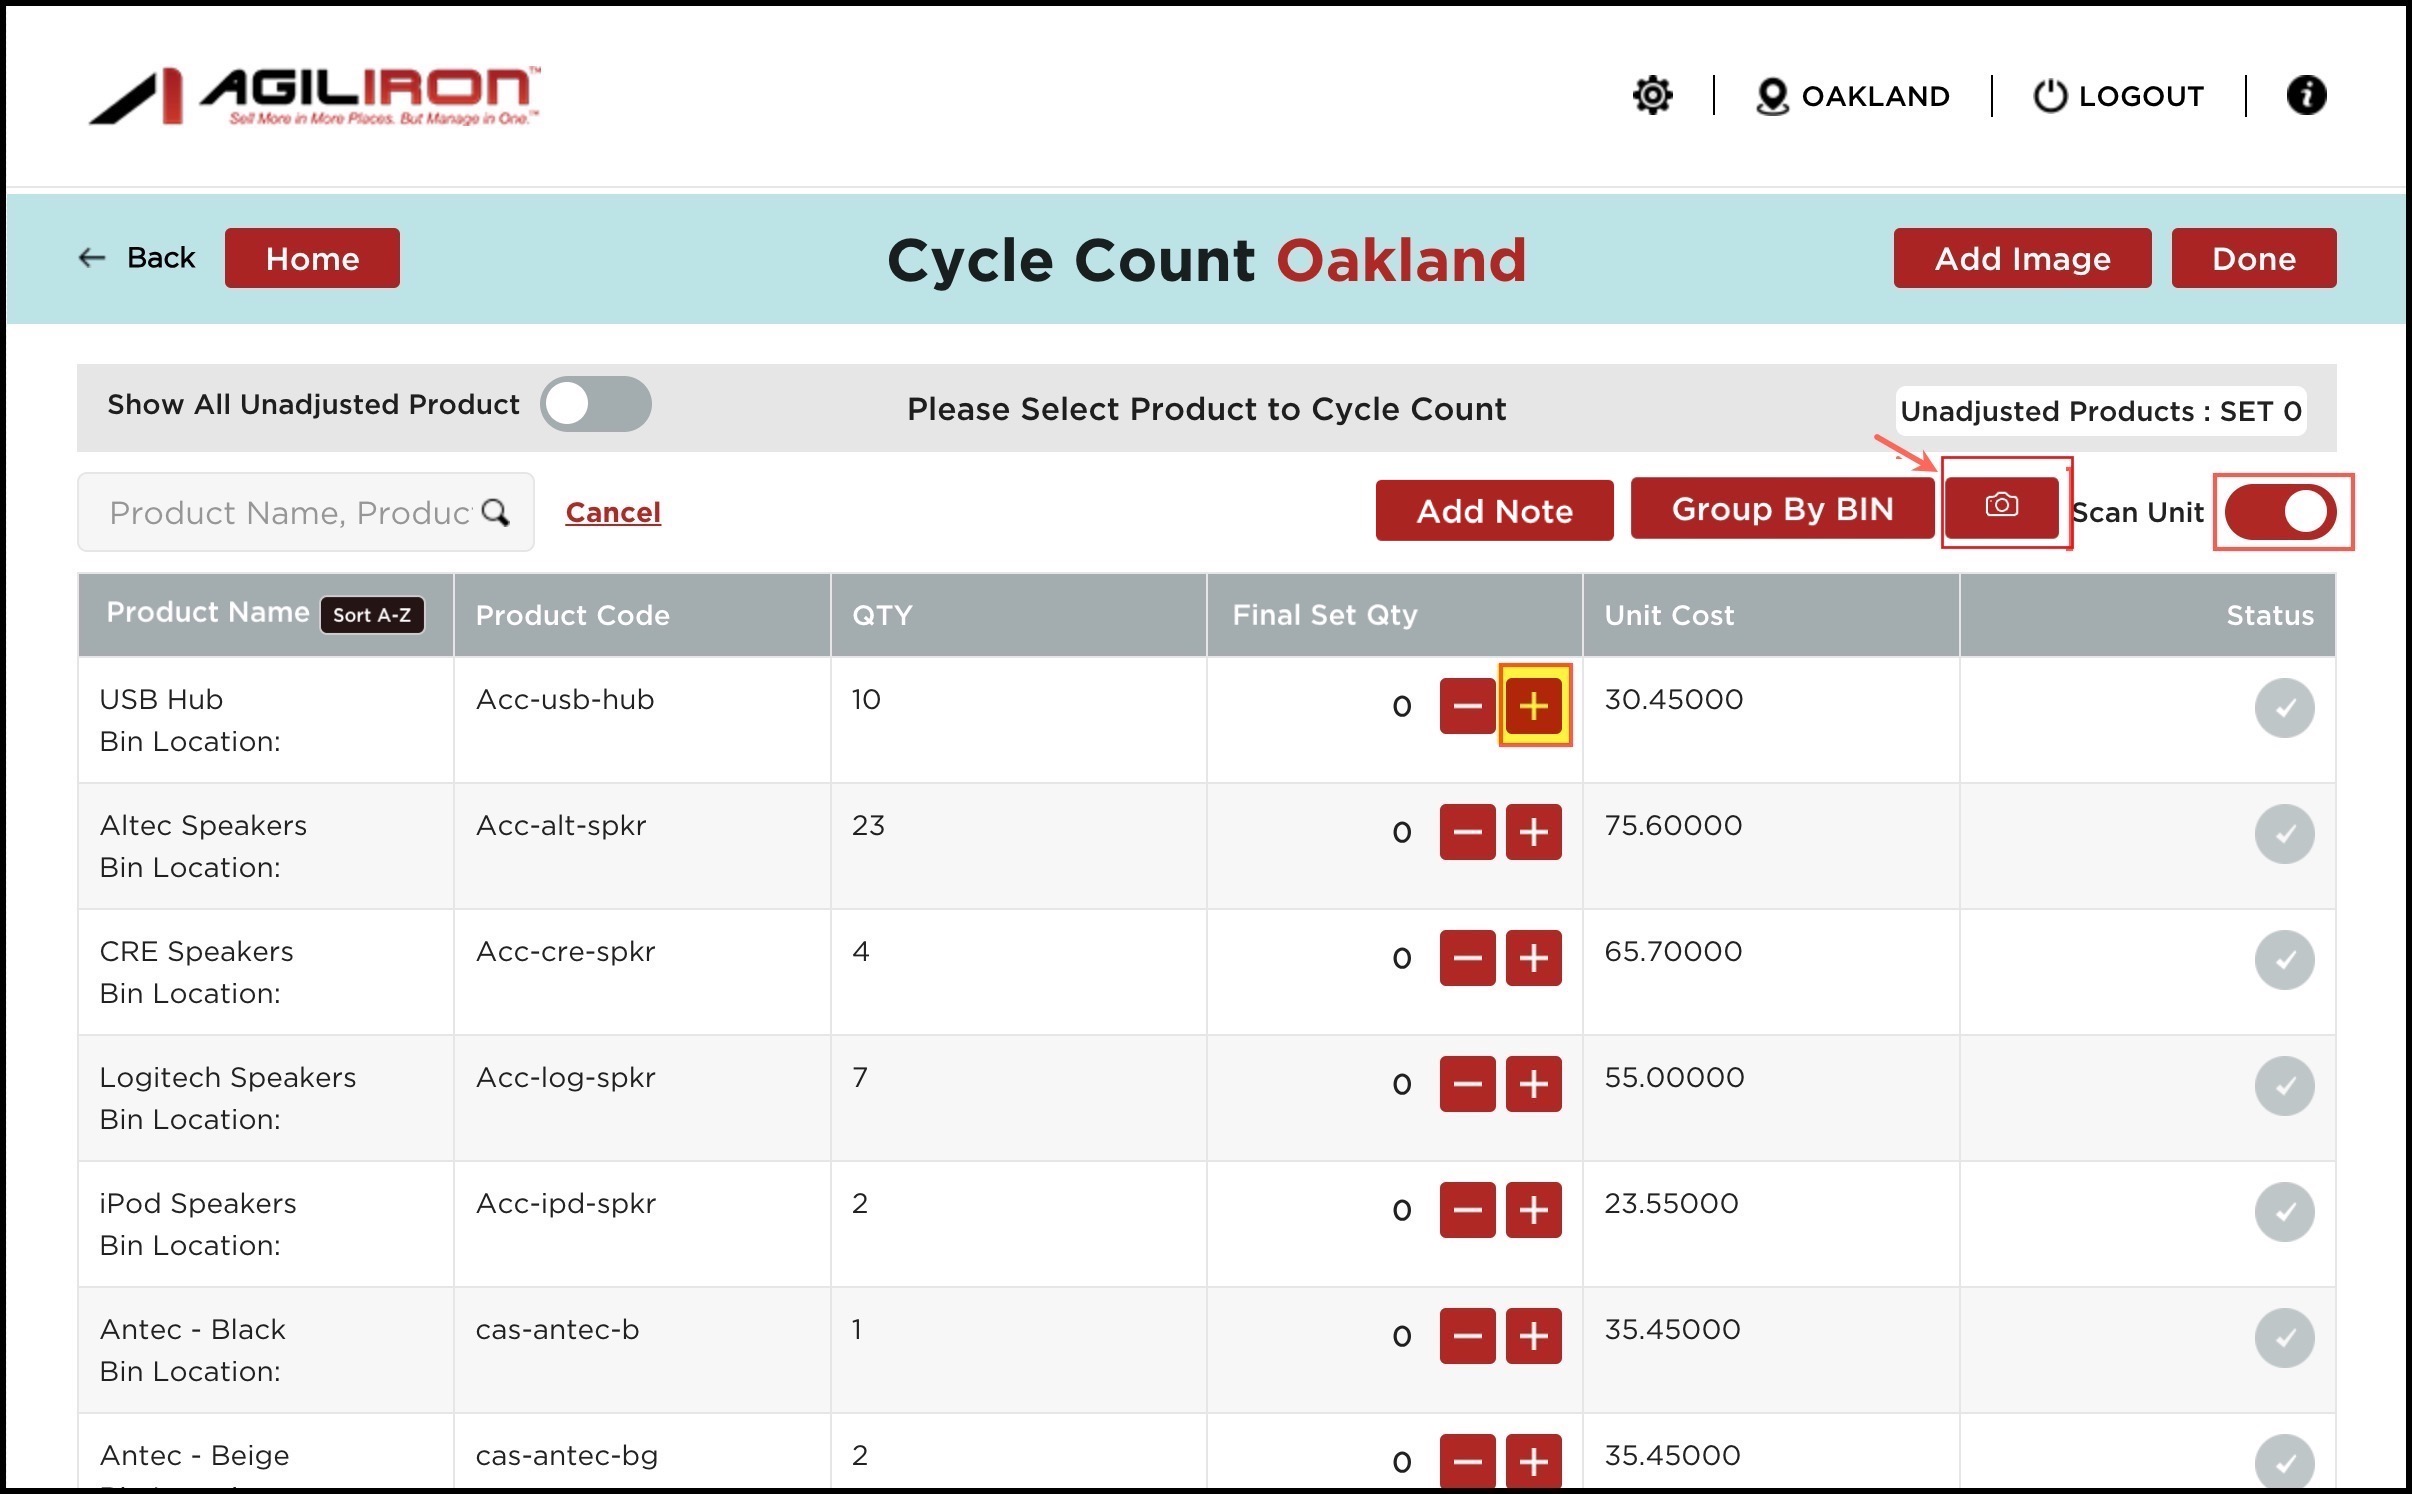
- If the scan unit is enabled for Cycle Count, then in the Adjusted Qty column you can see the "+ sign" and "- sign" (against each product). Either scan units with a barcode scanner or click on the camera icon to scan the product barcode.
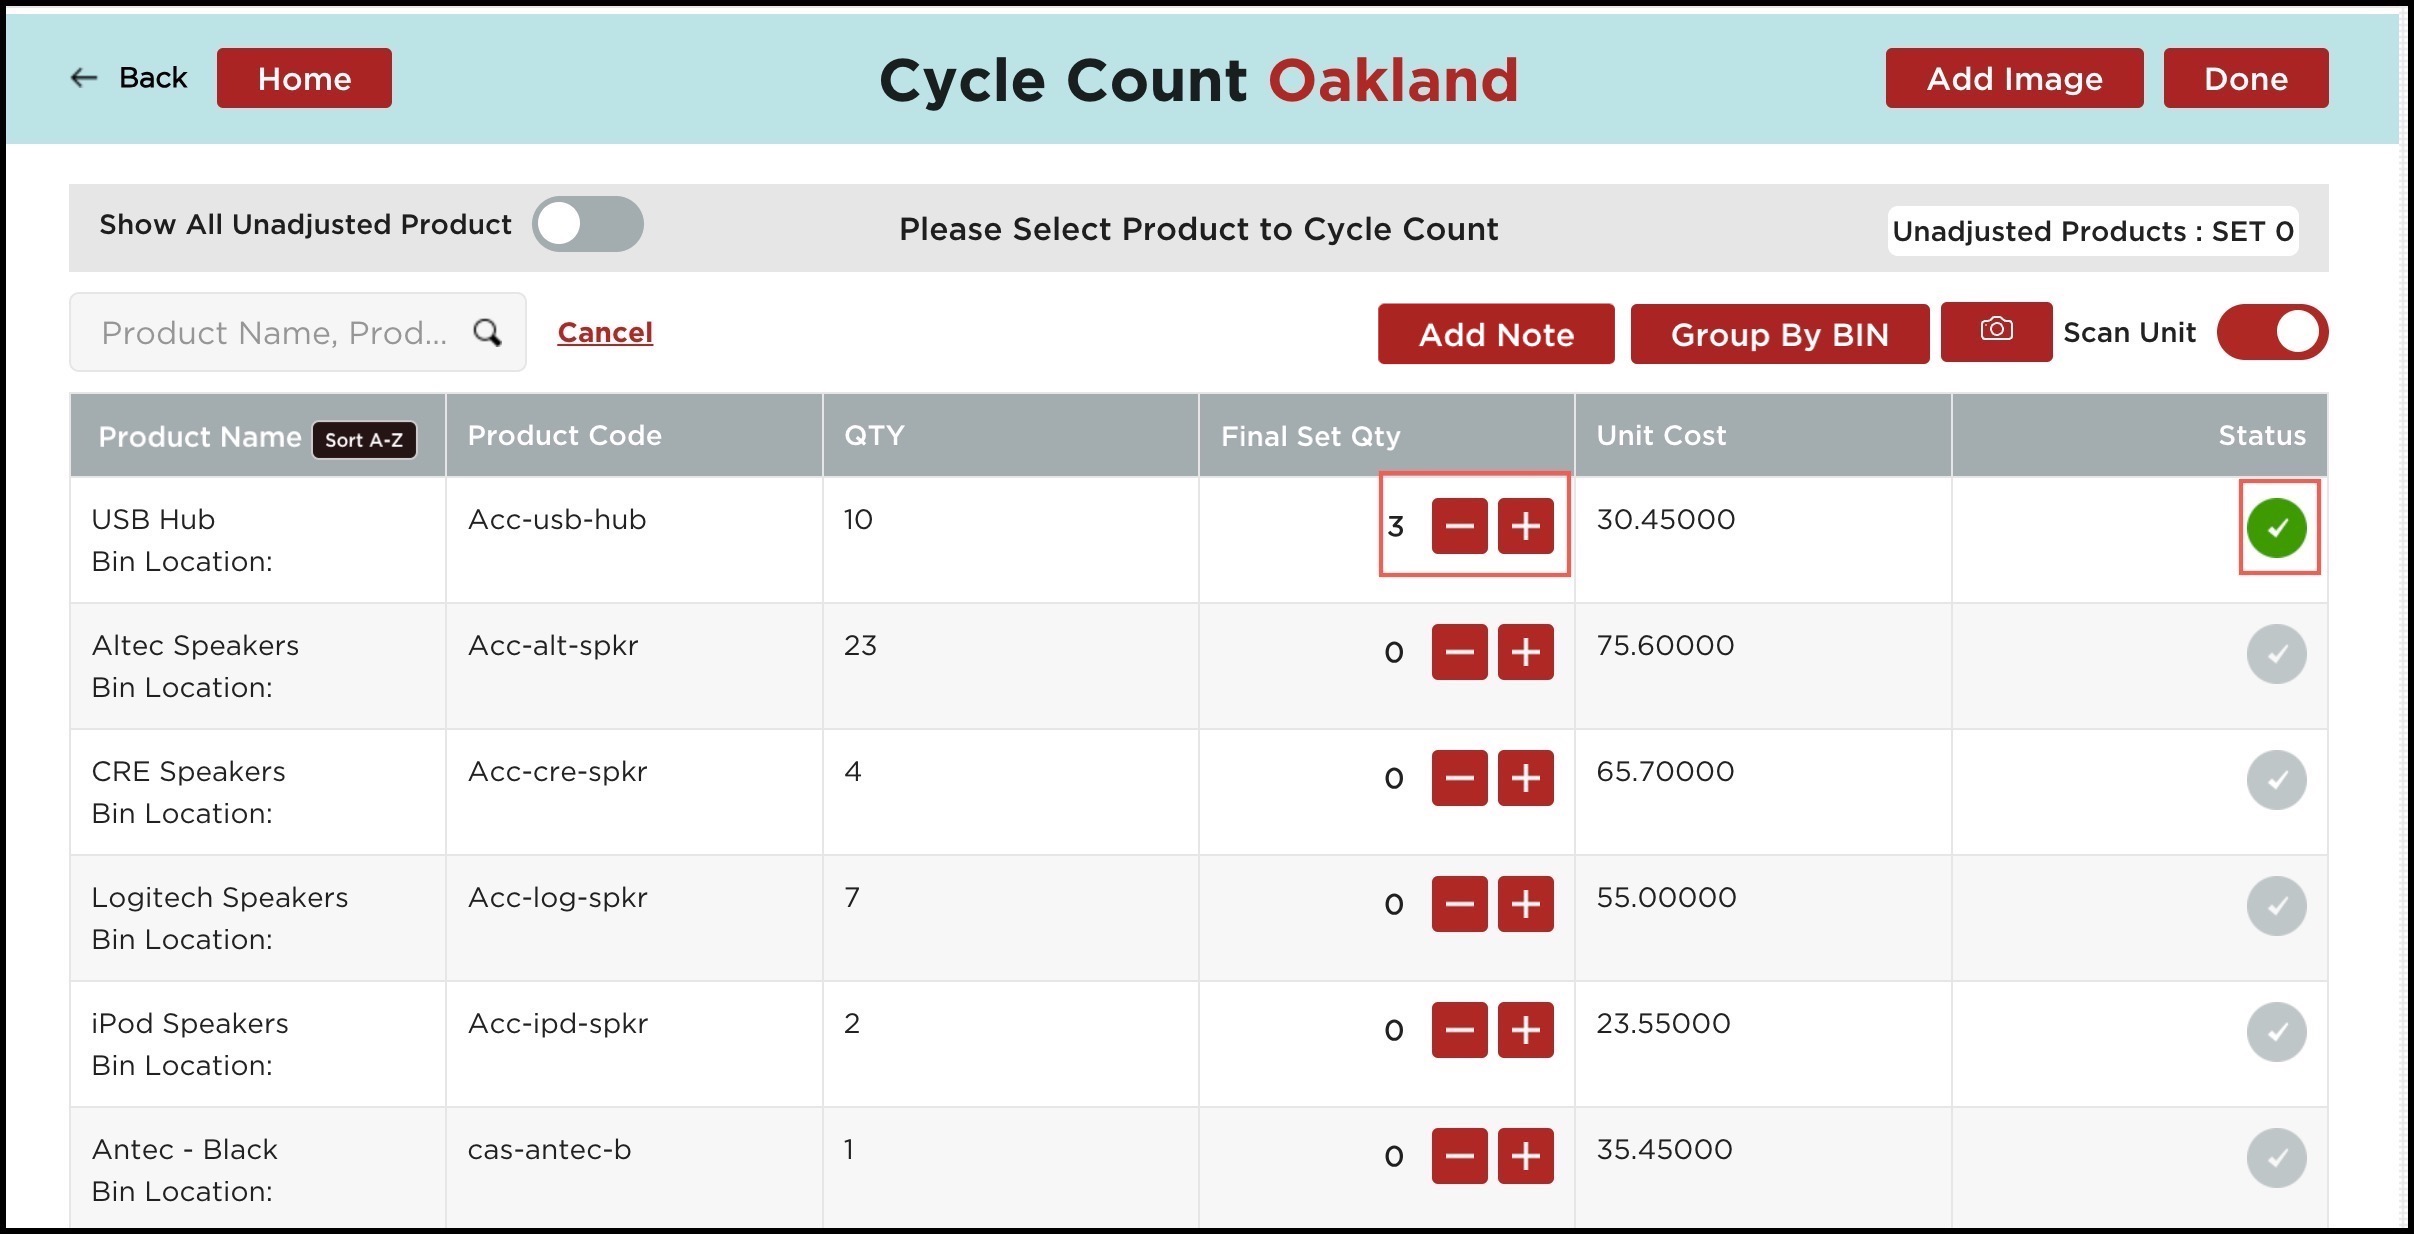
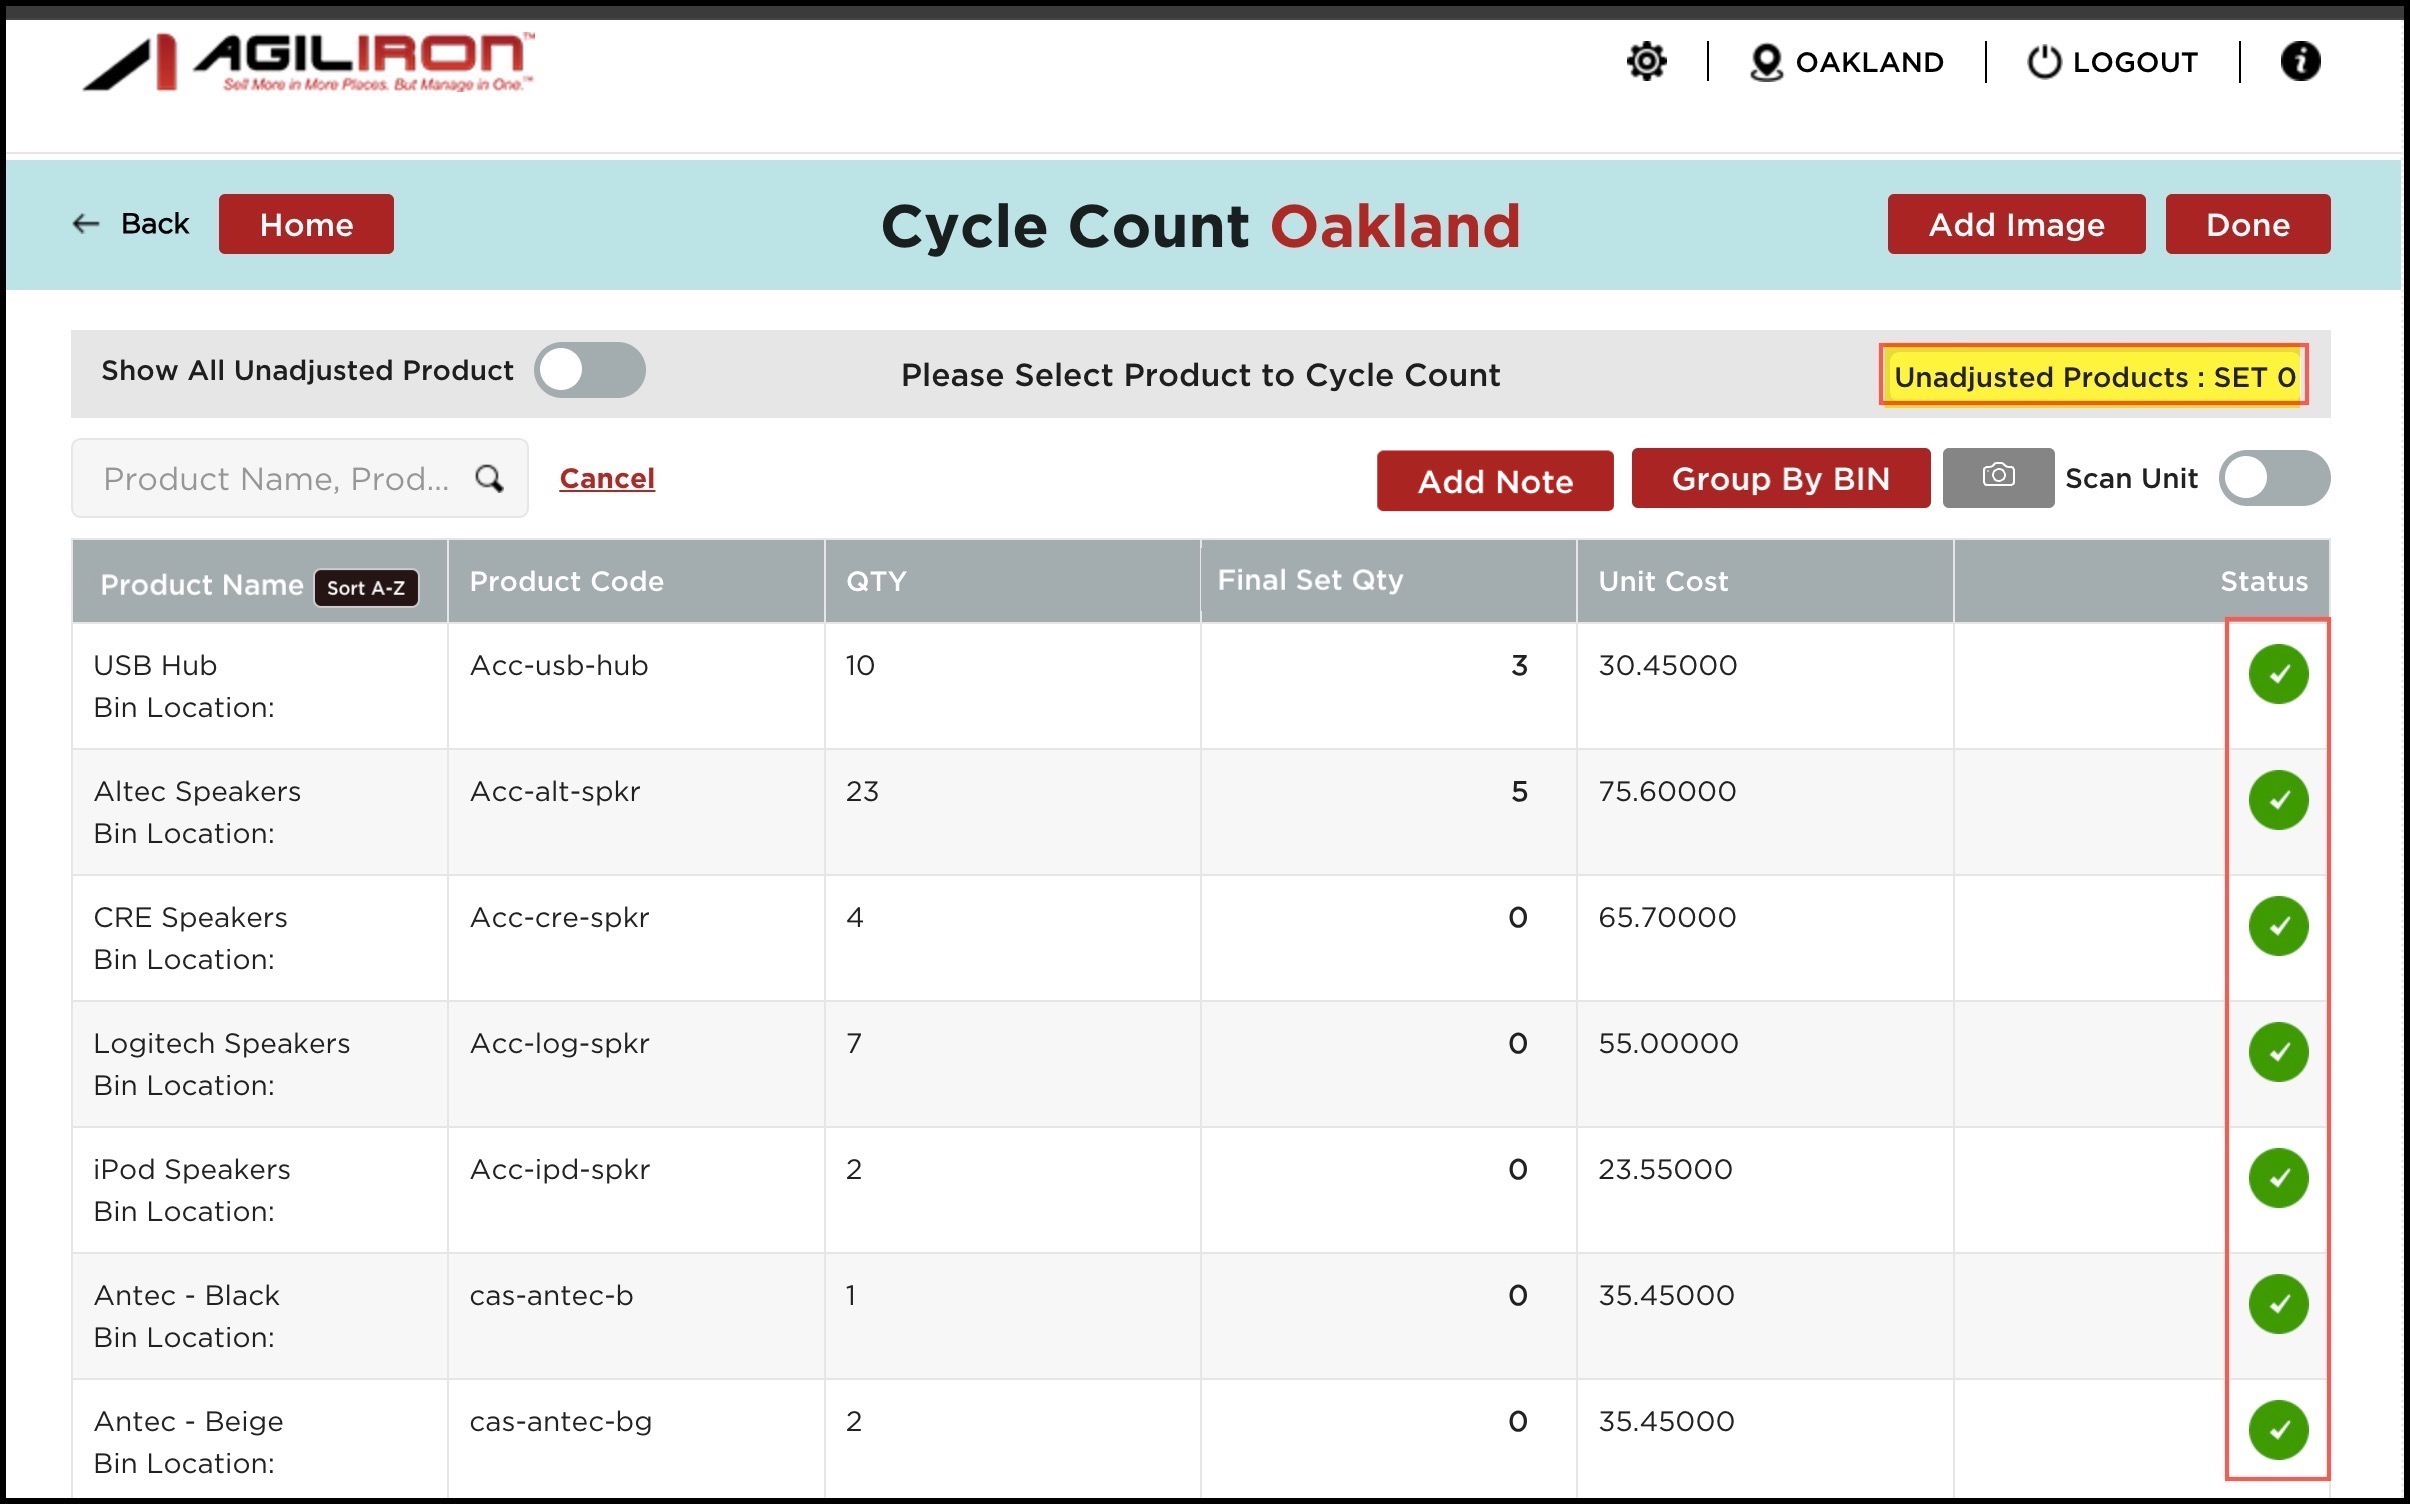
Once the Final Set Qty is added, you will notice the status of the product for which you have set the quantity turns green.
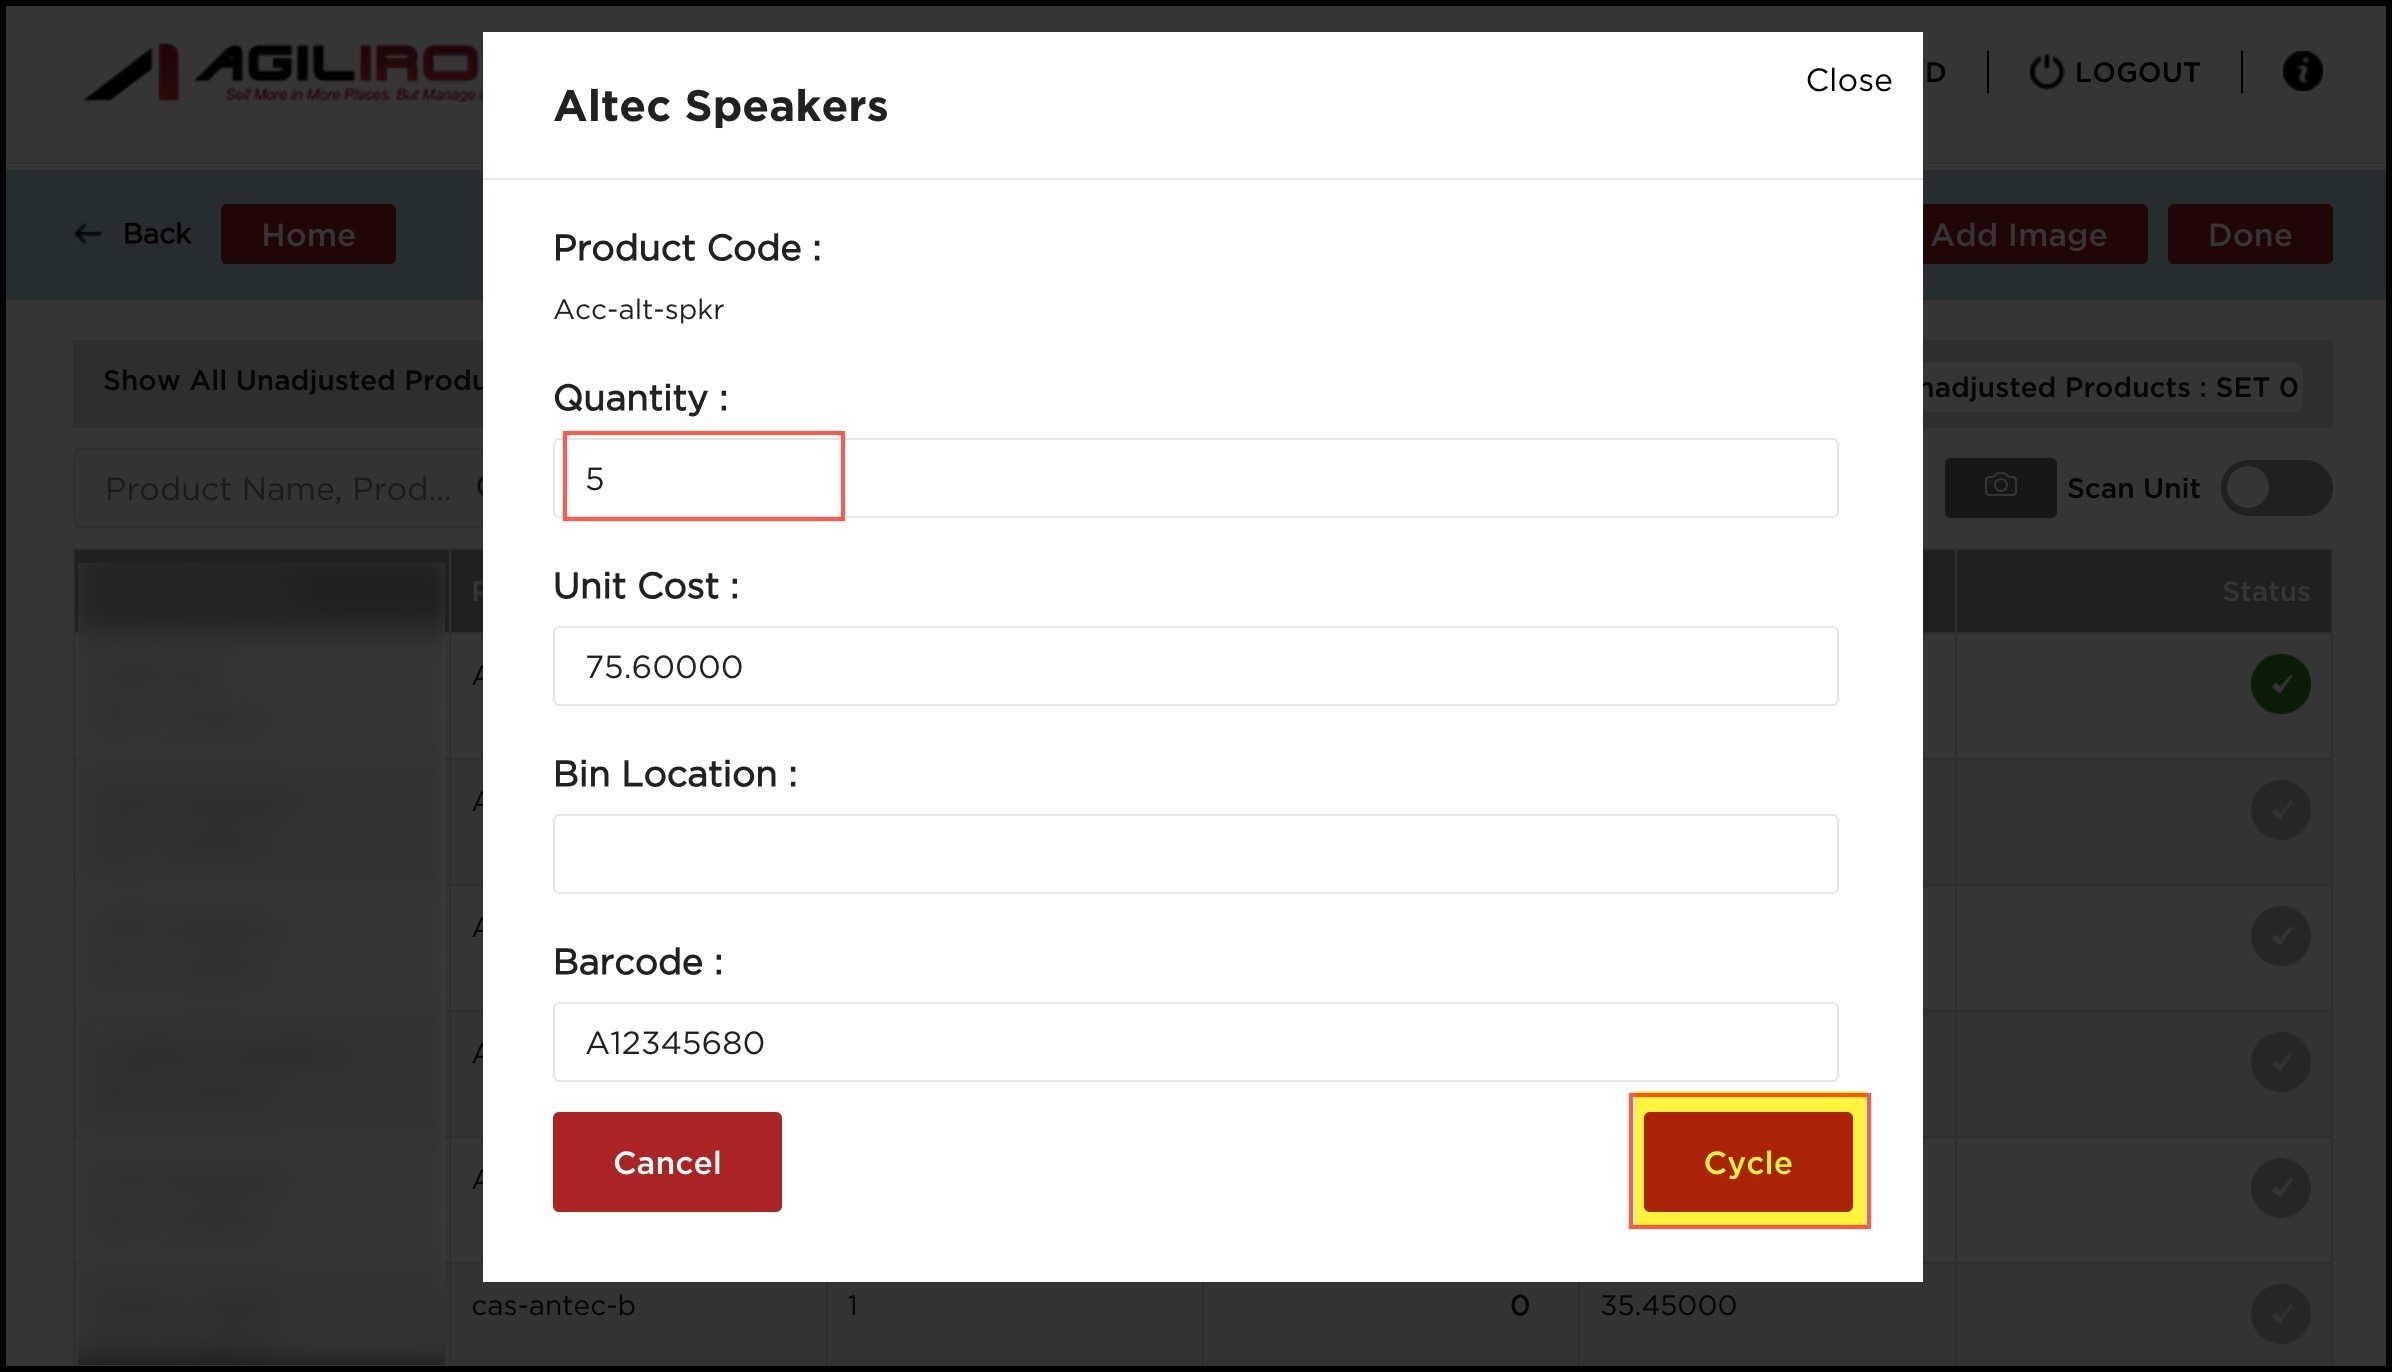
- If the scan unit is disabled, select the product.

- A pop-up screen will appear where you need to enter the quantity.
- The Unit Cost for products (excluding assembly products) can be added or adjusted on this screen.
- The Bin Location can also be added to the product on this screen. If there is an existing bin location, it will be displayed.
- You can optionally add/edit the Barcode associated with the Product. If there is an existing barcode that will be displayed in the Barcode field.
- You can also optionally add a note related to this particular product.
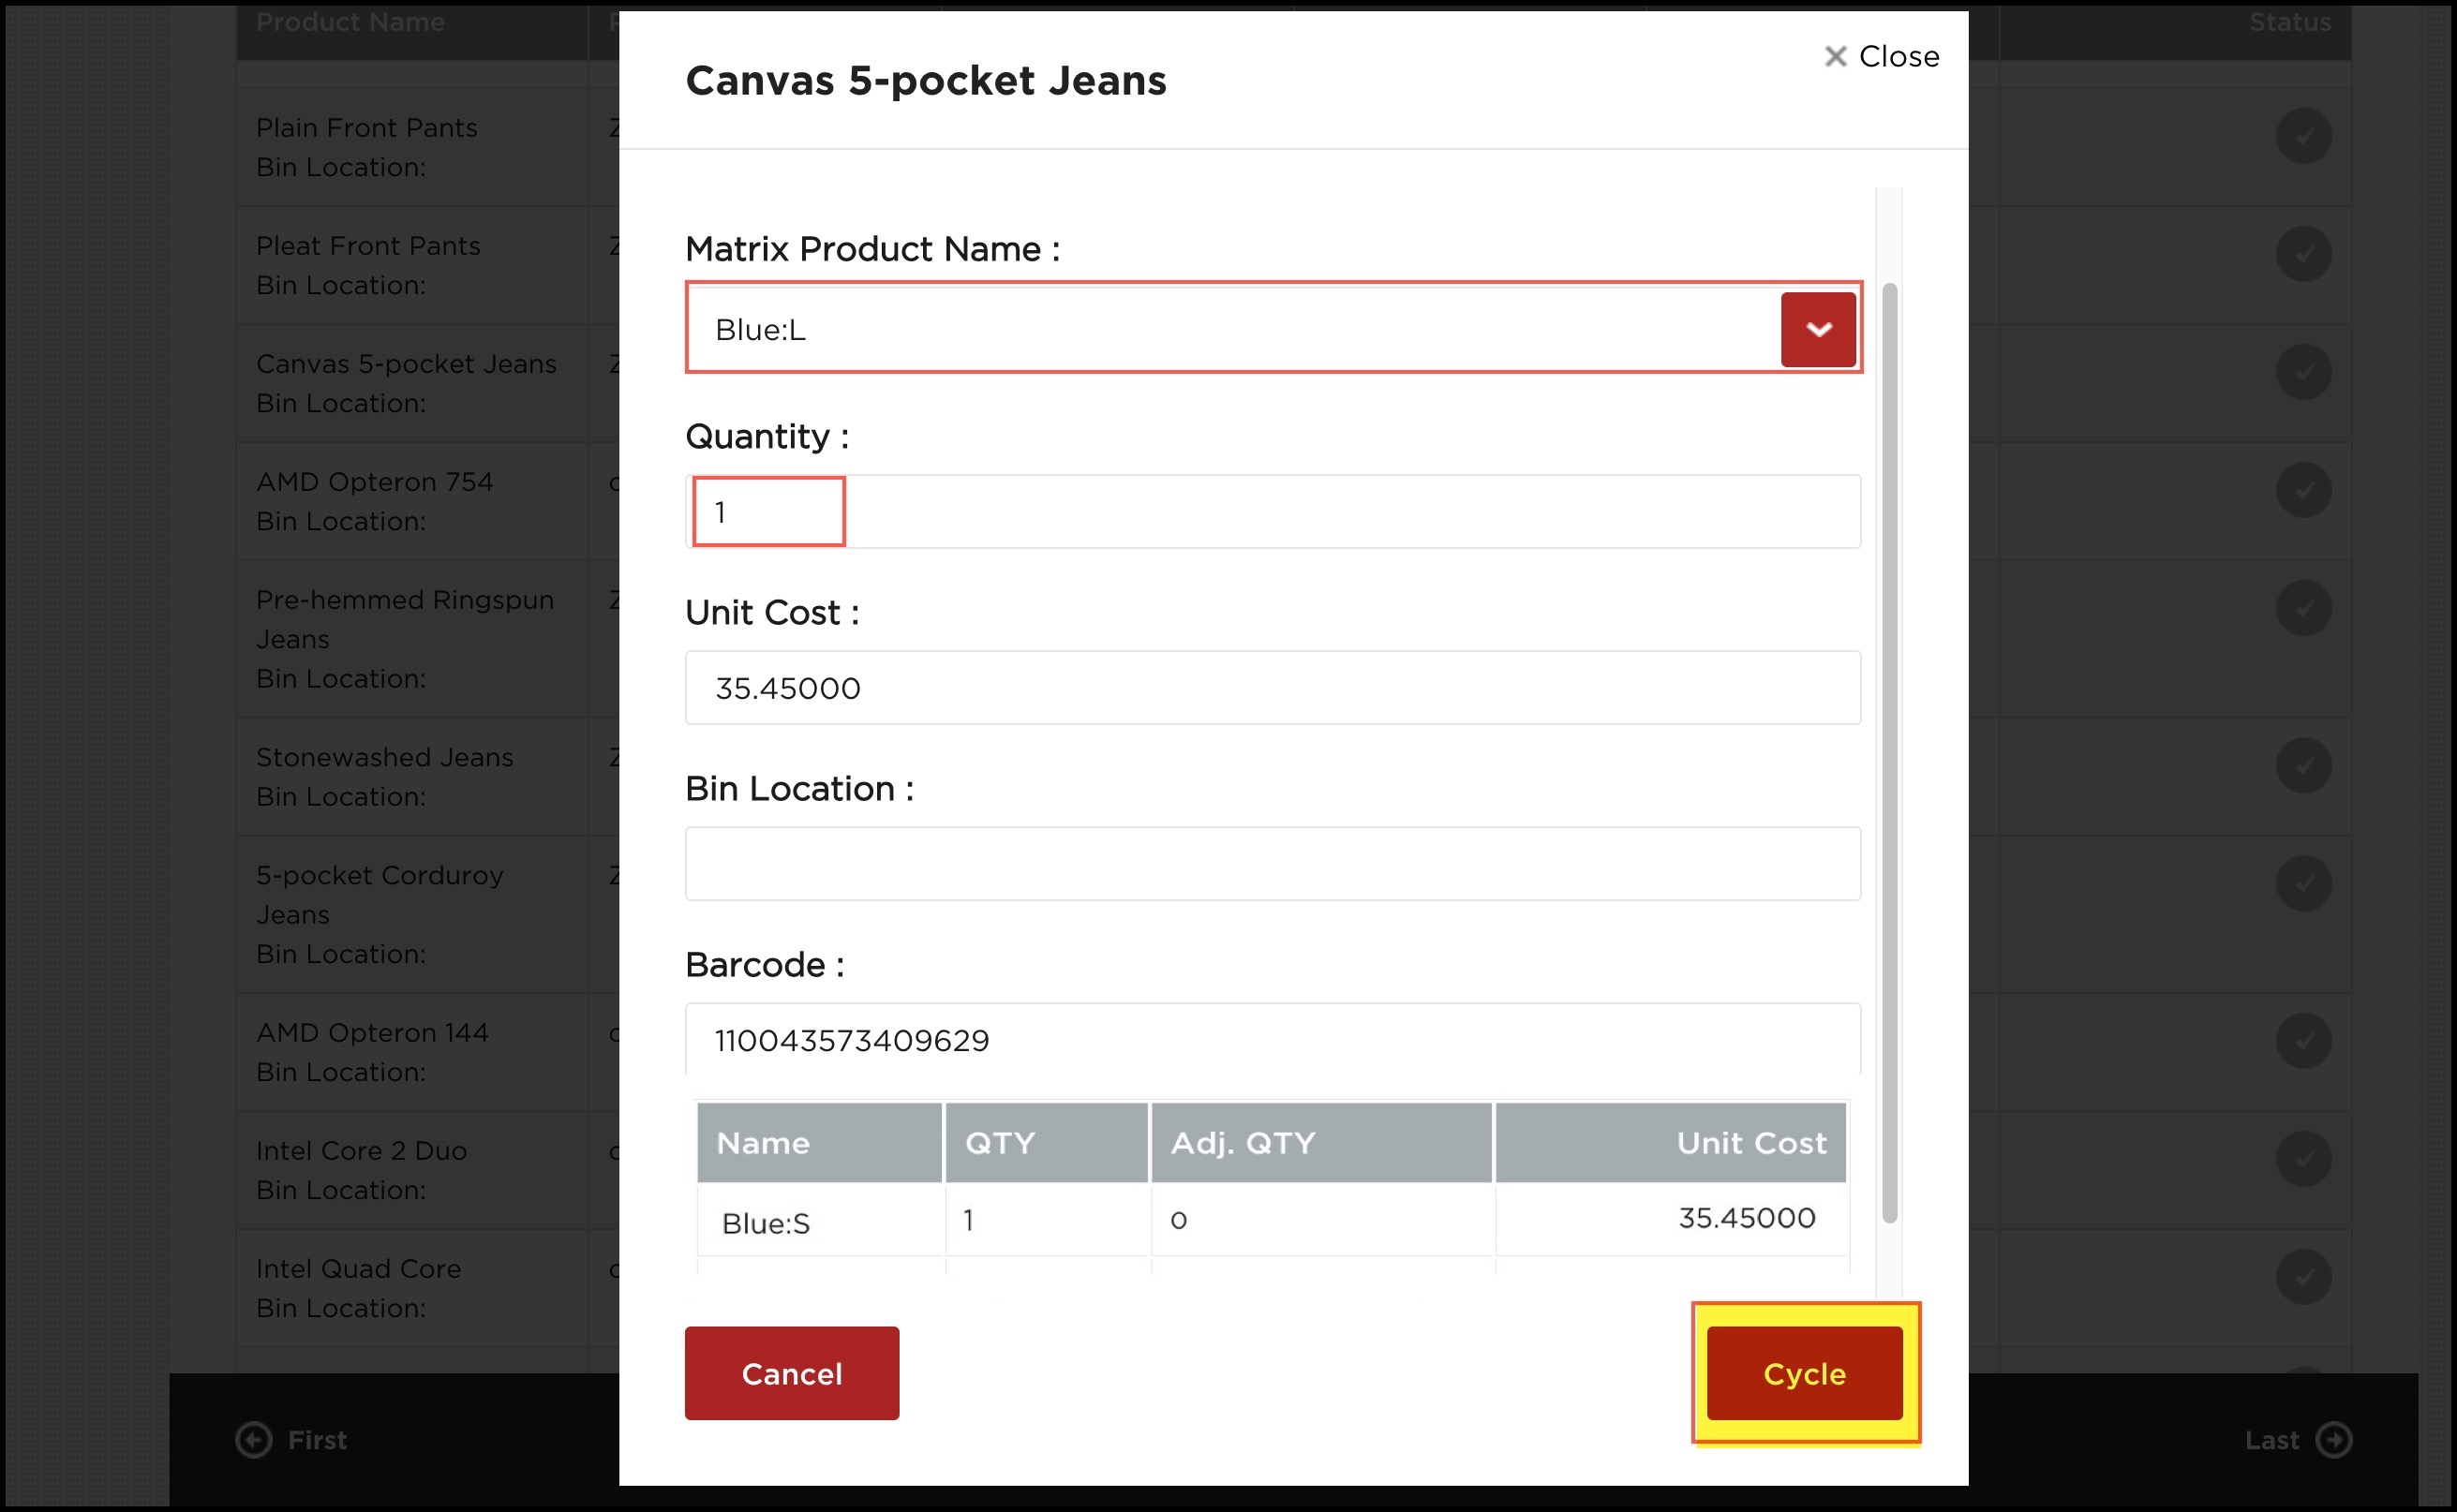
- If it is a matrix product, also select the Matrix variations like - color, size, etc.
- Next, click on the Cycle button.
- For Matrix product, select the Matrix product name.
- Enter quantity and click Cycle.
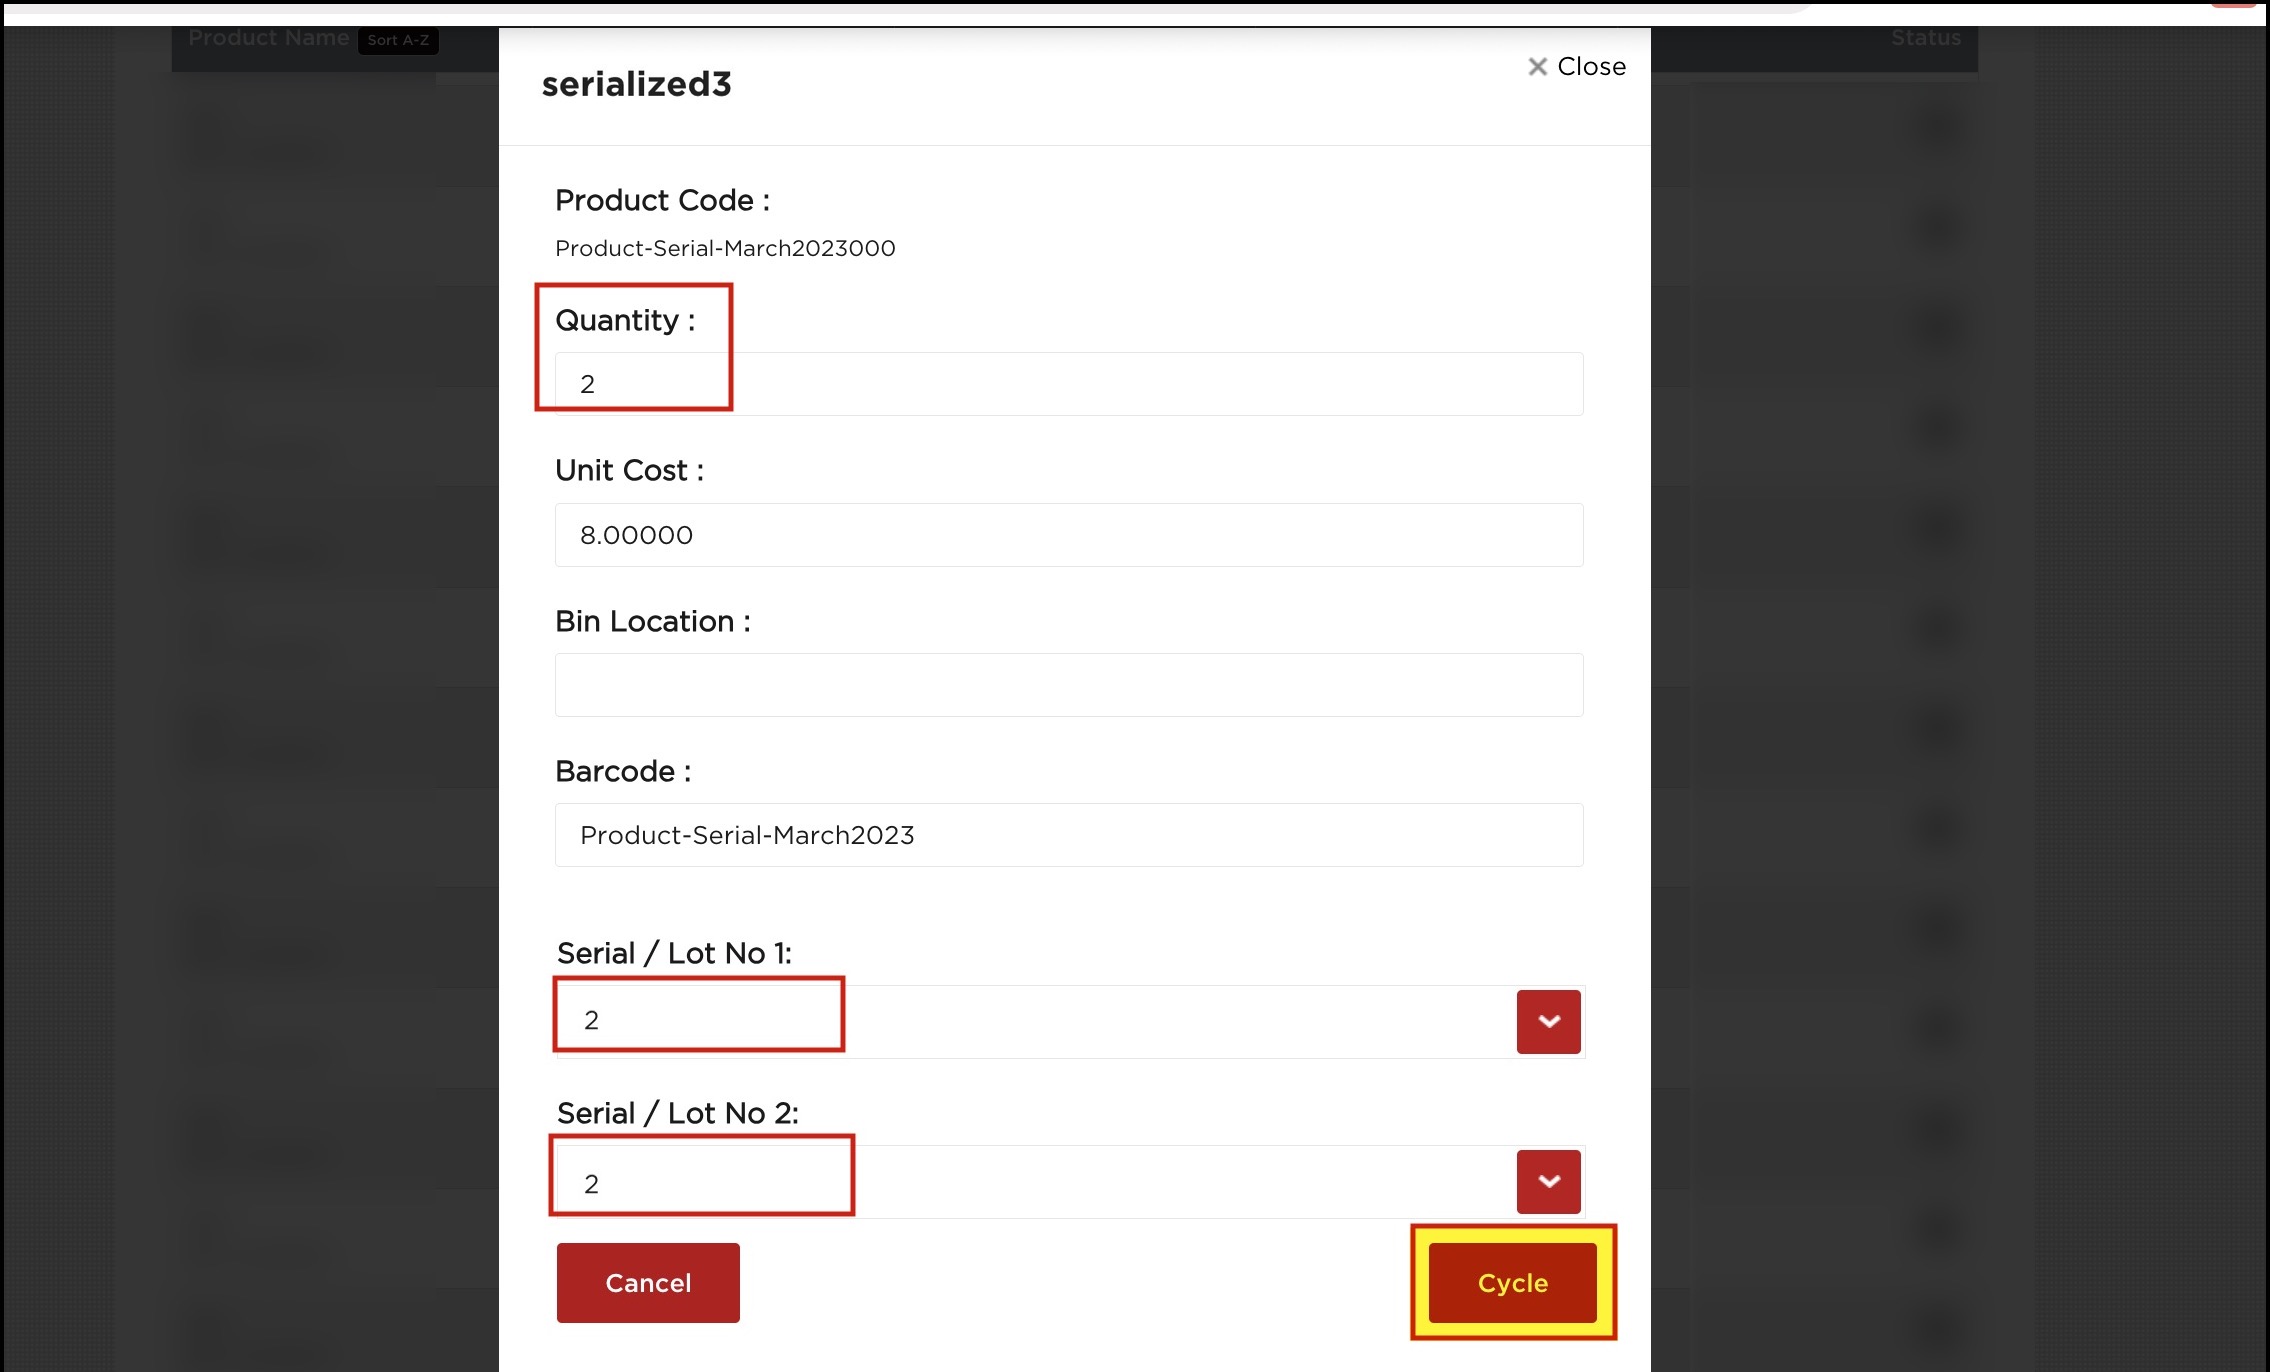
- To cycle count serialized products, select the item in the list.
- Enter the serialized product quantity and unit cost (if needed). If you want to enter the quantity of all serialized products, then enter the number in the Quantity field, serialized/lot no. The fields will get disabled then.
- Enter a Bin Location if desired (can update this in "Enter Units" mode only)
- Click "Cycle" to save changes.
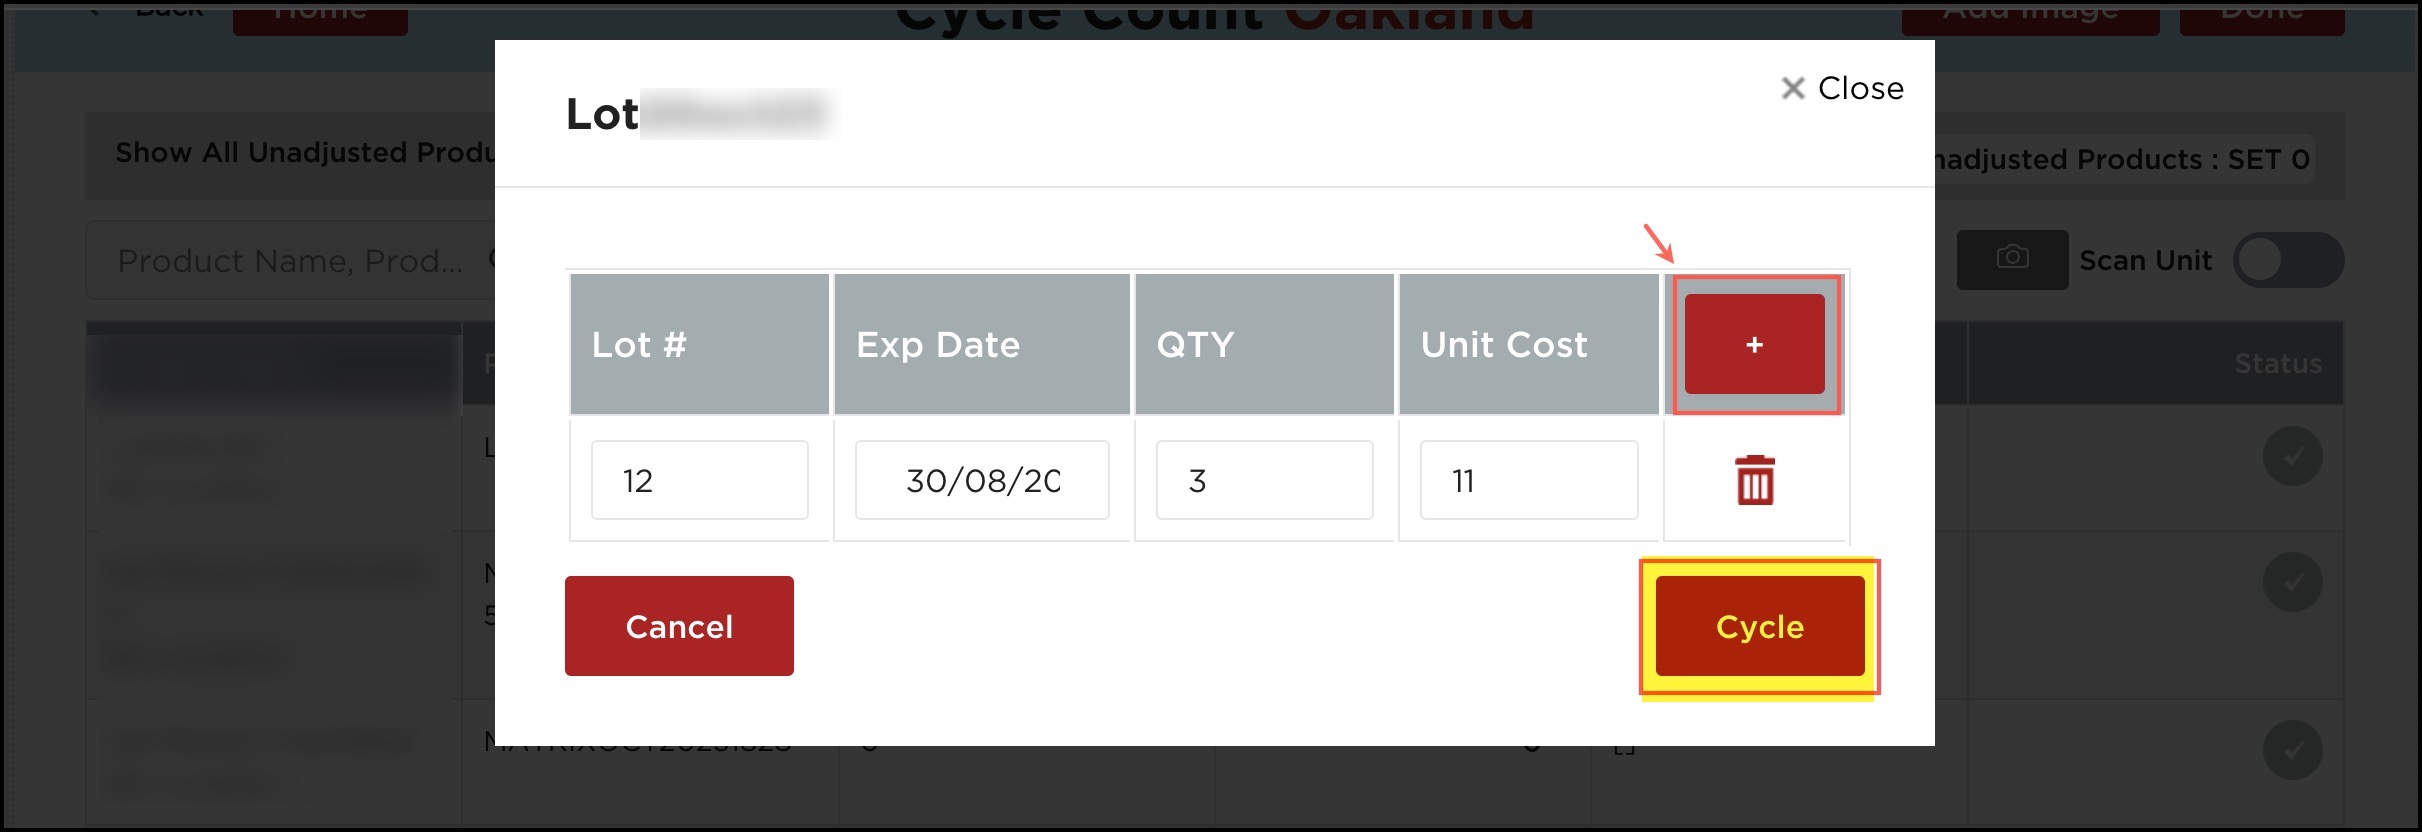
- For Lot Products , click on the + sign
- Add Lot details and click on Cycle.
You will notice the status of the product for which you adjusted the quantity has turned green.
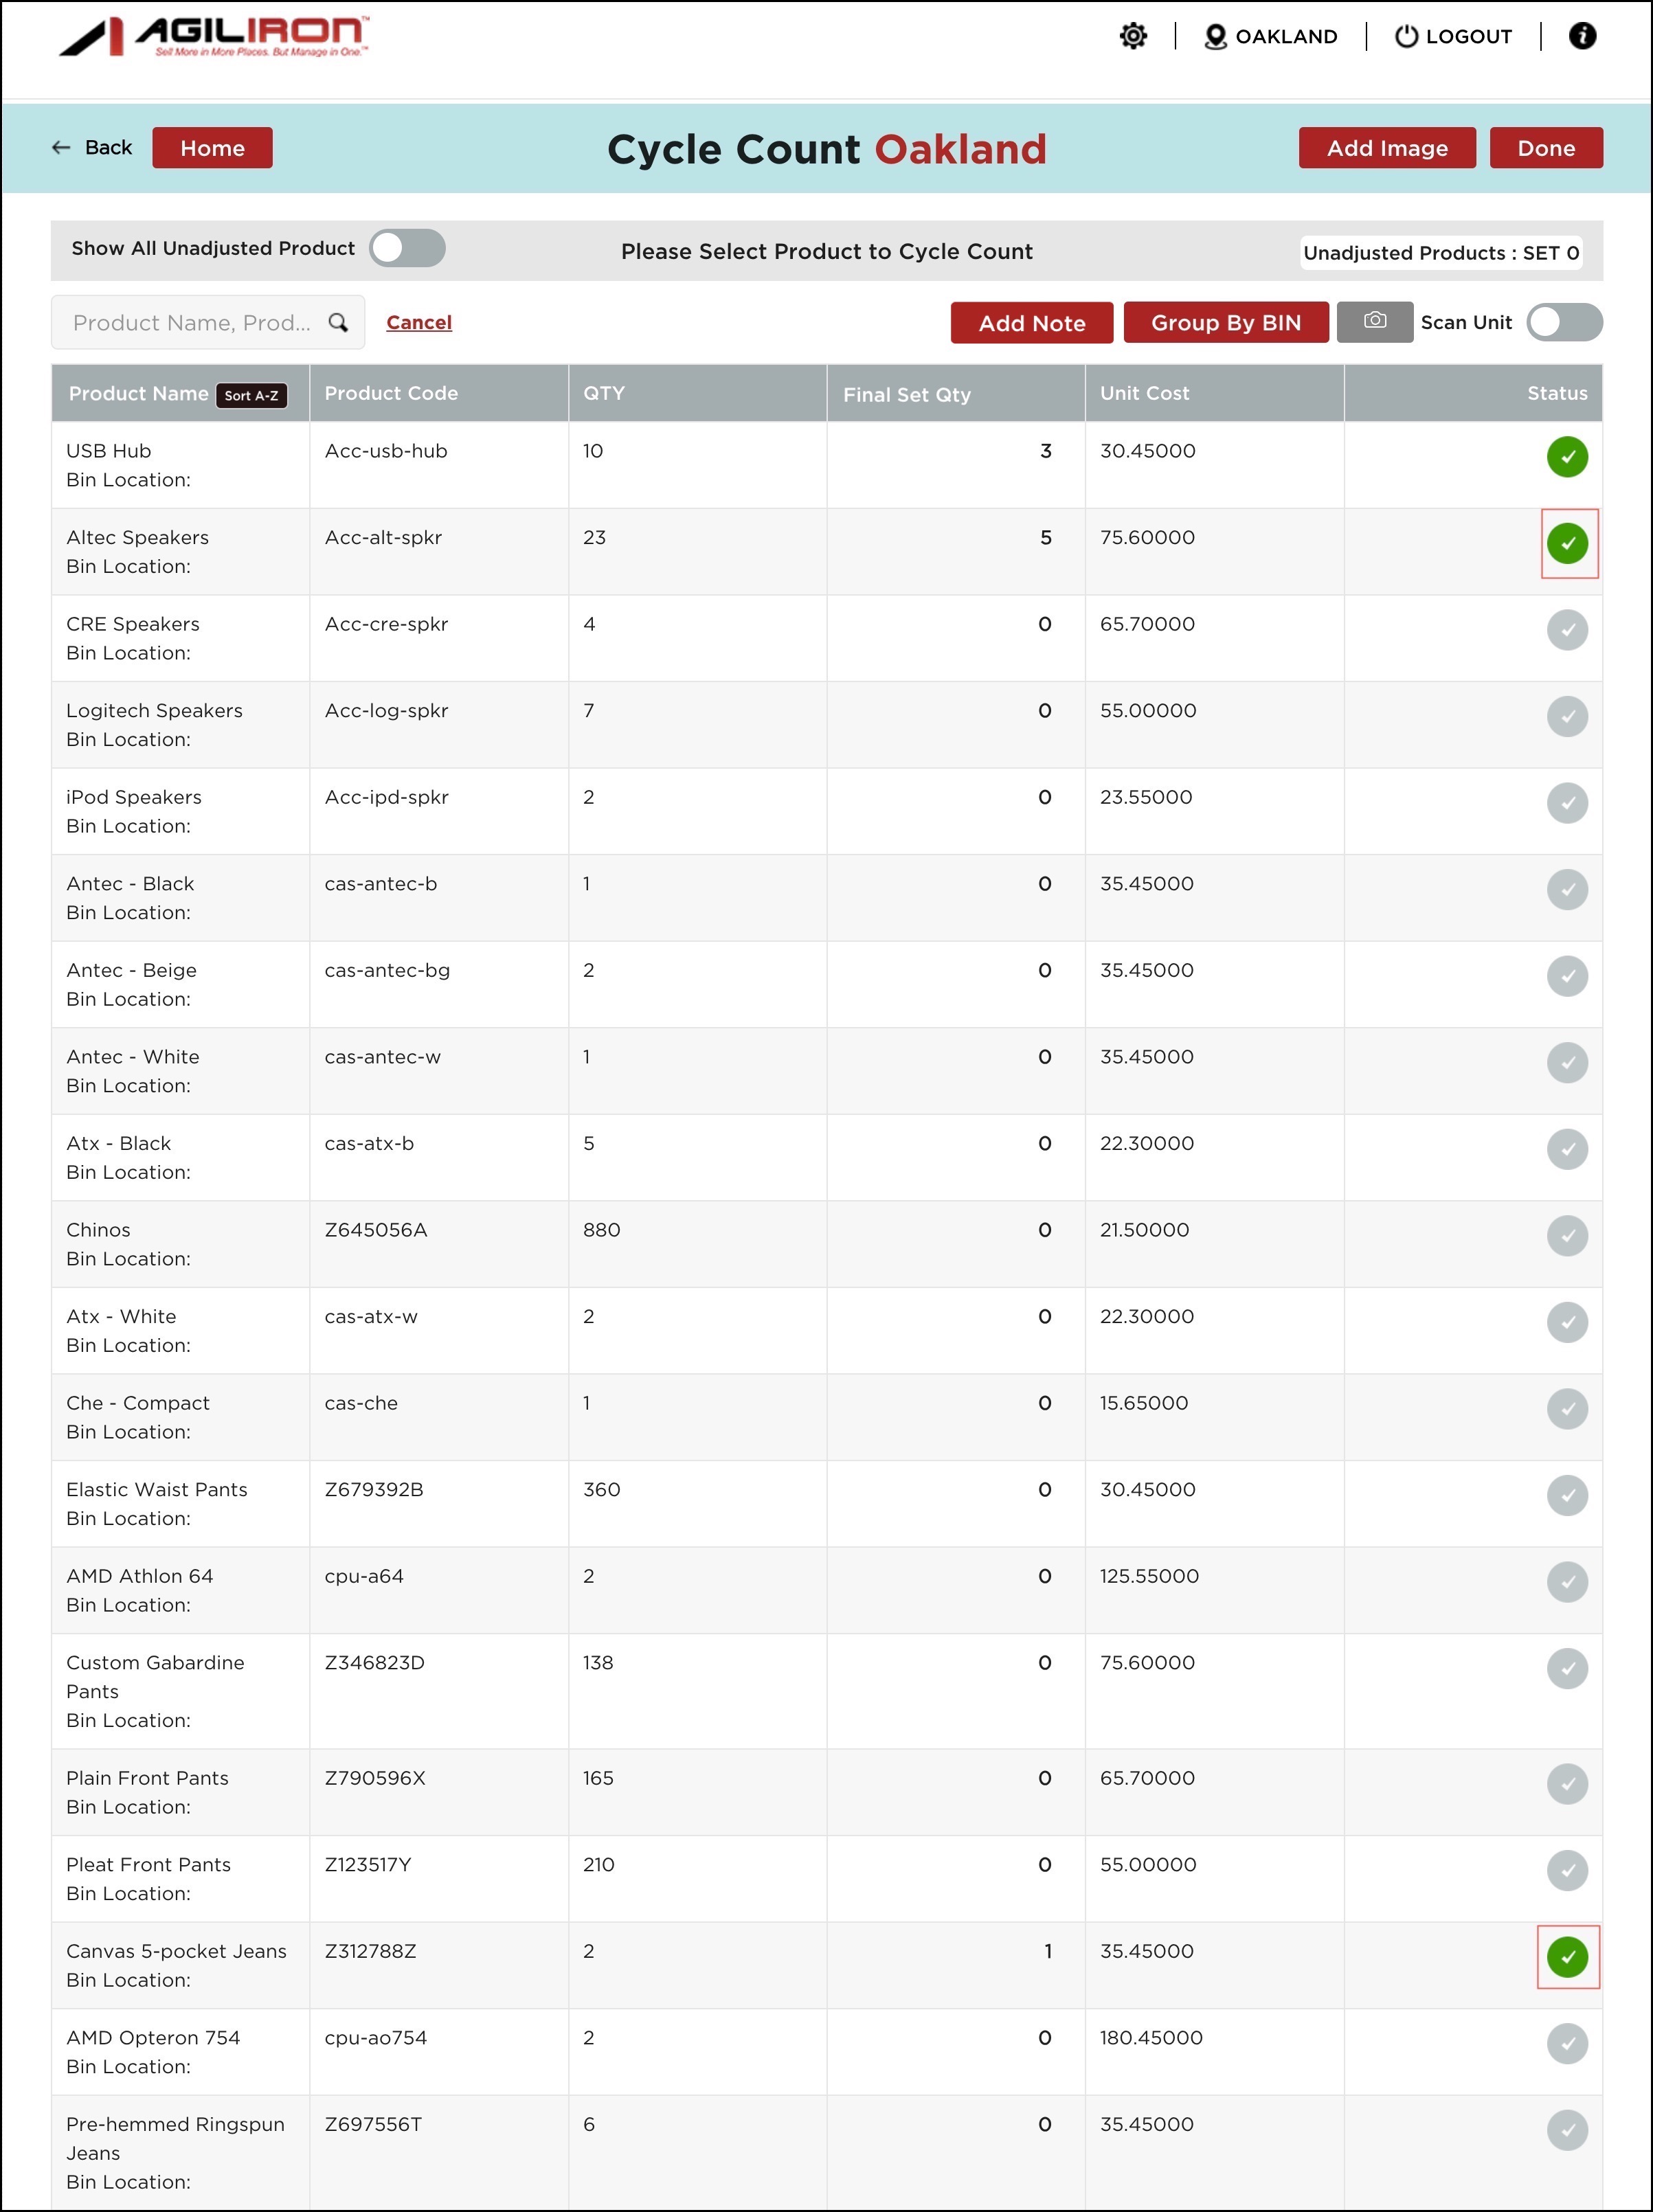
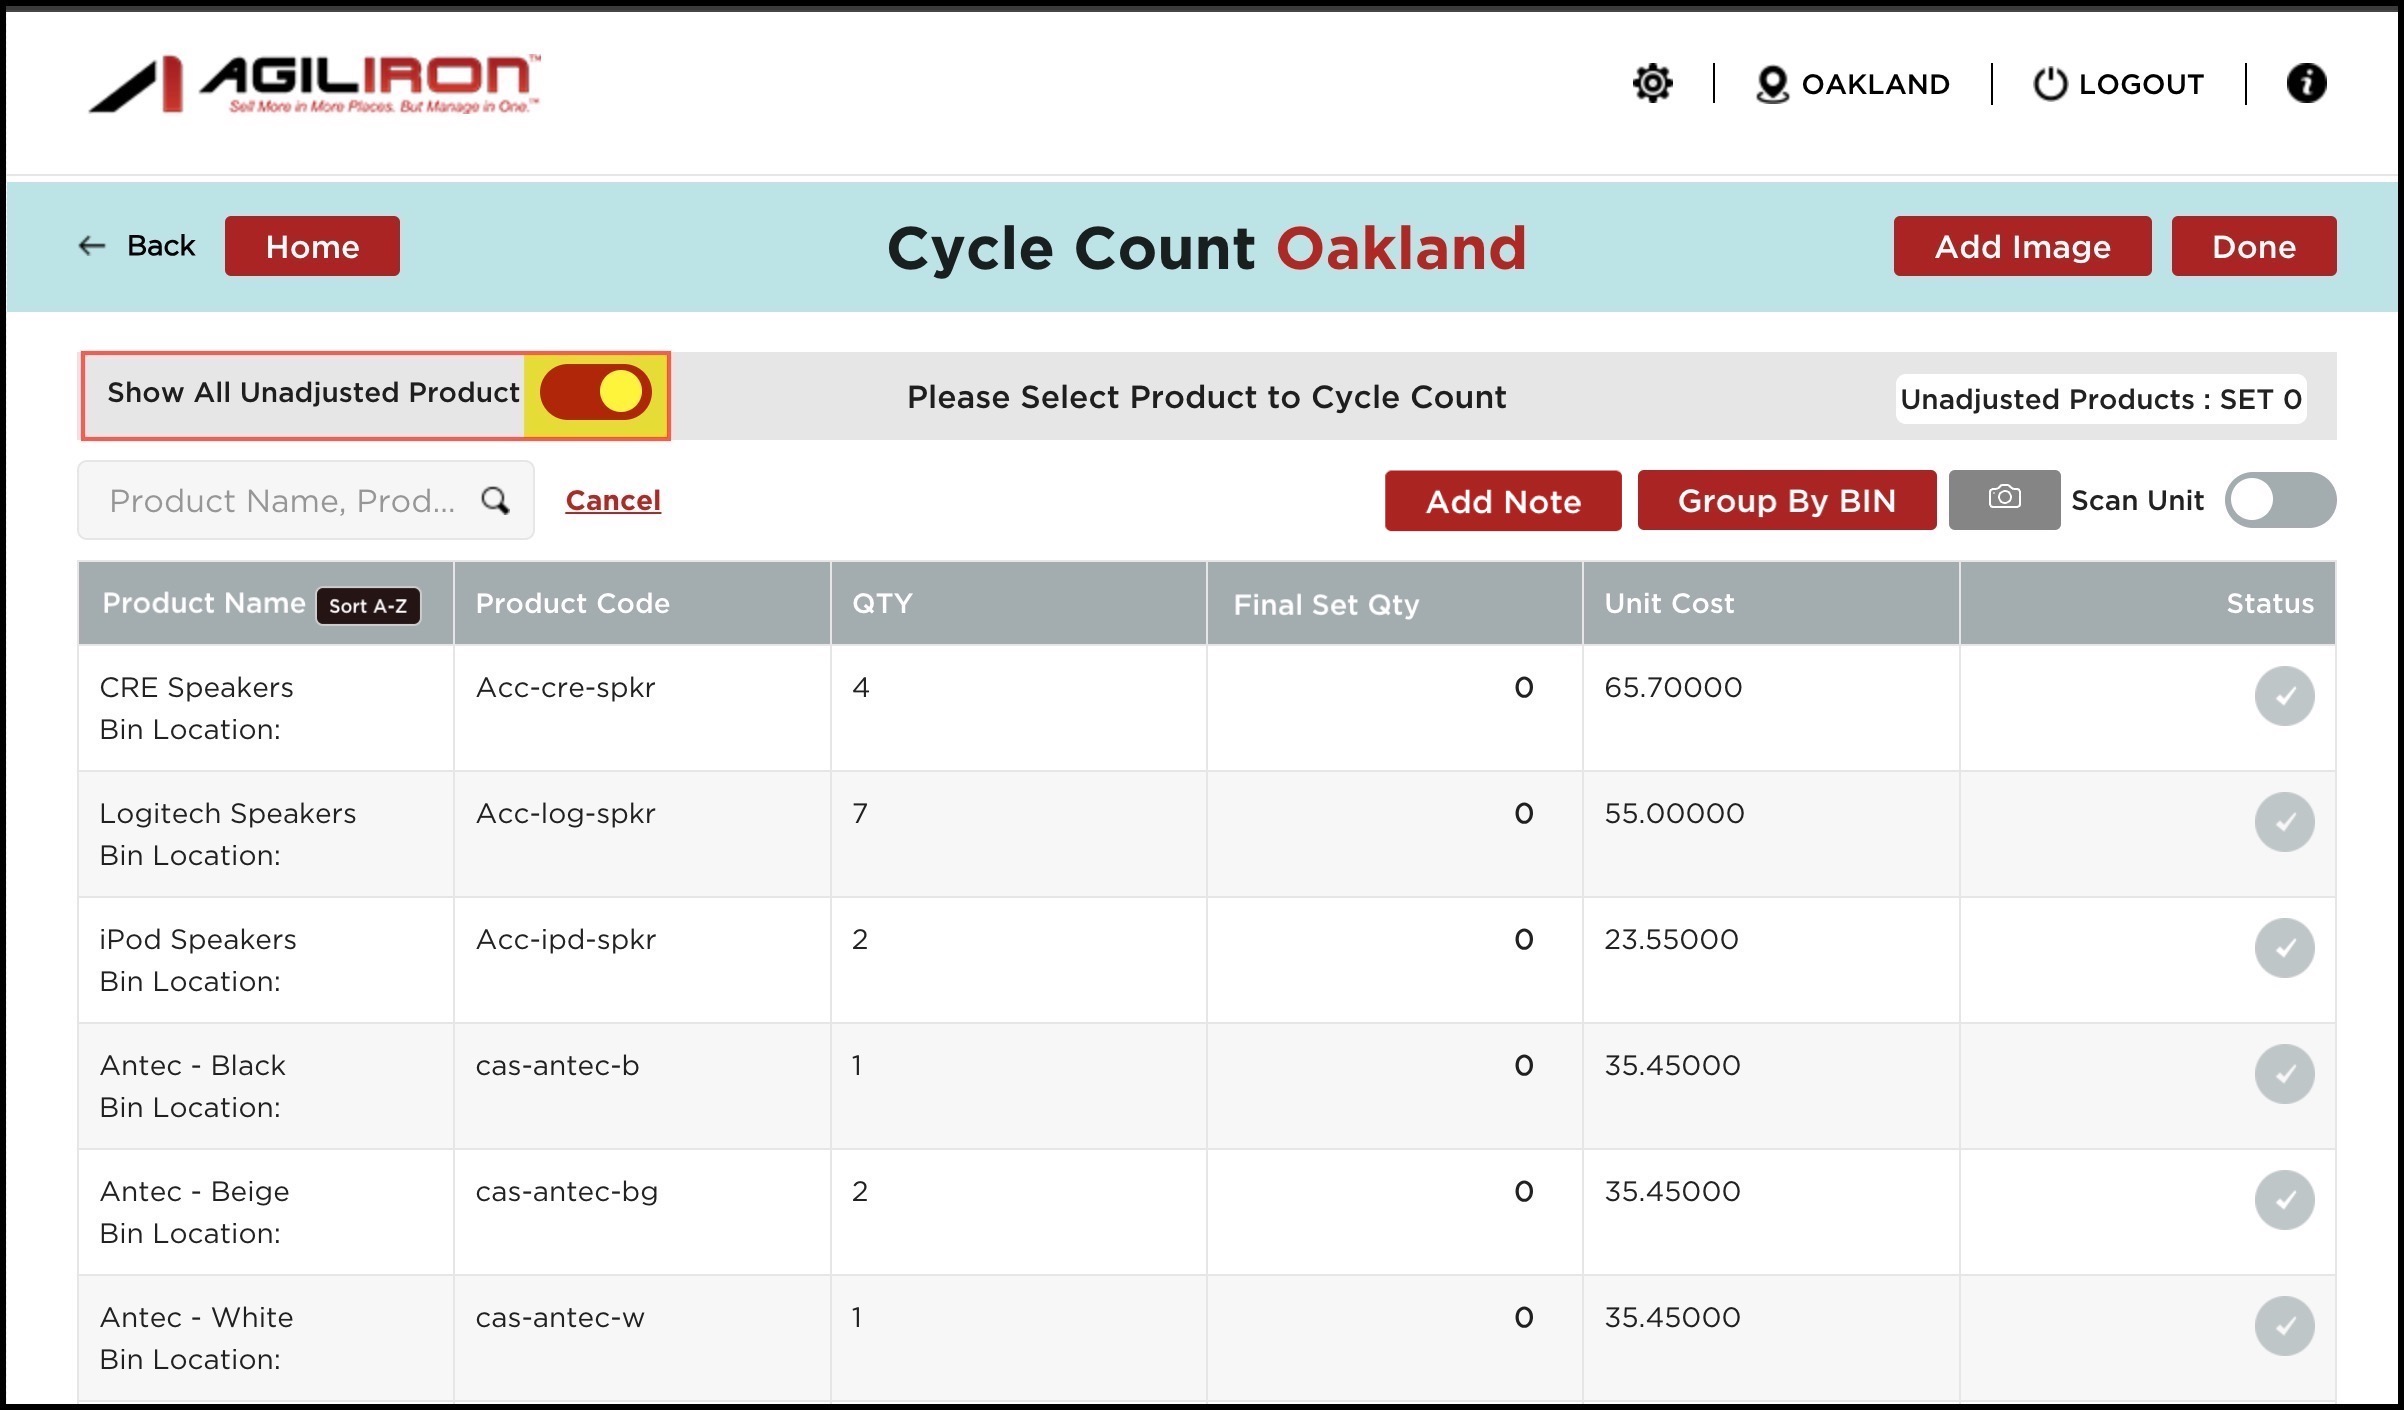
Show All UnAdjusted Products toggle button is on the top left corner. When you enable it, the cycle count feature will display only the product/list of products whose quantity is unadjusted (products without green status).
On the top right corner, All UnAdjusted Products - Set 0. When you click on this button, all the products whose quantity was unadjusted will automatically now be set to 0 and the status of all the products will turn green.
- When the Cycle Counts are complete, select Done or Back to return to the home screen.

- Lastly, click on the Sync Inventory Updates to Back-Office button present on the home page.

Updated 5 months ago