An Overview of eComm Admin Platform
This user guide will you an overview of the eComm (B2B B2C WebStore) admin platform.
- Firstly, login to your eComm Admin Platform with your username and password.
Since the application presents data storewise, the selection of store is mandatory.
- Select the store type from the drop-down list.
If you are a backoffice user, you can login with backoffice credentials.
- Click on the Login button.

This will take you to the default homepage. Here the default homepage screen is Sales.

Now let's explore each segment of this eComm Admin platform:
Left Menu Panel
You can see different menus on the left panel under categories like Tools and Services, Reports, and User Management.

Tools and Services - Products
- Under Tools and Services -> Products -> Catalog, when you click on it, you can see a list of products. You can filter them category-wise or price-wise.

- Clicking on each product will open the particular product's detail page displaying the description and specifications.

Next, you can see Stock on the left menu panel. Here you can manage the quantity of the product. The list contains basic as well as matrix products (with individual quantities as per their matrix attributes).
- By clicking on the respective signs, you can either increase or decrease the quantity as per your requirement.
- You can also search for the required product with the help of the search box.
As soon as the changes are made in quantity, you'll see a message saying, "Quantity updated successfully." This, then gets updated in that particular store.

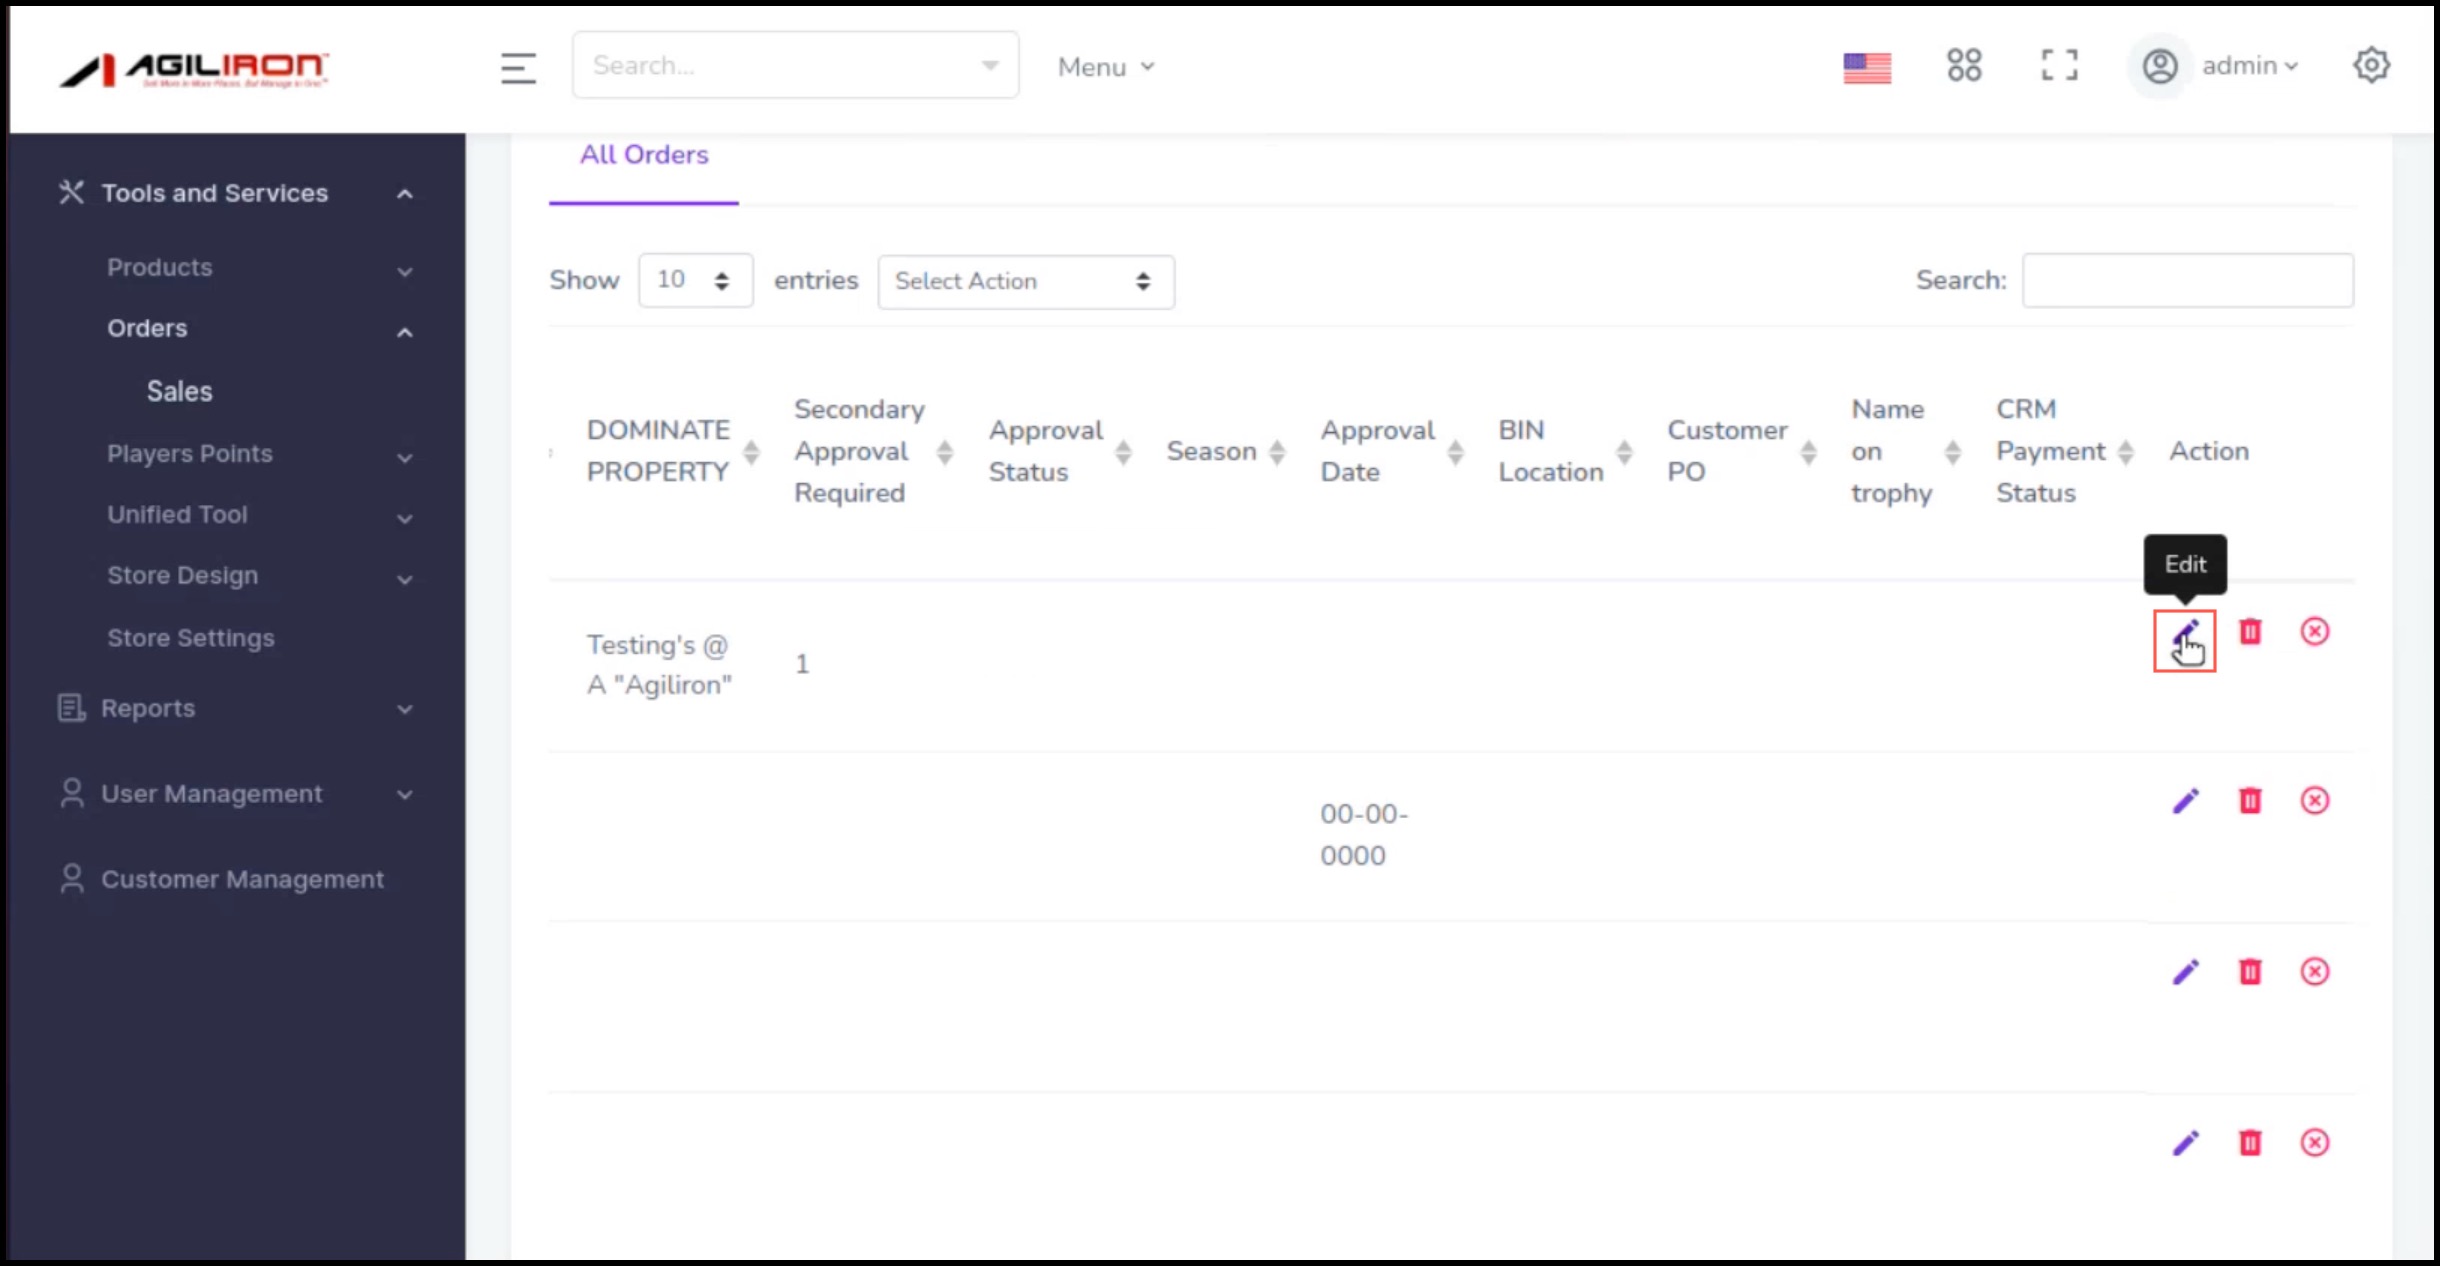
Tools and Services - Orders
- Next under Orders, there is Sales where you can select an action from the dropdown. You can either create an order or edit.

Here in Sales, just like the backoffice you can create or edit an order.
- Click on the Create Manual Order option from the dropdown. You'll see the step-by-step process.

Edit Order
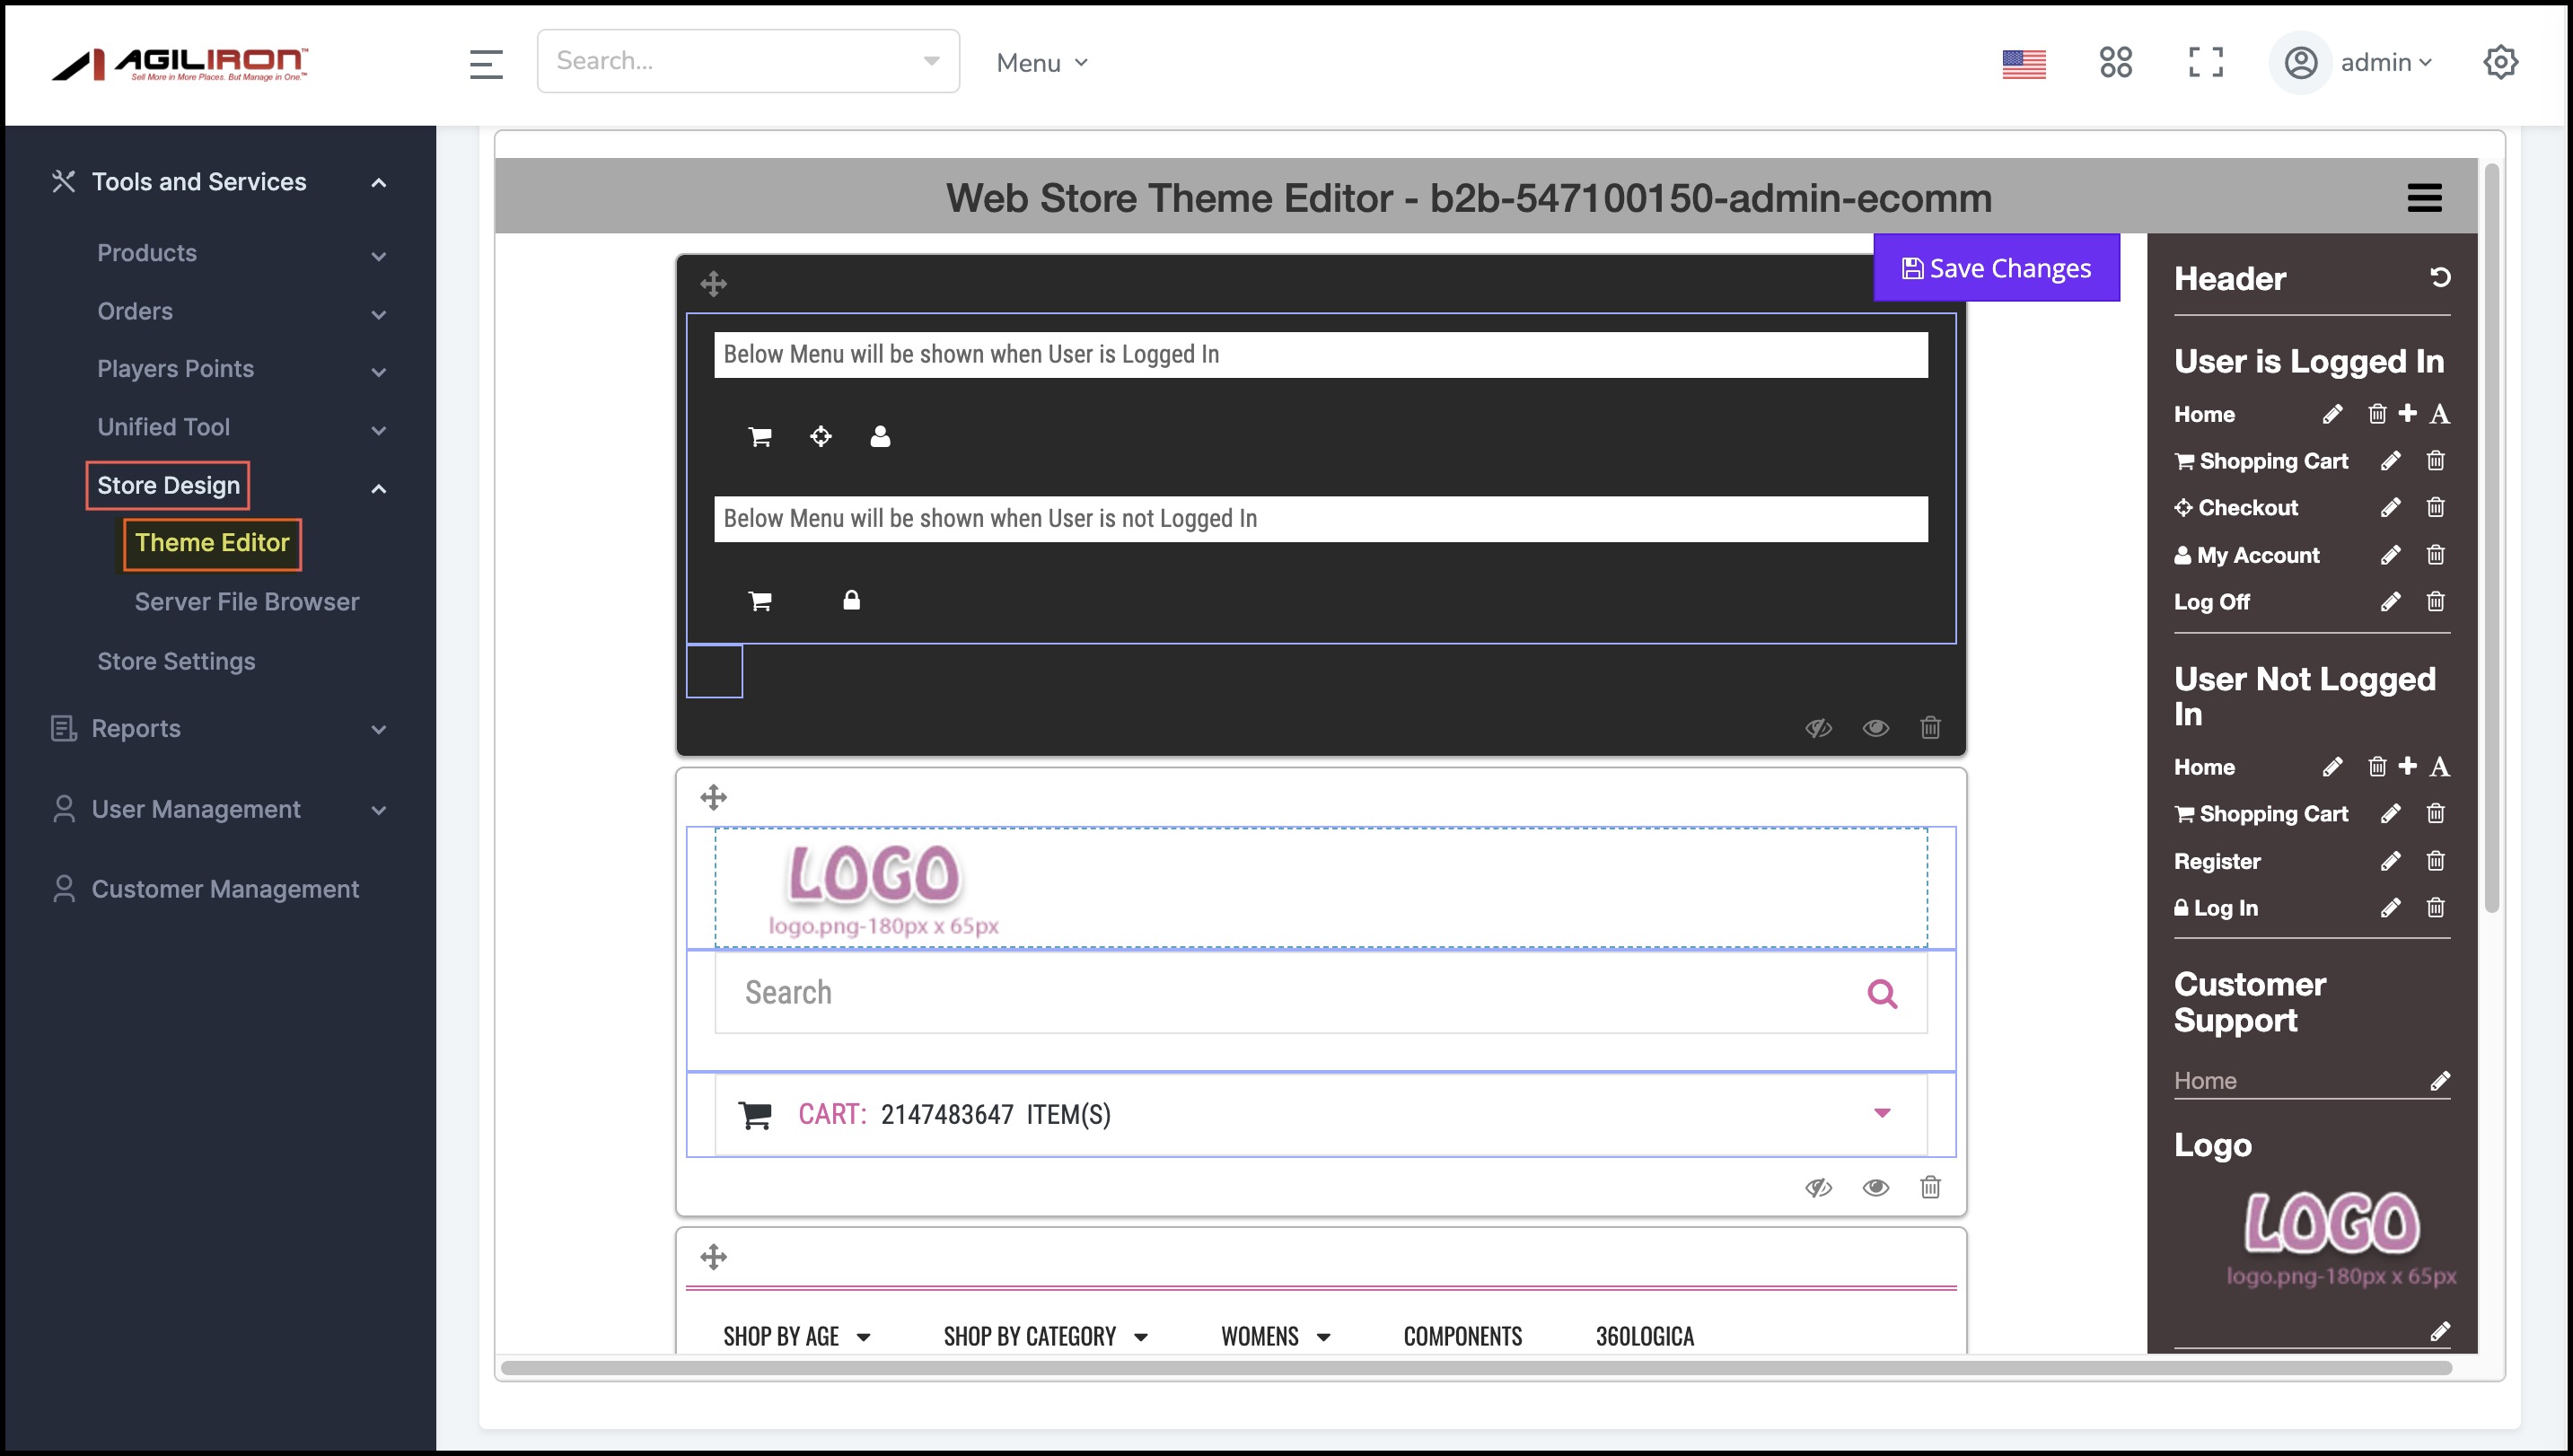
Store Design
- Backoffice users will also have an additional ability to access store design features like Theme editor and server file browser from the eComm admin platform.

Unified Tool
Under Unified Tool you can see Sales Order Import, Export Shipped Orders, and PO Tracking Import.
- When you click on Sales Order Import, you can see a form kind of screen where a Secret Token is auto-generated. It is the security token that is generated in the backoffice related to this eComm admin platform. A by default channel is displayed.
- To import sales orders, click on Select and Upload CSV file and upload the sales order report which you want from your system.
- Then click on Import Orders to Agiliron.

Now in the System Message, you will see the message saying the file is uploading and eventually orders are imported successfully.

- To export ship orders, you need to select the order range to fetch the orders between those dates. Enter the start date and end date and click on, Click to Fetch Orders button.

Then next under Unified Tool comes PO Tracking Import.
- To import PO tracking info, click on Select and Upload CSV file and upload the sales order report which you want from your system.
- Then click on Import Tracking Info to Agiliron.
In the System Message, you will see the message saying the file is uploading, CSV uploaded successfully, and eventually Importing Purchase Orders Tracking Info to Agiliron!

Then there is also access to the Reports menu.
User Management
Then comes User Management, under which you can see Roles and Users.
- When you click on Roles, you can see Roles and the access to modules given to each role. Basically, on the basis of the role set here, the user gets access to the modules present on the left menu panel.

Let's for example give access to a user to certain modules. You can add a new role by clicking on the + Add Role button.
- For the existing user, click on the edit icon under the action column of the respective user.

- Add role name (in case of the new user).
- Select the modules to which you wish to give access to the particular user.
- Once done, click on Save.

- You can see the role has been updated successfully.

Note - Any particular user will only be able to access the modules to which their role permits and only those modules will be visible on their left menu panel.
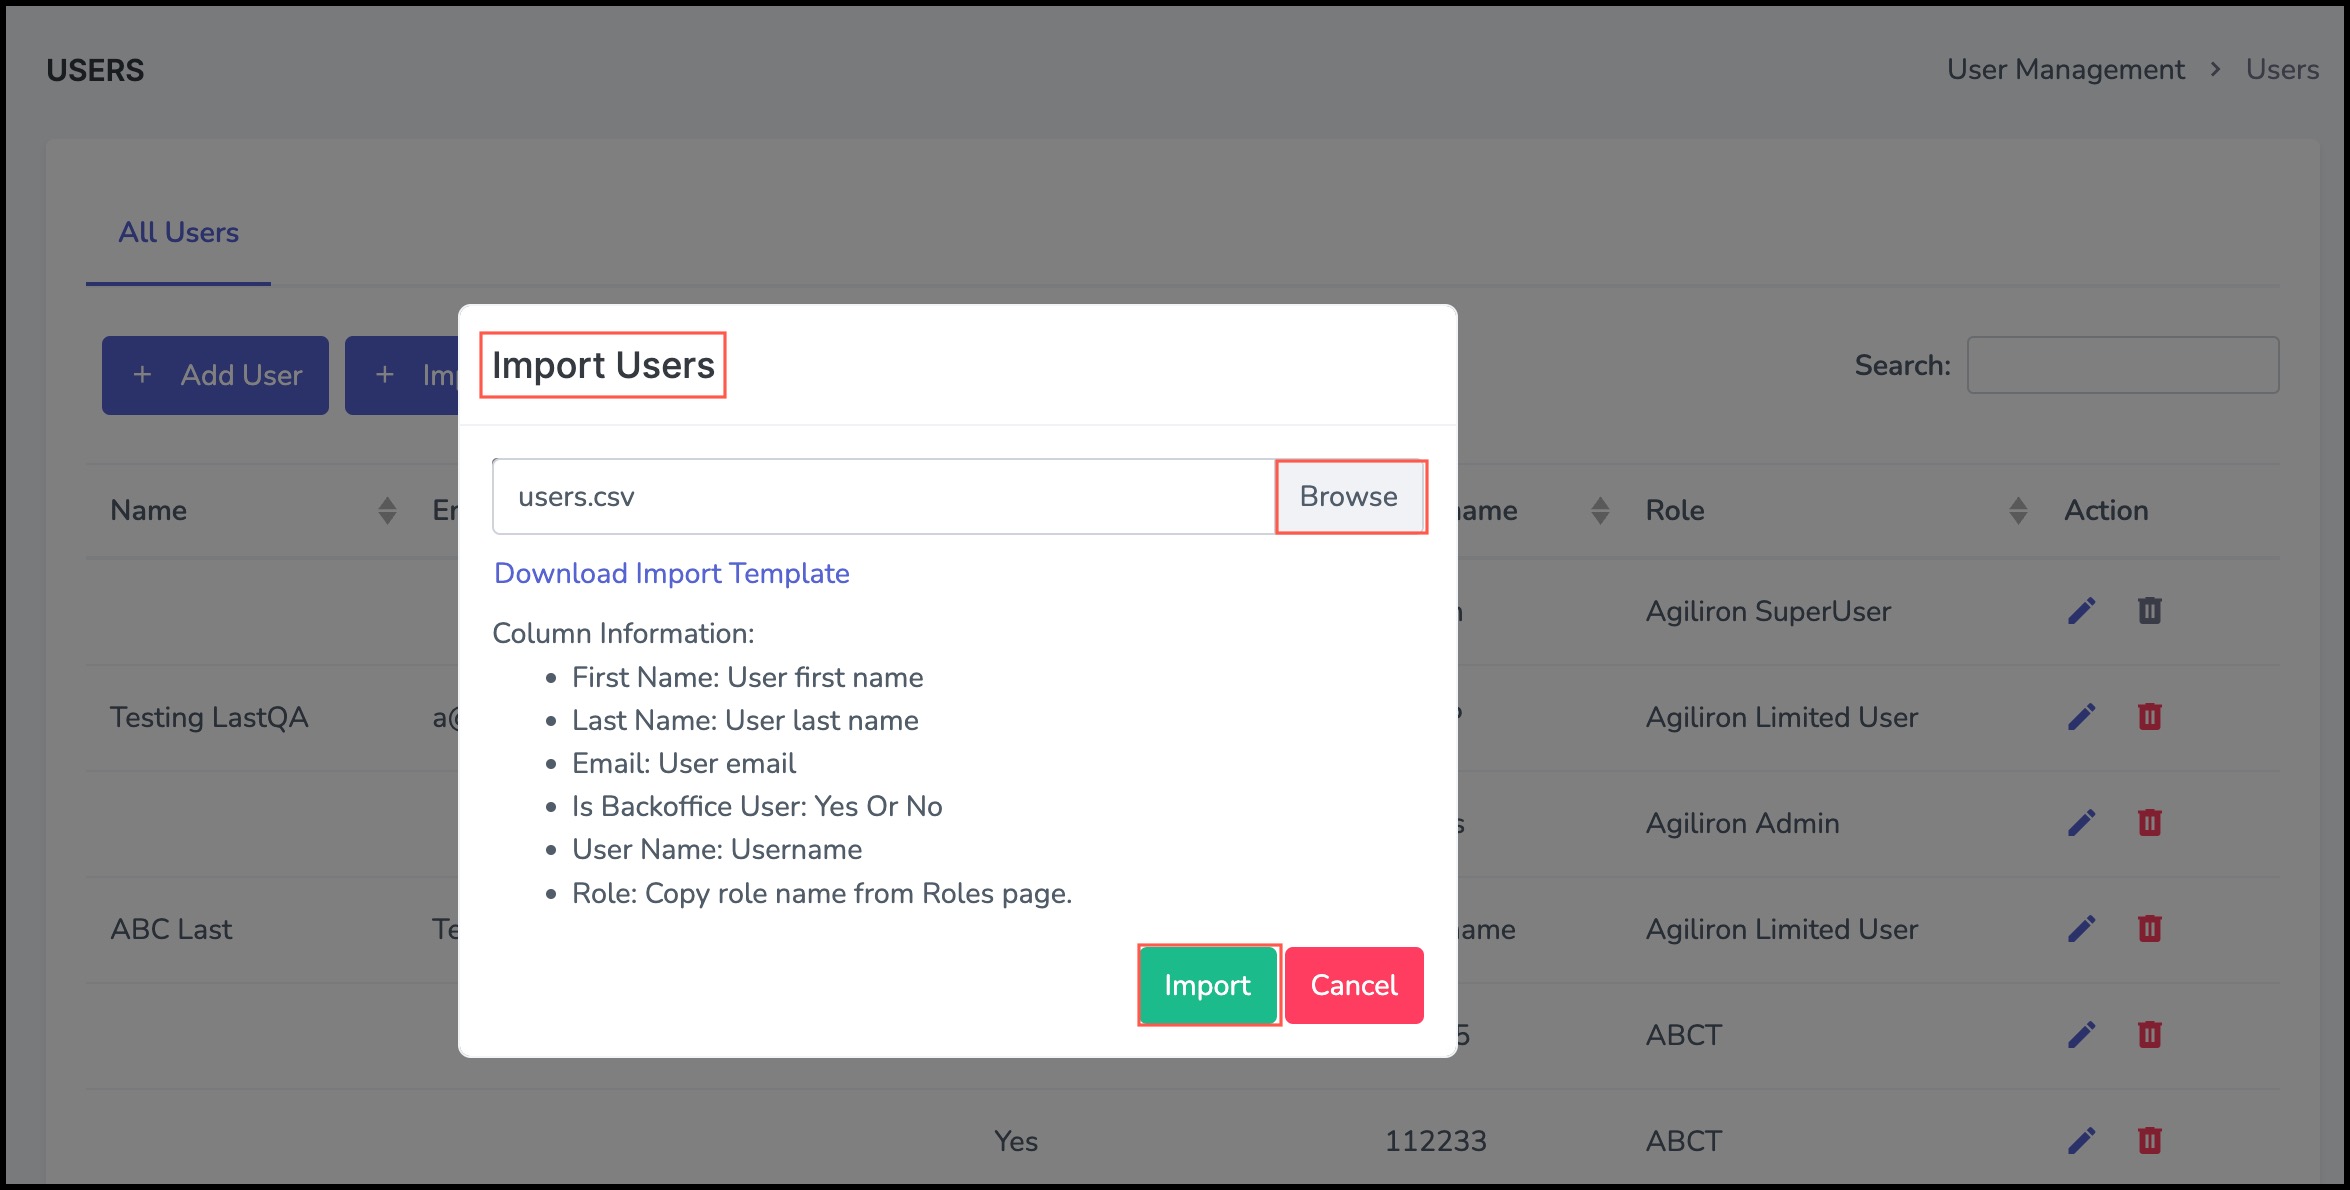
- Next, in user management when you click on Users, you can here either Add user, Import users or Export users.

- When you click on Add User, you'll see a form as shown below. You must fill in all the details, select role and click on Save.

- In case, you are a backoffice user, you simply need to click on the "Is Agiliron BackOffice User" checkbox. You will only need to enter the UserName and Role and click on Save.

Clicking on Import Users will bring up a pop-up window where you can see Download Import Template that provides the upload (CSV) file format template.
Note - Backoffice admin users can also customize their left panel options and list views in ecomm admin platform from backoffice itself - Check out this user guide.
Settings and other UI features
- On the top of the application, you can see 3 horizontal lines, clicking on it will expand the module screen and minimize the left menu panel - showing only their icons, as shown below:

- Next, you can see a global search bar. Whether it is the menu or product name, here you can either type or click on the down arrow sign to perform the search operation.

- Whichever modules you see on the left menu panel will be displayed when you click on the Menu option present on the top bar.

- You can also change your application language preference from the options available.

- By clicking on the 4-circle icon, you can either open the respective webstore or Agiliron backoffice. This will open in a new tab.

- For full screen click on the icon that's highlighted below.

- When you click on the Profile icon, you can access your profile details, lock the application screen, or logout.

- Last, there is Settings. Click on the gear icon to change the settings of the eComm admin platform. Here you can change the look of the layout, change the width of the application, change the color or look of the sidebar, and set the preloader on or off.

Updated over 1 year ago