New Account Wizard and Vendor Wizard - Edit View
Agiliron's 'New Account Wizard' and 'New Vendor Wizard' is a more streamlined way of creating and managing customer accounts and vendors.
After following the step-by-step process, at the completion, users will be put in the Edit View of both the modules, respectively.
Let's walk through the process:
Account Edit View:
- Follow the New Account Wizard link as shown below.
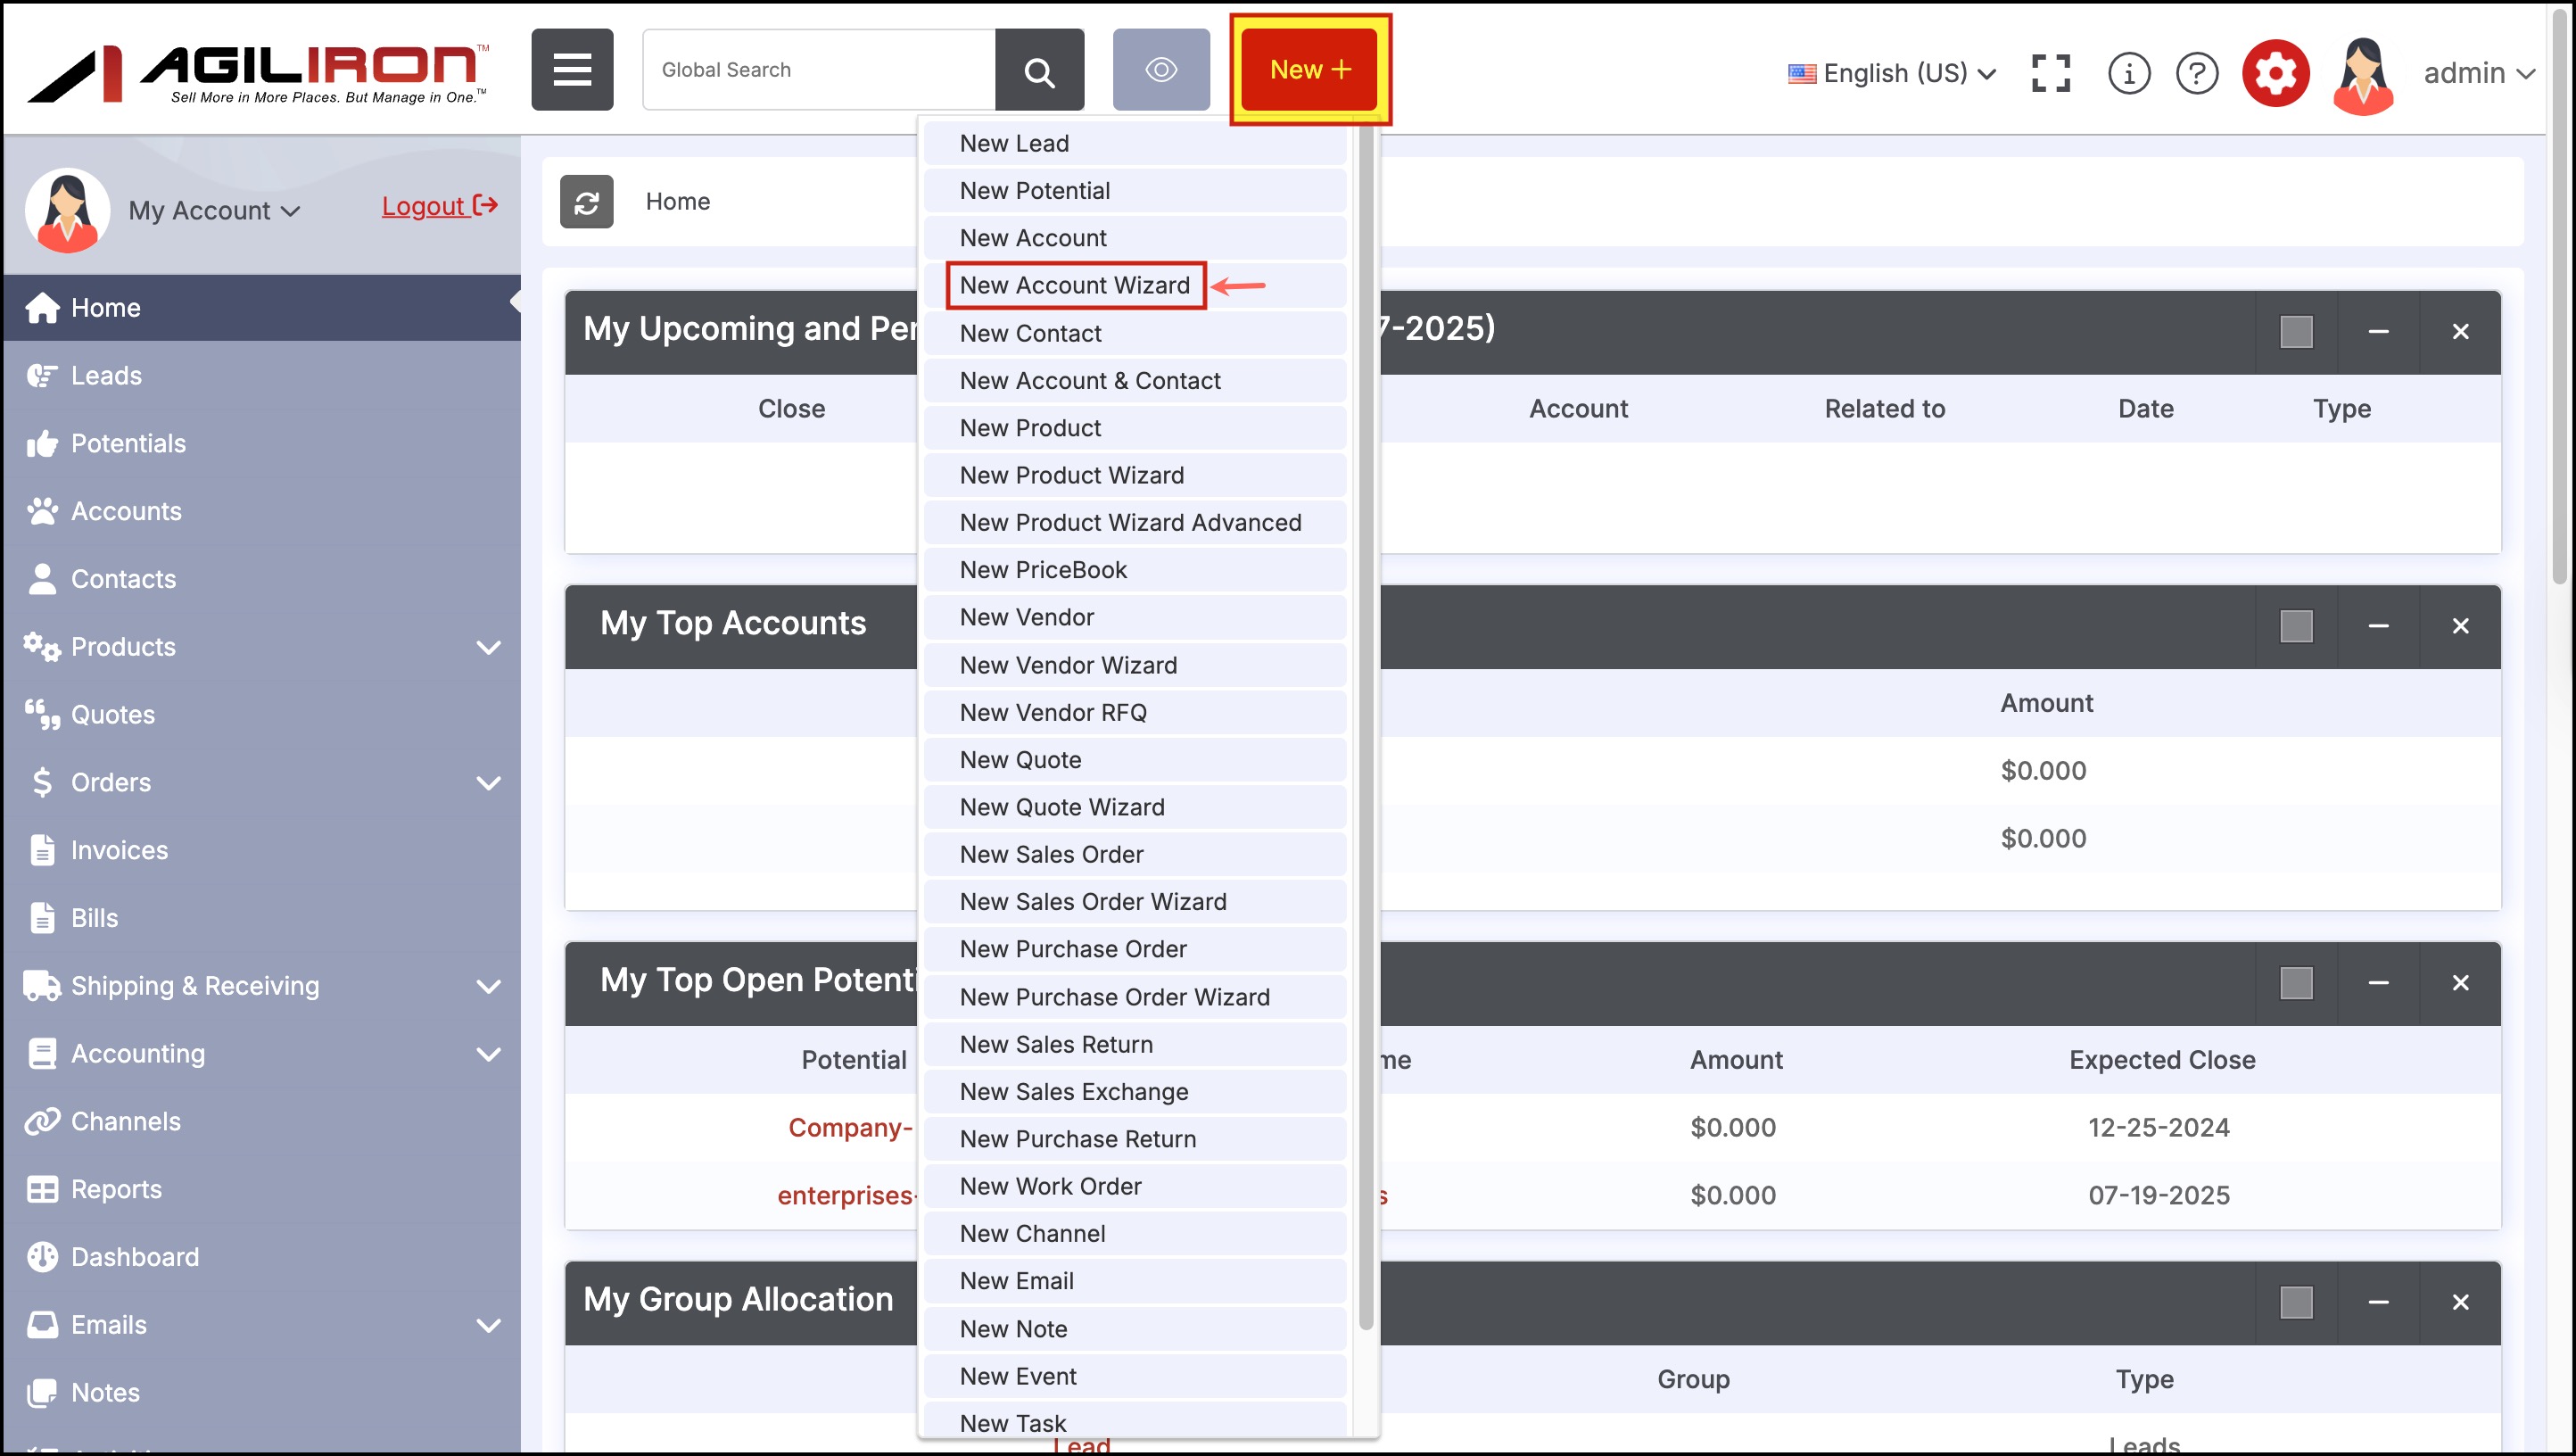
- This brings up the step-by-step process where you need to enter relevant information in each step and proceed by clicking on Next.
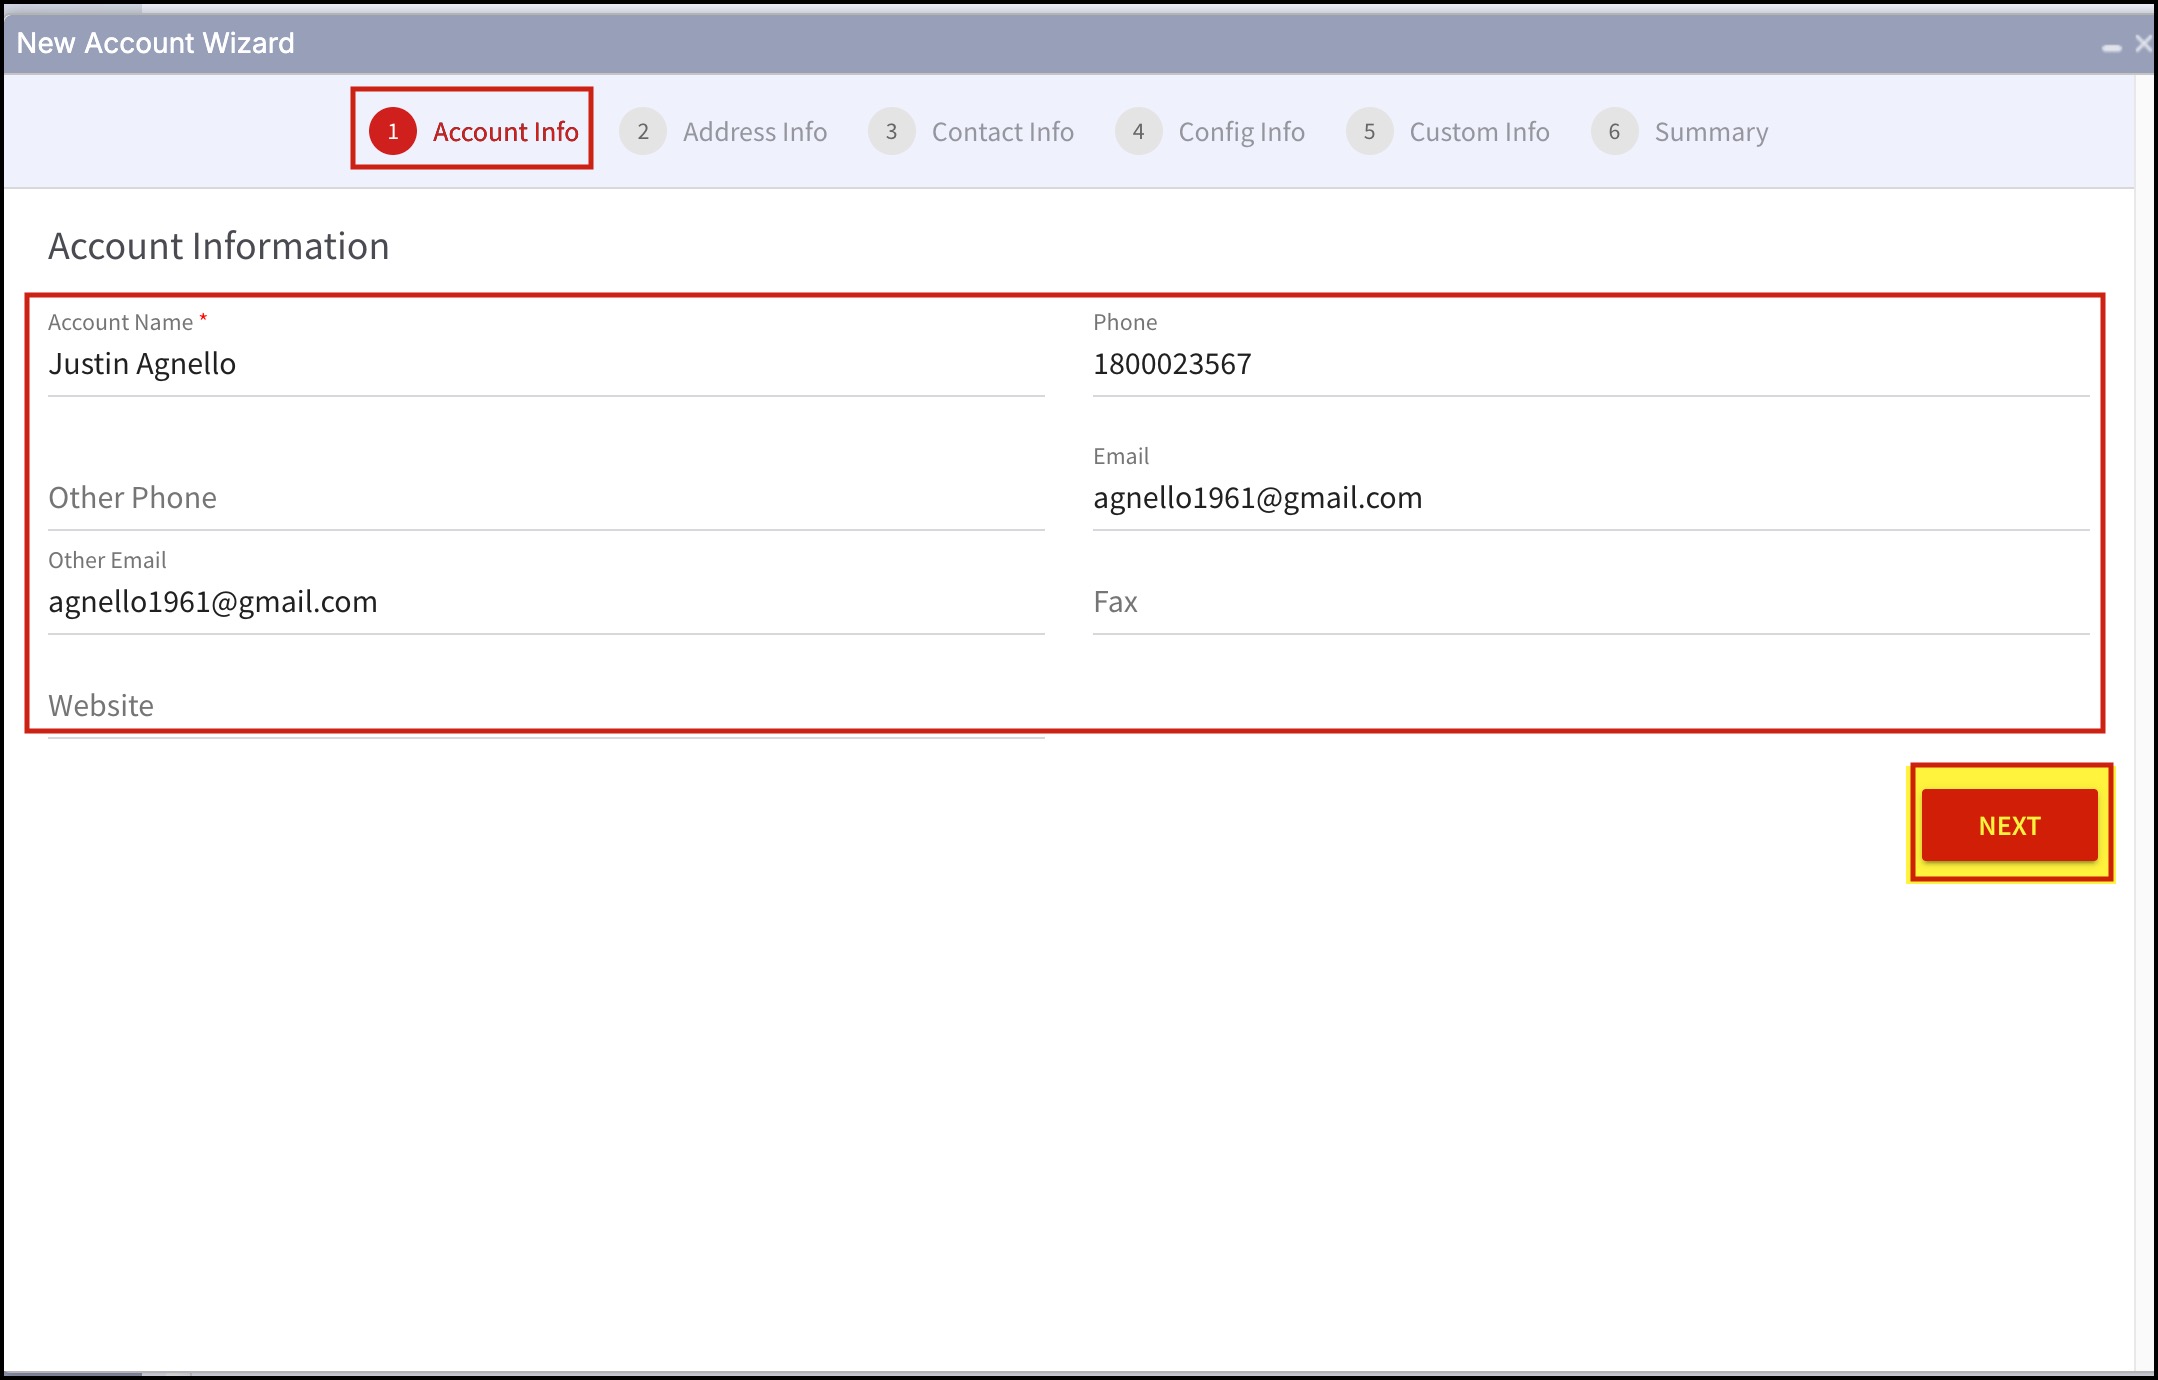
- Data in mandatory fields (fields marked with *) has to be filled.
Step 1 - Enter Account Information
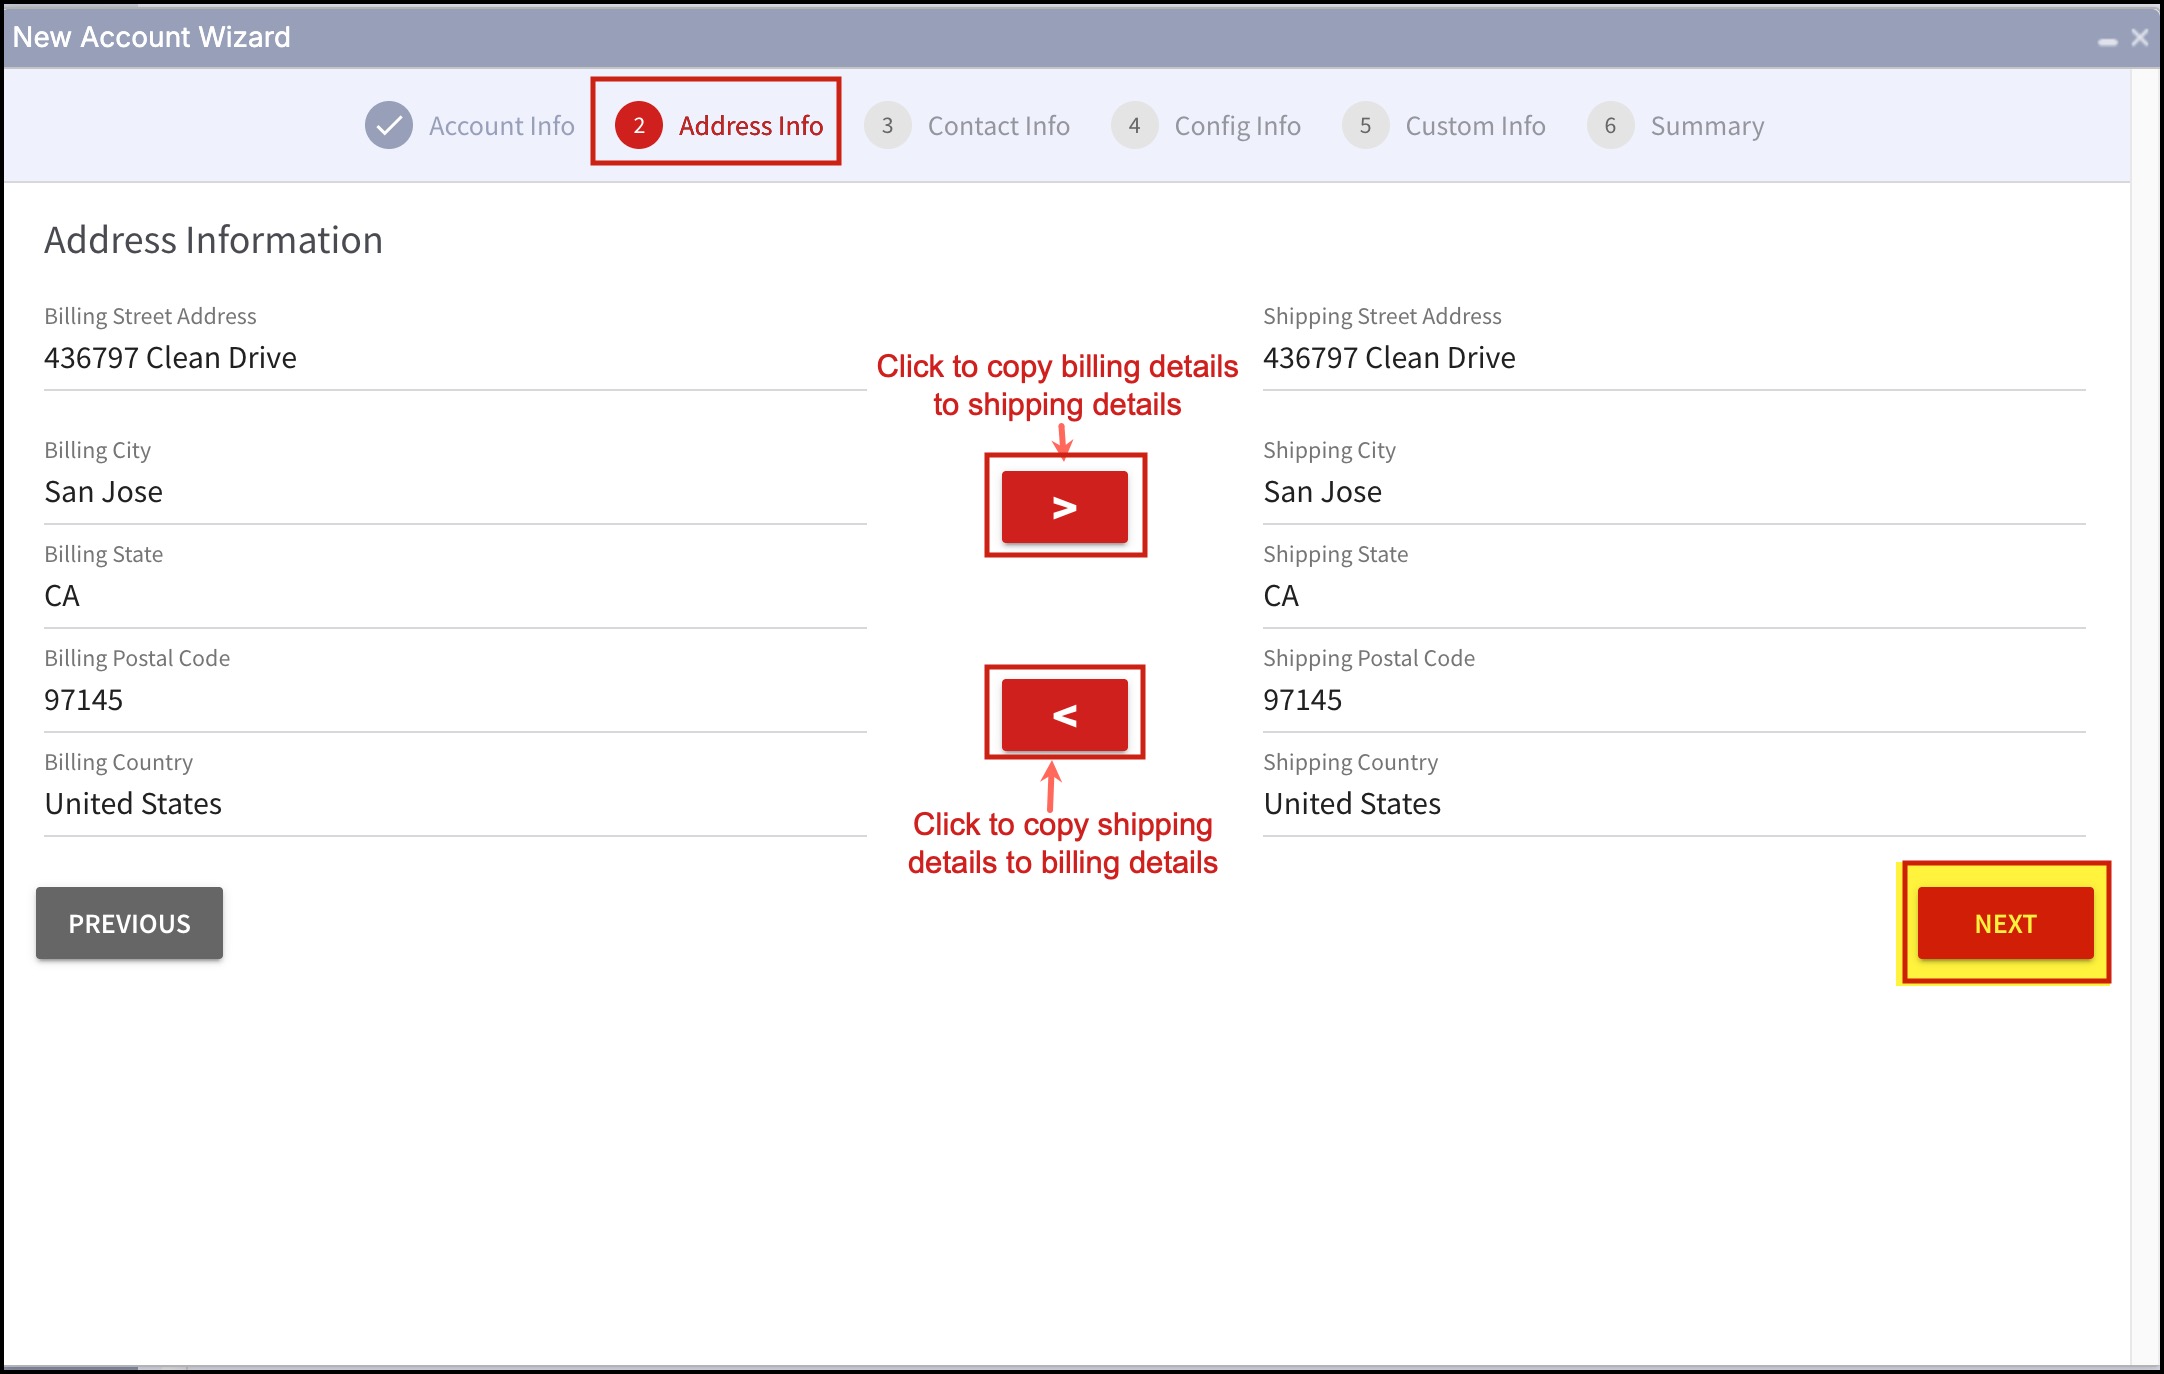
Step 2 - Enter Address Information
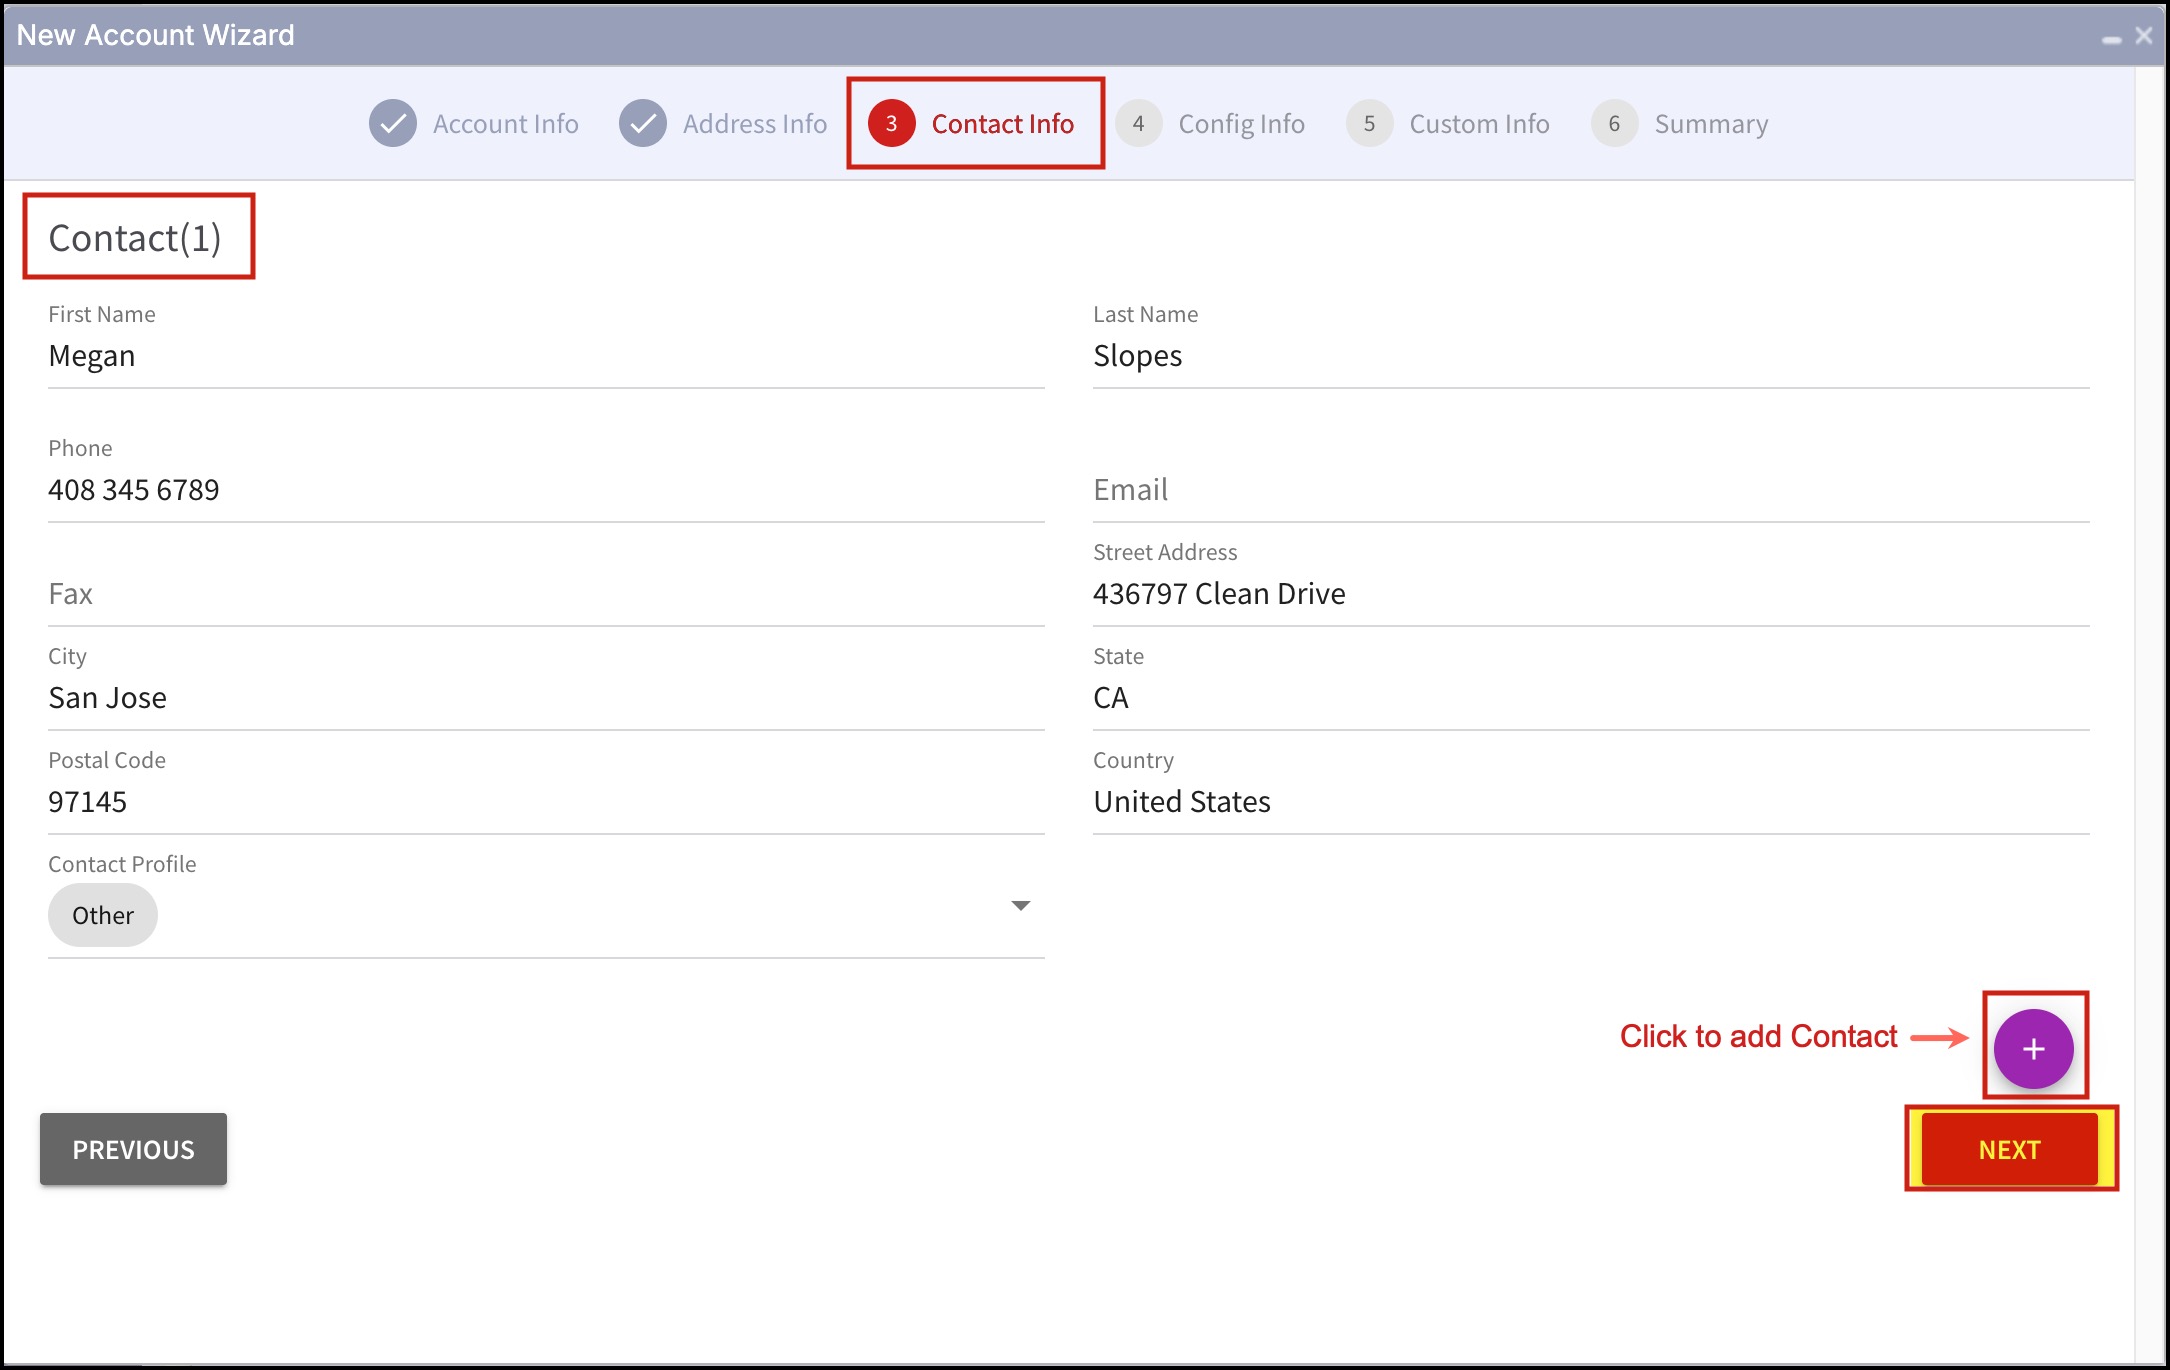
Step 3 - Enter Contact Information
- You can add maximum 3 contacts. Click on the + sign to add contacts.
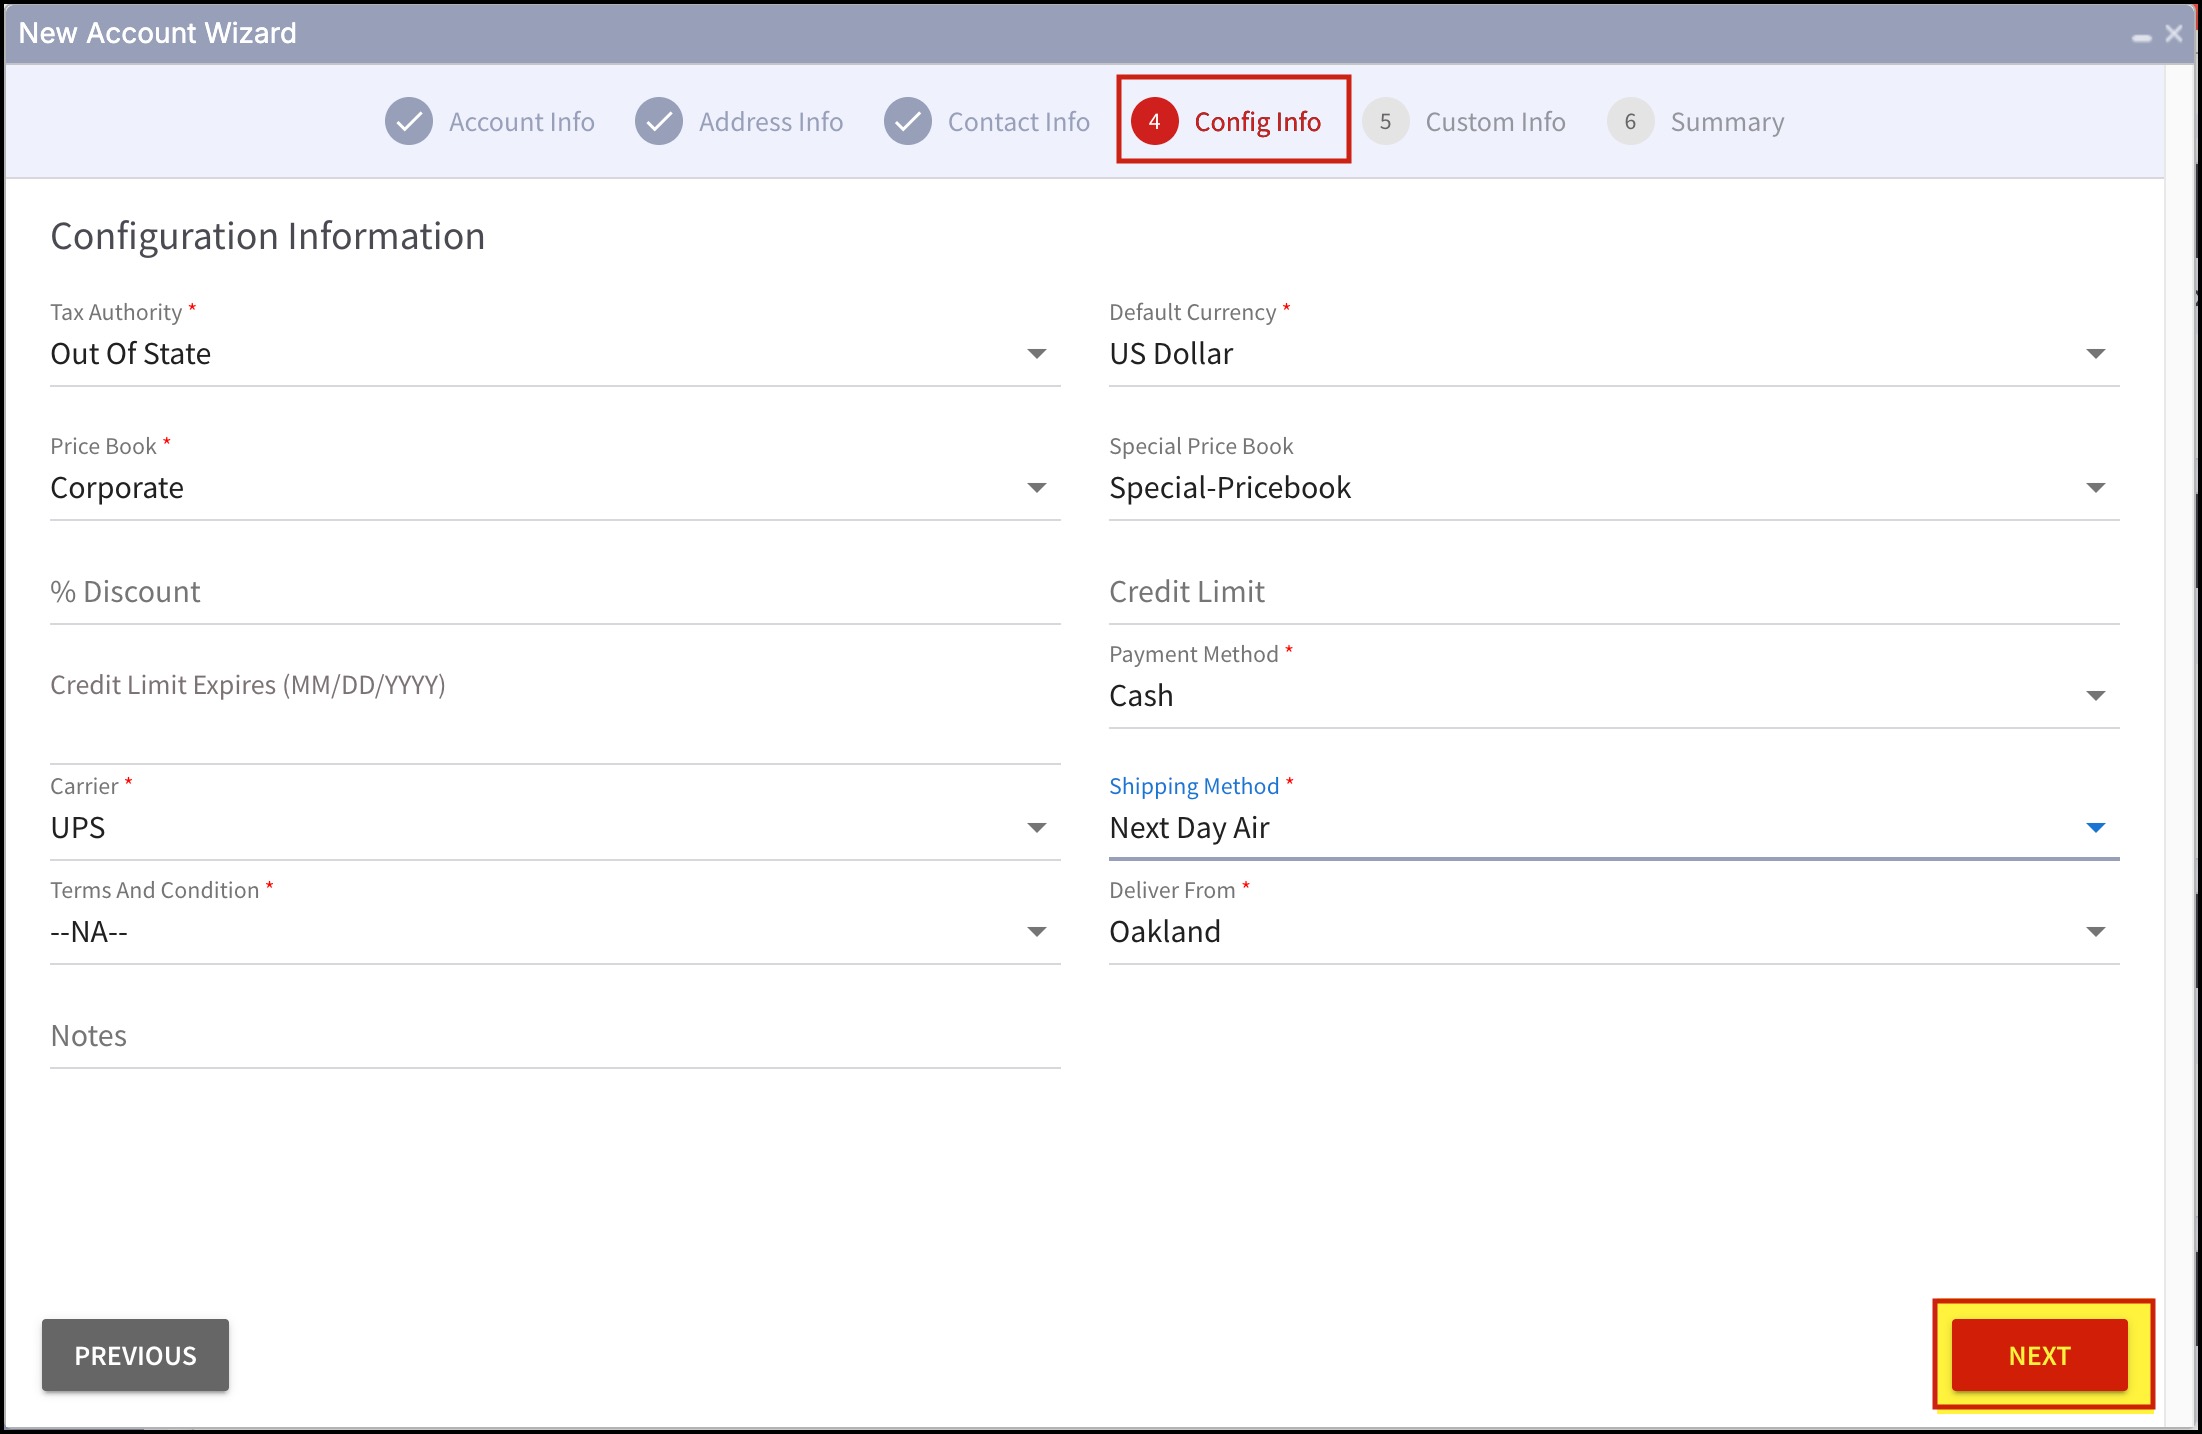
Step 4 - Enter Configuration Information
- Enter information in all mandatory fields.
Step 5 - Enter Custom Information
Custom Fields data entry is the additional step added in the New Account wizard for users to add their specific business needs.
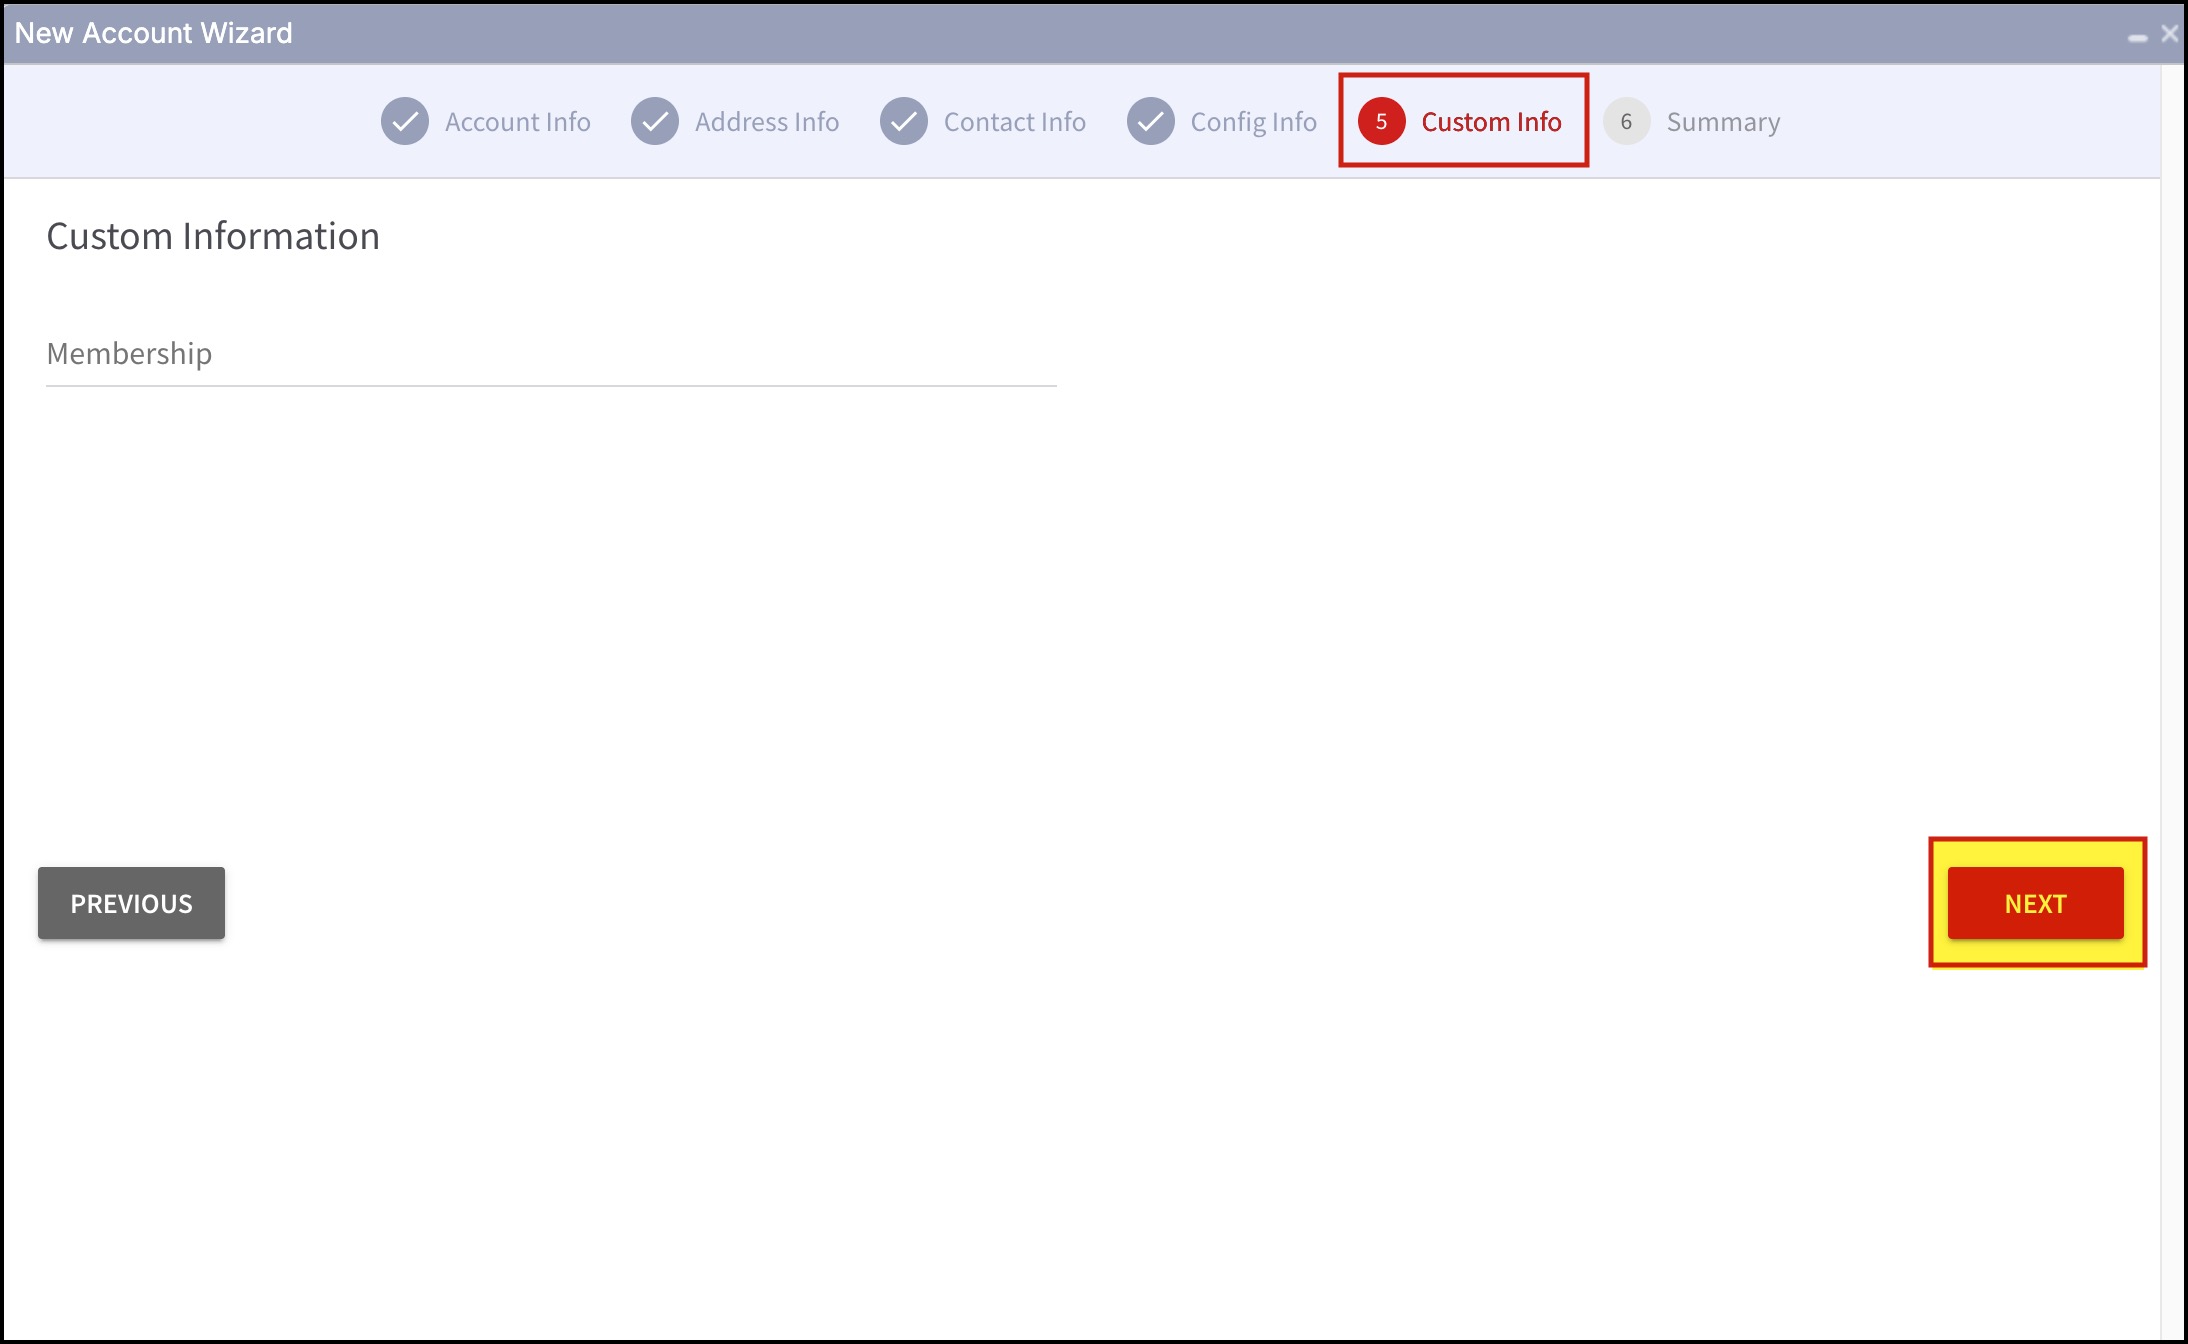
The fields in this section will only appear if you have added it in Account Custom Fields.
To add custom fields
- Go to Settings -> Module Customization -> Custom Field Settings -> Account Custom Fields.
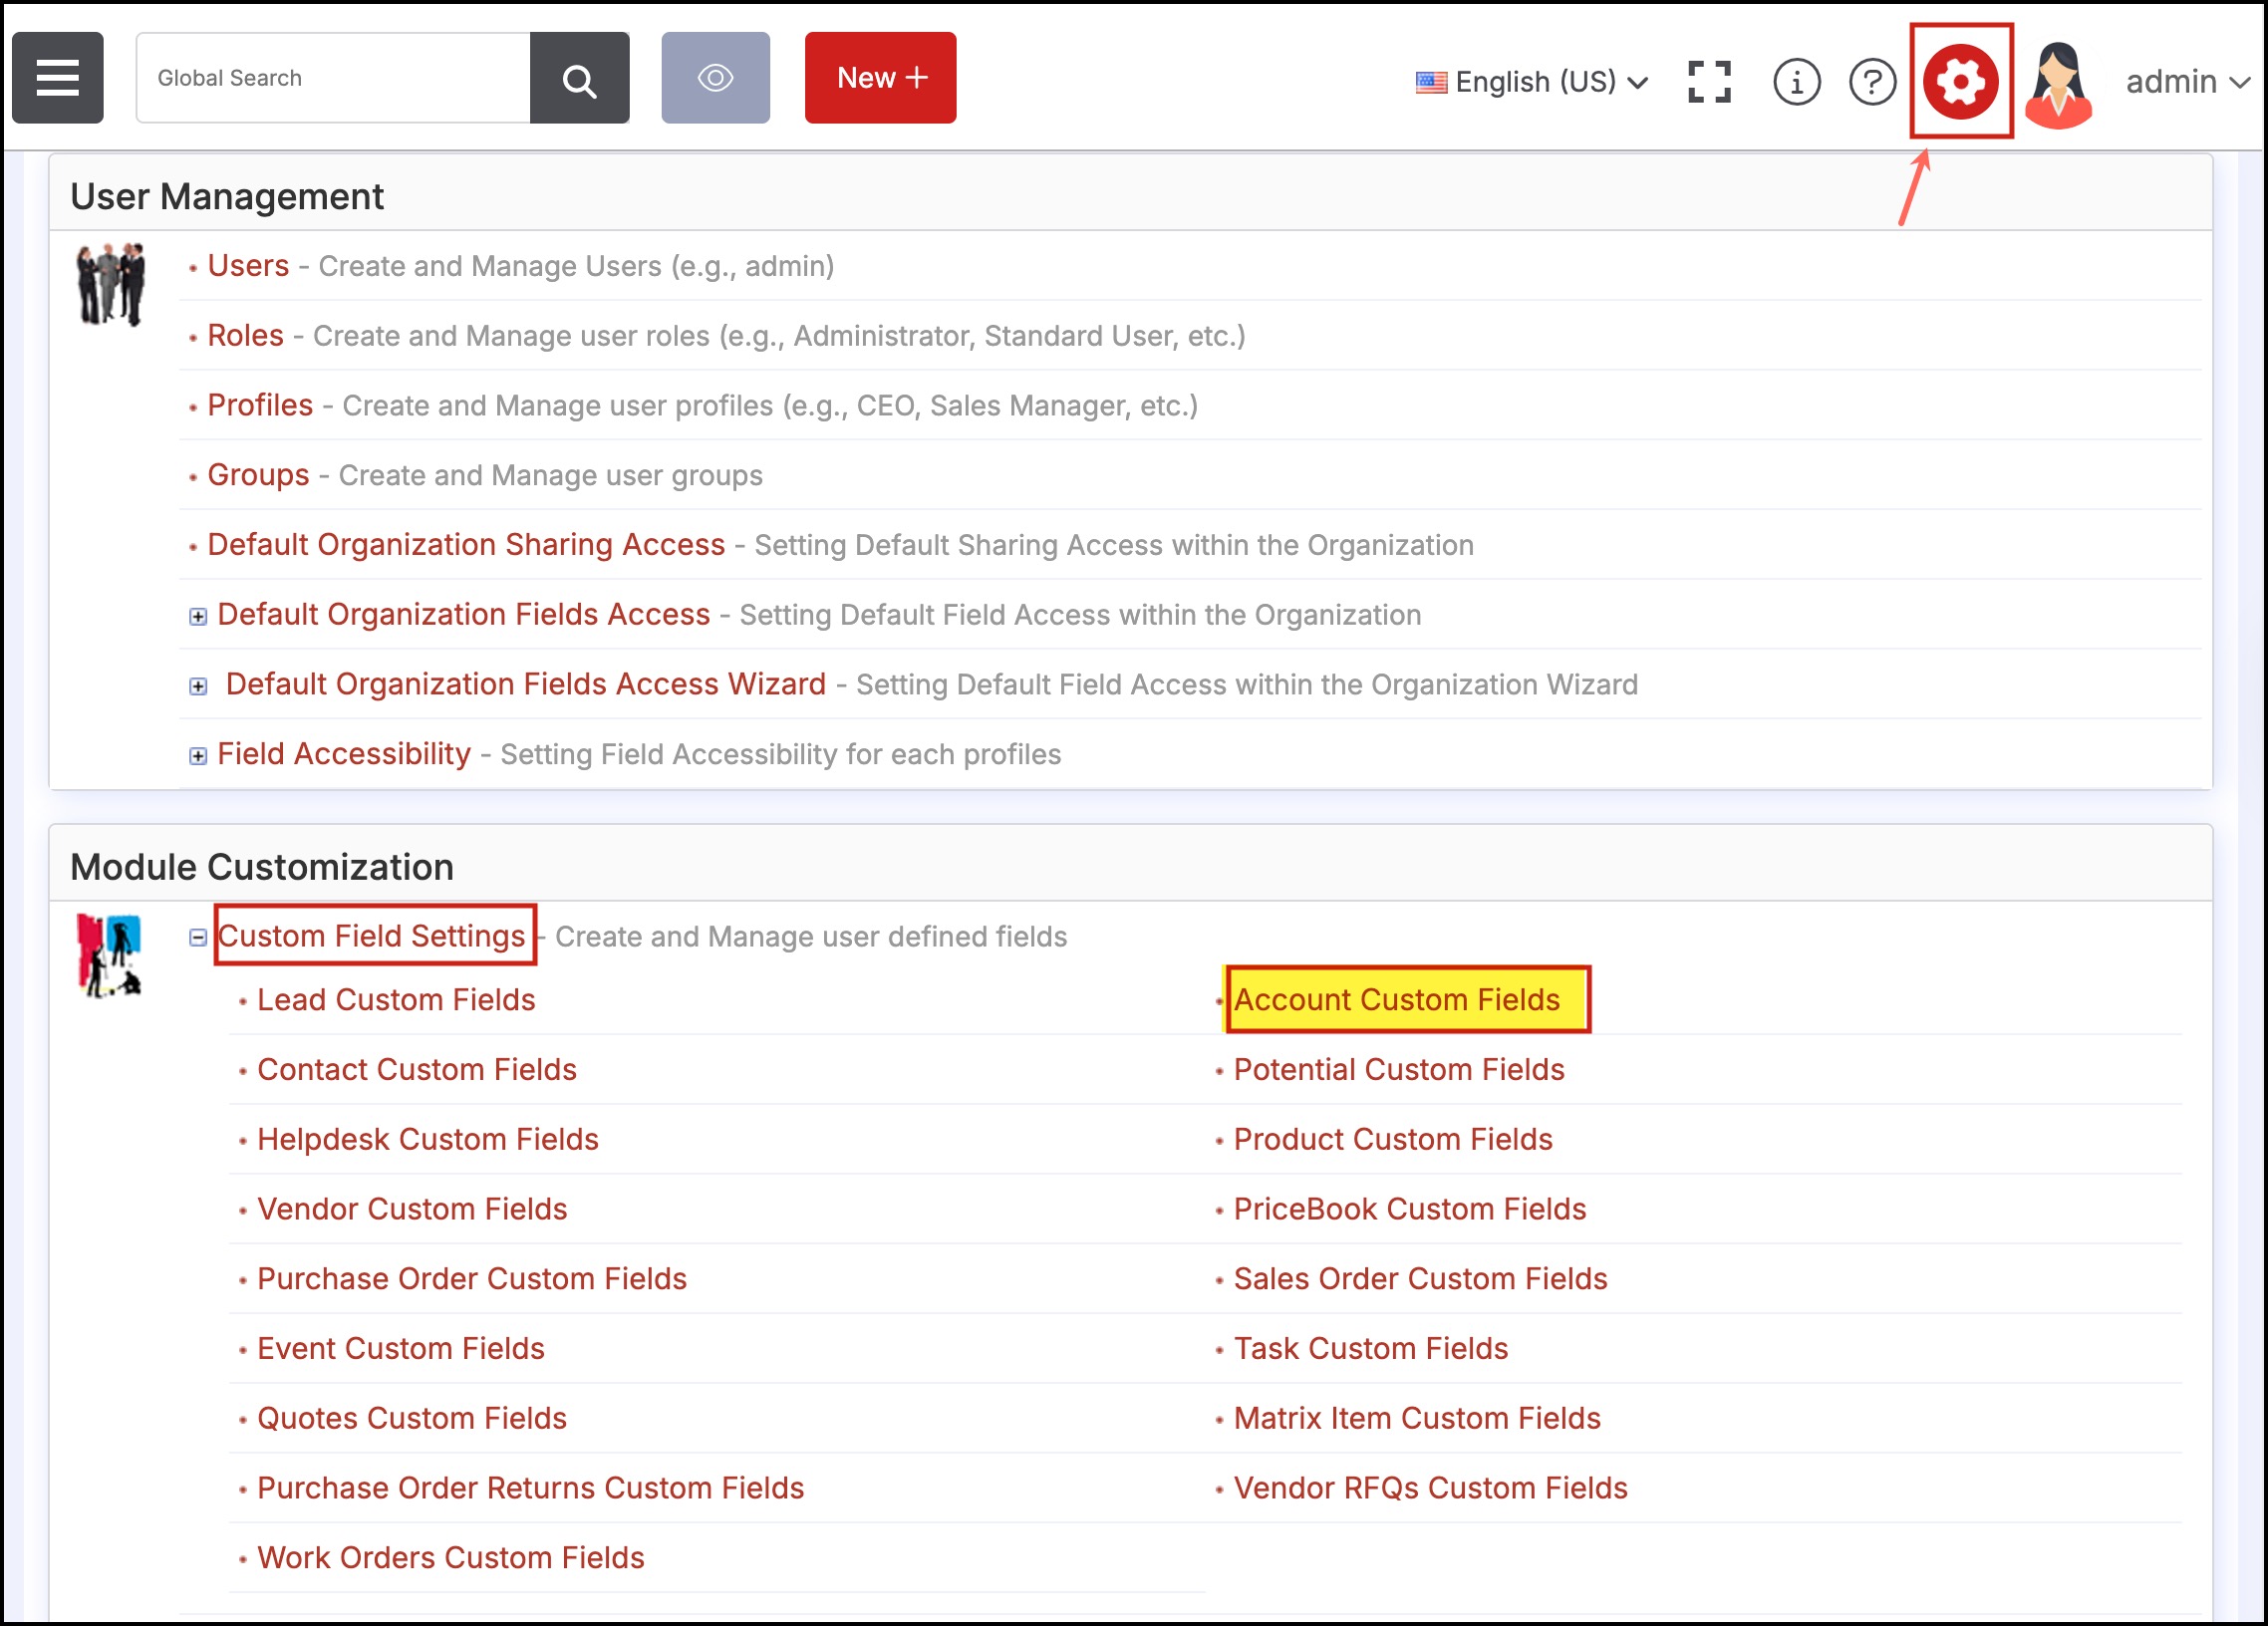
- Click on New Custom Field.
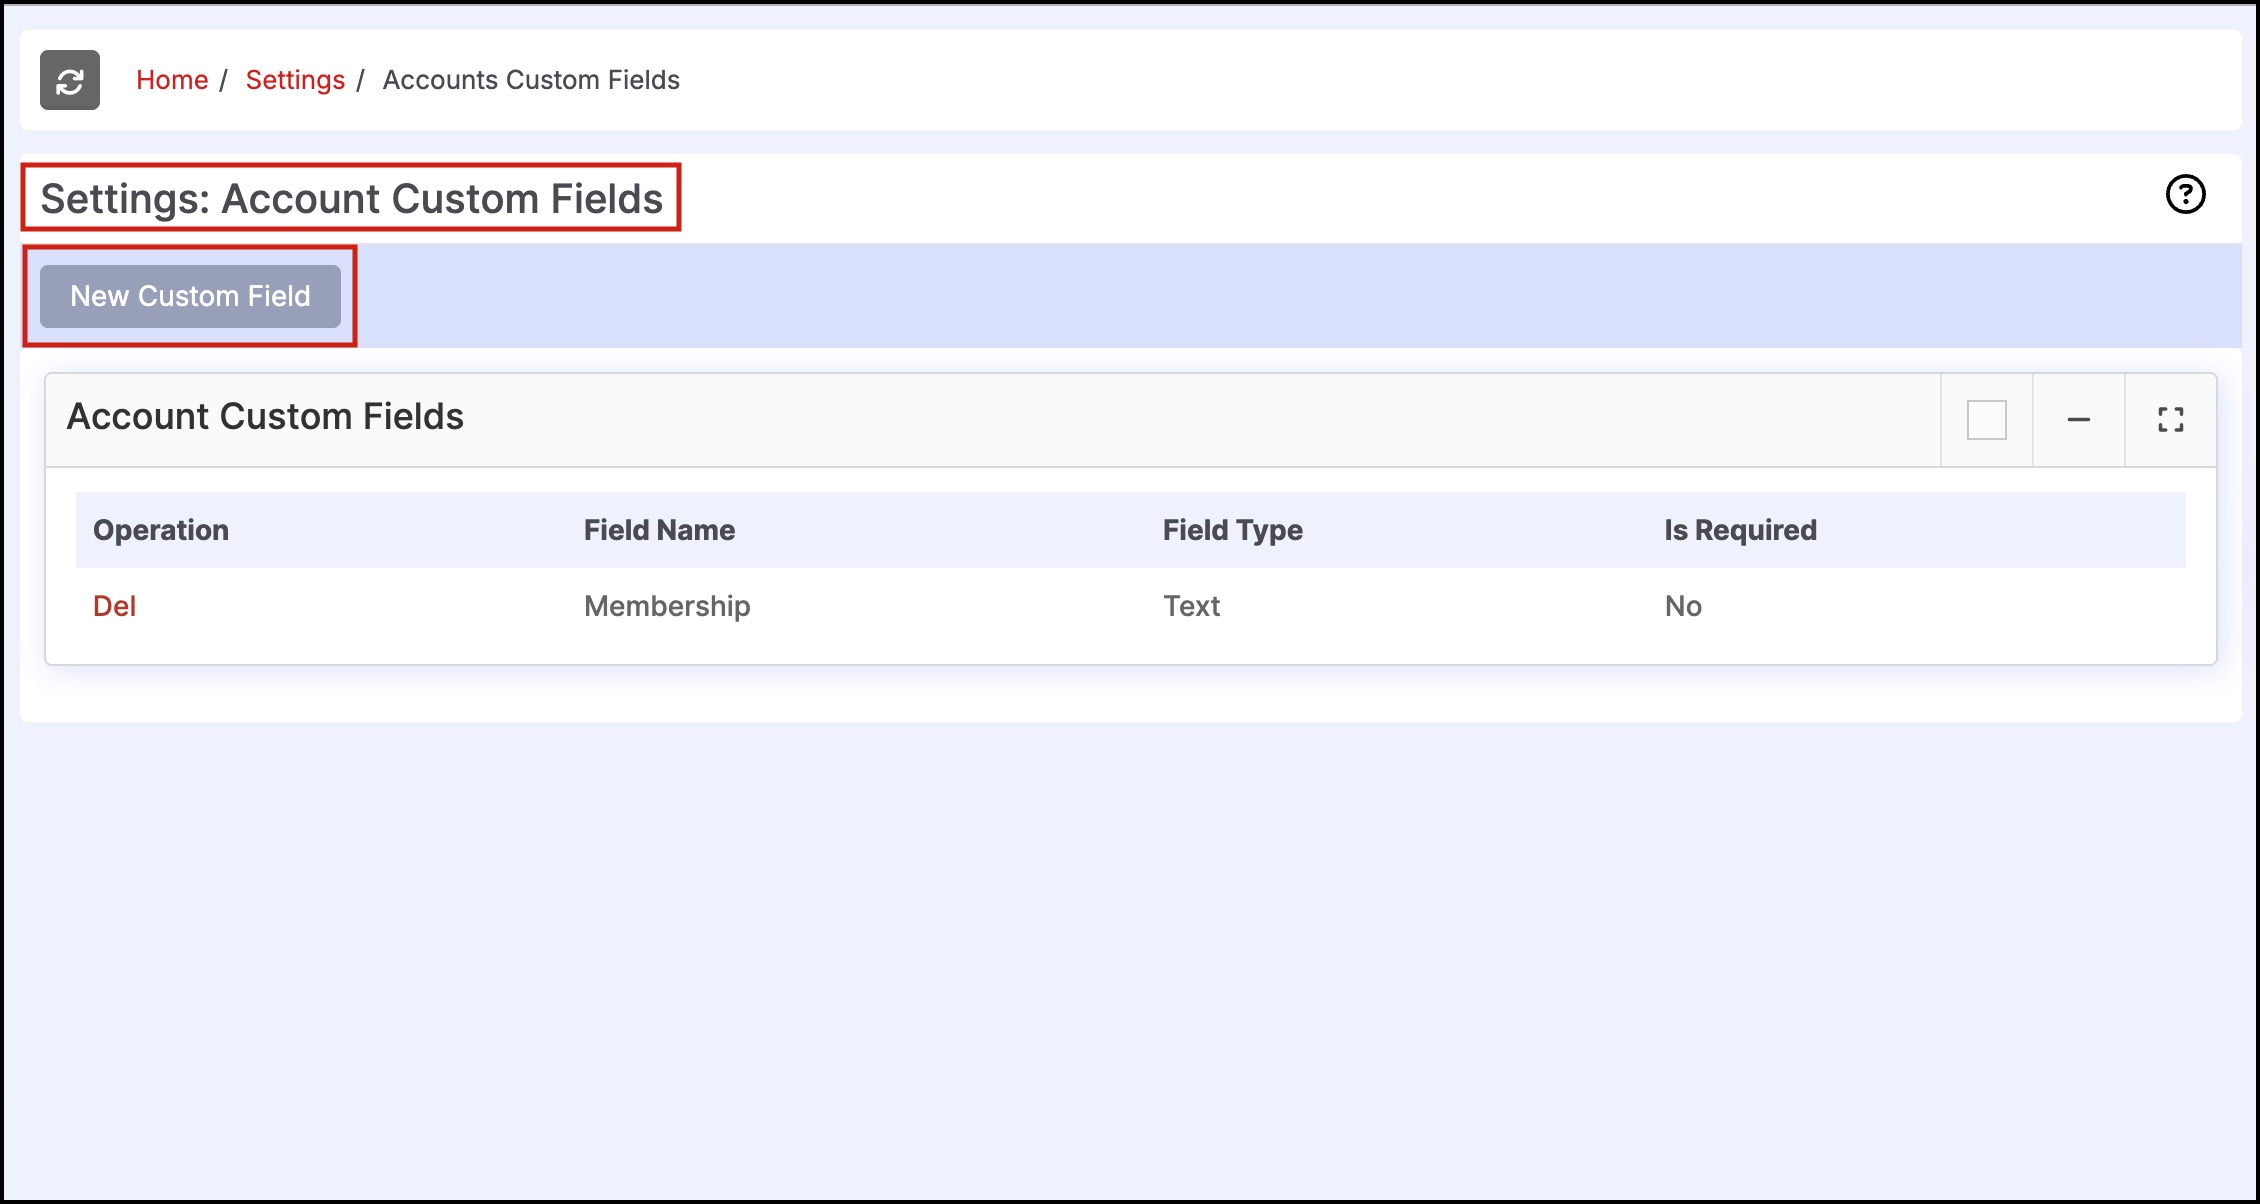
- Select the field type you want, provide necessary field details and click on Save.

- You can add any number of custom fields you want by clicking on New Custom Field, providing all details, and then clicking on Save.
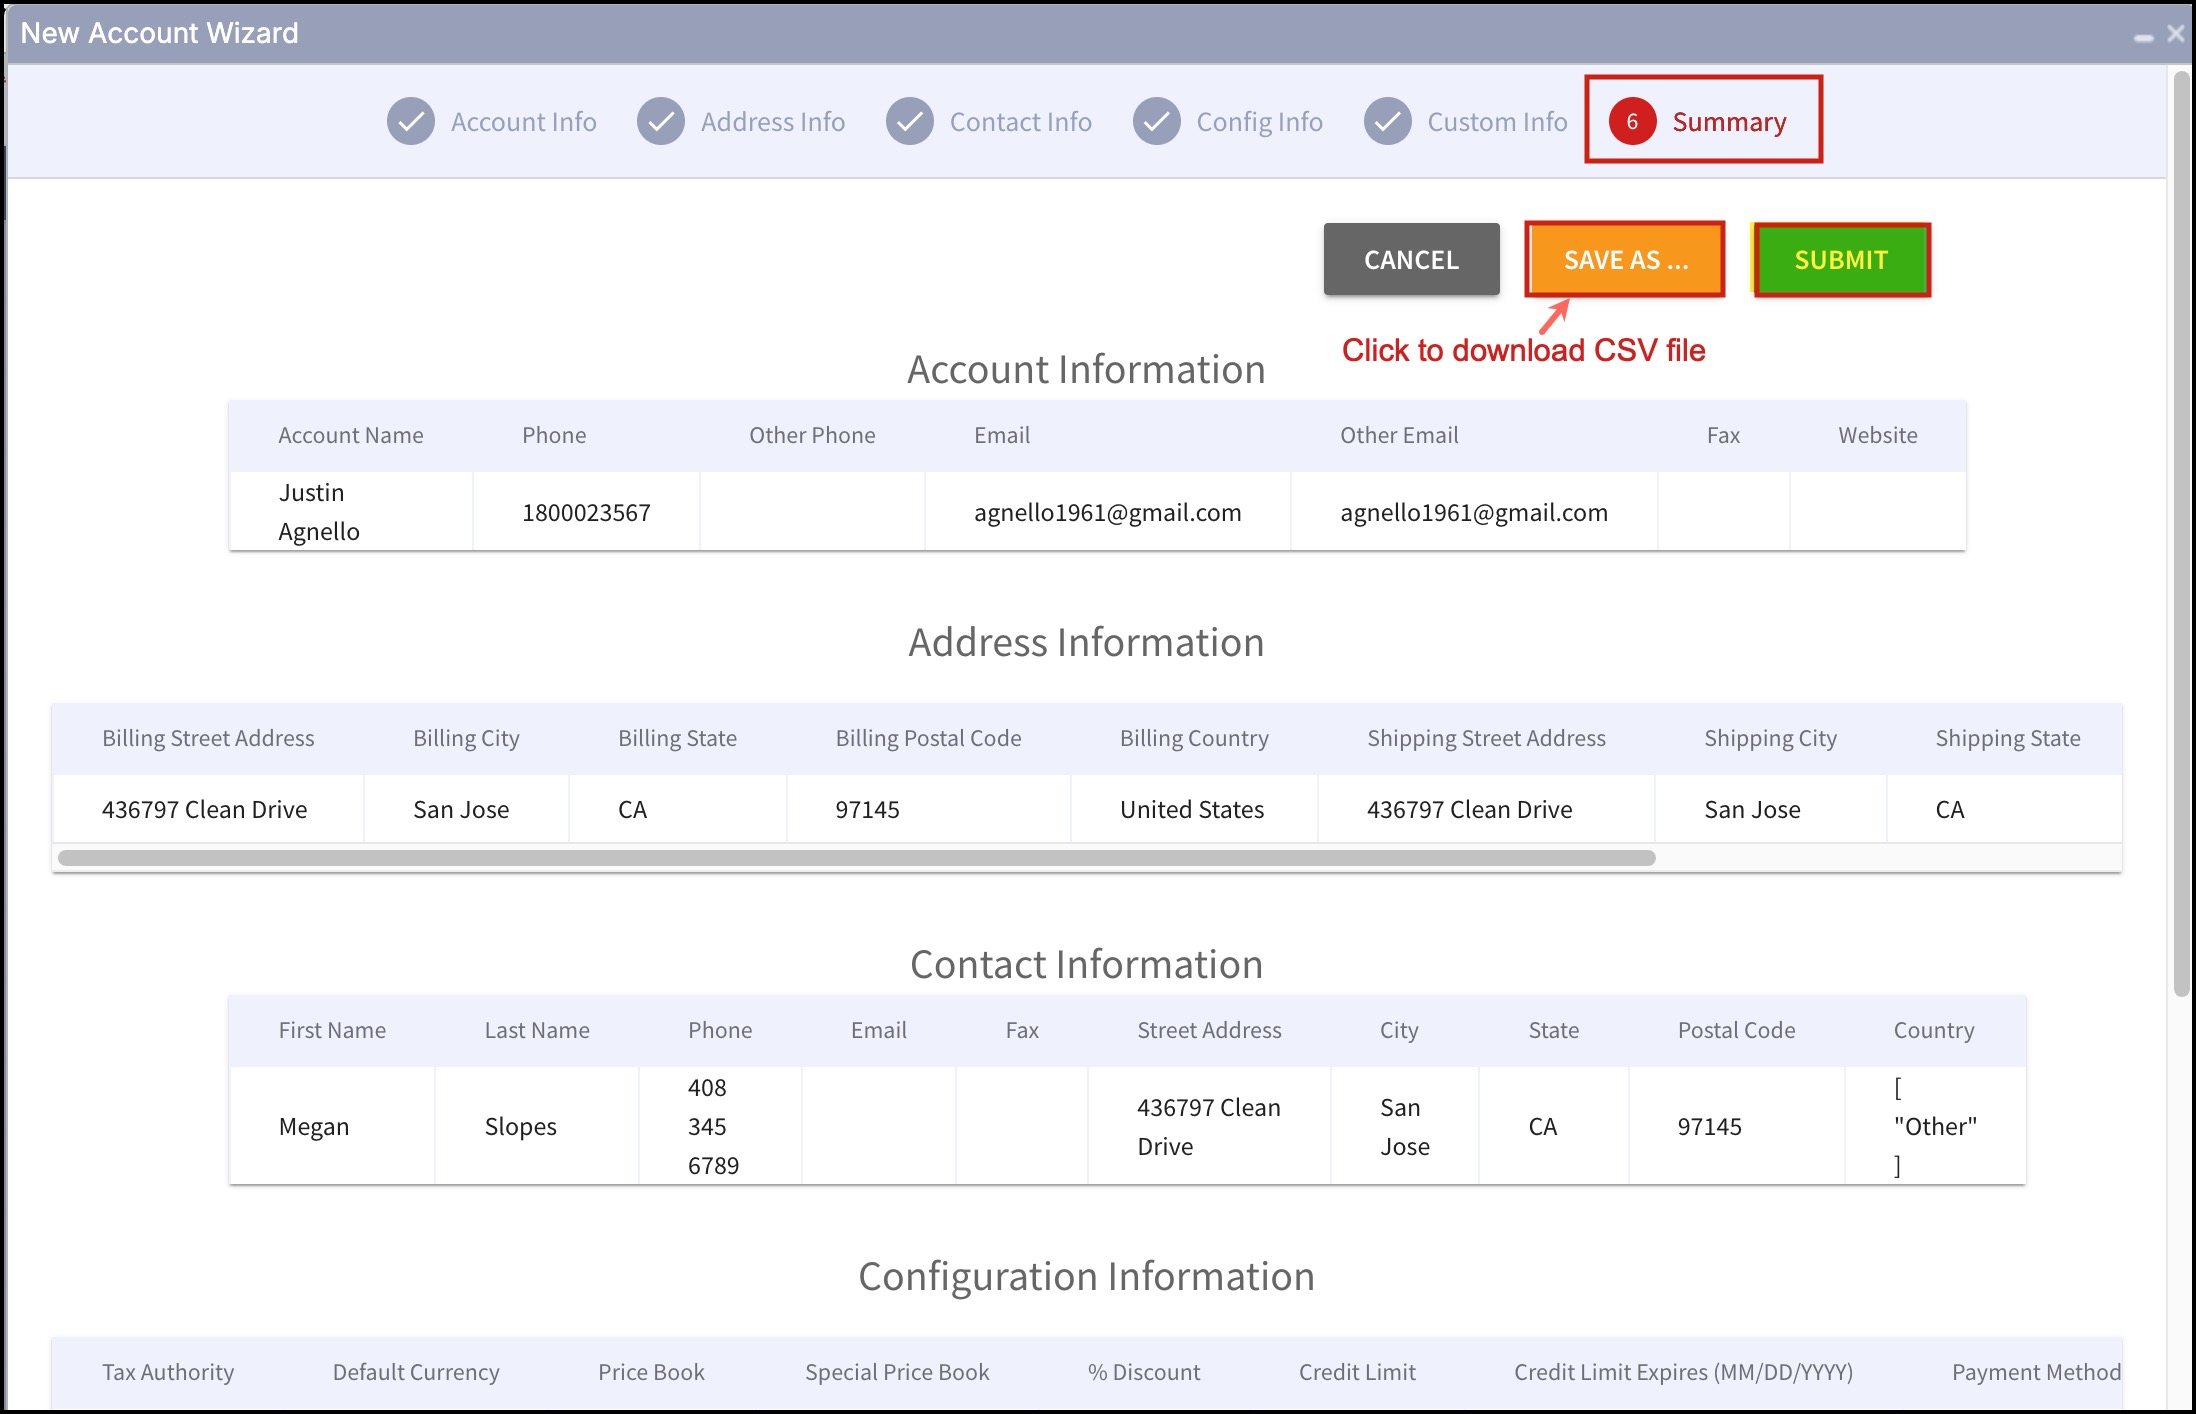
Step 6 - Summary
- You'll get a detailed summary of the information added in each step.
- Click on Save as to download a CSV file of the summary.
- Then click on Submit.
- Once you click on Submit, the created data gets saved successfully and then you will be routed to the Account Edit View.
- Enter/Edit any information needed or directly click on Save.

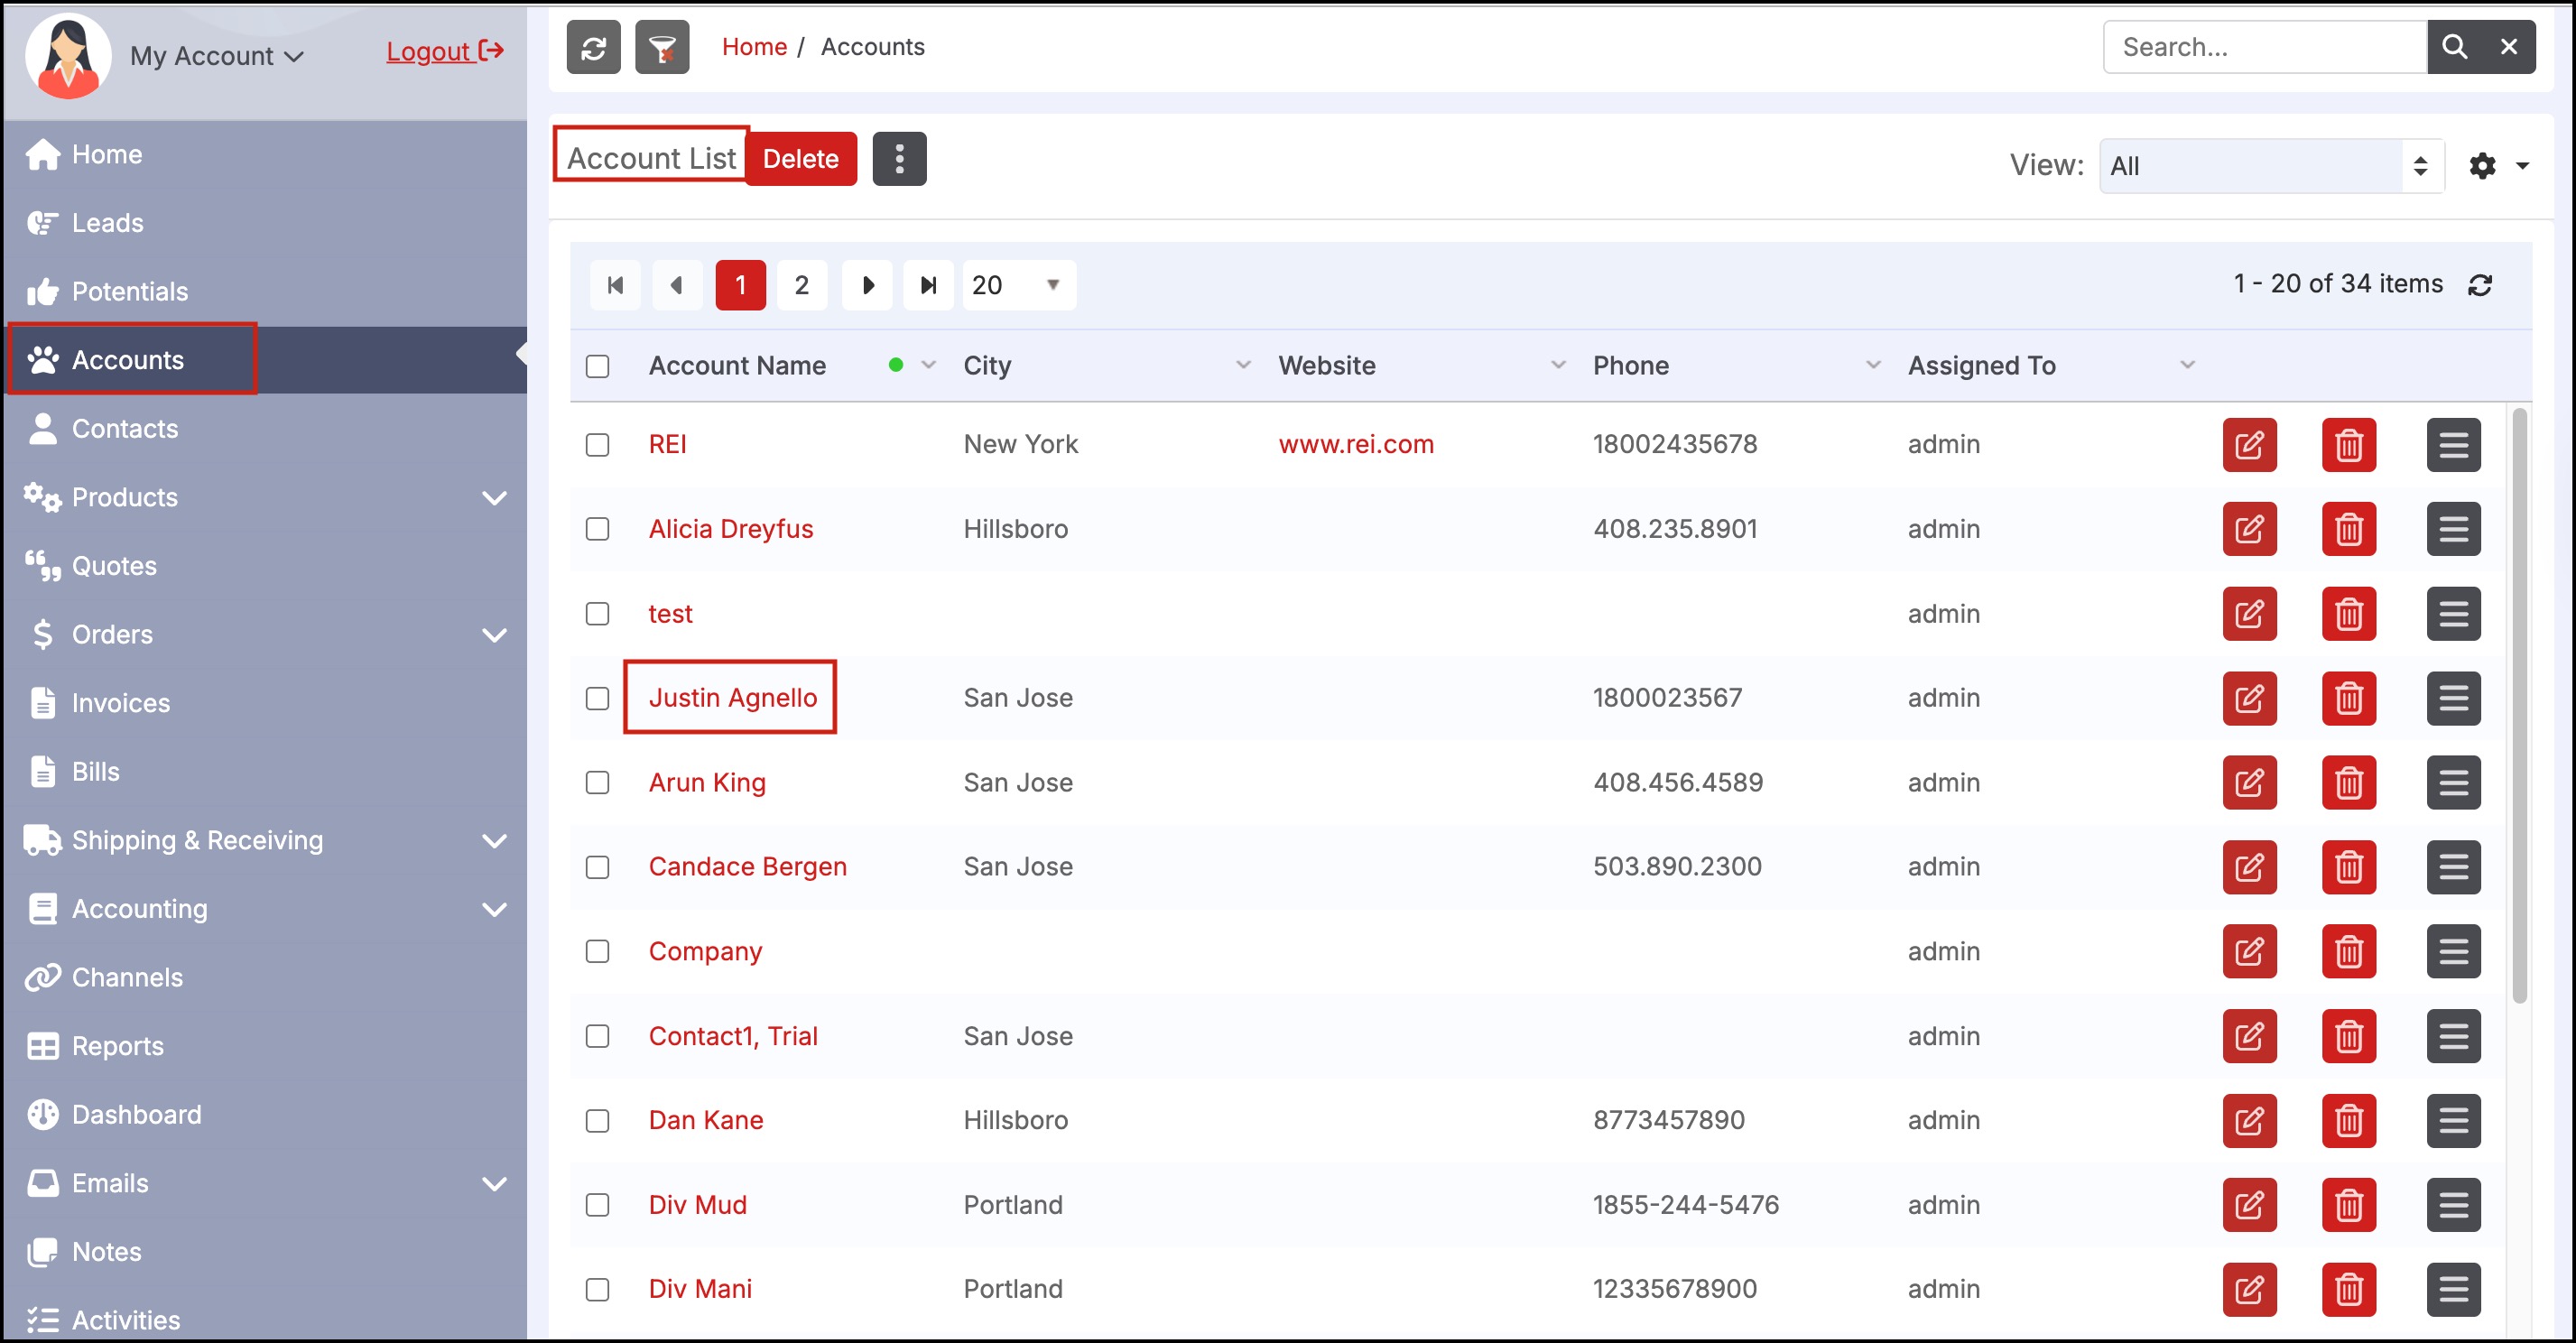
- You can view the new Account created in the Account List.
Vendor Edit View:
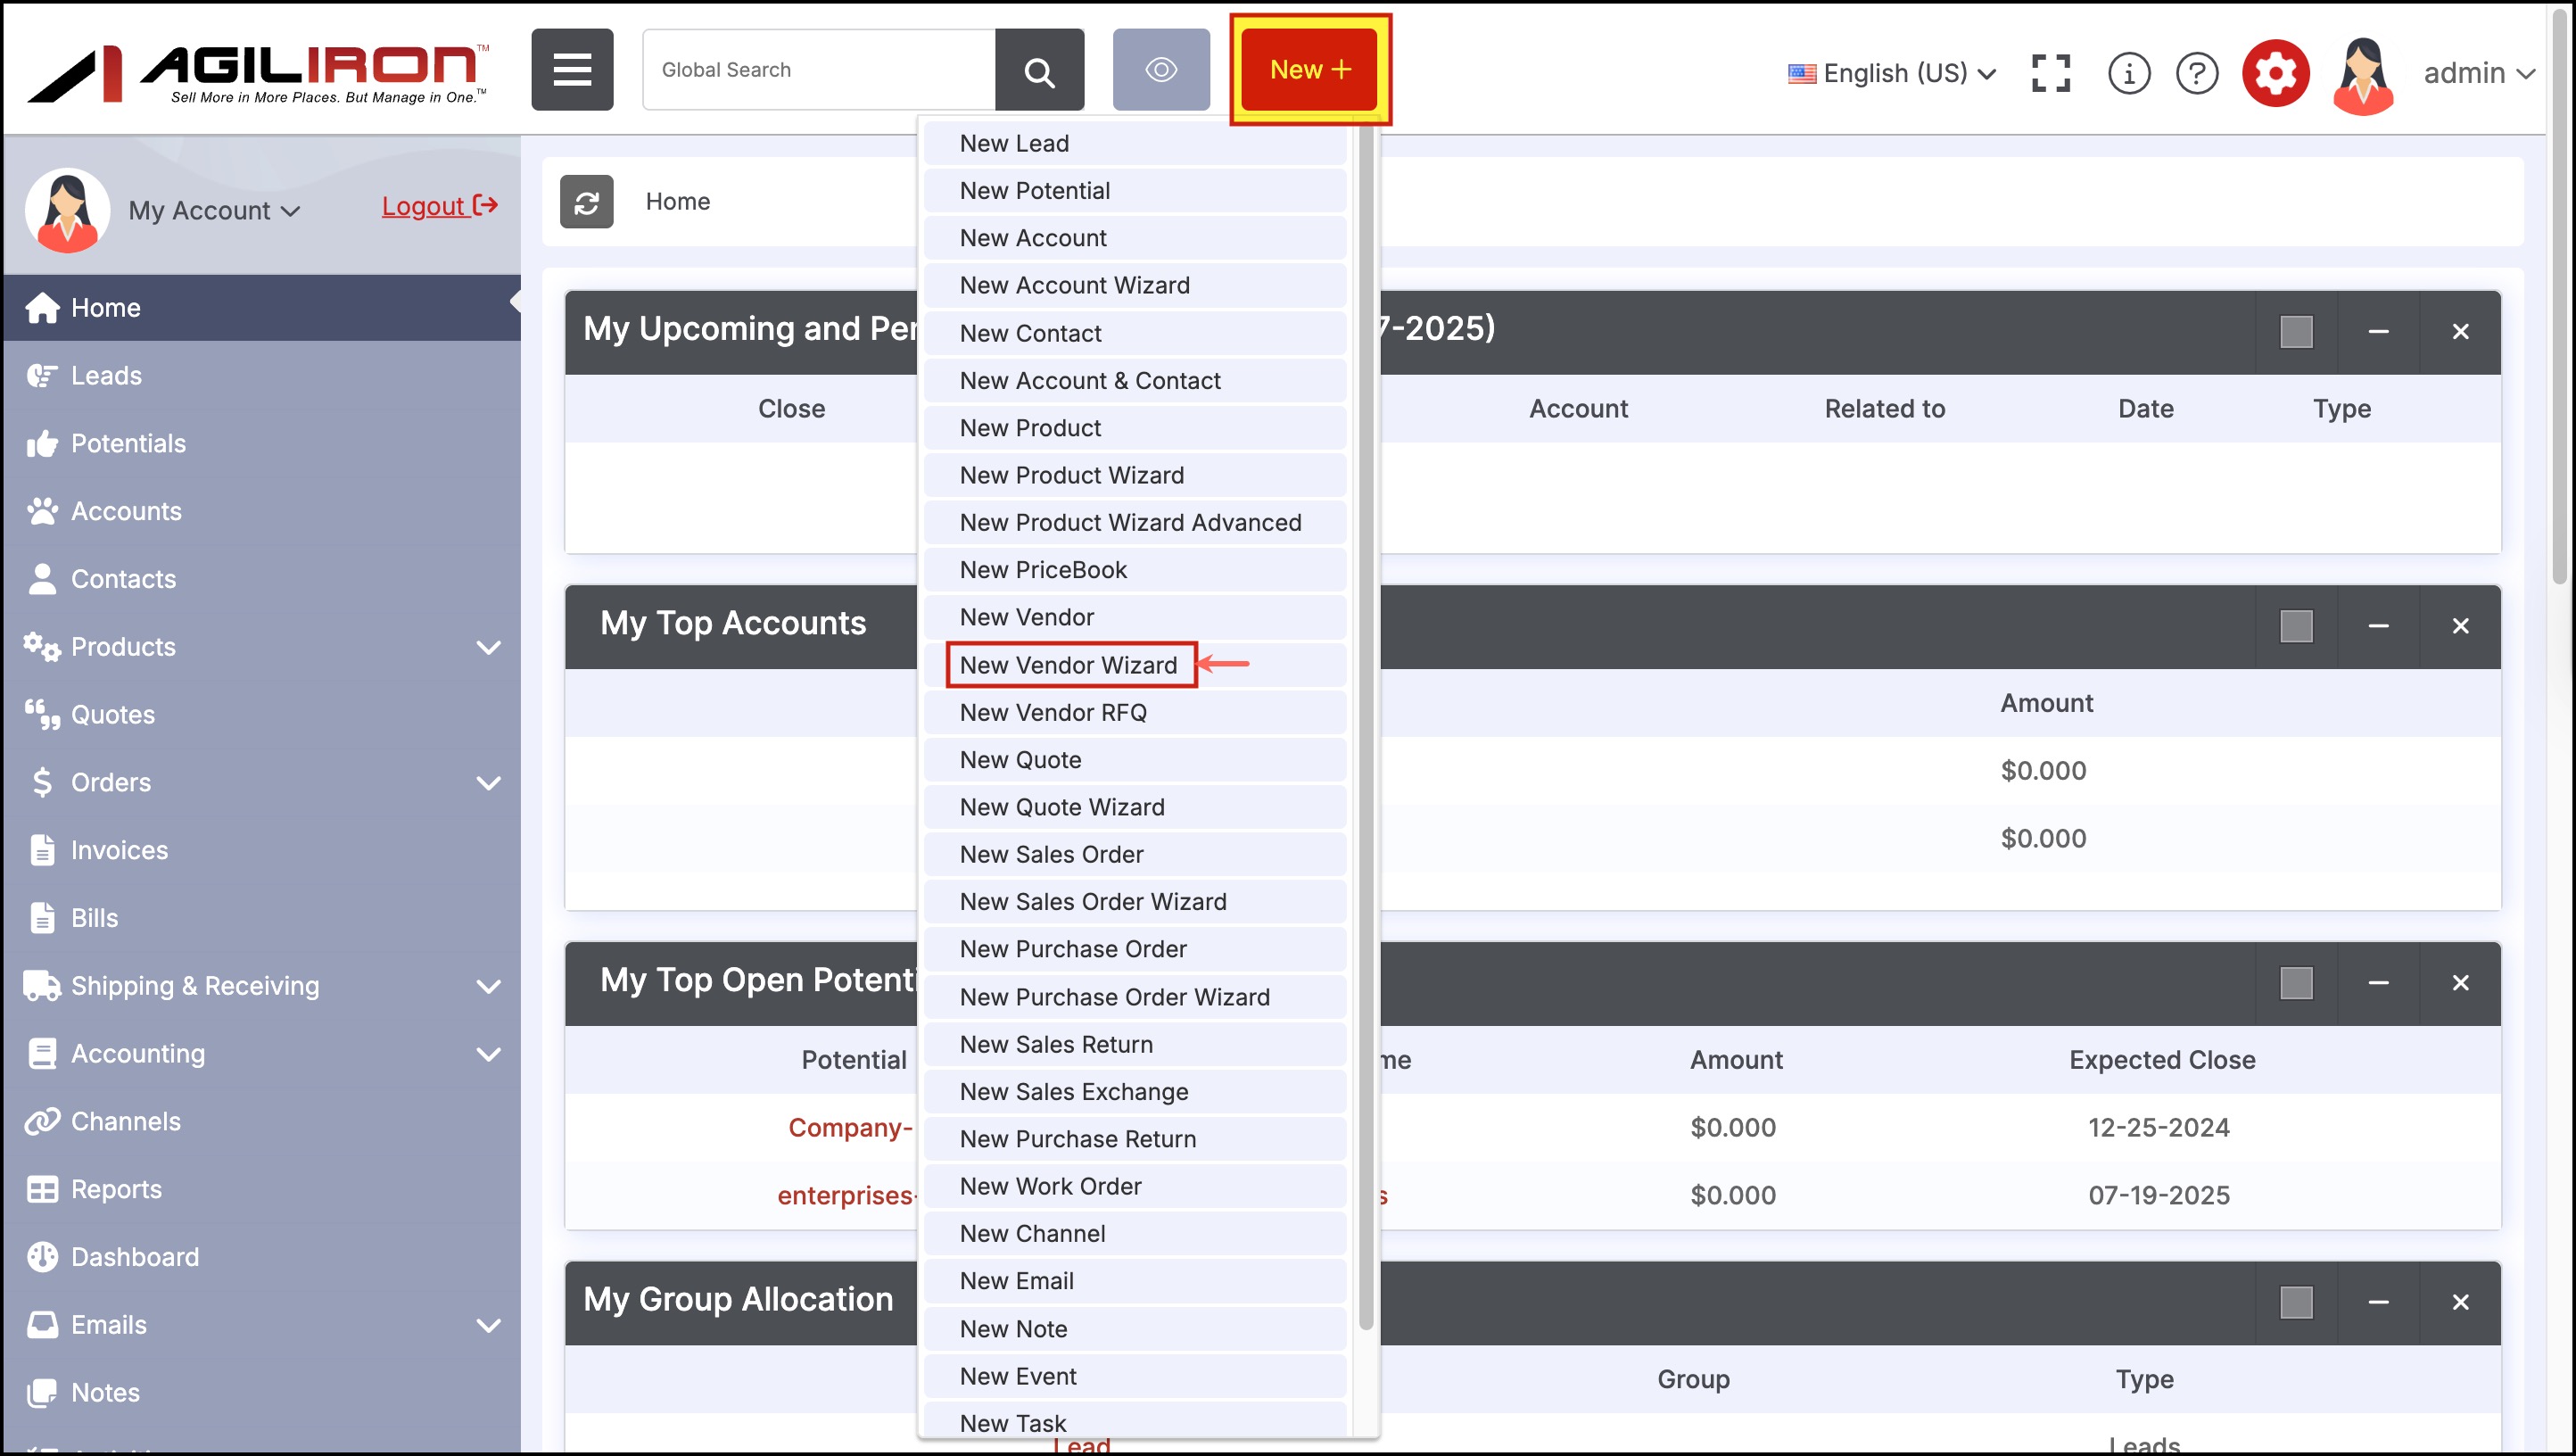
- Follow the New Vendor Wizard link as shown below.
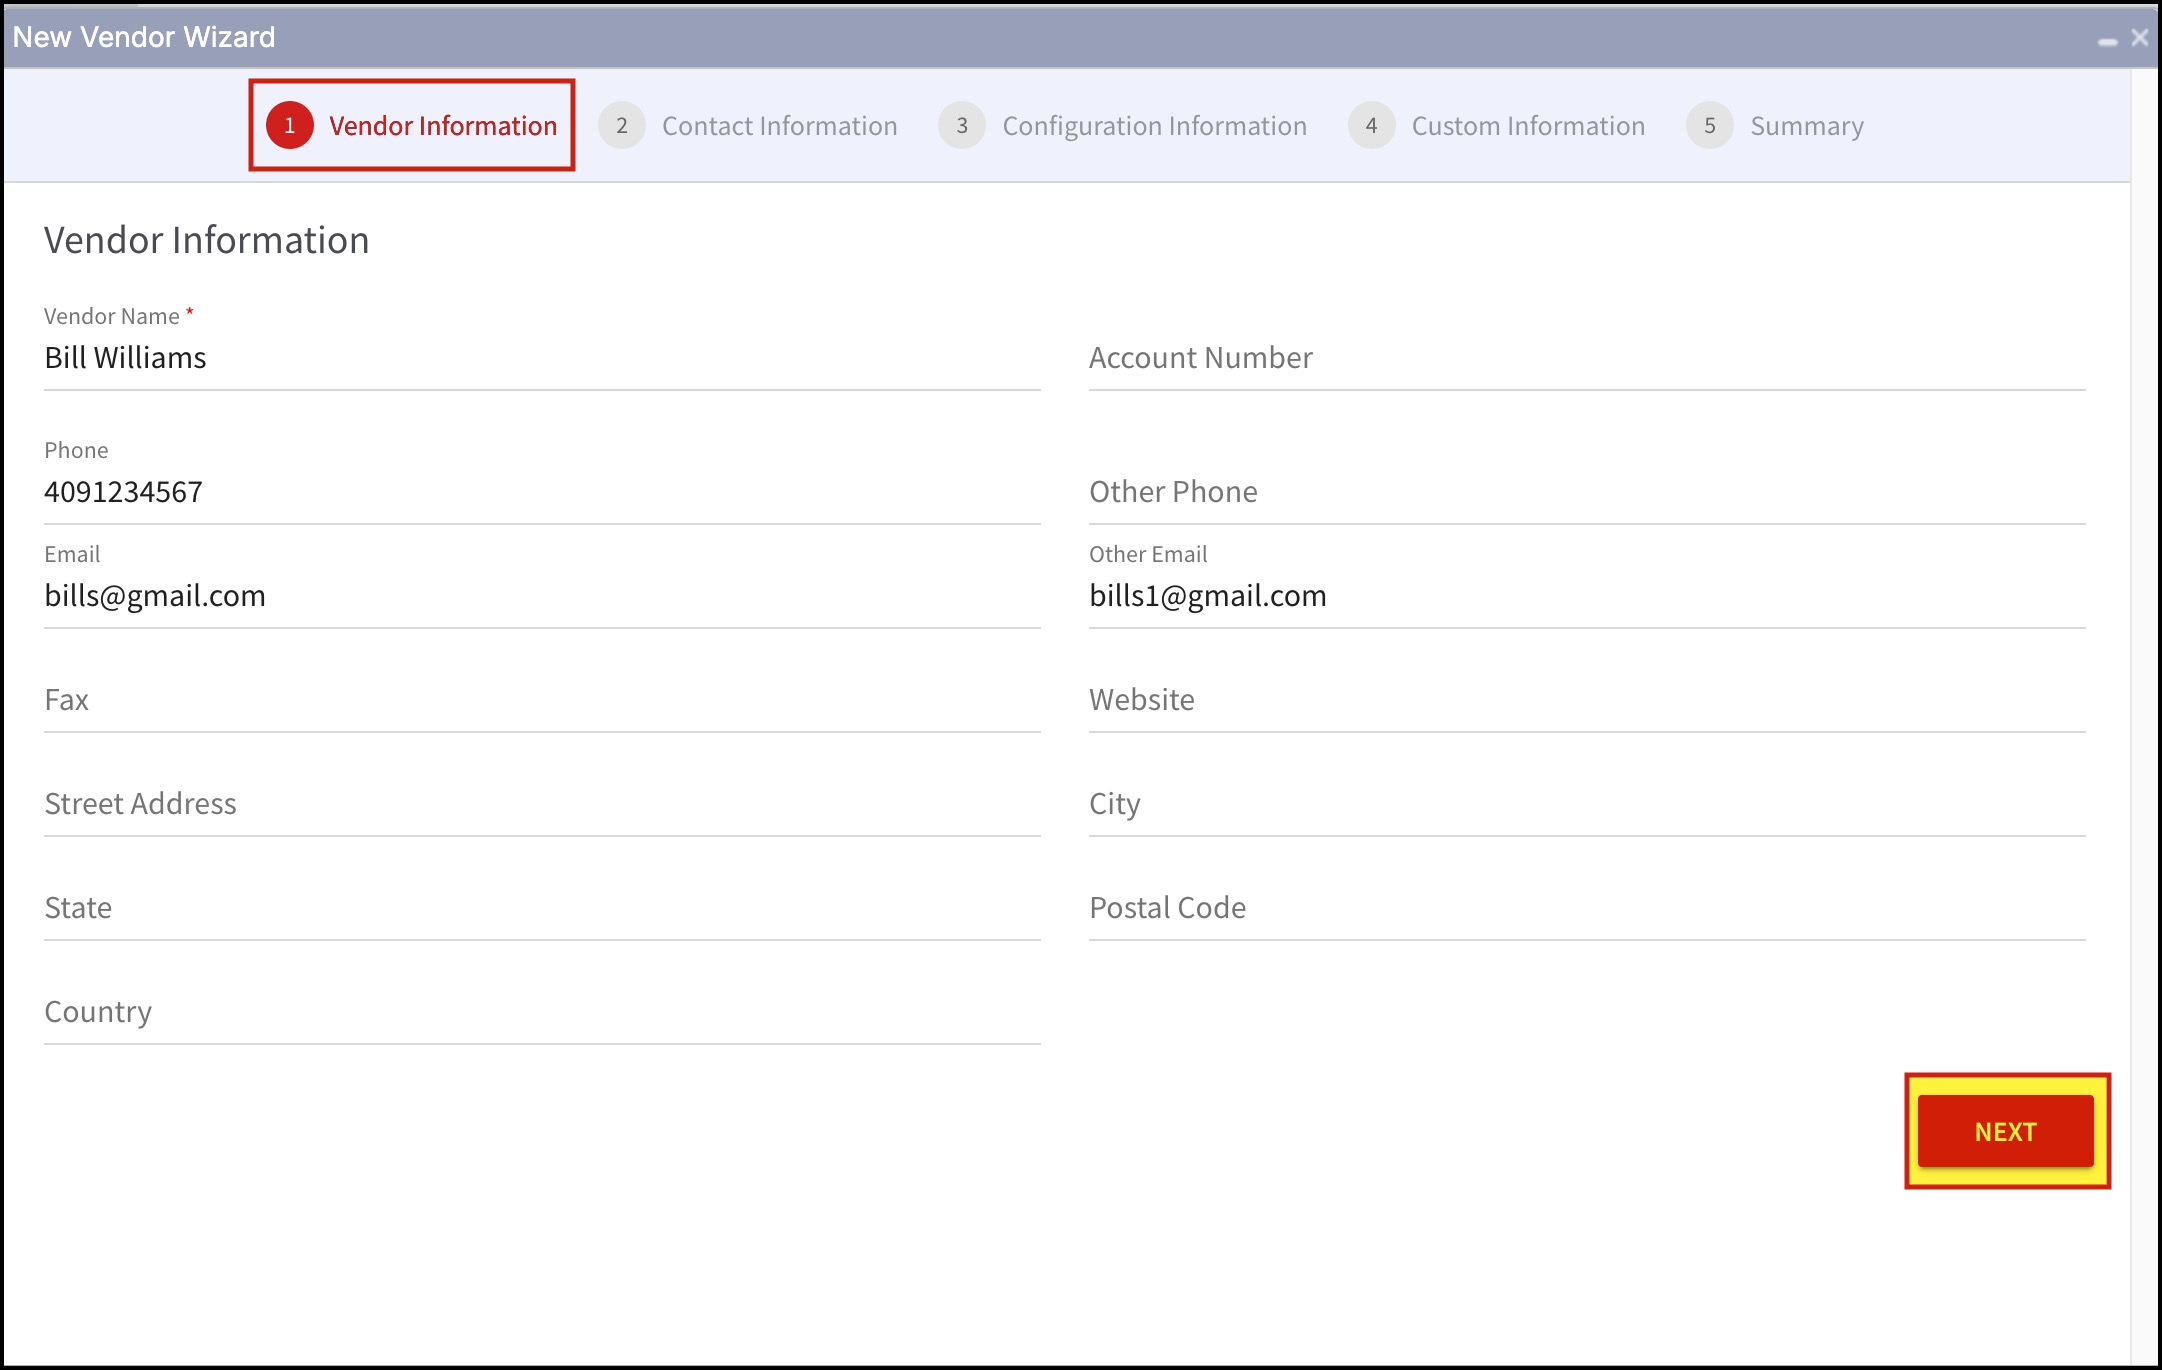
- This brings up the step-by-step process where you need to enter relevant information in each step and proceed by clicking on Next.
- Data in mandatory fields (fields marked with *) has to be filled.
You can minimize or maximize each screen as per convenience.\
Step 1 - Enter Vendor Information
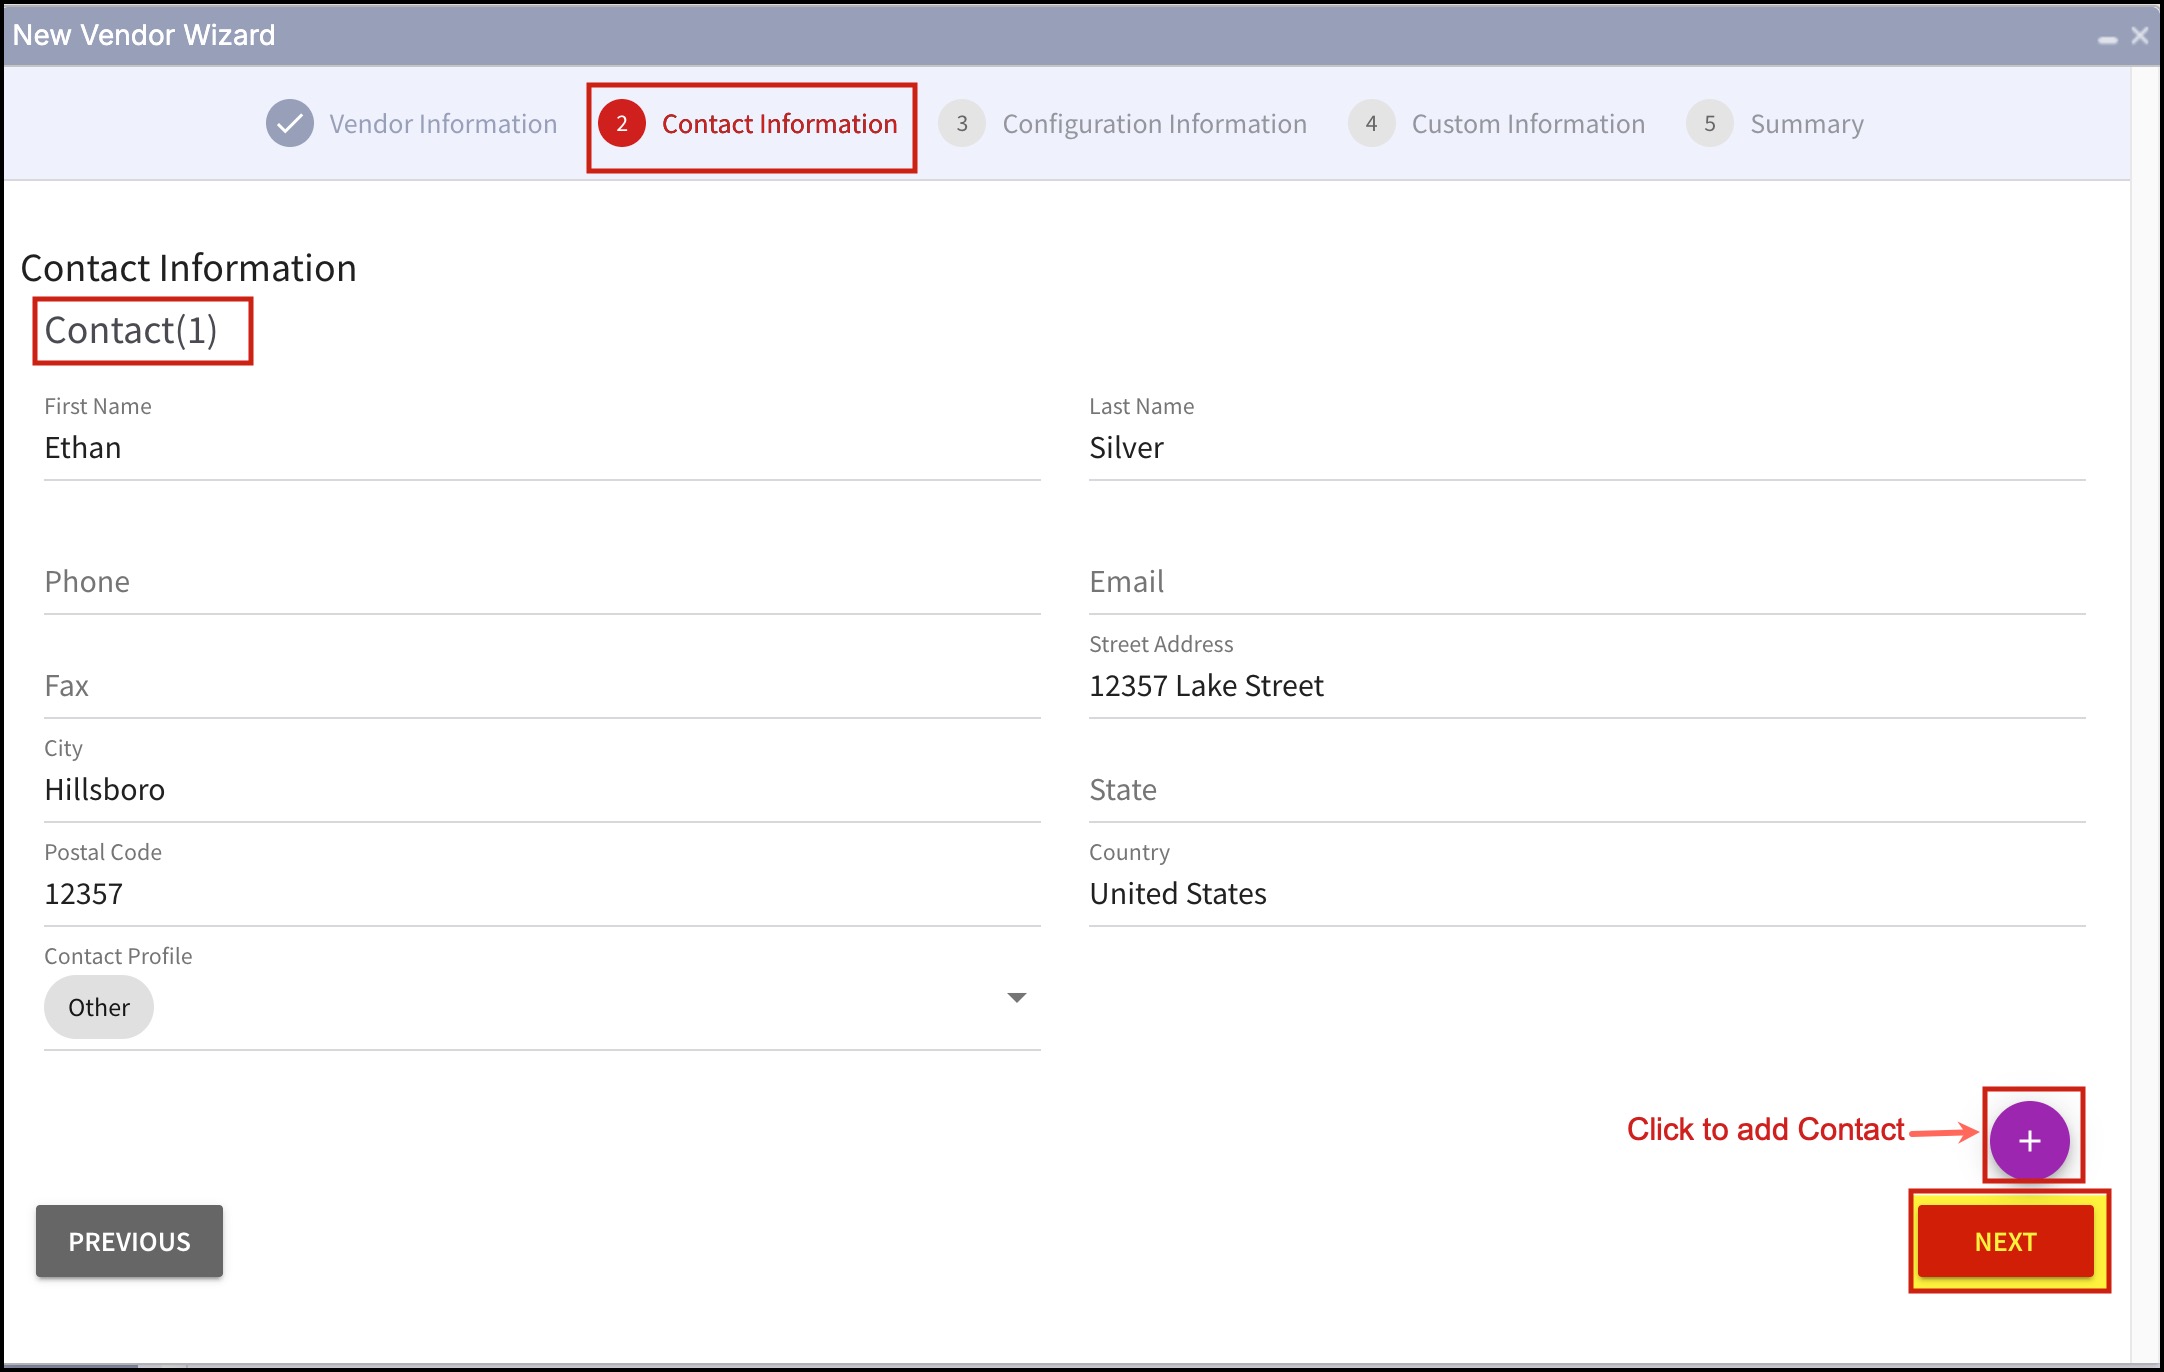
Step 2 - Enter Vendor Contact Information
- You can add maximum 3 contacts. Click on the + sign to add contacts.
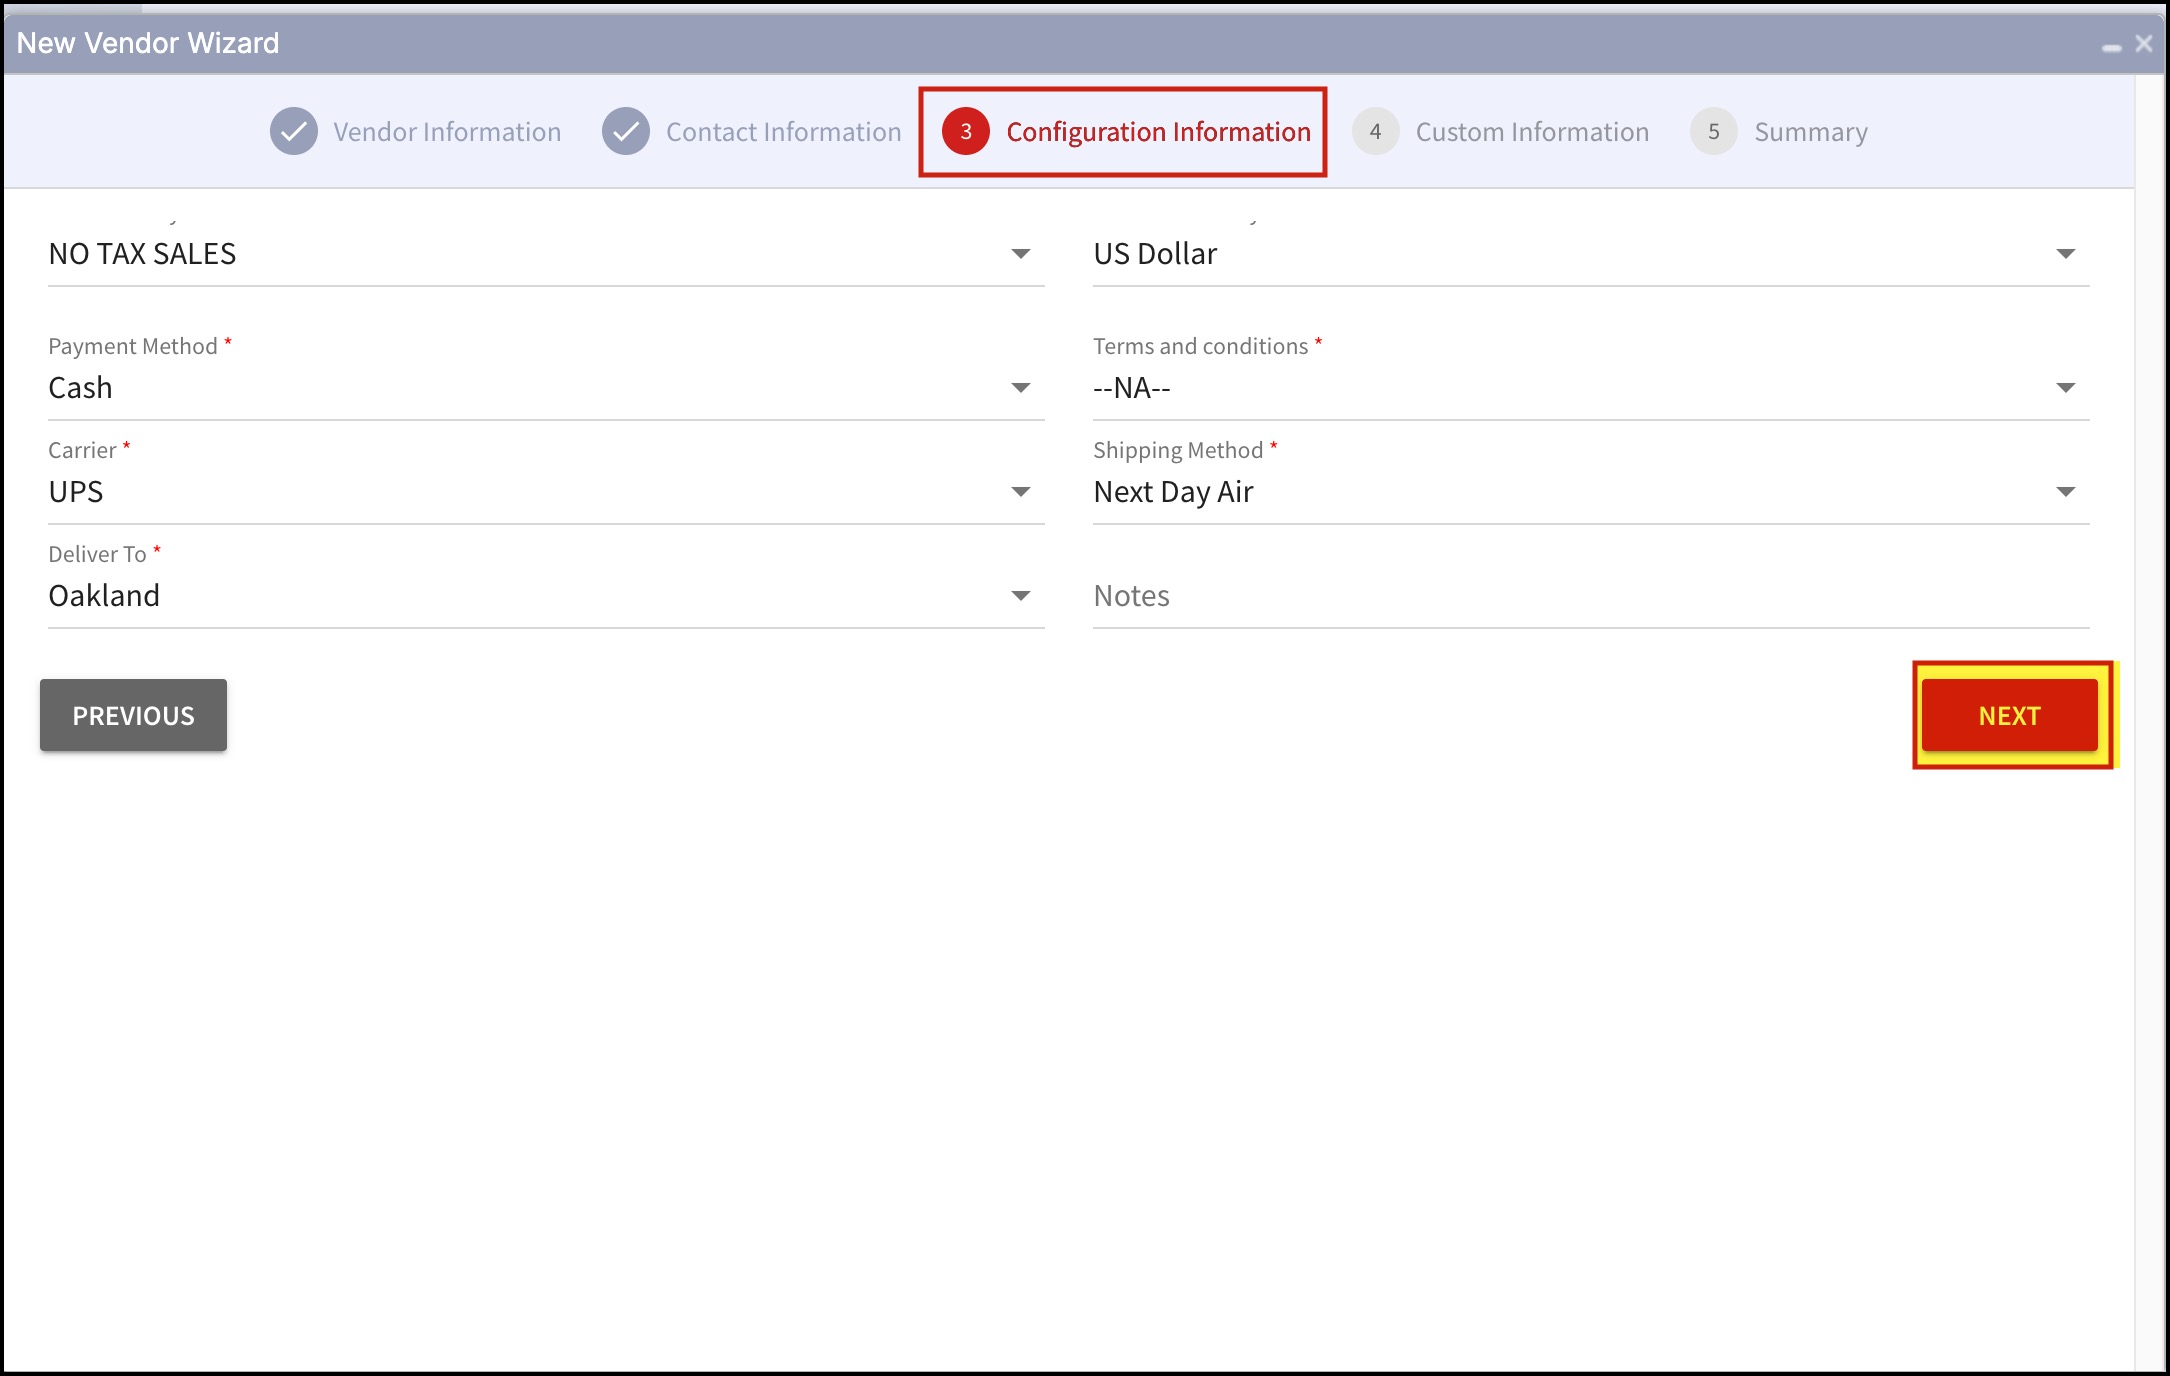
Step 3 - Enter Vendor Configuration Information
- Enter/Edit information in all mandatory fields.
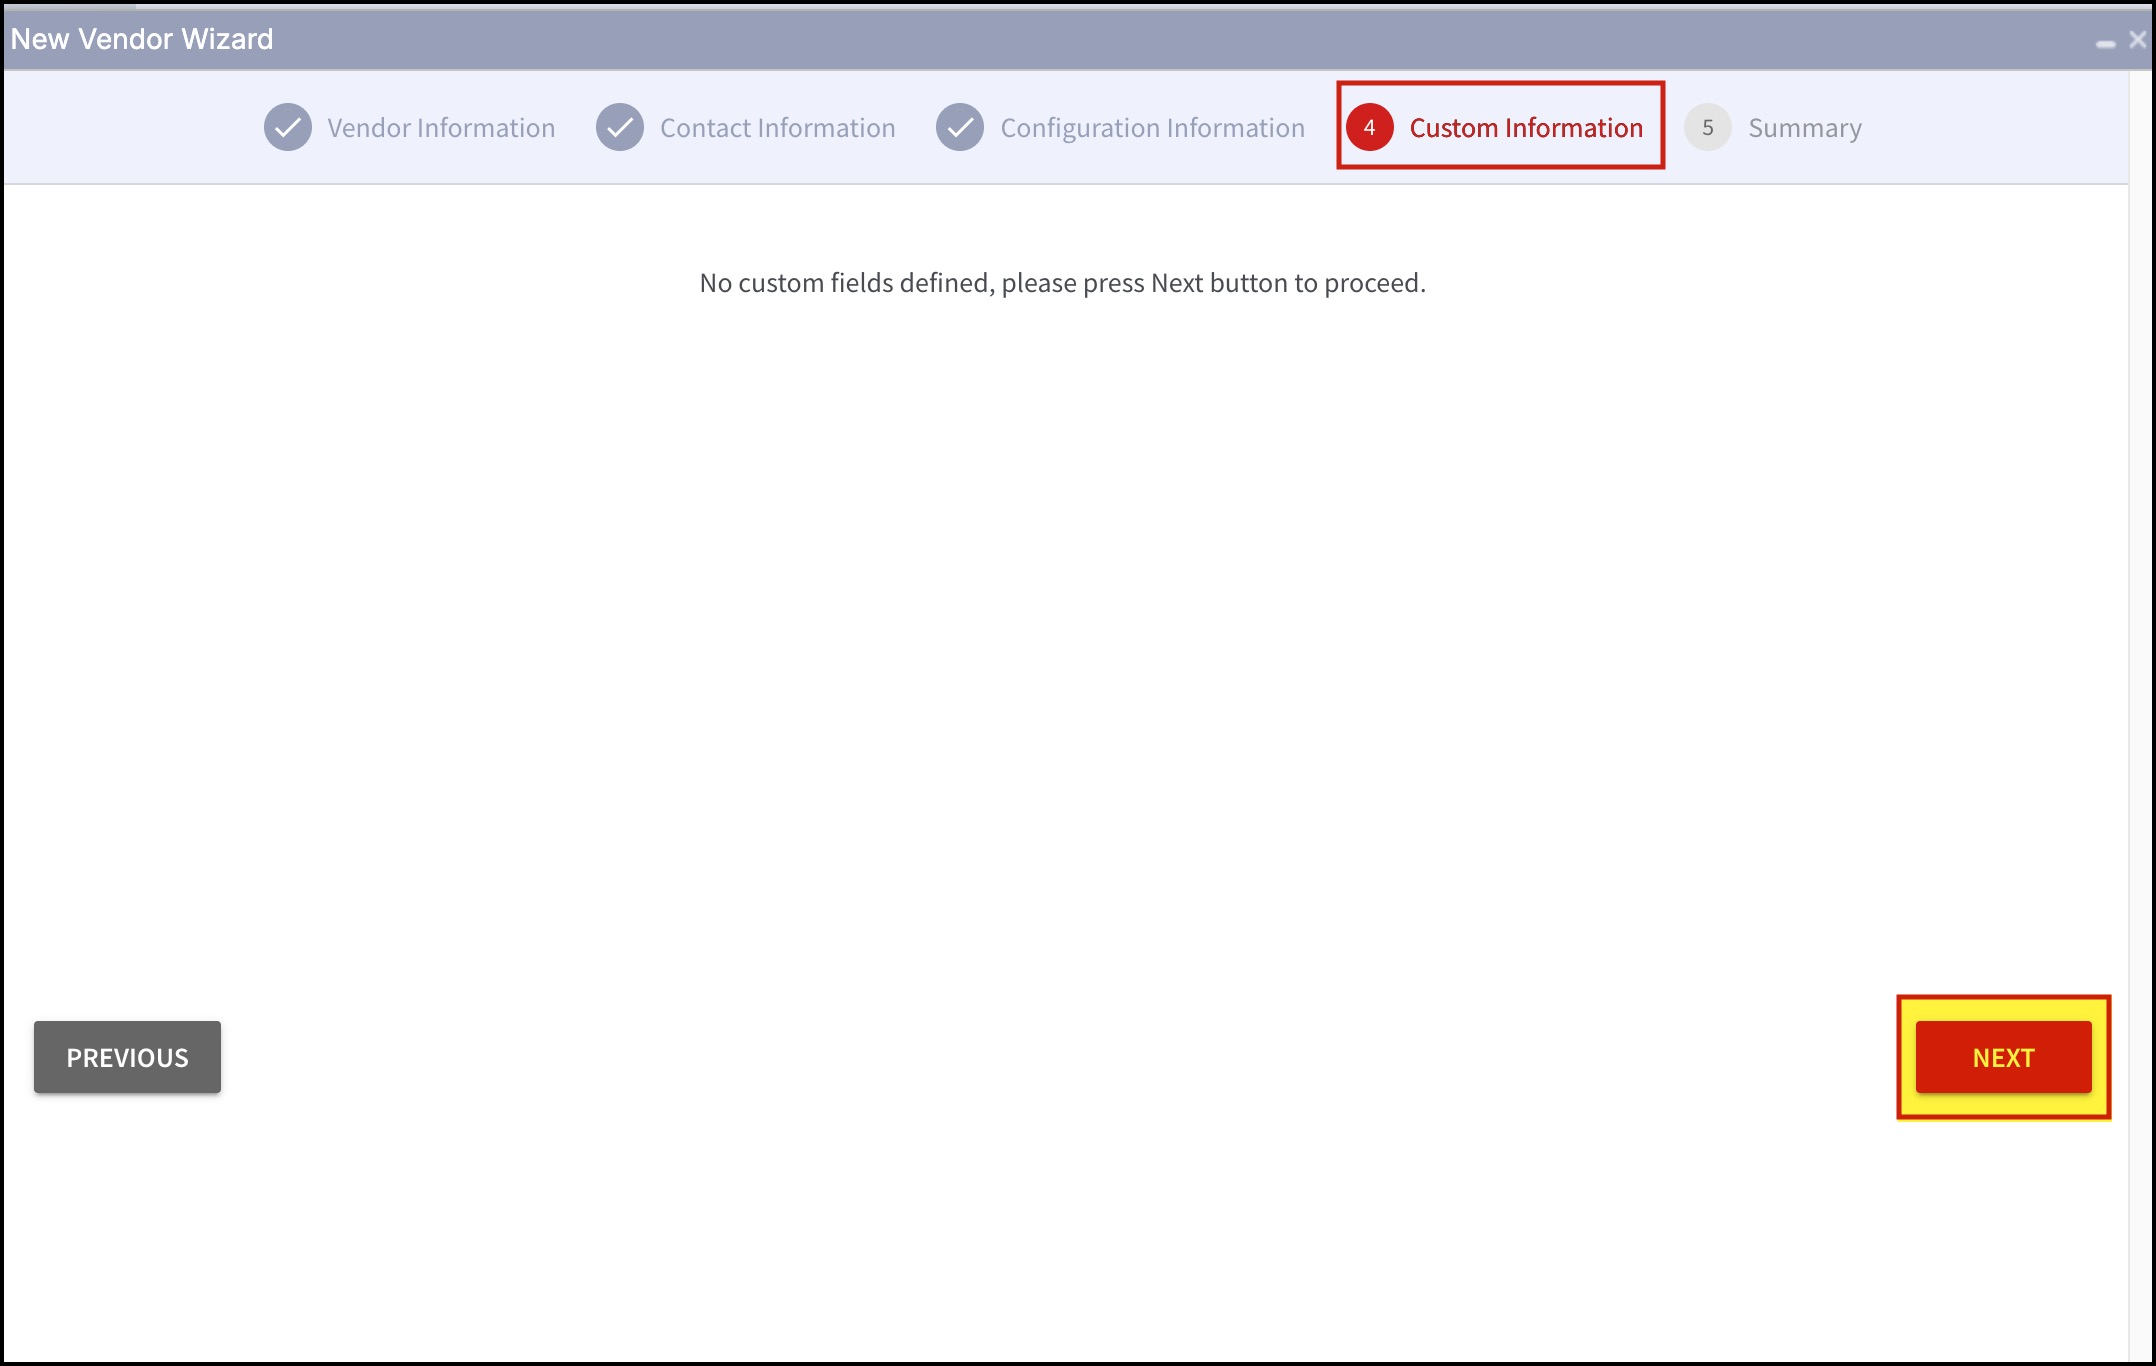
Step 4 - Enter Custom Information
Custom Fields data entry is the additional step added in the New Vendor wizard.
- Add custom information if any or proceed by clicking on Next.
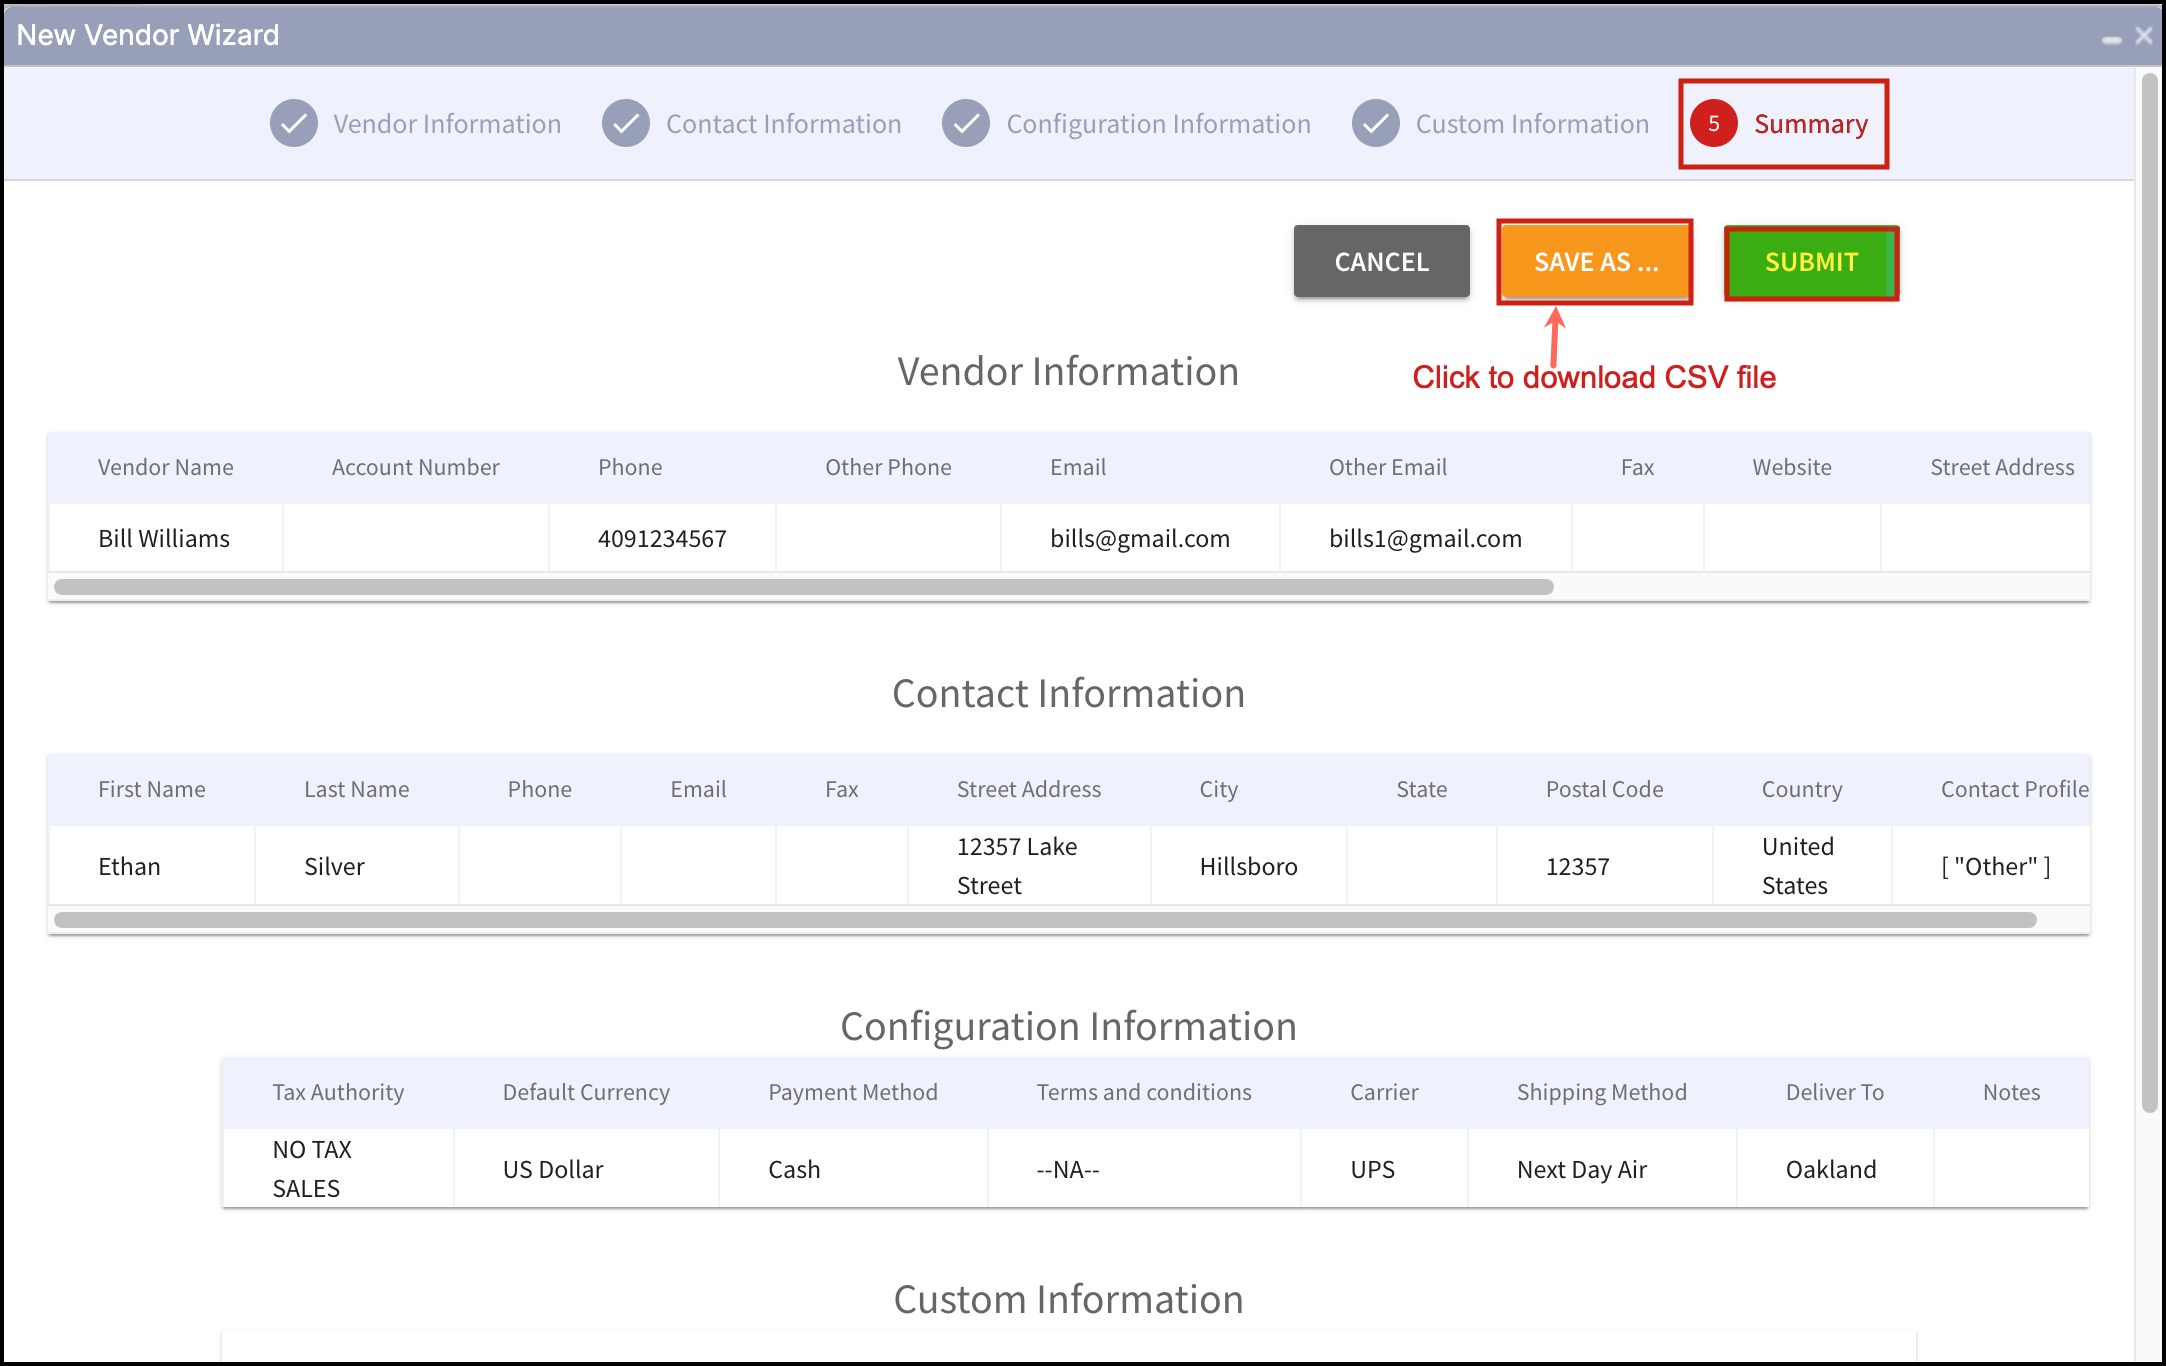
Step 5 - Summary
- You'll get a detailed summary of the information added in each step.
- Click on Save as to download a CSV file of the summary.
- Then click on Submit.
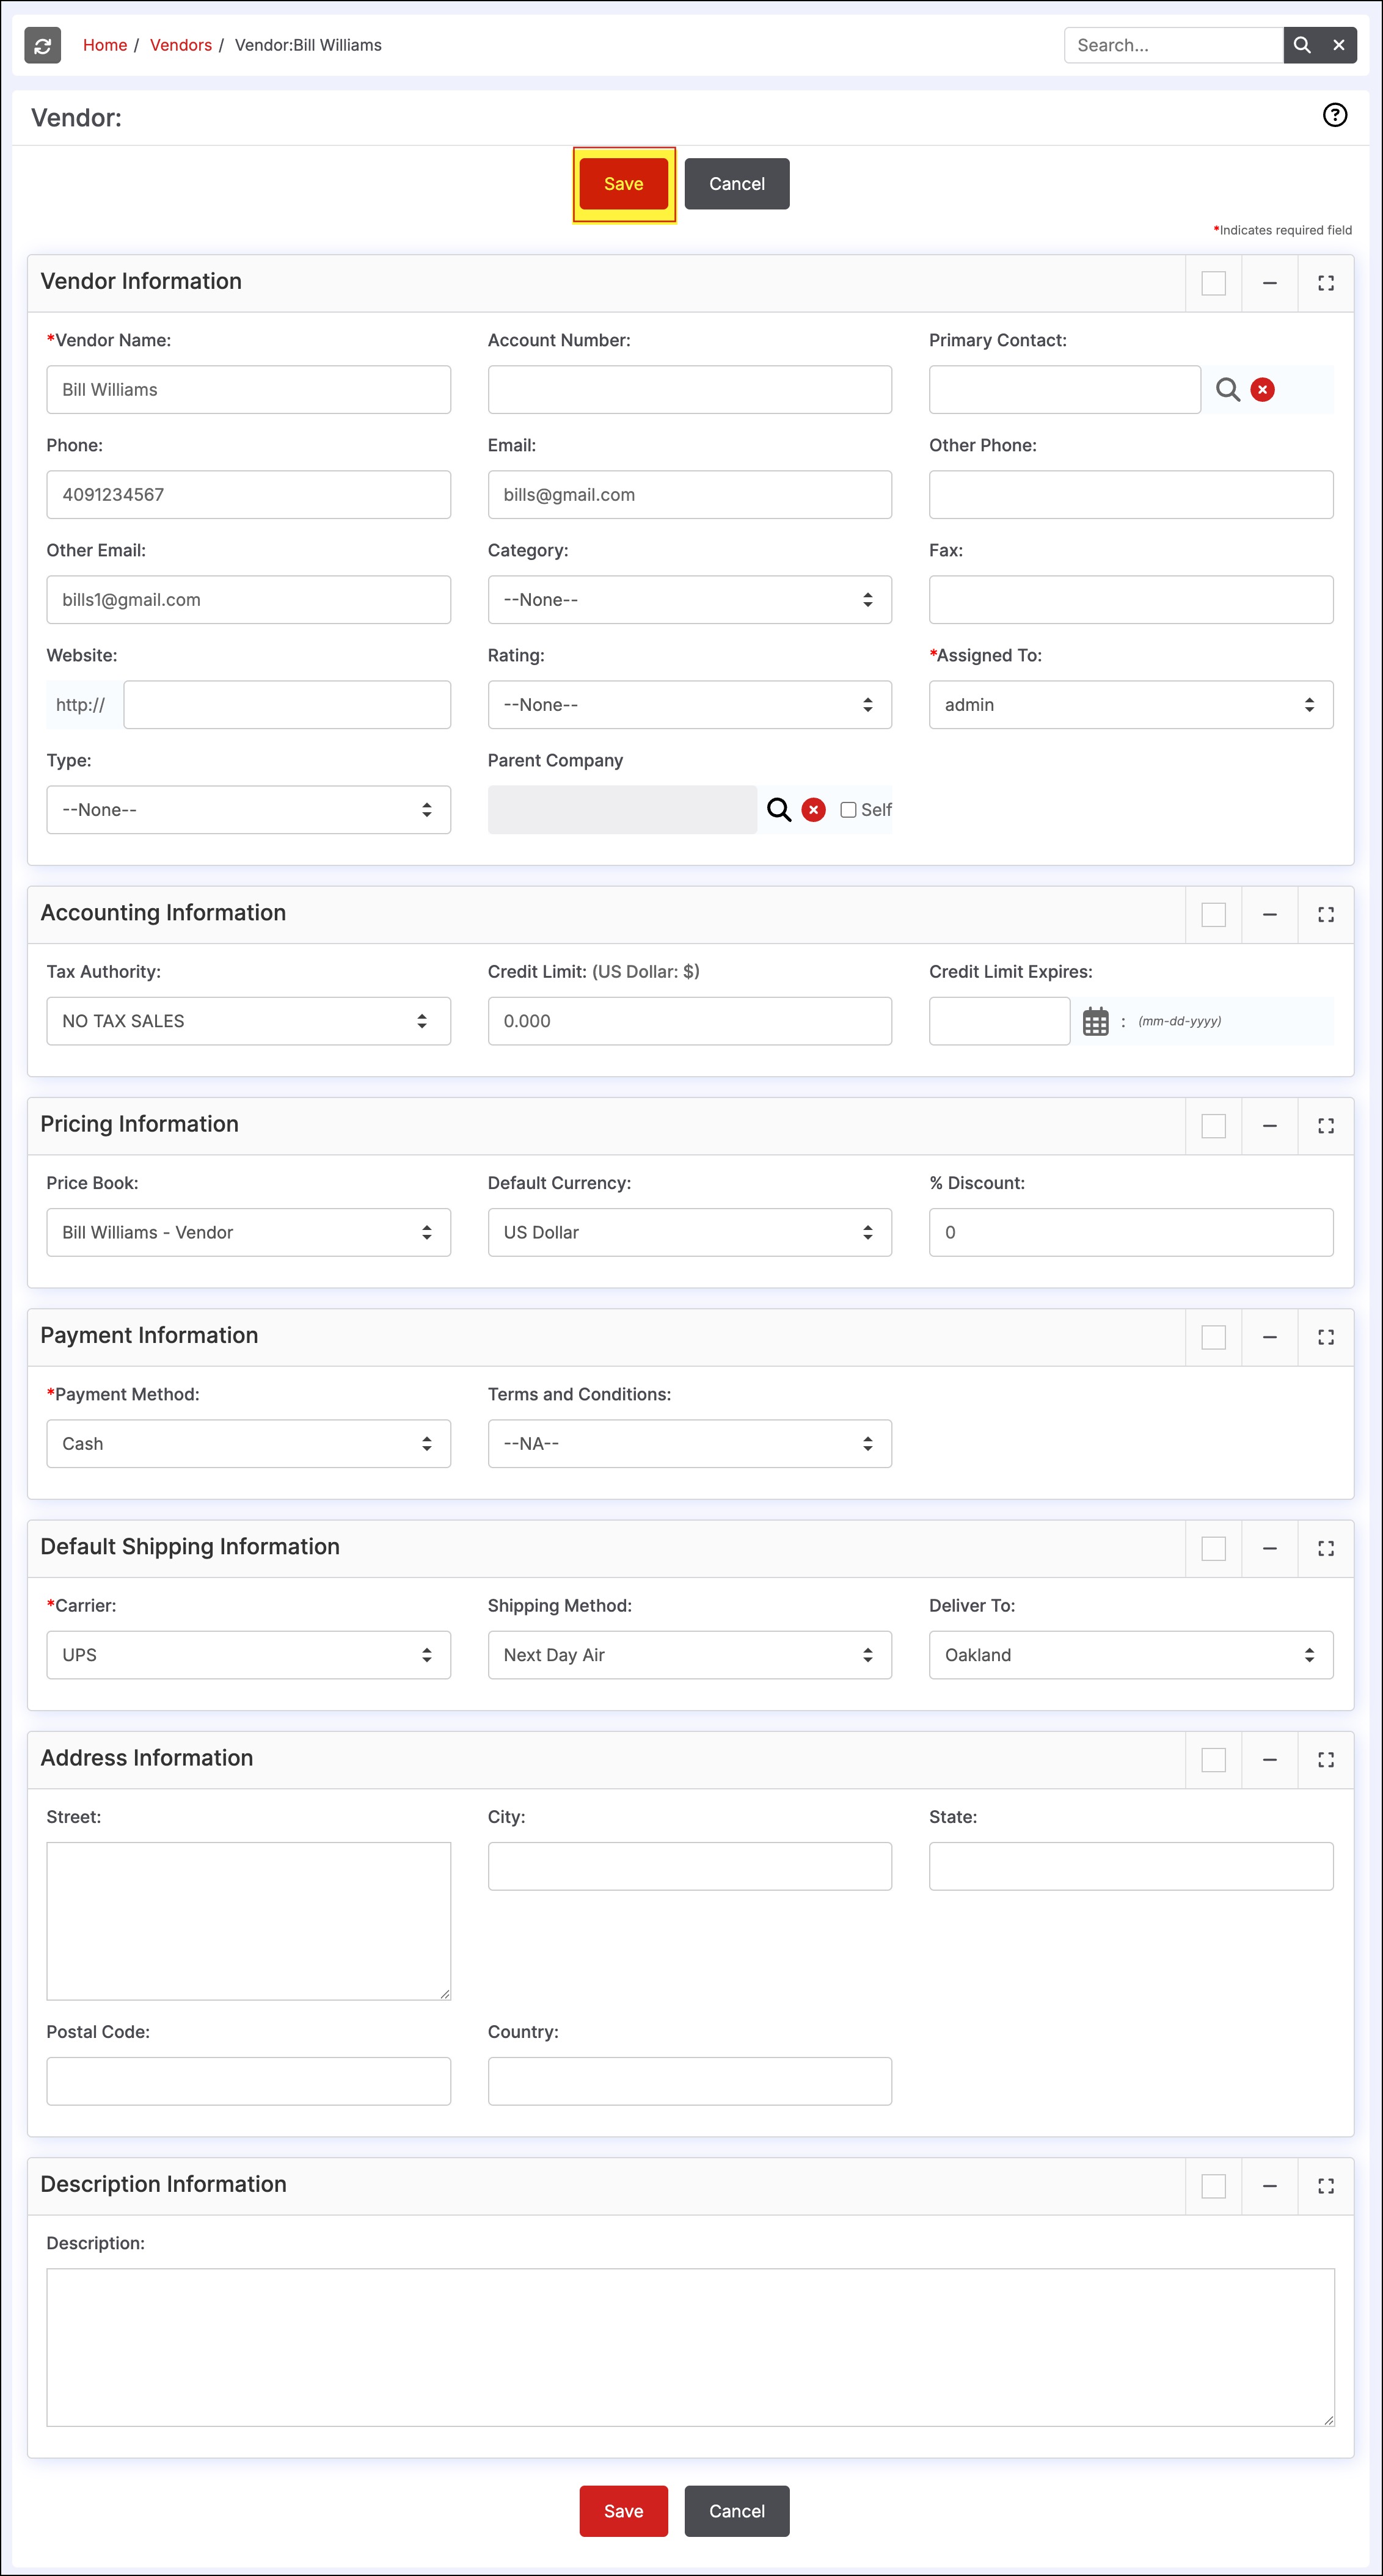
- Once you click on Submit, the created data gets saved successfully and then you will be routed to the Vendor Edit View.
- Enter any information needed or directly click on Save.
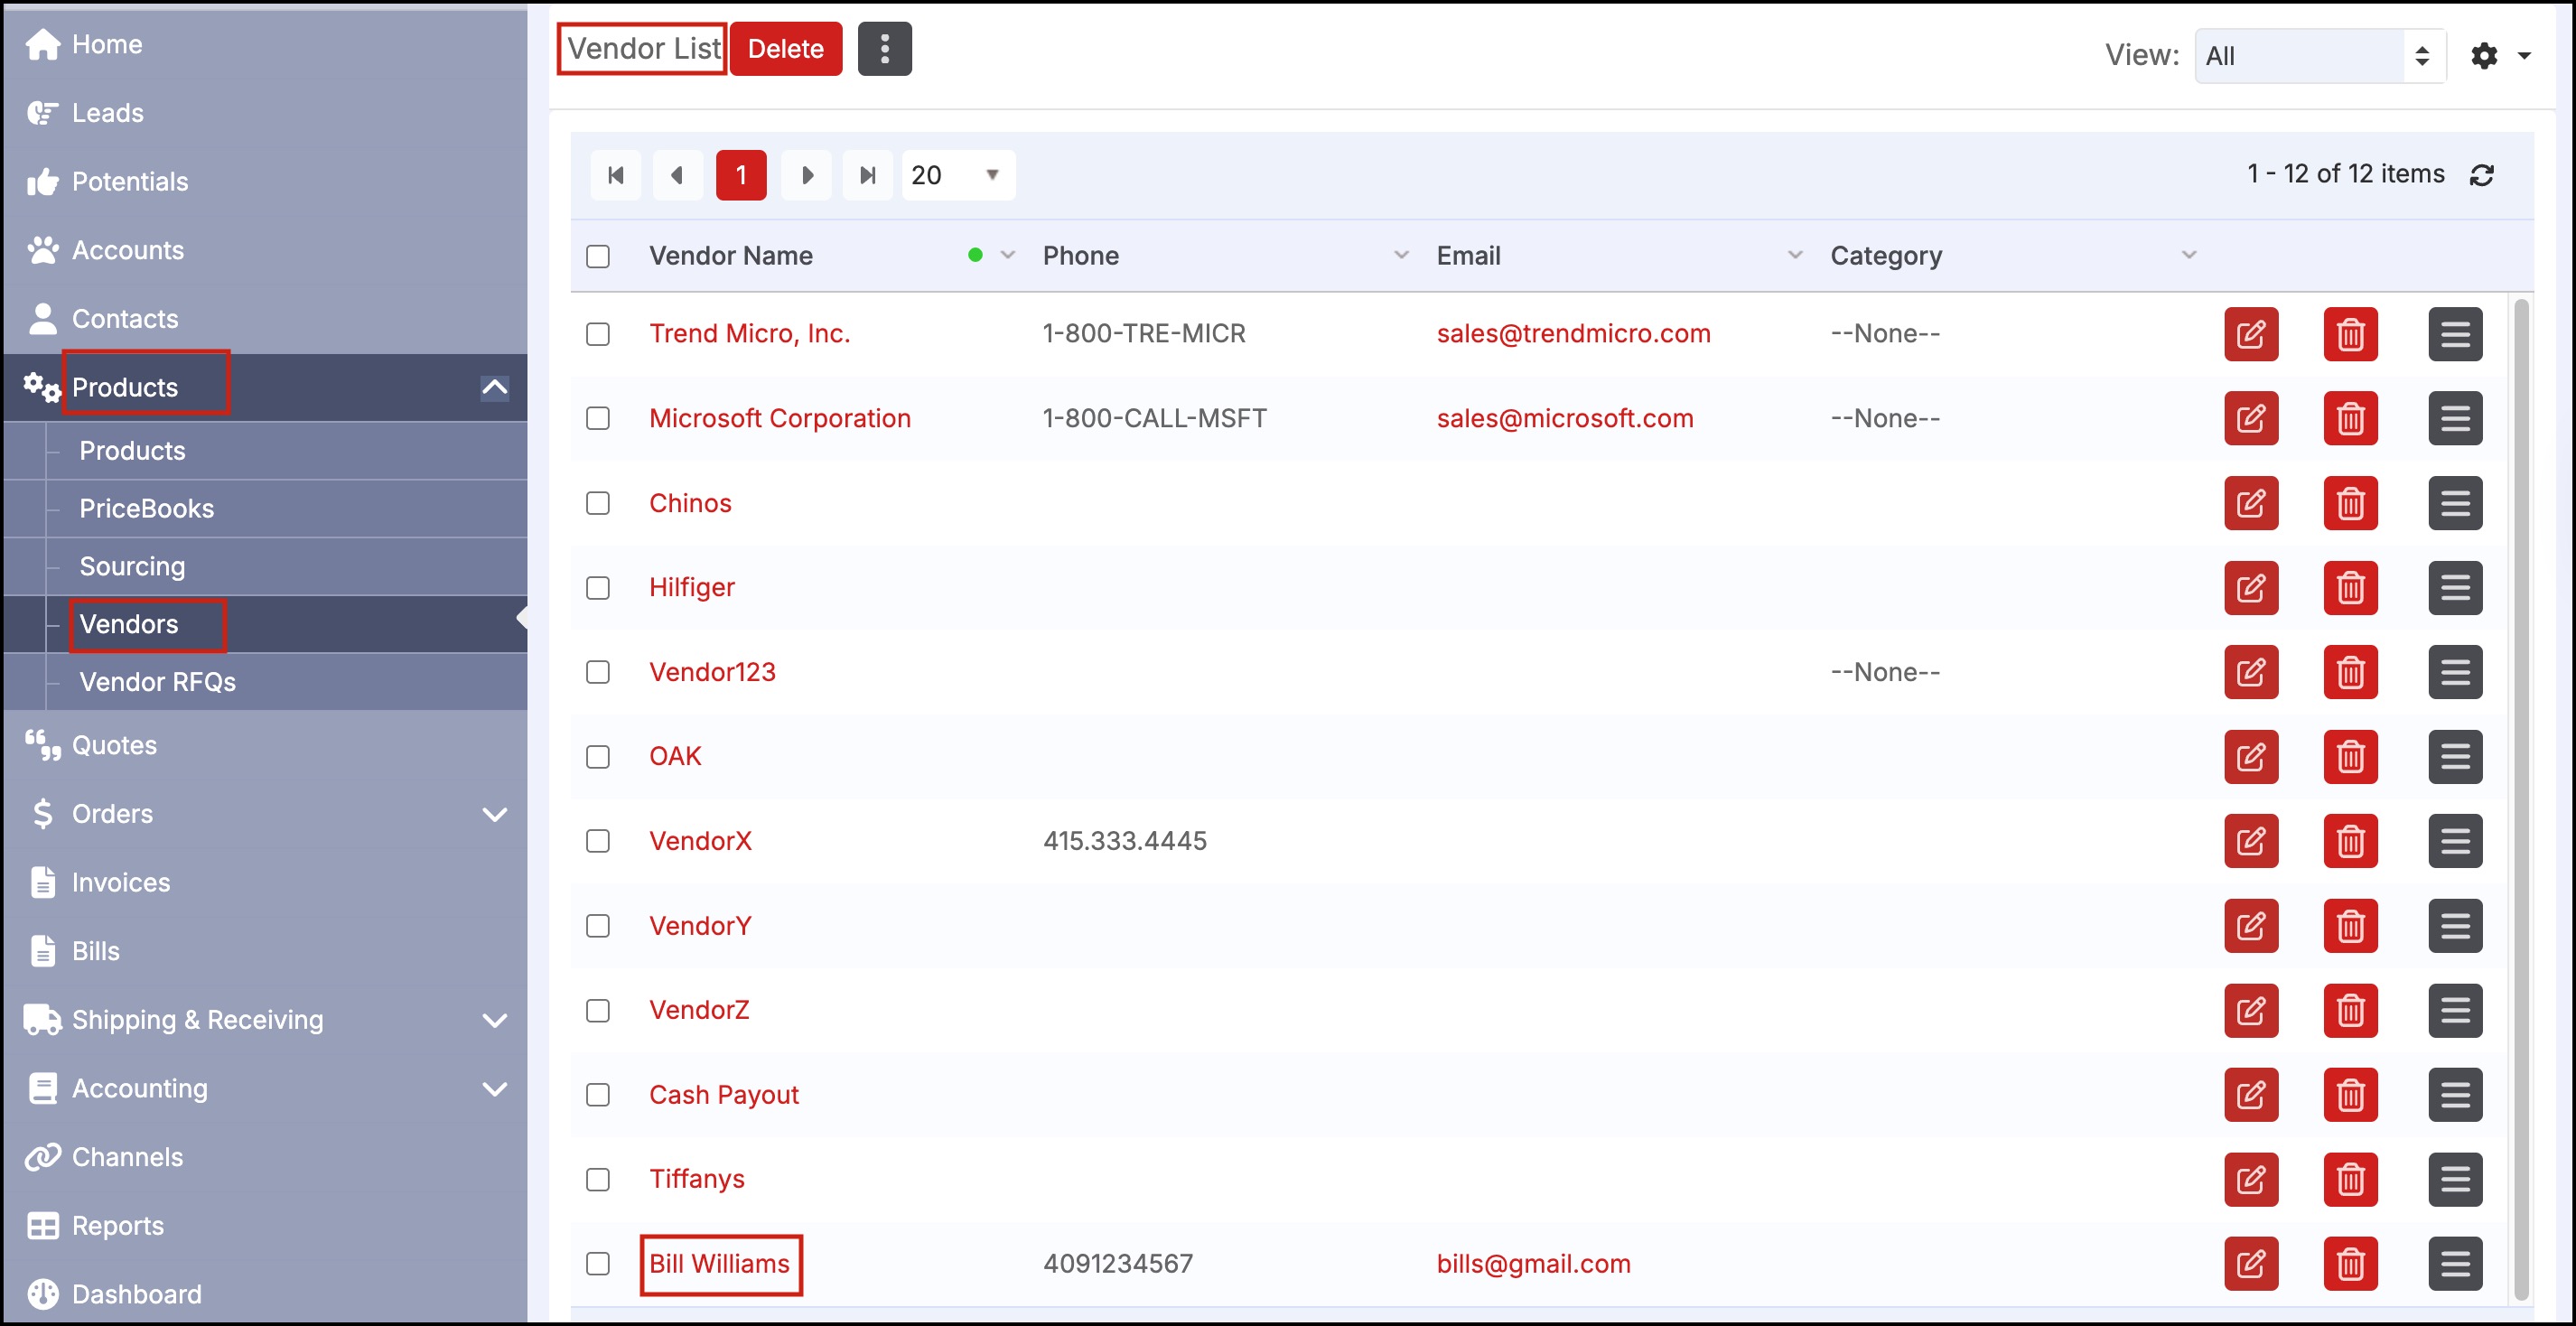
- You can view the new Vendor created in the Vendor List.
Updated 12 months ago