Purchase Order
Next, let's now walk through the transfer of data from Agiliron to QuickBooks Online for Purchase Orders.
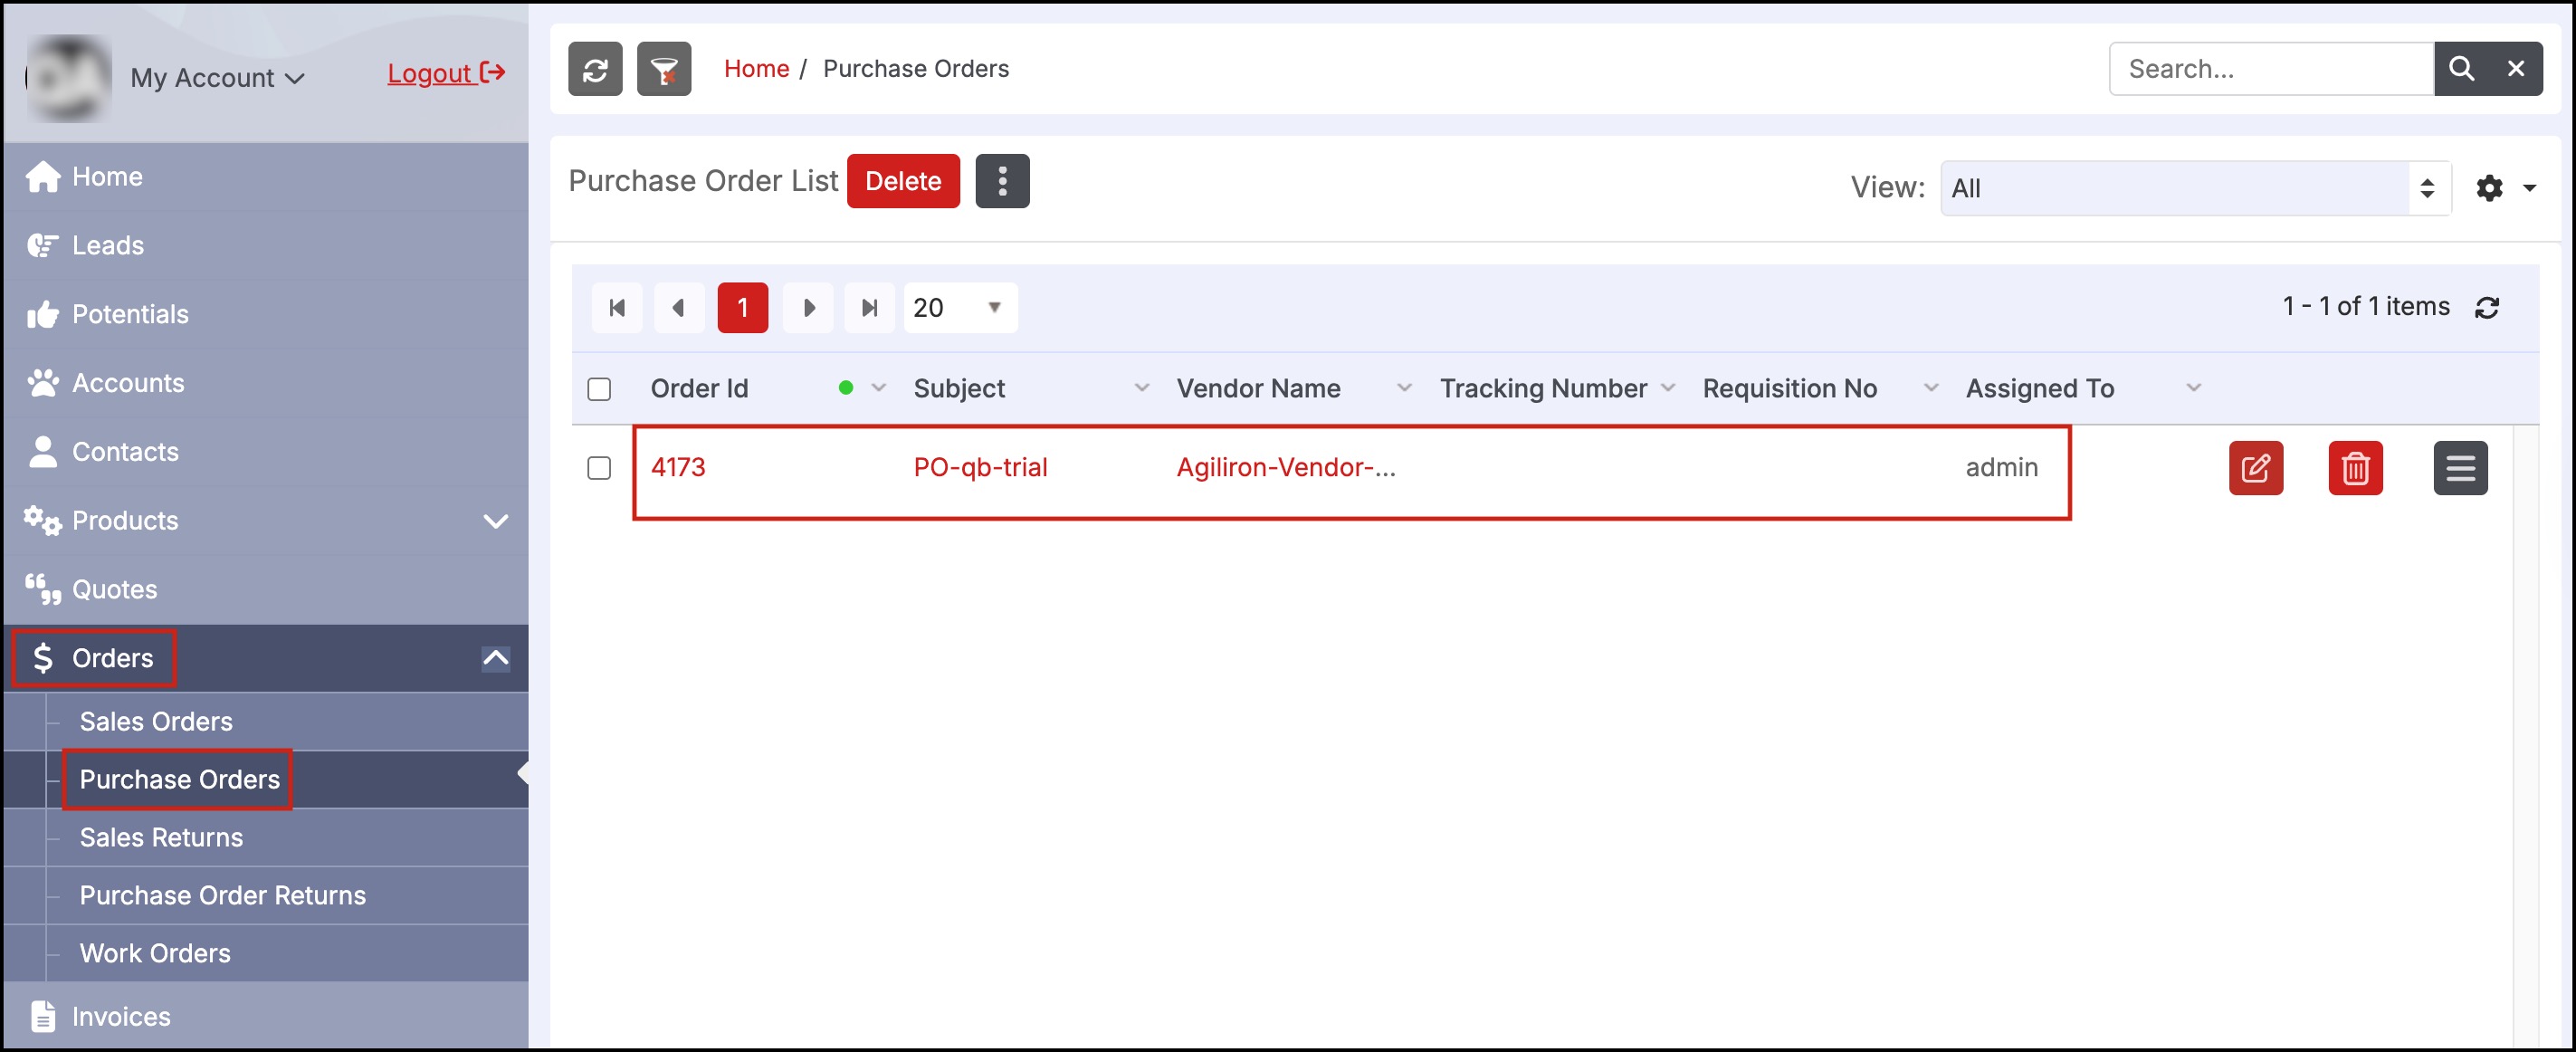
Purchase Orders can be found under the "Orders > Purchase Orders" tab on the left menu panel.
In general, most people manage their payables in QuickBooks and will want to sync POs after they are marked "Received". The PO is sent to QuickBooks as a "Bill" that the user can match to the Vendor Invoice when received and pay through QuickBooks.
- If webhooks are enabled, once synced to QuickBooks Online, any Payments paid on the Vendor Bill in QuickBooks Online will update the PO Status in Agiliron to "Paid".
- Note: this feature is not turned on by default, please navigate to Settings > QuickBooks and select the box next to "Enable QuickBooks Webhook (QuickBooks Online Only)" to turn this feature on.
Syncing Purchase Orders that have been partially received
- Purchase orders can be synced to QuickBooks Online when the PO has been received in full or they can be synced even if the entire PO hasn't been received.
- By default, if POs are synced to QuickBooks Online using the "Received" status the PO will only sync when fully received.
- To enable PO Partial Sync, navigate to Settings > QuickBooks and scroll down to the Purchase Orders section. Select the box next to "Enable PO Partial Sync (QuickBooks Online Only)" to turn this feature on.
Syncing Purchase Orders
Purchase Orders can be found under the "Orders" tab on the left menu panel.
In the example shown below, we have one Purchase Order which has NOT been marked as "Paid".
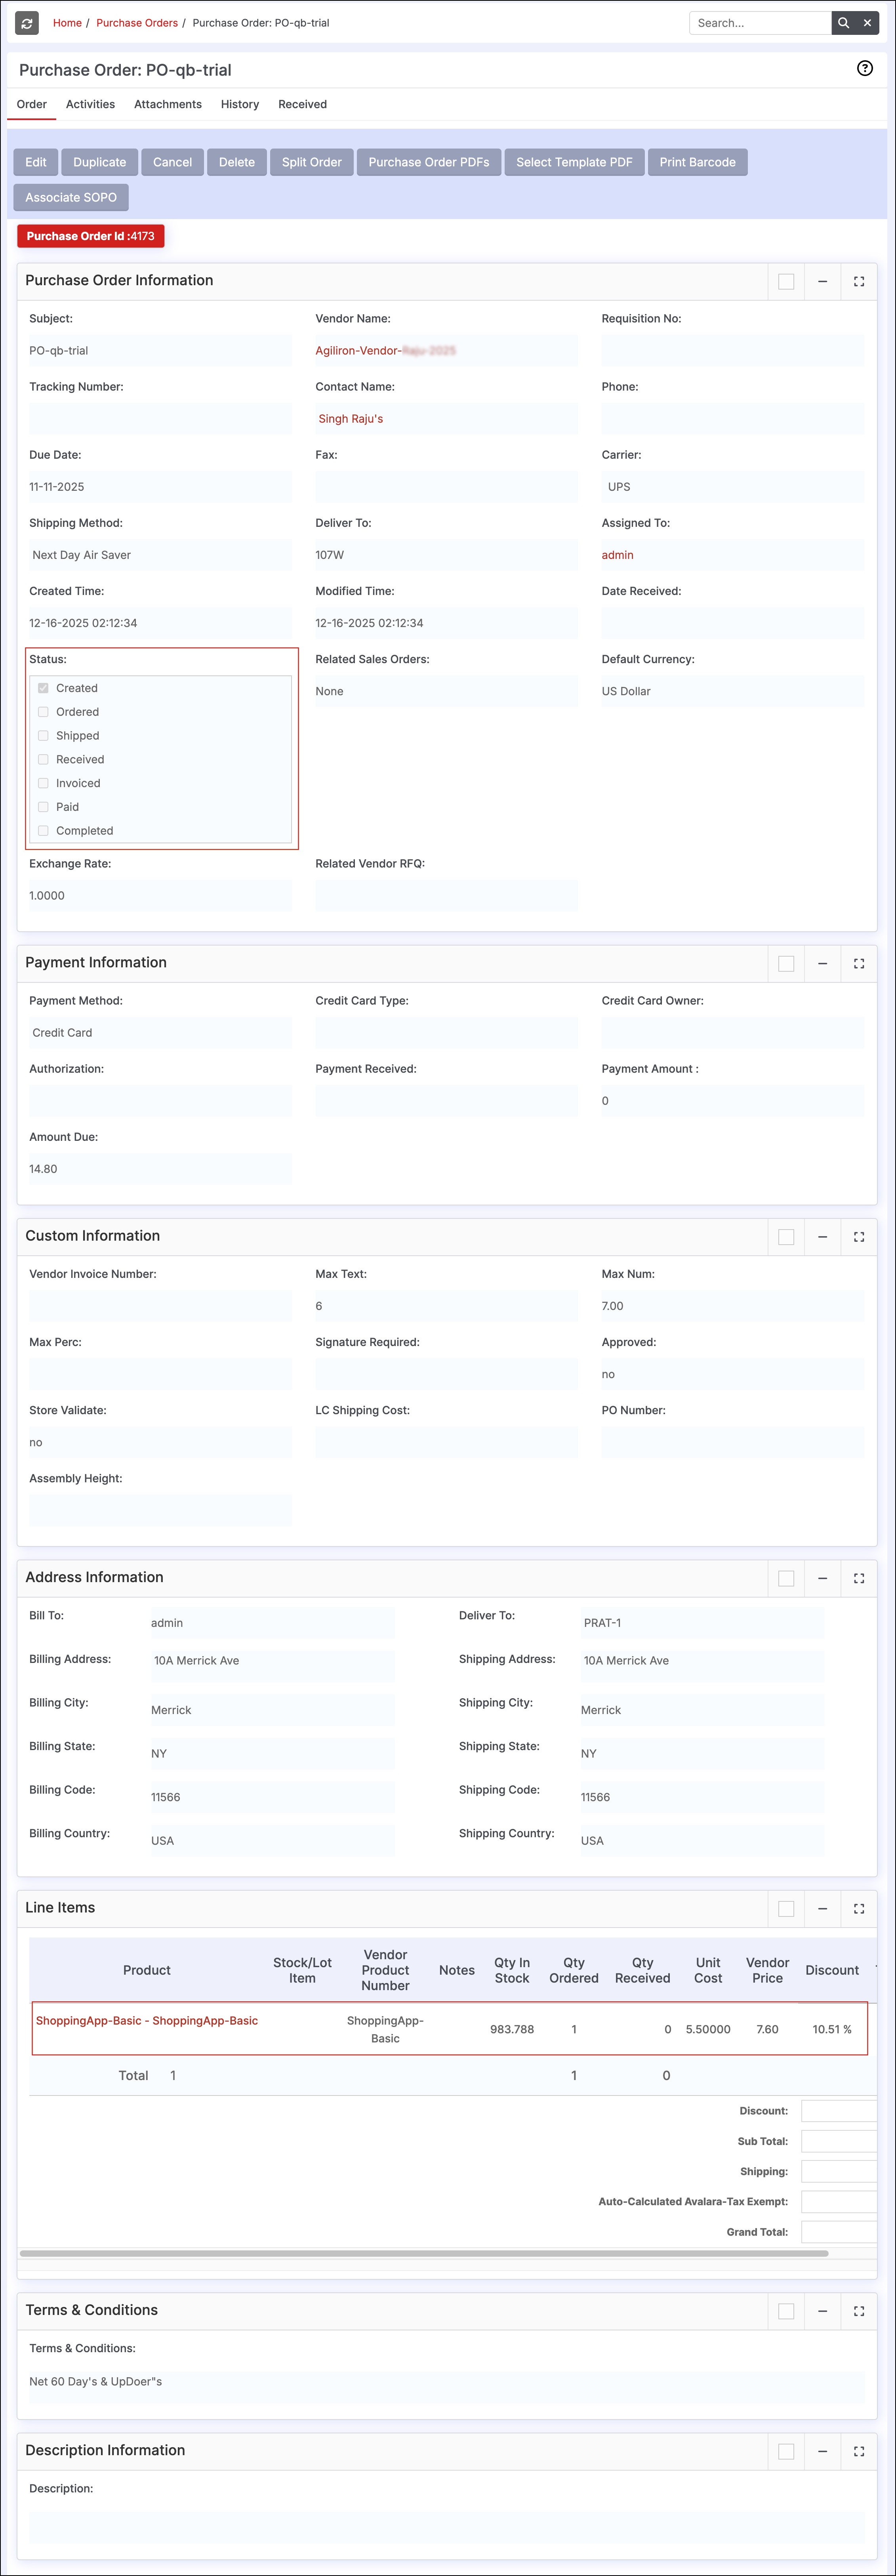
Details for Order 4173 are shown below.
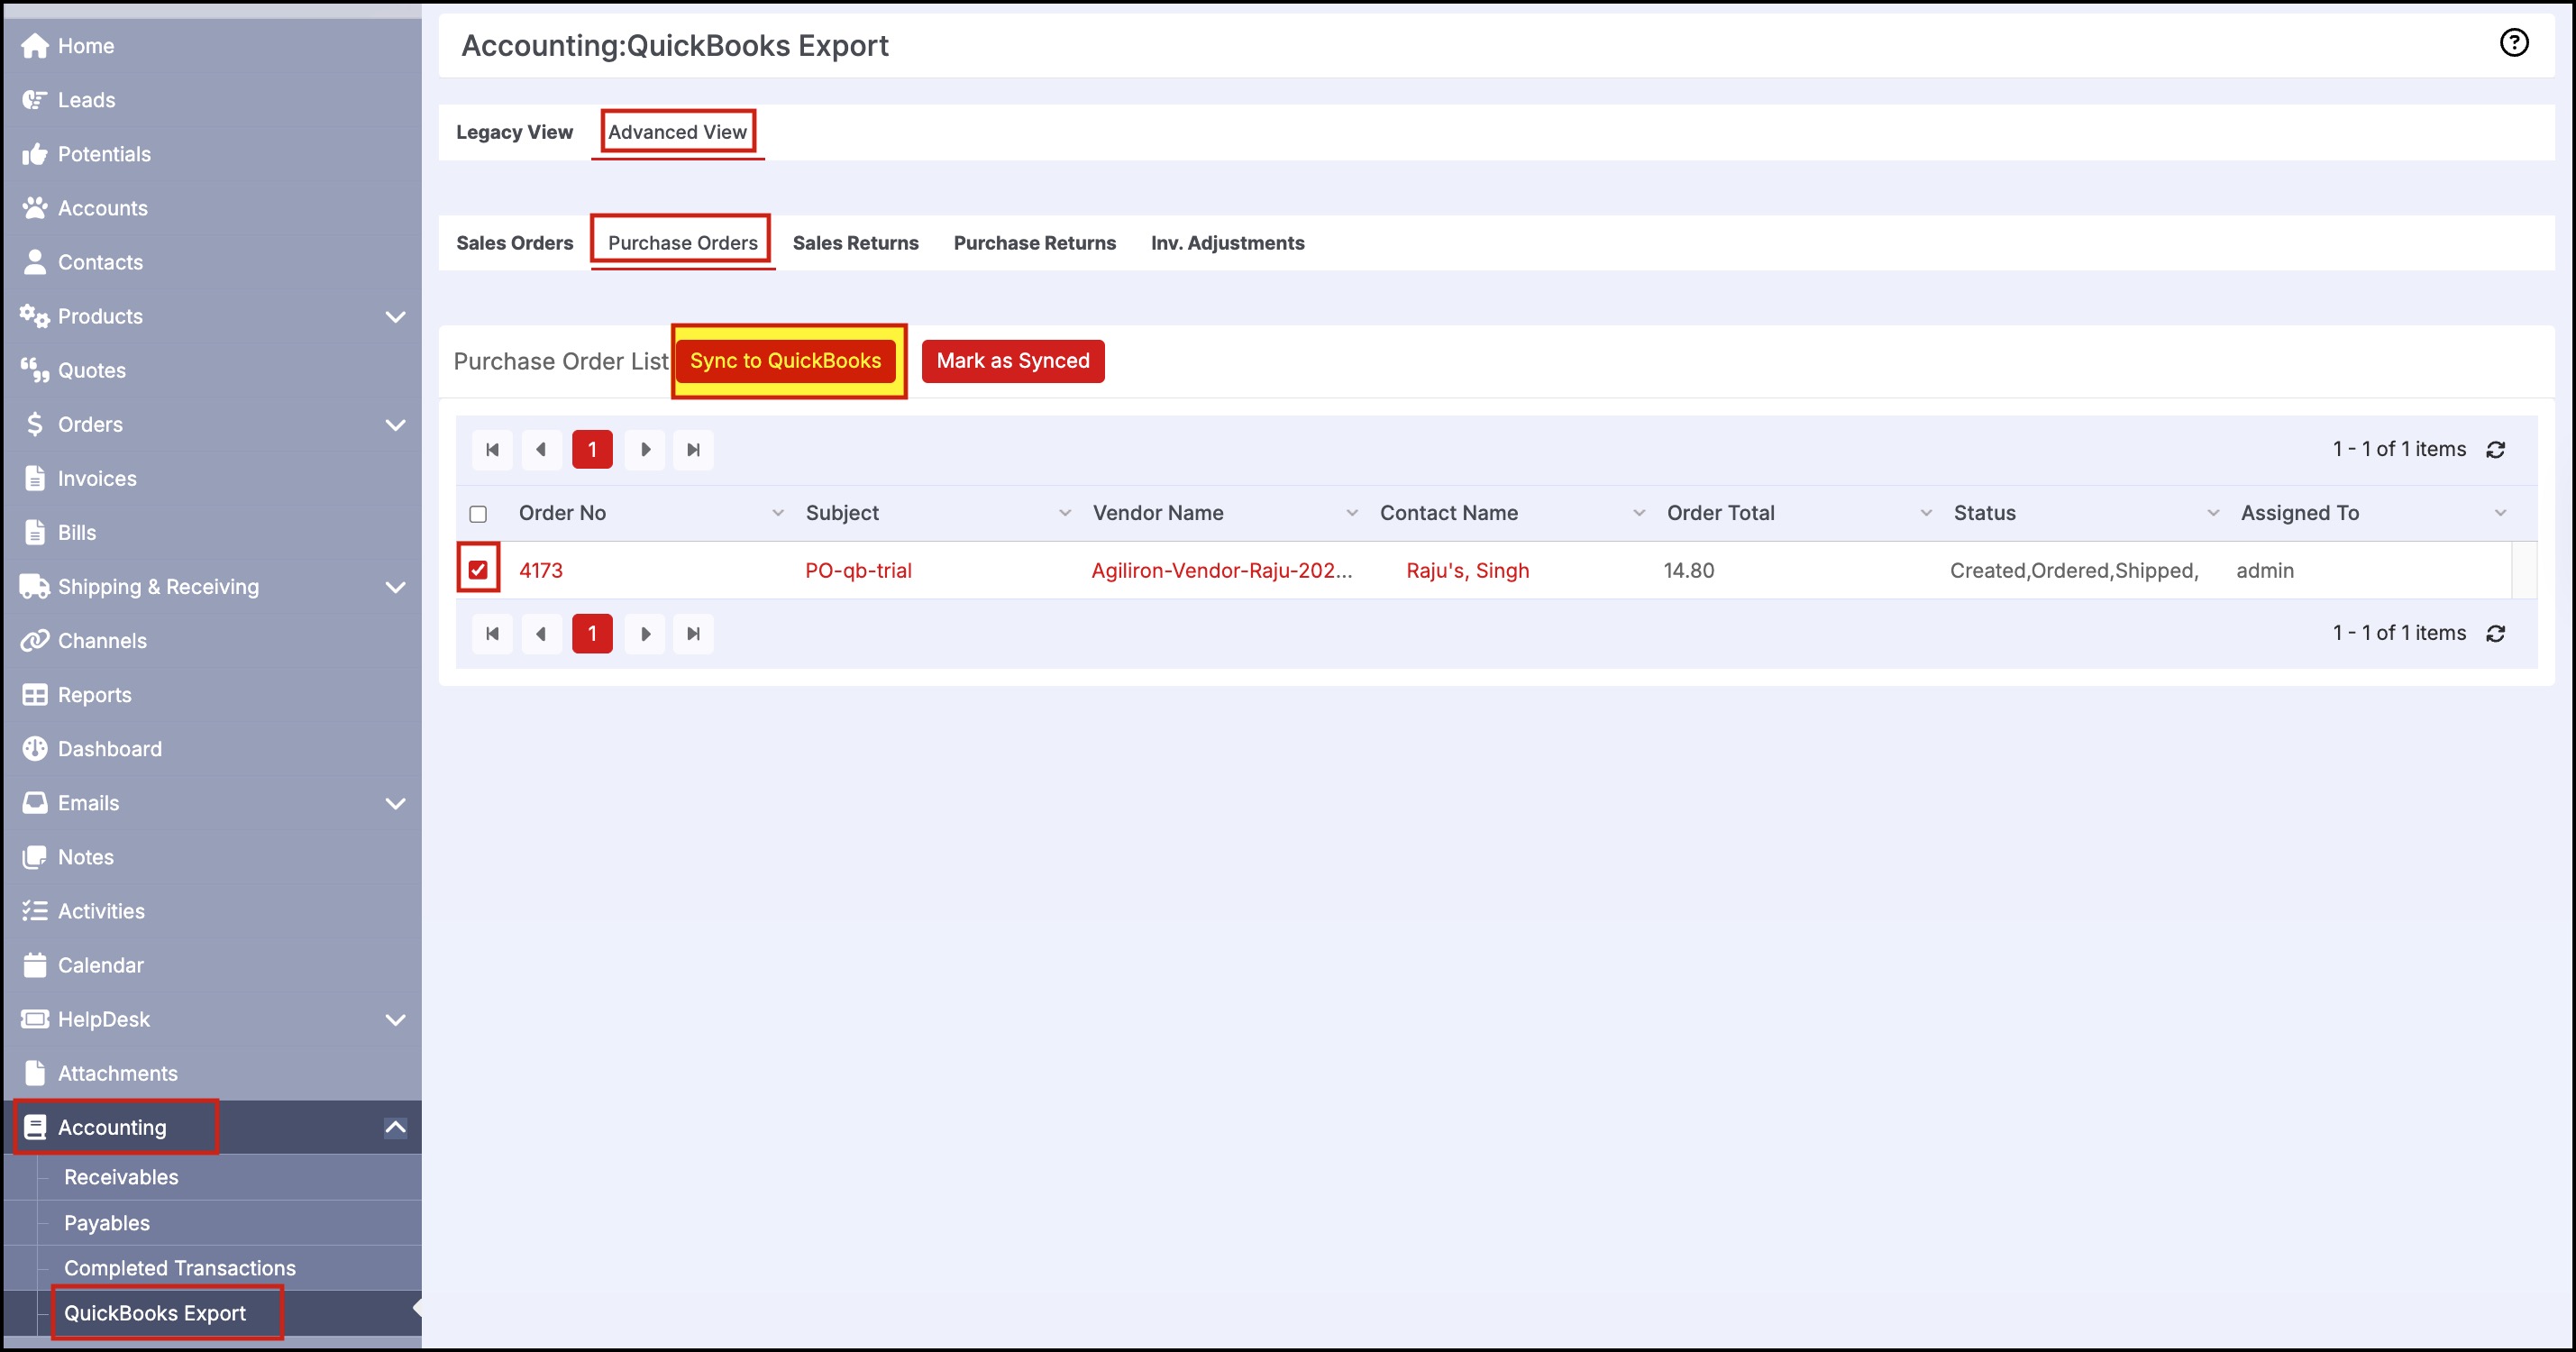
Now let's go to "Accounting > QuickBooks Export". The "Advanced View" displays by default, in this tab we have control over the orders we sync to QuickBooks.
- The Legacy View tab can be selected and will sync the first 30 orders in the list to QuickBooks, no selection can be made in this view.
Select the "Purchase Orders" tab to begin.
- Select the purchase order(s) from the list to be synced.
- Click the "Sync to QuickBooks" button.
Note: It is important to note here that you do not need to do this for every order. As the orders come in, the system will recognize and keep accumulating them until you initiate the sync.
- Select the "OK" button on the pop-up box that displays.
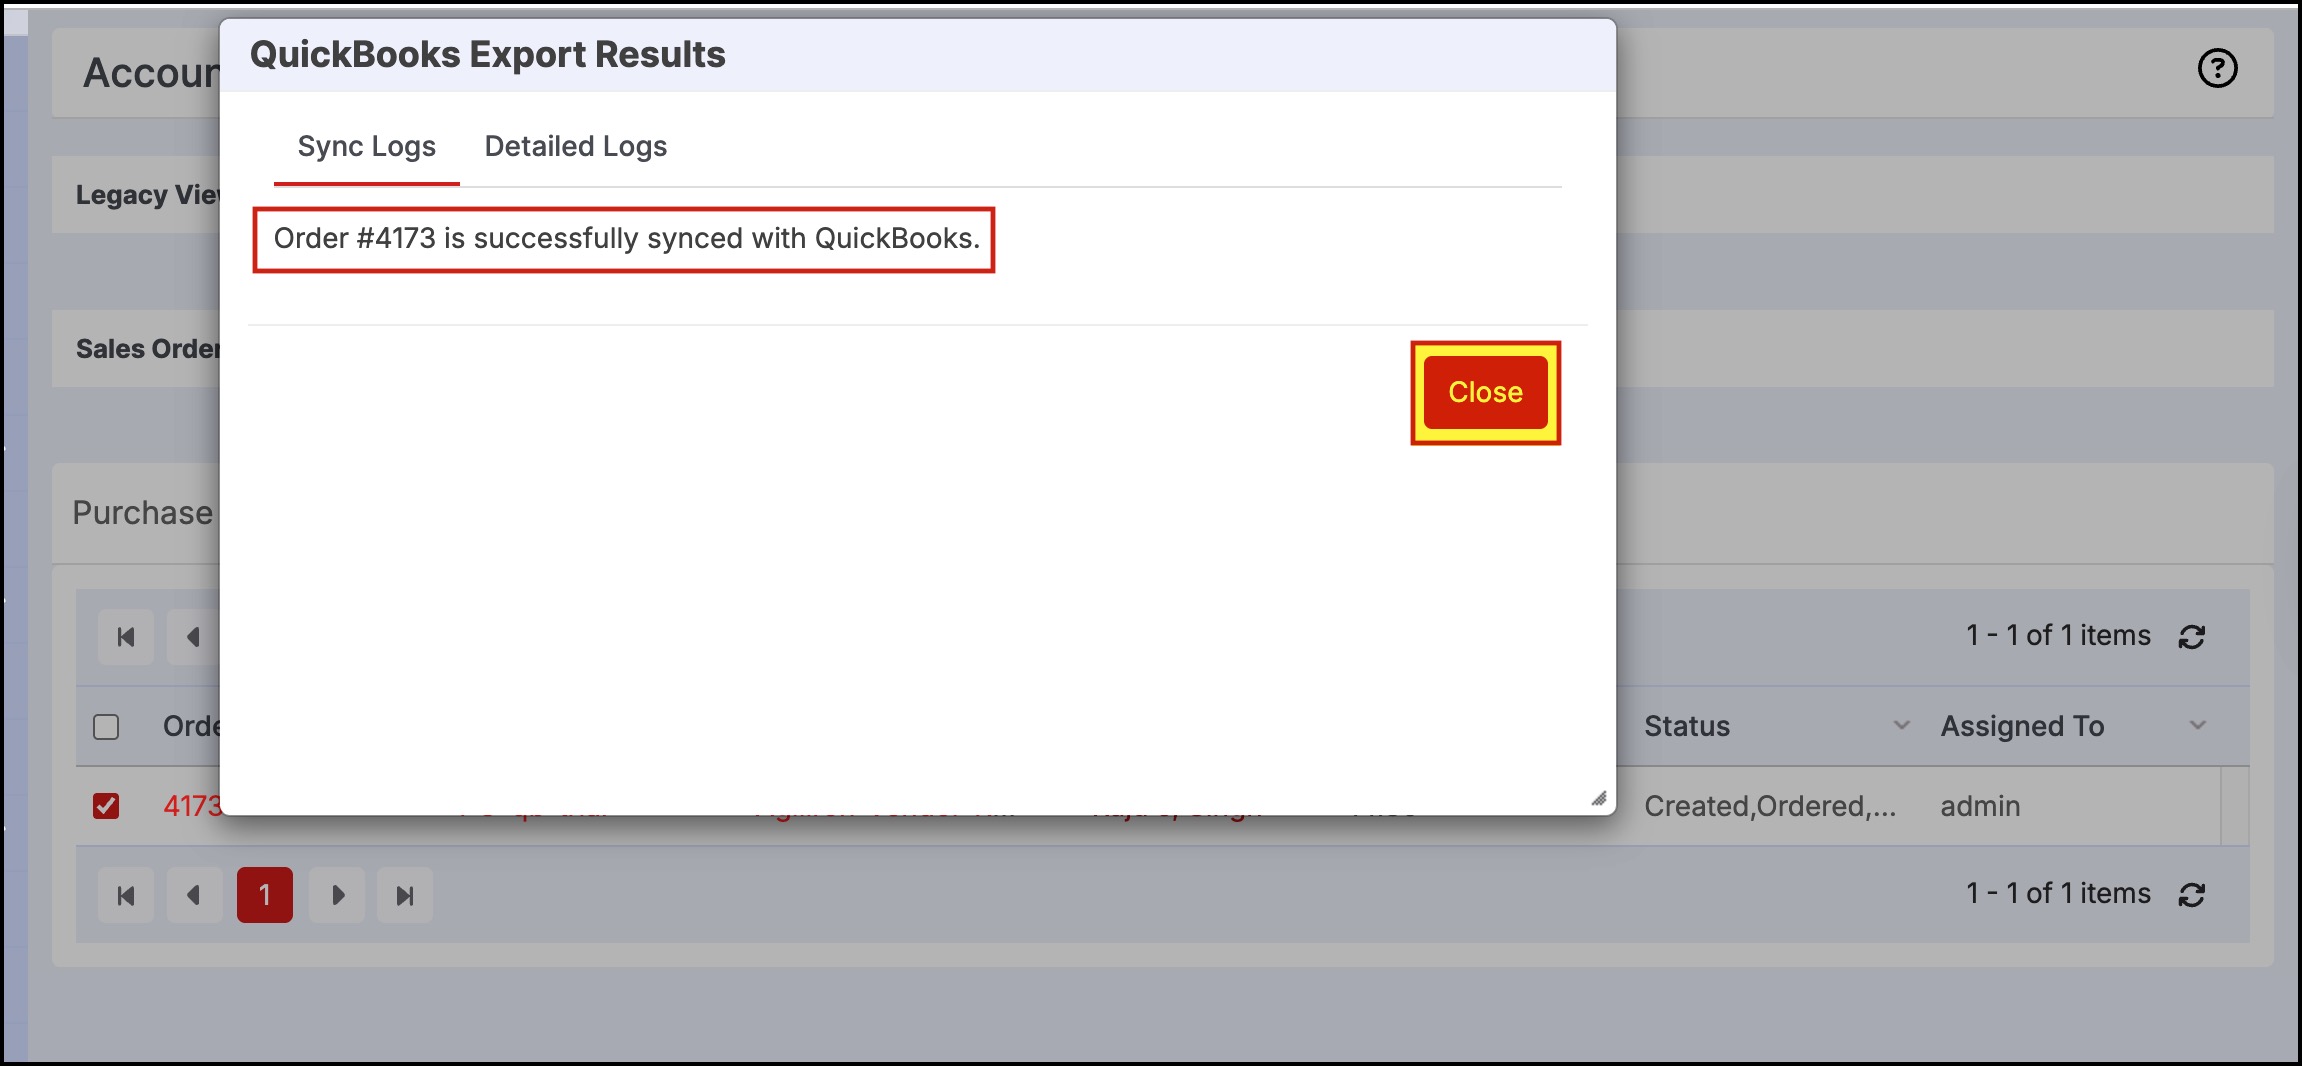
- A status window will appear with results of the export. If no errors are found, the message will display successful results as shown in the image below.
Let's shift now to QuickBooks Online.
- Navigate to the "Expenses" tab.
- The purchase orders are now displayed.

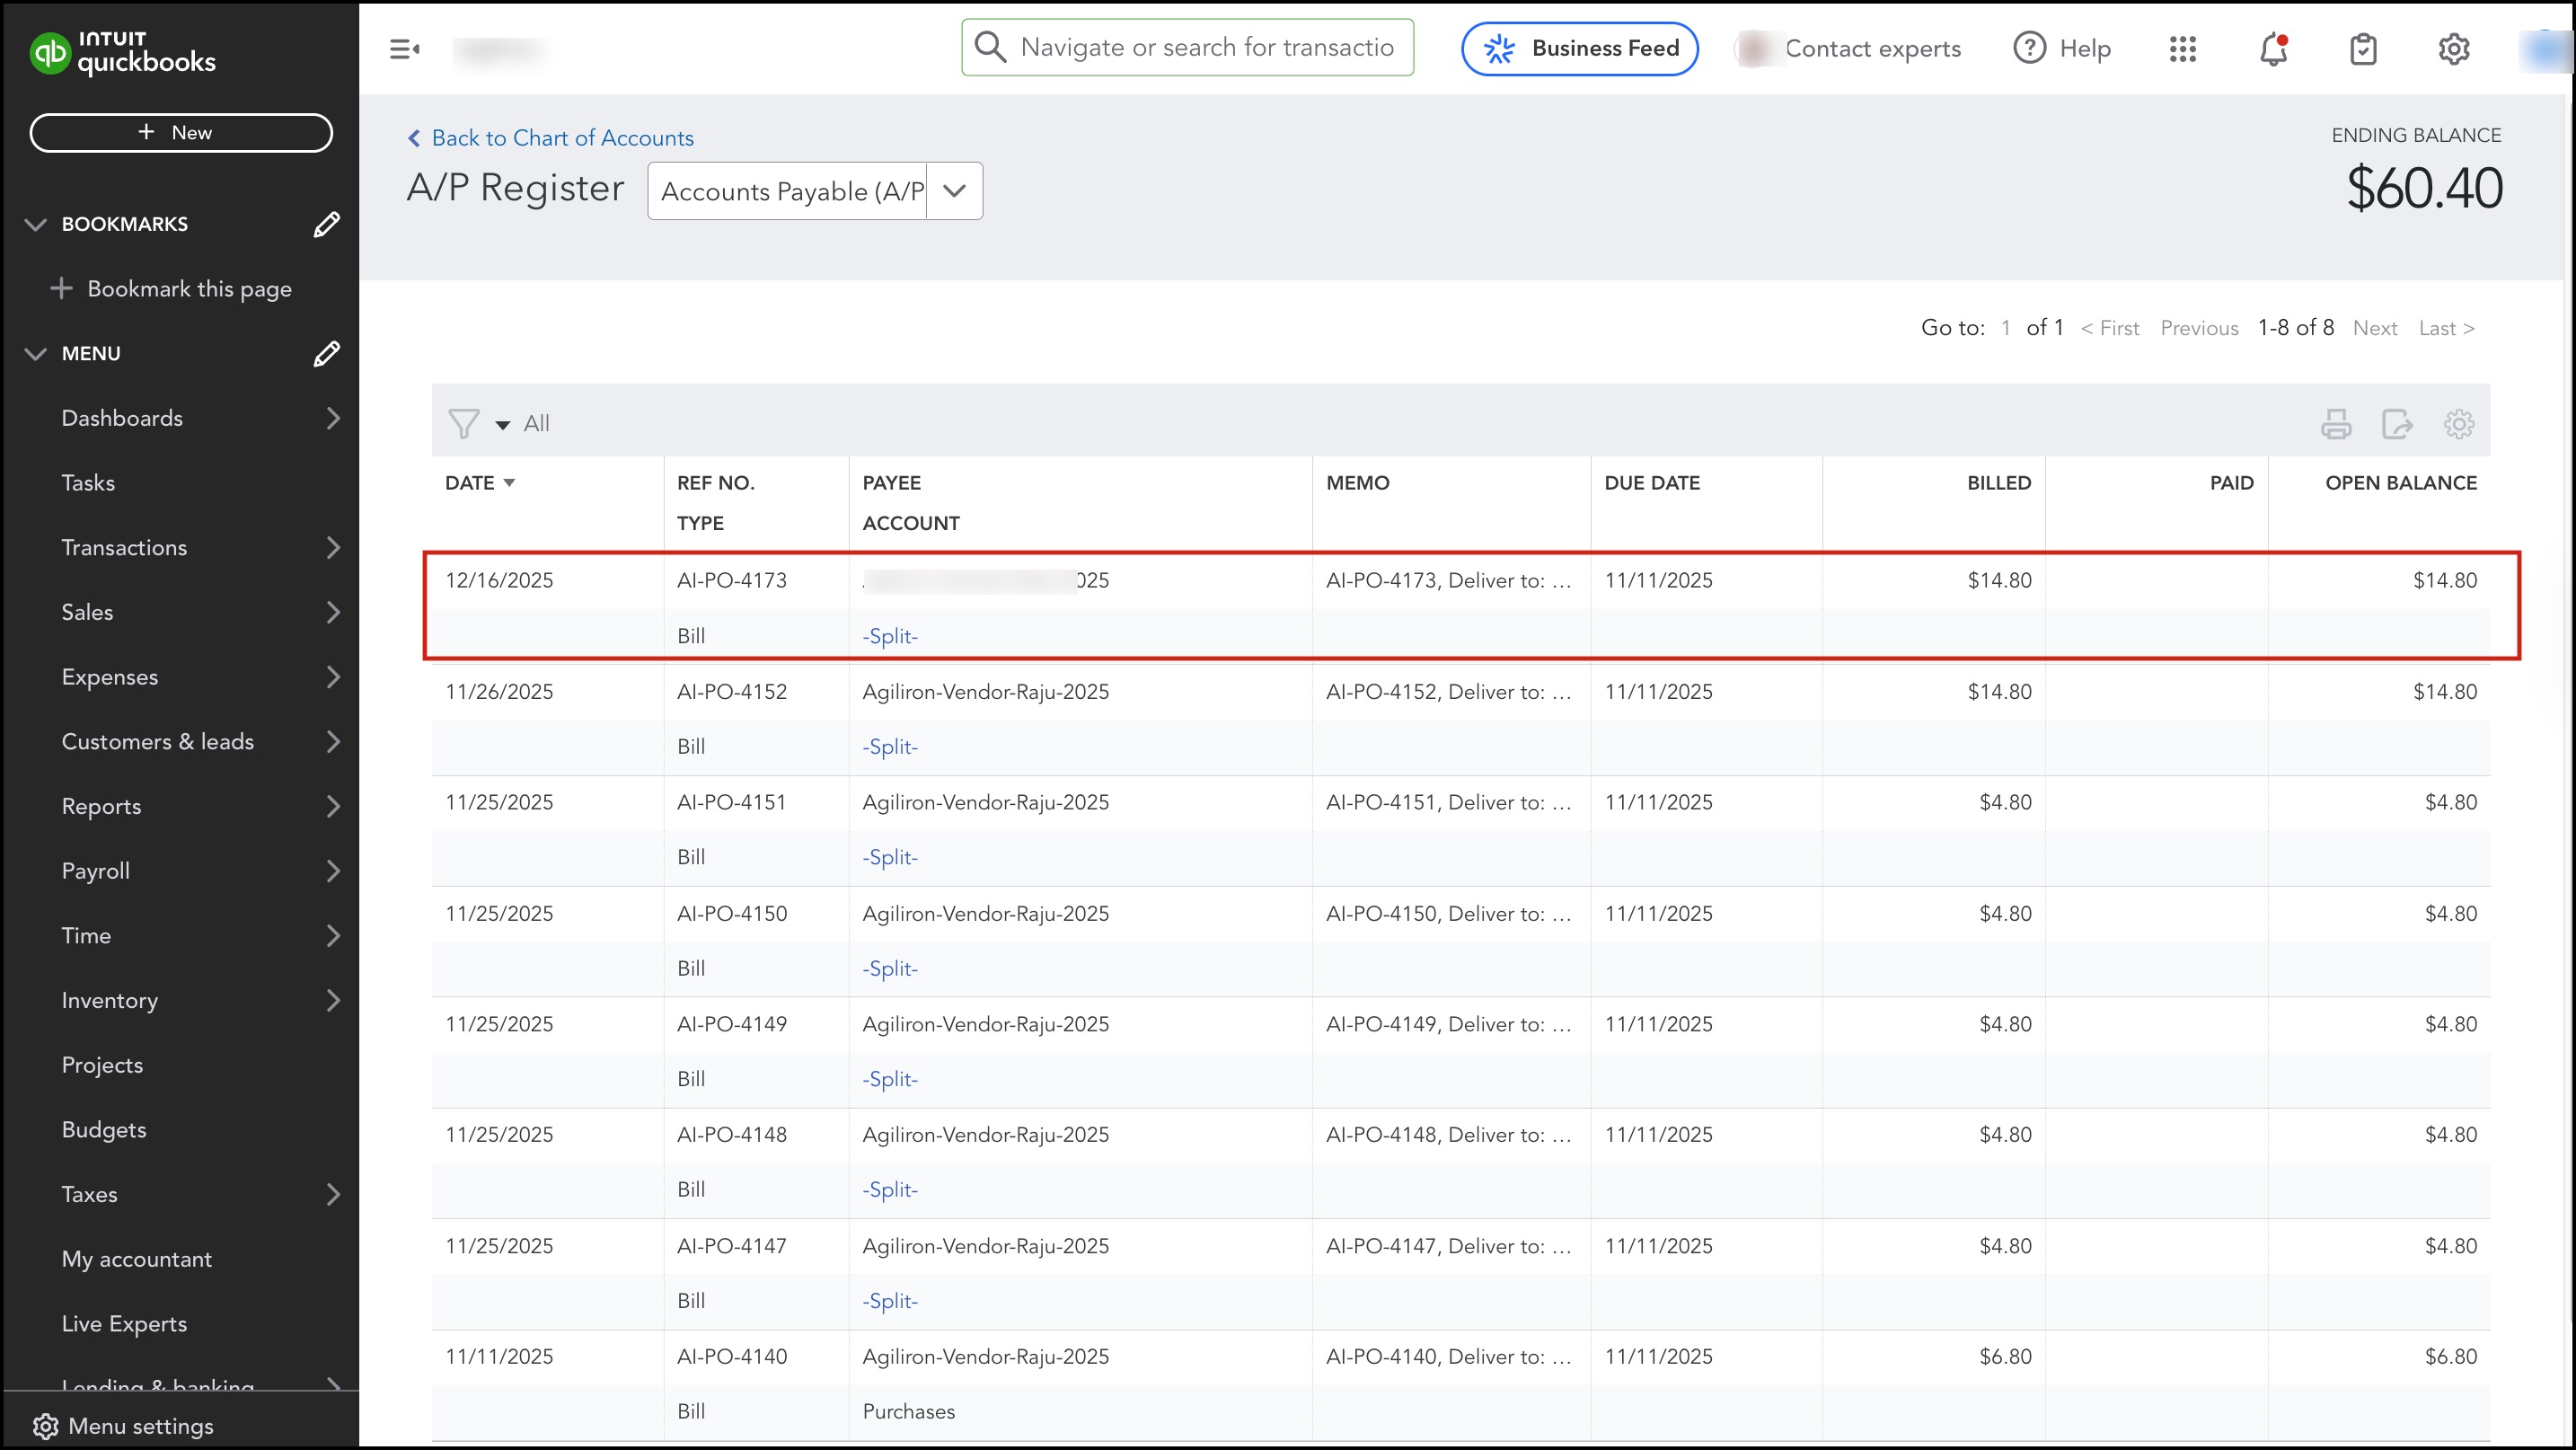
Let's look at the Bill that has now been created for the associated Vendor.
- You can see that all the details have come in correctly - including the Vendor information (vendor name character limit = 100), the Product Line items (product code now included in the line item description), Taxes (if applicable), Shipping, and other elements of the order.
- In our Agiliron instance under Settings > QuickBooks, we have set the "Use as Transaction Date" to "Created Date". For this purchase order, the date displayed in QuickBooks reflects the dates the orders were created in Agiliron.

One final thing we will want to look at here is the adjustments made to the Inventory Asset account for the purchase order that just came in.
Let's go to the Chart of Accounts and bring up the Inventory Asset account - here you can see entries that increase the Inventory Asset for the purchases that have been made against the Accounts Payable to the vendor.

Updated 7 months ago