Sales Associate Login to POS
In order to use the POS system, the user has to login to the POS using the Sales Associate user name and password.
- Enter the URL of the POS system (e.g., https://yourbusiness.agiliron.net) in the address bar of the browser.
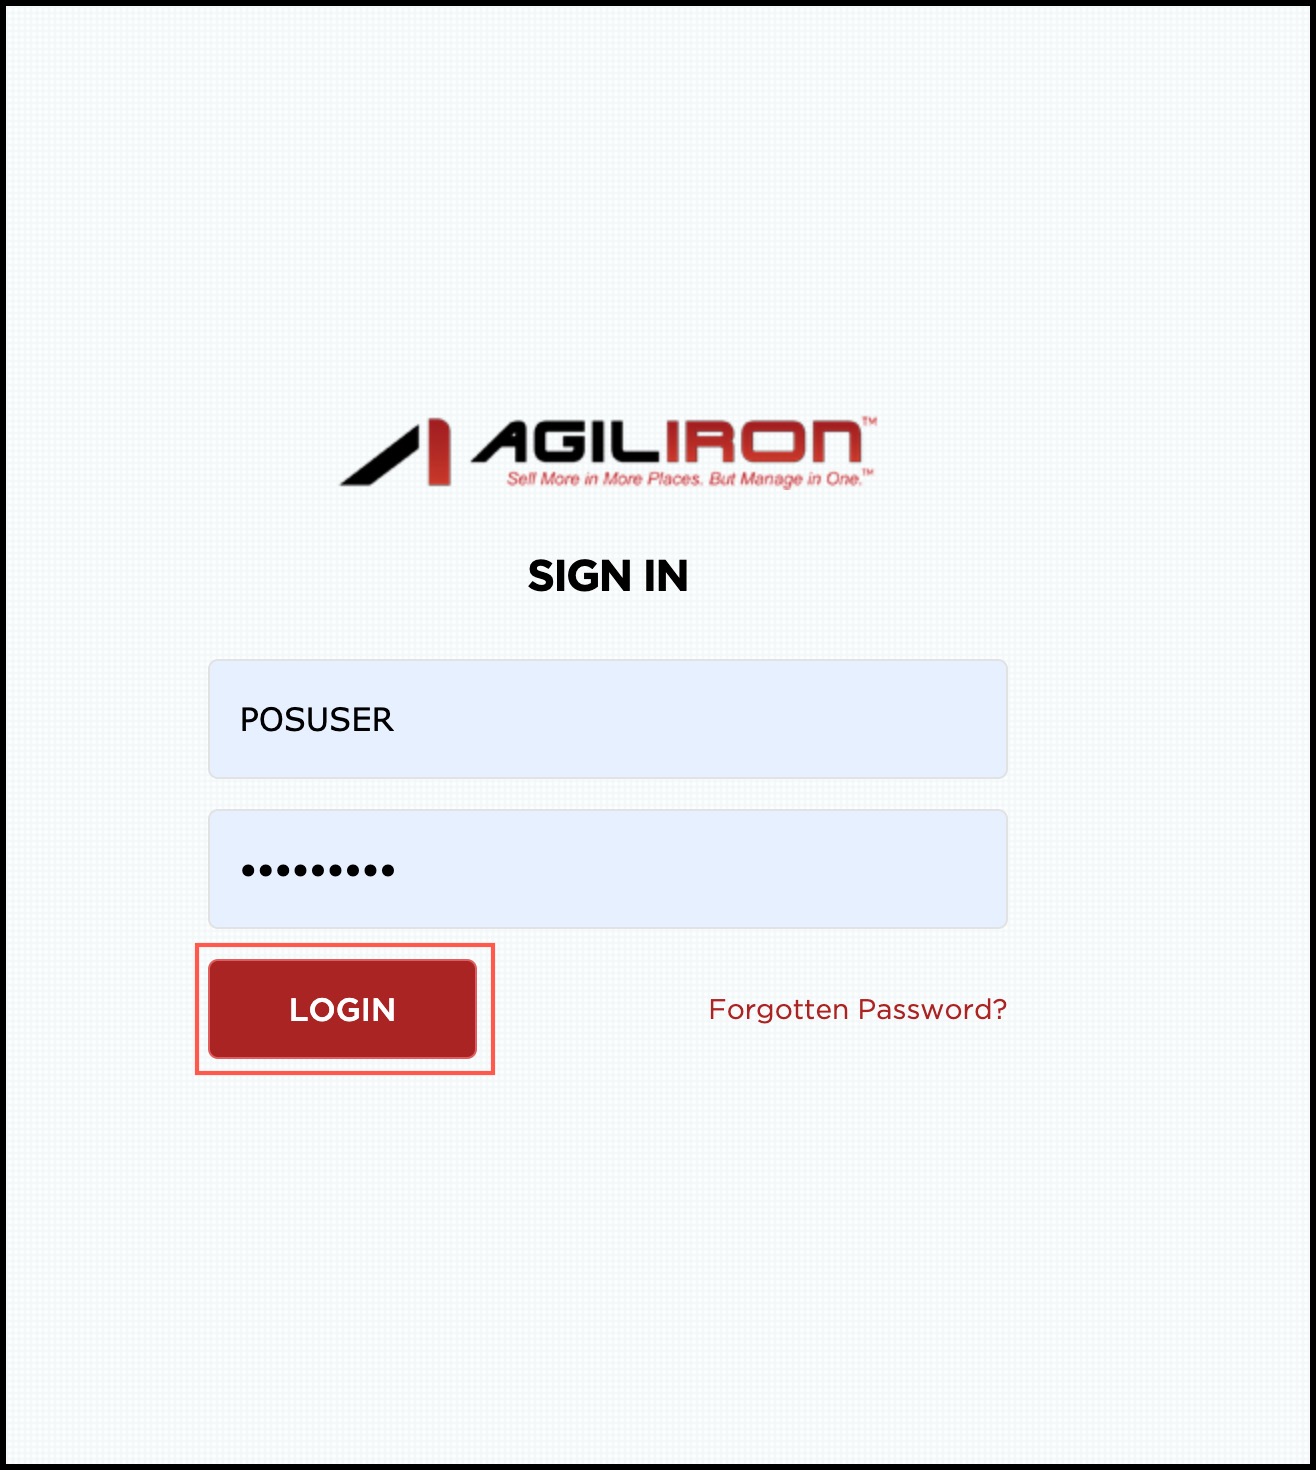
- Enter the username in the User Name field.
- Enter the password in the Password field.
- Click Login. The following popup window is displayed.
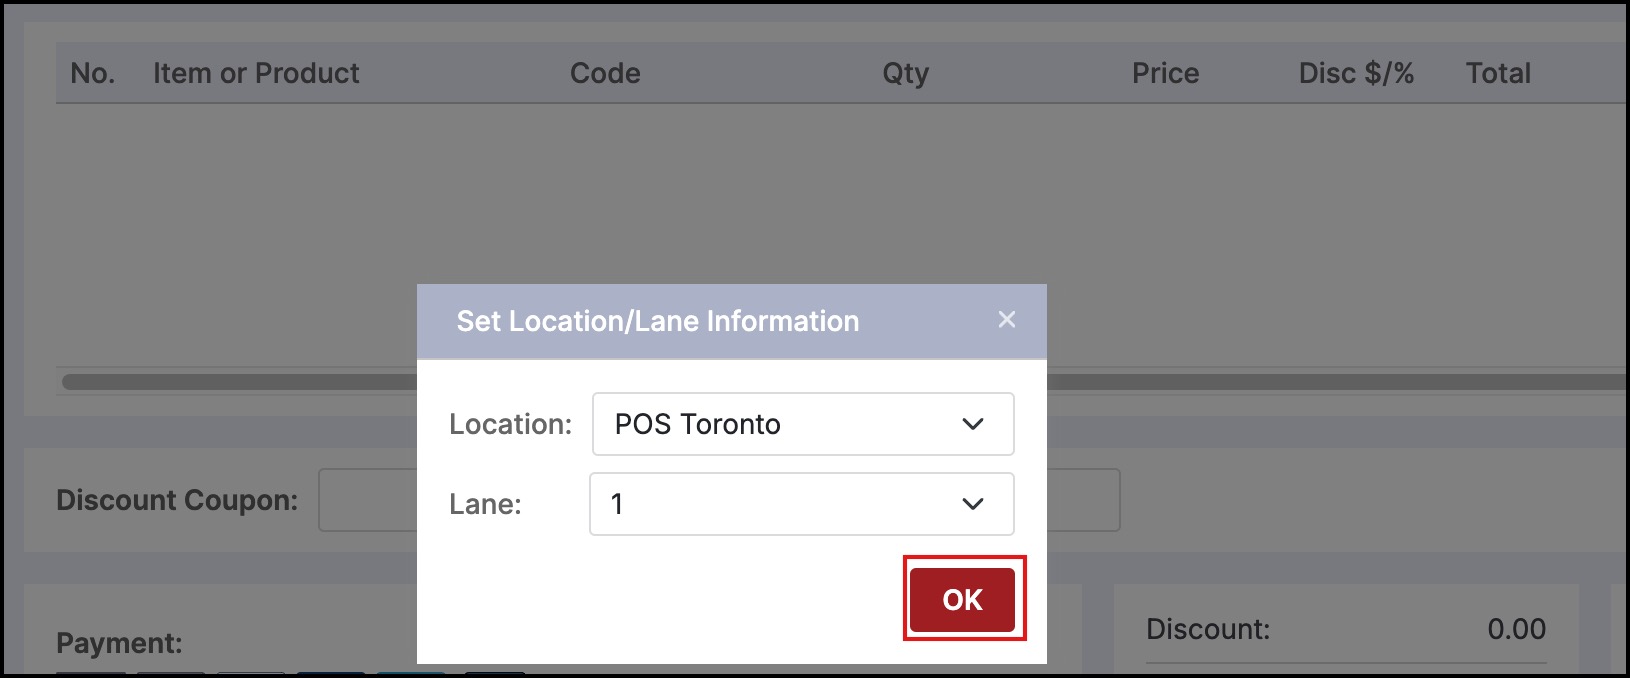
- Select the required store location from the Location dropdown list.
- Select the lane or station number from the Lane dropdown list.
- Click OK.
The Change Password popup window is displayed if logging in for the first time after the password has been reset.
- Enter the current password in the Current Password field.
- Enter the new password in the New Password field.
- Re-enter the password in the Confirm Password field.
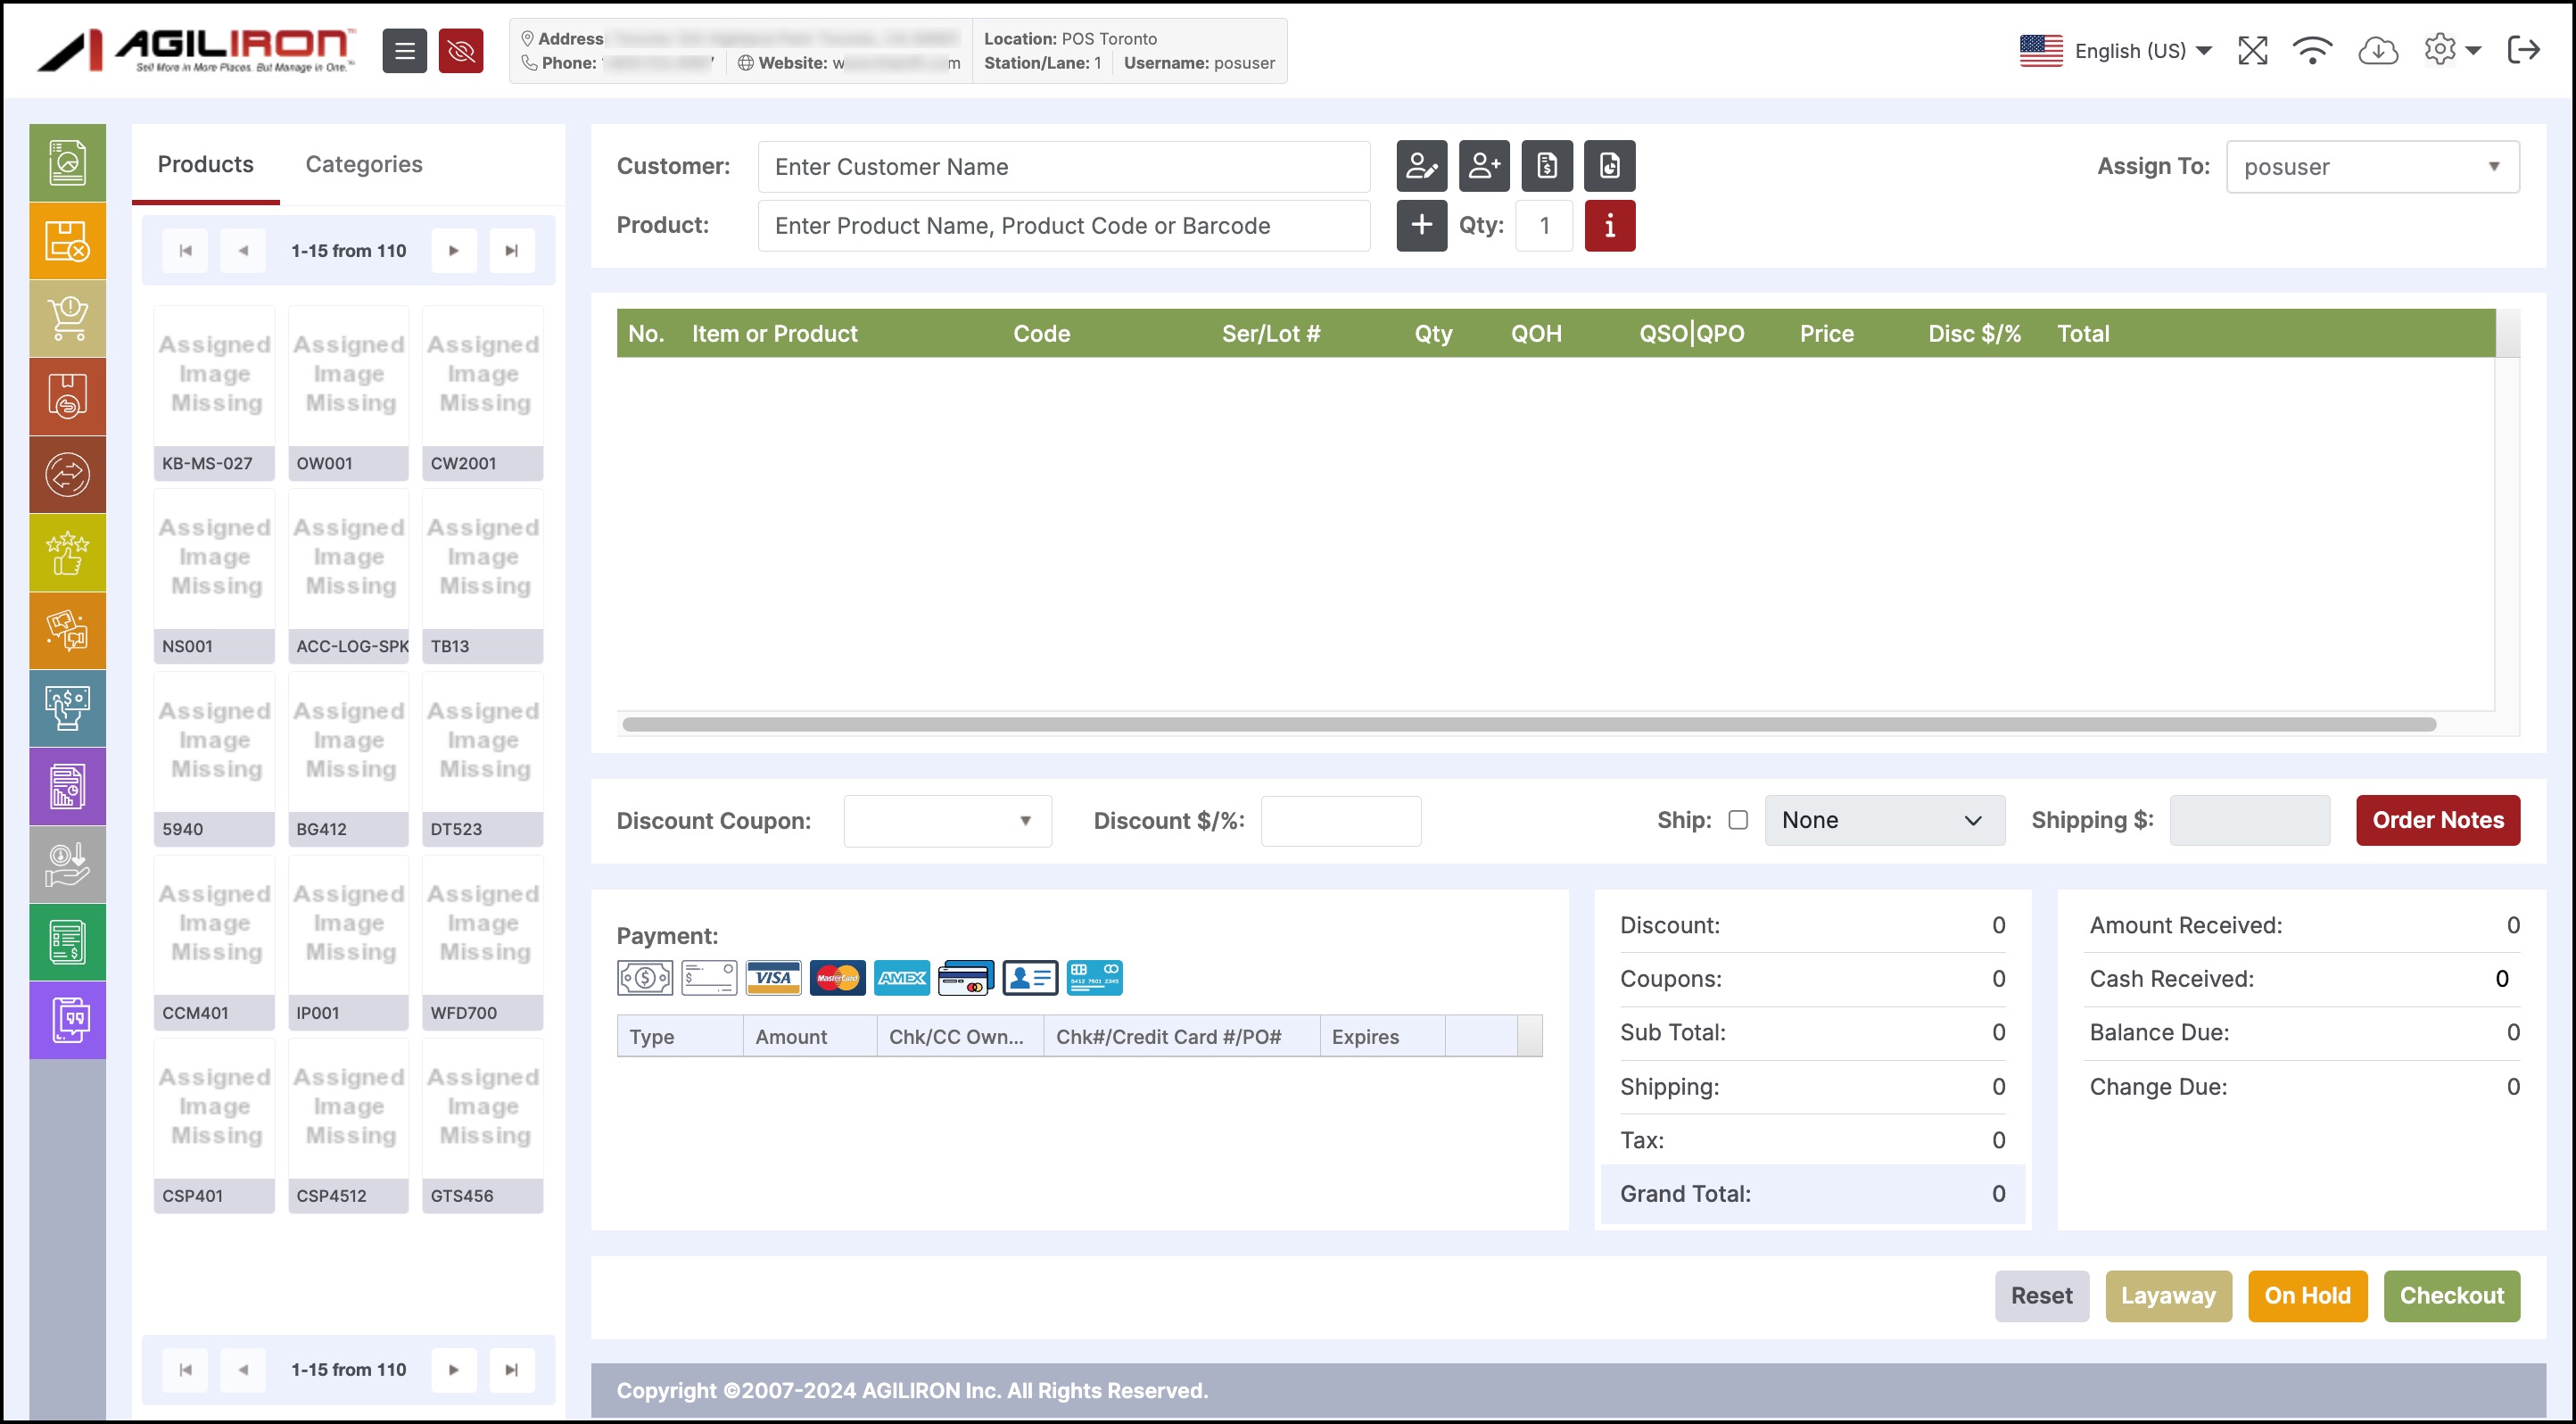
- Click OK. The POS page is displayed. Note: some of the icons are turned off by default, so the image below may look slightly different from your screen. All POS features are turned on in the example below.
POS Navigation
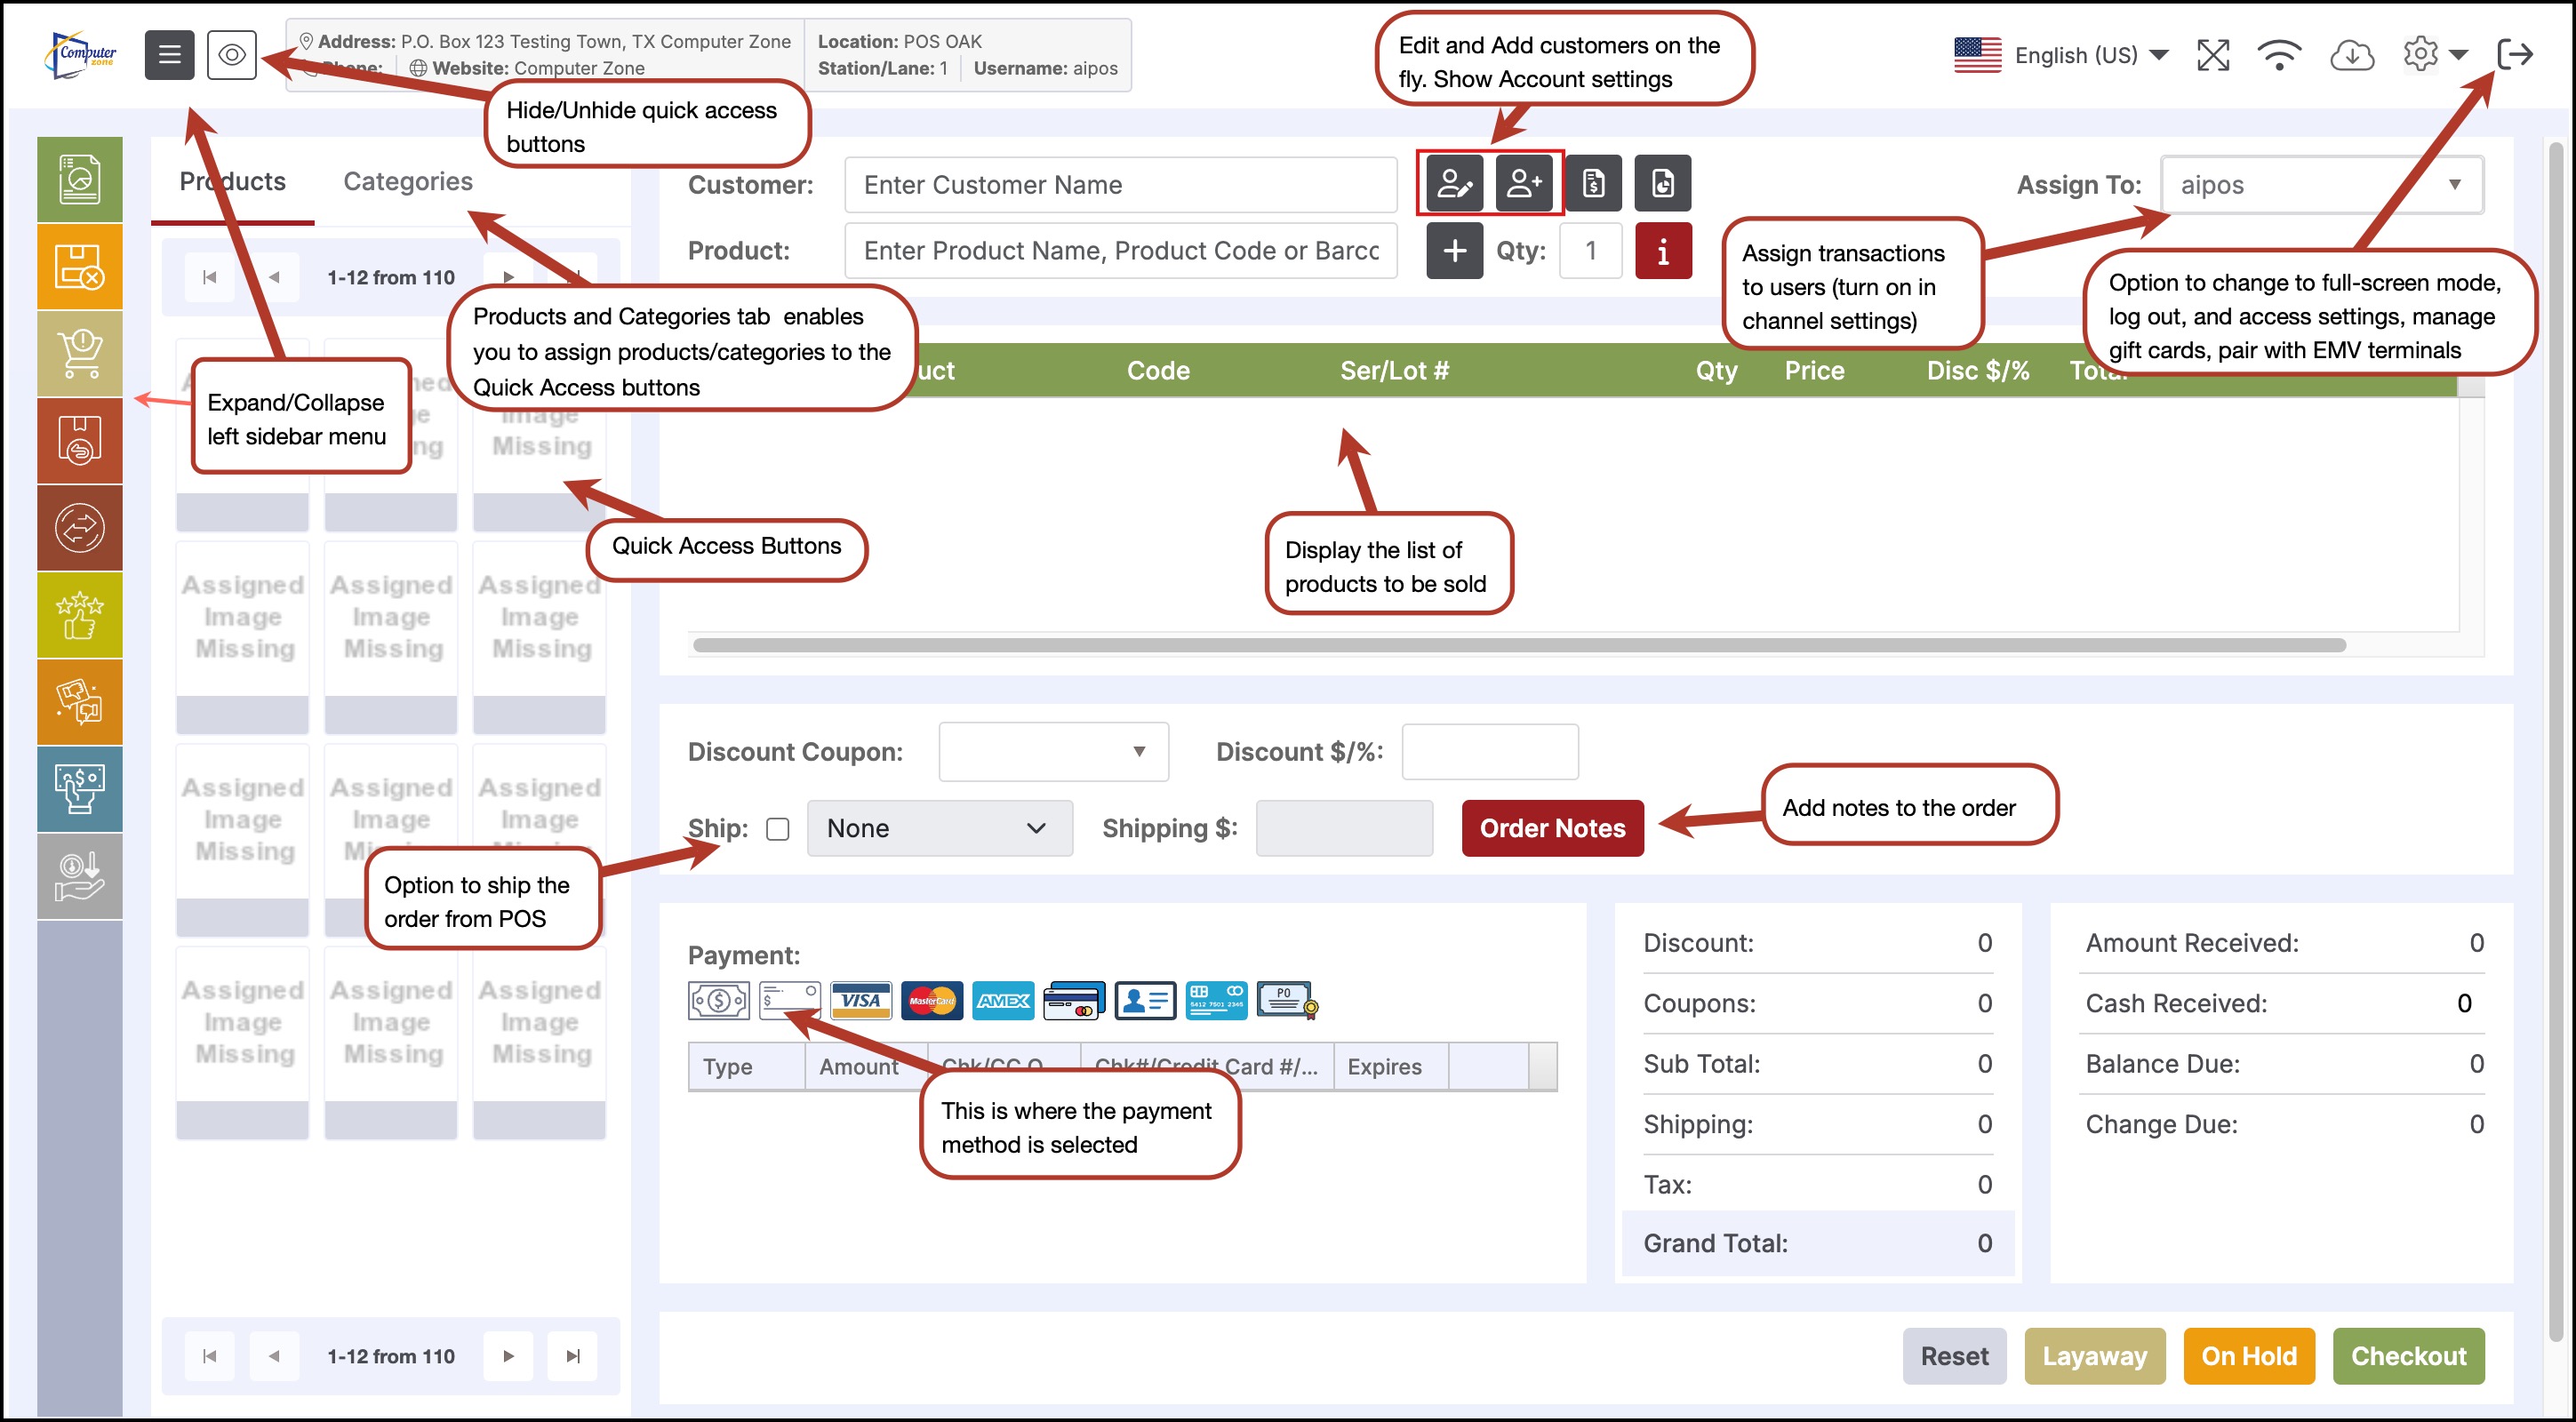
The POS screen contains the following buttons and sections:
-
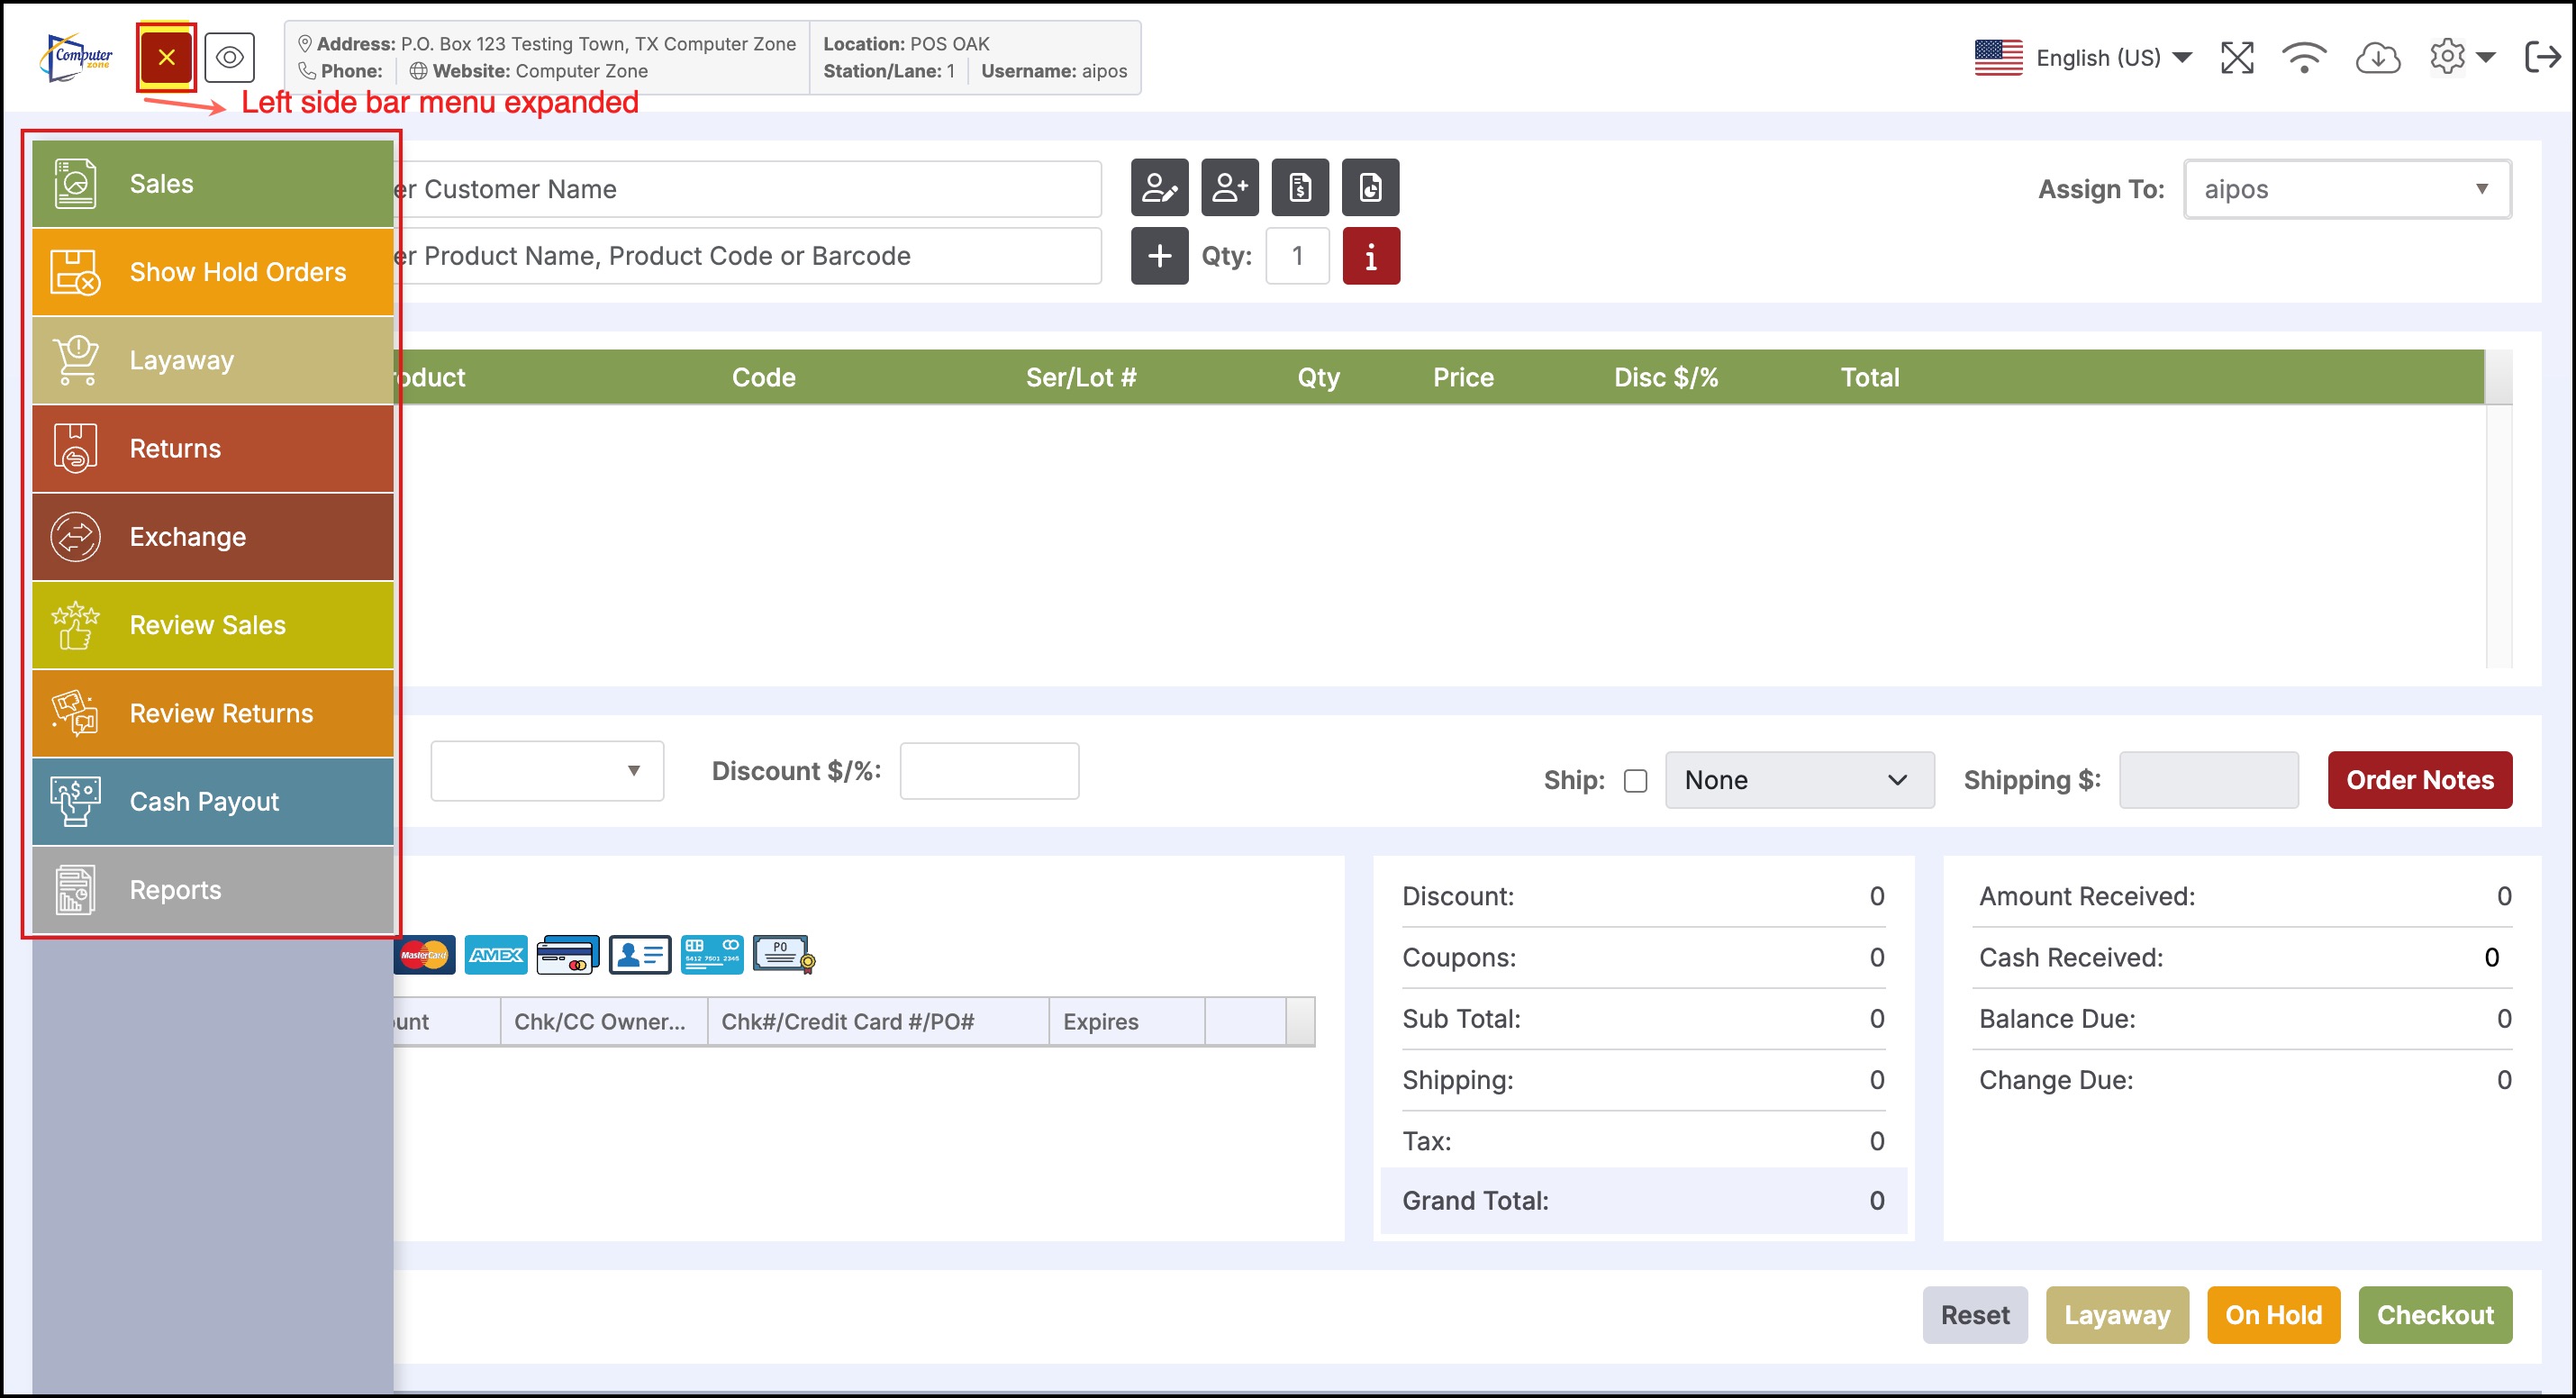
Option to create a New Sales transactions (Default mode)
-
Option to view orders placed on Hold (must be enabled in the back office)
-
Option to view orders placed on Layaway (must be enabled in the back office)
-
Option to process Sales Returns
-
Option to process product Exchanges
-
Option to Review Sales and reprint receipts
-
Option to Review Sales Returns and reprint receipts
-
Option to execute a Cash Payout at the POS (must be enabled in the back office)
-
Option to generate Reports (must be enabled in the back office)
-
Option to change the window to Full Screen mode
-
Option to Logout of the application
-
Option to access other Tools (Lock Screen, Change Password, and Clock In/Out if enabled)
-
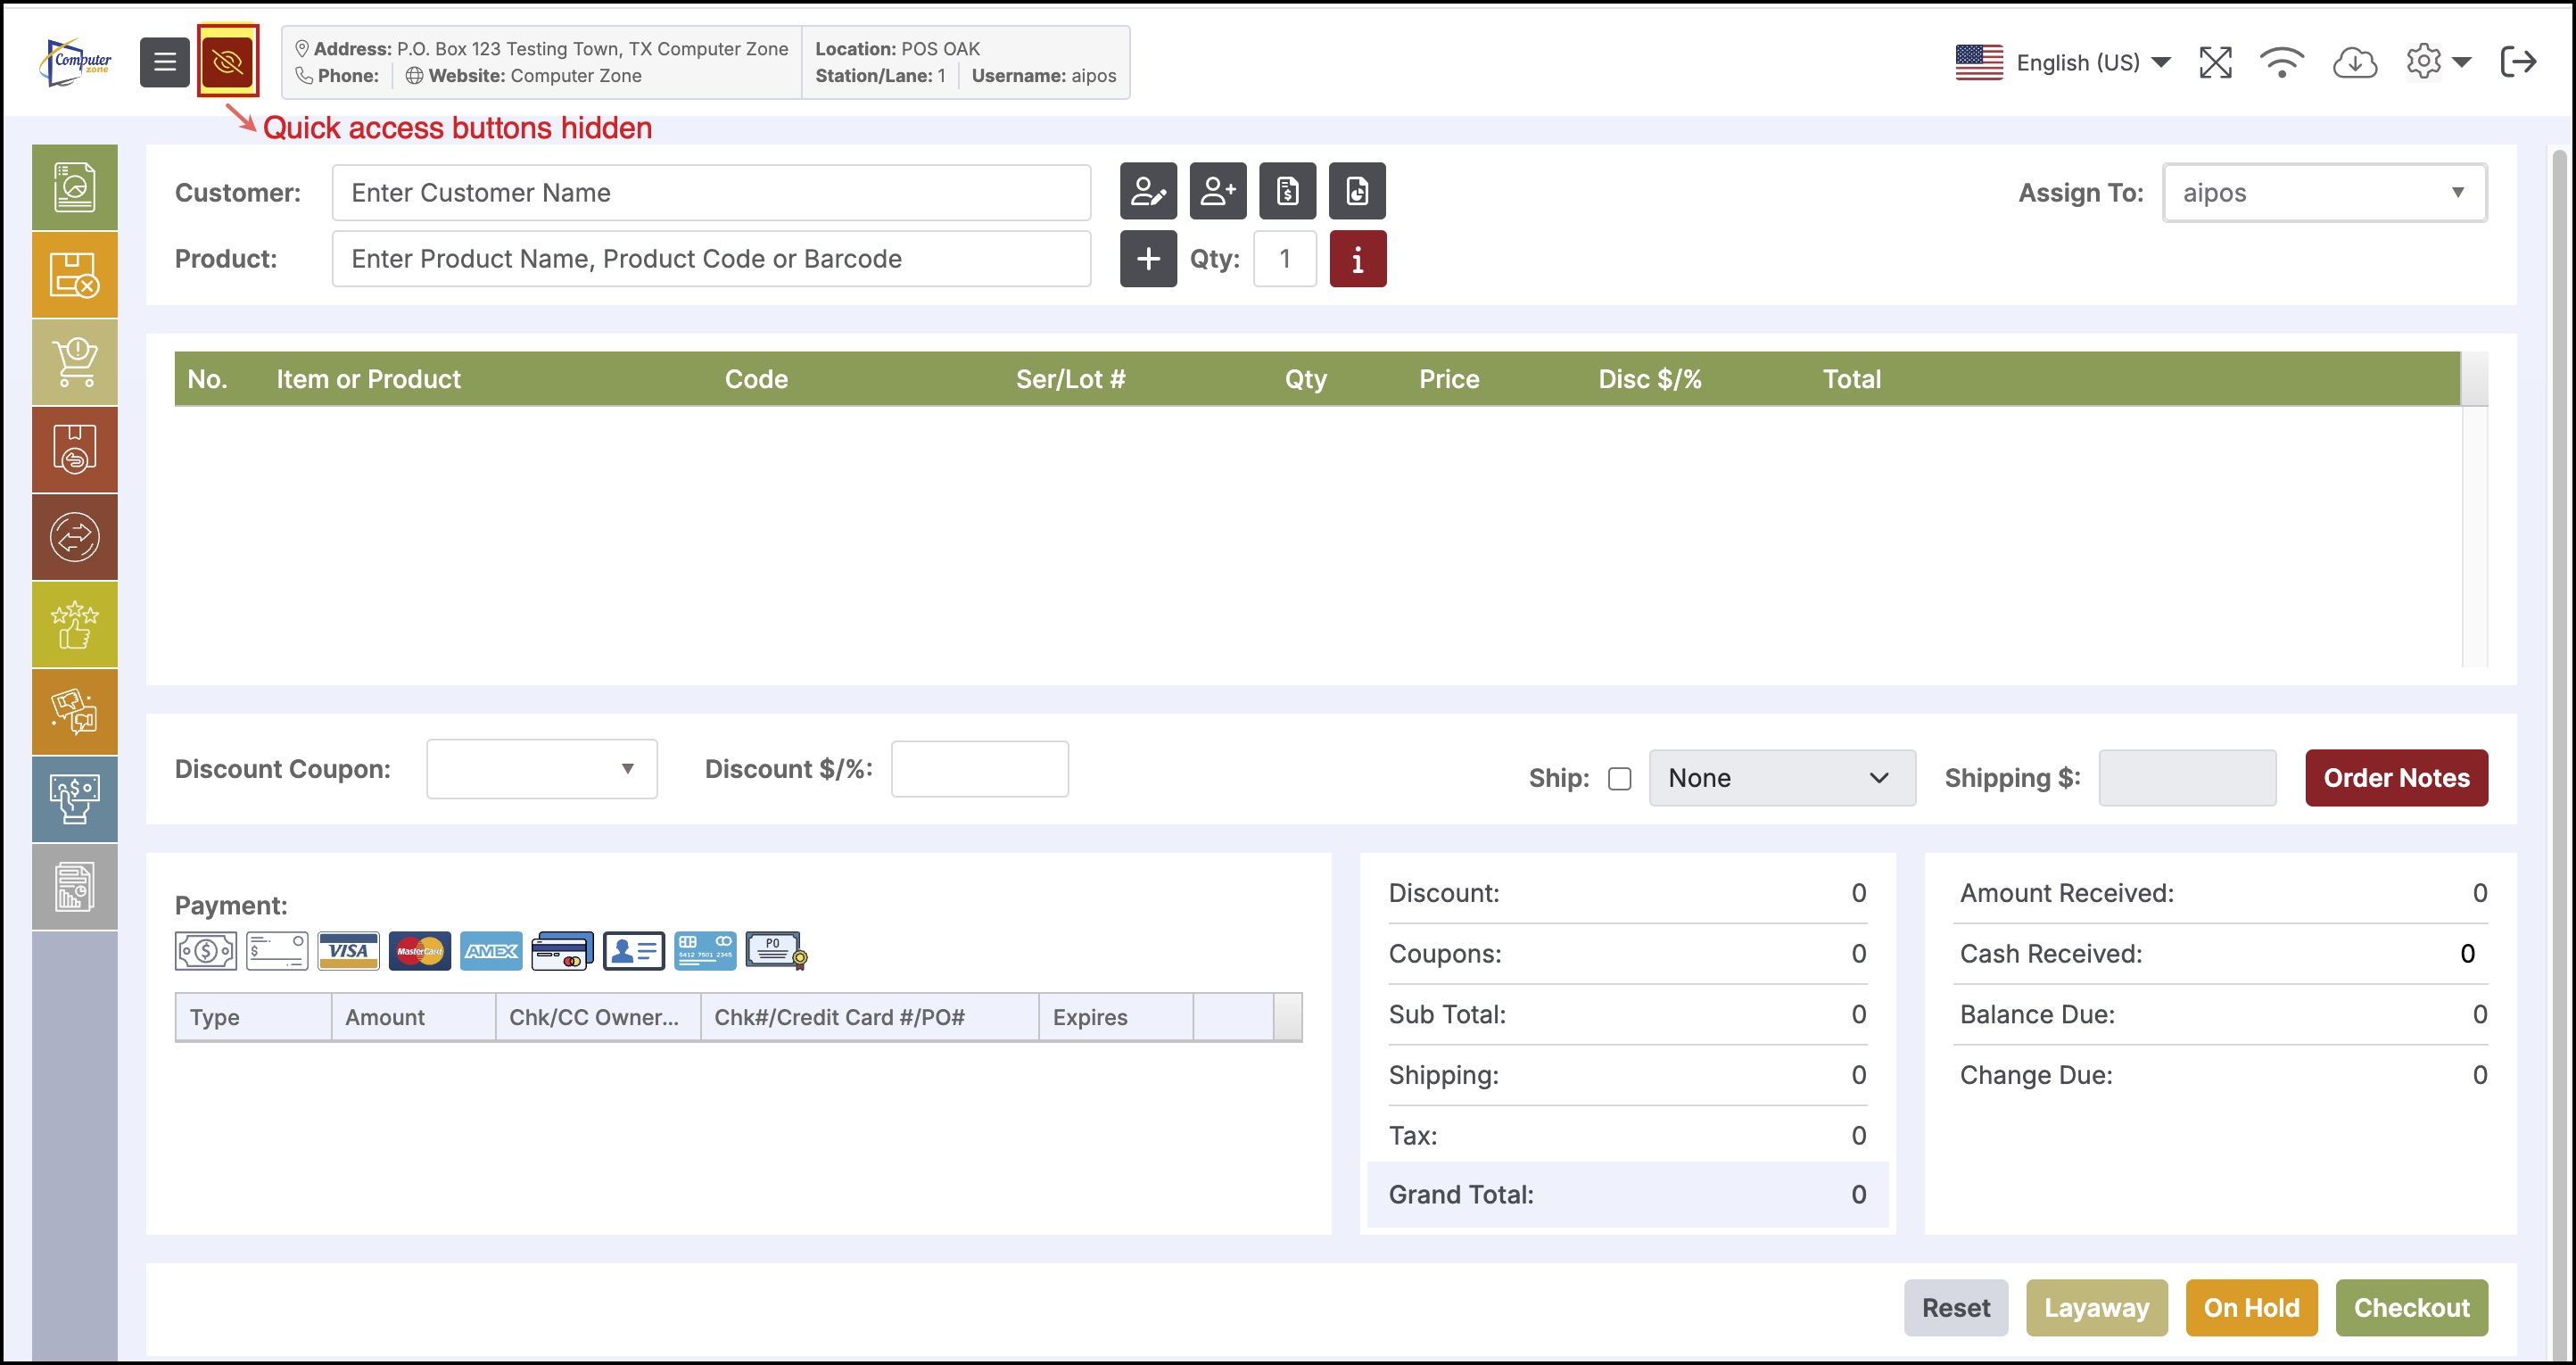
Option to Hide/Unhide Quick Access Buttons
-
Option to Expand/Collapse Left Sidebar Menu
Products Tab - Enables you to assign Products to the Quick Access buttons.
Categories Tab - Enables you to assign Categories to the Quick Access buttons.
Payment panel - Enables you to select the mode of payment (automatically selected if credit card is swiped with a credit card swiper device)
Hidden Quick Access Buttons
Expanded Left Side-bar Menu
Updated about 1 year ago
