New Product Wizard
The "New Product Wizard" feature allows users to quickly and efficiently create new products and assign them to PriceBooks and Vendors.
To add a new Product, select "New Product Wizard" from the "New entry area as shown below.
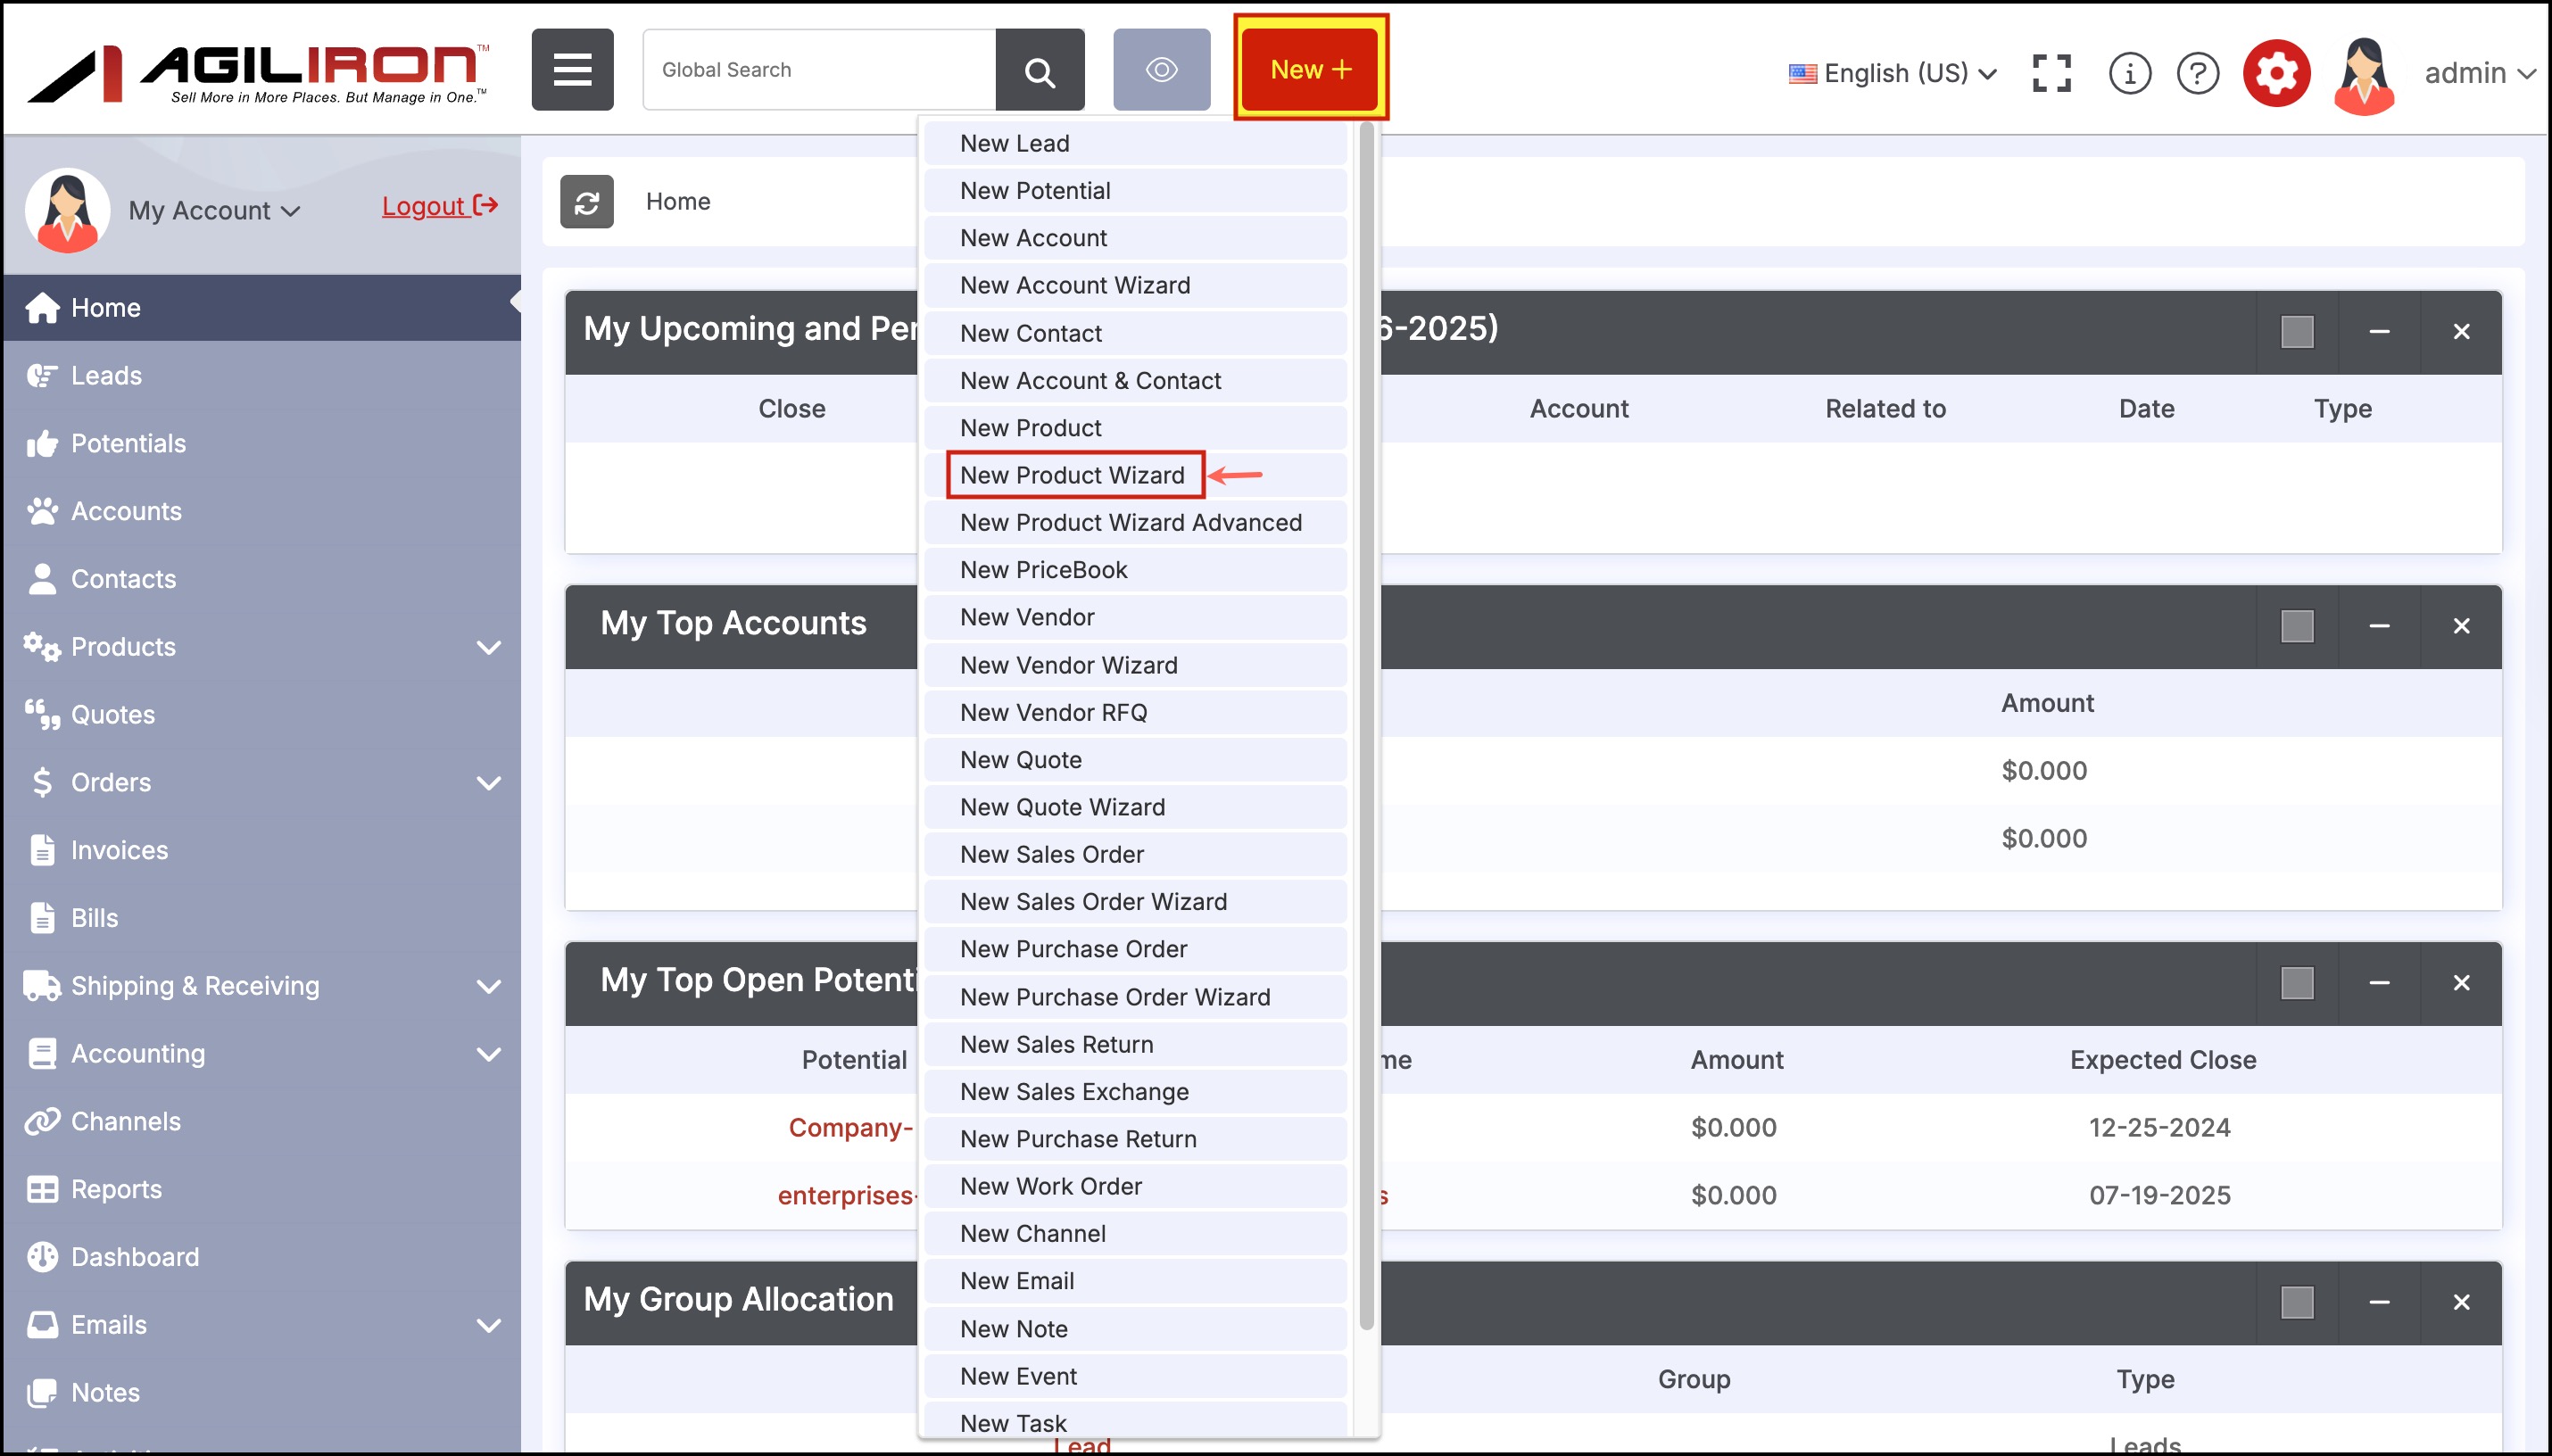
This prompts the New Product Wizard progress screen as shown below.
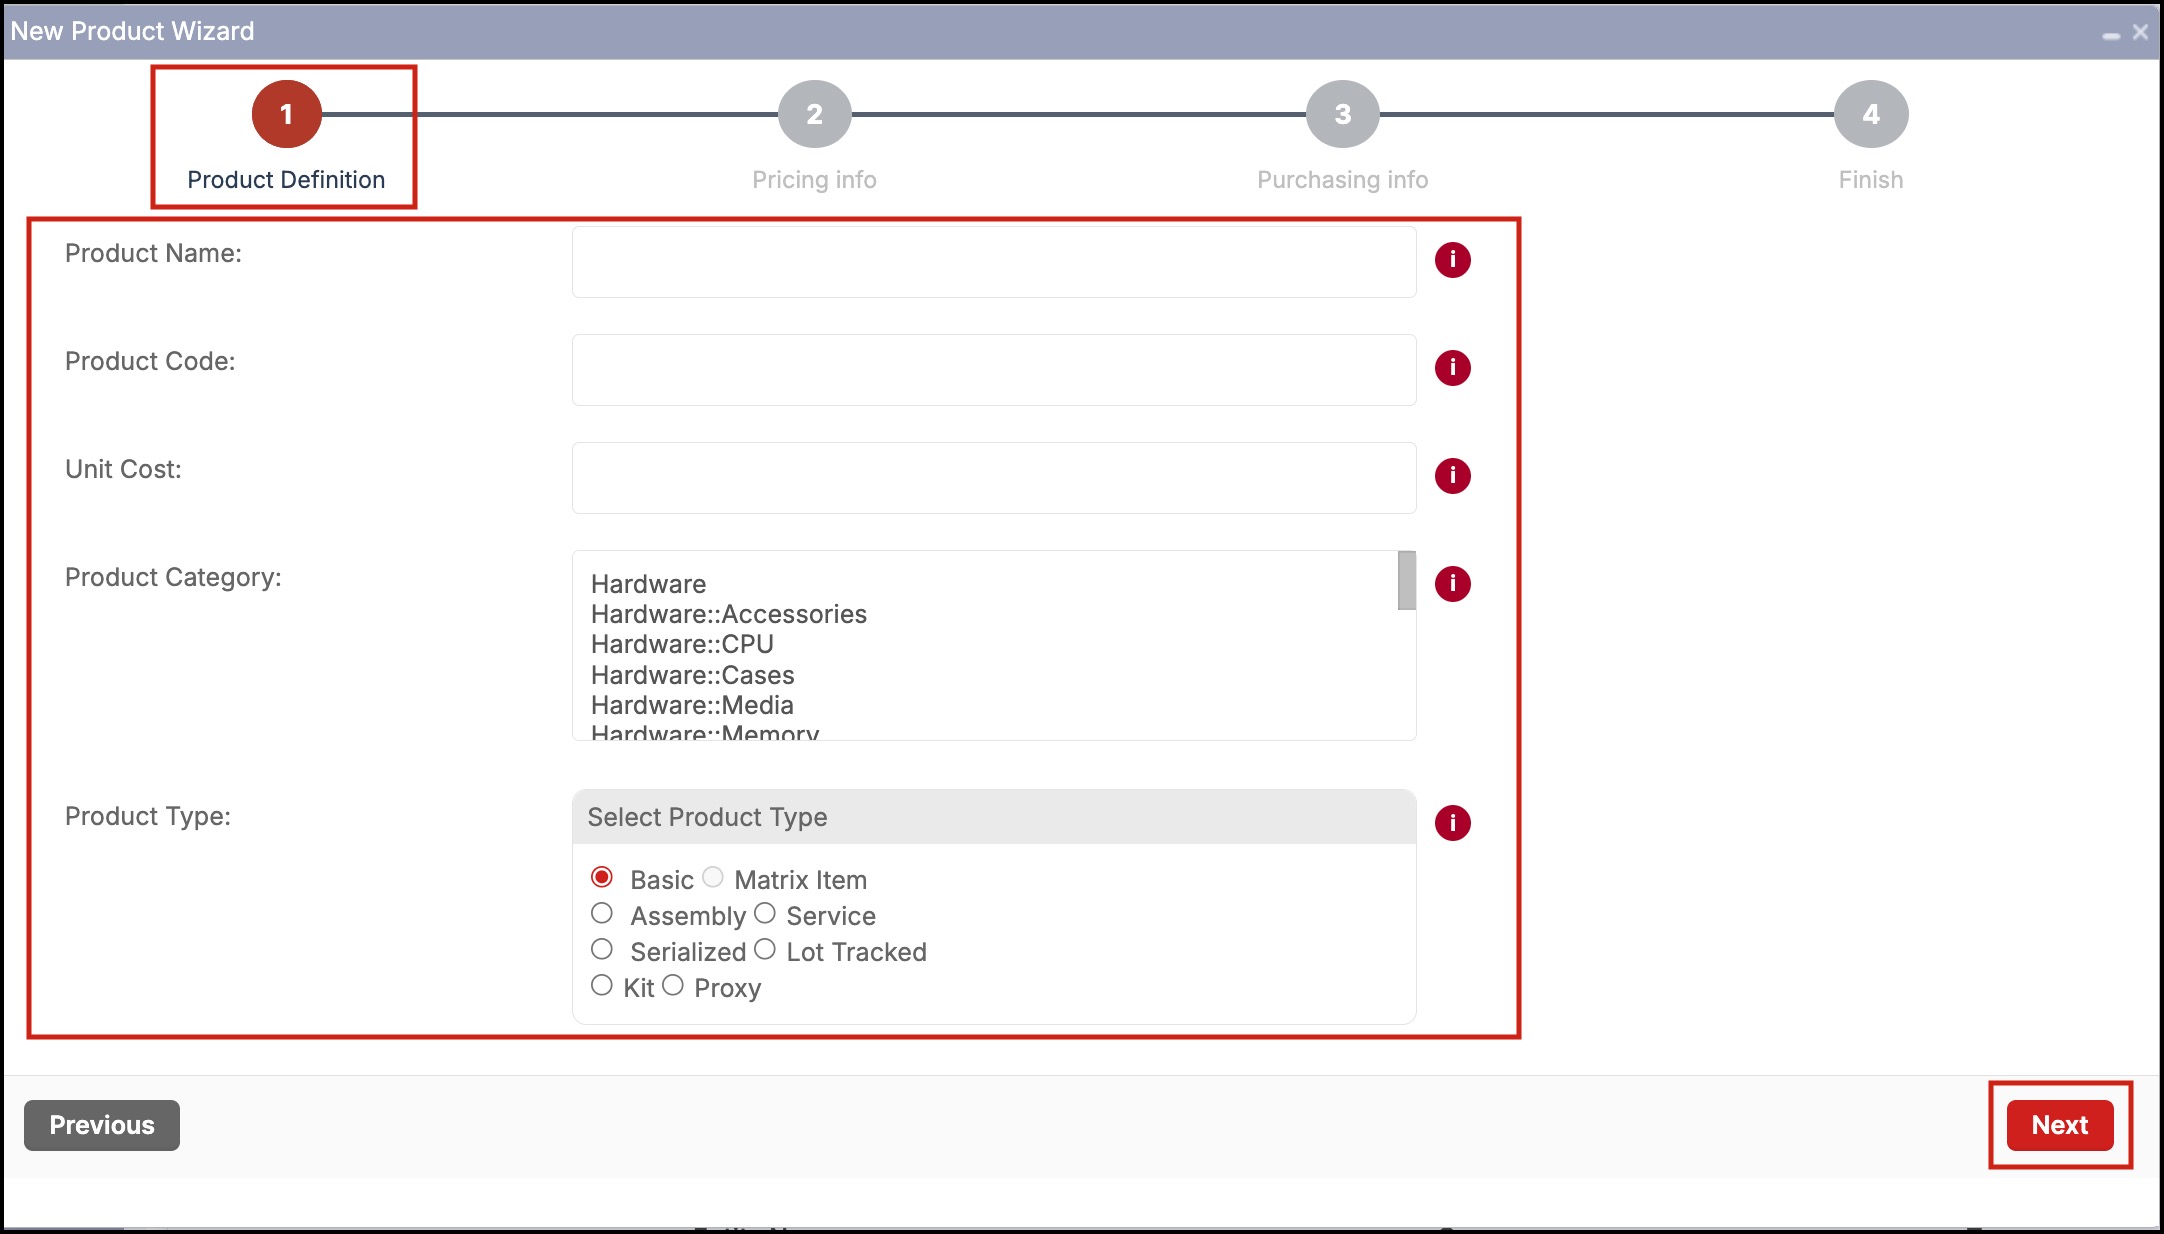
The first section is Product Definition.
Enter the required fields and click "next" to progress to the next step.
For more information about each product field, hover the mouse pointer over the red circle icon. Text will display providing information such as character length restrictions, instructions on selecting additional categories, and product type assistance. These icons appear throughout the New Product Wizard providing information about each step.
A note about product types - for Matrix type products, leave the Basic button selected in the Product Type section and continue adding product details. Once the wizard is complete, select "Matrix" in the Product Type section of the Product Details and follow the steps for creating a matrix as outlined here.
Click Next to proceed to the next step, "Pricing Info".
- Enter the pricing information for all PriceBooks that will house the product. For more information on how to add PriceBooks, see Creating a New PriceBook.
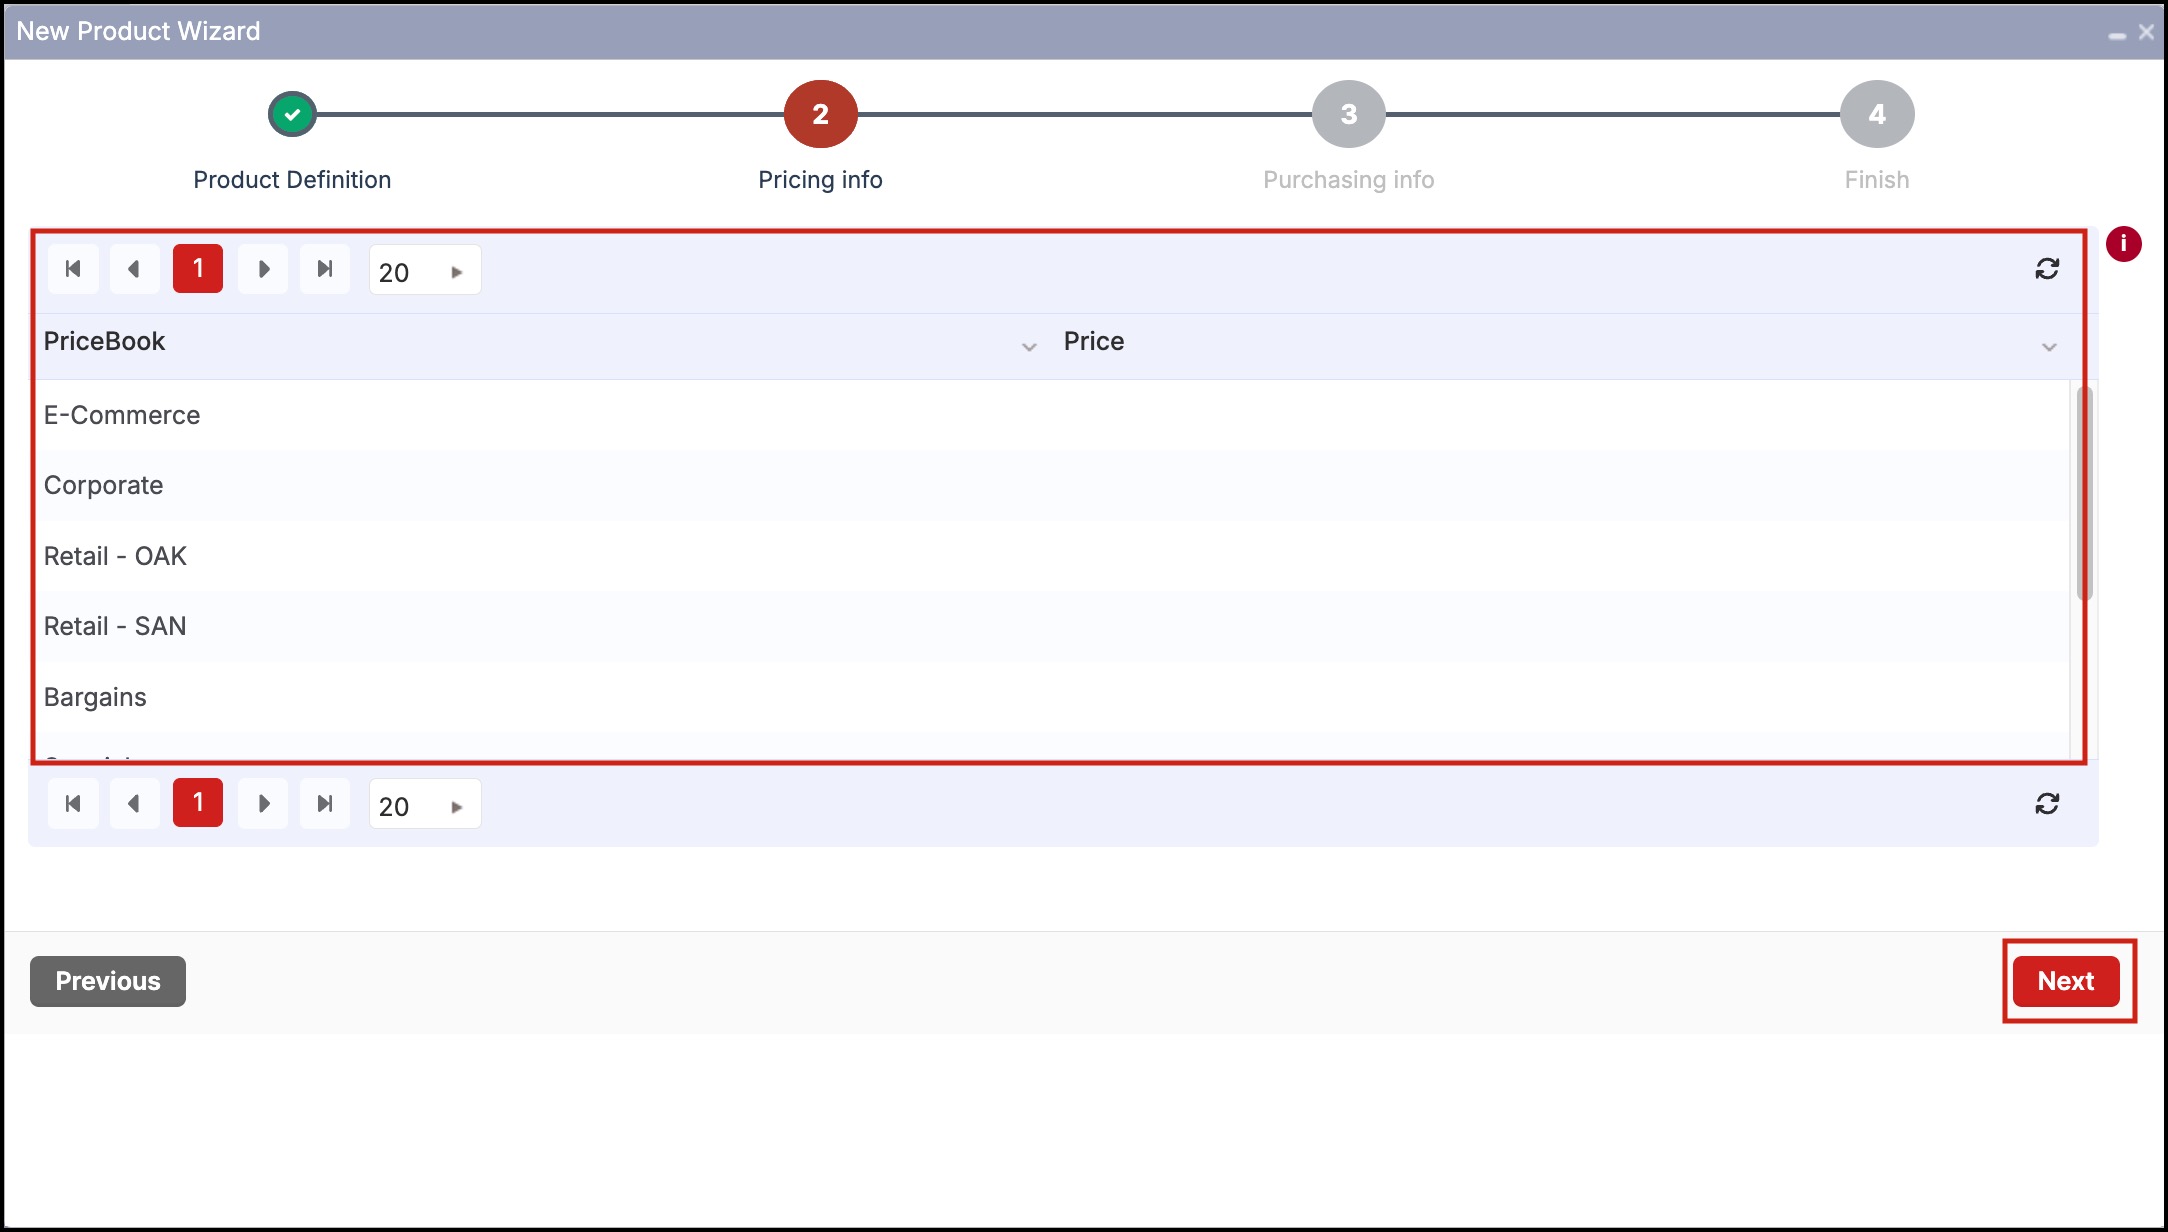
Click Next to proceed to the next step, "Purchasing Info".
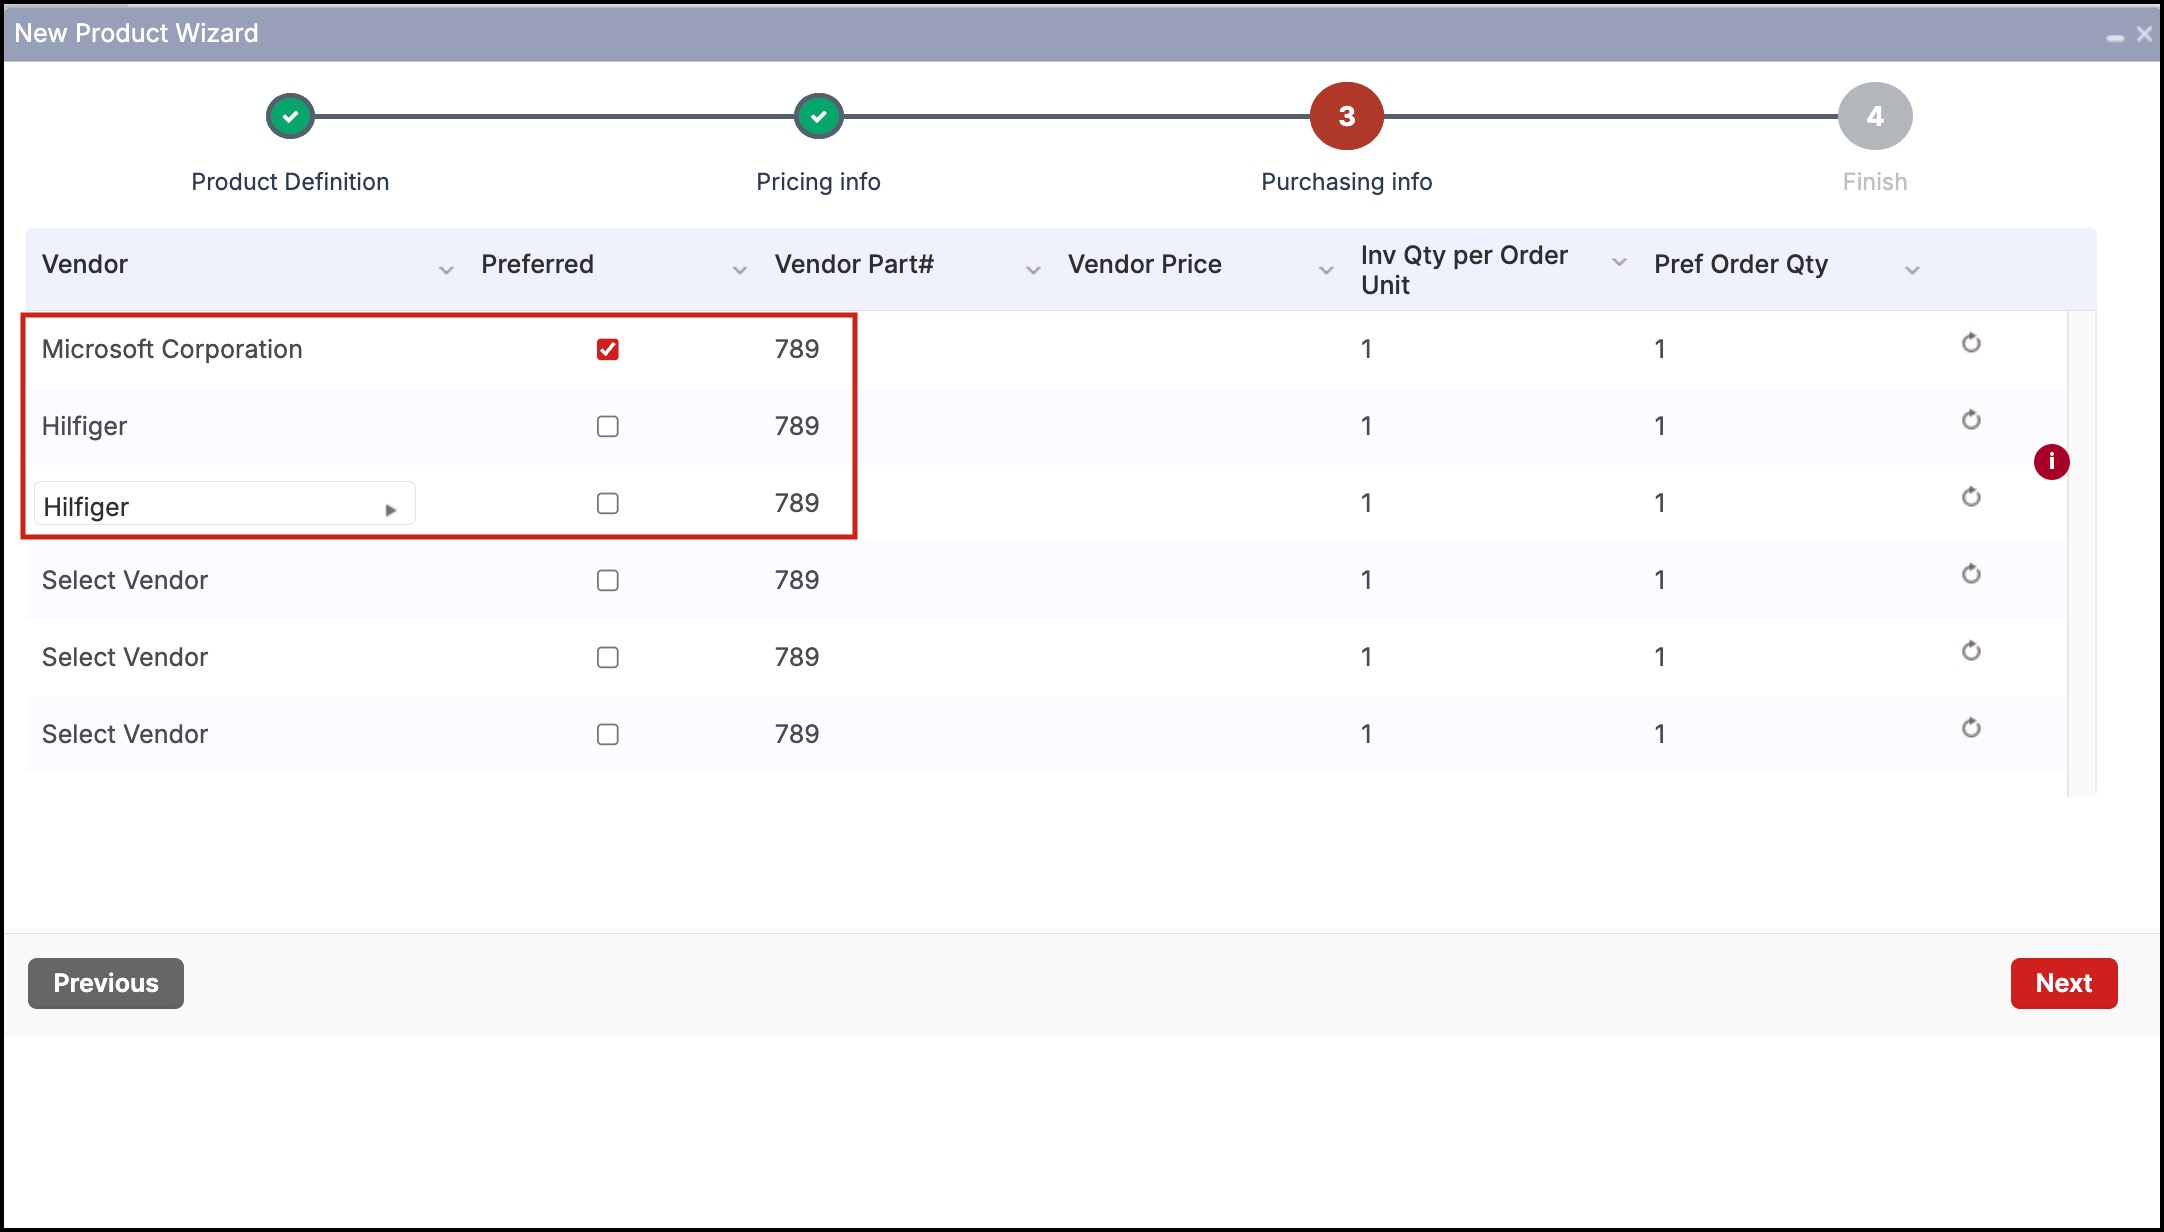
This section allows for assigning a Preferred Vendor to the product along with selecting any additional vendors that may be used when ordering (for example, the Preferred Vendor is out of stock or another vendor occasionally provides better pricing). Please note: only one vendor can be selected as the Preferred Vendor.
- Click Select Vendor to begin.
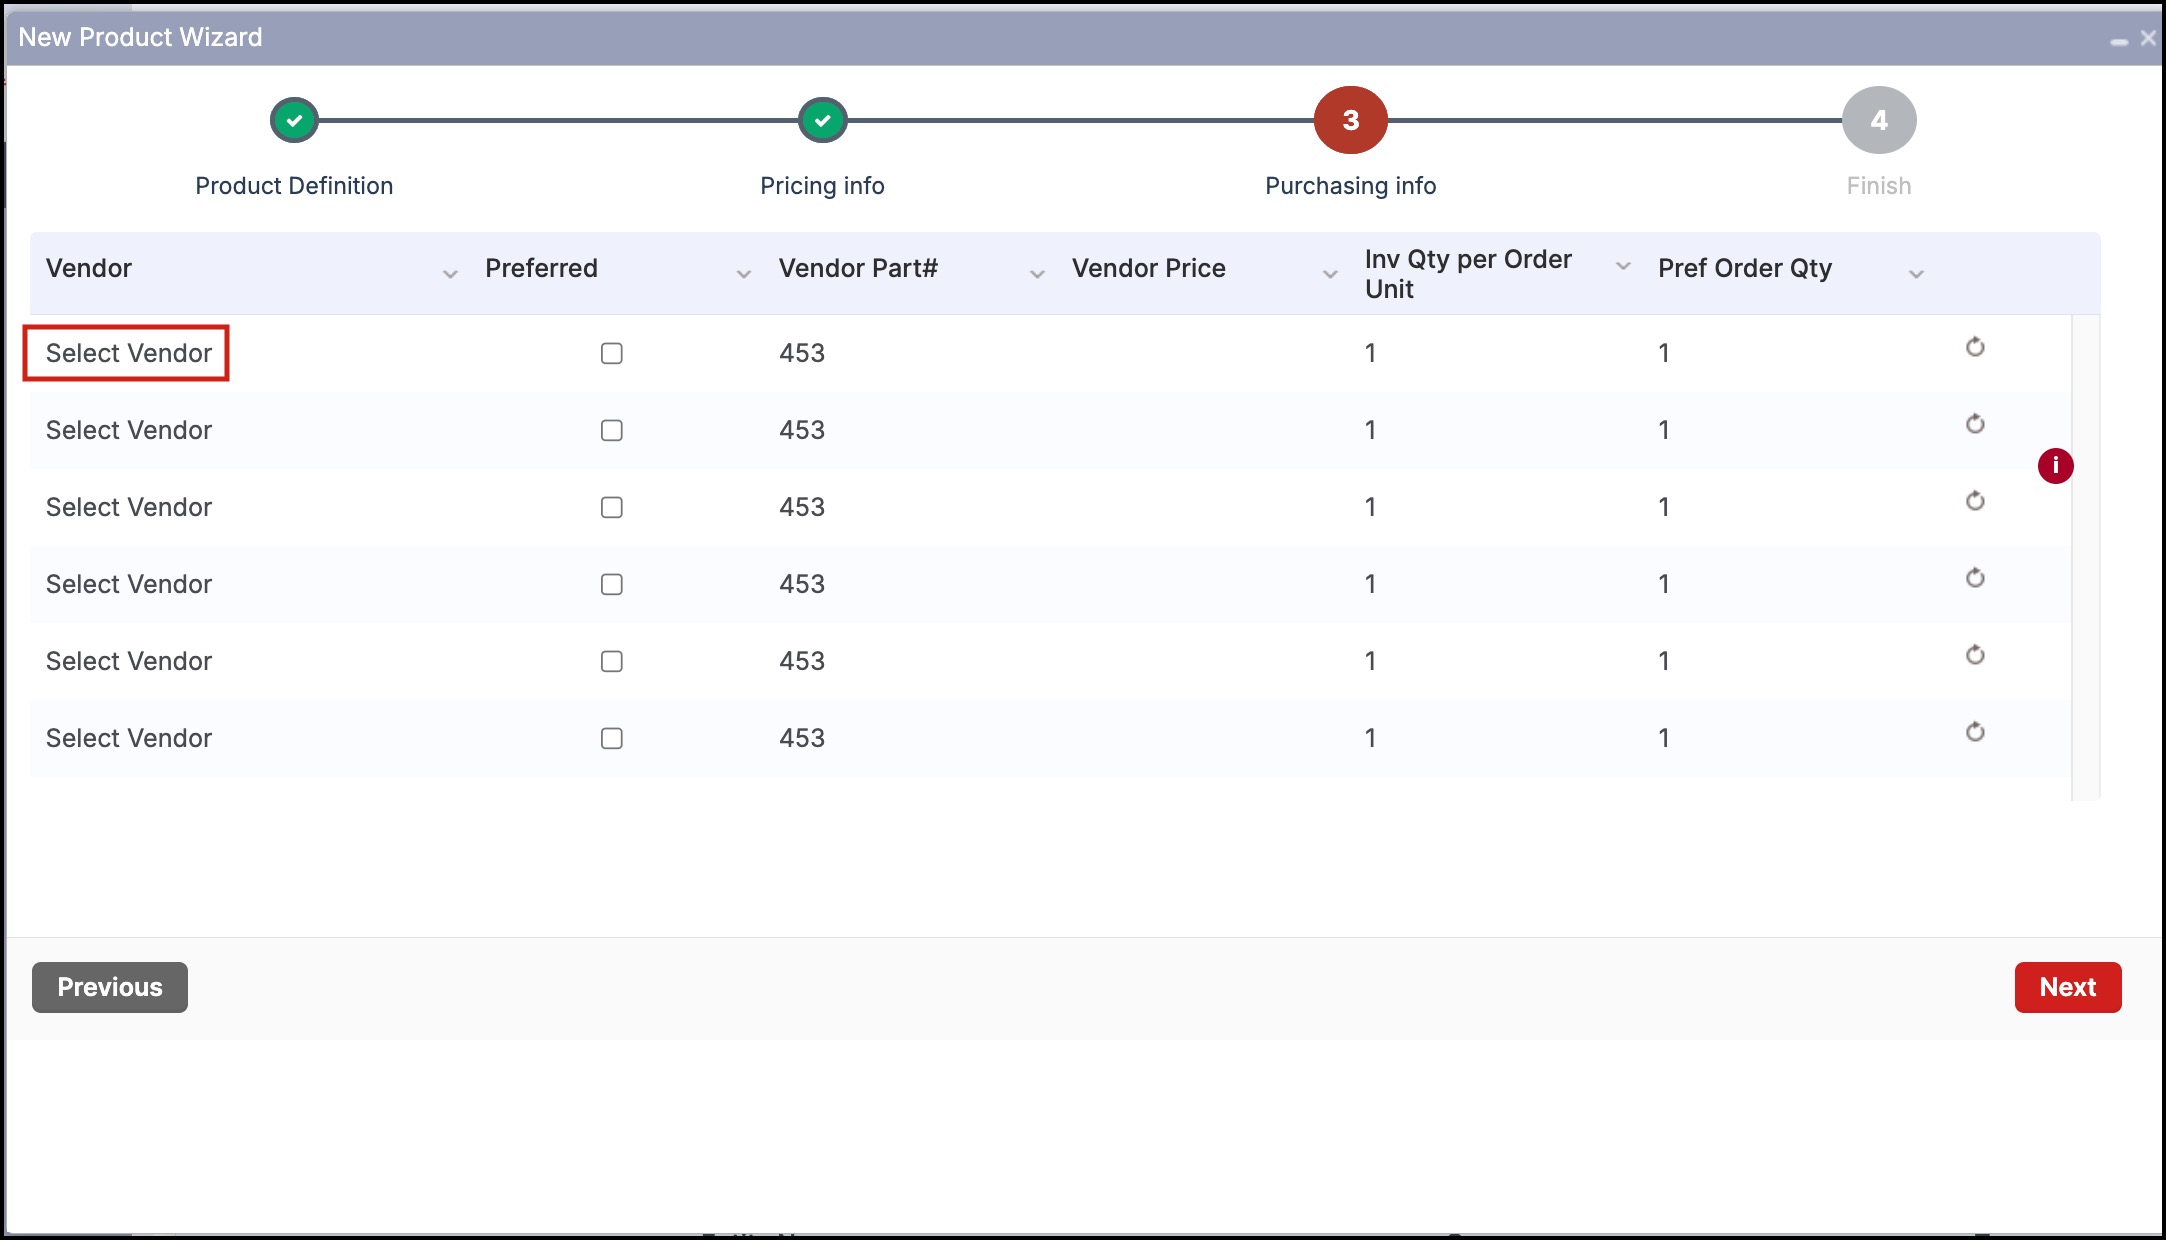
Select the required vendor from the drop-down list.
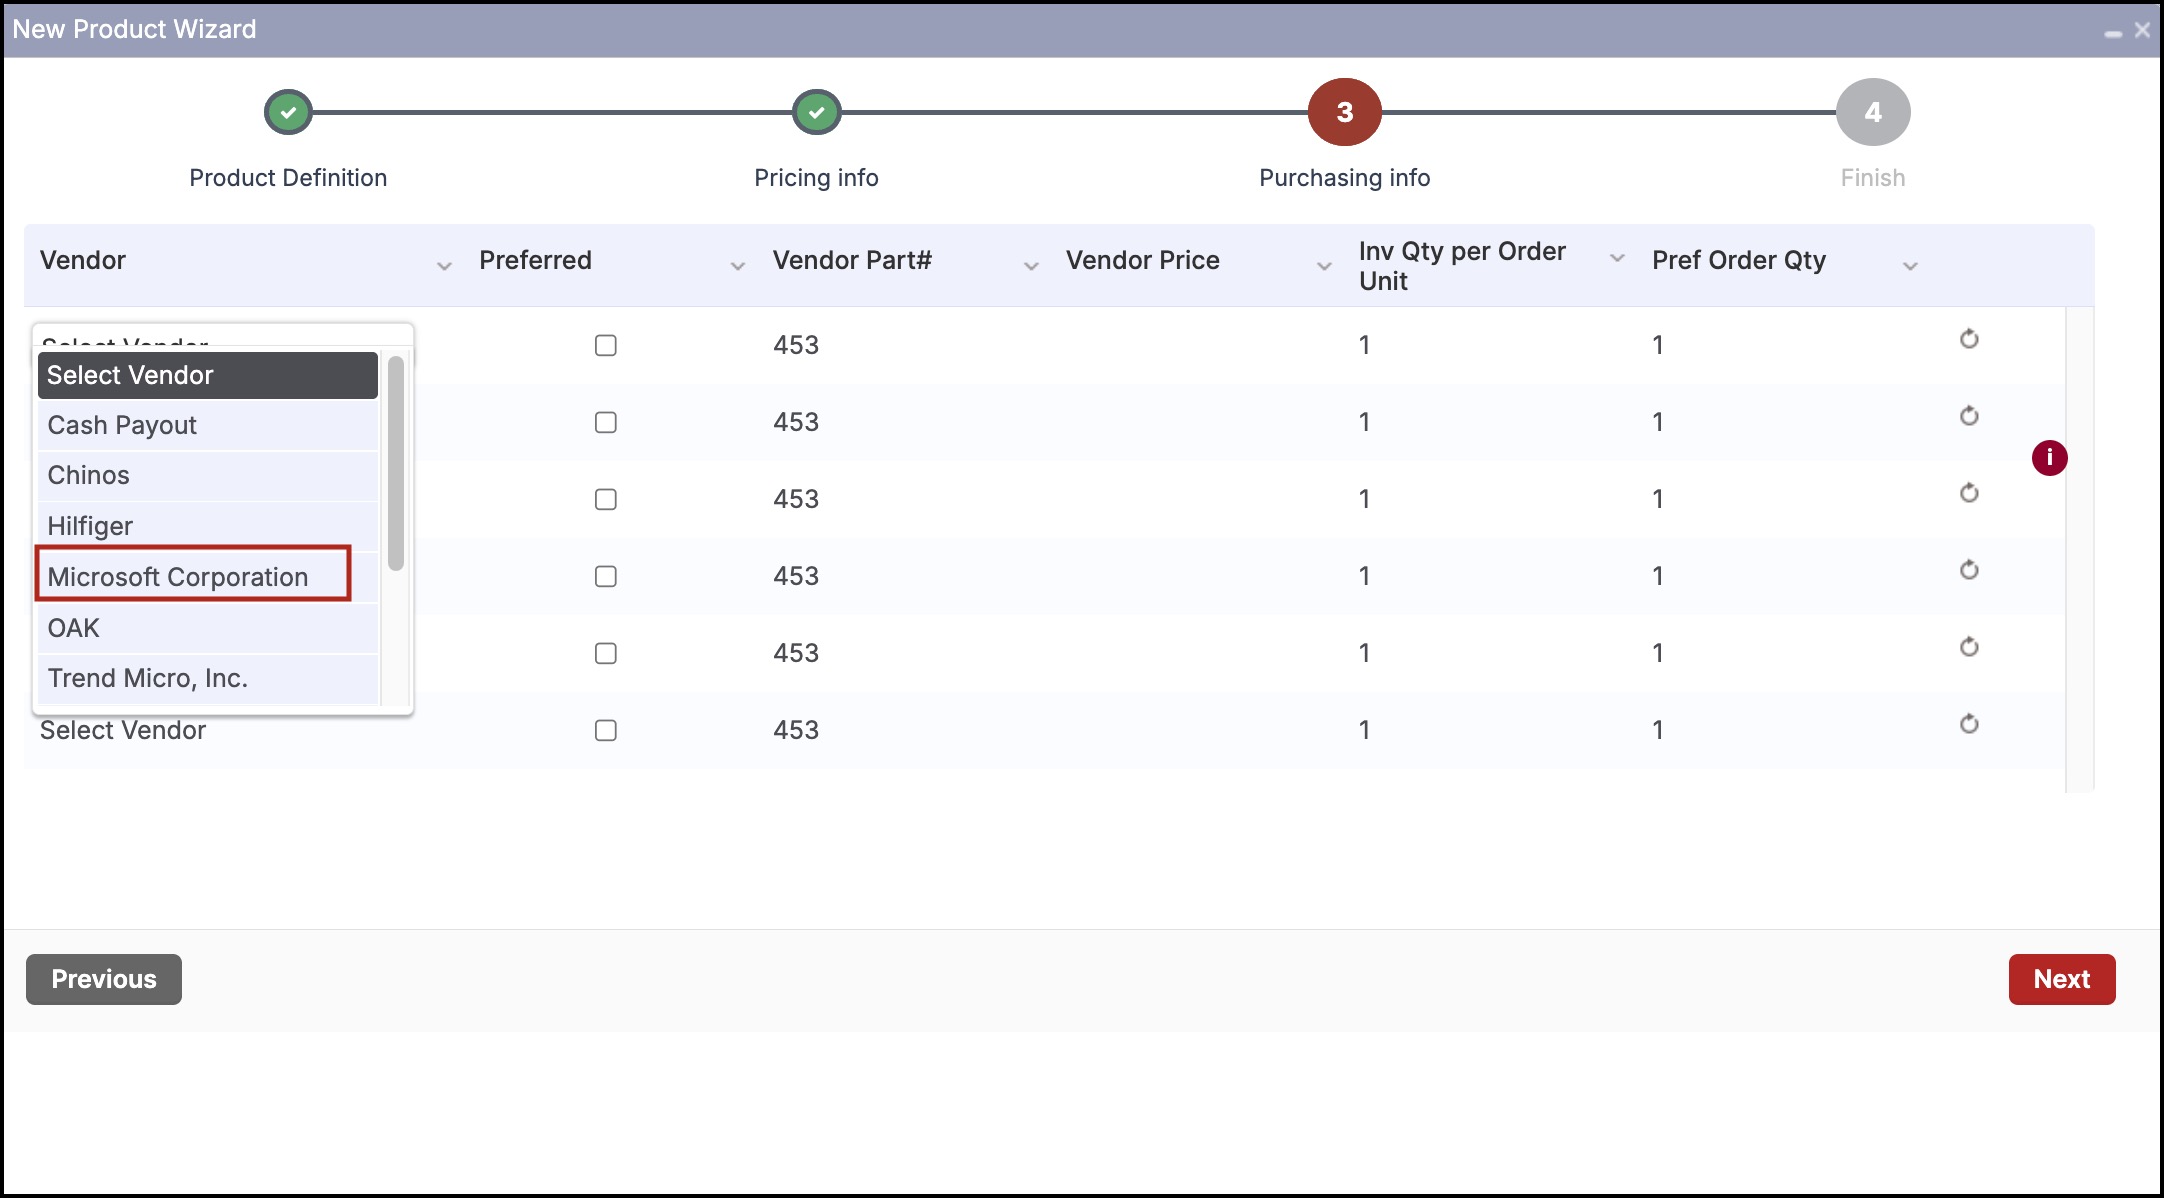
Select one vendor as the Preferred Vendor for ordering.
- By default, the product code displays as the Vendor Part #. Click the area next to the product code to change the vendor part number.
- In addition, multiple part numbers can be entered for a vendor if varying quantities are purchased (ie: Part No 12345 for a box of 50, part no 6548 for a box of 100, etc.). See the image below for an example.
- Enter the Vendor Price. This will usually be the same amount as the unit cost for the product.
- Enter the Inventory Quantity per Order Unit. This specifies the conversion of the Ordered Quantity to the Inventory Units that will be maintained in the system.

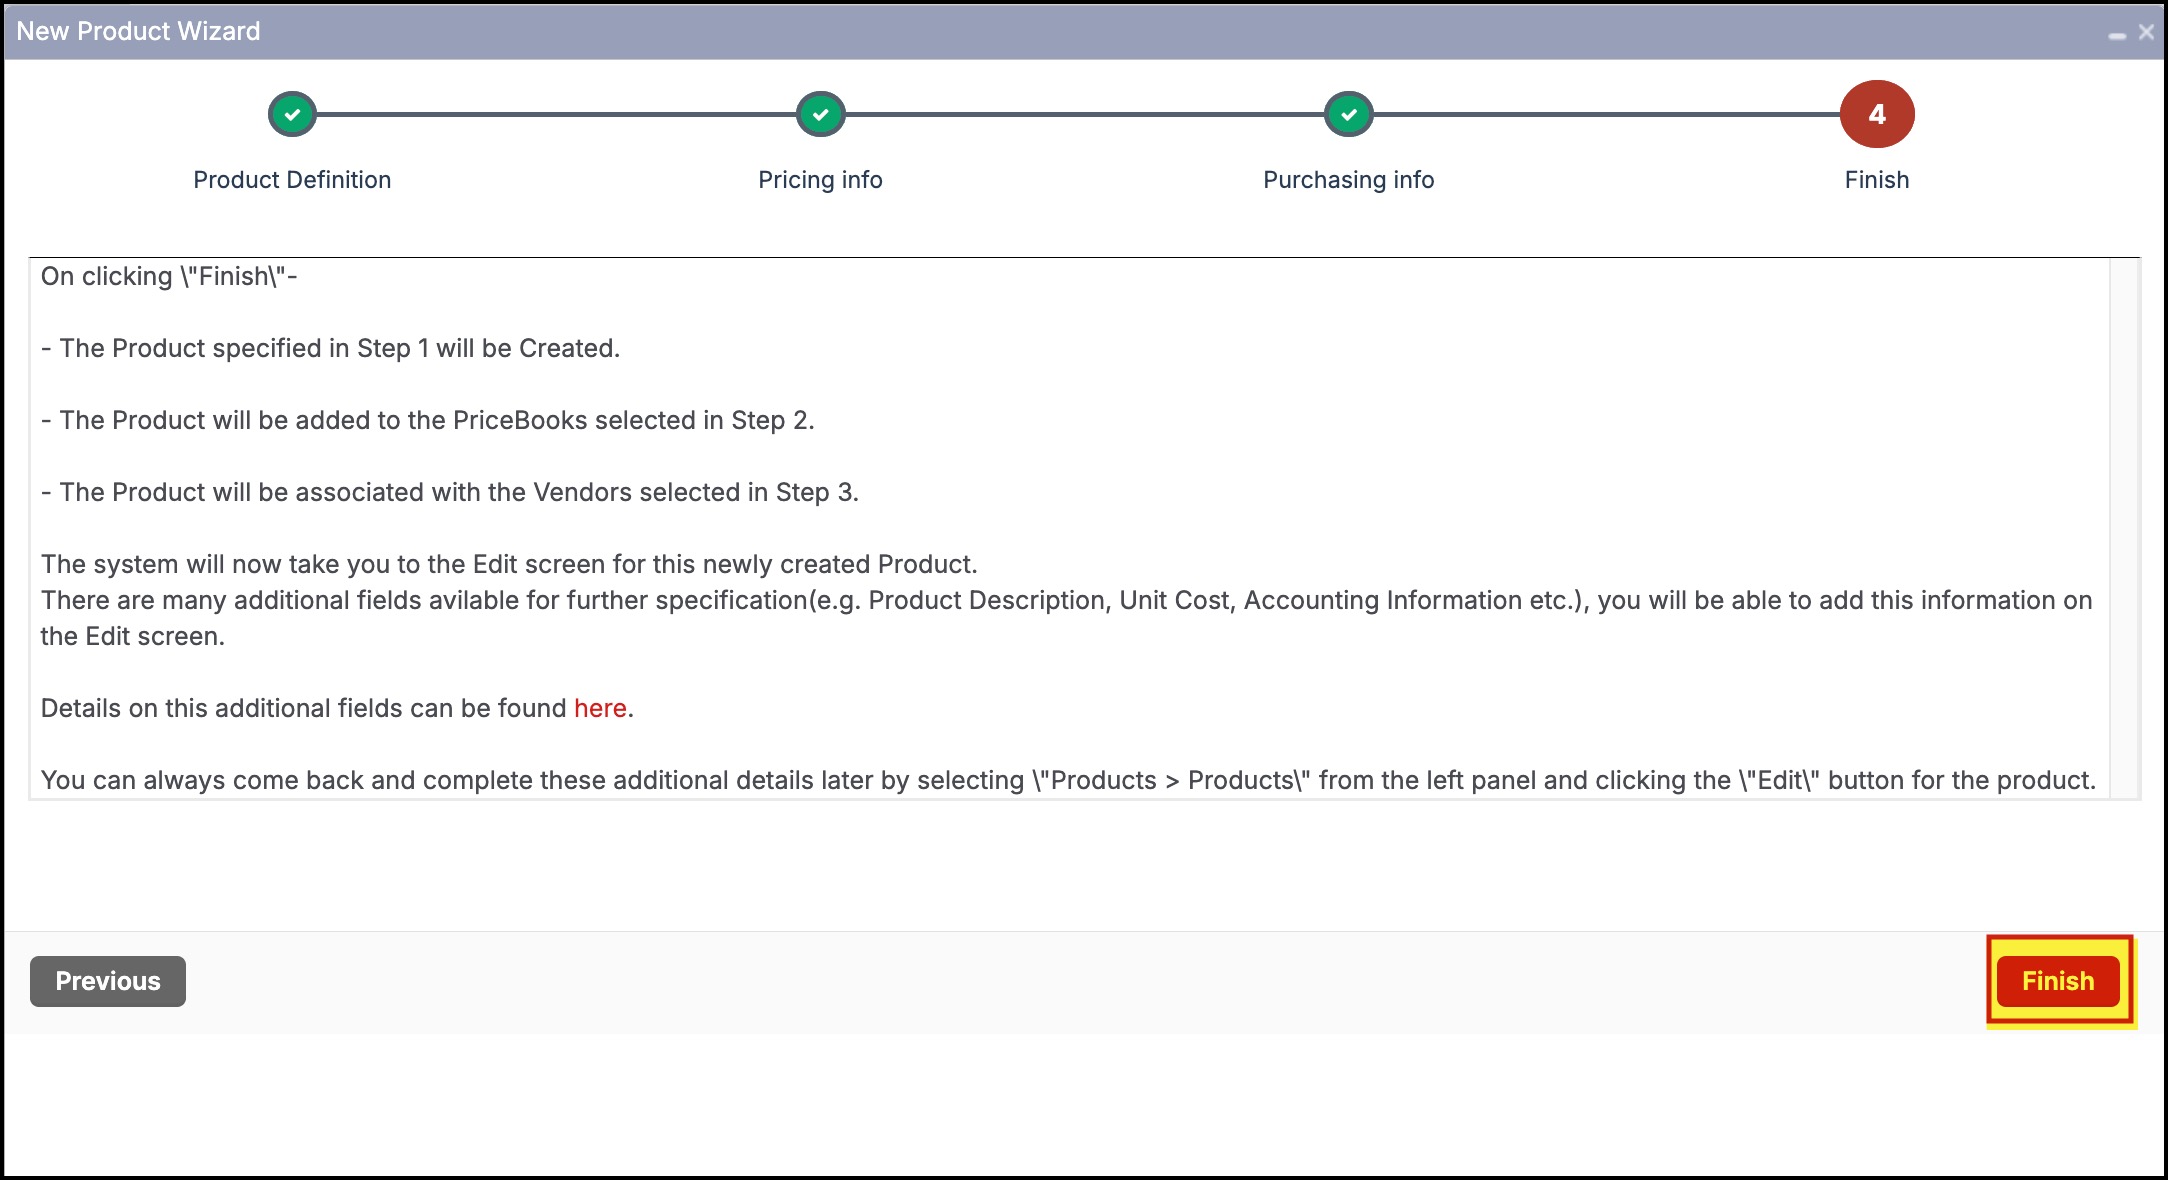
Click Next to proceed to the last step, "Finish".
This section explains the tasks that will be completed upon clicking the Finish button.
- Click Finish to complete this part of product setup.
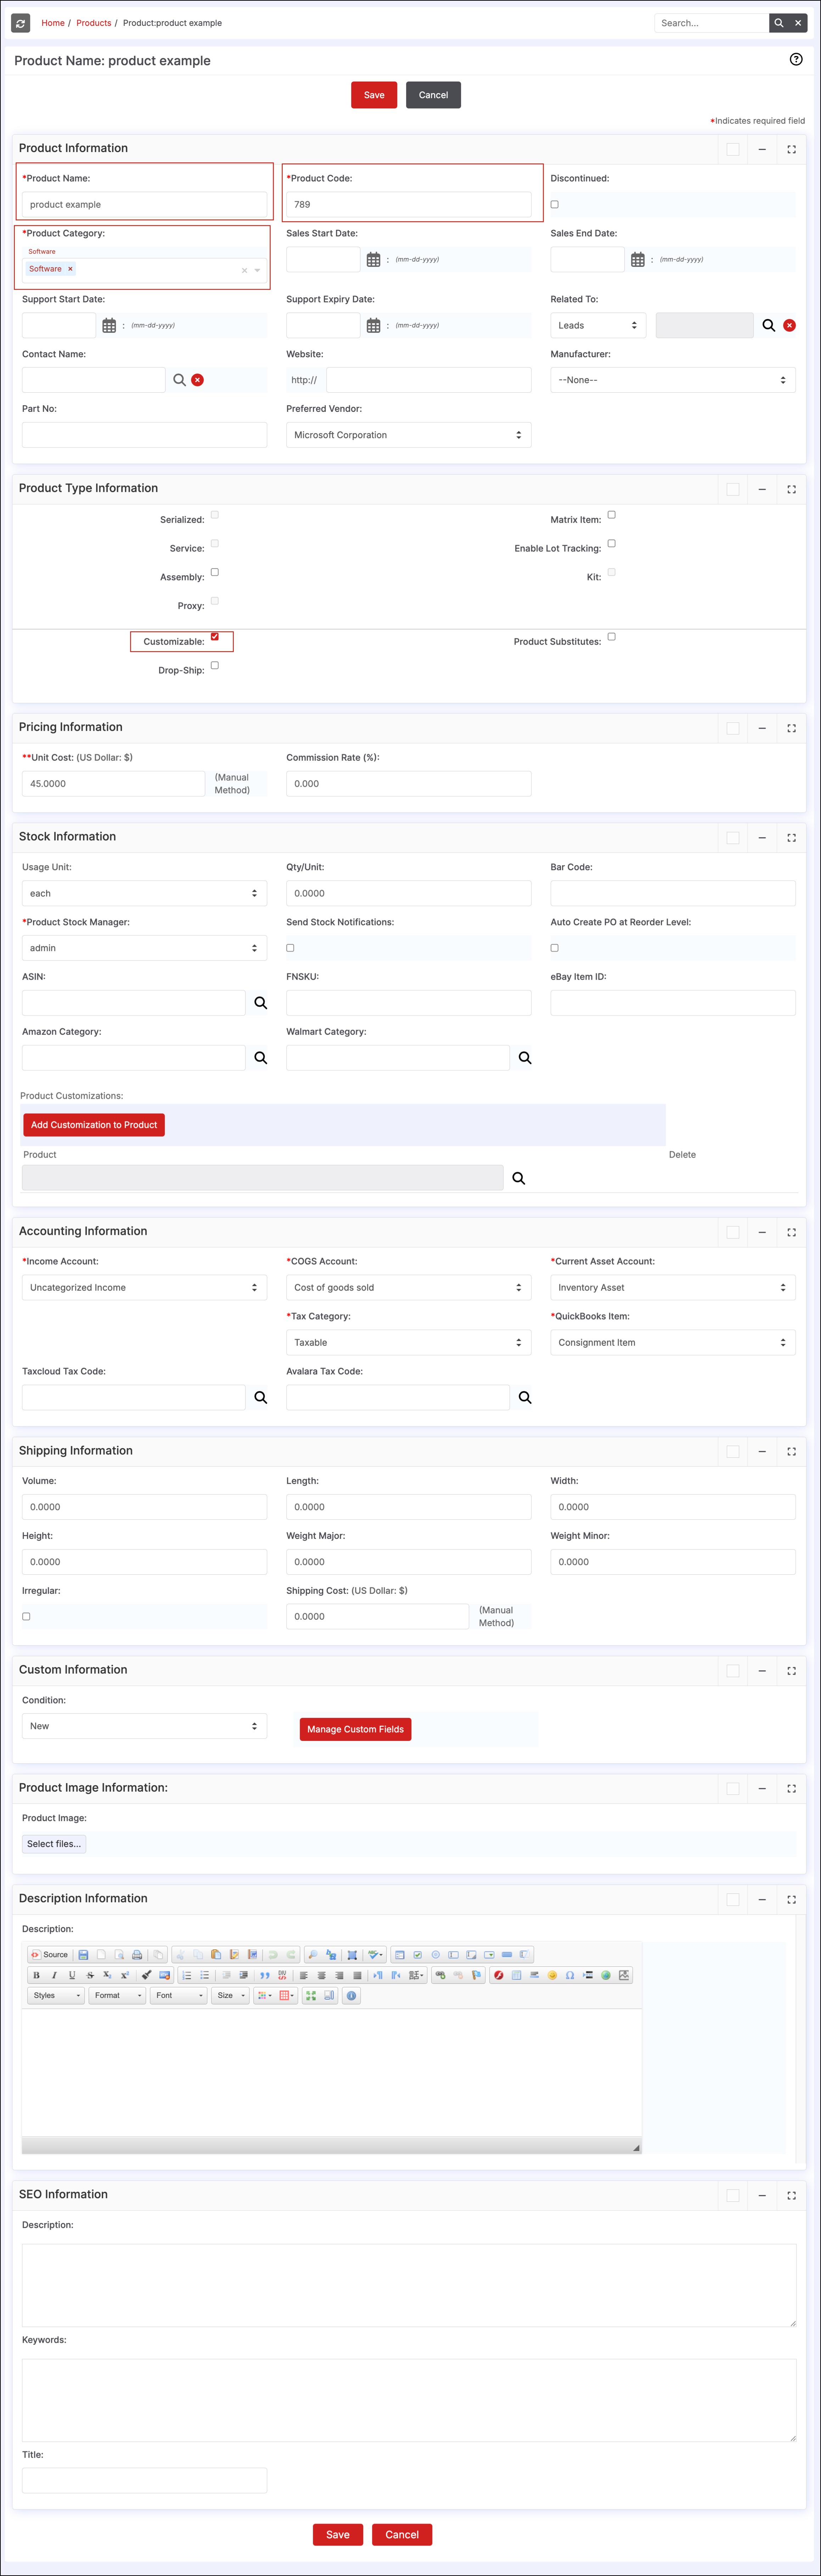
The newly created product displays and additional fields can now be edited.
- Review and add information to the additional fields as needed.
- Once all changes have been made, click Save.
Updated 12 months ago