Bulk Stock Location Transfer
Inventory for multiple products can be transferred to another stock location in one action using the Bulk Transfer feature.
-
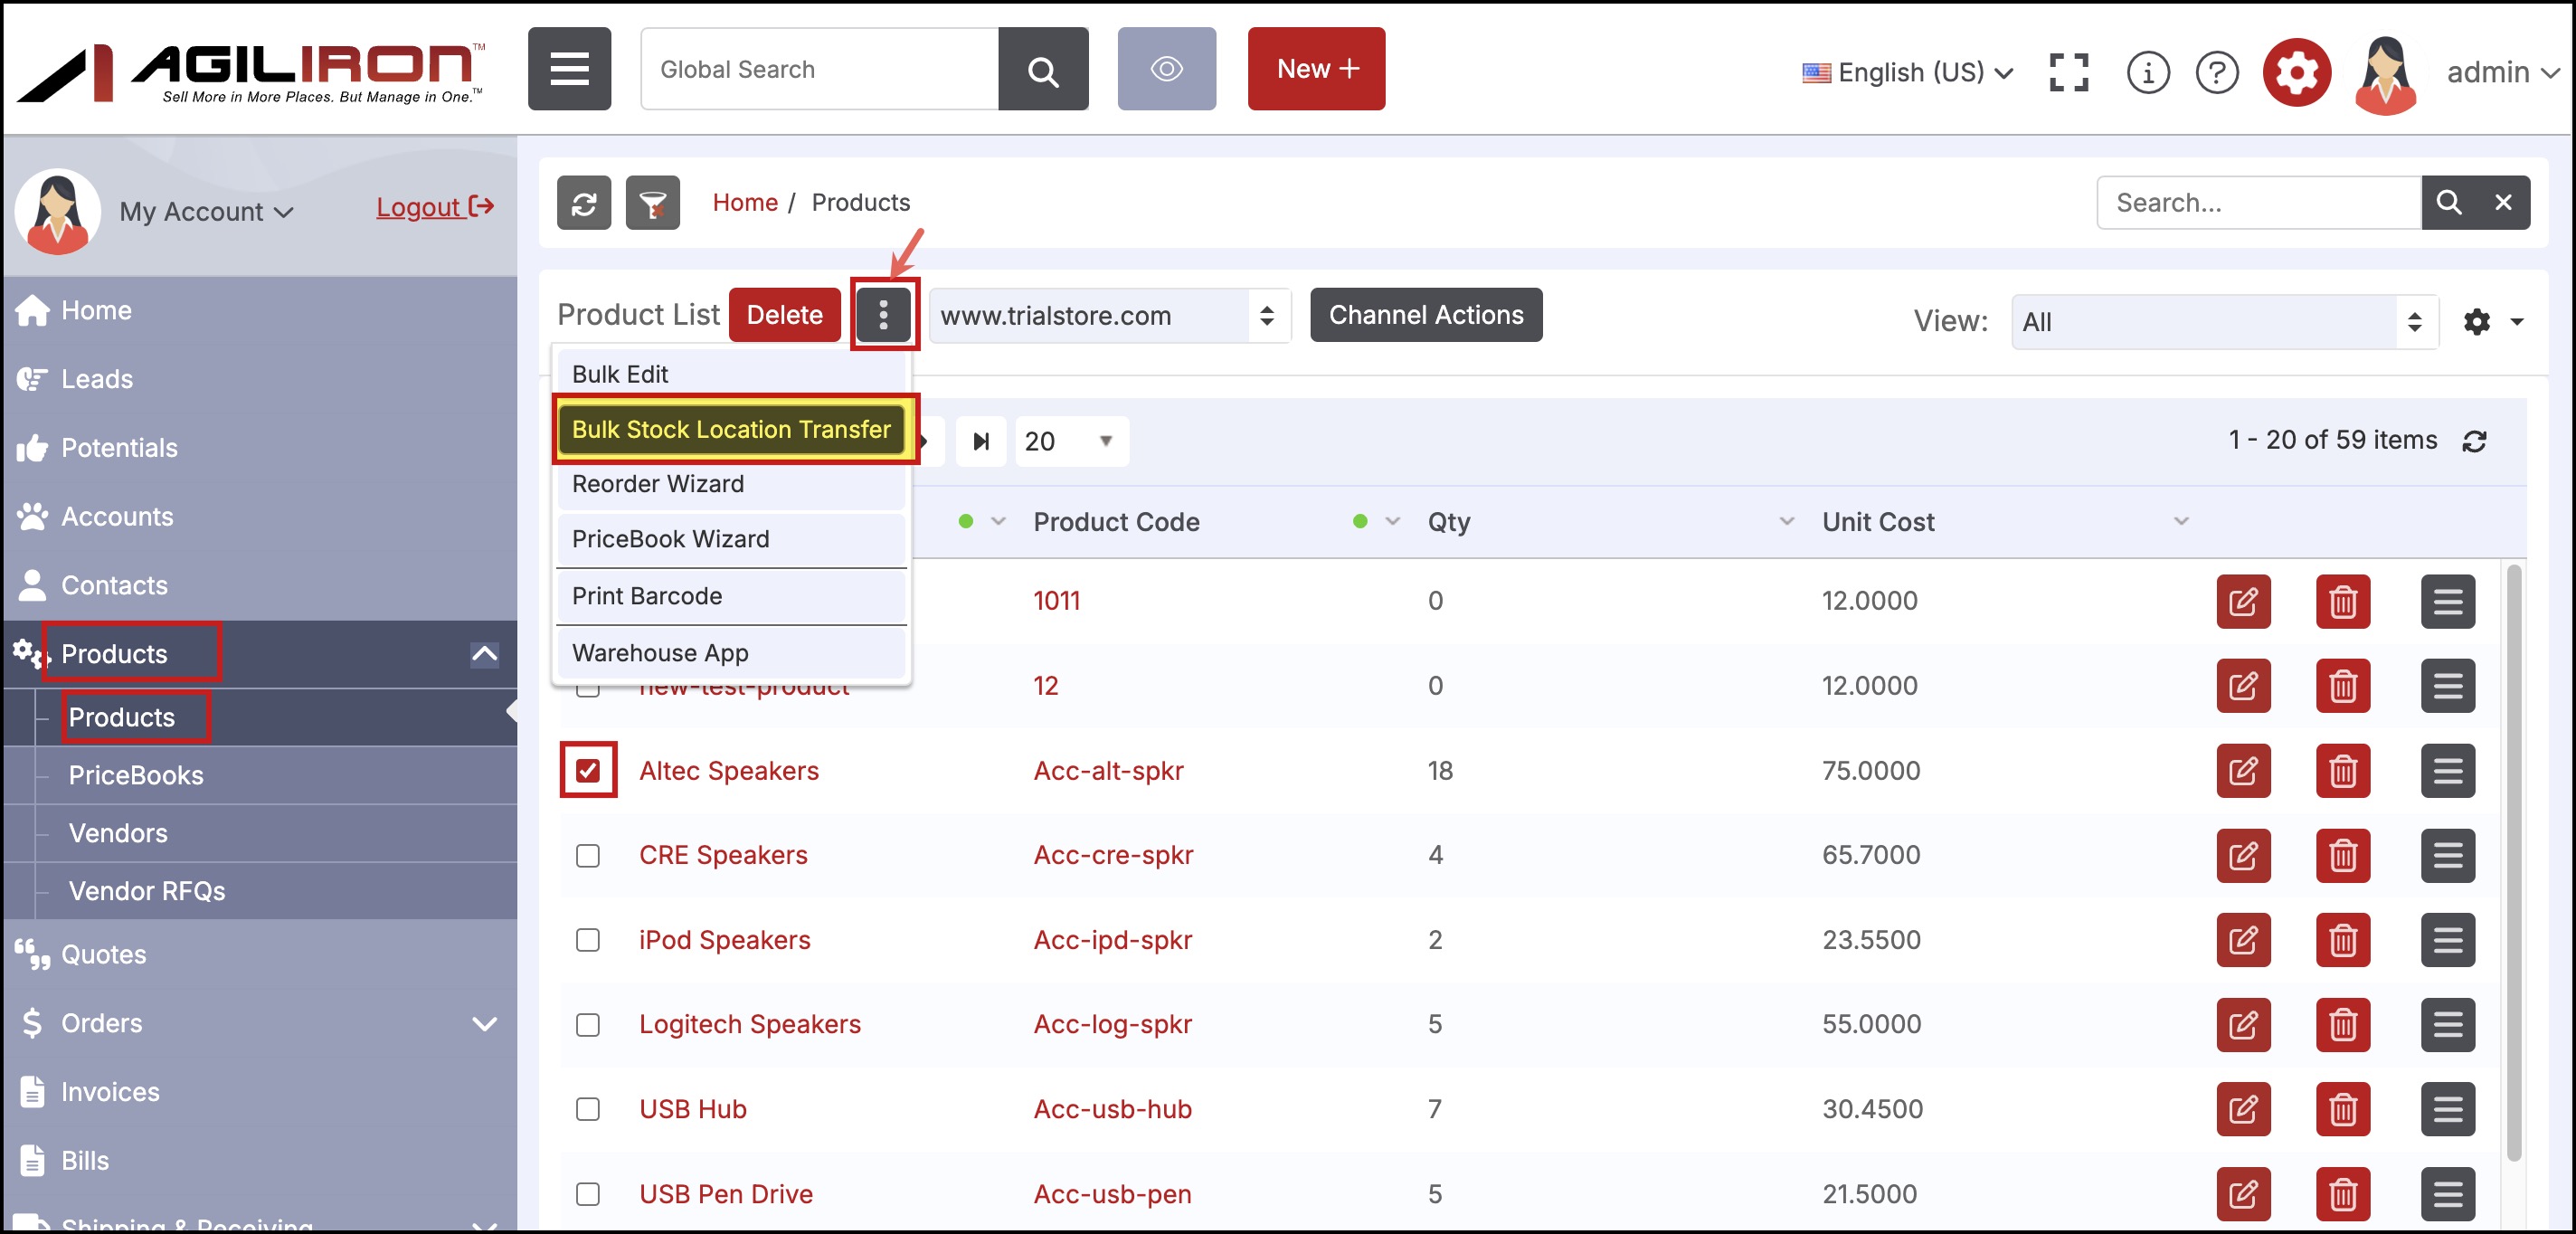
To begin, navigate to Products > Products and select the checkbox next to the products to be transferred.
-
Click the "3 Dots Menu" and select "Bulk Stock Location Transfer" from the list.
Note - You can even proceed without selecting products and clicking the Bulk Stock Location Transfer option.
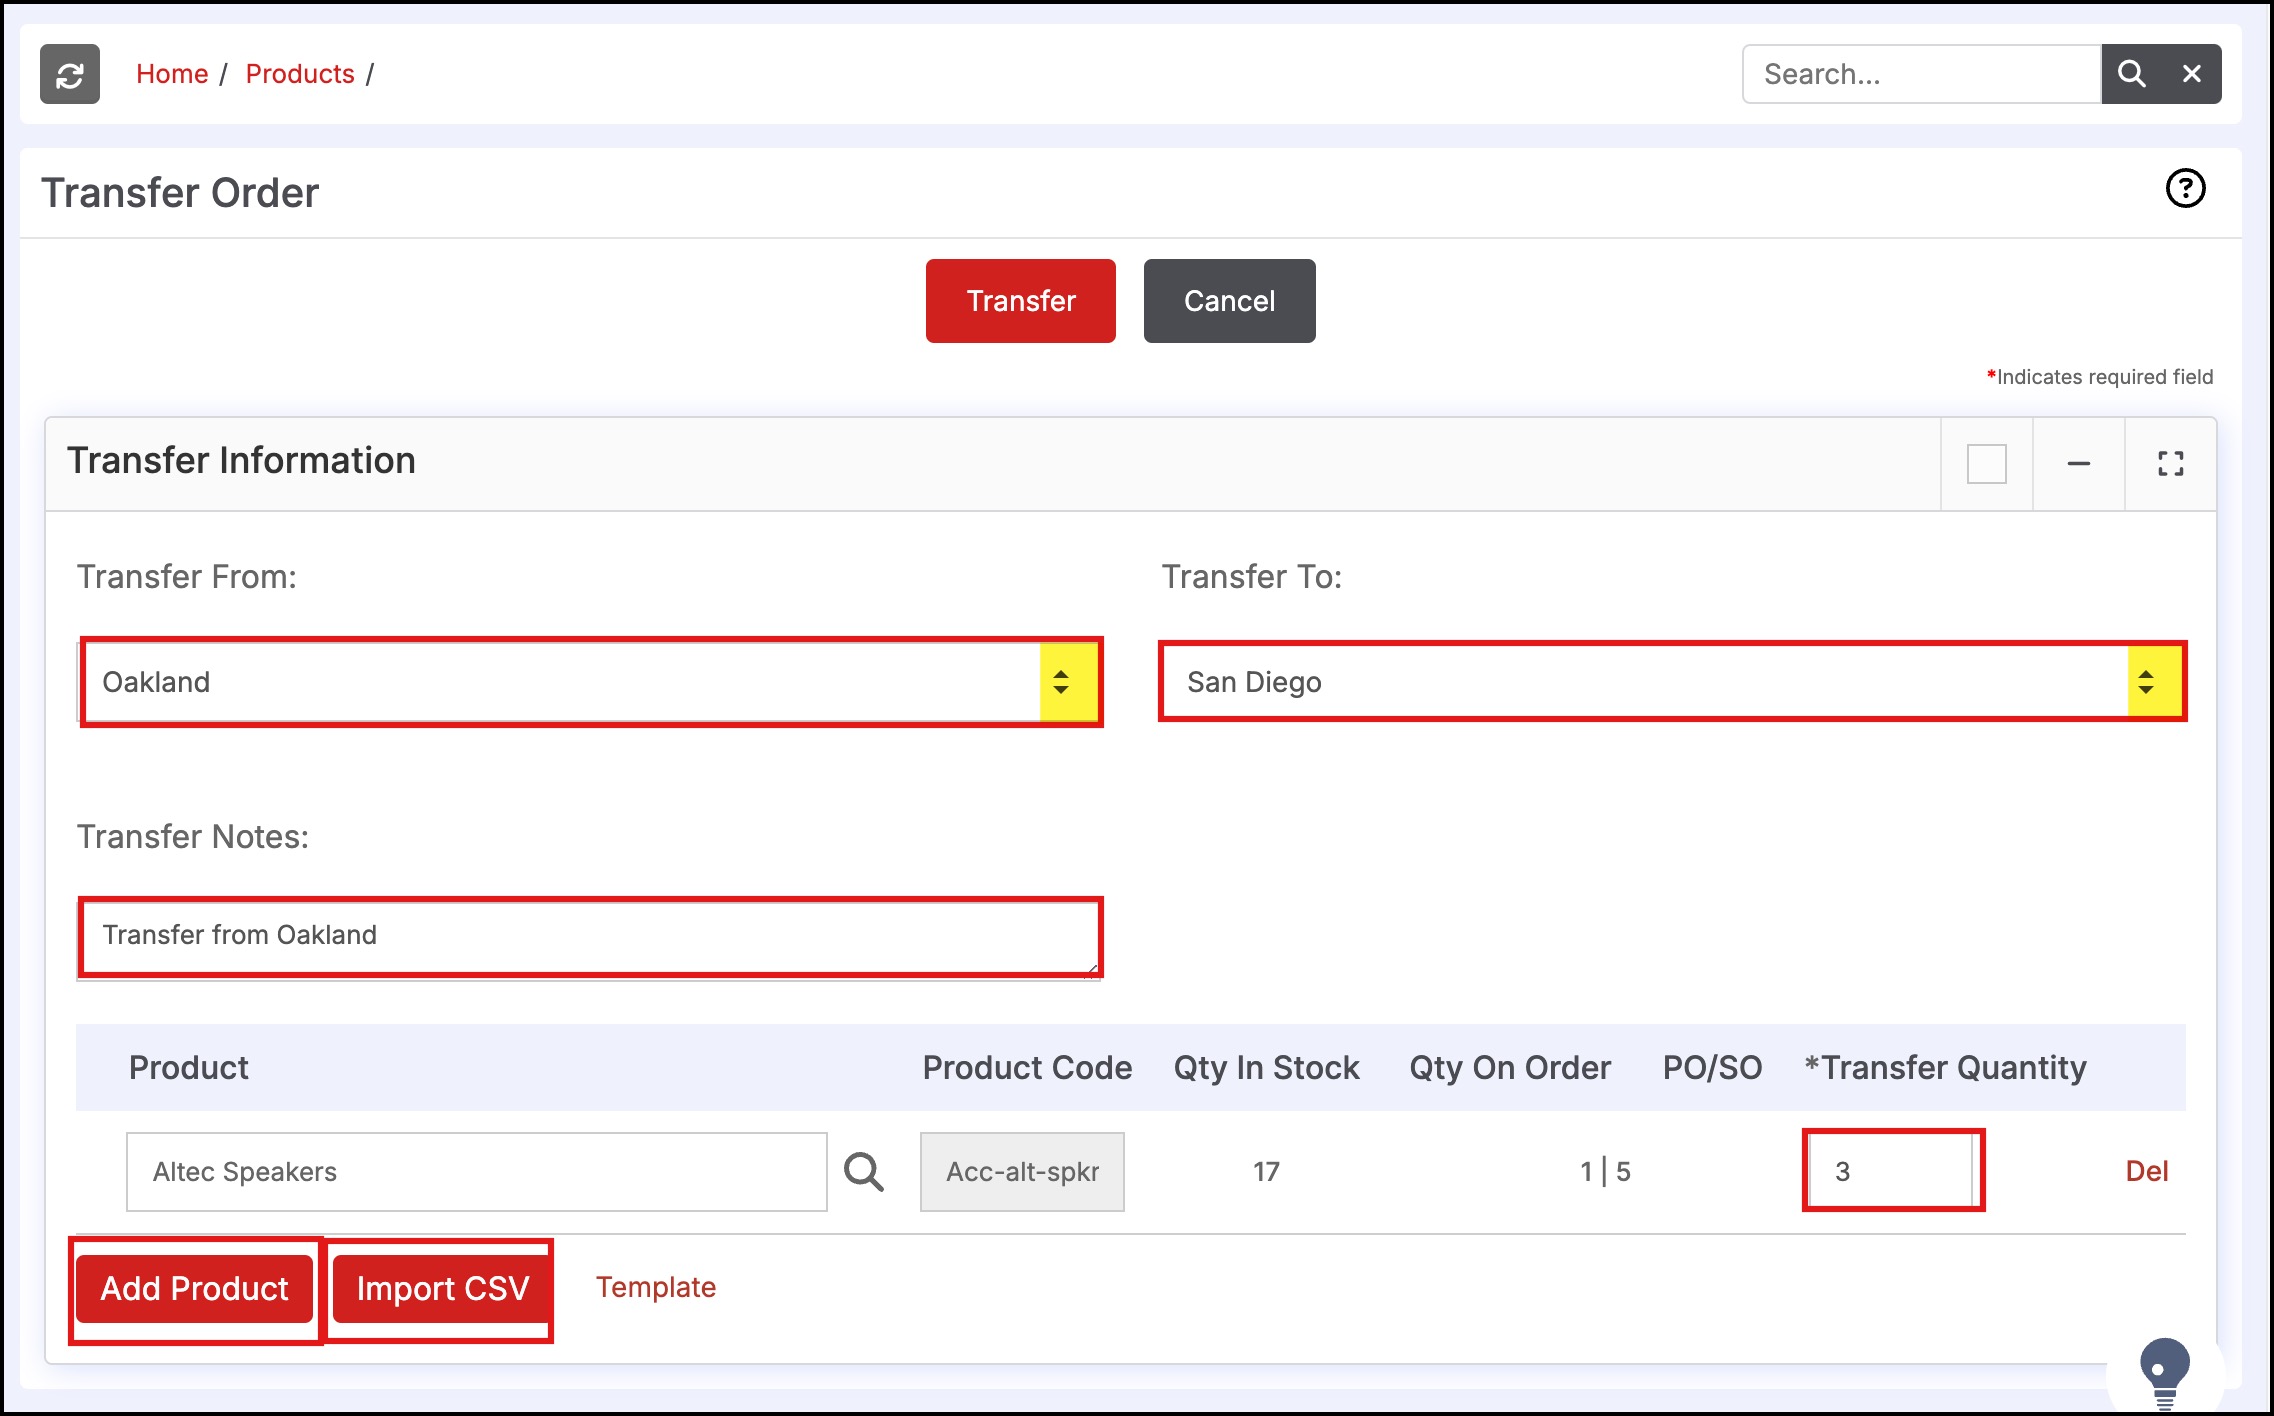
On the Transfer Order screen, select/enter all the necessary information.
Transfer From - This is the stock location from which the stock is being transferred.
Transfer To - This is the location where the stock will be received.
Transfer Notes - Add Transfer Notes, if any.
Product - If you had proceeded without selecting any product prior, you can add products by clicking on the magnifying glass - search icon.
- Clicking on the magnifying glass icon will also allow you to change the product(s) in the list.
- You can add multiple products to the transfer by clicking the Add Product button.
- Another way to add products is by clicking on the Import CSV button. You can download the Template (click onTemplate option) to know the CSV format. Select a CSV file from your local directory containing the list of products.
Transfer Quantity - Enter the Quantity to be transferred.
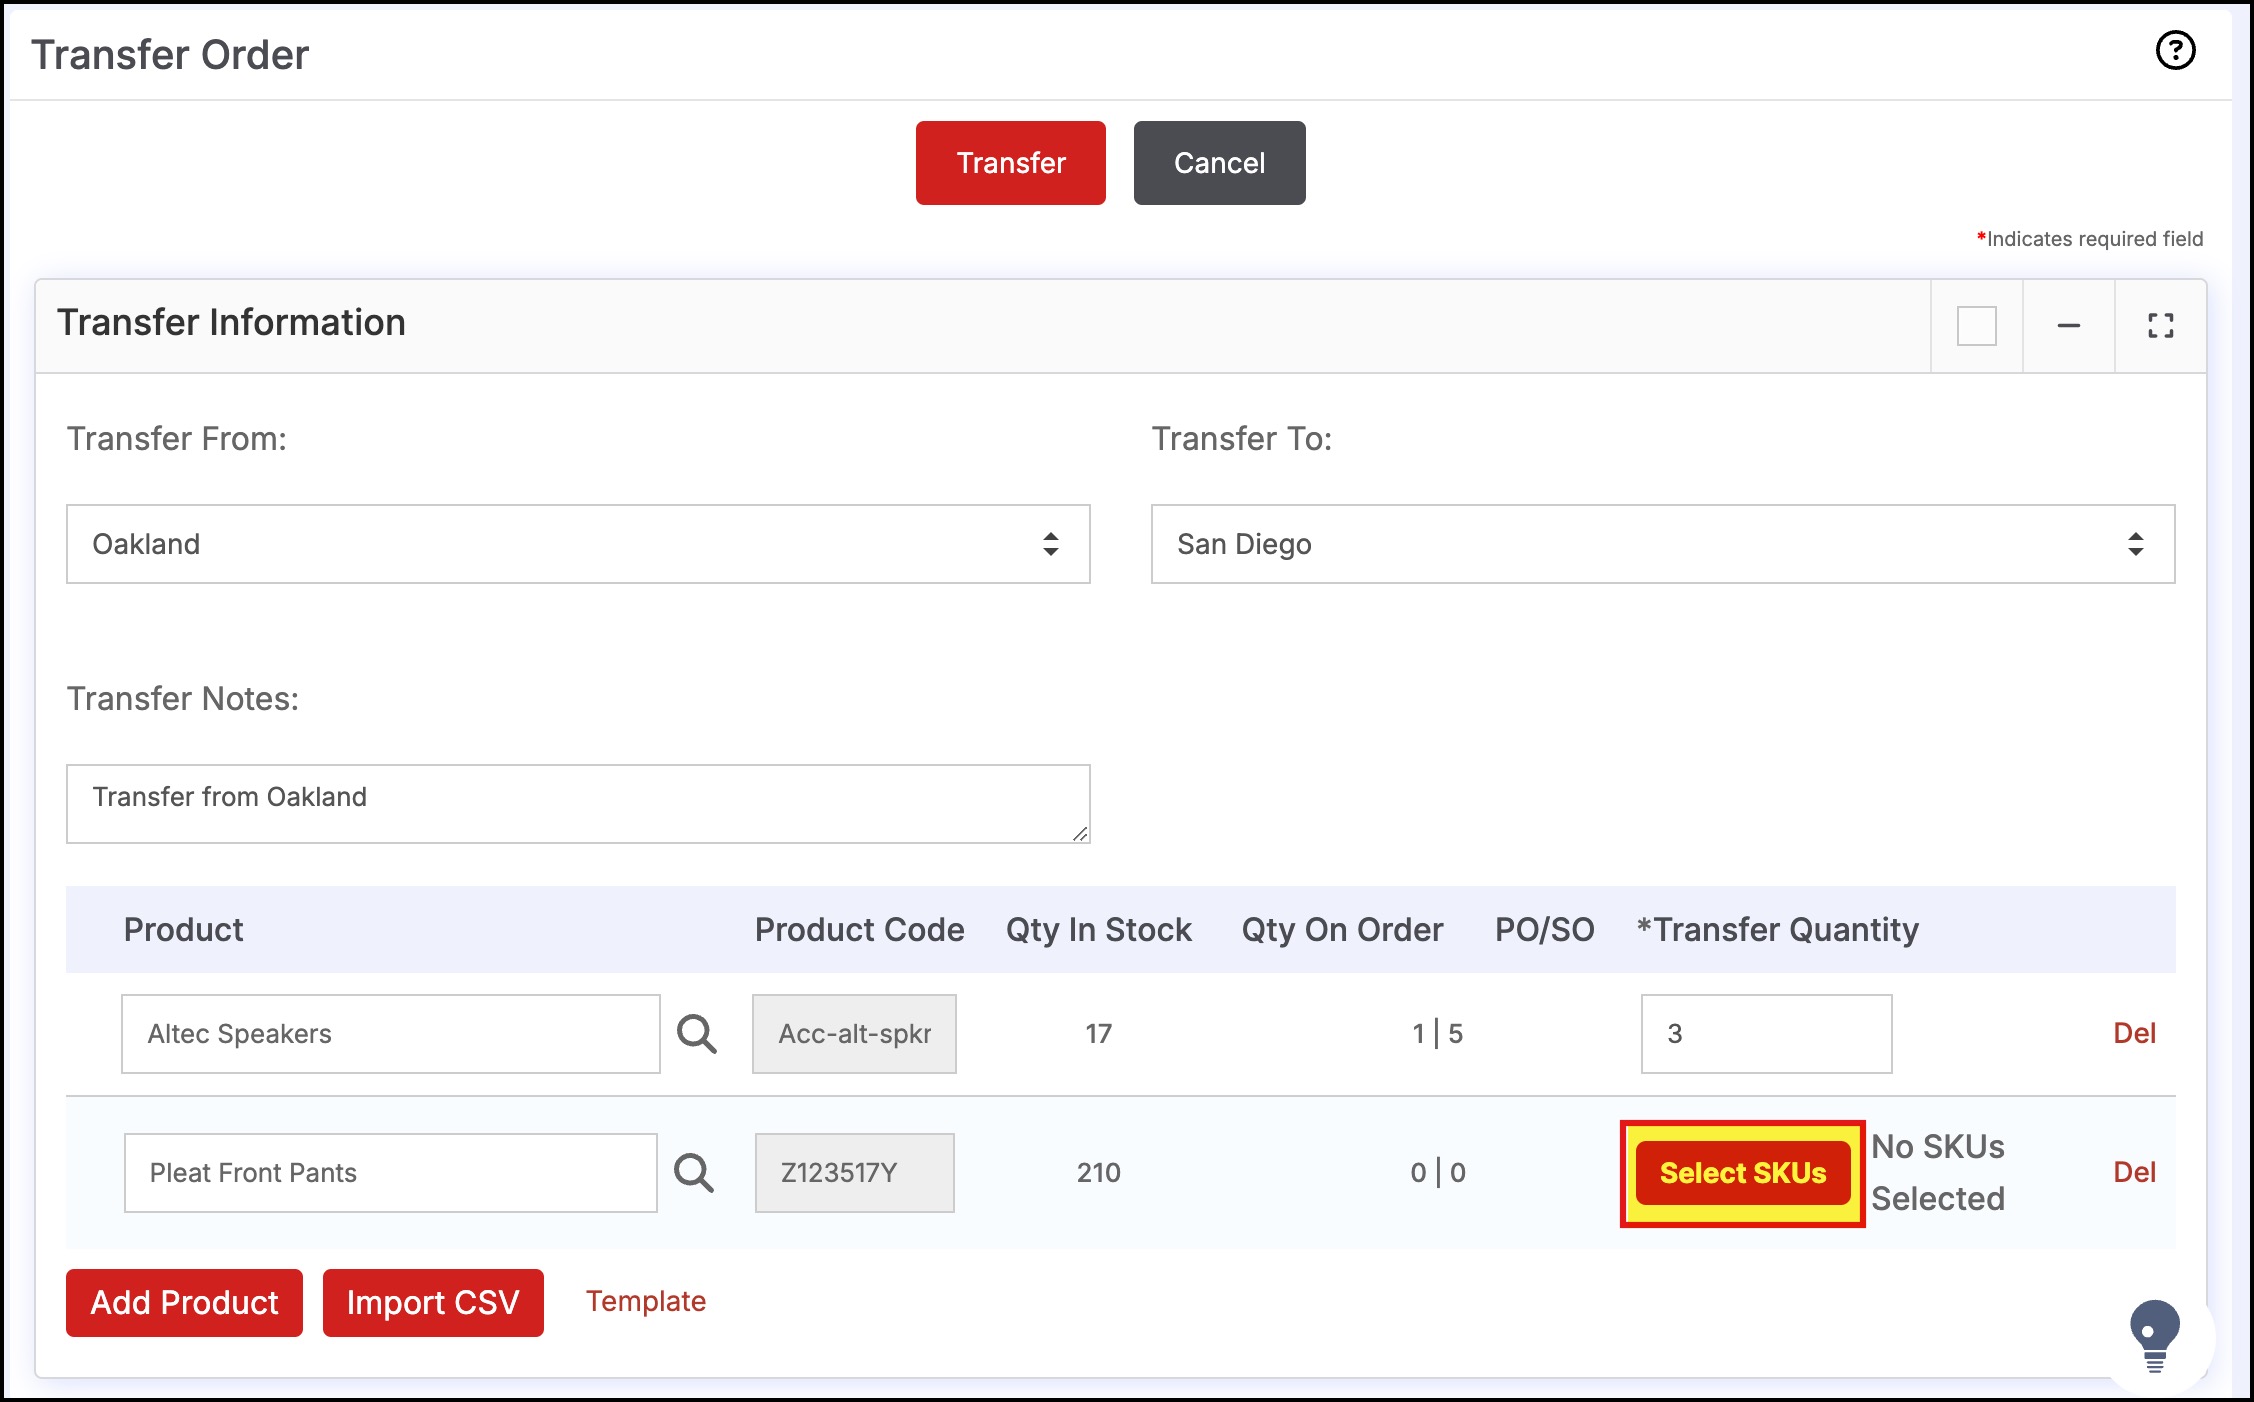
Bulk Stock Location Transfer for Matrix Products
- Follow the instructions as mentioned above.
- For Matrix products, under the Transfer Quantity, click the "Select SKUs" button to select child SKUs that will be transferred.
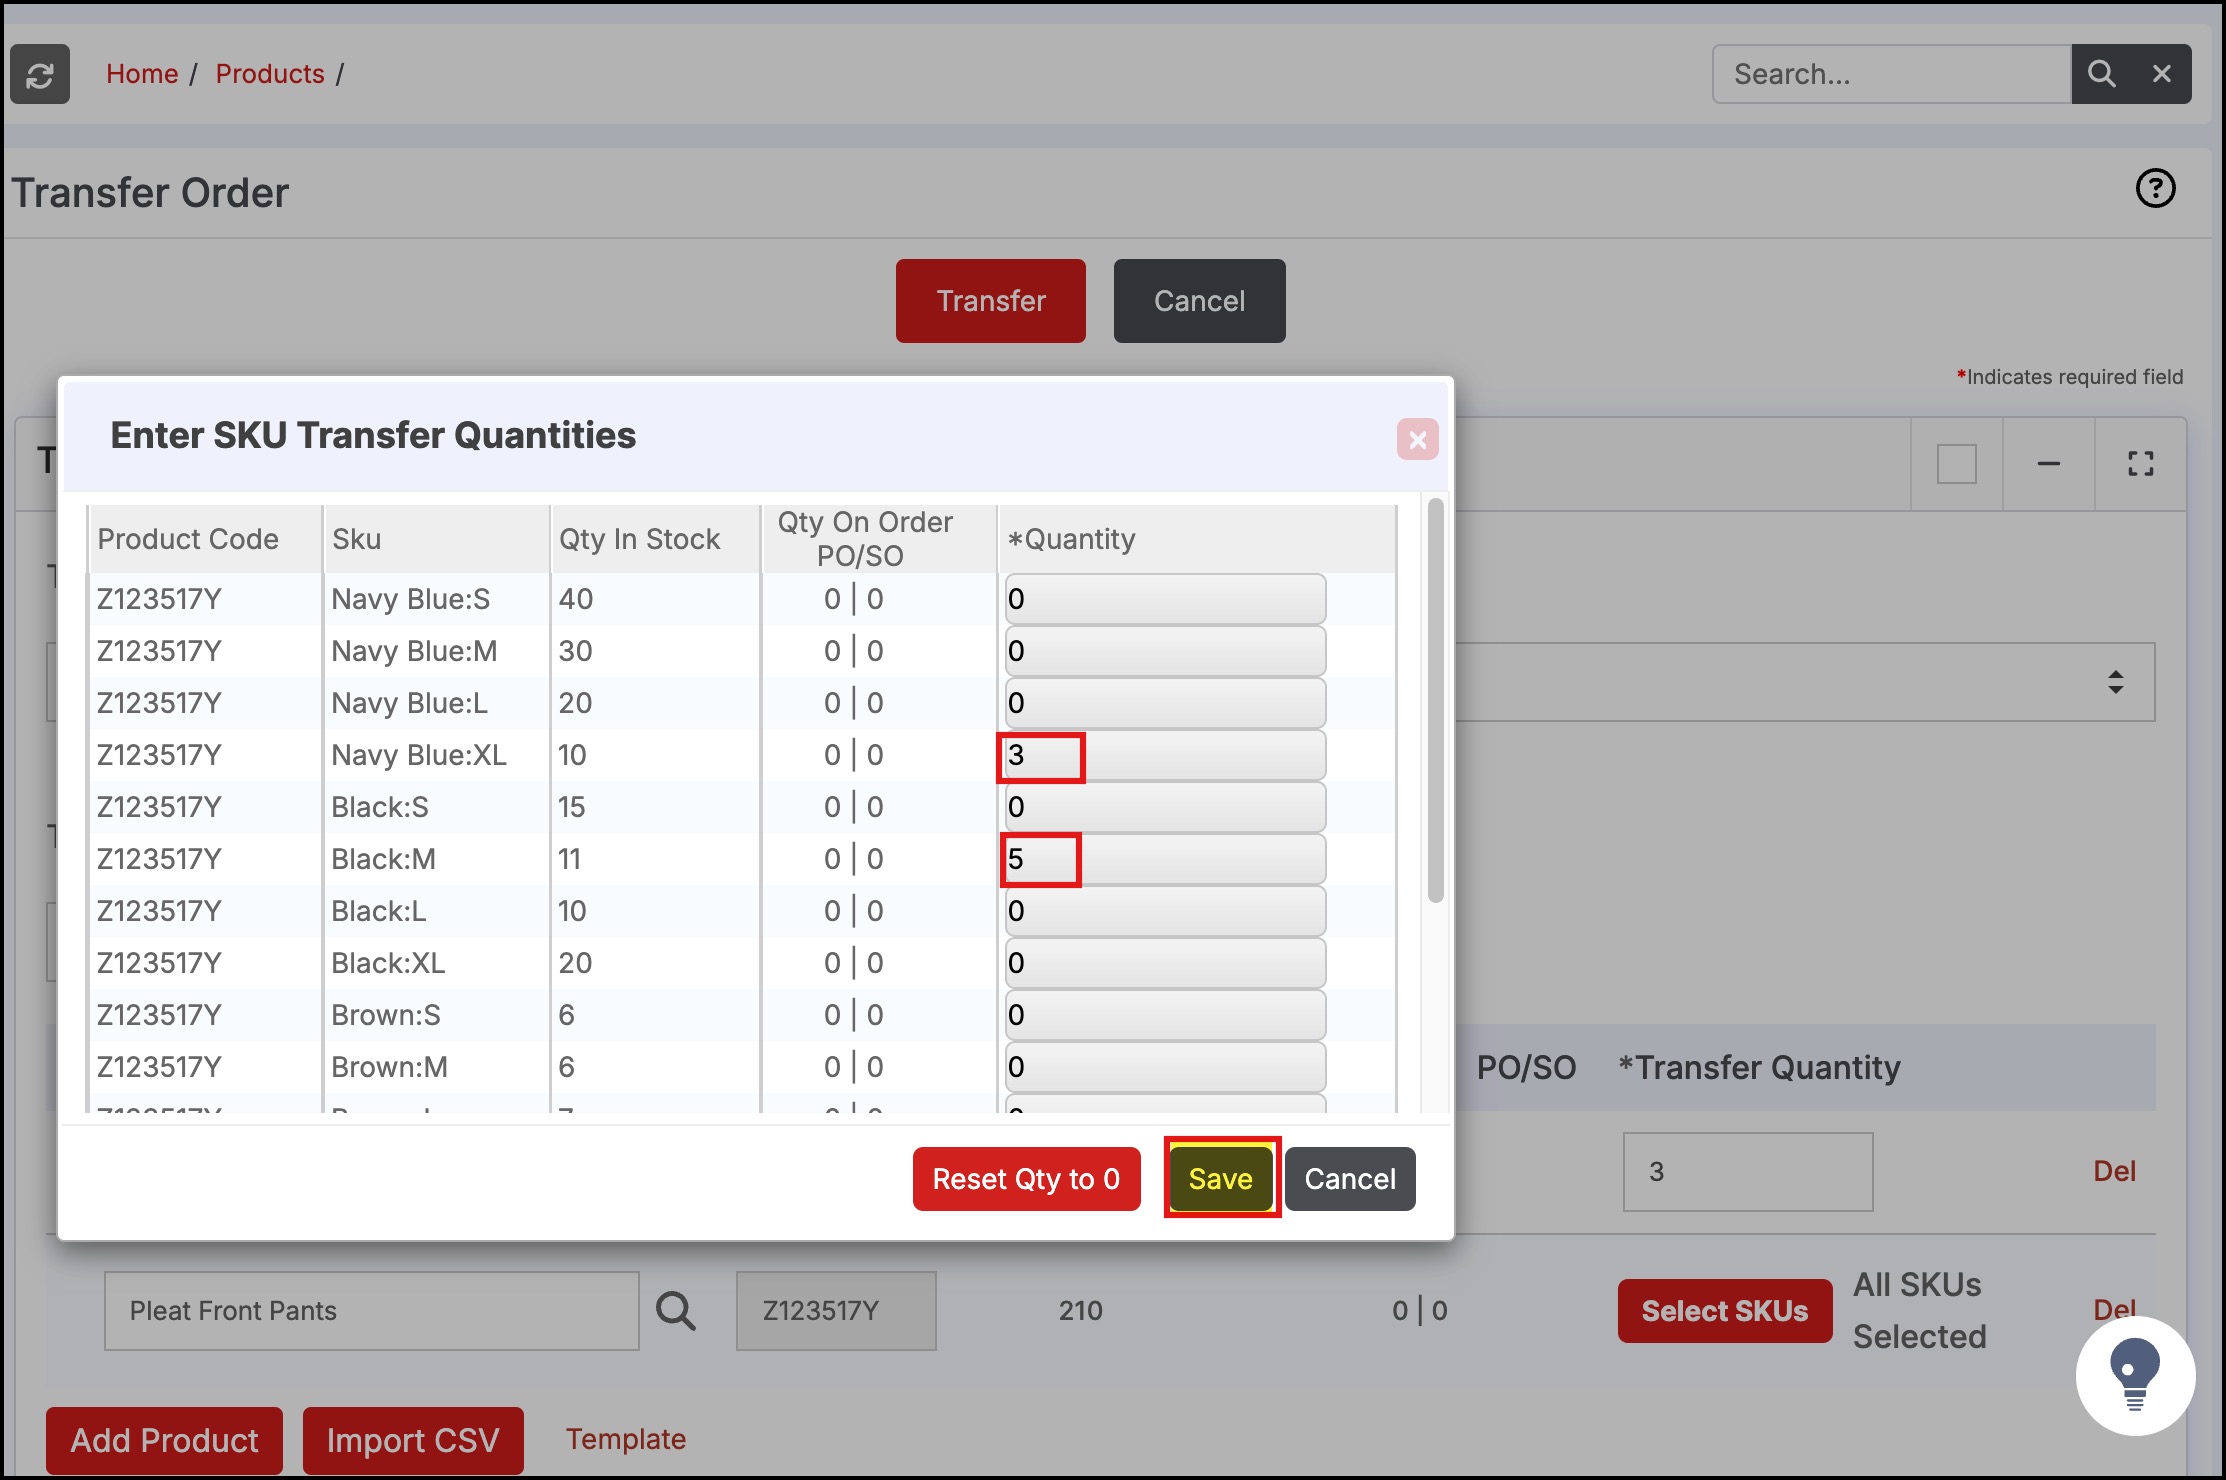
- By default, the quantity displayed on the screen is the Qty in stock less Qty on the Sales Order. Scroll down to see additional child SKUs in the list (if applicable).
- Enter the desired quantity to transfer and make sure to enter zero or leave the qty fields blank for the products that do not need to be transferred.
- Click "Save" to continue and close this box.
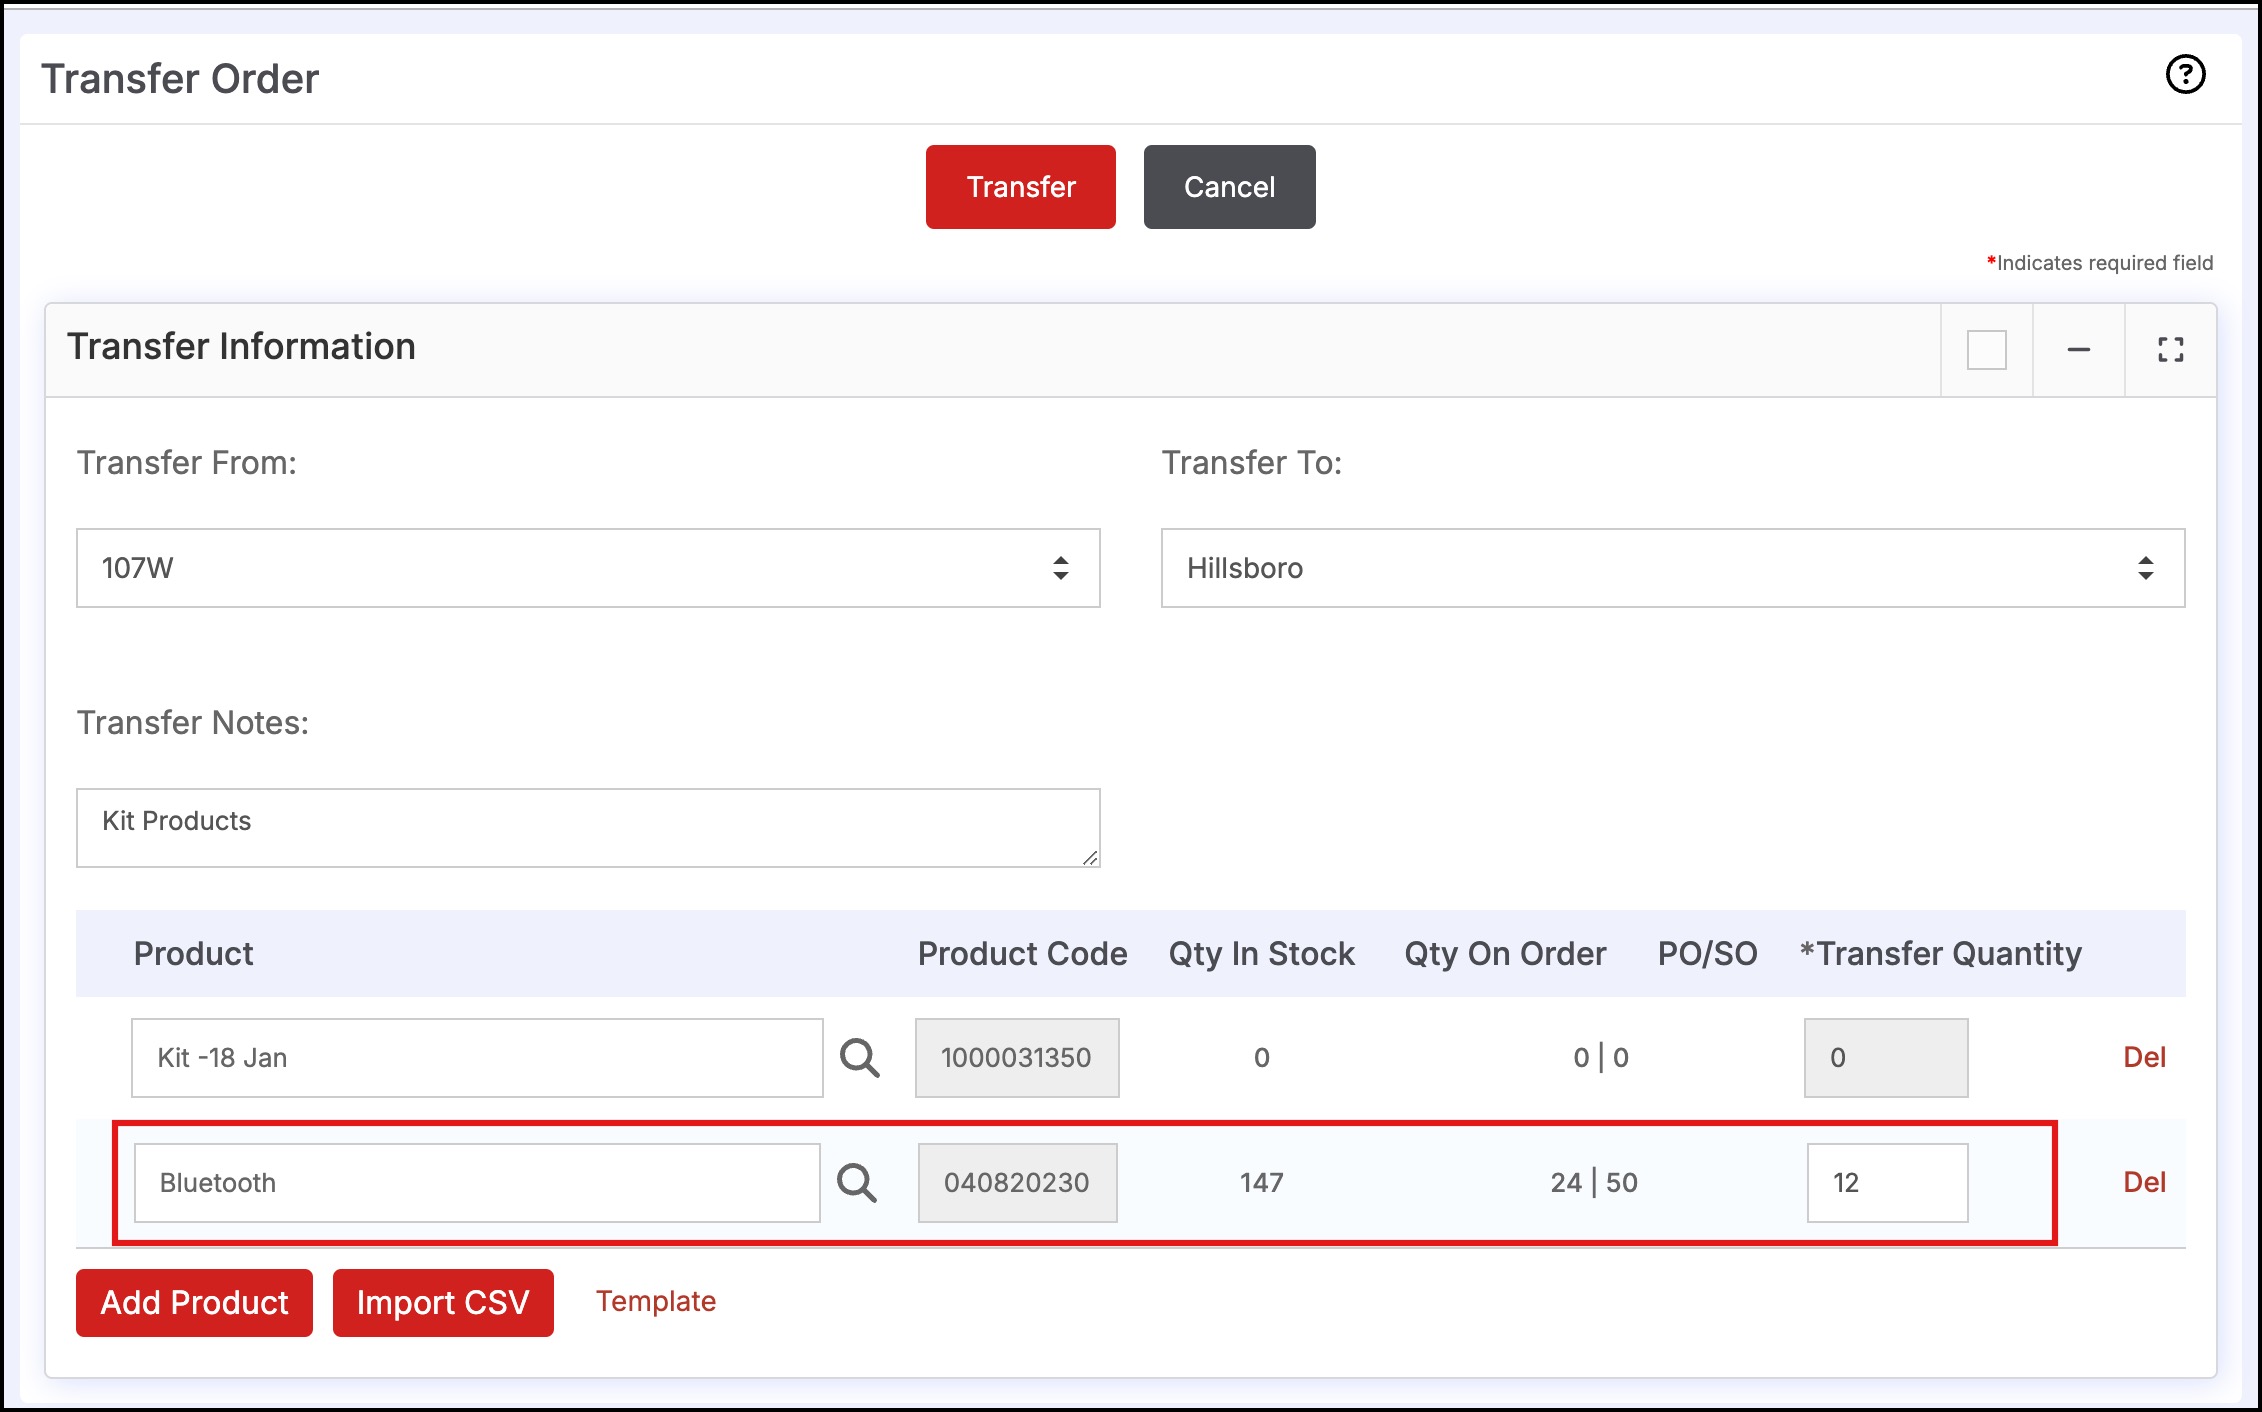
Bulk Stock Location Transfer for Kit Products
- Follow the instructions as mentioned earlier.
- When you add Kit Product, the components within the kit gets added.
- Enter the Transfer Quantity for the component you want and proceed.
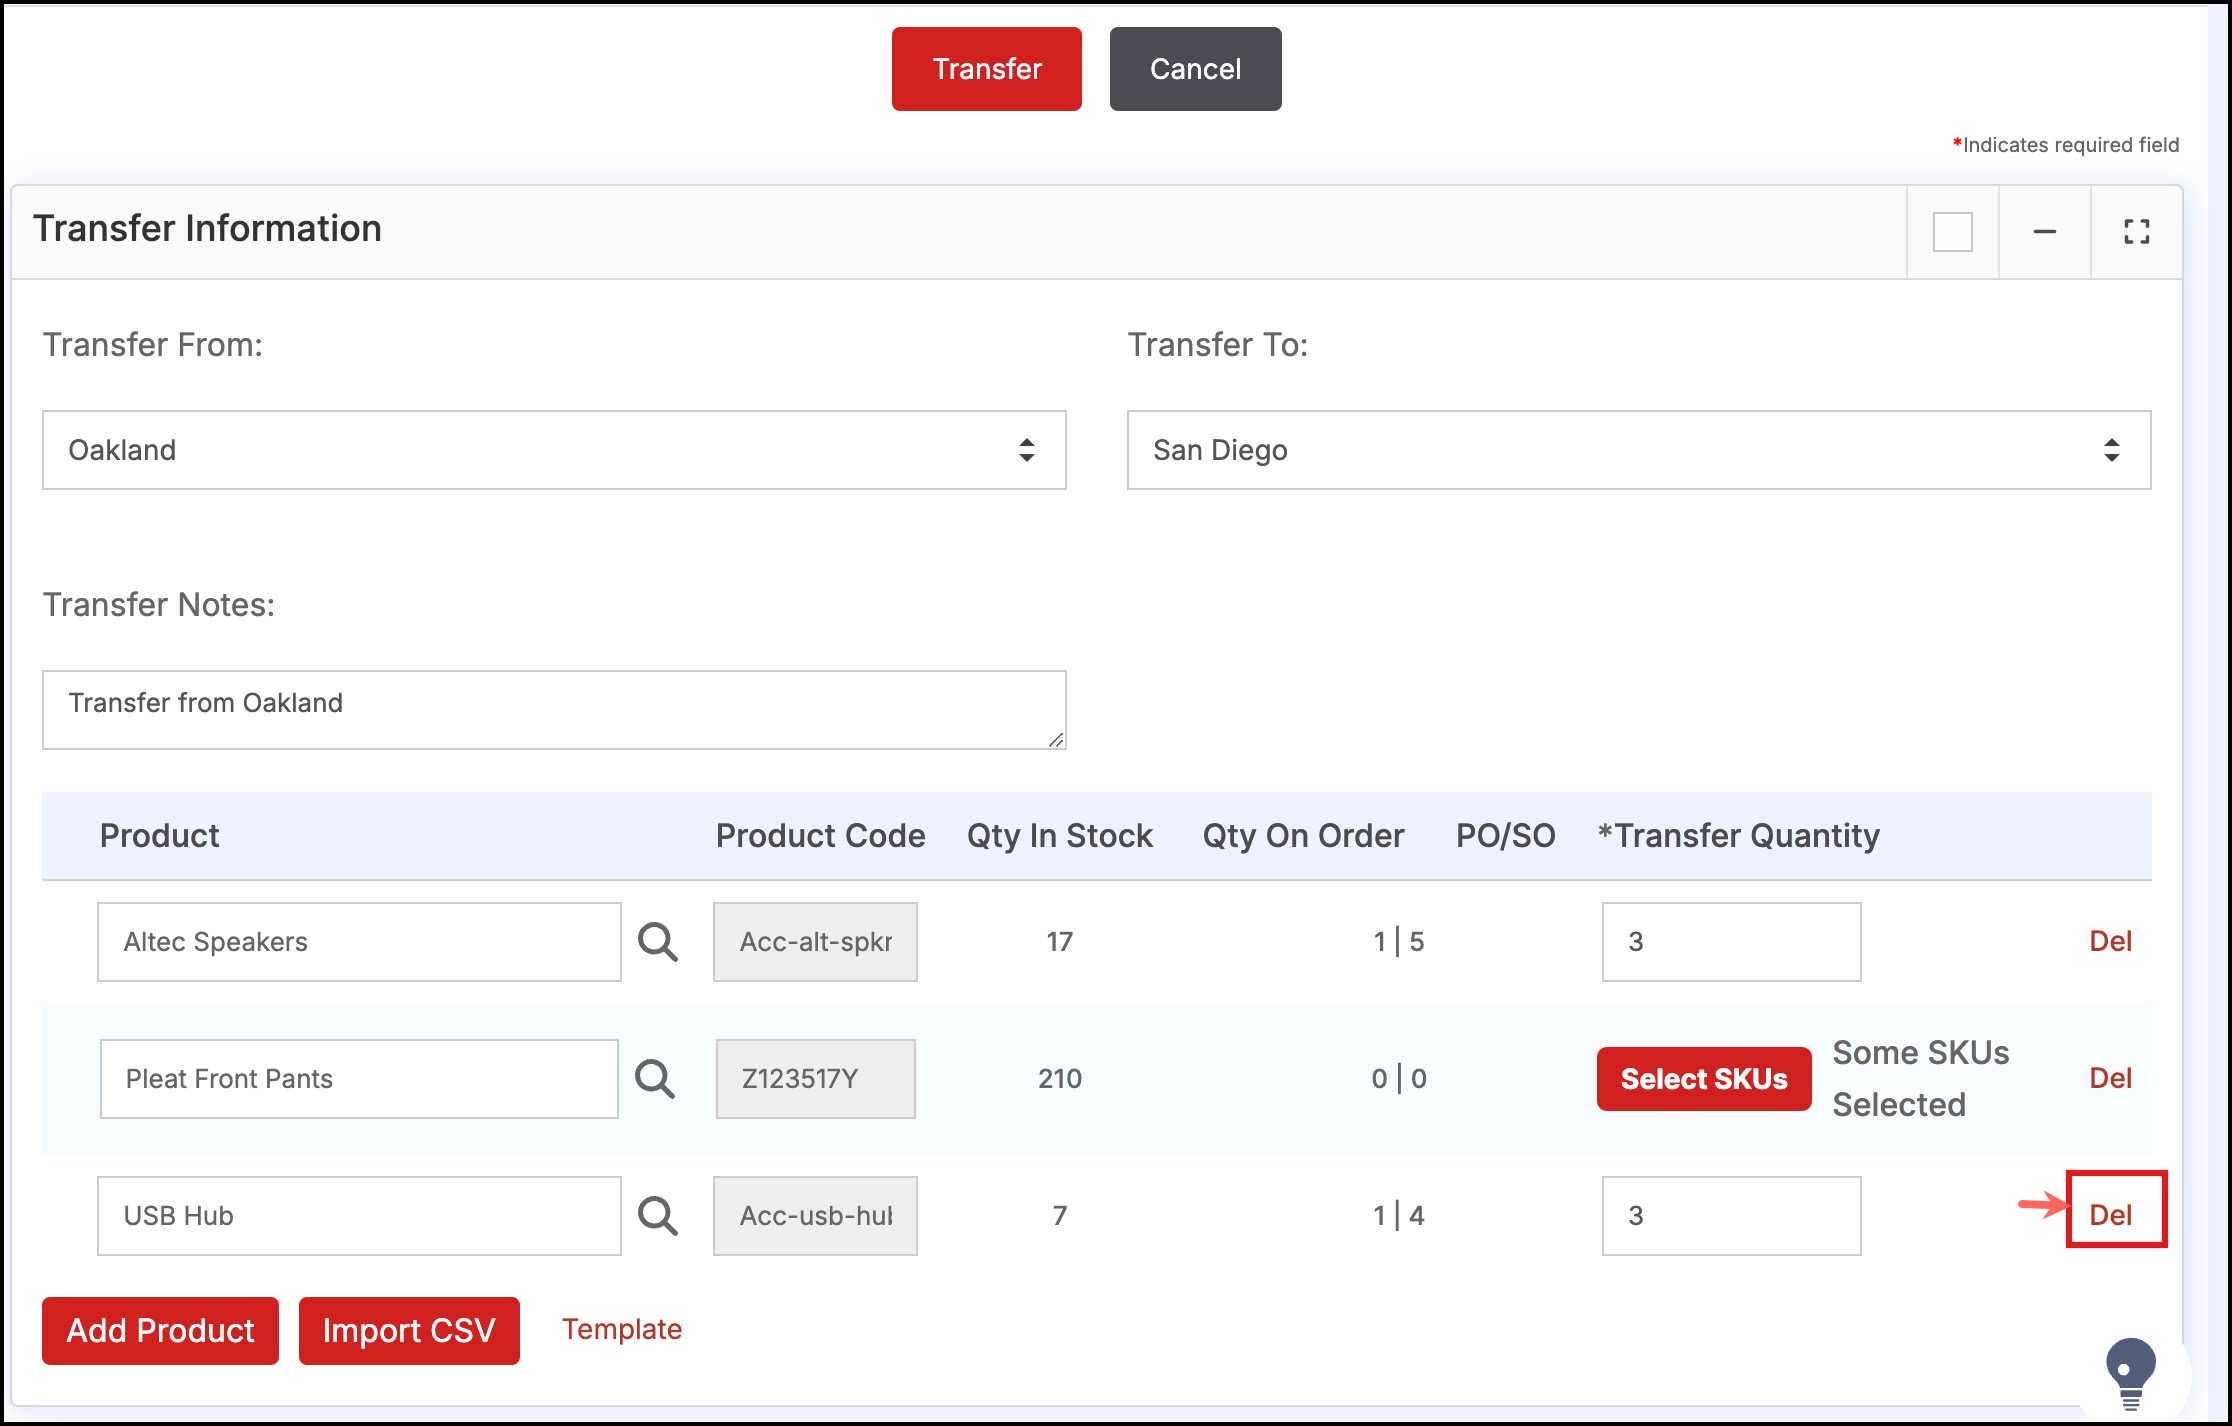
- You can even delete any product from the list by clicking on Del.
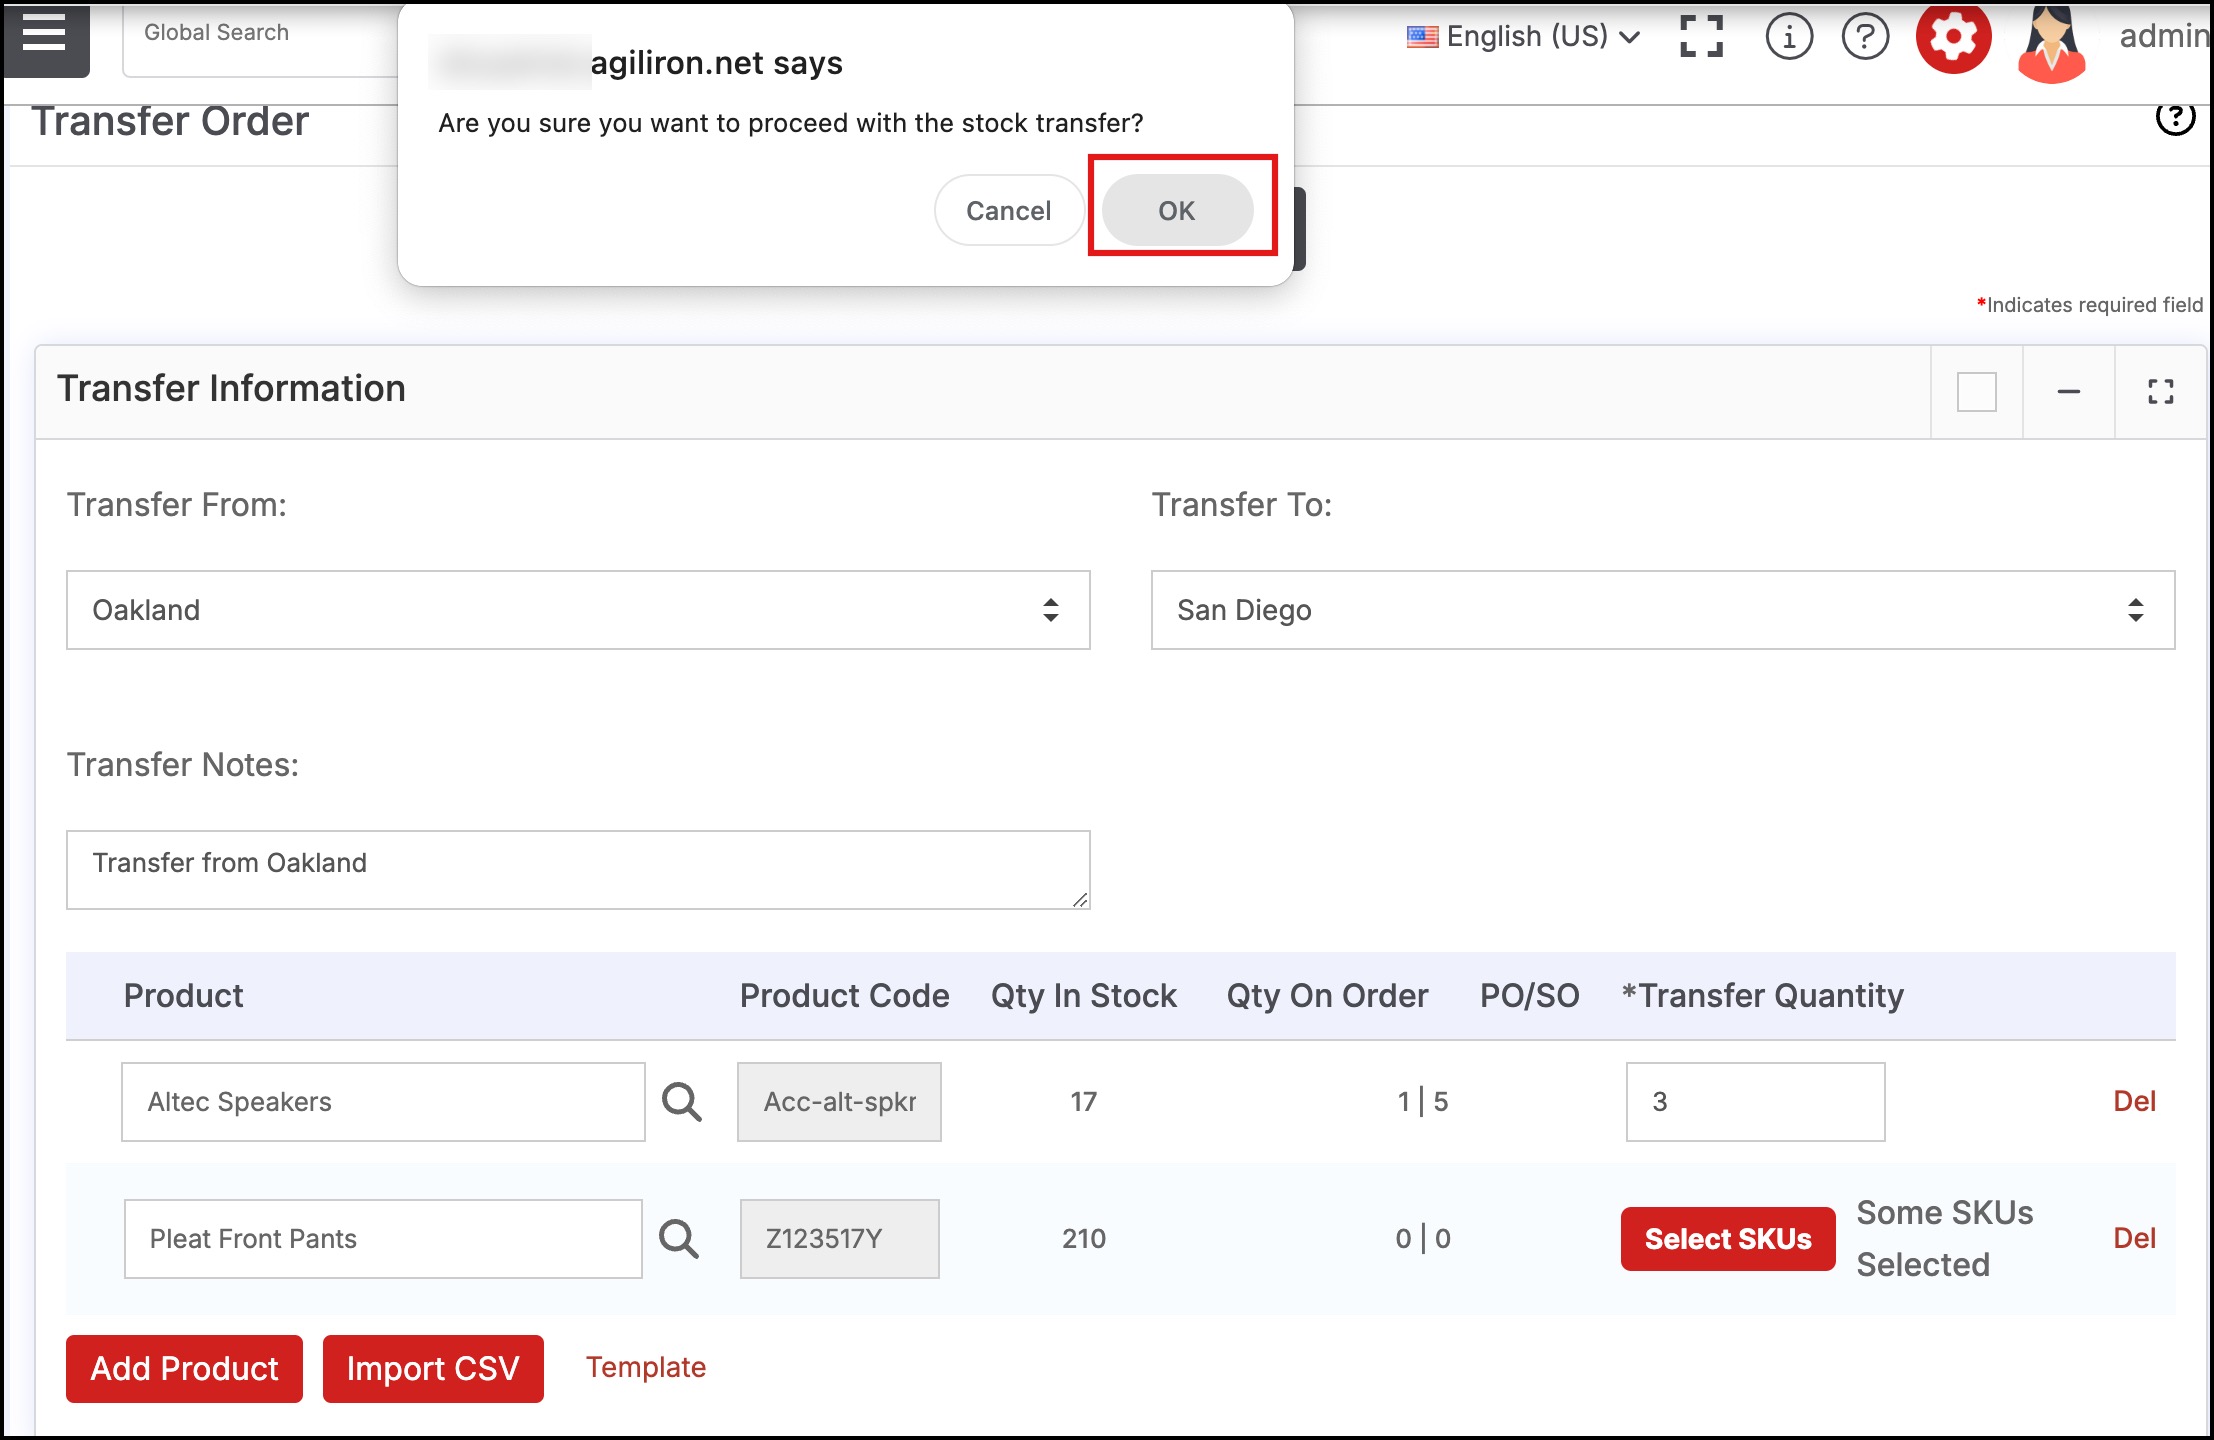
- When all of the information has been entered, click the "Transfer" button to proceed.
- A pop-up box will appear, select "OK" to continue with the transfer.

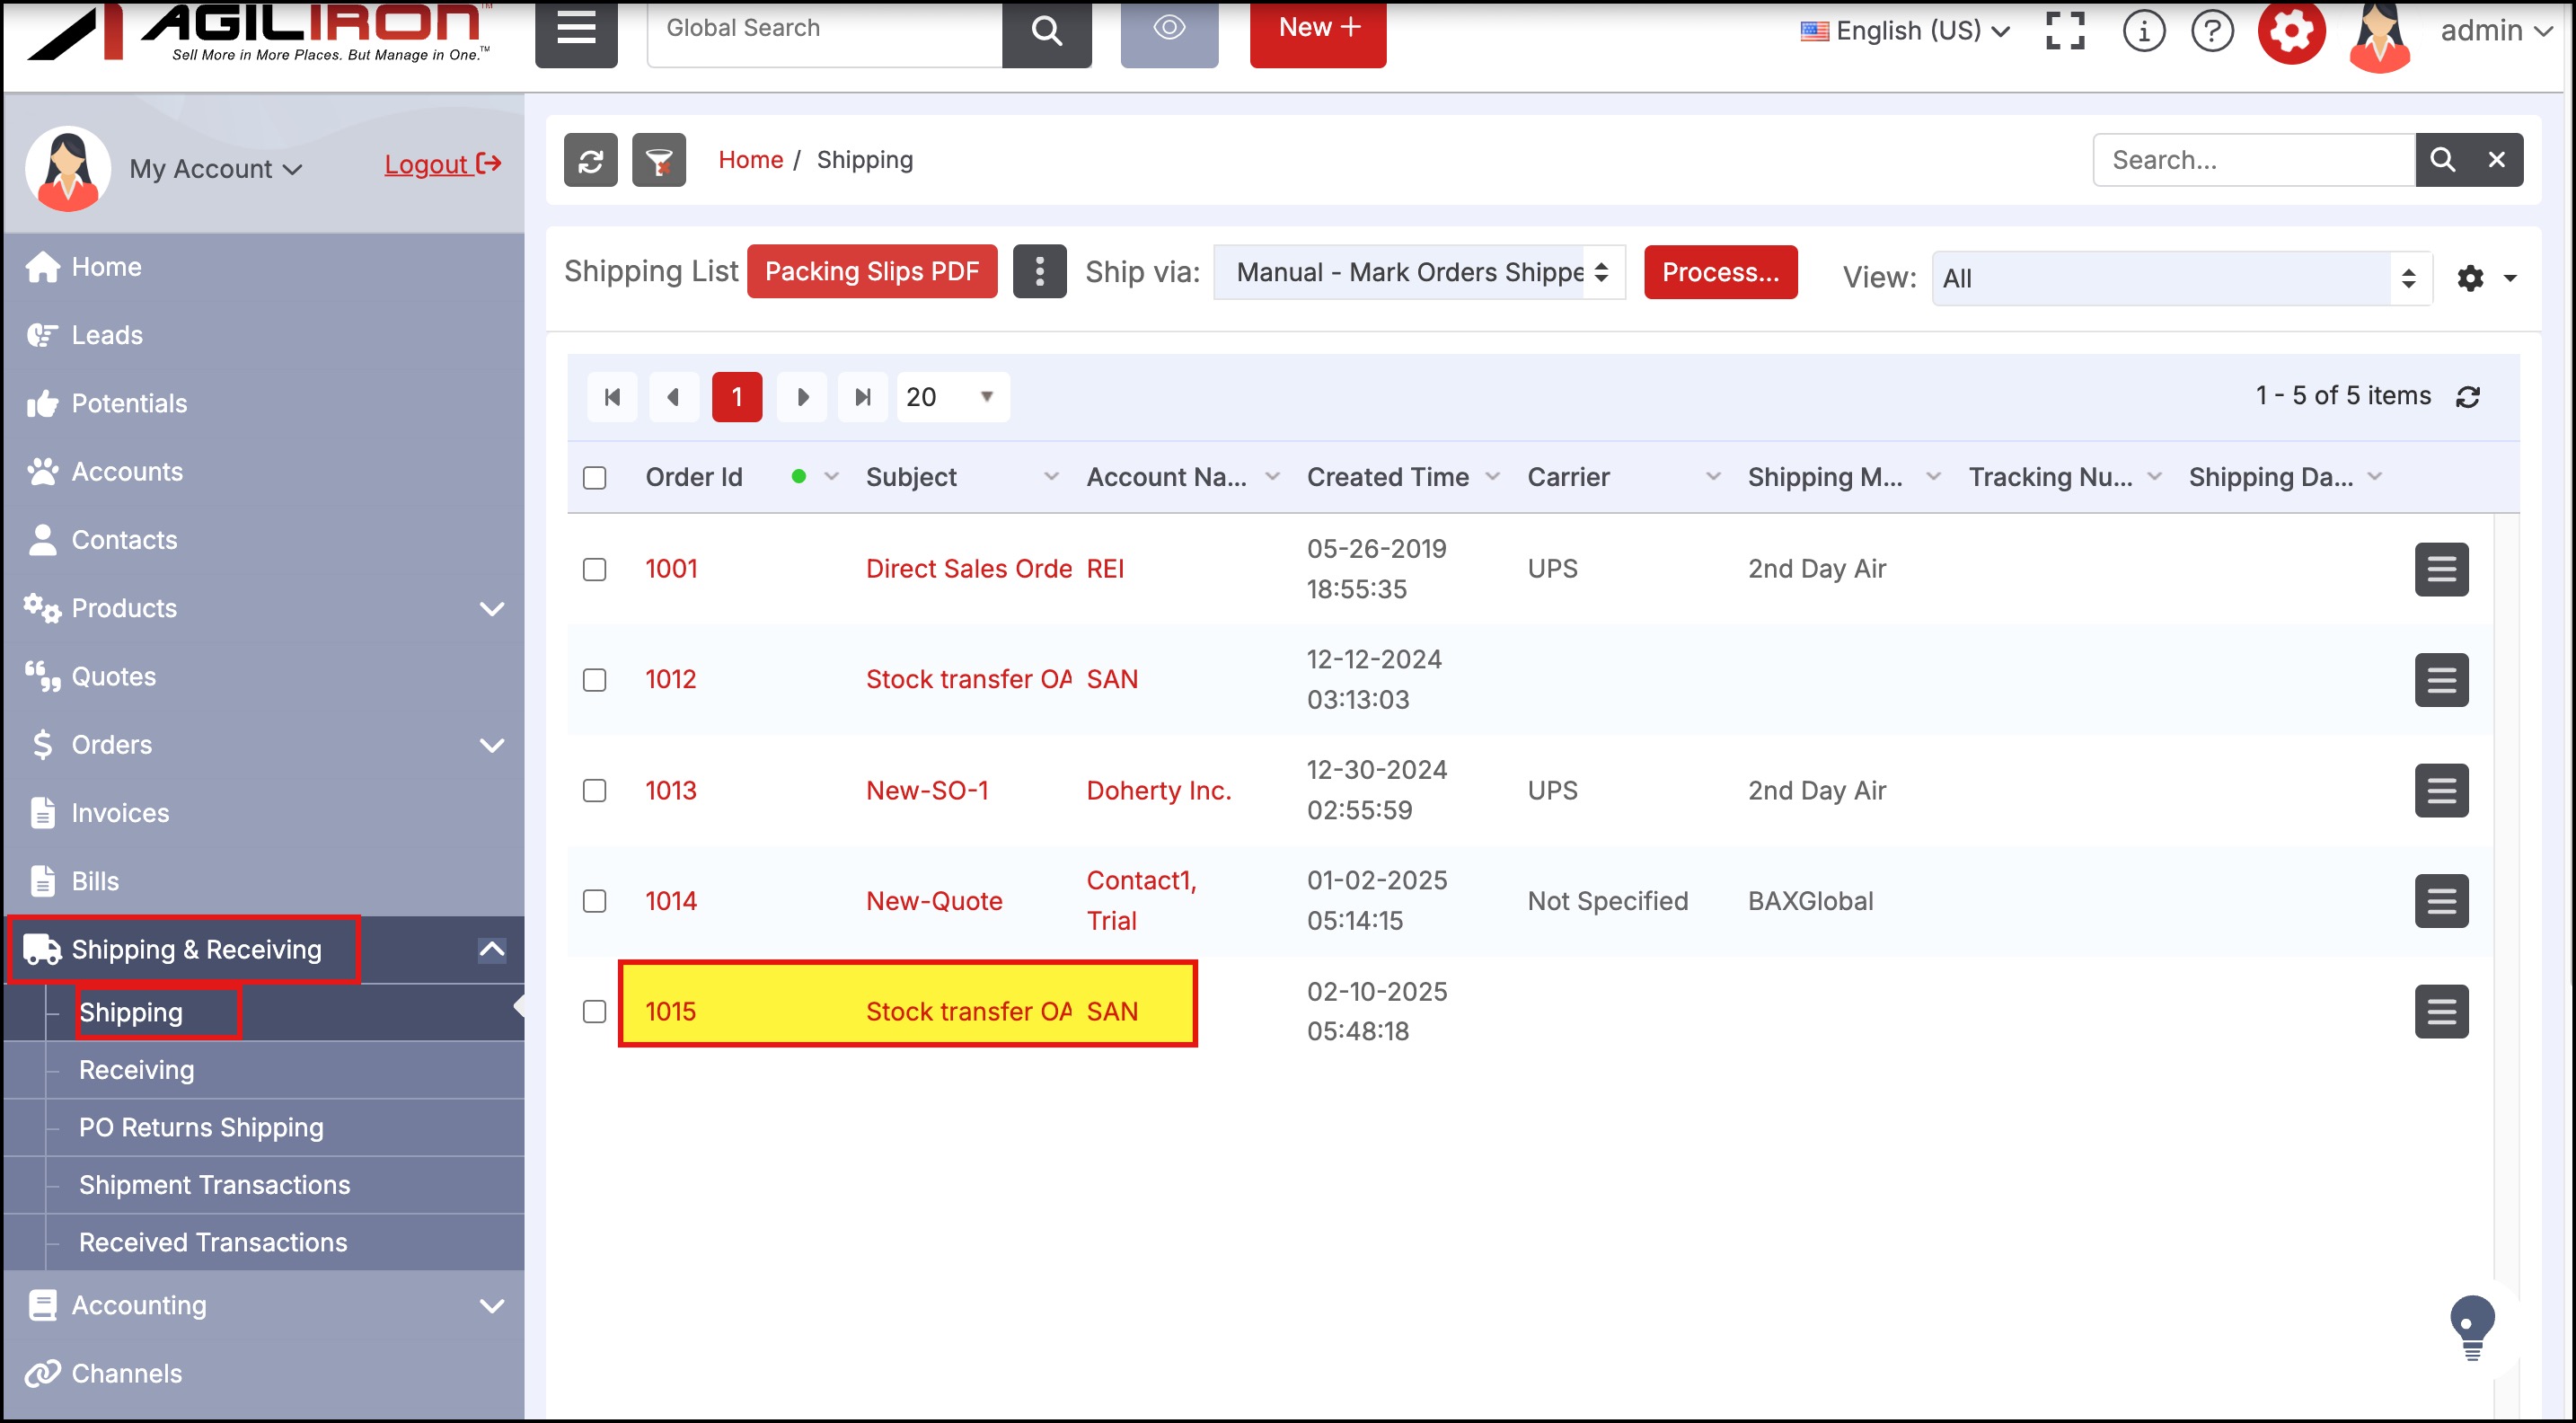
Once the transfer has been made, an entry is automatically added to the "Shipping & Receiving > Shipping" tab to "ship" the inventory out.
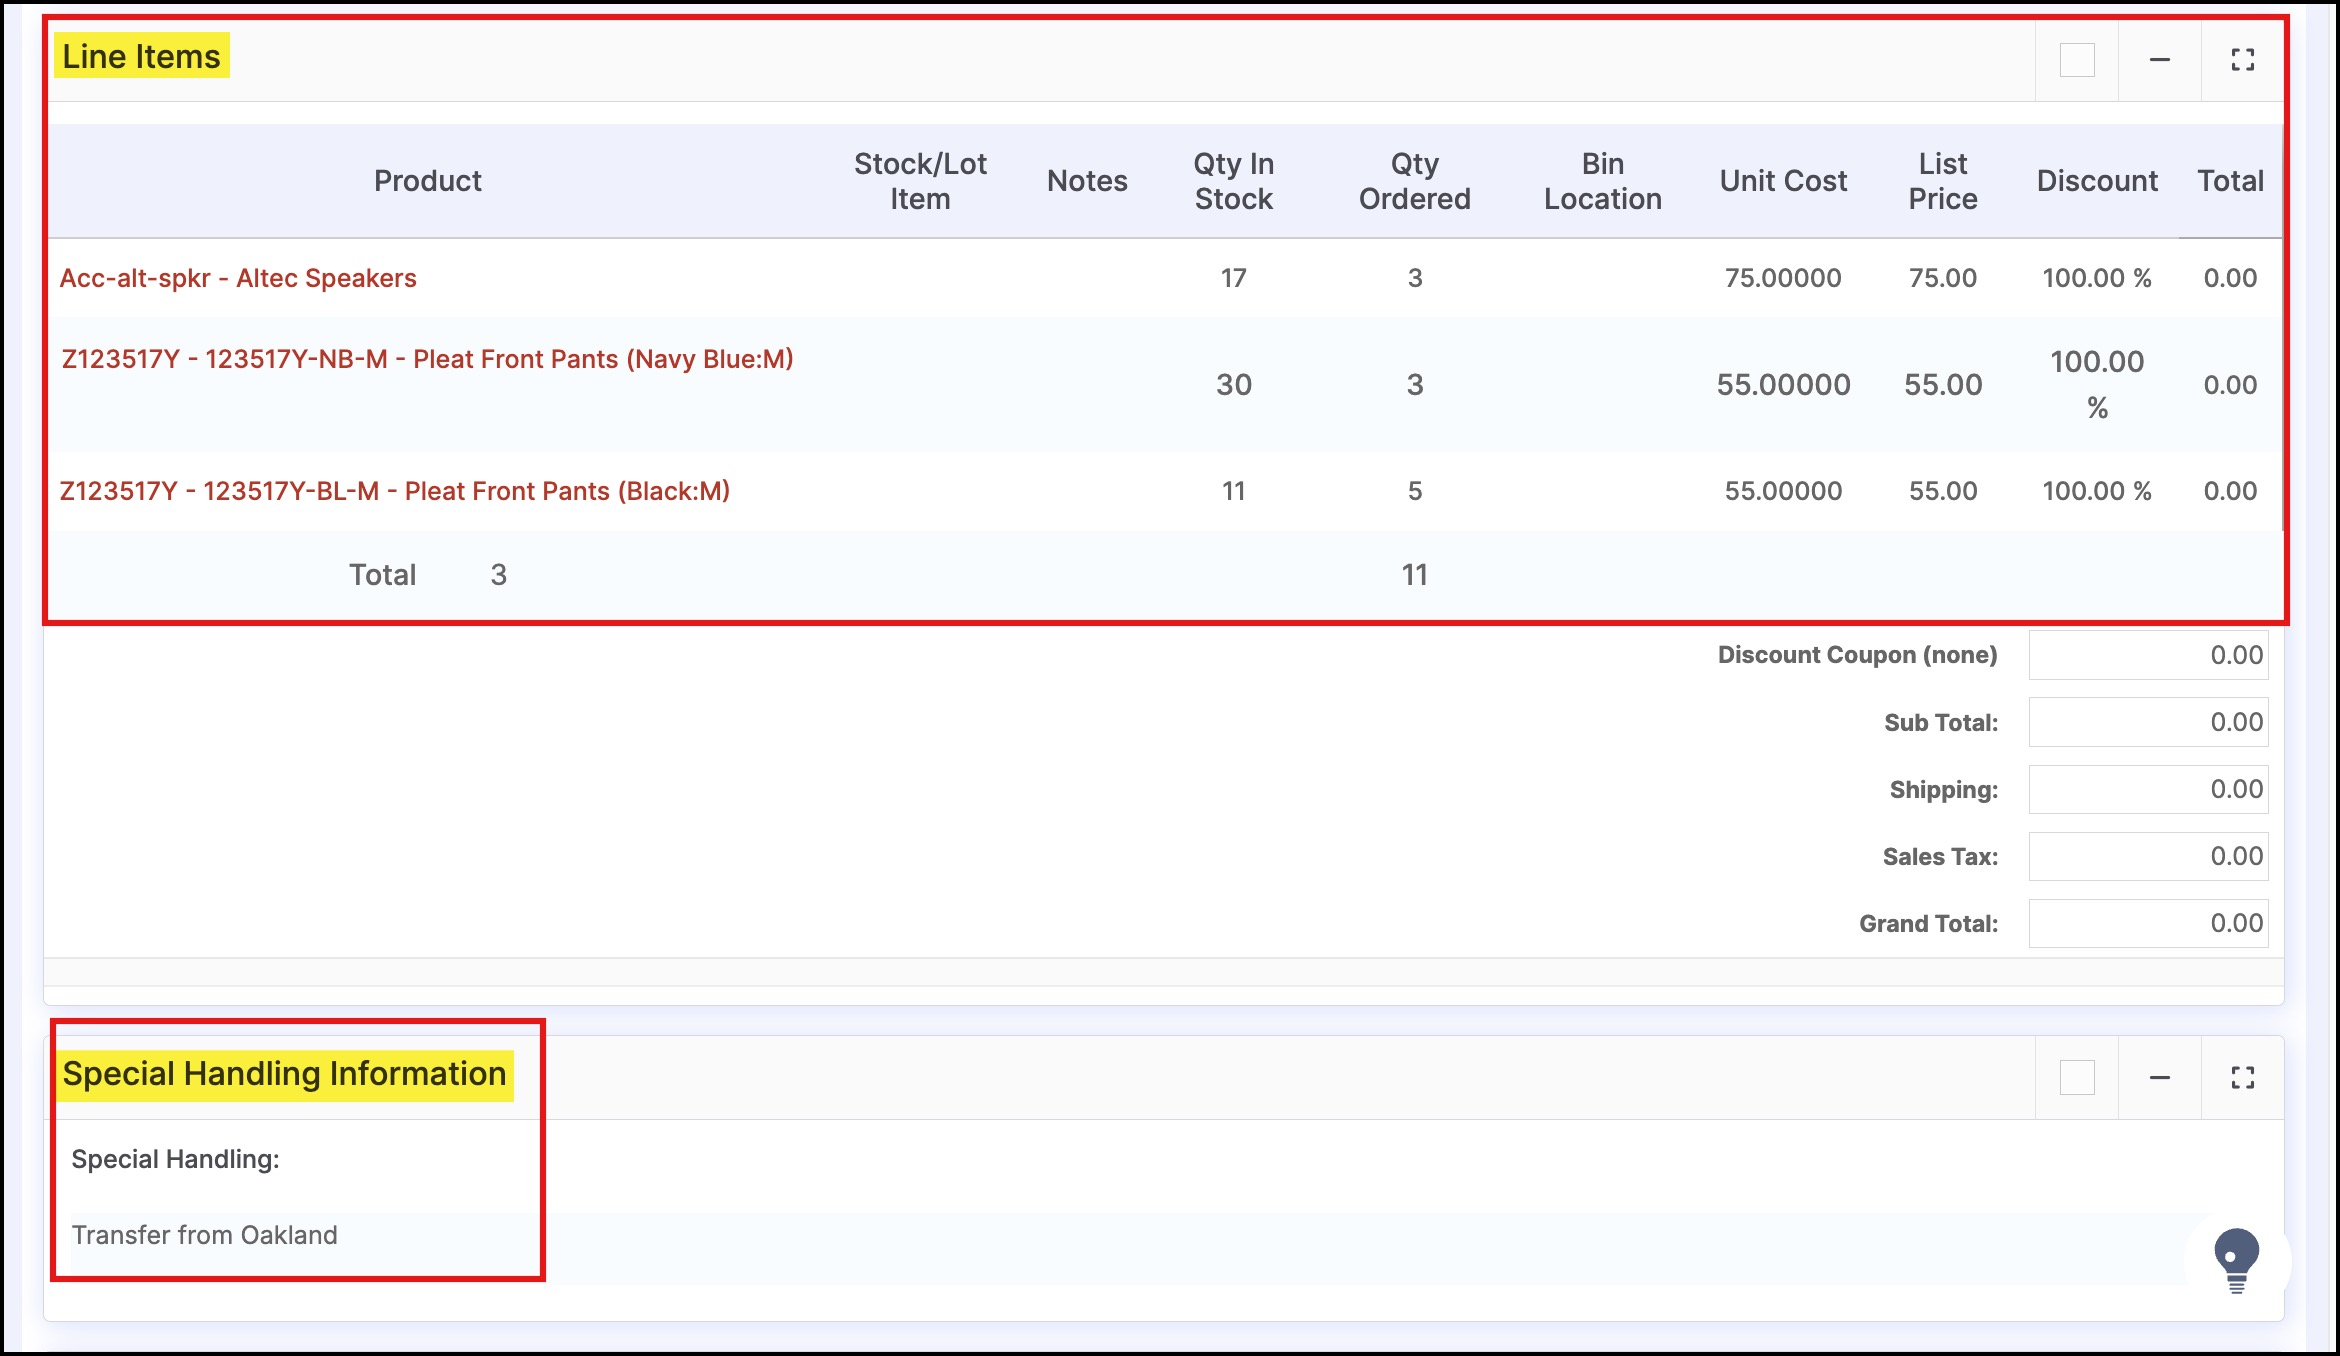
Selecting the Subject will display the transfer details. The sequence of products in the Ship Order created for the transfer sorts the Products alphabetically by Product Code.
- Under the Line Items tab, you can se the product Stock Transfer Details.
- In Special Handling Information, you can see the Transfer Note which you had mentioned.
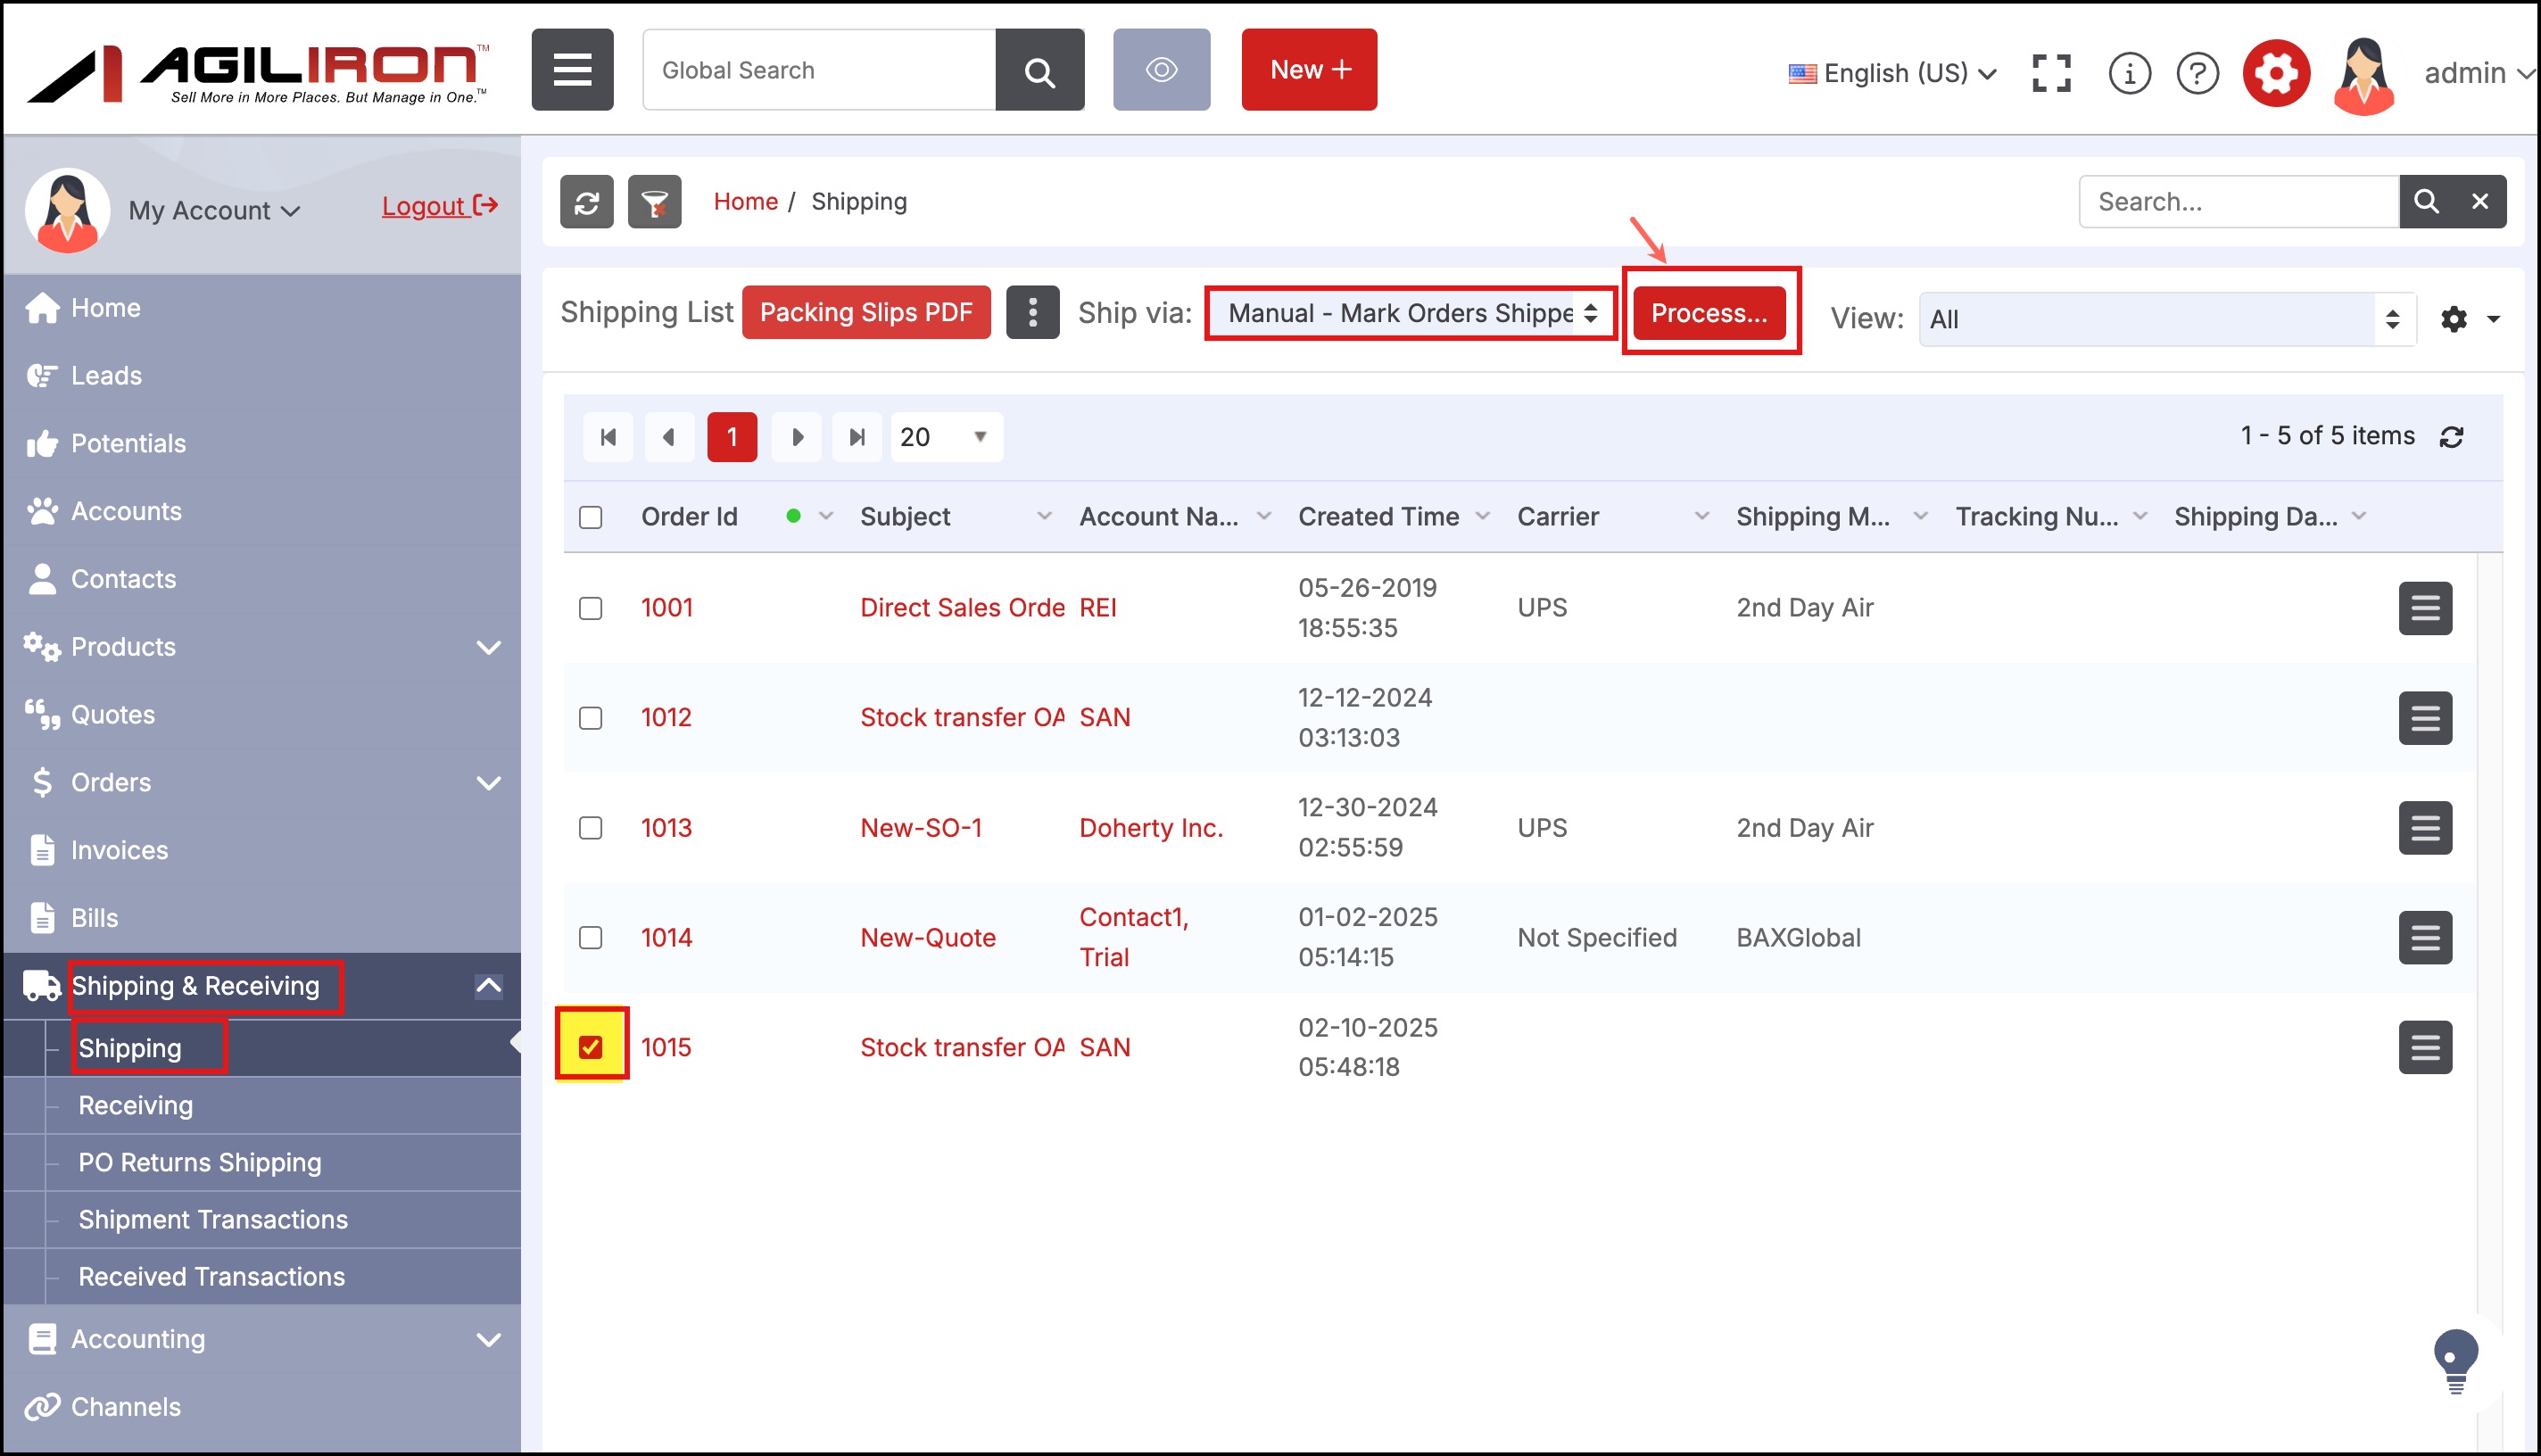
- Now go back to the Shipping List, click on the checkbox next to the transfer, and select "Manual - Mark Orders Shipped".
- Click the "Process" button to mark the entry as Shipped.
Note: For Lot-tracked and Serialized products, a lot number or serial number must be entered before shipping. Please see this link for instructions on editing the ship order to add this information (scroll down to the middle of the screen to see the process).
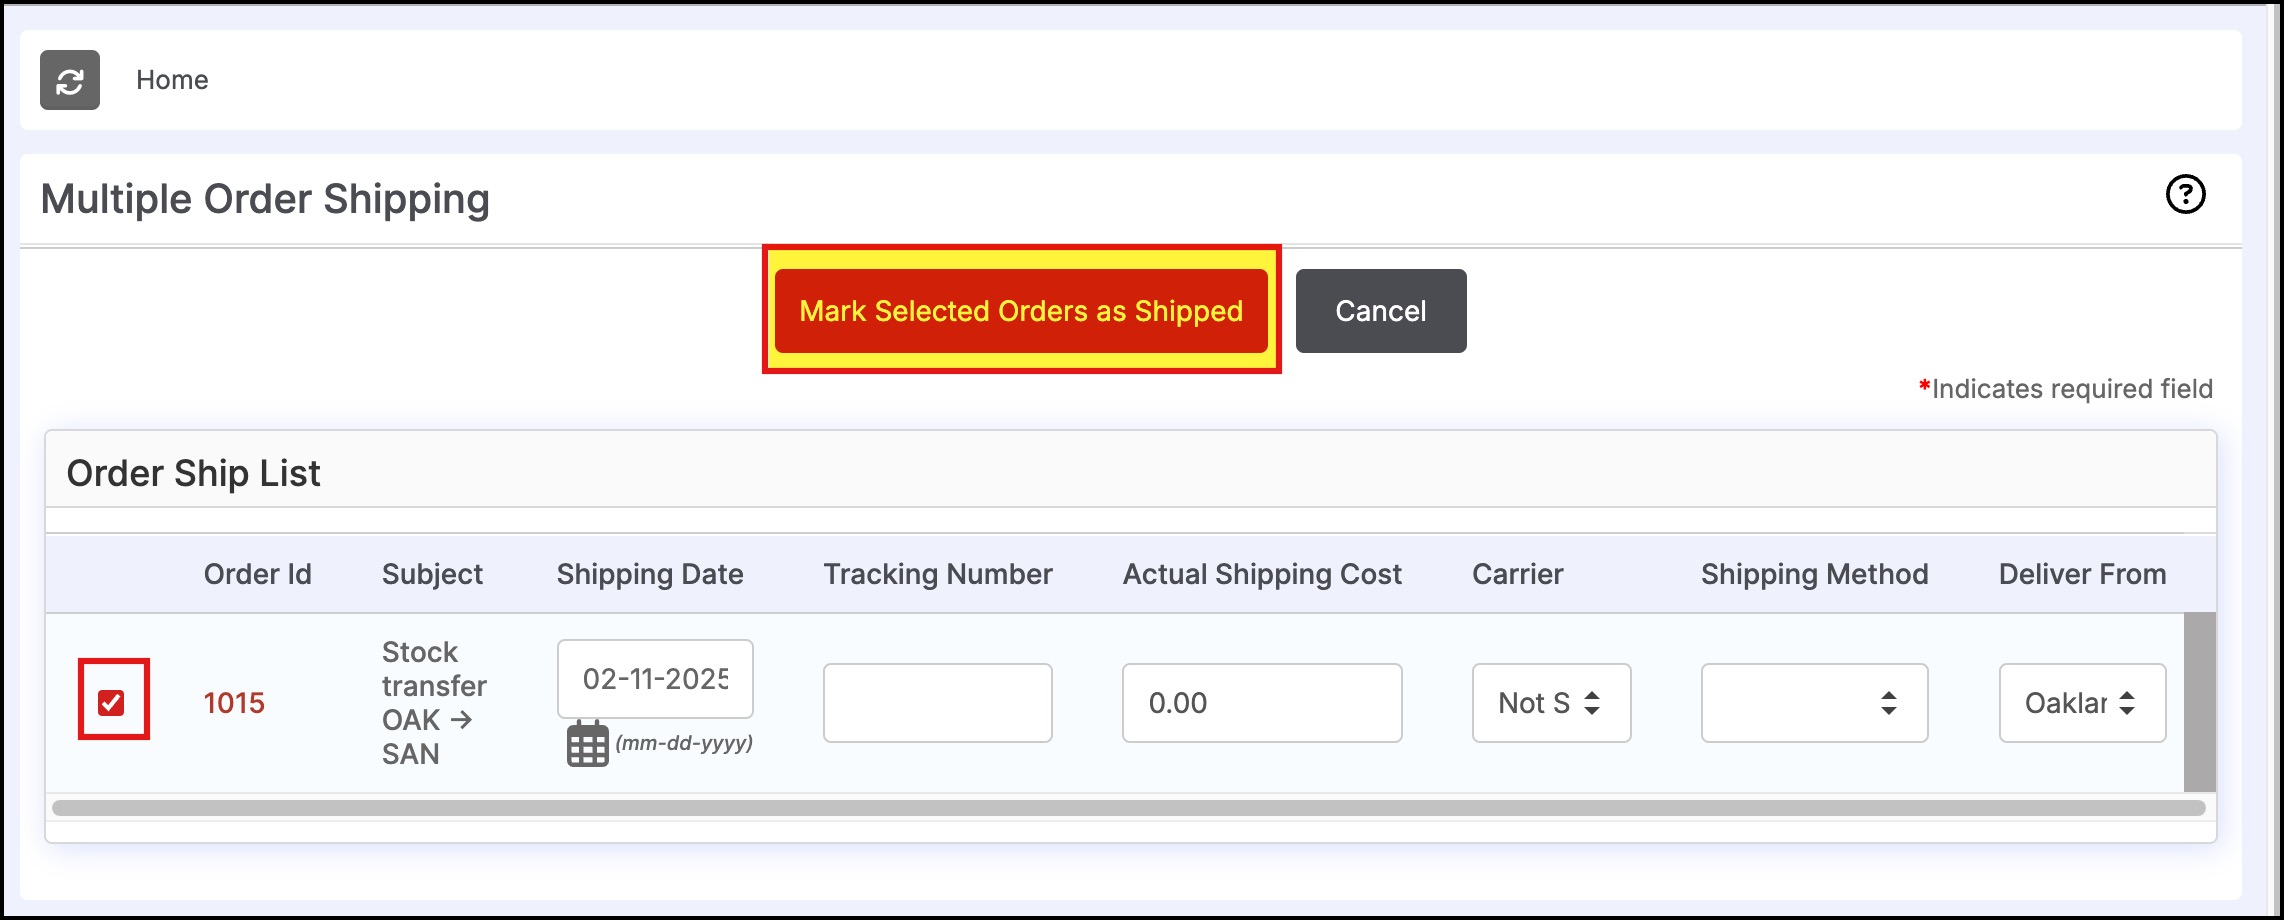
- Keep the Order Id selected and click on Mark Selected Order as Shipped.
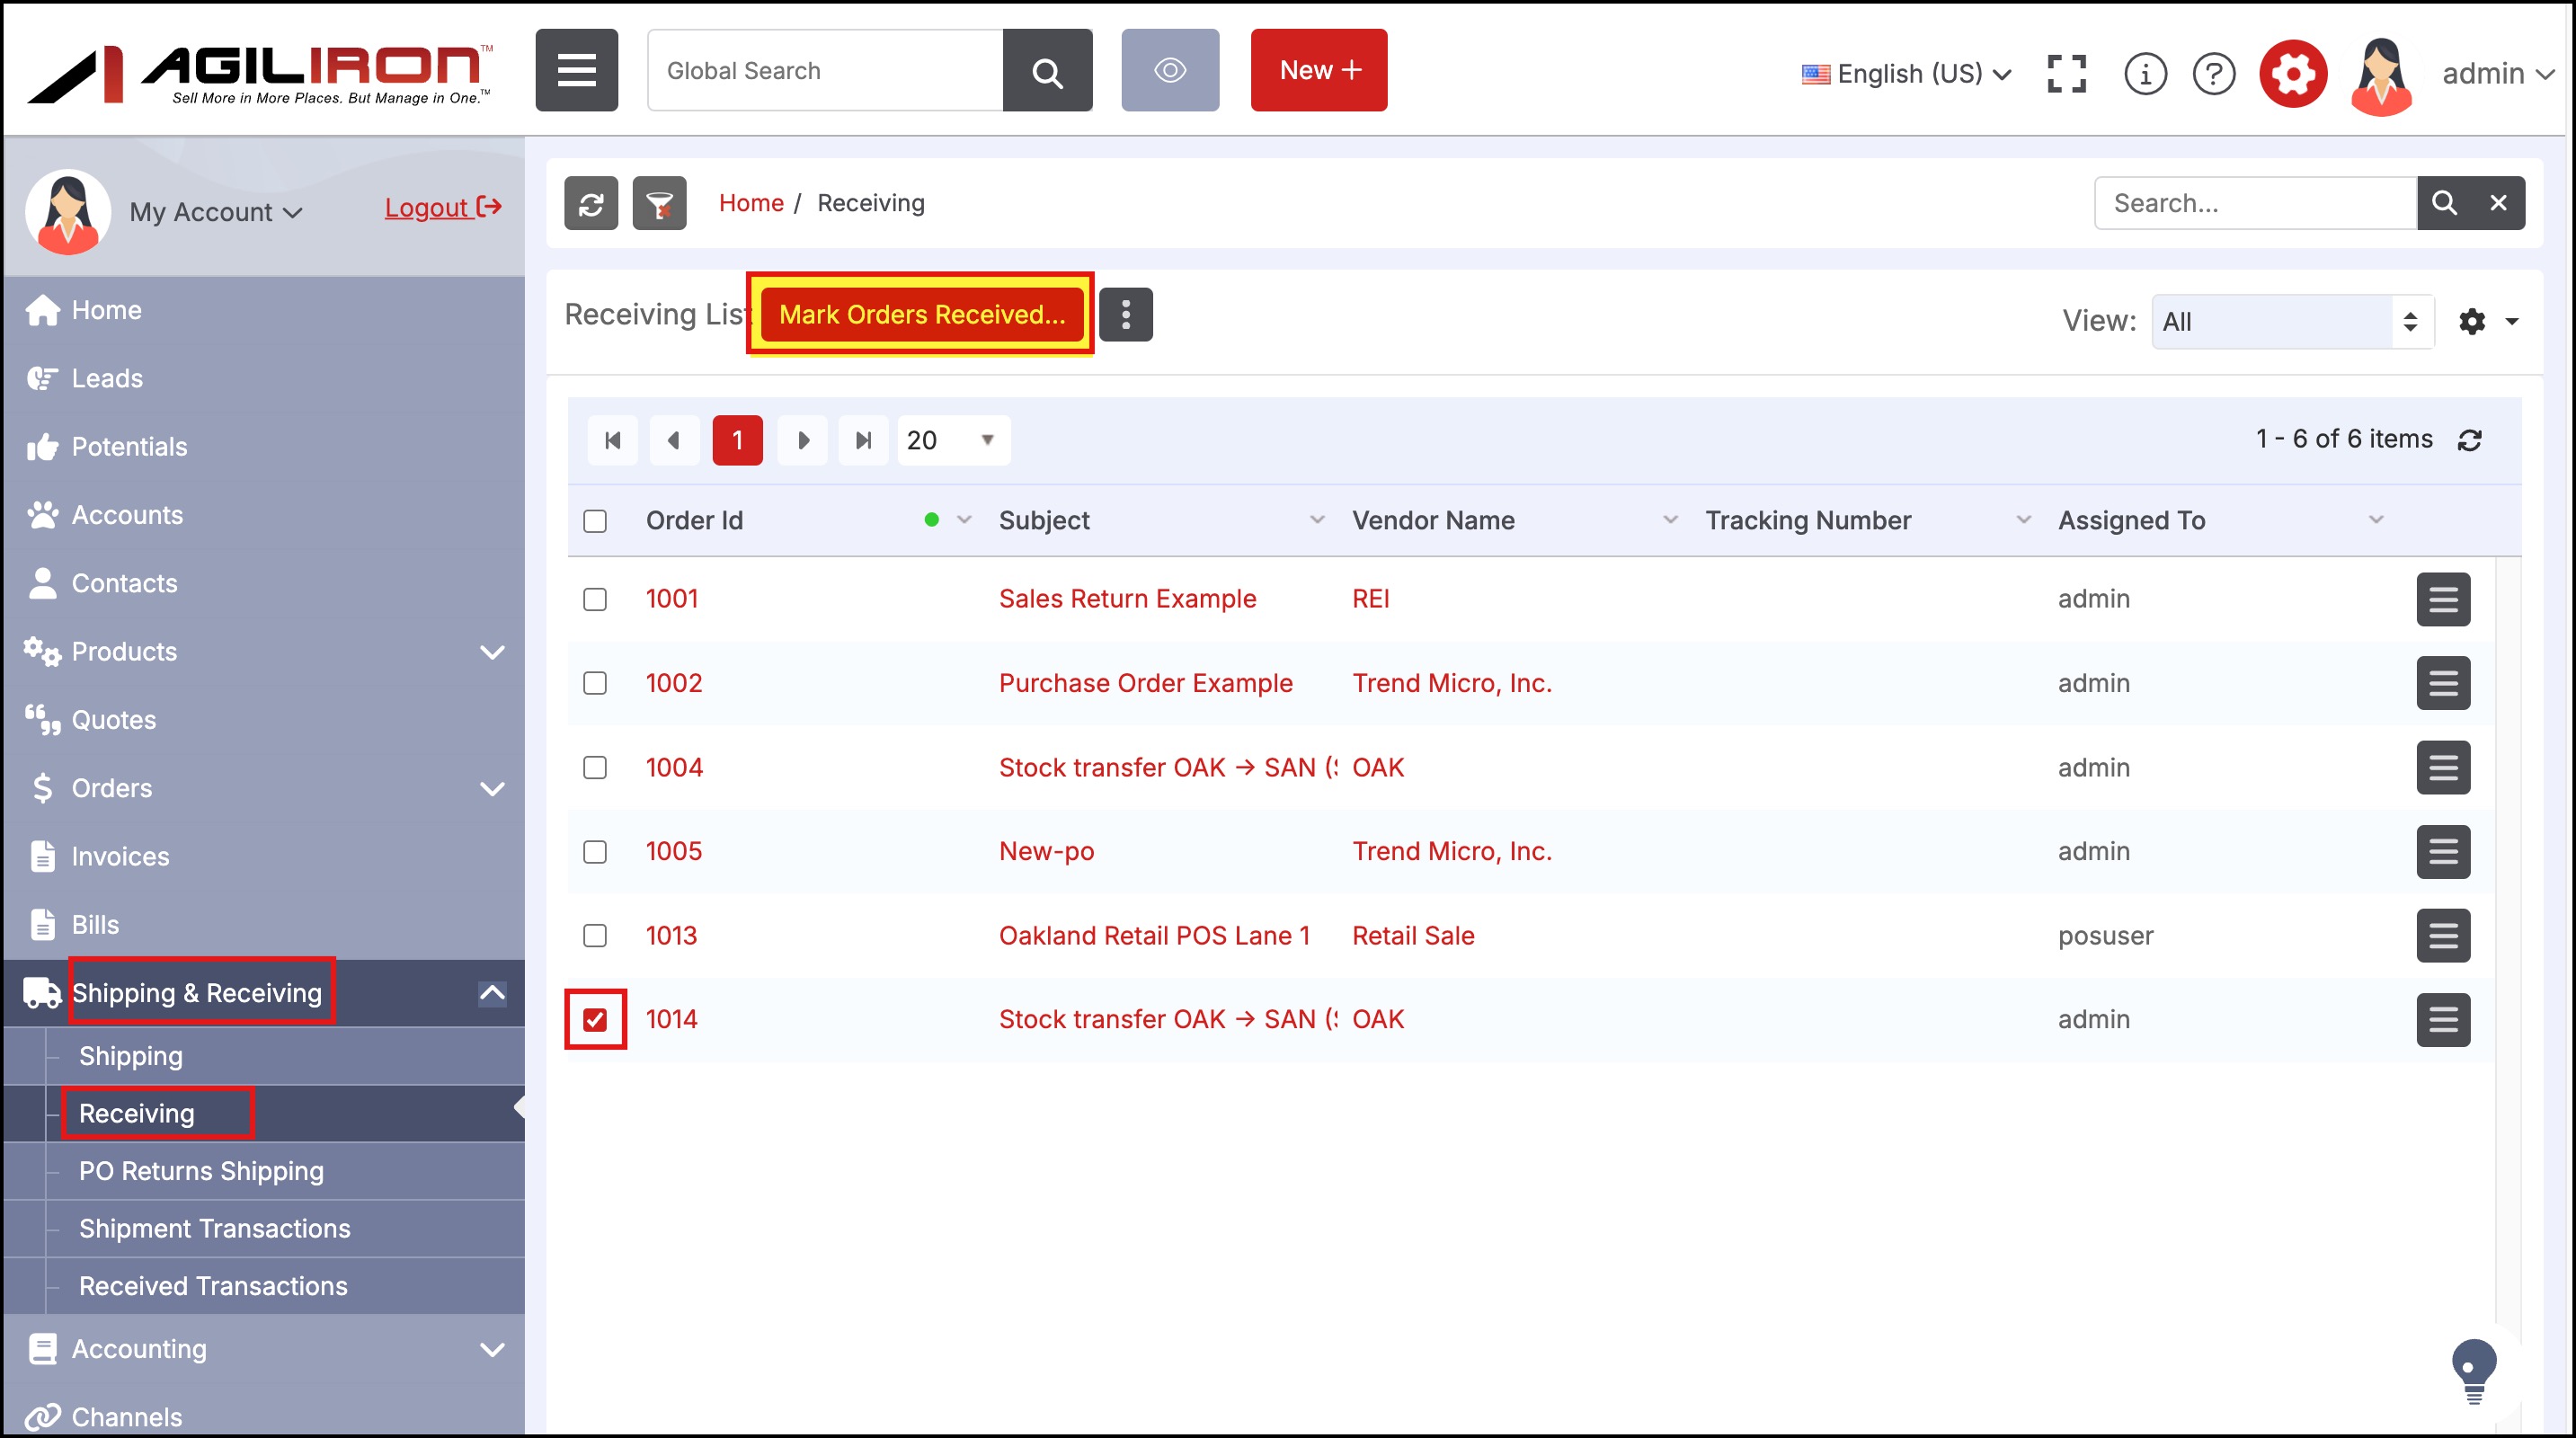
- Once the shipping is completed, an entry will automatically be added to the "Shipping & Receiving > Receiving" tab to receive inventory at the location receiving the transferred inventory.
- Click on the checkbox next to the transfer and select the "Mark Orders Received Button" to finalize the transfer.
Note: For Lot-tracked and Serialized products, a lot number or serial number must be entered before receiving. Please see this link for instructions on editing the order to add this information (scroll down to the middle of the screen to see the process).
Updated about 1 year ago
