Bulk Edit - Accounts List View
With the bulk edit action for Accounts, you can edit multiple accounts and their relevant fields at once from your Agiliron admin.
Go through the step-by-step guide to get started with the bulk edit process for Accounts.
Method 1
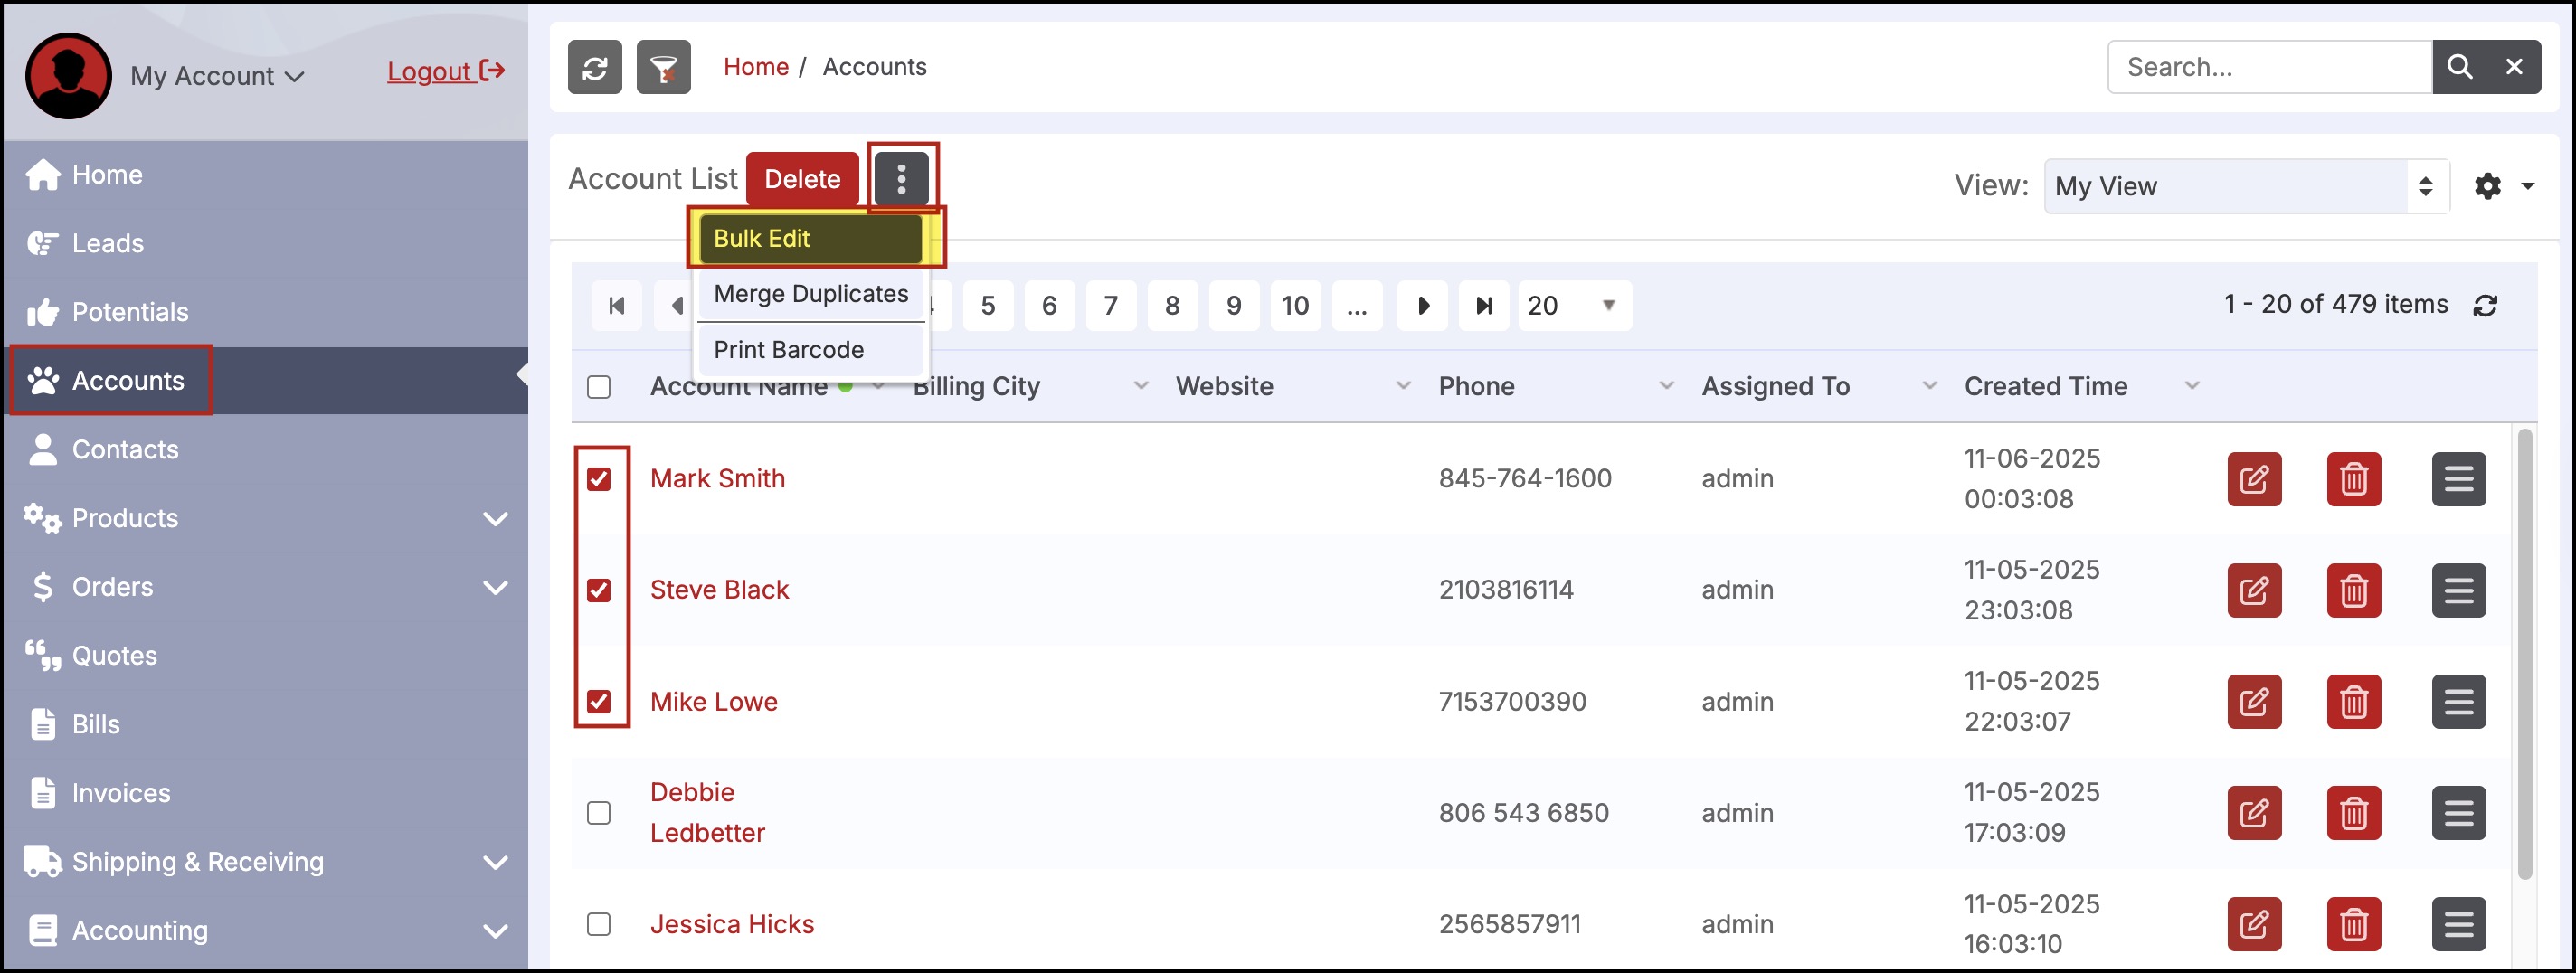
- Go to Accounts on the left menu panel of the admin.
- Account List view will open.
- Select the Accounts that you want to edit.
Either select all by ticking the checkbox preceding the Account Name column or click on the particular checkboxes preceding the Account name you want to make changes.
- Click on the three vertical dots (next to the delete button).
- Next, click on the Bulk Edit.
Method 2
NEW - Performing bulk edit on a specific set of accounts (uploading CSV file or spreadsheet table)
The new bulk edit wizard offers an additional feature. Users can now either upload a CSV file or enter the Account ids in a spreadsheet. Bulk edit will be performed only on those specific accounts.
Follow the below steps:
- Without selecting any accounts, click on the three dot menu and select Bulk Edit.

Select Label Type window will pop up with two options to upload accounts for bulk edit - 'Upload CSV' or 'Spreadsheet Table'.
To Upload CSV
Note - Under this condition, along with the accounts Ids, you can add custom fields as well (maximum 5 fields) in the CSV file and directly update only the custom fields.
- Select Upload CSV radio button.
- Click on Next.

- After clicking on Next, you'll be asked to Upload CSV. Either drop a CSV file or browse the required file from your system and upload it.

- Click on Upload file then click on Next.

- The spreadsheet table will get displayed.
- Click on Next.

IMPORTANT NOTE:
-
Make sure the account ids added are all valid.
-
Also if you are adding the custom fields, make sure the field name and field values are valid. The custom fields can be edited in the spreadsheet itself. As soon as the update process gets completed successfully, you can close the window.
-
In case the custom field is a checkbox - you can make any text entry like true-false, yes-no, 0-1 or off-on.
-
In case the custom field is a date field, enter date in yy/mm/dd format.
-
If the custom field is a picklist or drop-down list, make sure all the values present in the list are entered in the CSV file.
Do not close the window or click on the Back button while the update process takes place.

- After the update process is completed successfully, close the window and the process will end. Custom fields for the mentioned account IDs will get updated.

If the spreadsheet table contains only account ids, click on Next to proceed with further steps .
Check - Accounts Bulk Edit Wizard - Step by step process section for further process.

Spreadsheet Table:
In case in the Select Label Type, if you select the Spreadsheet Table radio button and then click on Next.

Directly, the spreadsheet table will open where you need to enter the Account Ids on which you want to perform bulk edit. Ensure that you enter valid account IDs.
Note - You can also add column/columns to edit custom fields in the spreadsheet itself. (Left click on the table column andselect insert new column left-right)
- Once account ids (also custom fields, if any) are entered, click on Next.
(Spreadsheet with account IDs and custom fields will get instantly updated)
Below is the screenshot of the spreadsheet table, excluding custom fields.

Whether you select Account Ids, upload CSV or enter account ids in a spreadsheet, the next set of steps are the same for all.
>>>Accounts Bulk Edit Wizard - Step-by-step process
- Accounts Bulk Edit Wizard will open. You can minimize or maximize each screen as per your convenience.
Step 1 - Select Fields
- In step 1, select the fields that need to be edited.
NOTE - You can select a maximum of 5 fields to perform bulk edit.
Ways to select fields:
a. Either type one by one field name in the search field and tick the checkbox as the field appears.

Or
b. Select fields (max 5) as per your requirement from the different segments as displayed below.

Or
c. Select all fields (max 5 fields) of a particular segment at a time by clicking on the checkbox preceding the main heading of the segment.
You can view the count of fields selected below the Reset All button.
Reset All button is to deselect all the selected fields. You can start again with field selection.

As an example, we are selecting fields 'Pricebook', 'Payment Method' and 'Due Date'.
- Select the fields and click on Next.

Step 2 - Generate Form
- Next comes the Generate Form.
- Enter the relevant data in fields and click on Next.
- If it's a text field, type the necessary text.
- If it's a drop down, select the required option from the list.
- If it's a date picker, just click on the field, a calendar will appear, select the date you want.
- If it's a search field, start typing, you'll get the related options.

Step 3 - Confirmation
- In Confirmation, you can see the Field names and Field values that you have edited for the selected account names.
- To proceed, click on Next.

Step 4 - Processing
- Then comes the Processing.
- You will be asked if you are sure to continue with the bulk edit. If yes, click on Start Updating.

- Execution starts.
- One by one field will be updated.
- When the updating is done, click on Next.
Note - When the update takes place, make sure you do not click the Back button on your browser or close the window.

Step 5 - History
- In History, you will see the status, the old value, and the new value of the fields edited in the description column. User name, last modified date, and timing will also be displayed.
- To start again with the bulk edit process, click on the Update Again button or simply close the window (x), if you are done with the bulk edit.

Updated 9 months ago