Pack-Ship Workflow
This section will demonstrate how Packaging Flow allows packing the line items of a particular sales order. Line Items of a sales order can be packed together as one package, or each line item can be packed separately as per the requirement.
Let's run through the process for a detailed understanding:
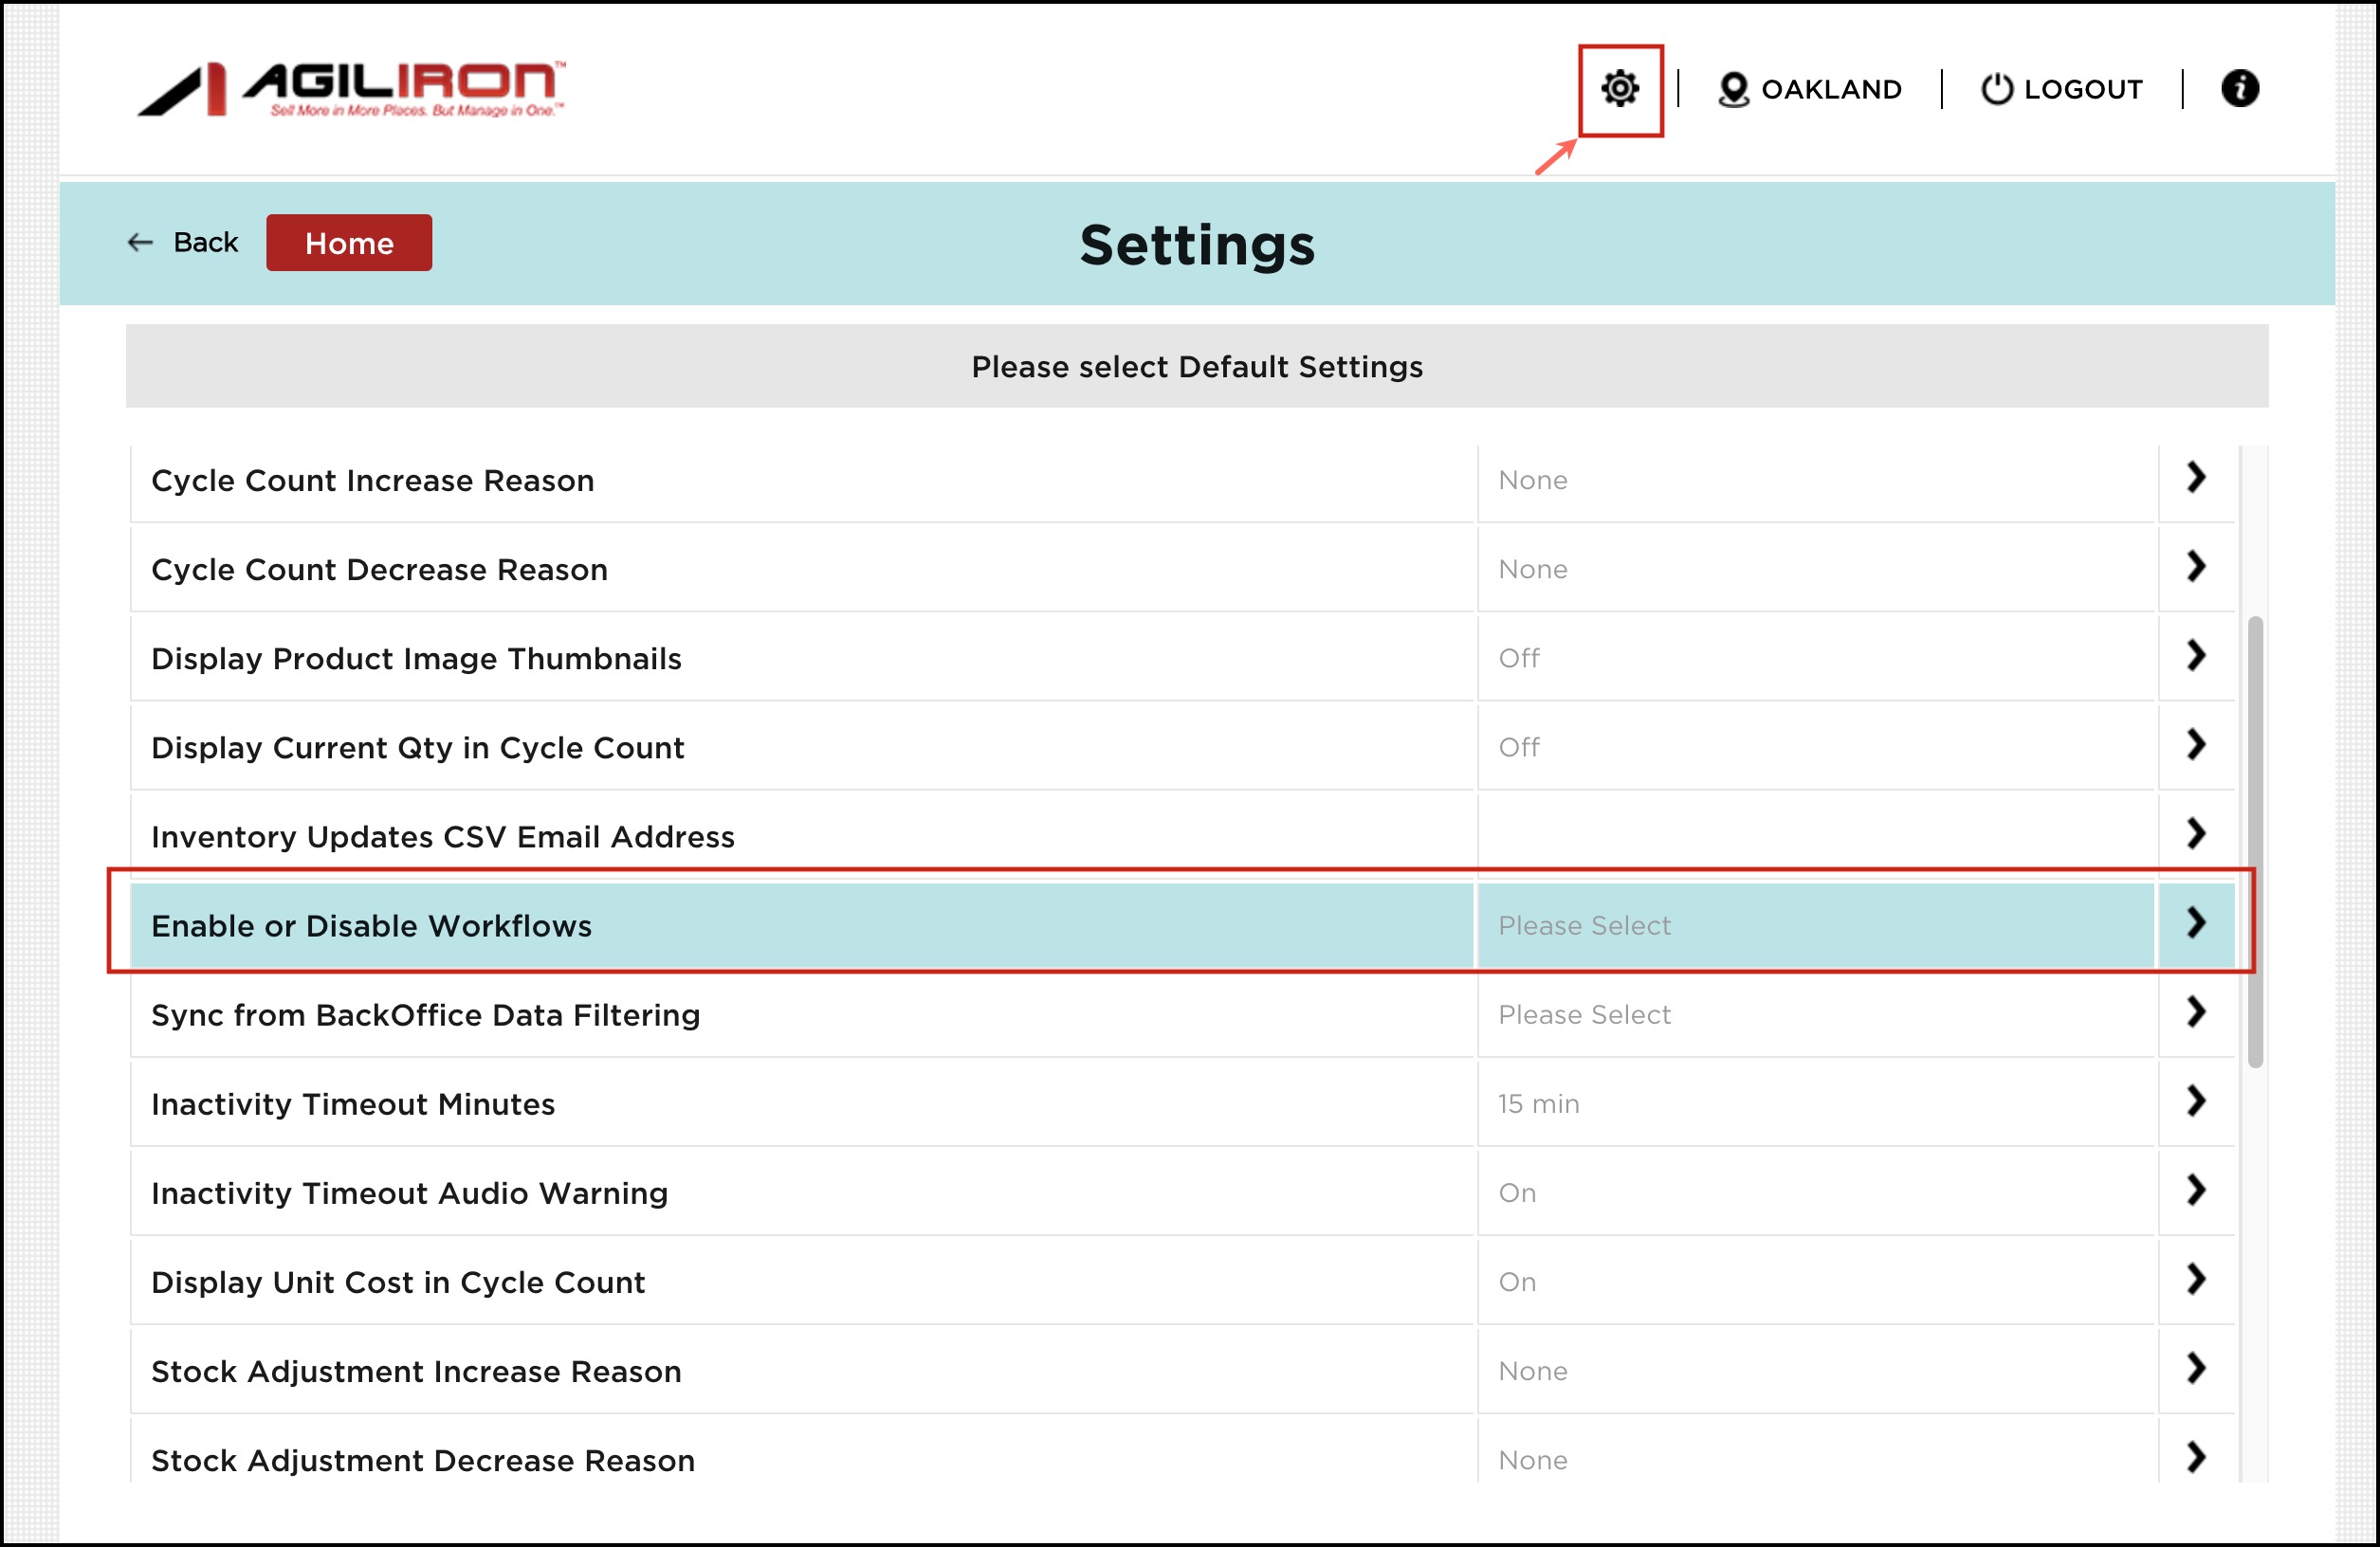
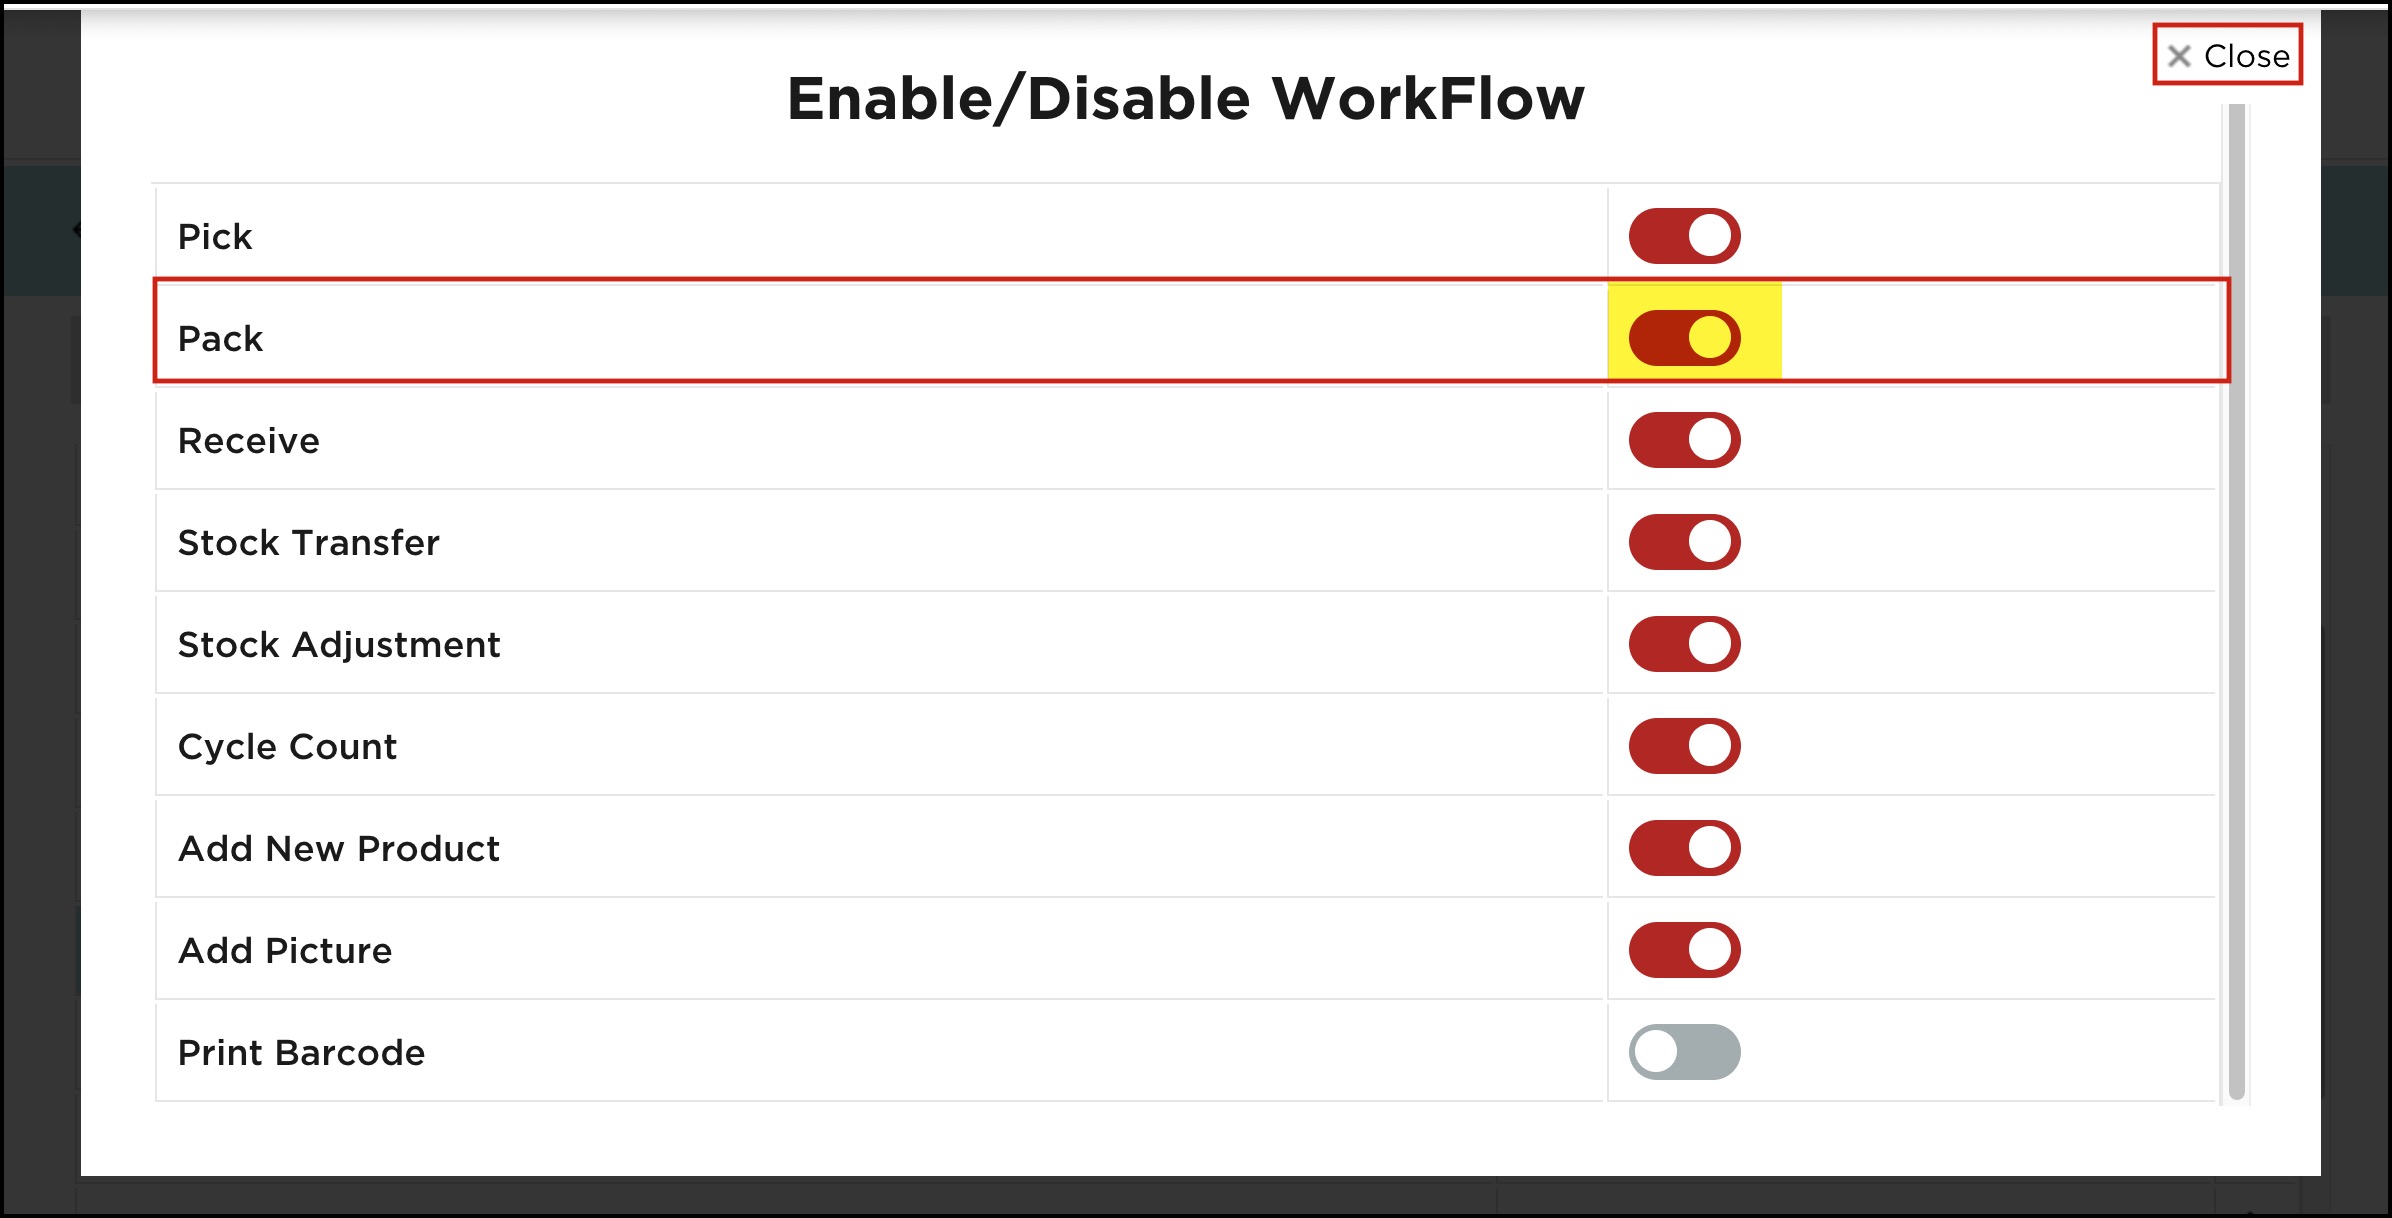
- After logging in to the warehouse app, first you need to click on Settings and go to Enable or Disable Workflows and Enable Pack workflow, as by default it is disabled.
- Once done, close the window and go to Home.

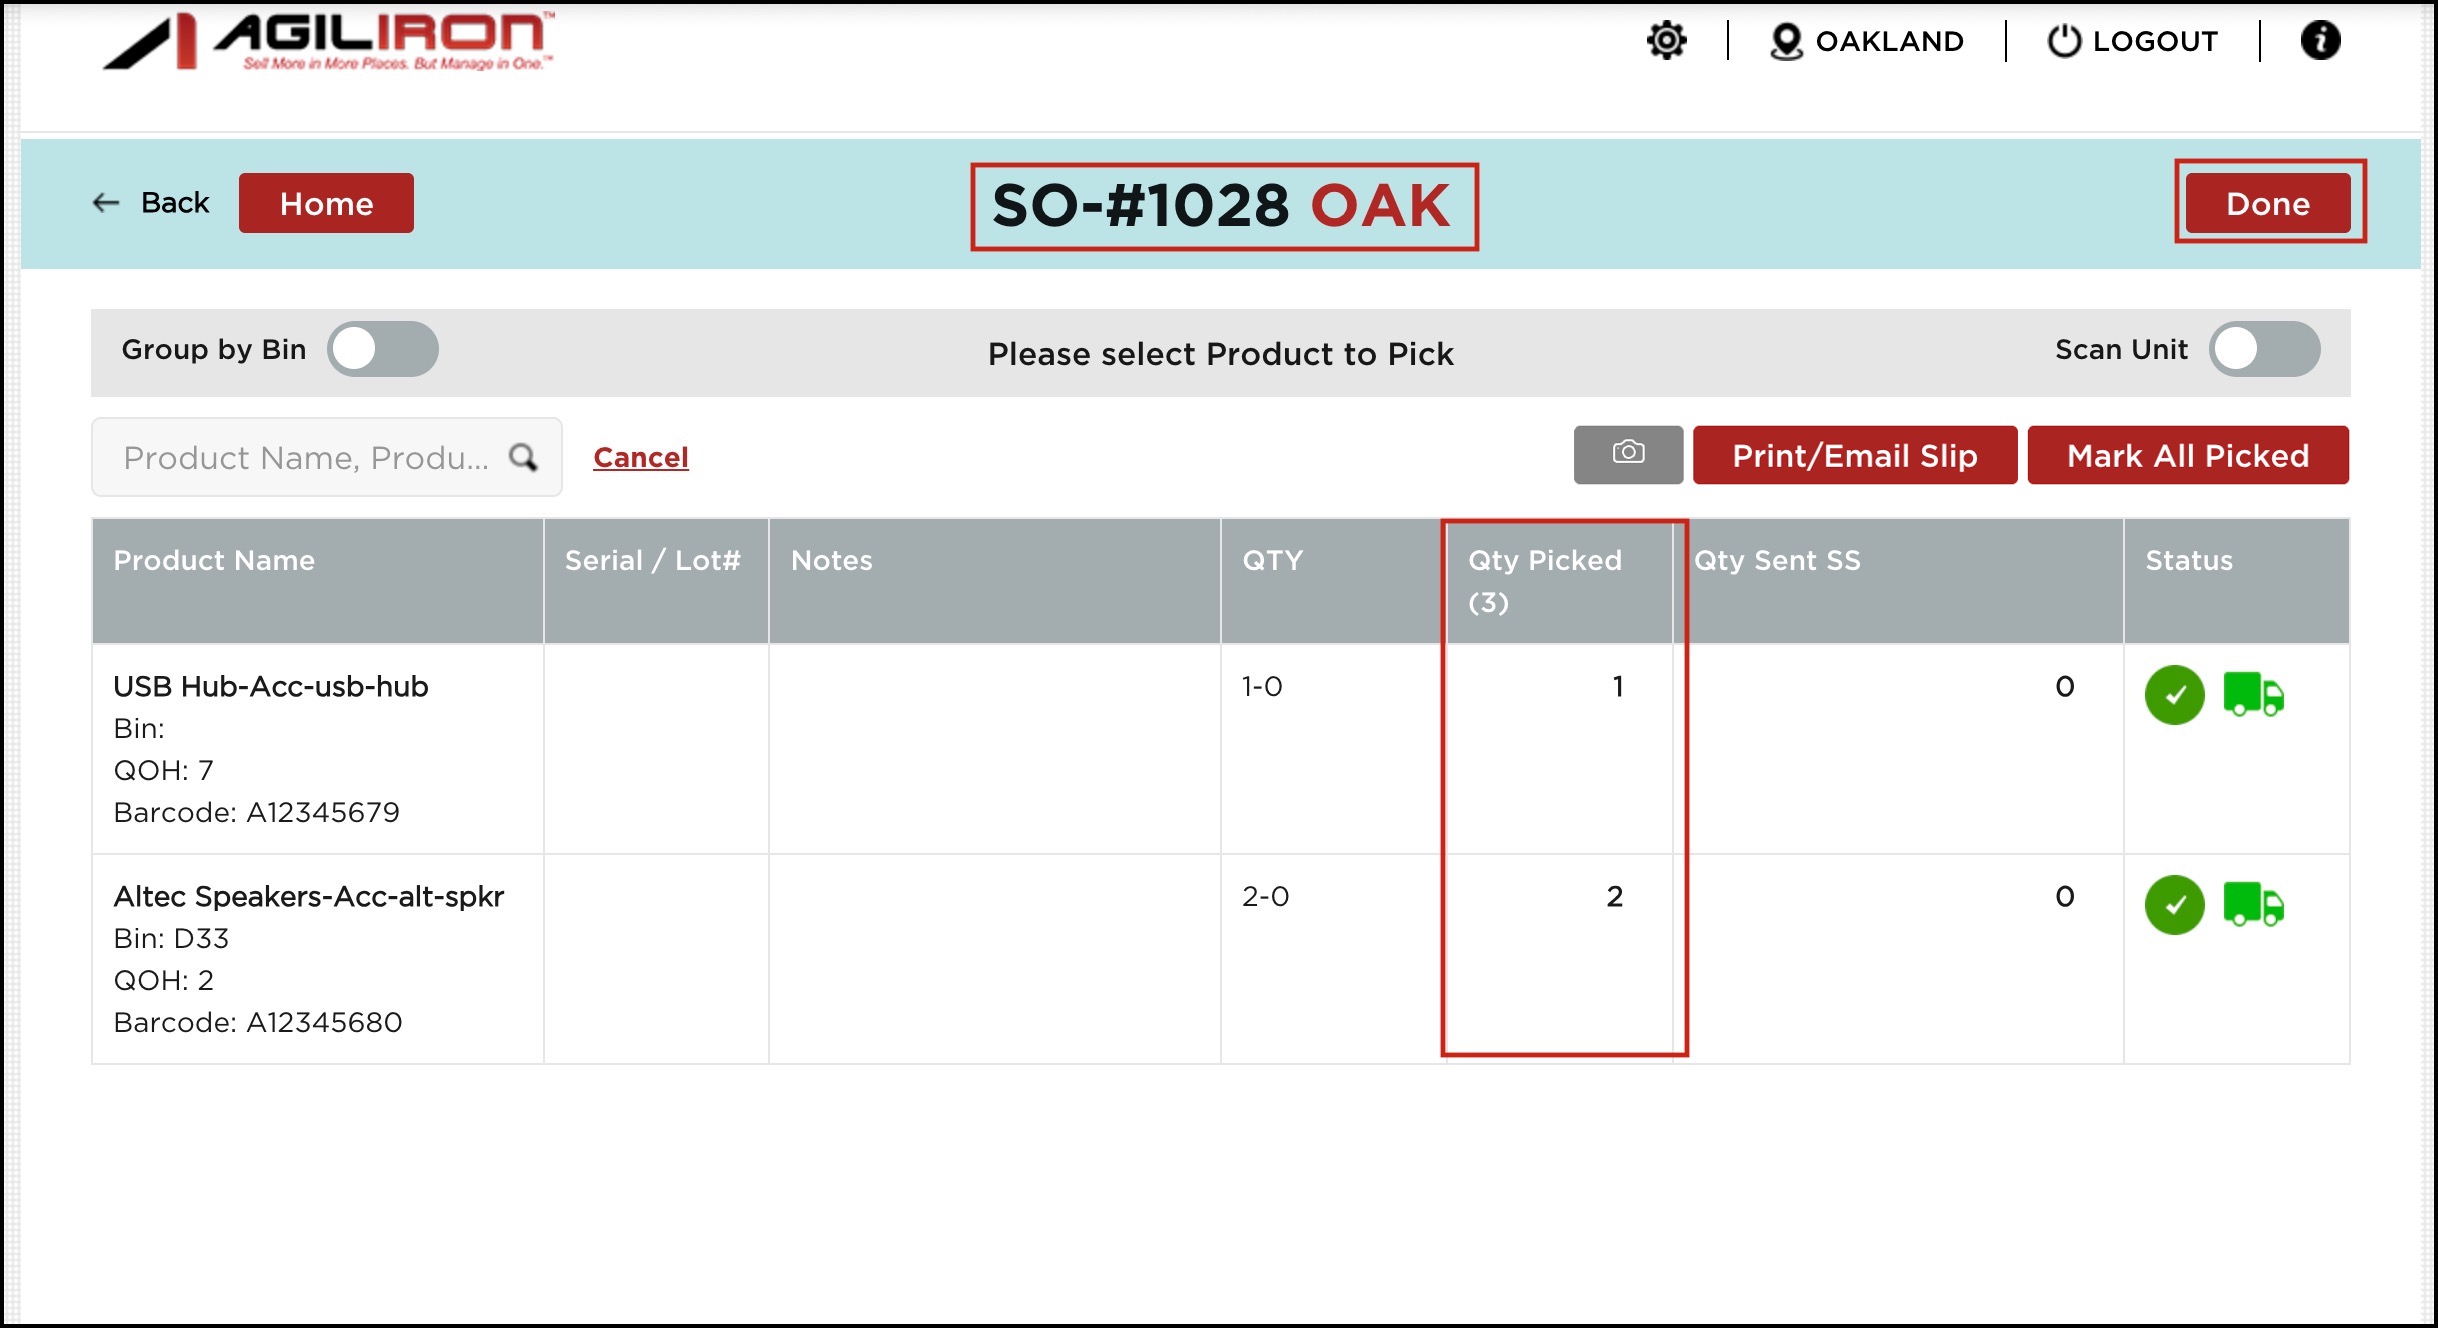
- As an example, we have picked all the line items (total quantities) of SO 1028.
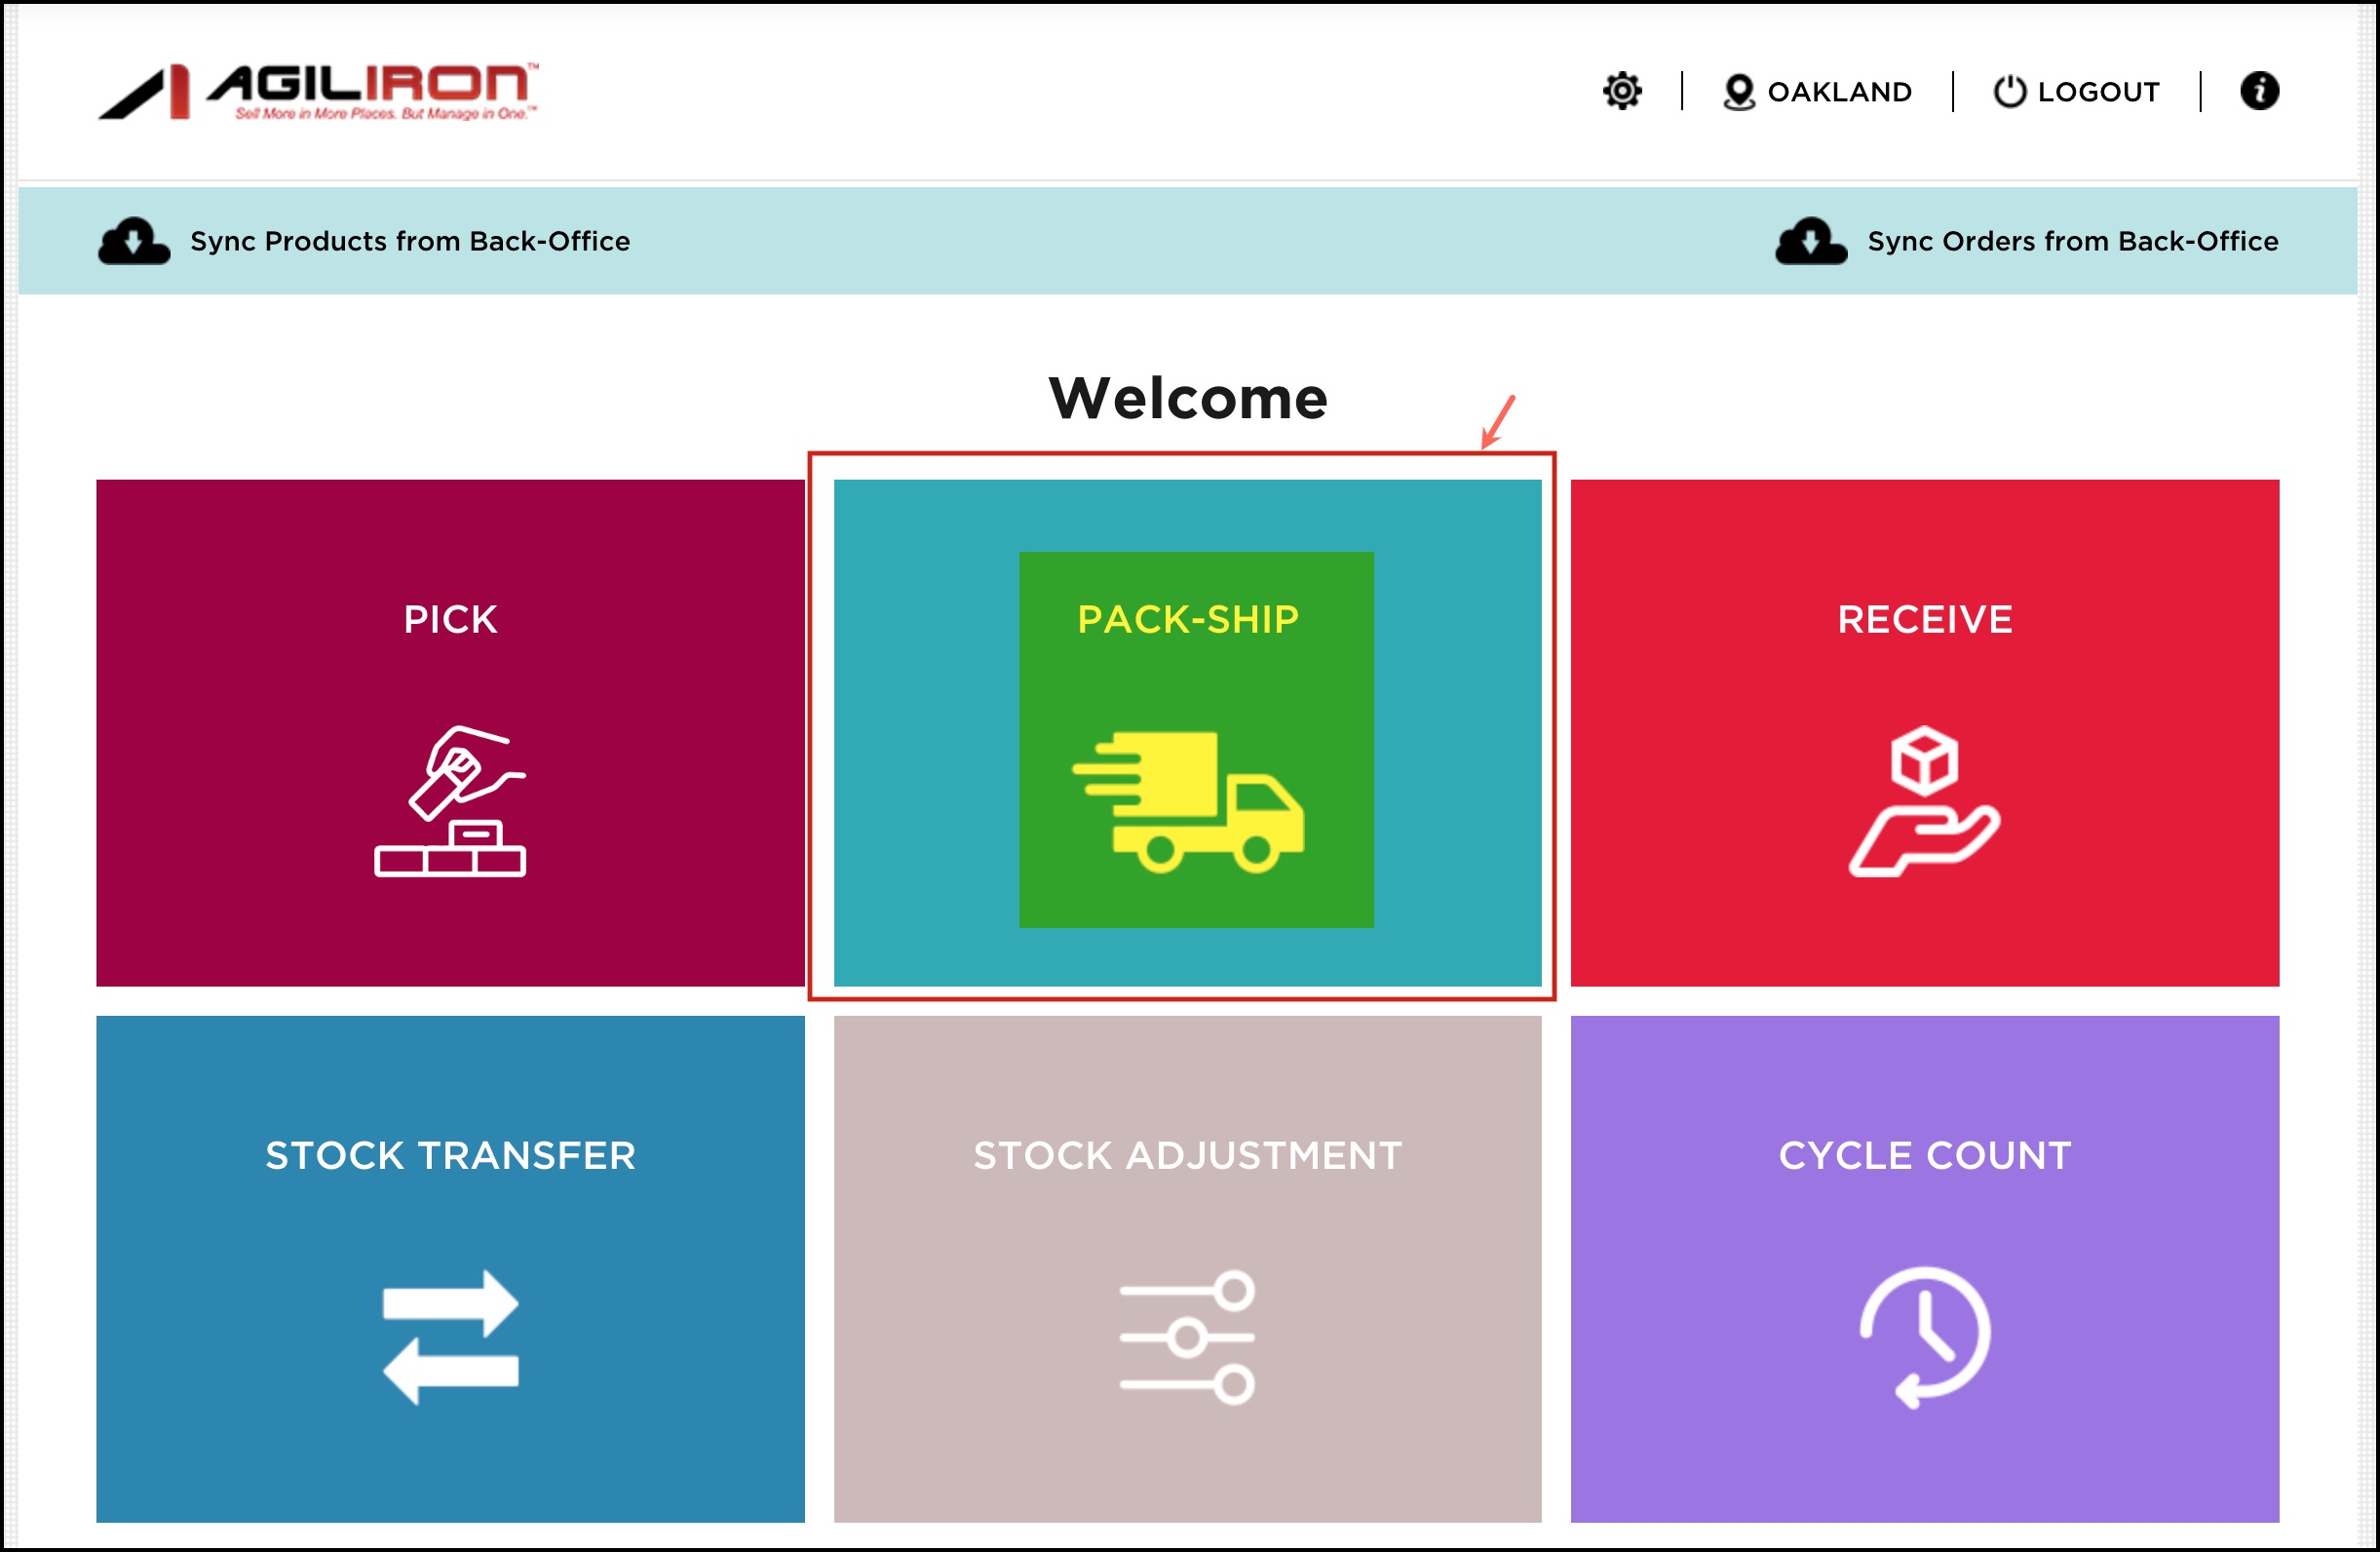
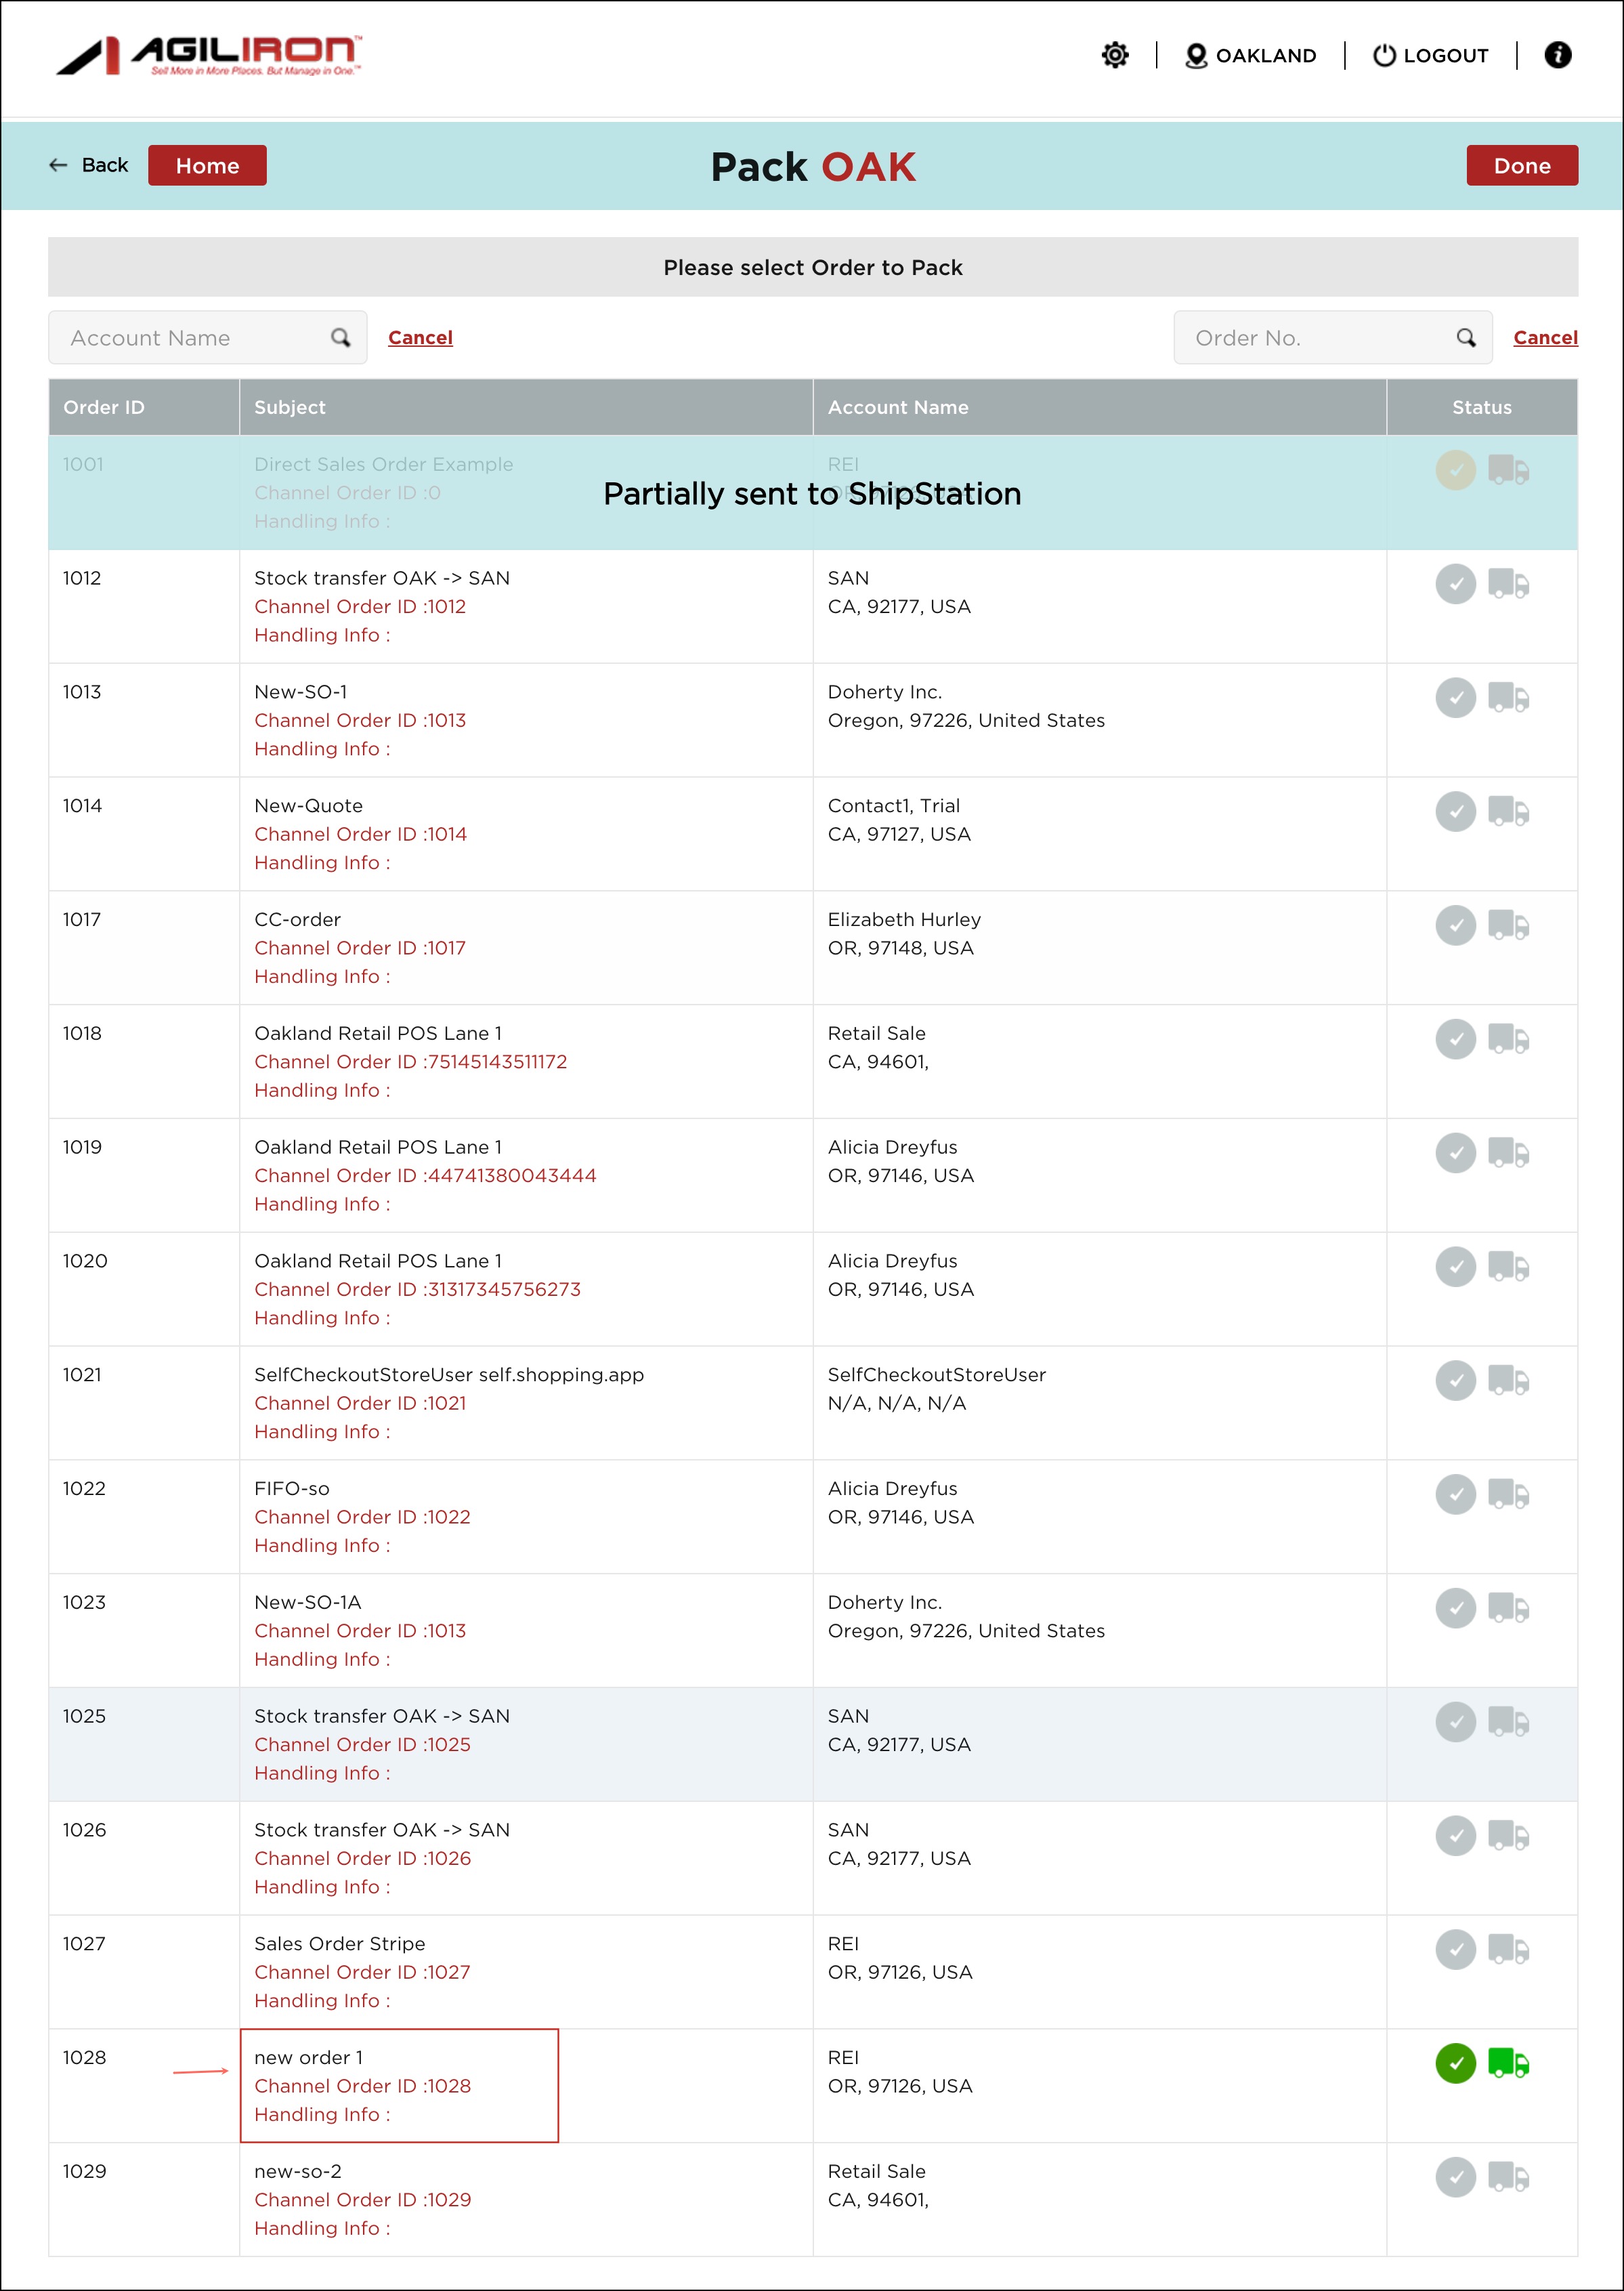
- To start the packing process, click the "Pack-Ship" button to view the orders.
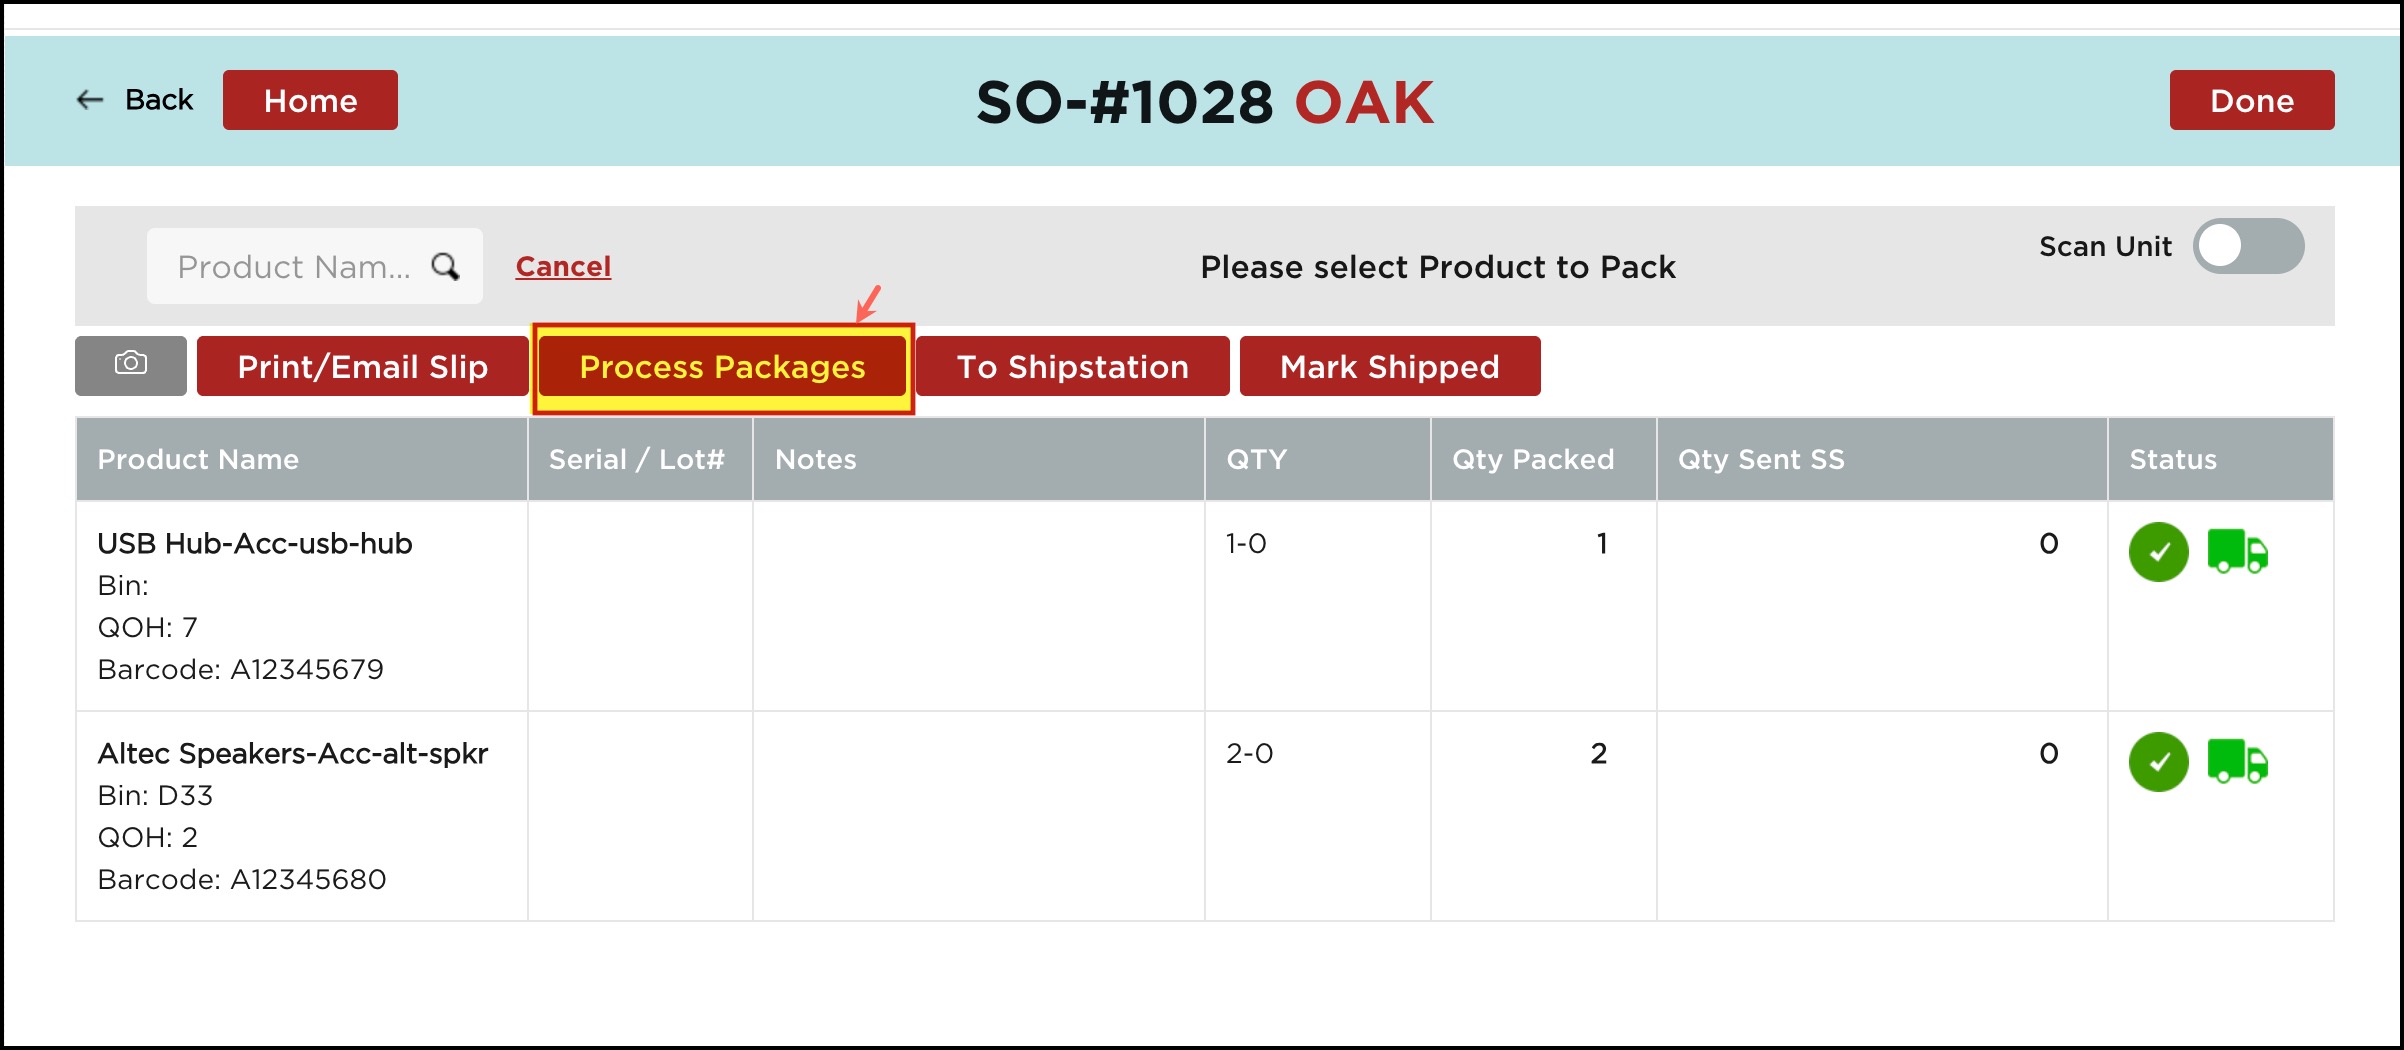
- The highlighted SO below is the one whose line items were picked. We've selected that order from the list.
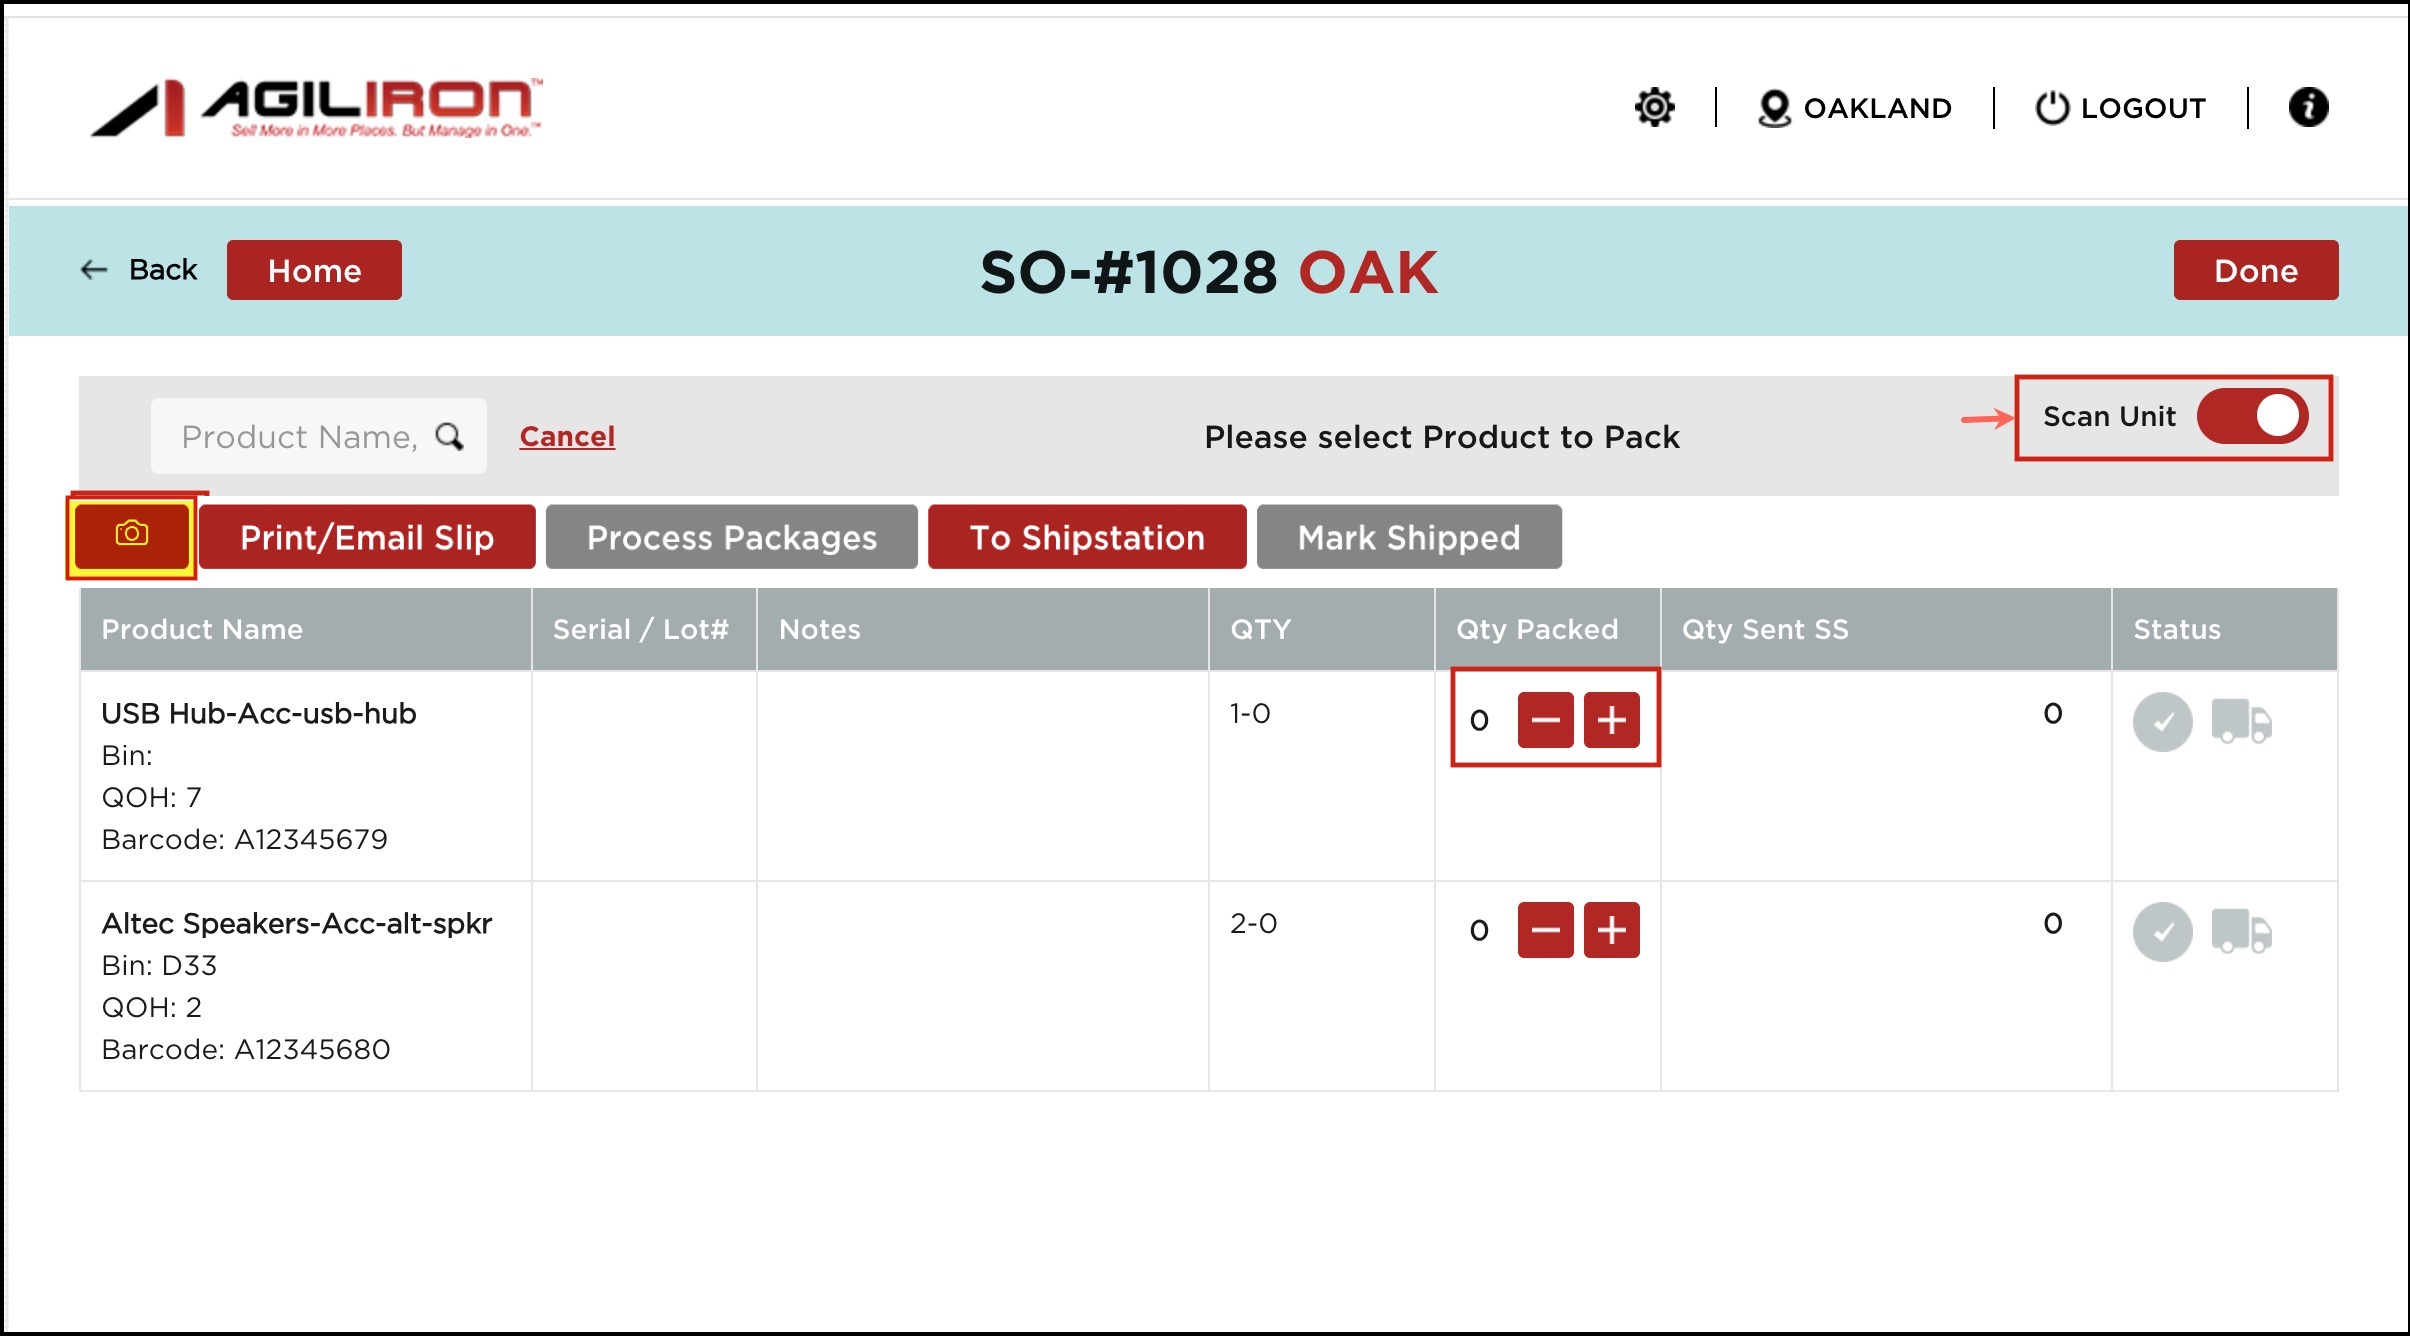
- For each product, you can view the bin locations, if added, and also the QOH (Quantity on Hand), which is the quantity in stock for that product if bin location quantity is enabled. QOH is based on the bin.
- If the Scan Unit is enabled, when you select any Product Id, you will see a '+', '-' under the Qty Picked column. It signifies that you can scan the product with a barcode scanner. As soon as you scan the product barcode, the quantity will increase by 1. You can increase or decrease the quantity with the respective + and - signs.
- You can also scan the product barcode using your device camera. Just click on the camera icon and scan the barcode.
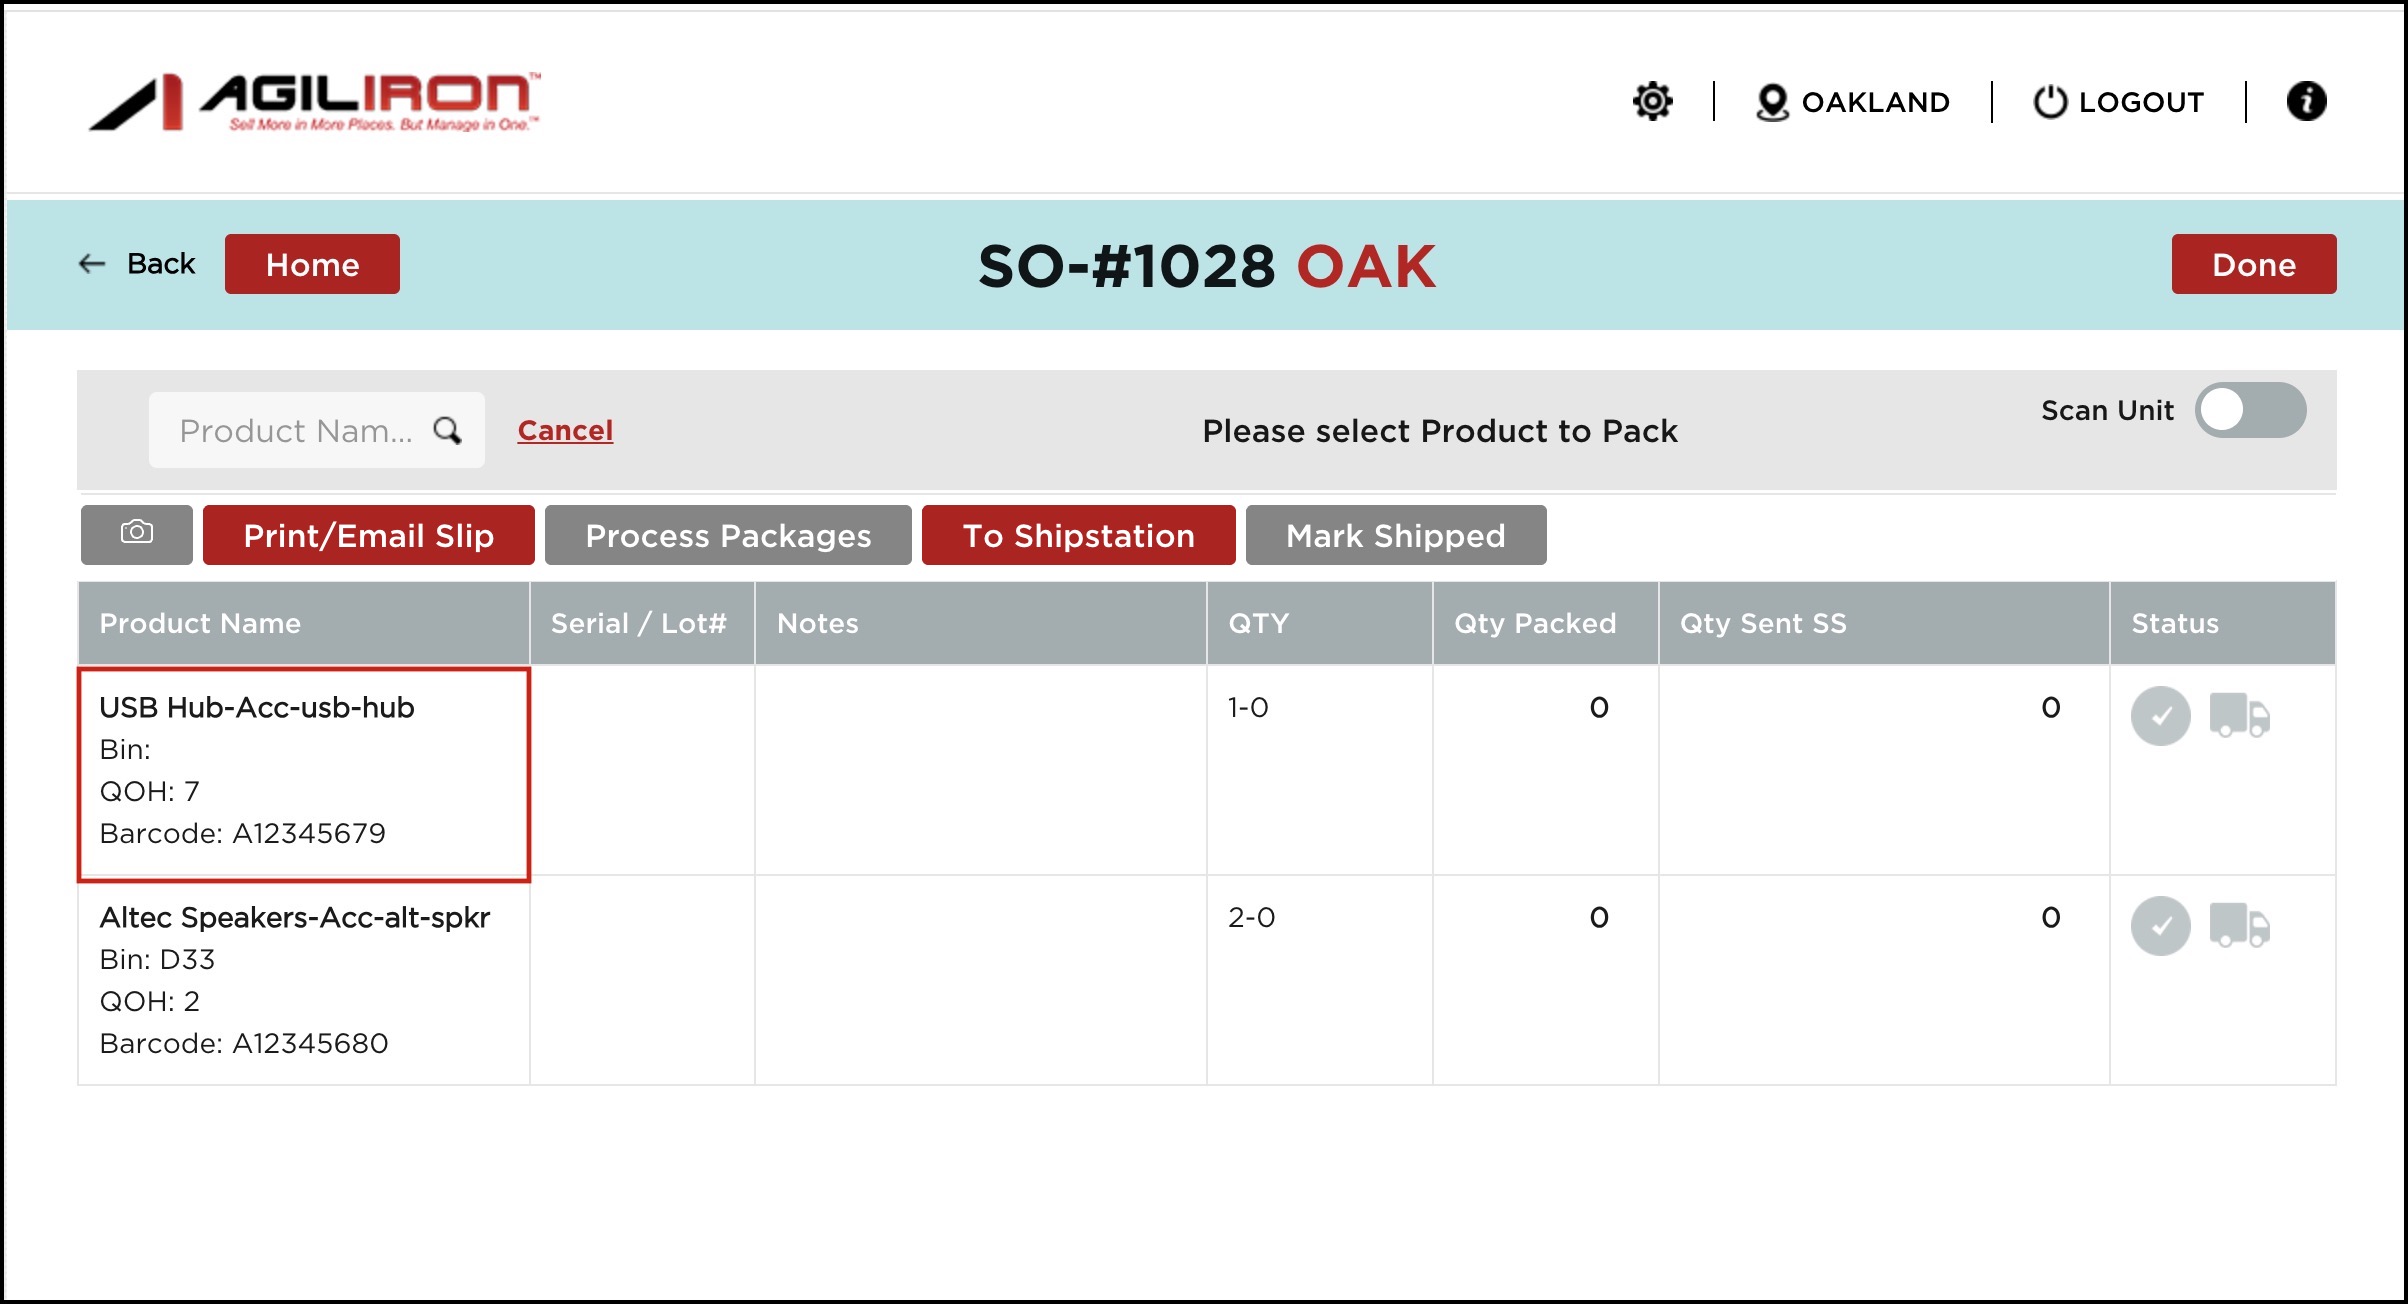
- Select a line item from the list to begin the packaging process. (Here the Scan Unit is disabled).
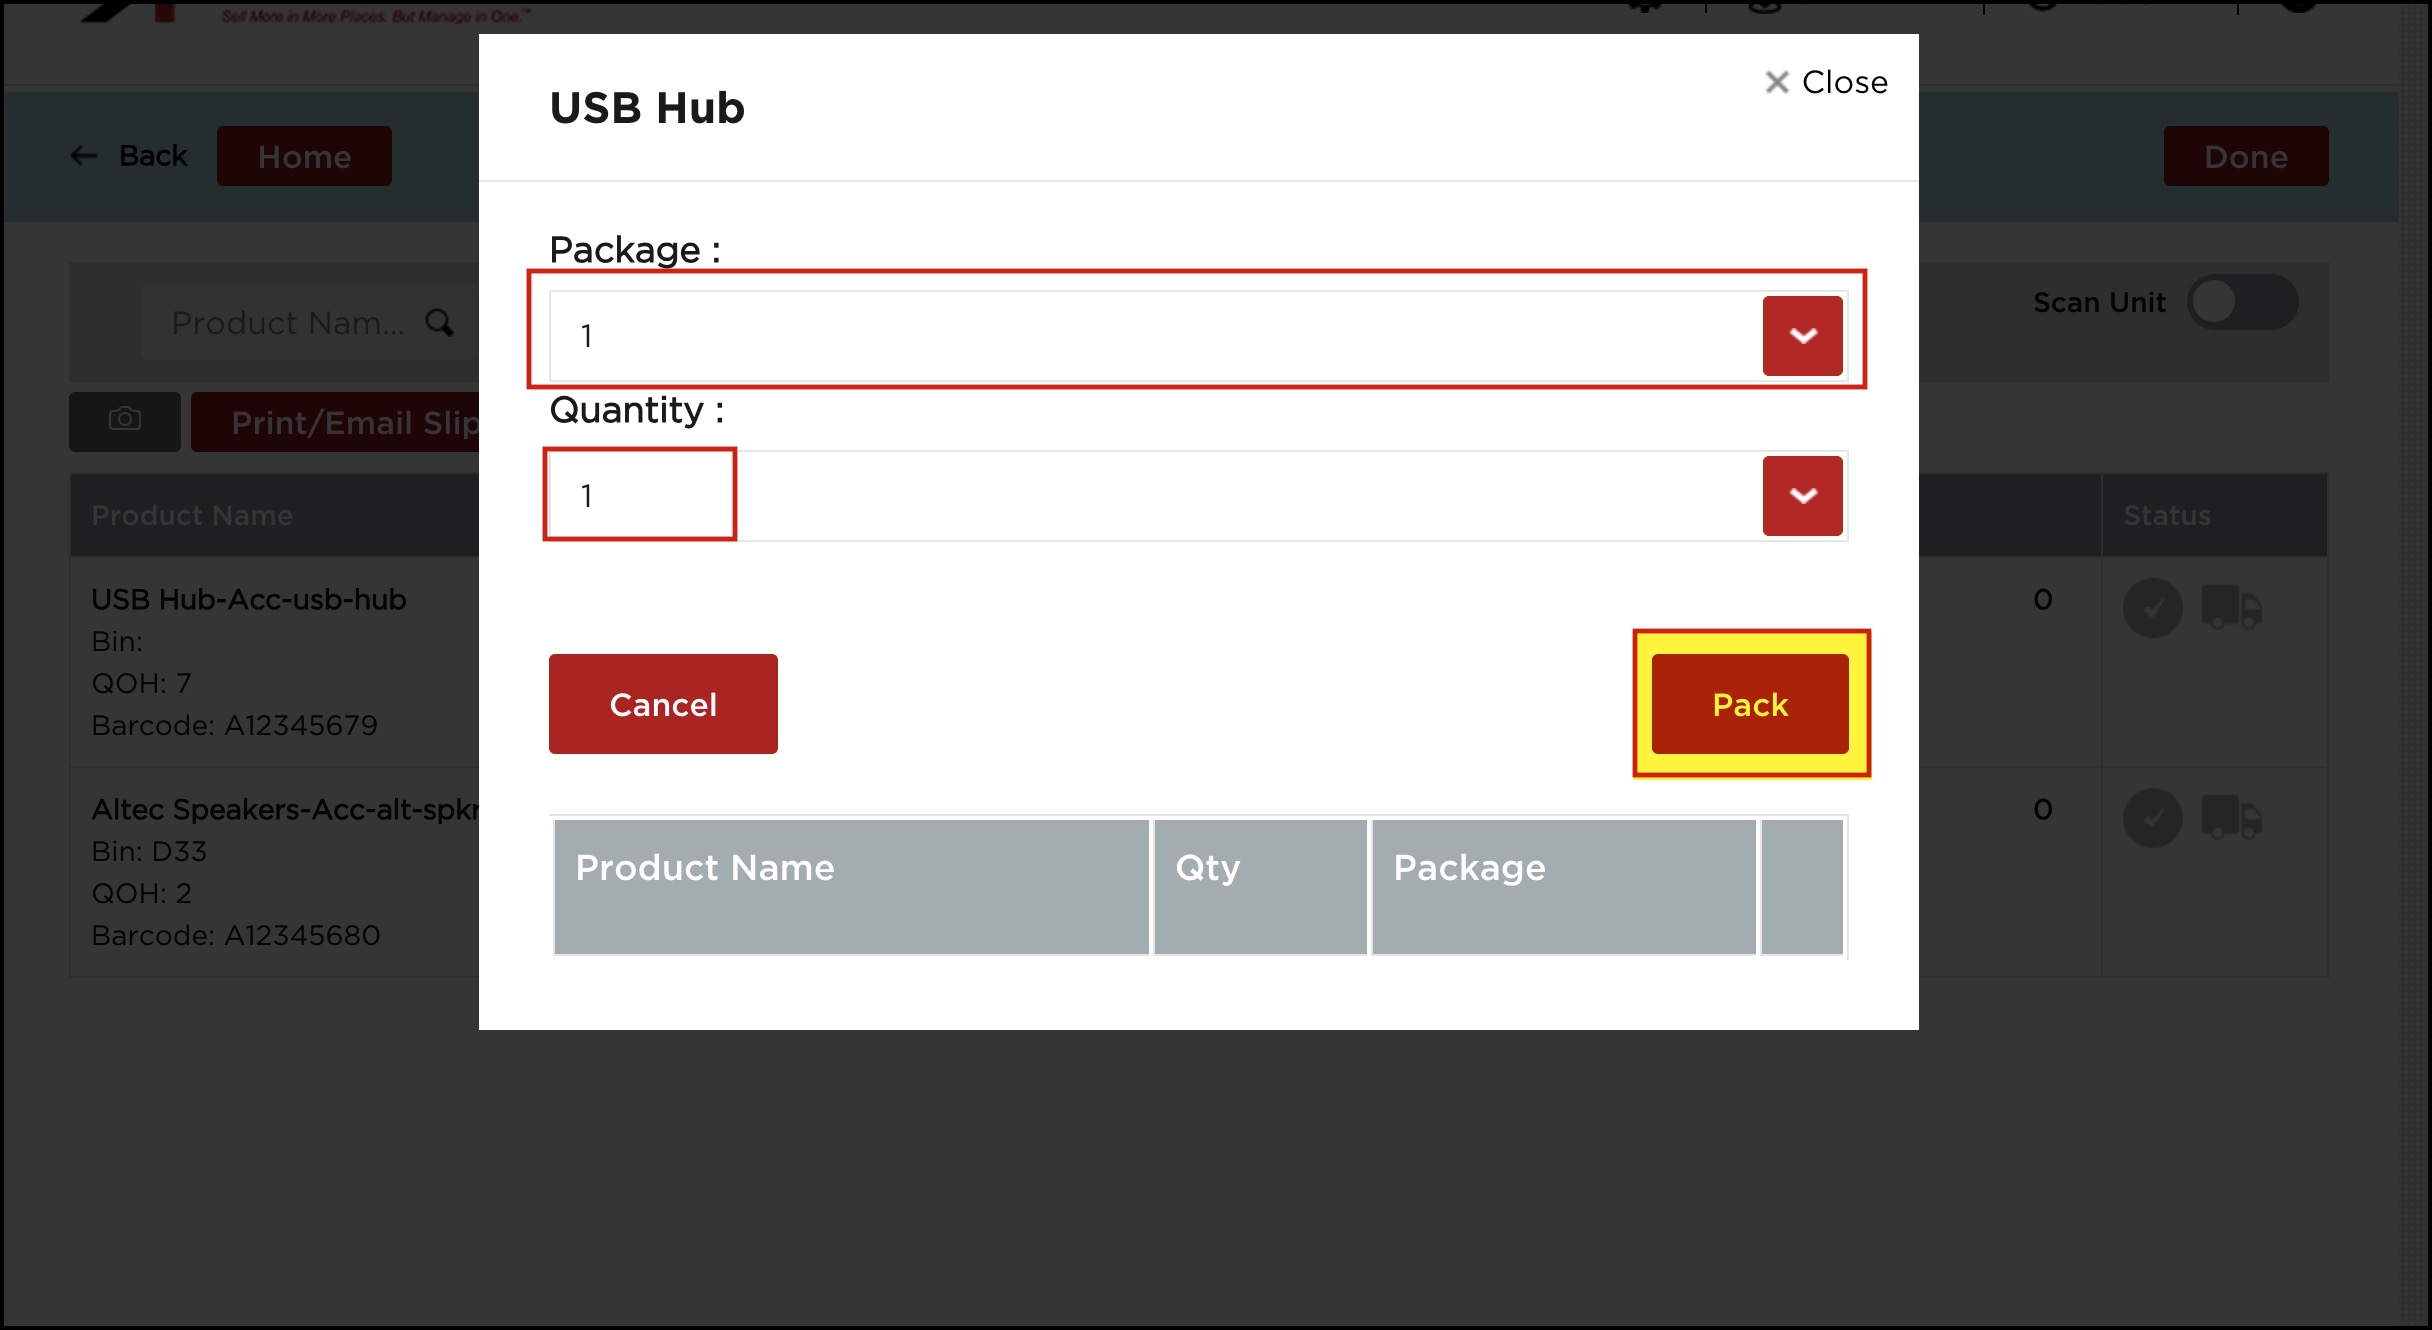
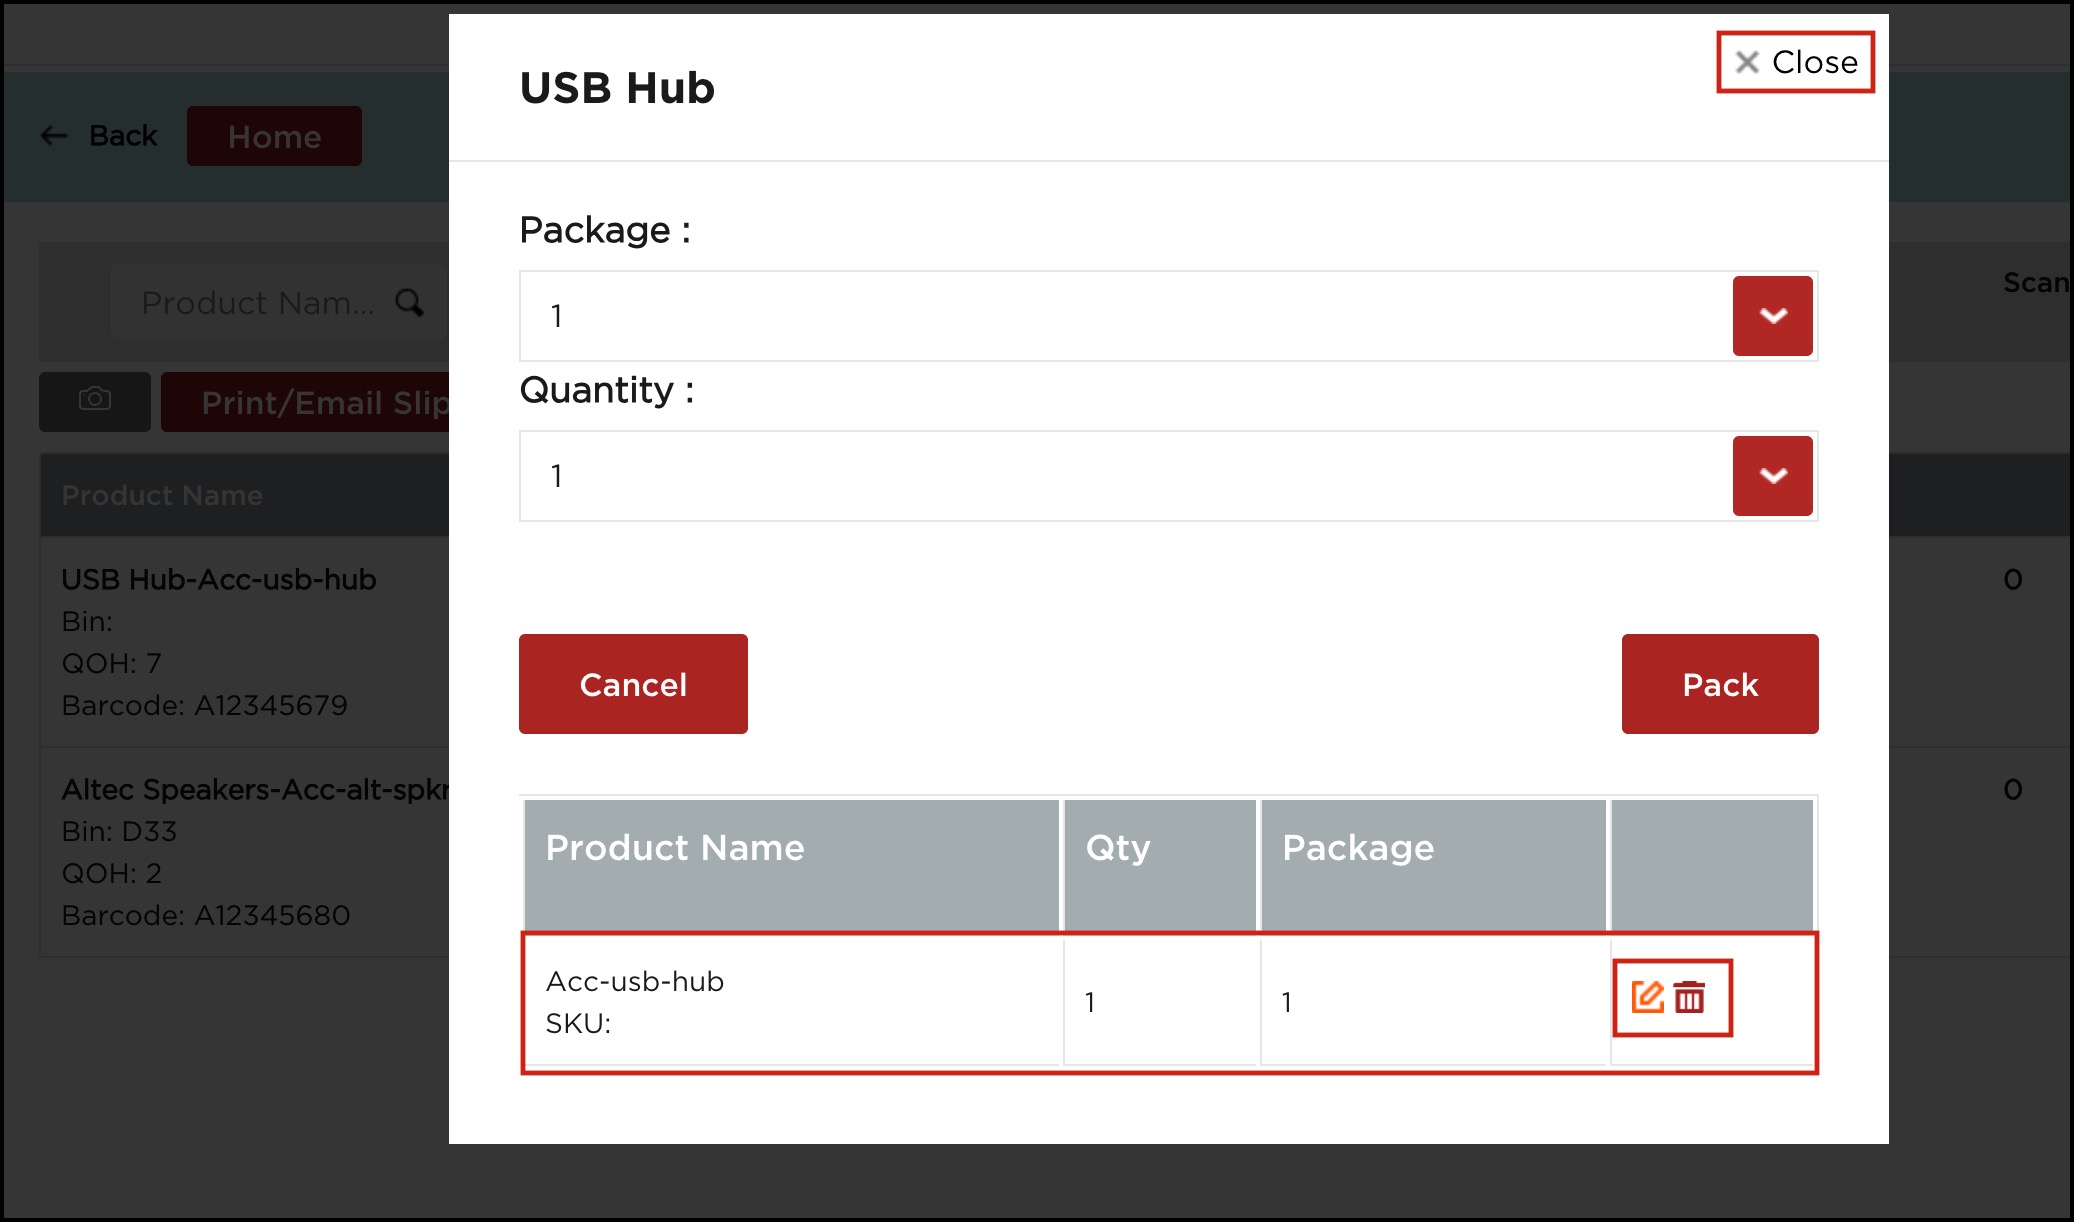
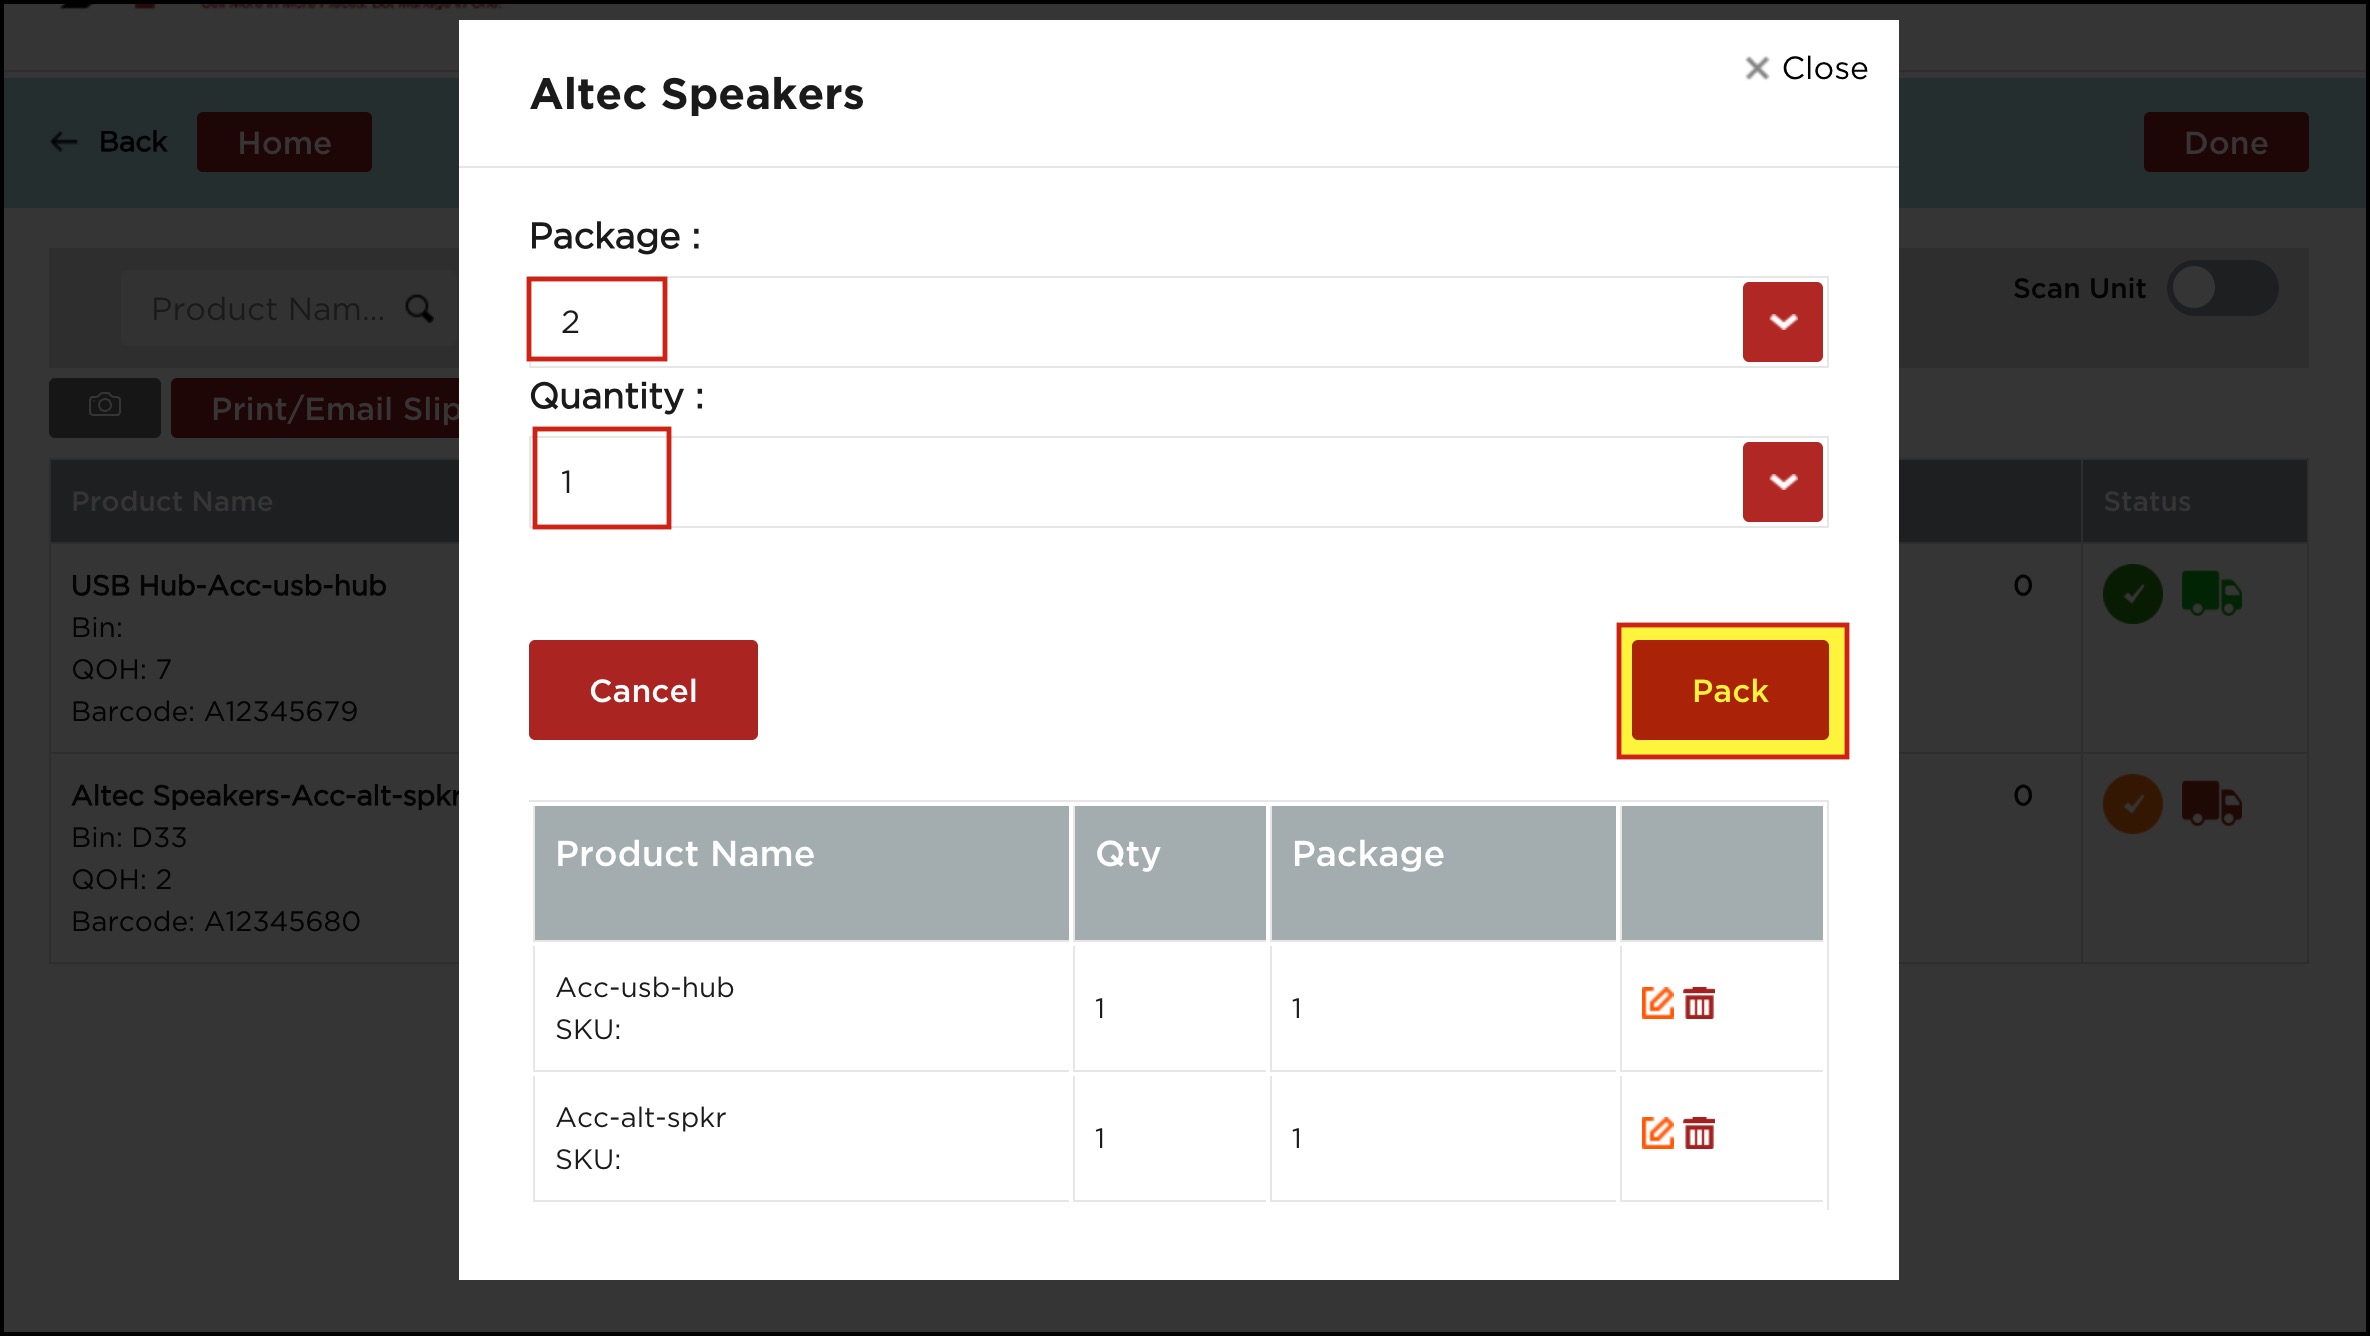
- A pop-up screen will appear where you need to enter the Package and quantity to be packed.
- Once done, click on the Pack button.

- You can see the details in the next screen. Here, you can edit or delete the package if you want.
- Close the window if done.
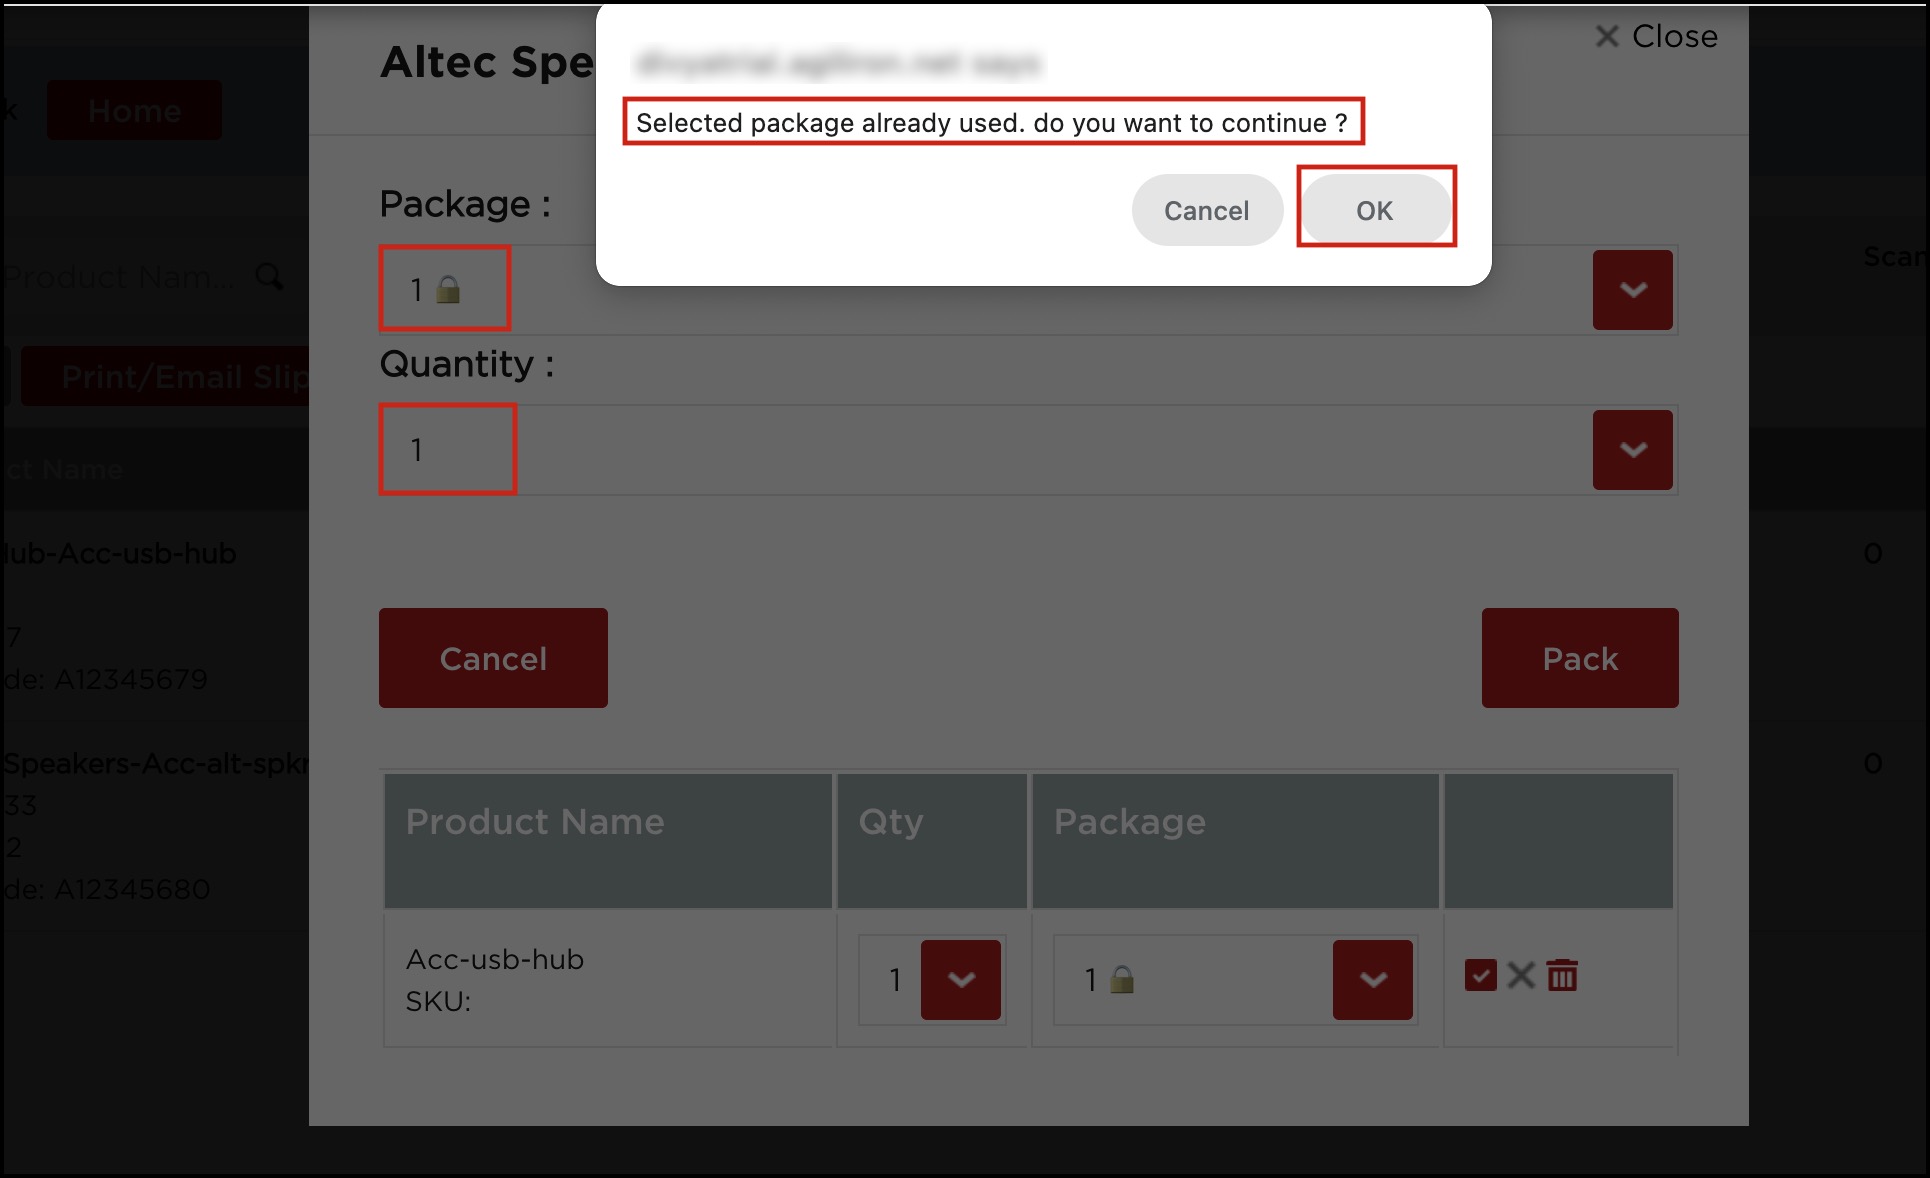
- As an example, let's pack the other line item as well.
- We can pack the line item quantity in the same package in which the previous line item was added, that is, Package 1.
- Since Package 1 is already used, you can see a lock symbol next to it, and you'll see a message asking if you want to continue with that package. Click OK.
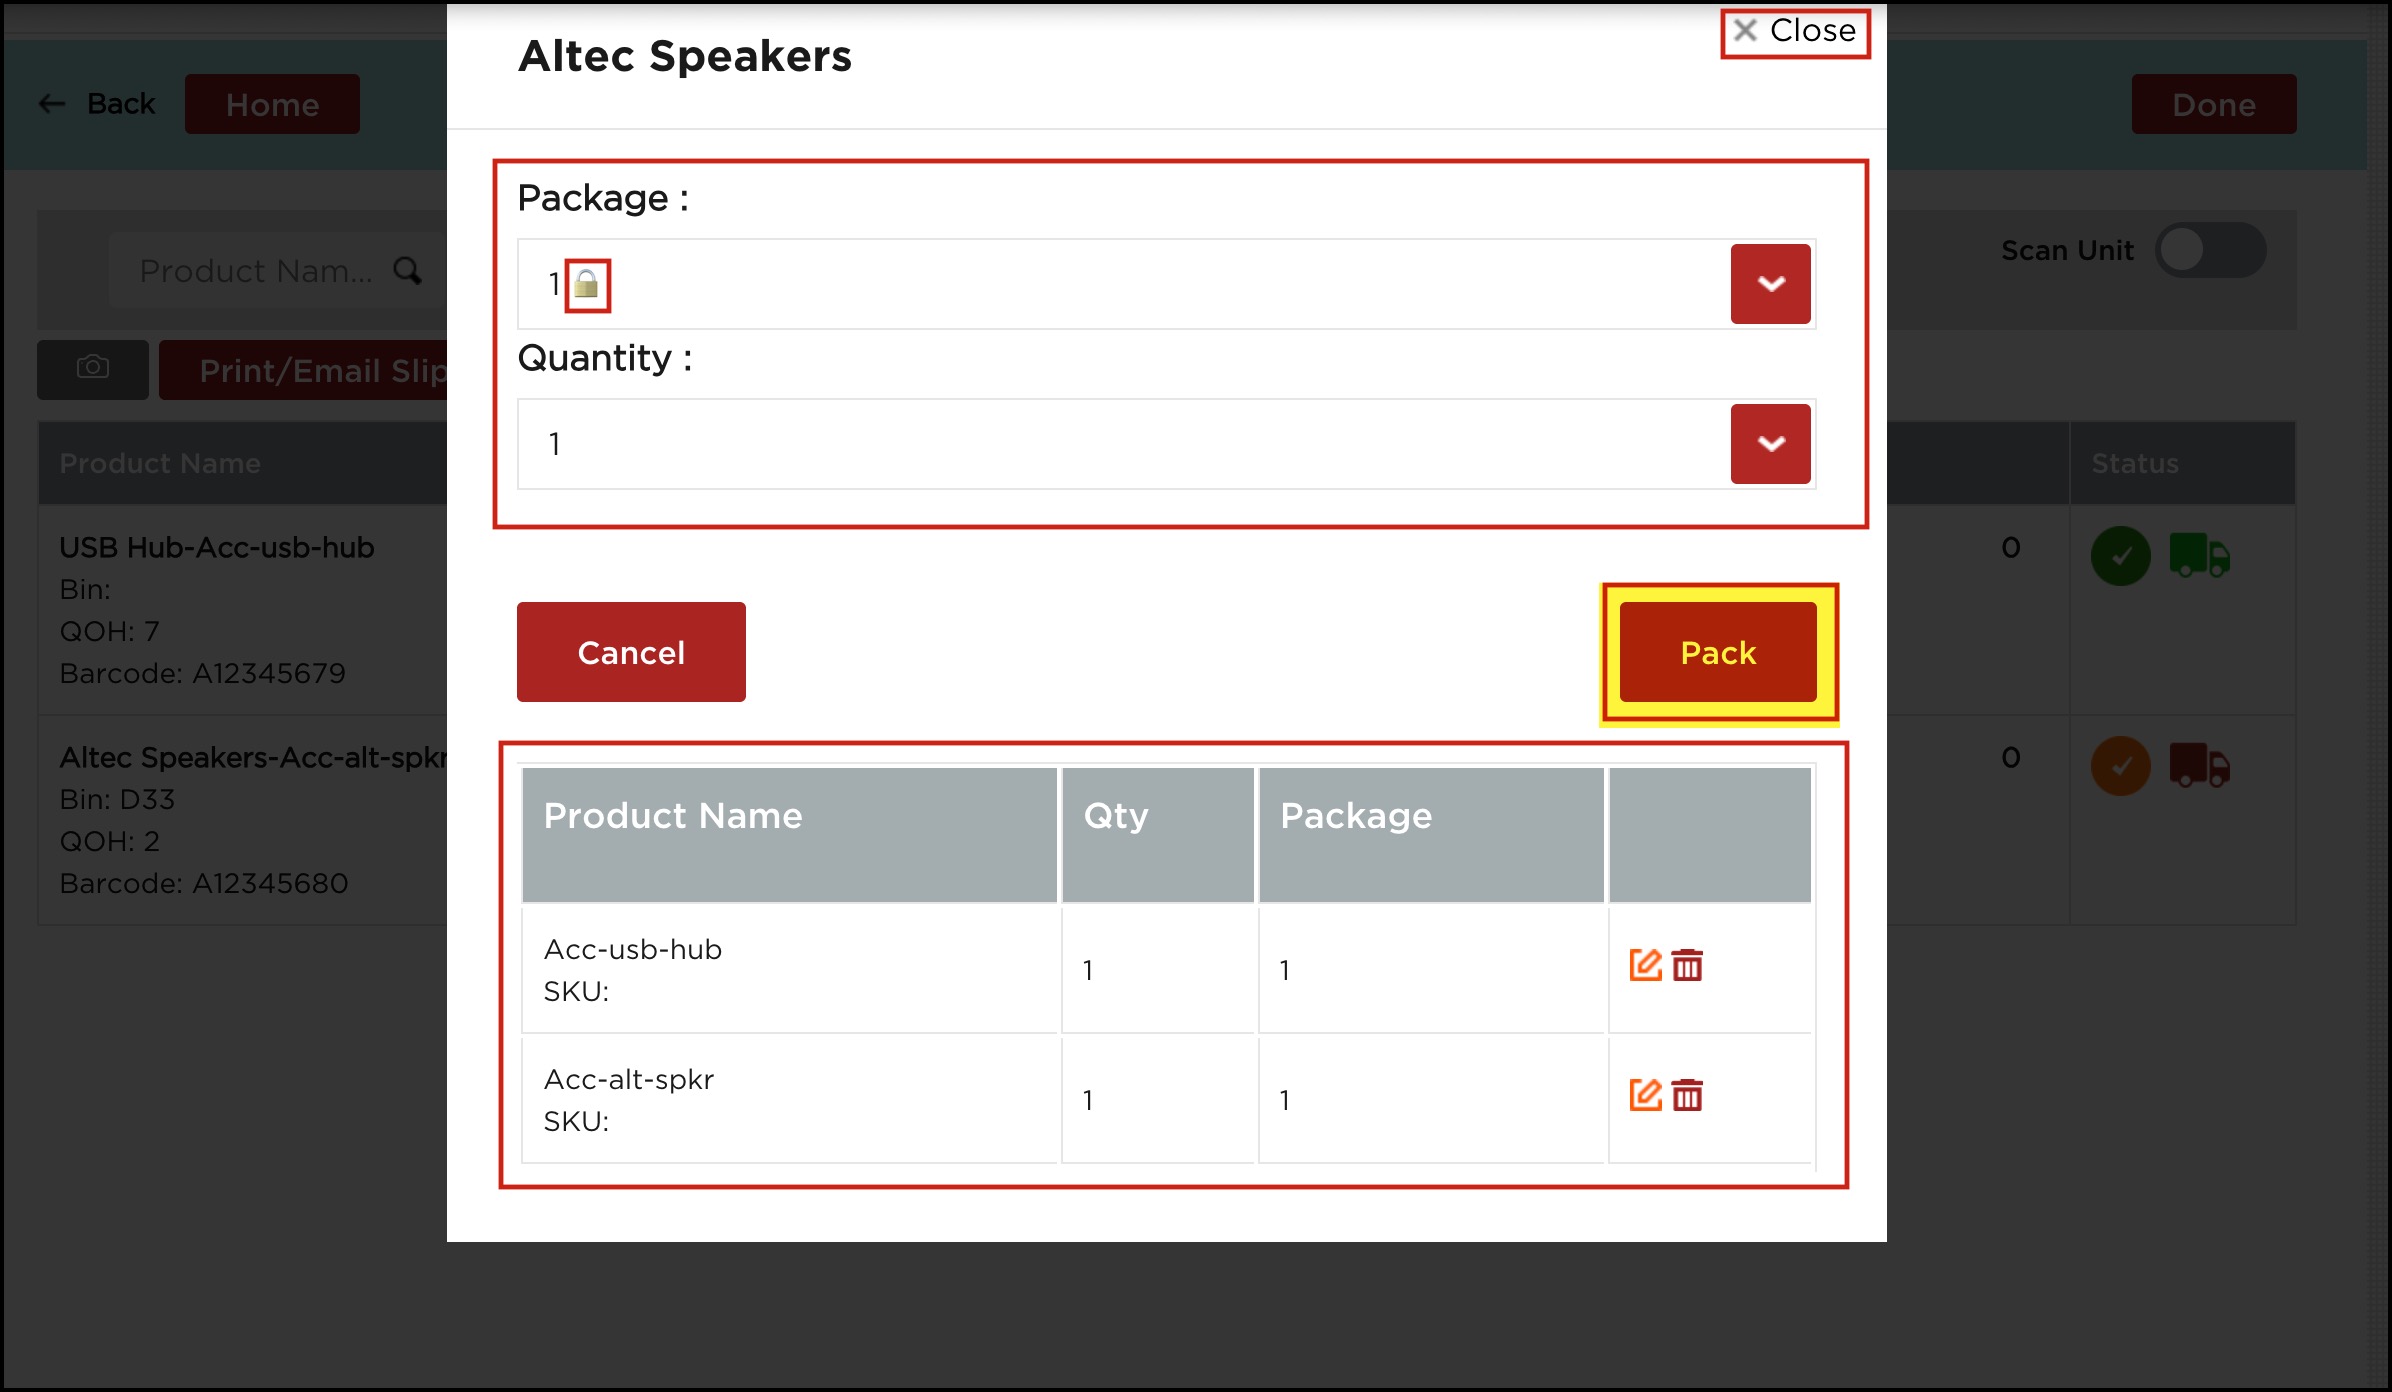
- Click Pack and close the window once done.
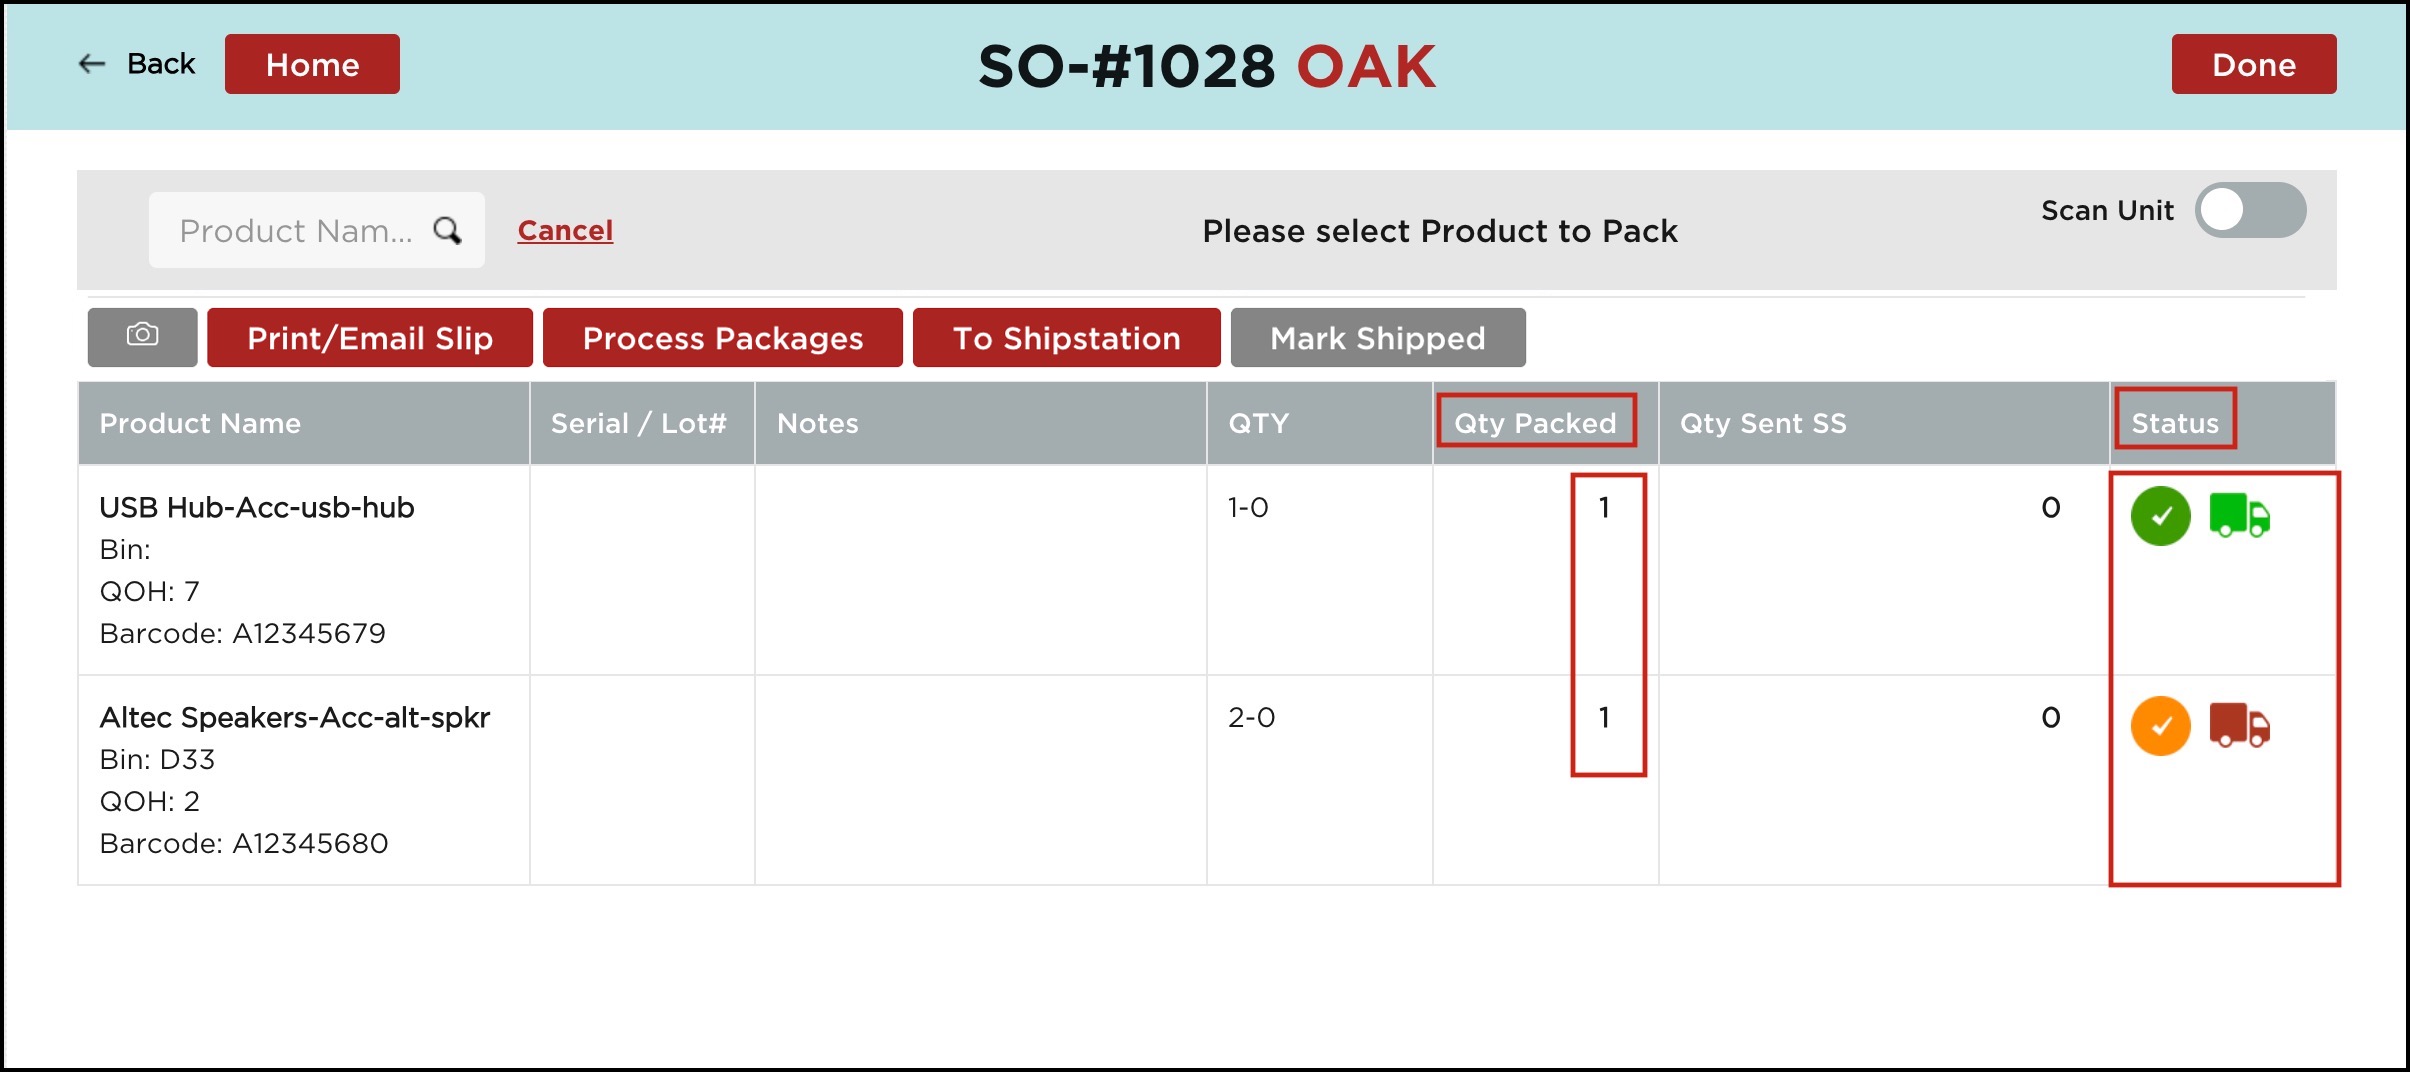
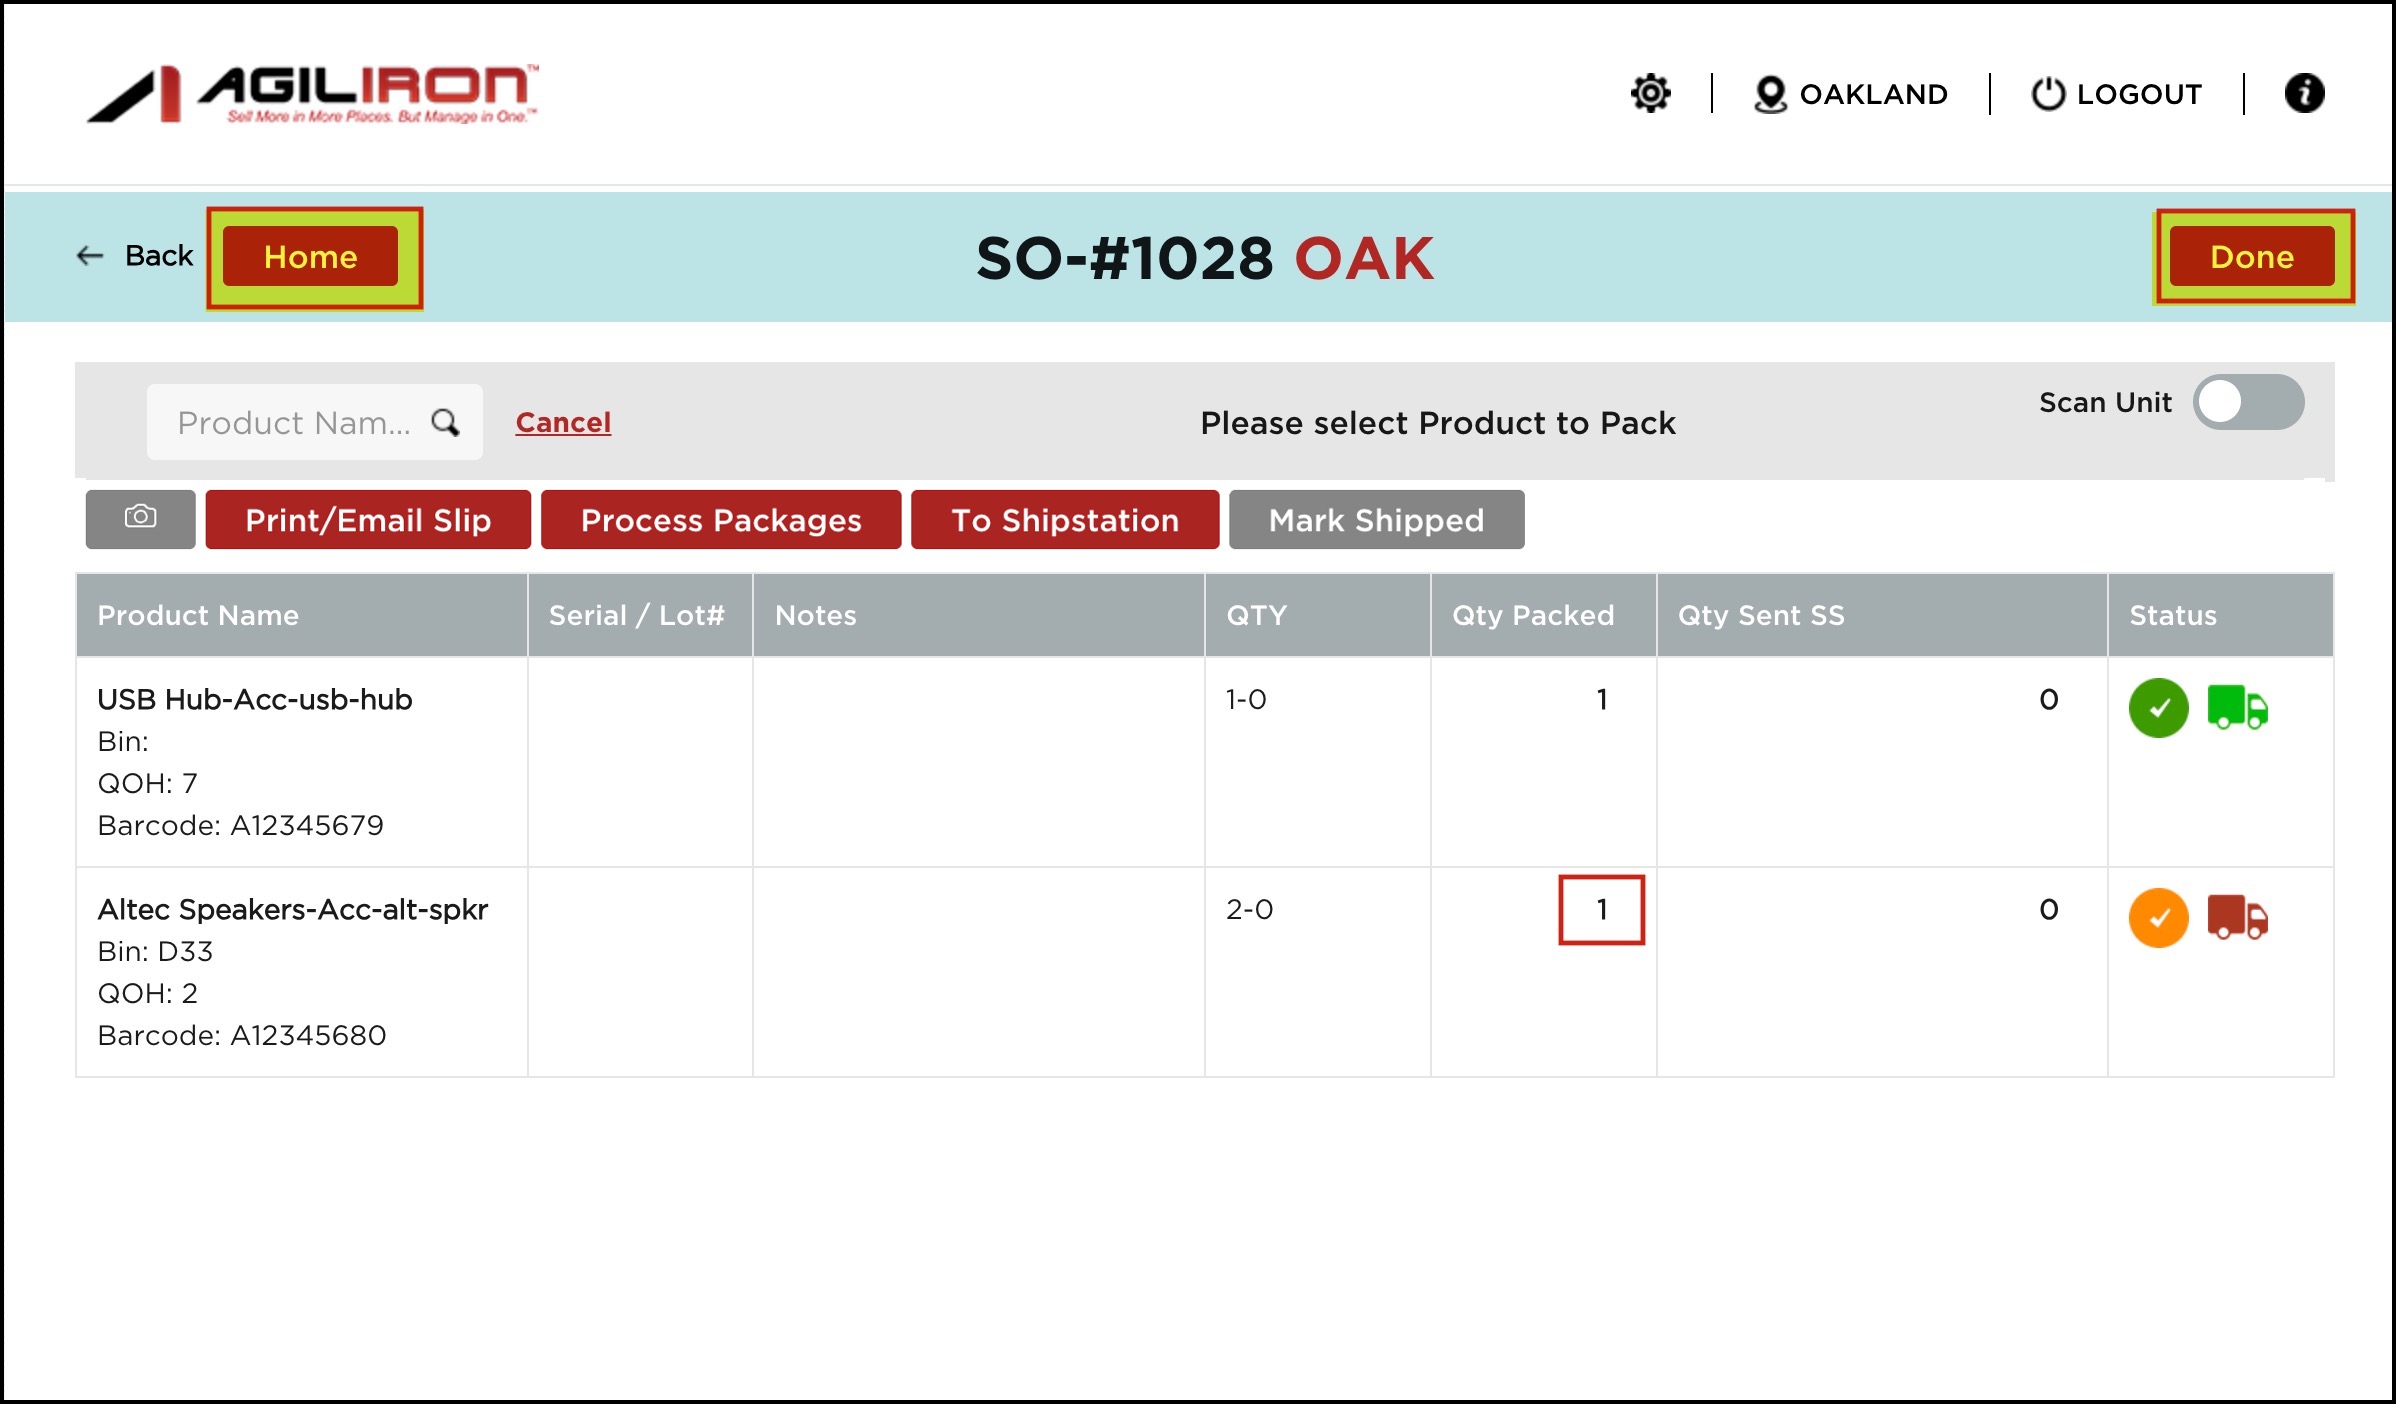
Here you can see package details like quantity packed and Status. Since the 1st line item, all the quantities are packed, the status is Green, whereas the 2nd line item is partially packed so the status appears Orange.
- Now, out of the remaining quantities, we are adding Quantity 1 in a new package created which is Package 2.
Click on Pack.
In the next screen, you can see details related to both packages.

After the packaging process, click on the Process Packages button.
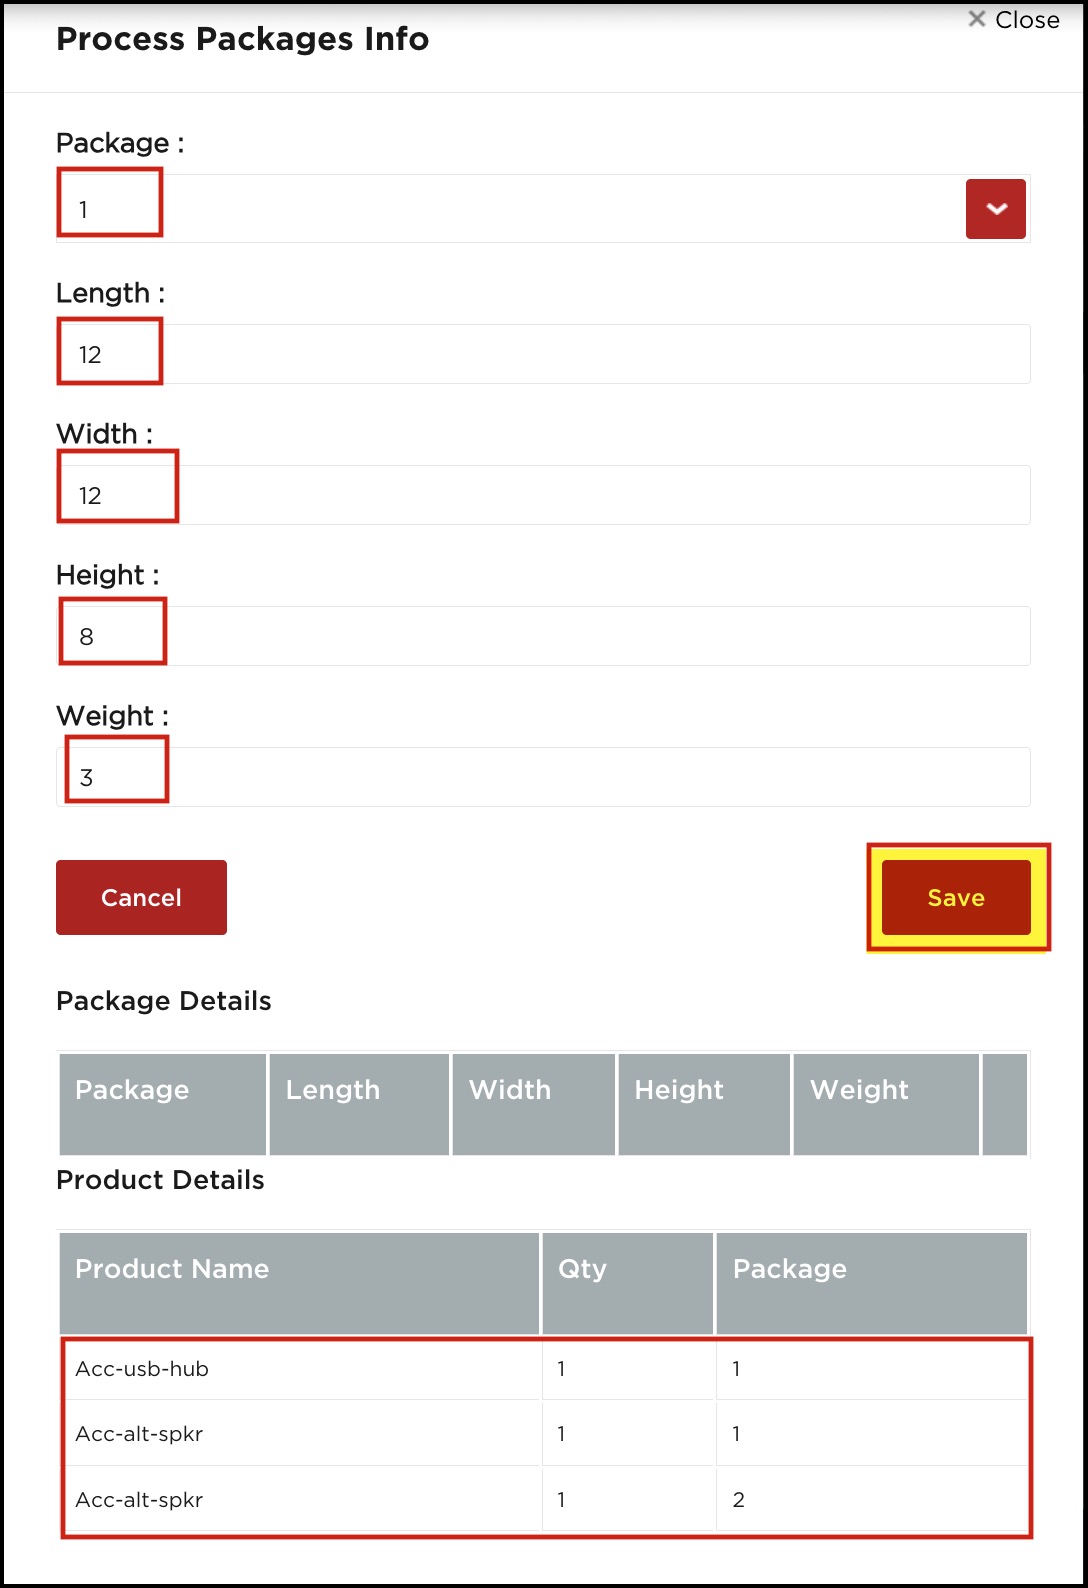
Here you can set the Dimensions and Weight for respective packages.
- Let's set package details for both packages.
- Once done, click on Save.
- You can edit/delete the package details.
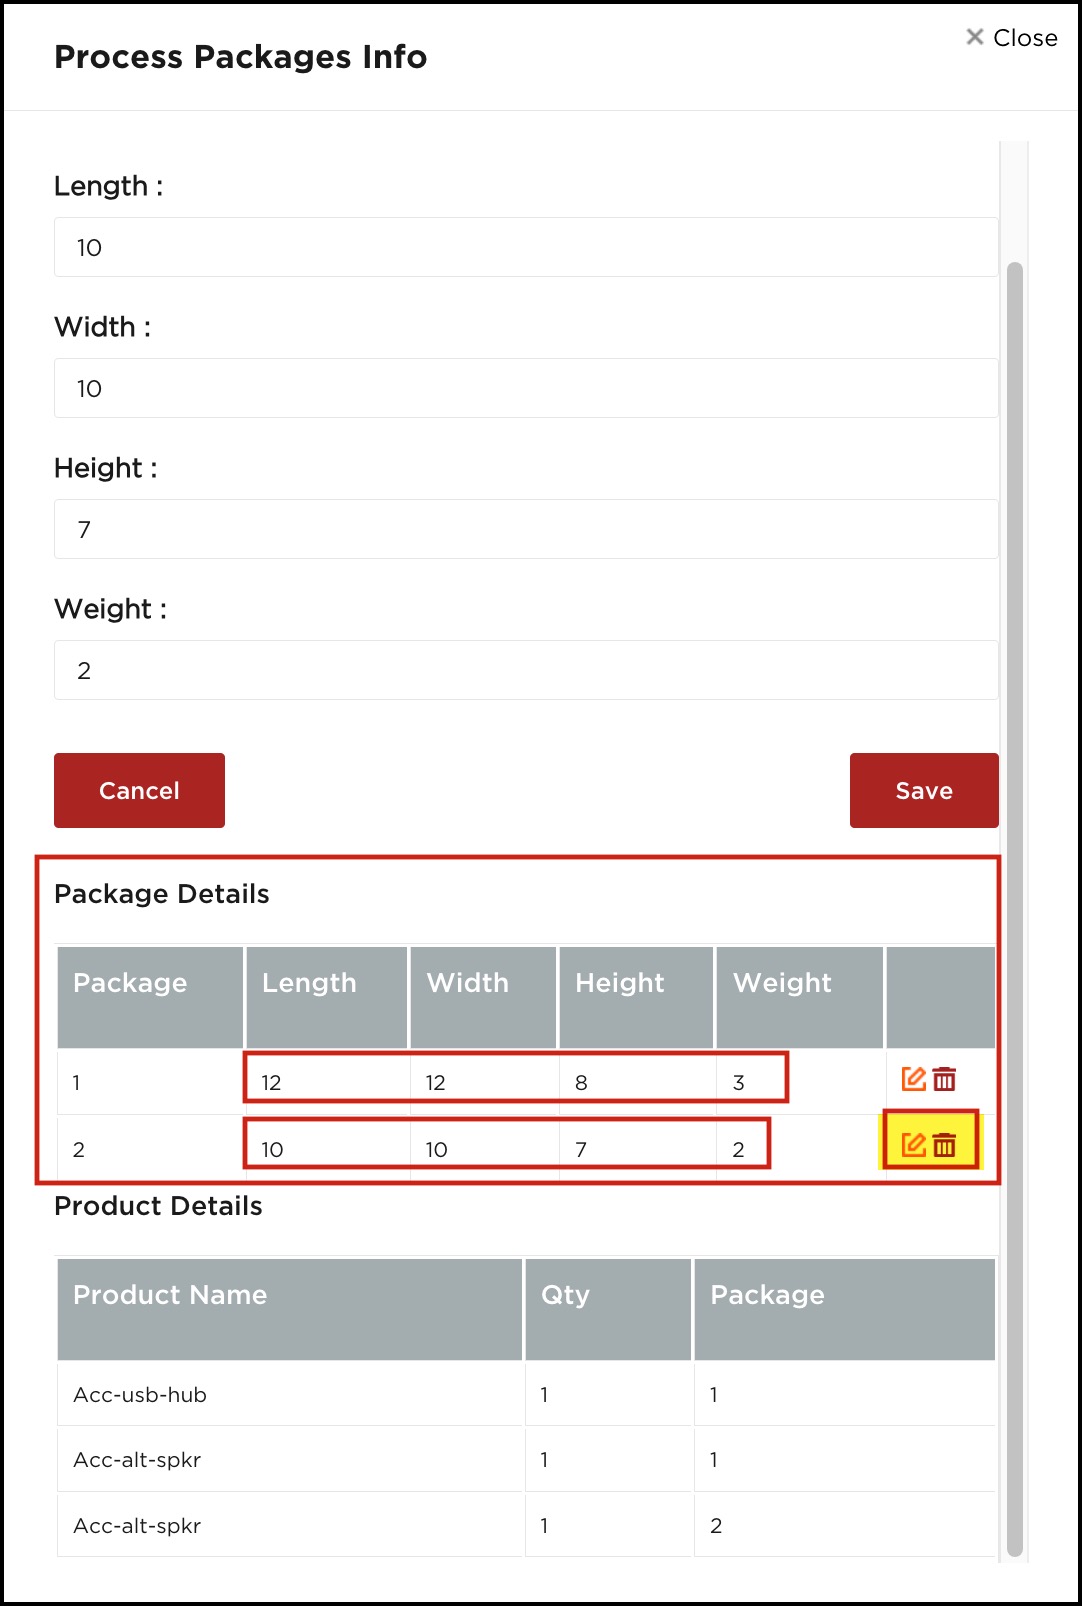
- If you want to delete a particular line item/line items from the package, click on the Line Item.

- Click on the Delete icon next to the line item you want to delete.
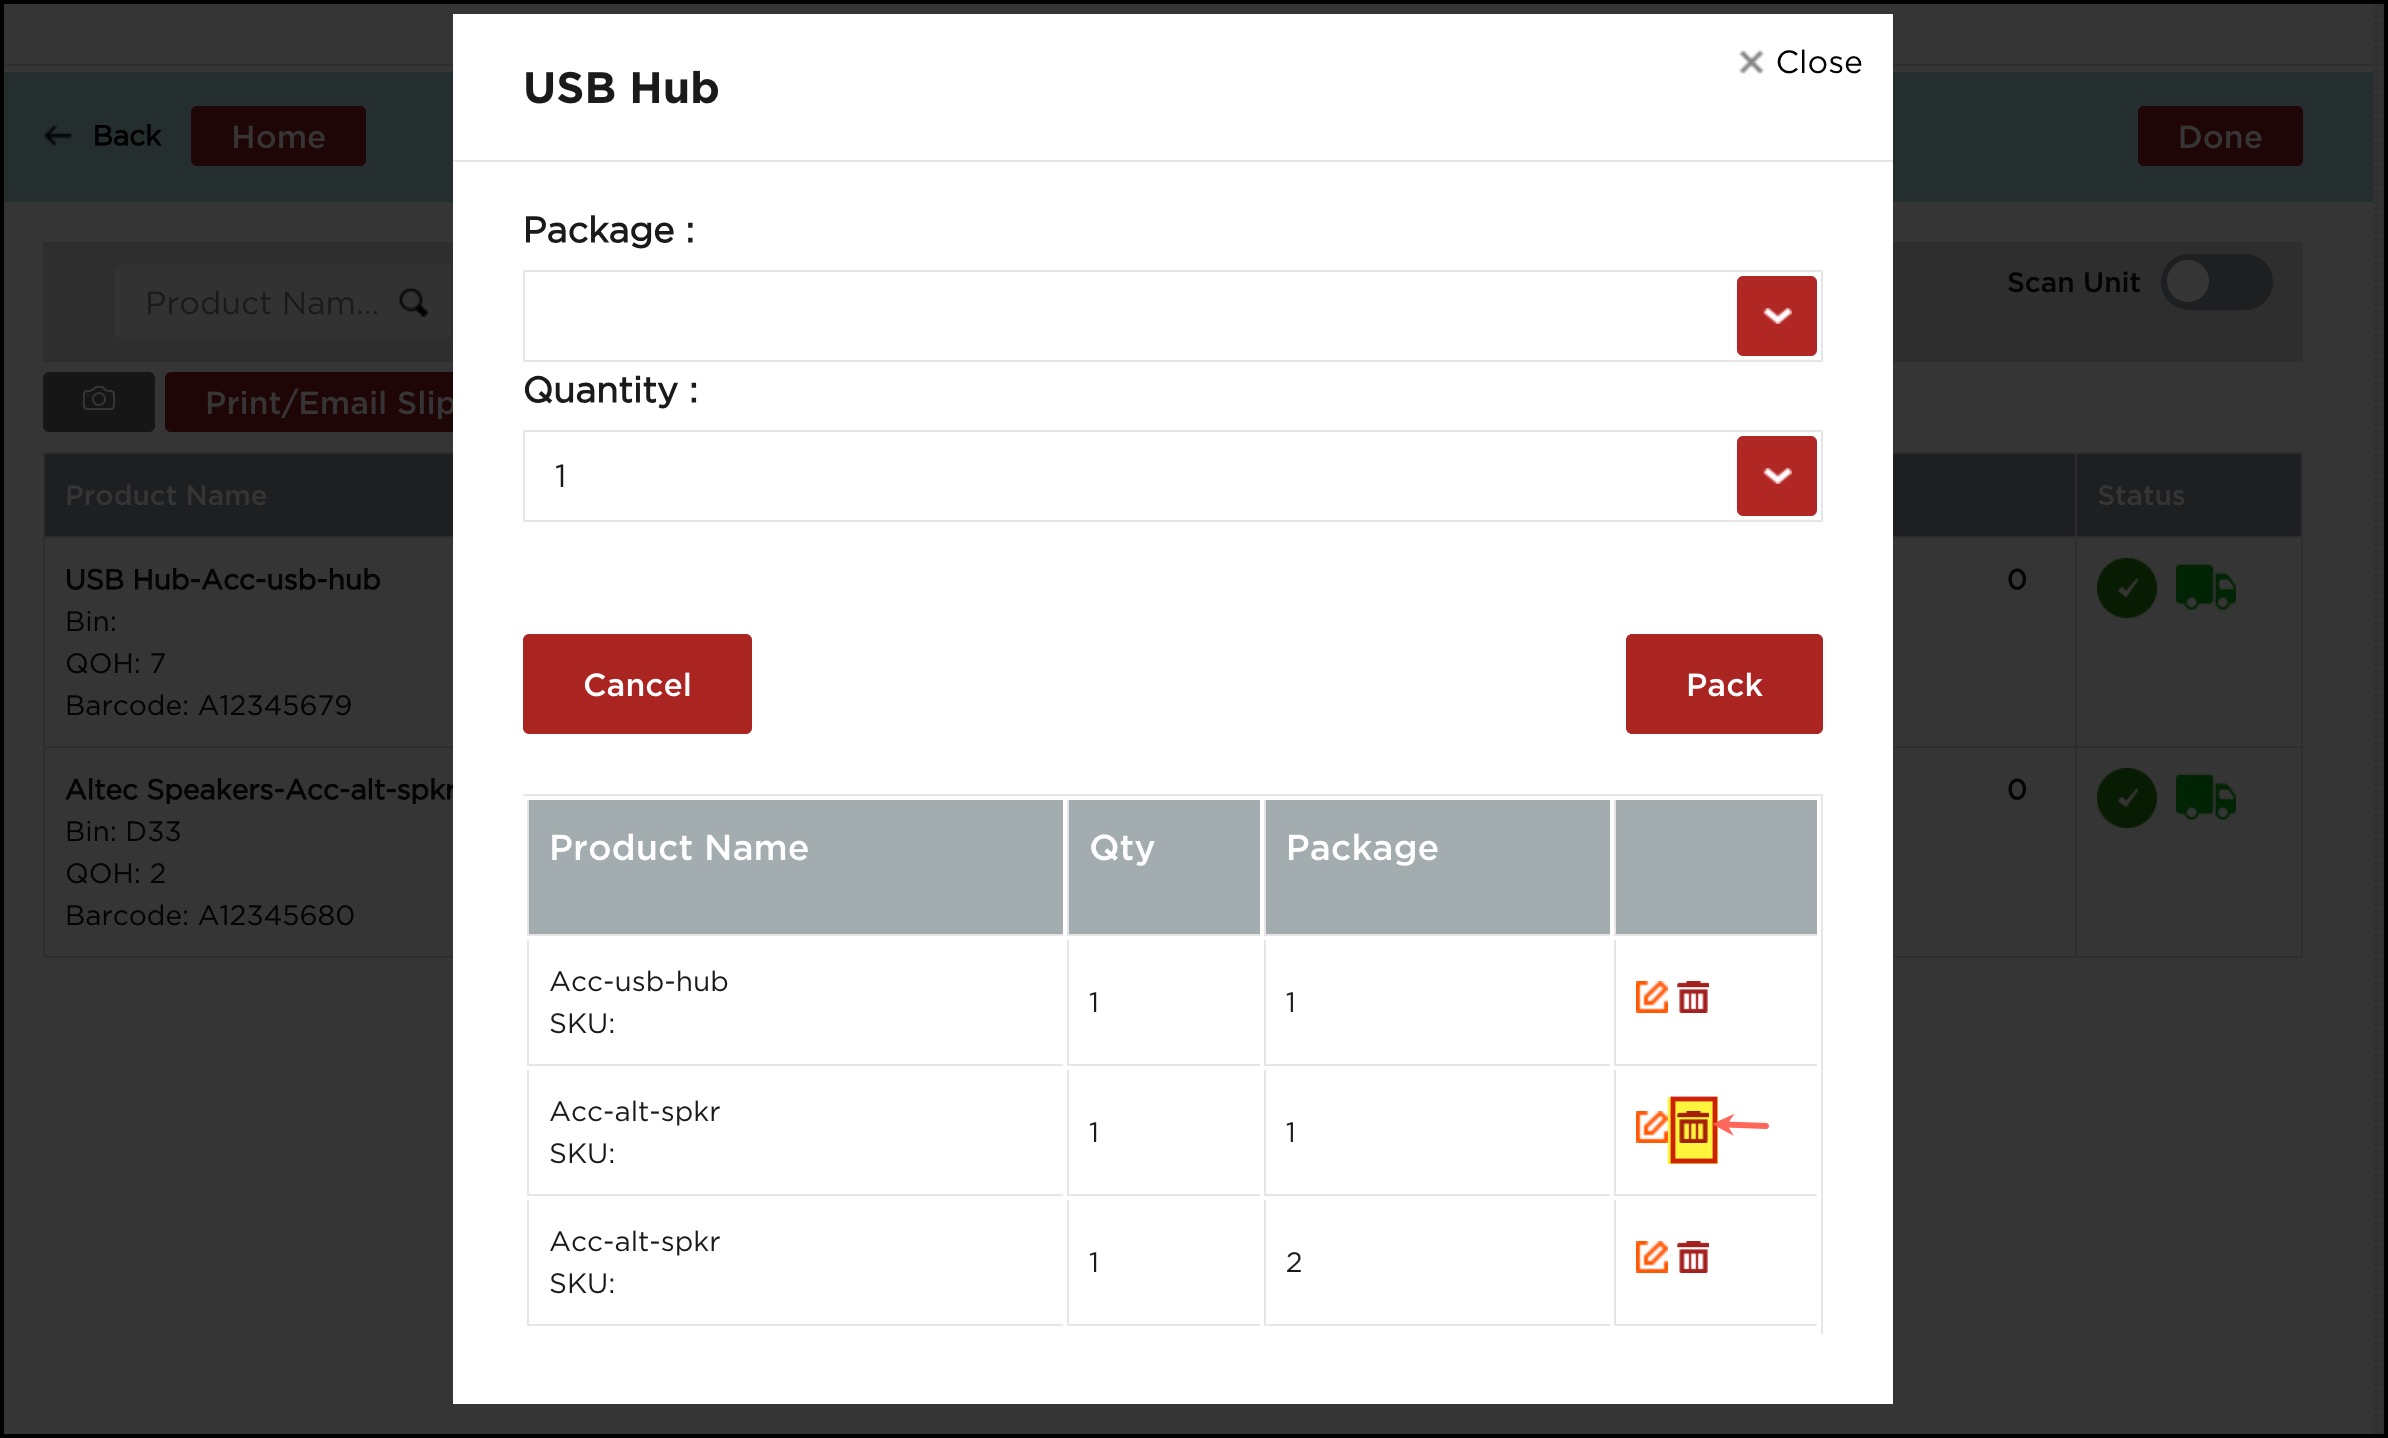
You can see the quantity packed has changed from 2 to 1.
- Click on Done or directly click on the Home page.
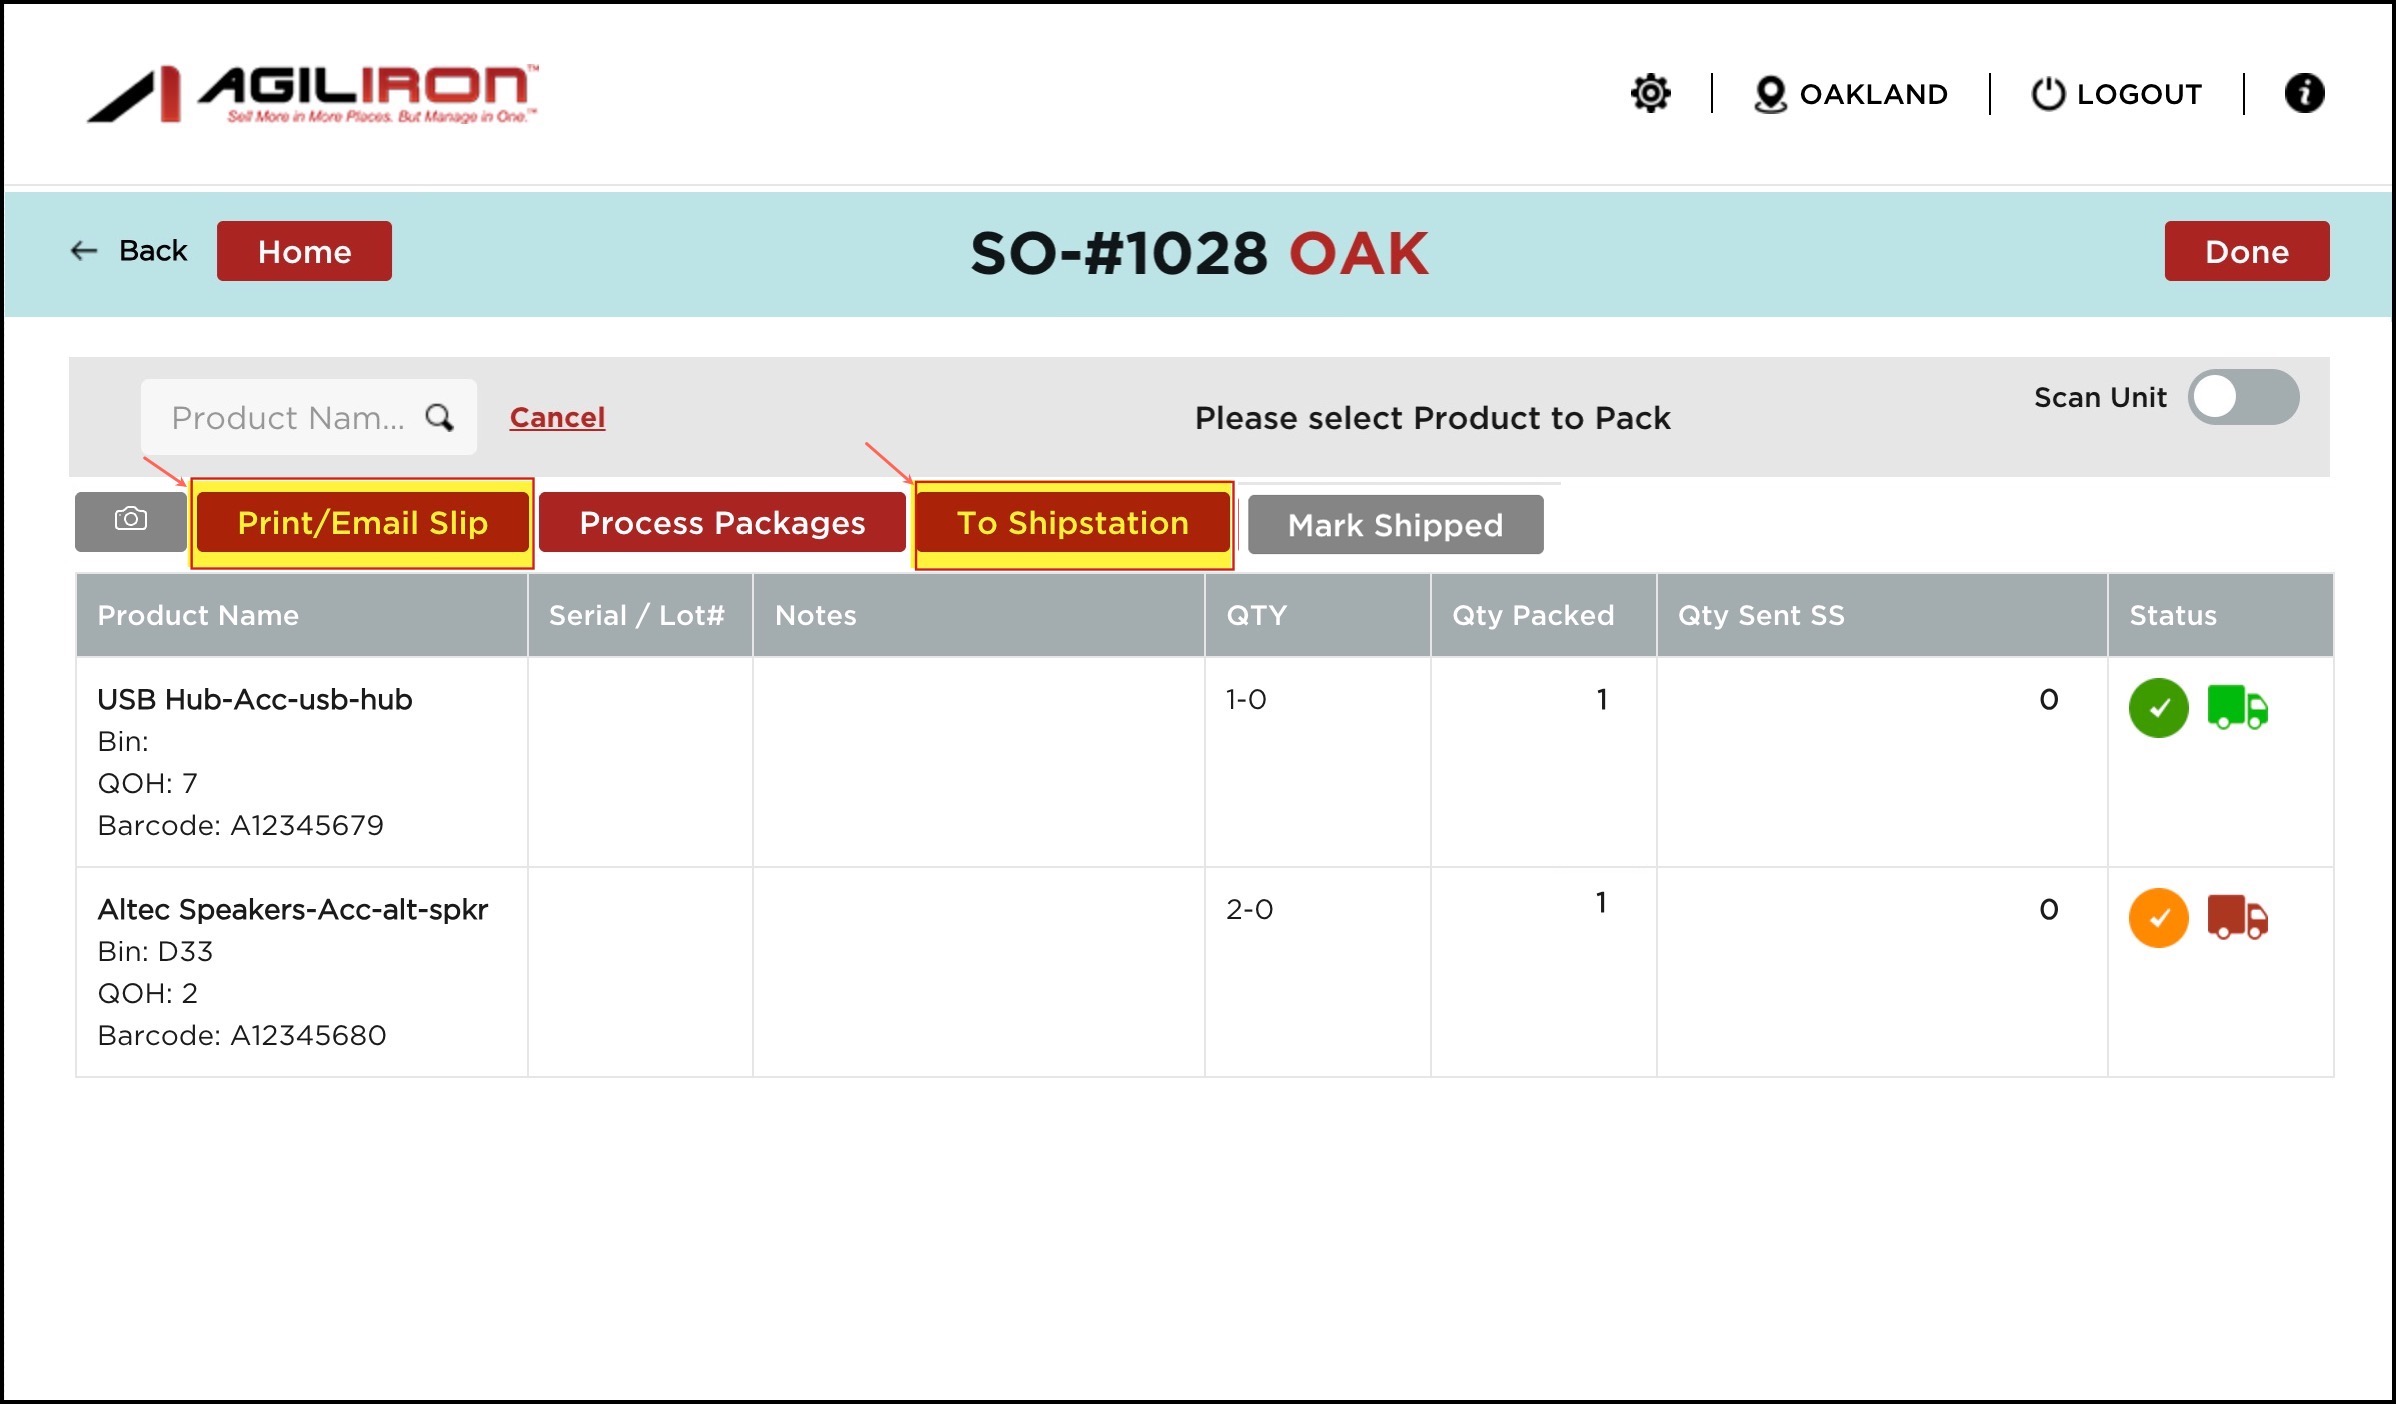
- To print or email the Packing Slip, select the Print/Email Slip button.
- The Packing Slip template is picked up from "Settings > Templates" in the back office.
- To send the order to ShipStation, select the "To ShipStation" button.
- This option sends the order to ShipStation to create/print shipping labels.
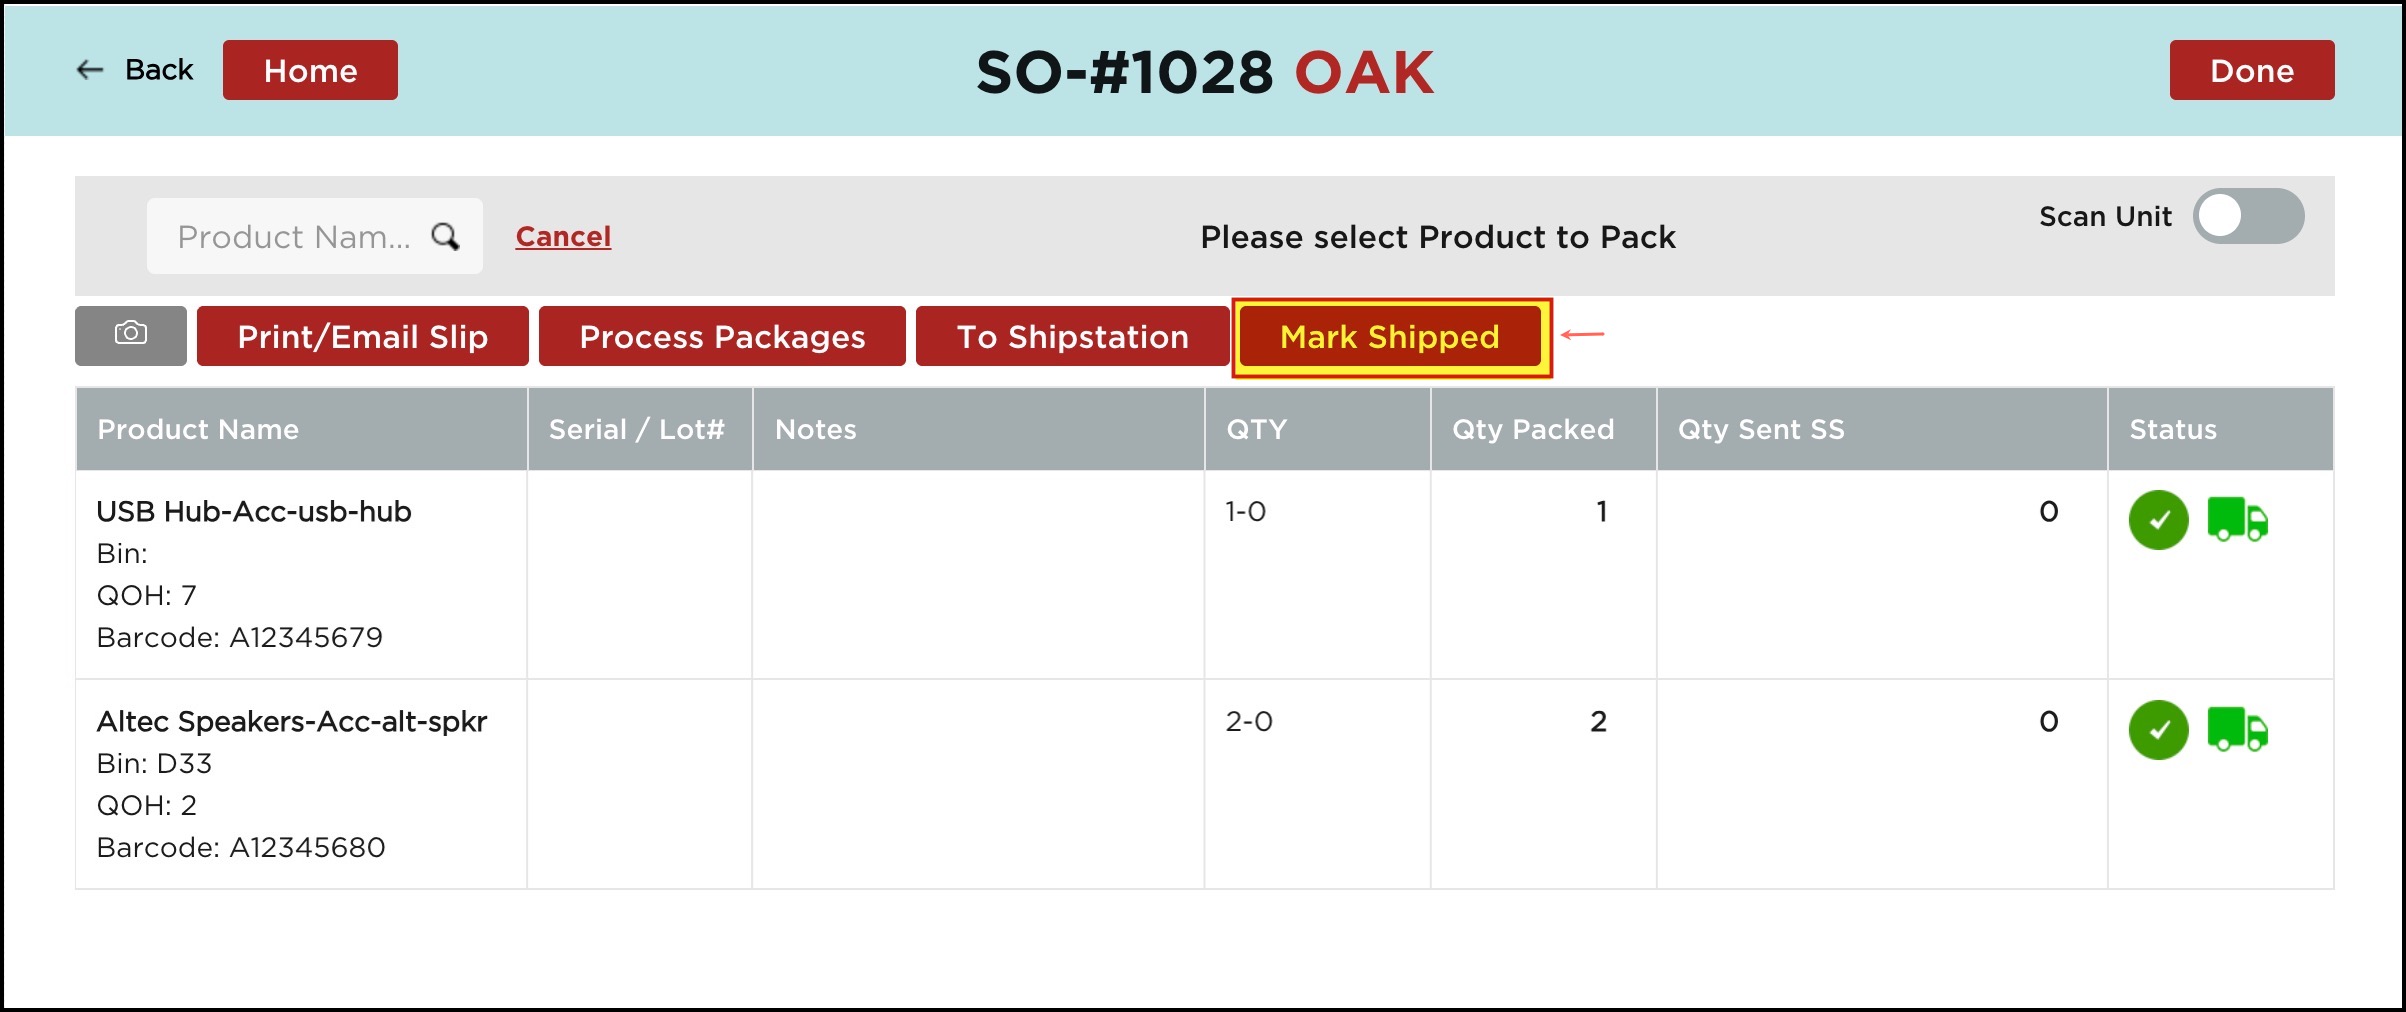
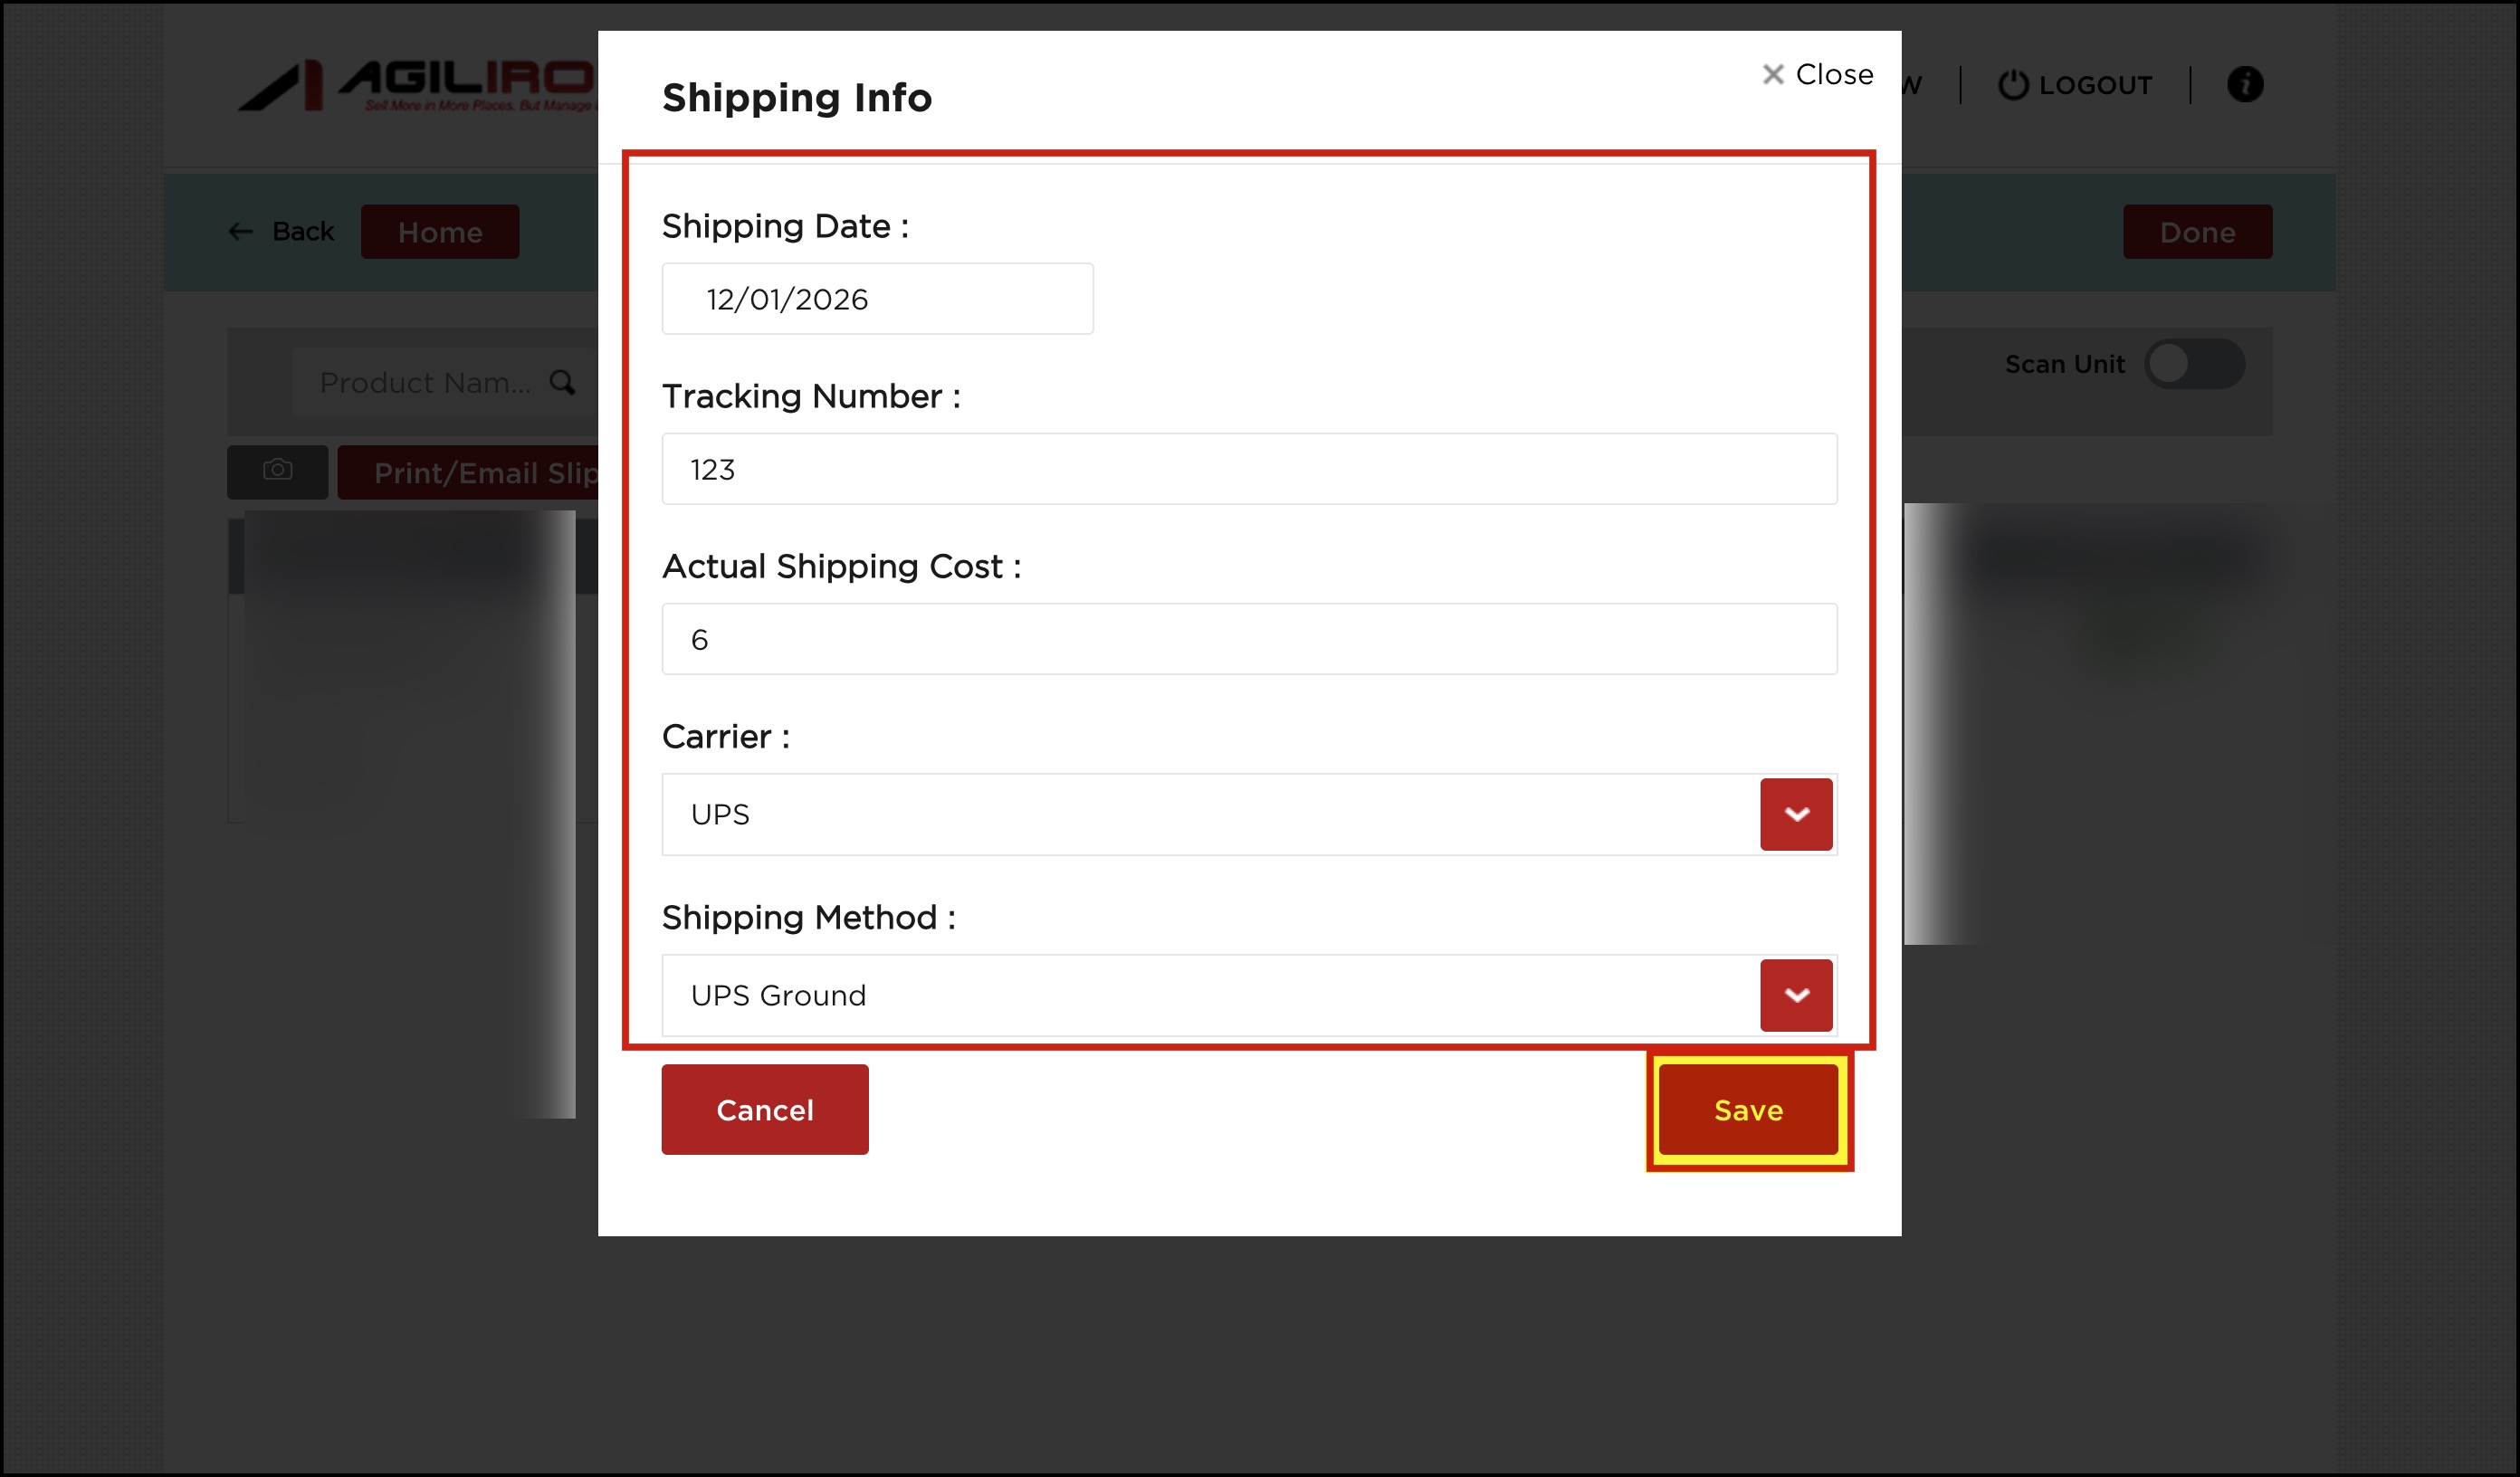
- When line items are fully picked, you can click on the Mark Shipped button. A dialog will pop up where you need to fill in all the necessary information.
Mark Shipped allows you to mark an Order as Shipped as applicable. This will then set the Order as Shipped in BackOffice on the next sync of the Warehouse App to the BackOffice.
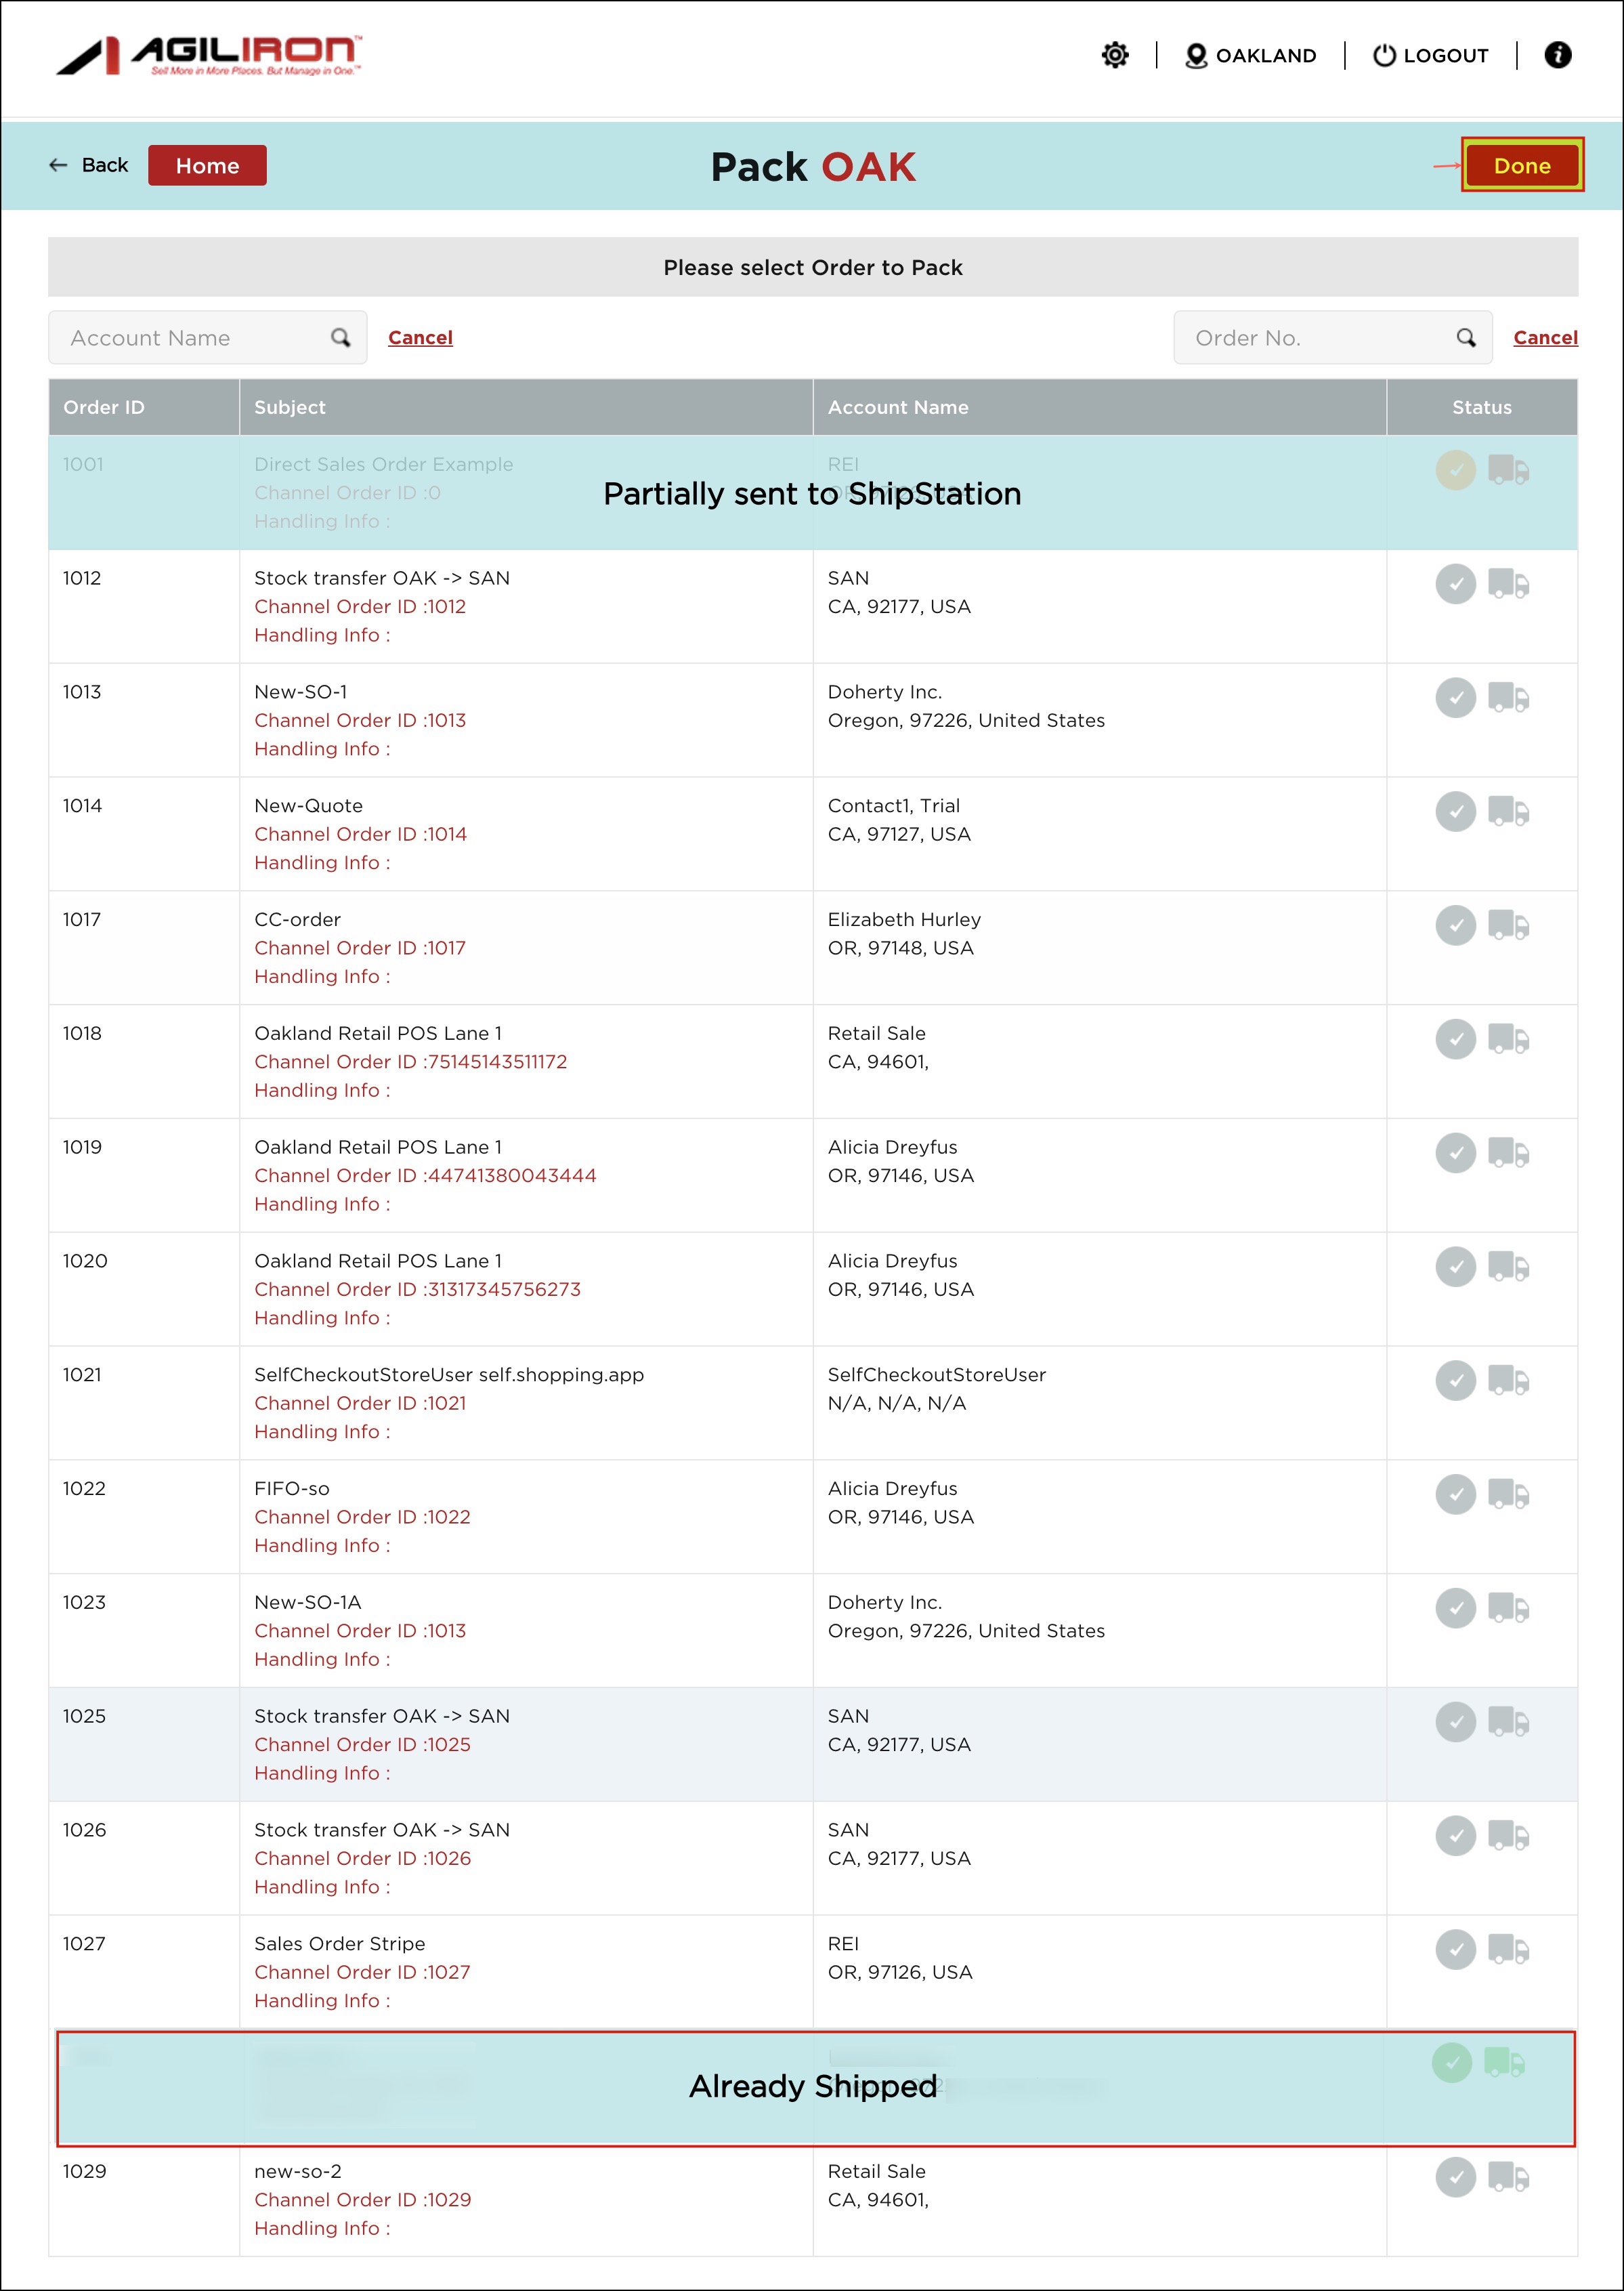
When you click on the Back button, you'll see a watermark - "Already Shipped", on the order that you had picked and packed.
Note - This gives an idea to the users which orders are already shipped and which are only updated.
- Click "Done" to return to the home screen.
- Now, on the Home page, click on "Sync Order & Product Updates to Back-Office" to update all changes

Note - Once you sync Packages to Backoffice and then sync back to the warehouse app, you will be able to delete the complete package and not particular line item/line items from the package.
Updated 5 months ago