Adding Sales Associate Users
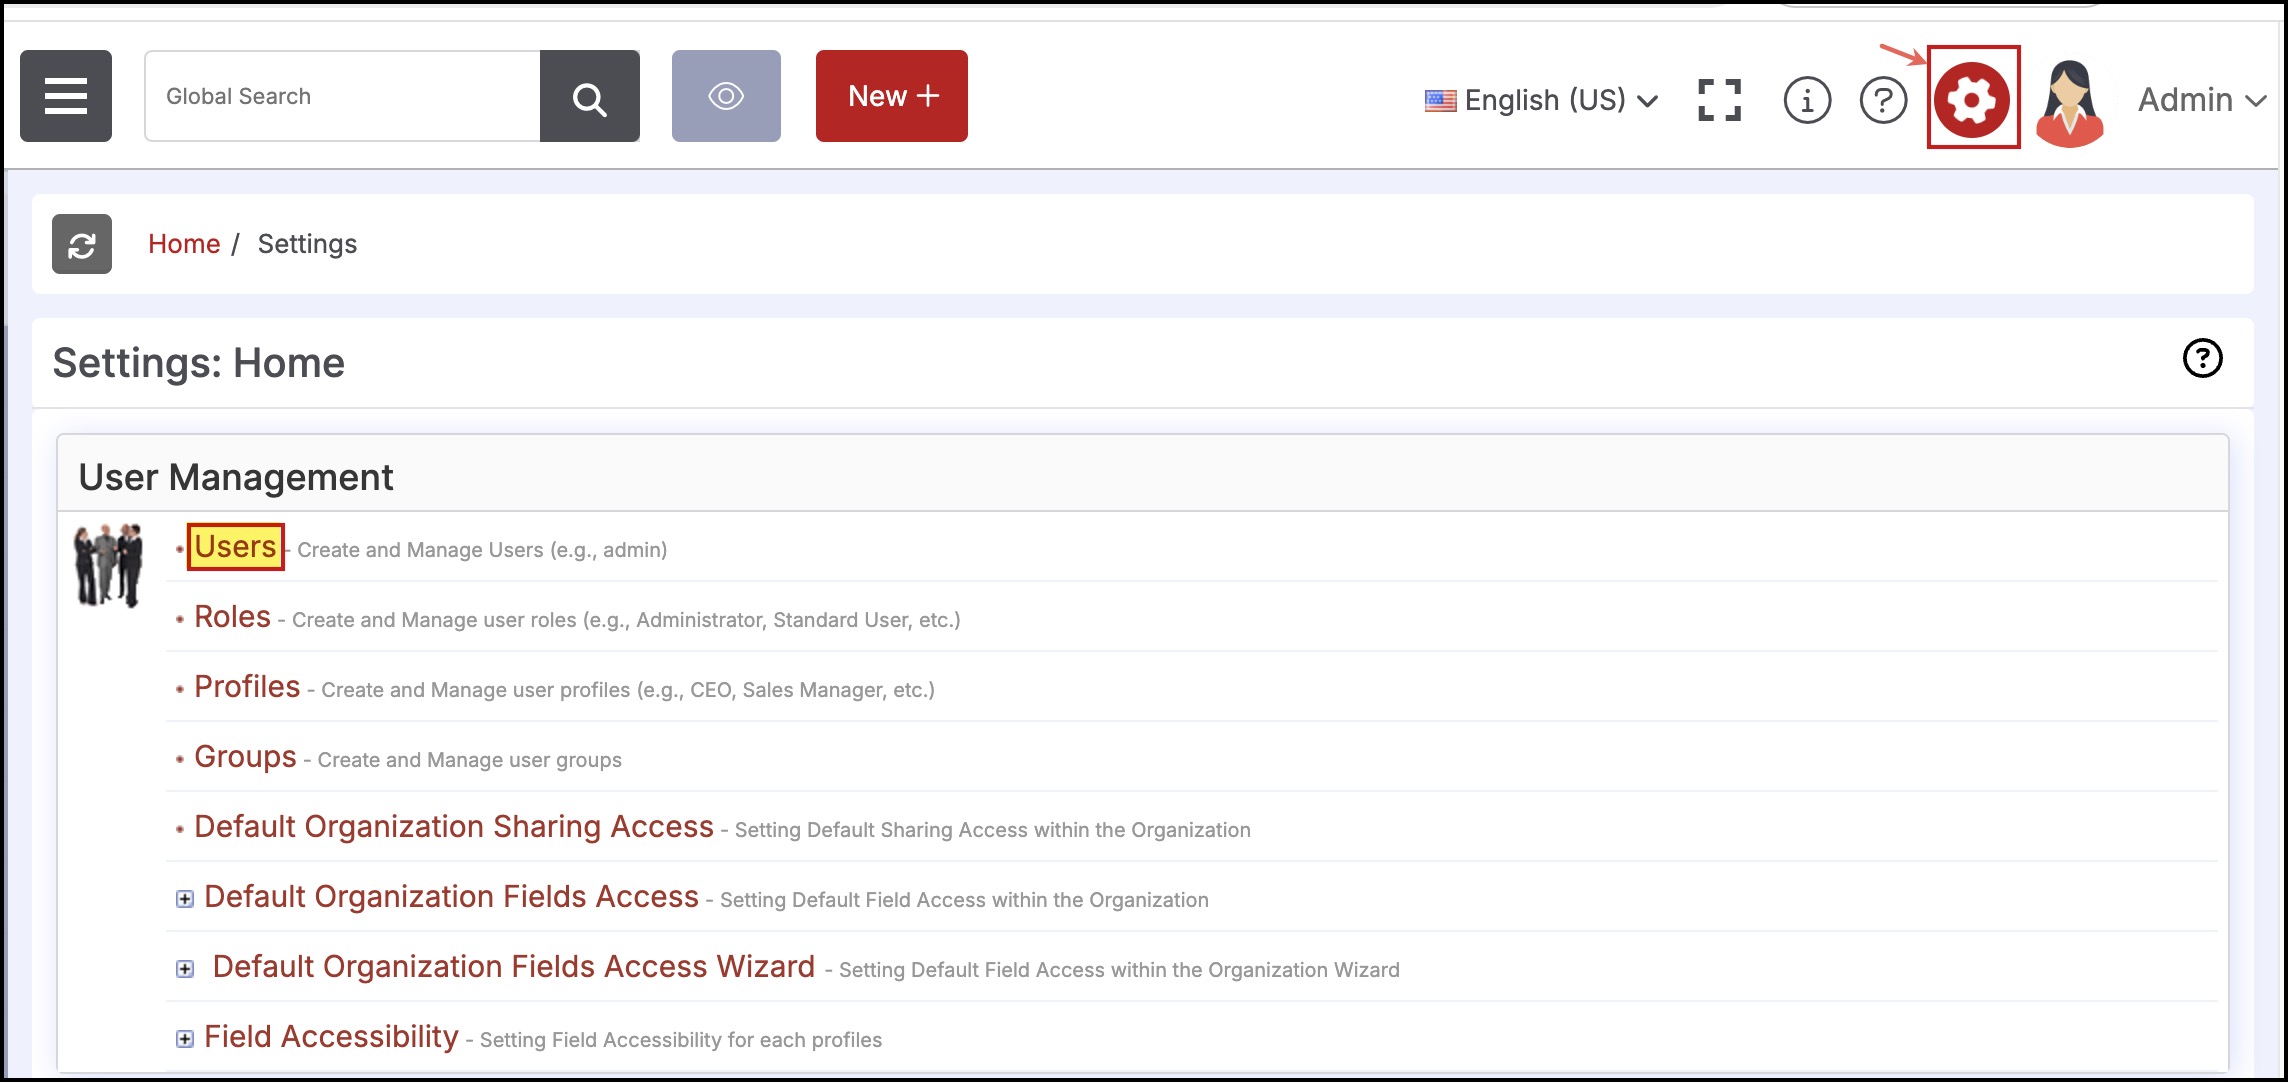
- Go to Settings. The following page is displayed.
- Click Users from the User Management section.
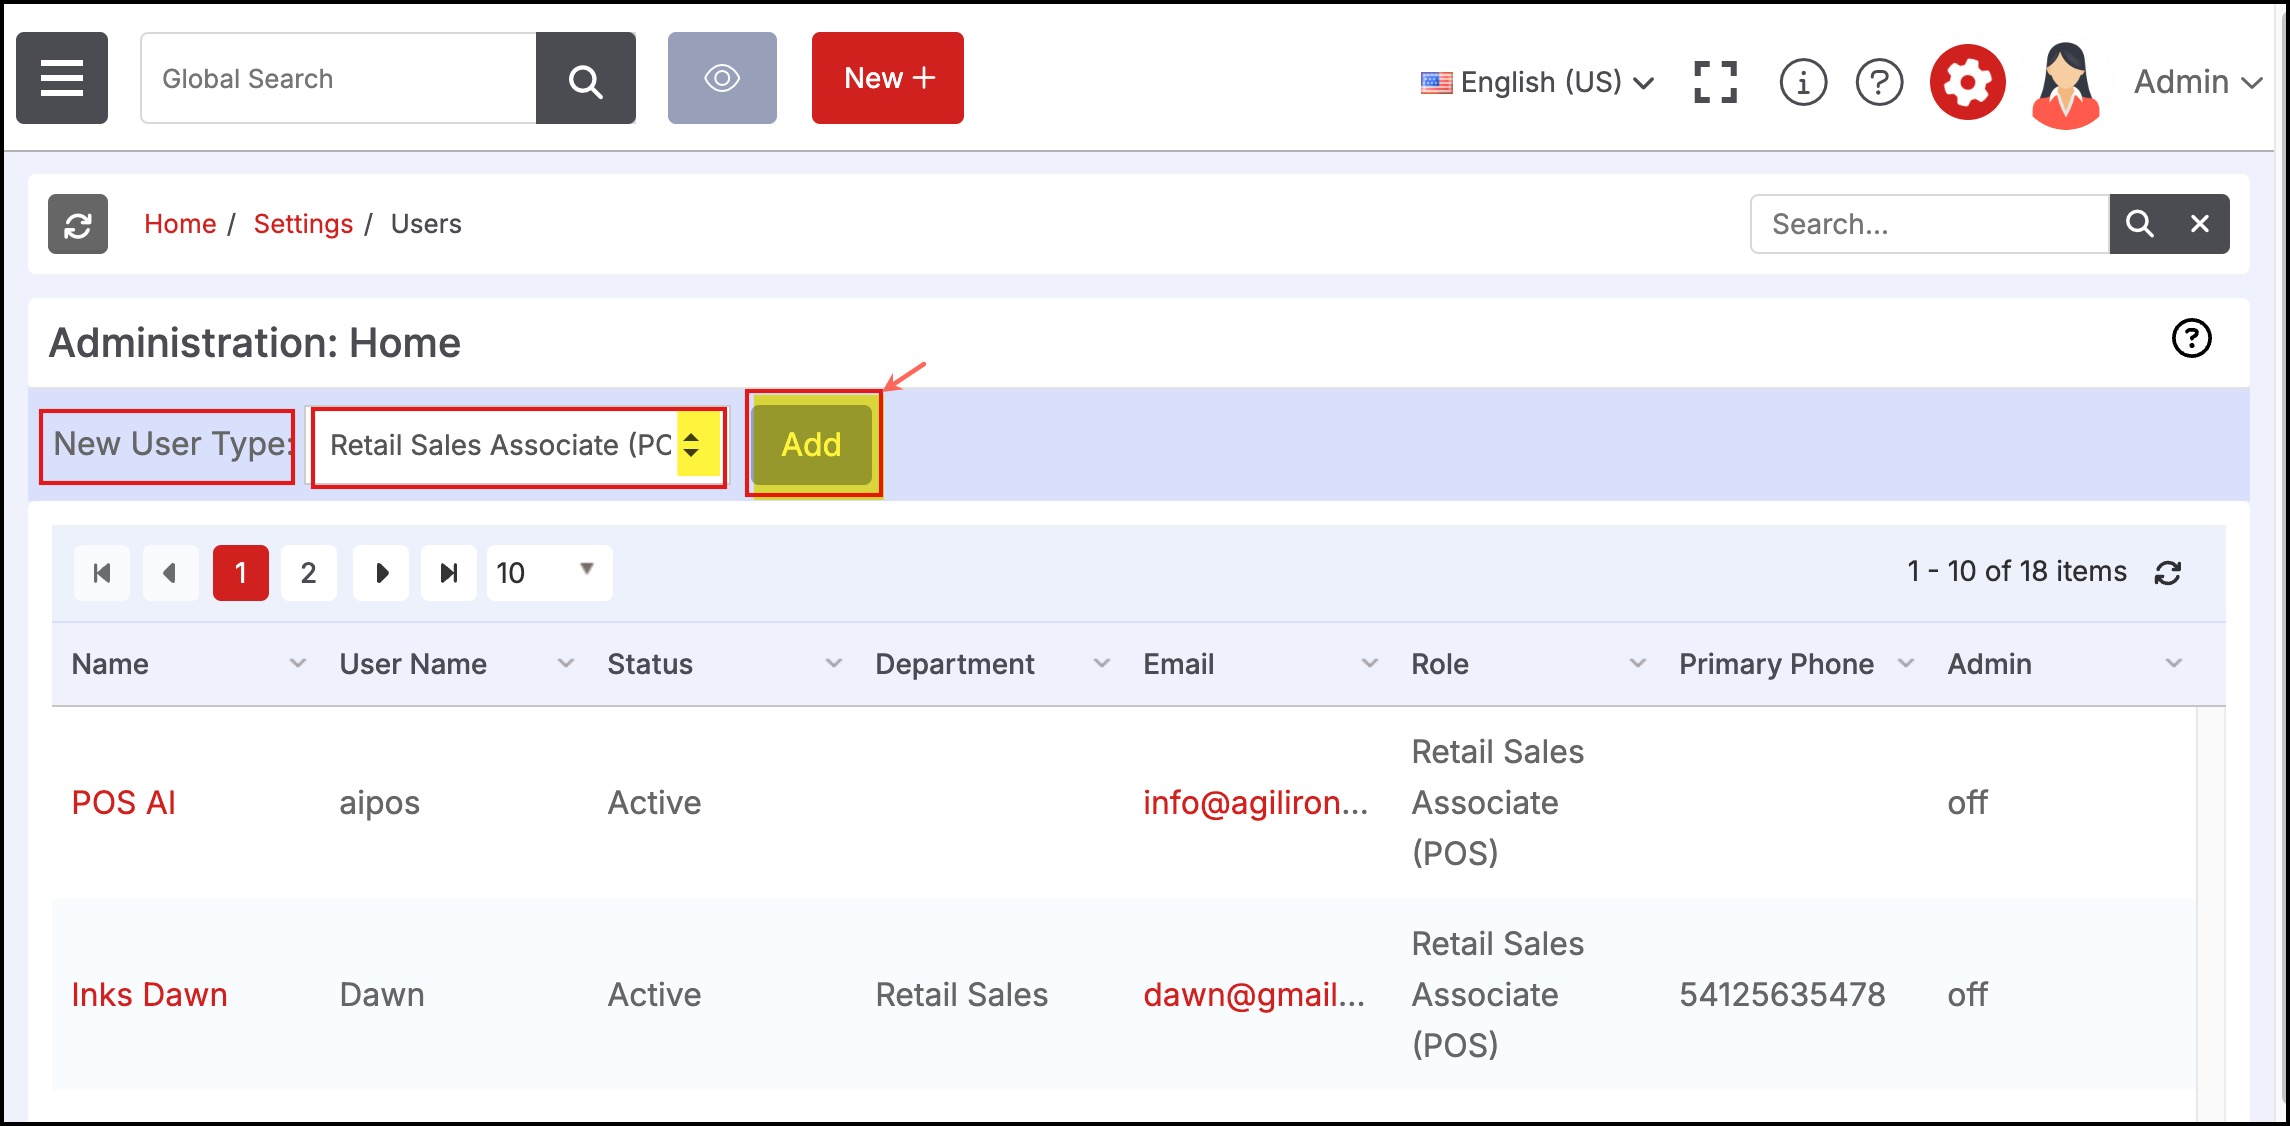
- The following page is displayed.
- Select Retail Sales Associate (POS) from the New User Type dropdown list.
- Click Add.
The following page is displayed.
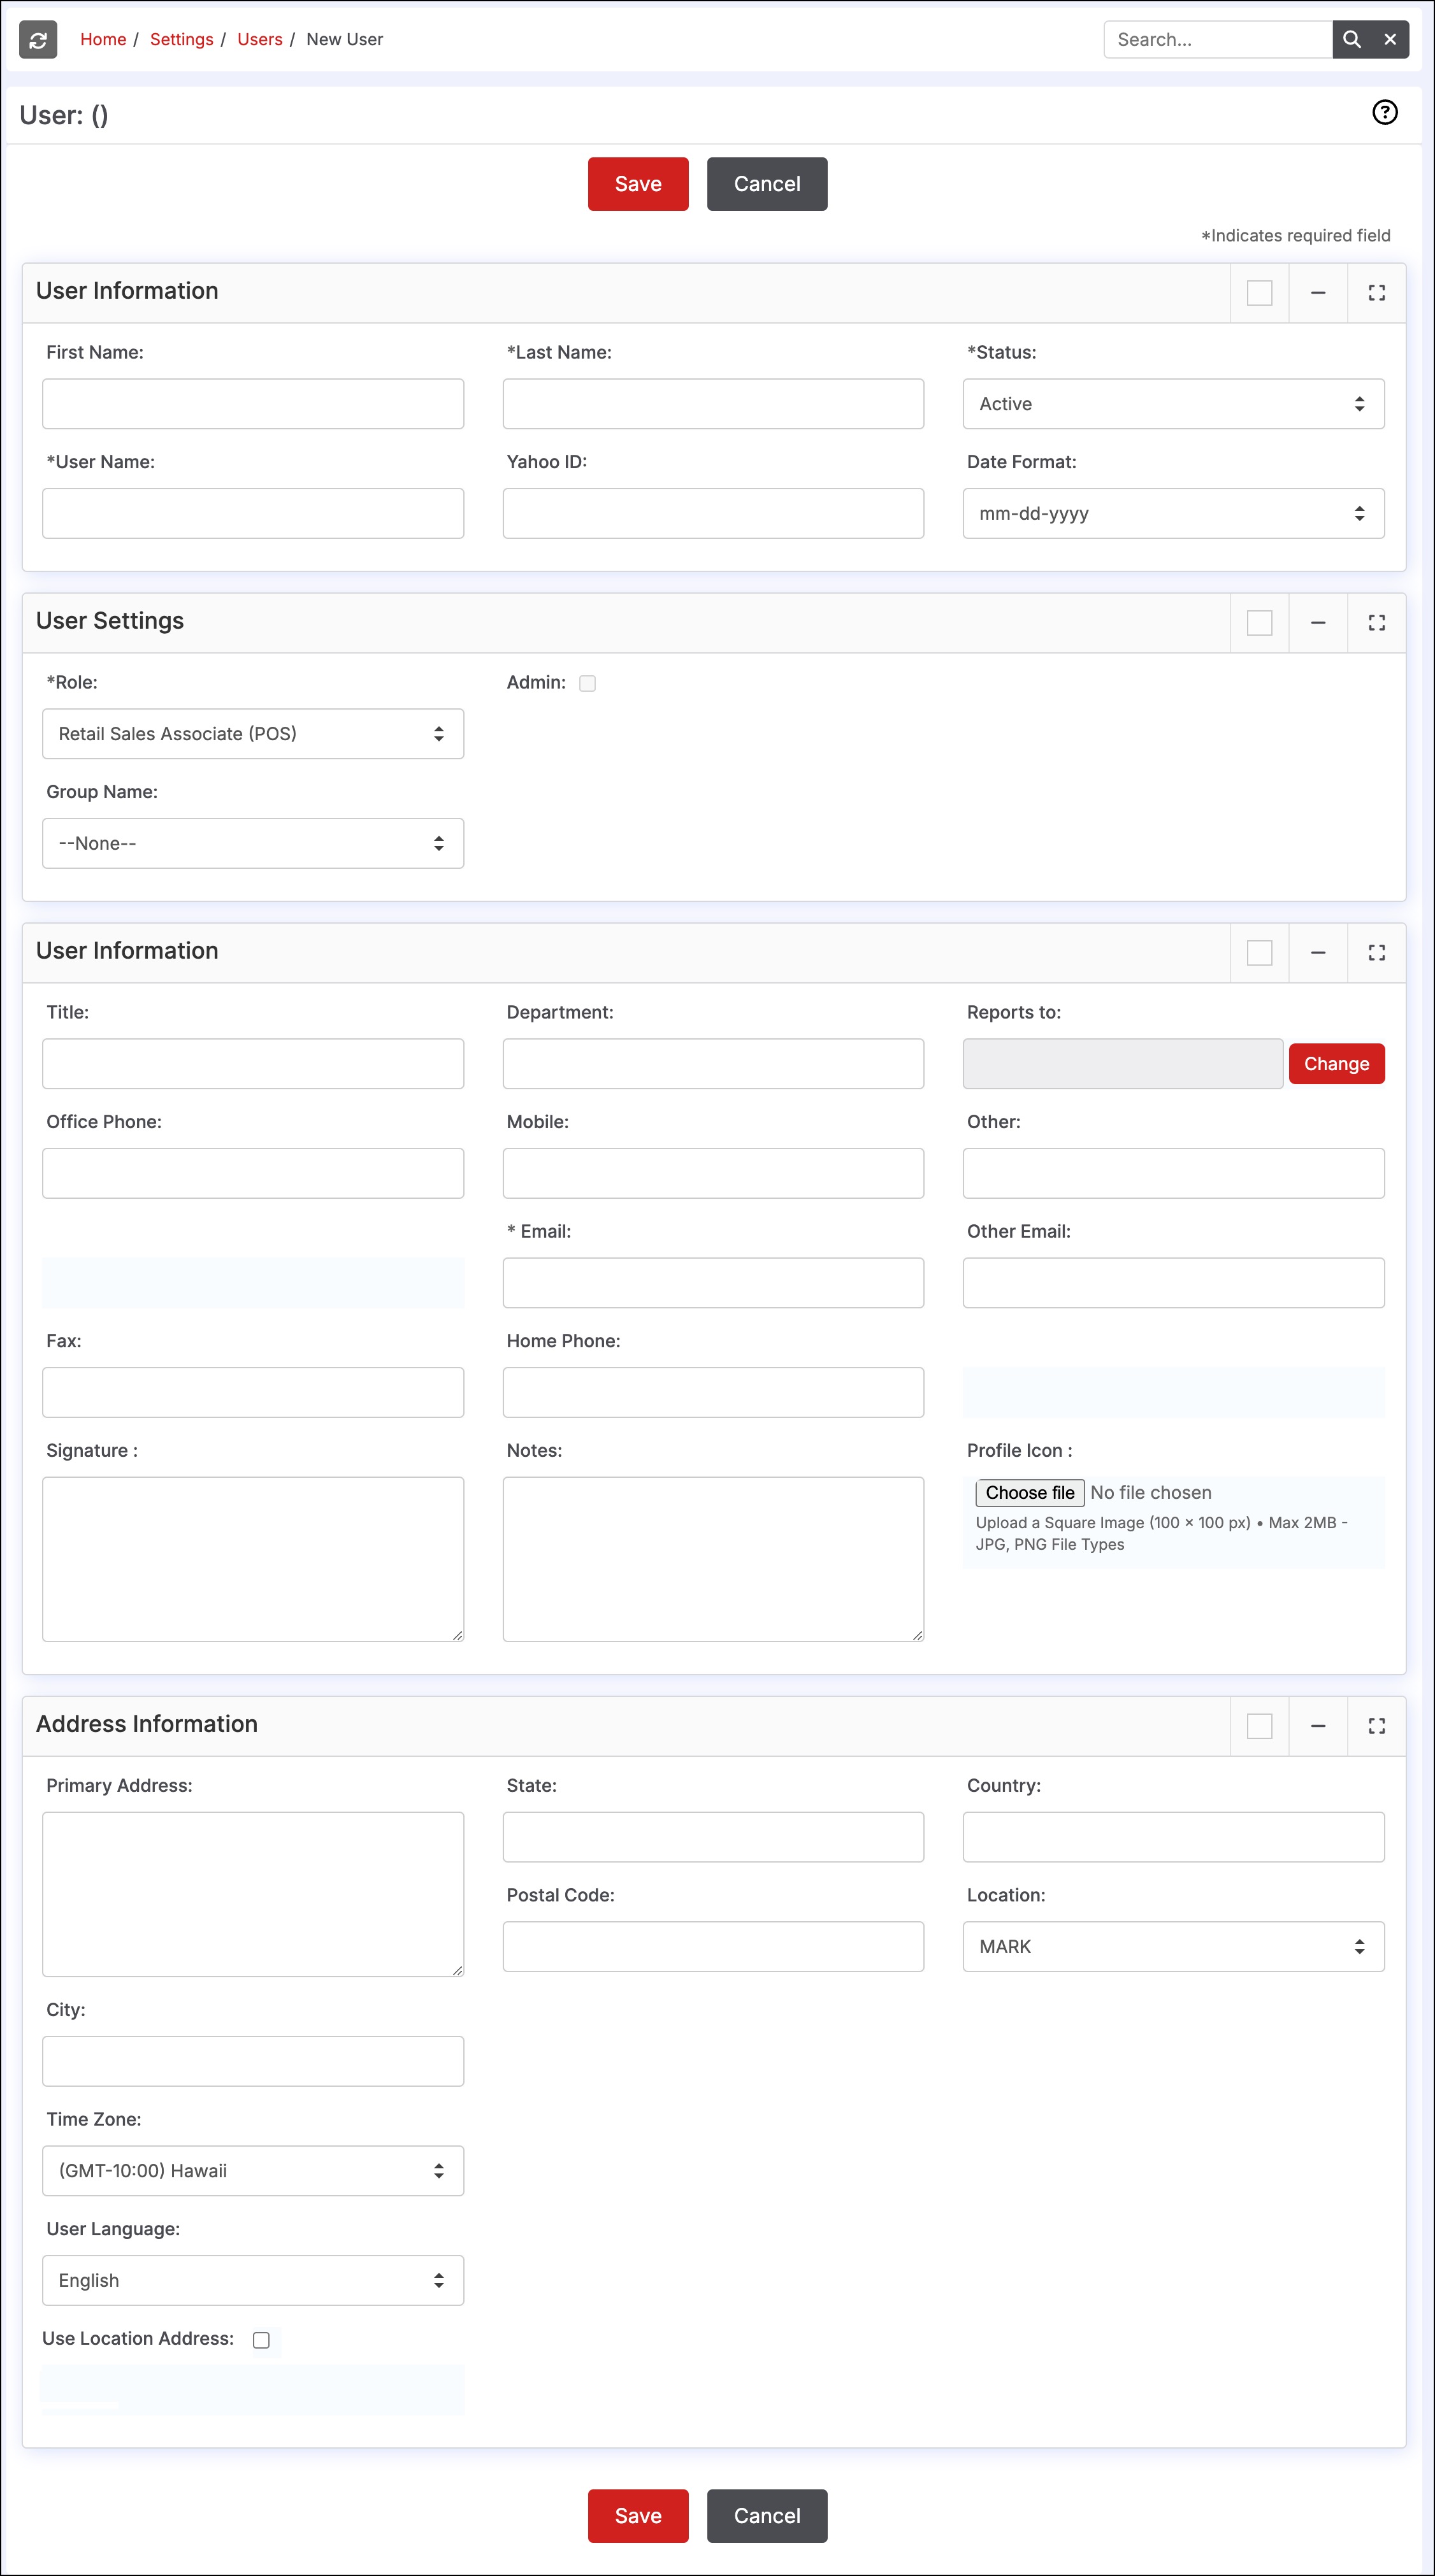
- User Information section
- Enter the first name of the user in the First Name field.
- Enter the last name of the user in the Last Name field
- Enter the desired User name of the user in the User Name field.
- User Settings section
- Select the role of the user from the Role dropdown list - select "Retail Sales Associate (POS)" for Sales Associates to use the POS.
- (Optional) Select the required group to which the user belongs from the Group dropdown list.
- User Information section
- Enter the email address of the user in the Email field.
- (Optional) Enter the title of the user in the Title field.
- (Optional) Enter the name of the department to which the user belongs in the Department field.
- (Optional) In the Reports to field, click the Change button to select the user in which the POS associate reports to.
- (Optional) Enter the alternate email of the user in the Other Email field.
- (Optional) Enter the signature of the user in the Signature field.
- (Optional) Enter additional notes, if any, in the Notes field.
- (Optional) Enter the office contact number in the Office Phone field.
- (Optional) Enter the mobile number in the Mobile field.
- (Optional) Enter any other contact information in the Other field.
- (Opitonal) Enter the fax number in the Fax field.
- (Optional) Enter the home contact number of the user in the Home Phone field.
- Address Information
- Select the timezone from the Time Zone dropdown list.
- Select the Use Location Address checkbox if you would like to use the location address for the user.
- (Optional) Enter the primary contact address of the user in the Primary Address field.
- (Optional) Enter the city in the City field.
- (Optional) Enter the state in the State field.
- (Optional) Enter the Zip code of the area in the Postal Code field.
- (Optional) Enter the country in the Country field.
- (Optional) Select the location of the user in the Location dropdown list.
-
Click Save. This creates the new Sales Associate user.
-
Click on the "Name" for that user, which brings up the form with the fields as filled in above.\
-
Click the "Change Password" or "Reset Password" button to set up a new password for the sales associate to login to the POS and email it to the user. In the case of the former, you must provide a new password; in the case of the latter, the system will generate a random password for the user. In both cases, the password will be emailed to the user by the system to the email address stored for the user. See the sections titled Change Sales Associate User Password and Reset Sales Associate User Password for more details.
Updated over 1 year ago