New Quote Wizard
Agiliron's 'New Quote Wizard' helps to create quotes for new or existing customers in a more streamlined and effortless manner.
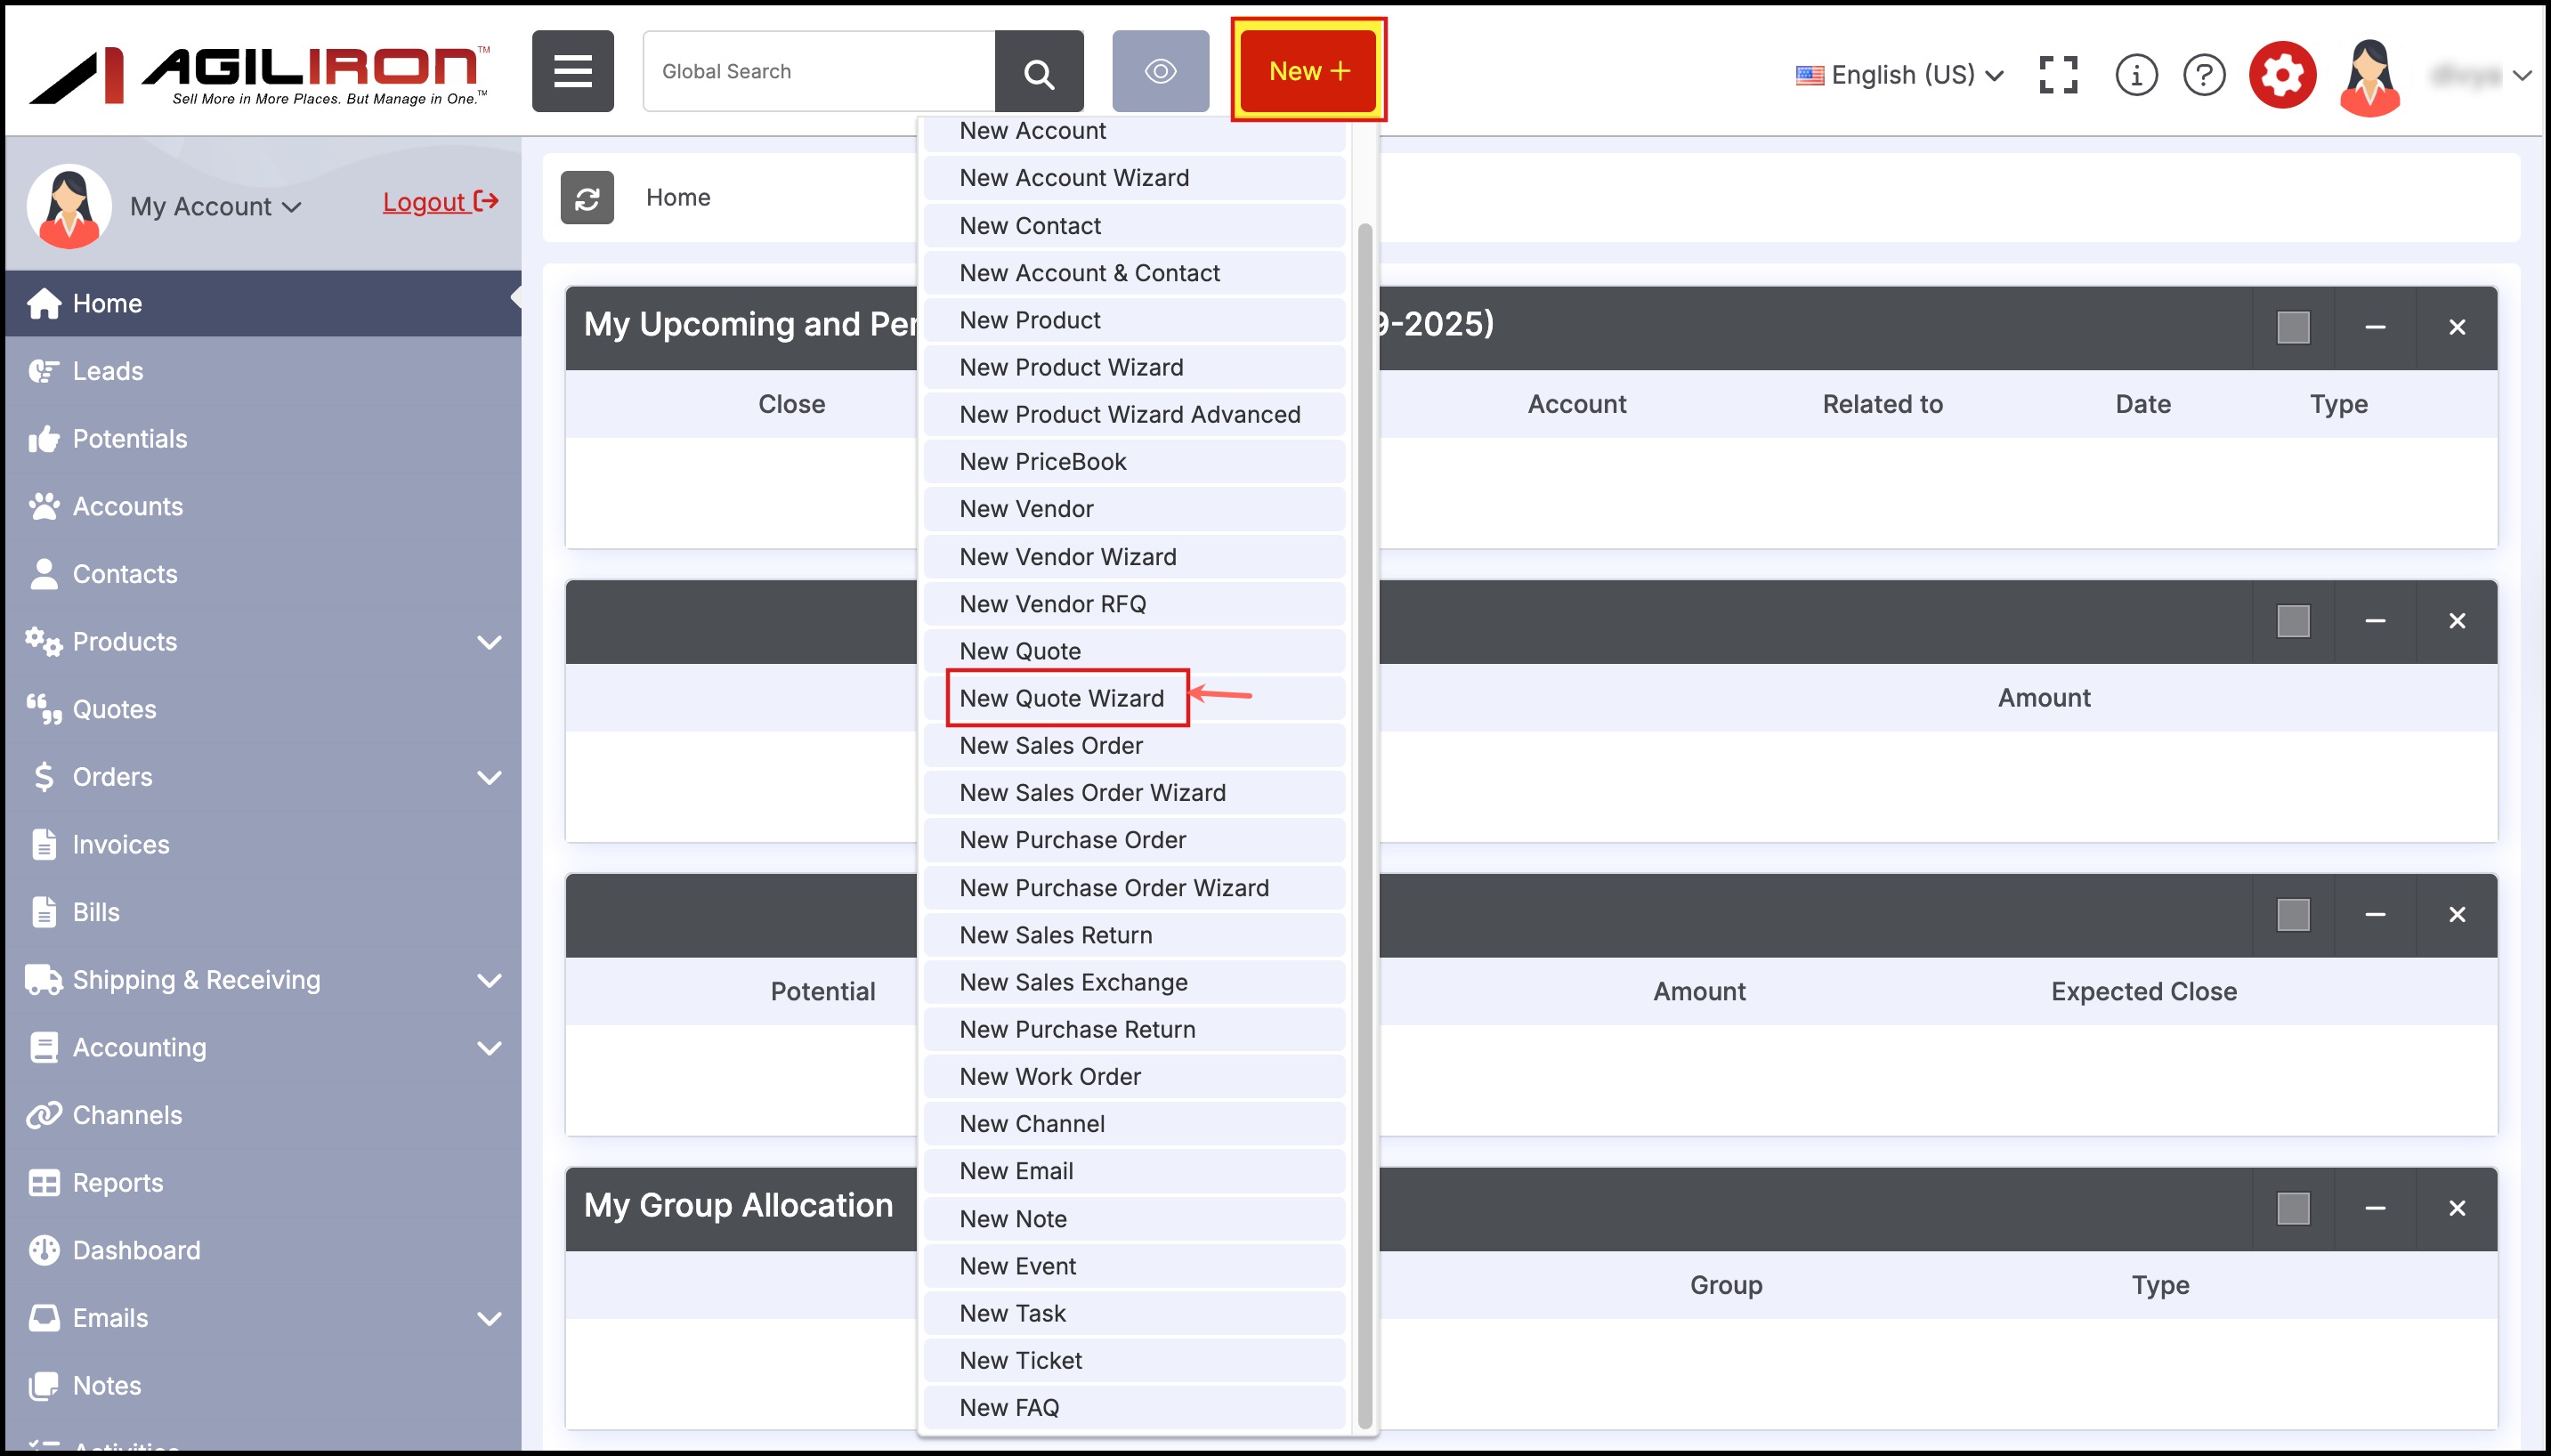
- To create a new quote, on the menu bar, click on New.
- Select 'New Quote Wizard' from the drop-down list.
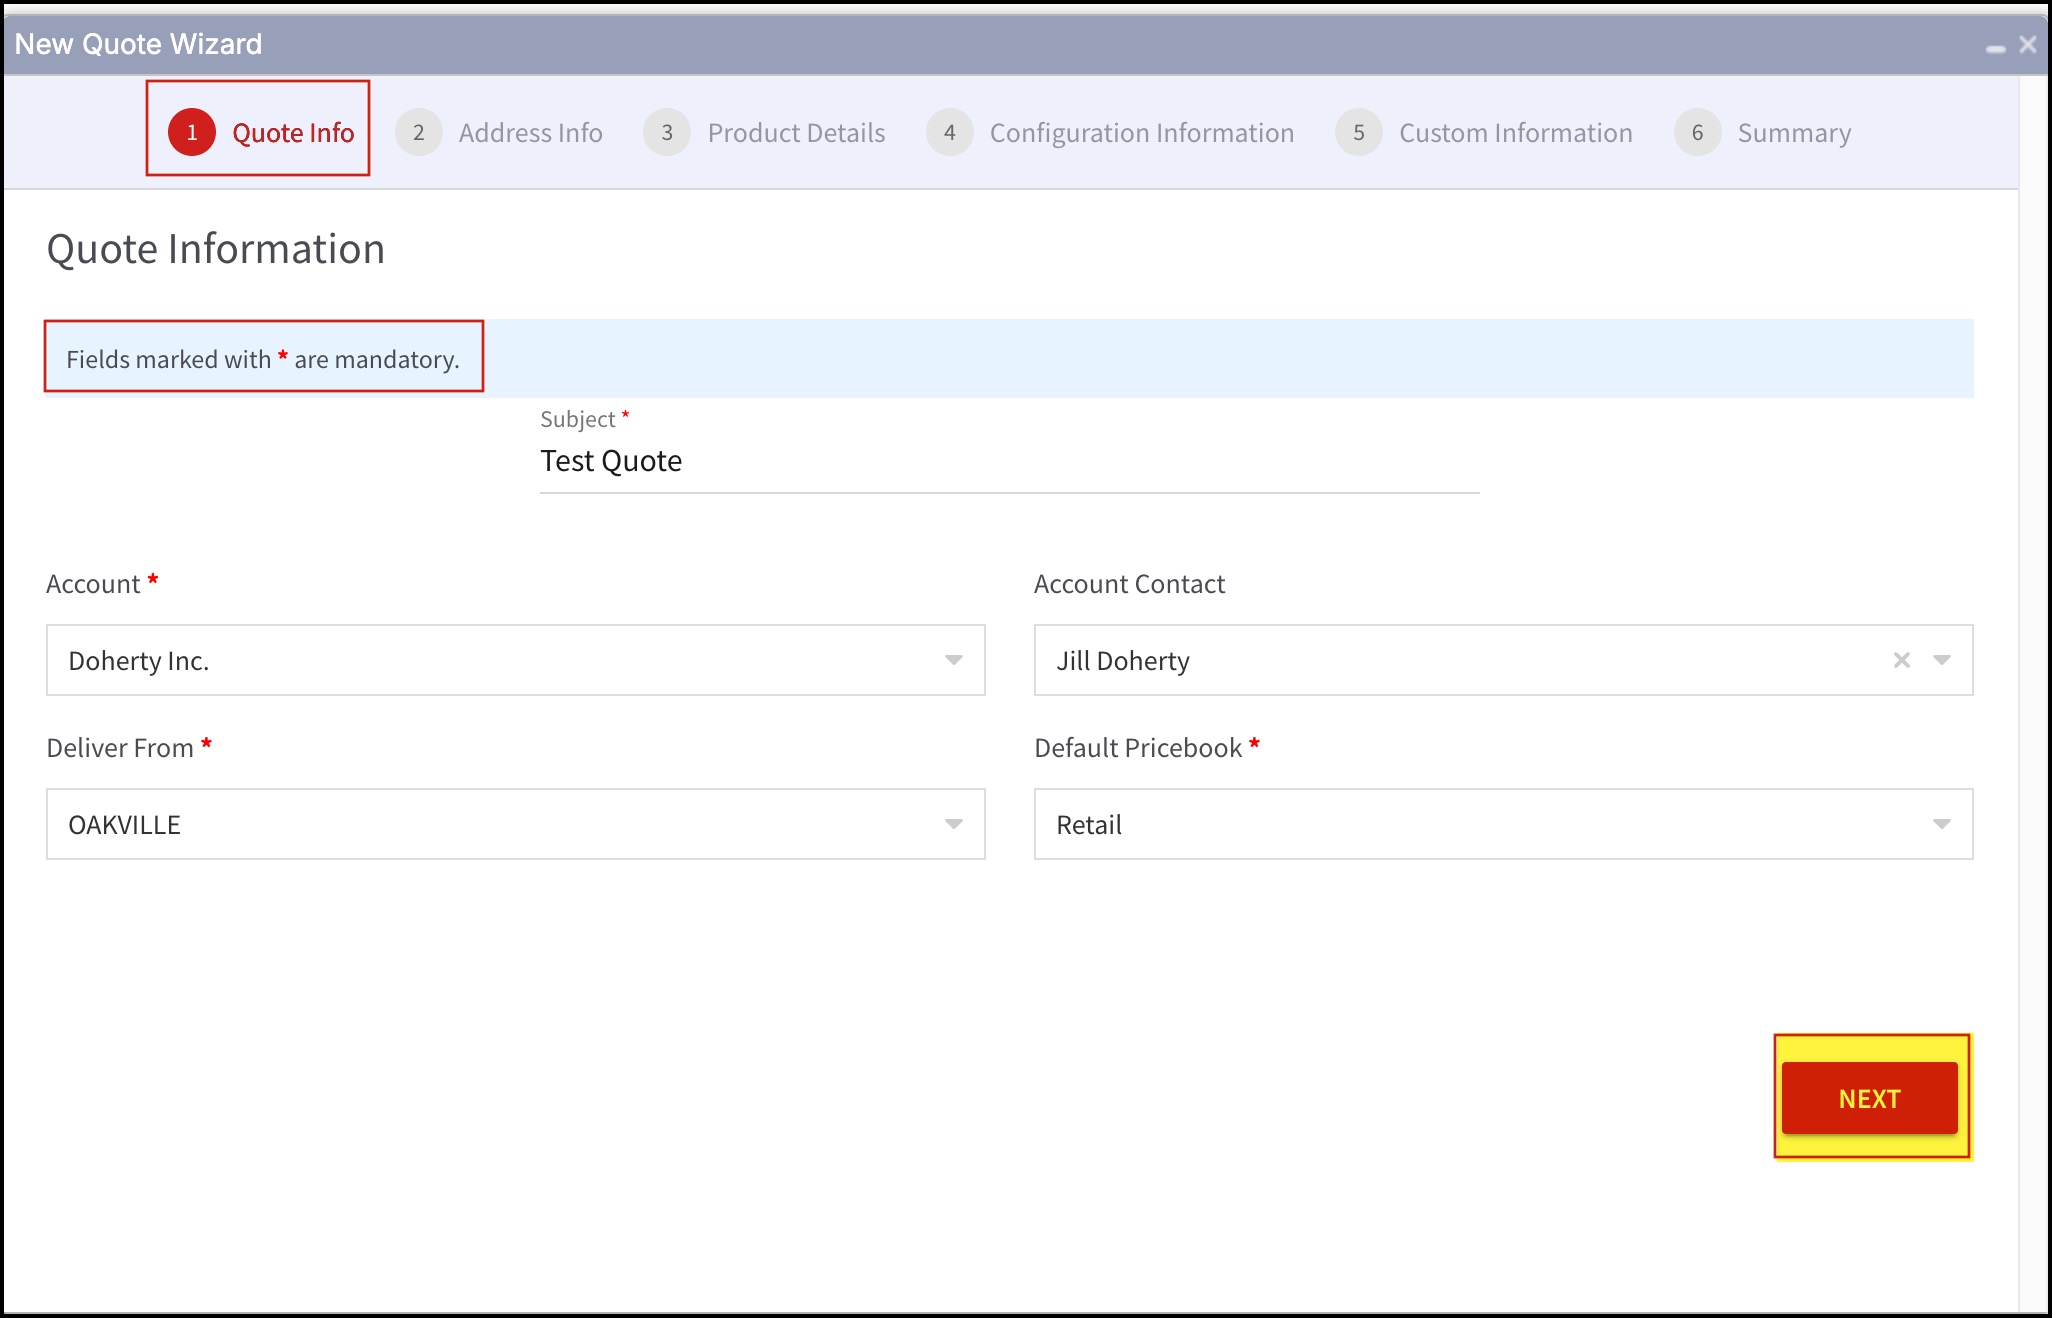
- This will open up the New Quote Wizard window. The Quote Information will appear first. All the fields marked with ***** are mandatory.
- In the Subject field, enter a name that rightly describes the quote. It could be a company name, customer name, product name, or description.
- In the Account field, type to search account name, the field will get auto-completed.
- Rest all the fields auto-populate with default information related to the customer's account.
The account contact list is filtered while the Default Pricebook (price book to be used for this particular customer) and Delivered from (stock location from where the product will be shipped), fields are automatically filled based on the selected account name.
- After all the necessary information is filled in, click on Next.
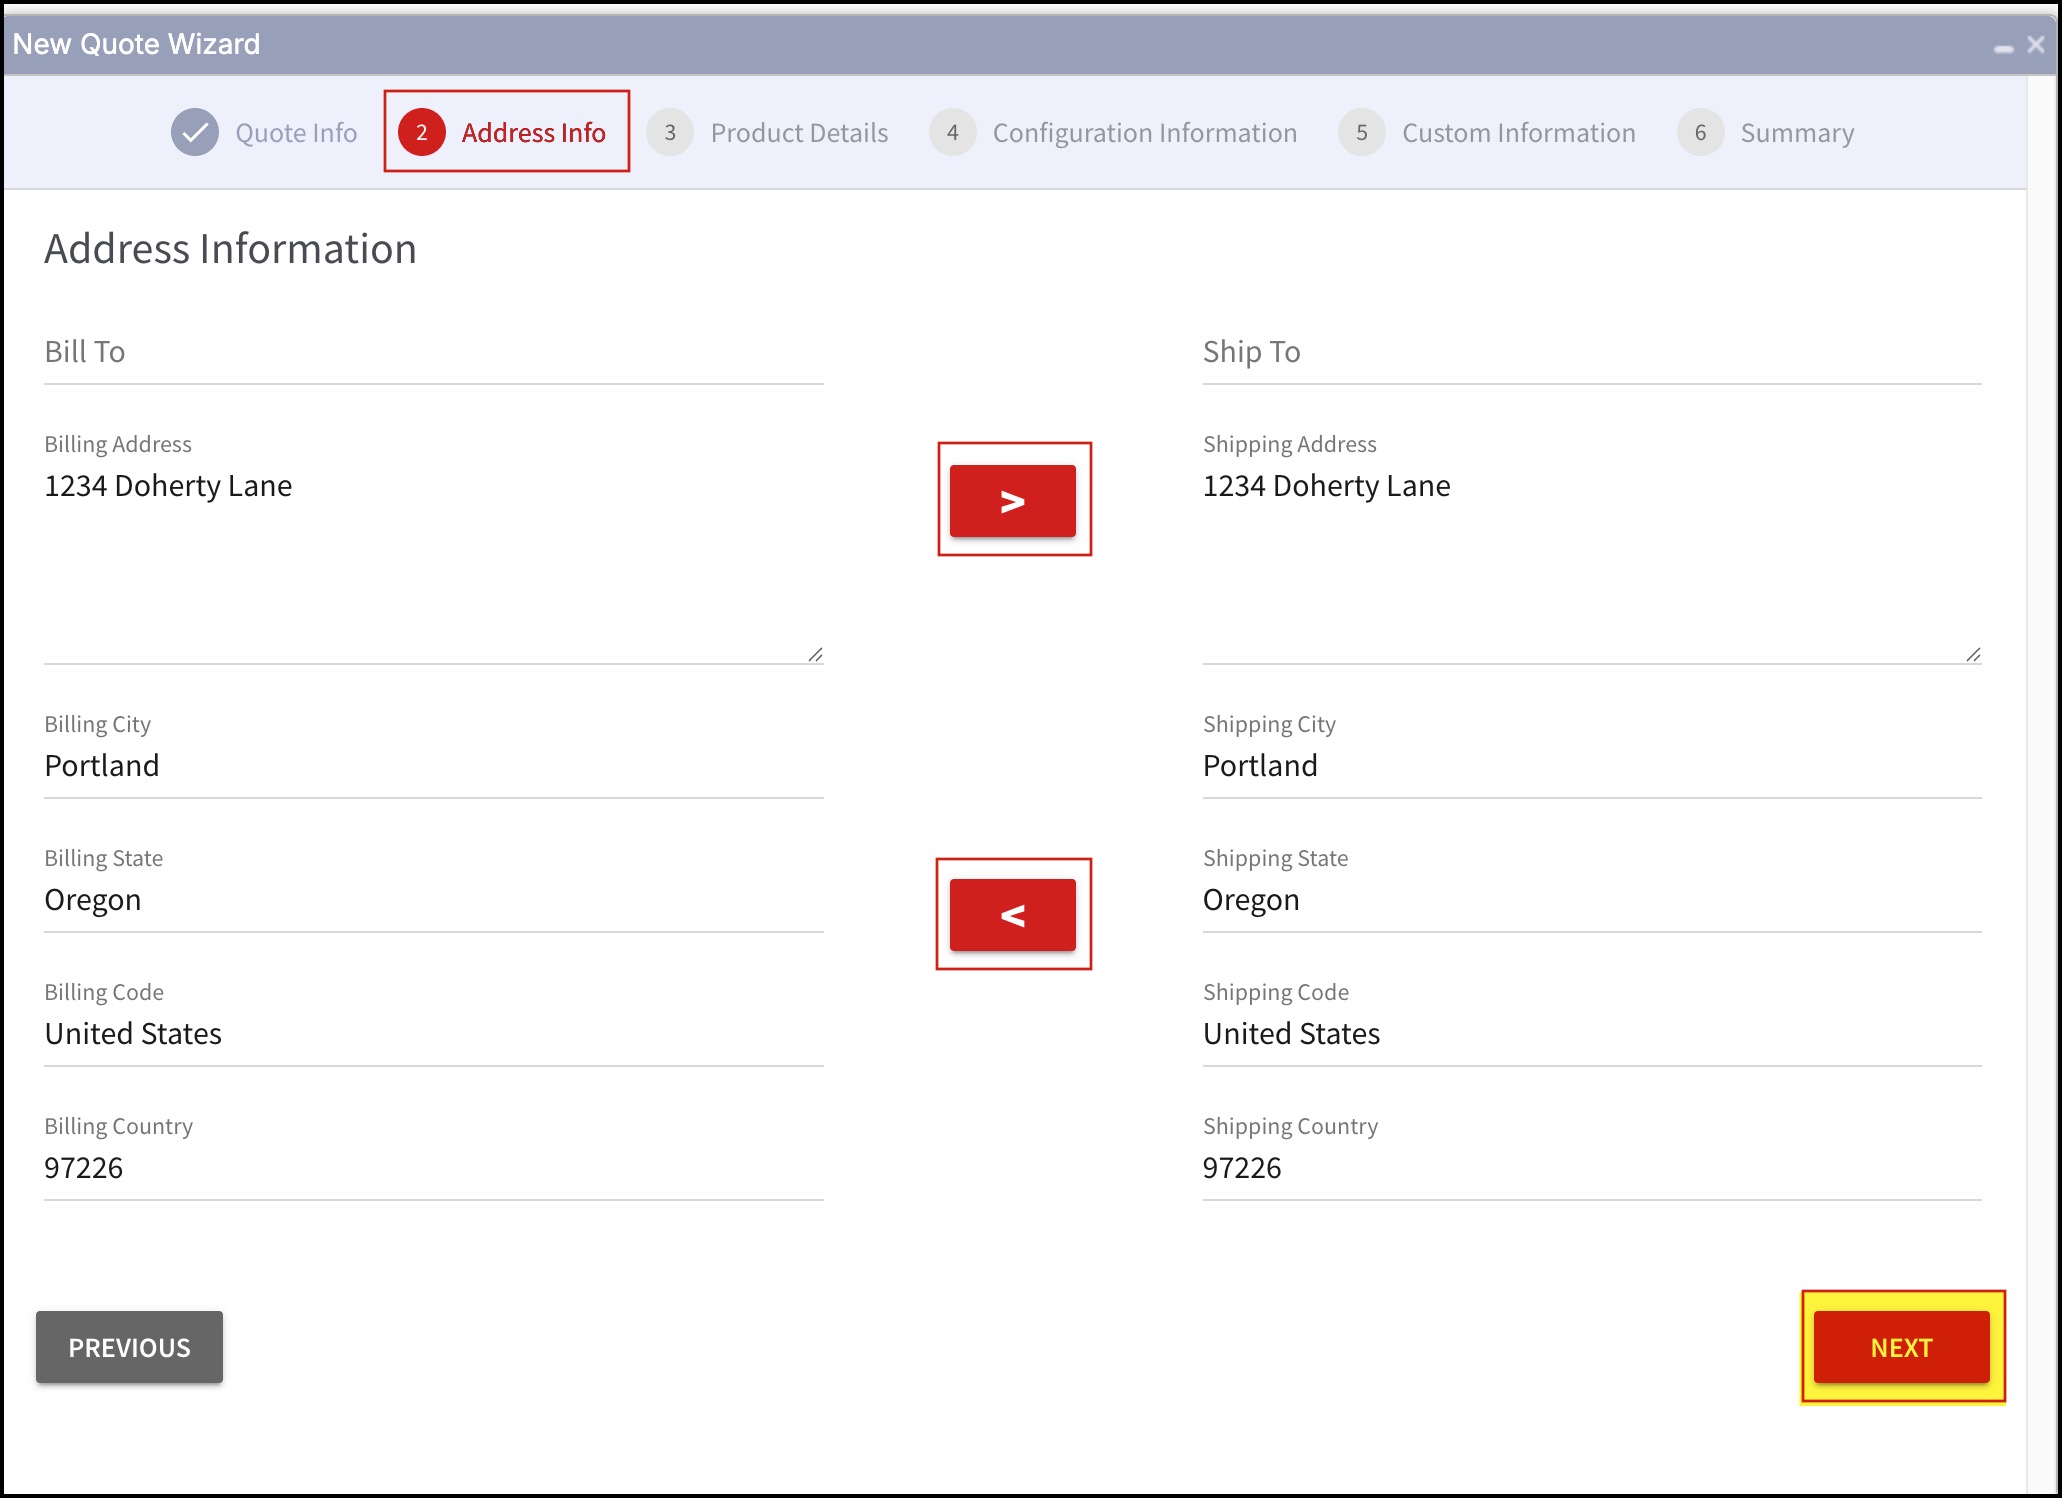
- Next comes the Address Information.
- Enter the name to whom the quote has to be billed and shipped (it can be the same or different as per your requirement).
- The other fields related to billing and shipping automatically get filled on the basis of the account name. However, you can edit the billing address and shipping address details.
- Also, if both the addresses are the same, conveniently copy the information entered on one side to another by just clicking one button.
- Use ''>'' button to copy the "Billing Address" to the "Shipping Address"
- Use ''<'' button to copy the "Shipping Address" to the "Billing Address"
- Once all the necessary fields are filled, click on Next.
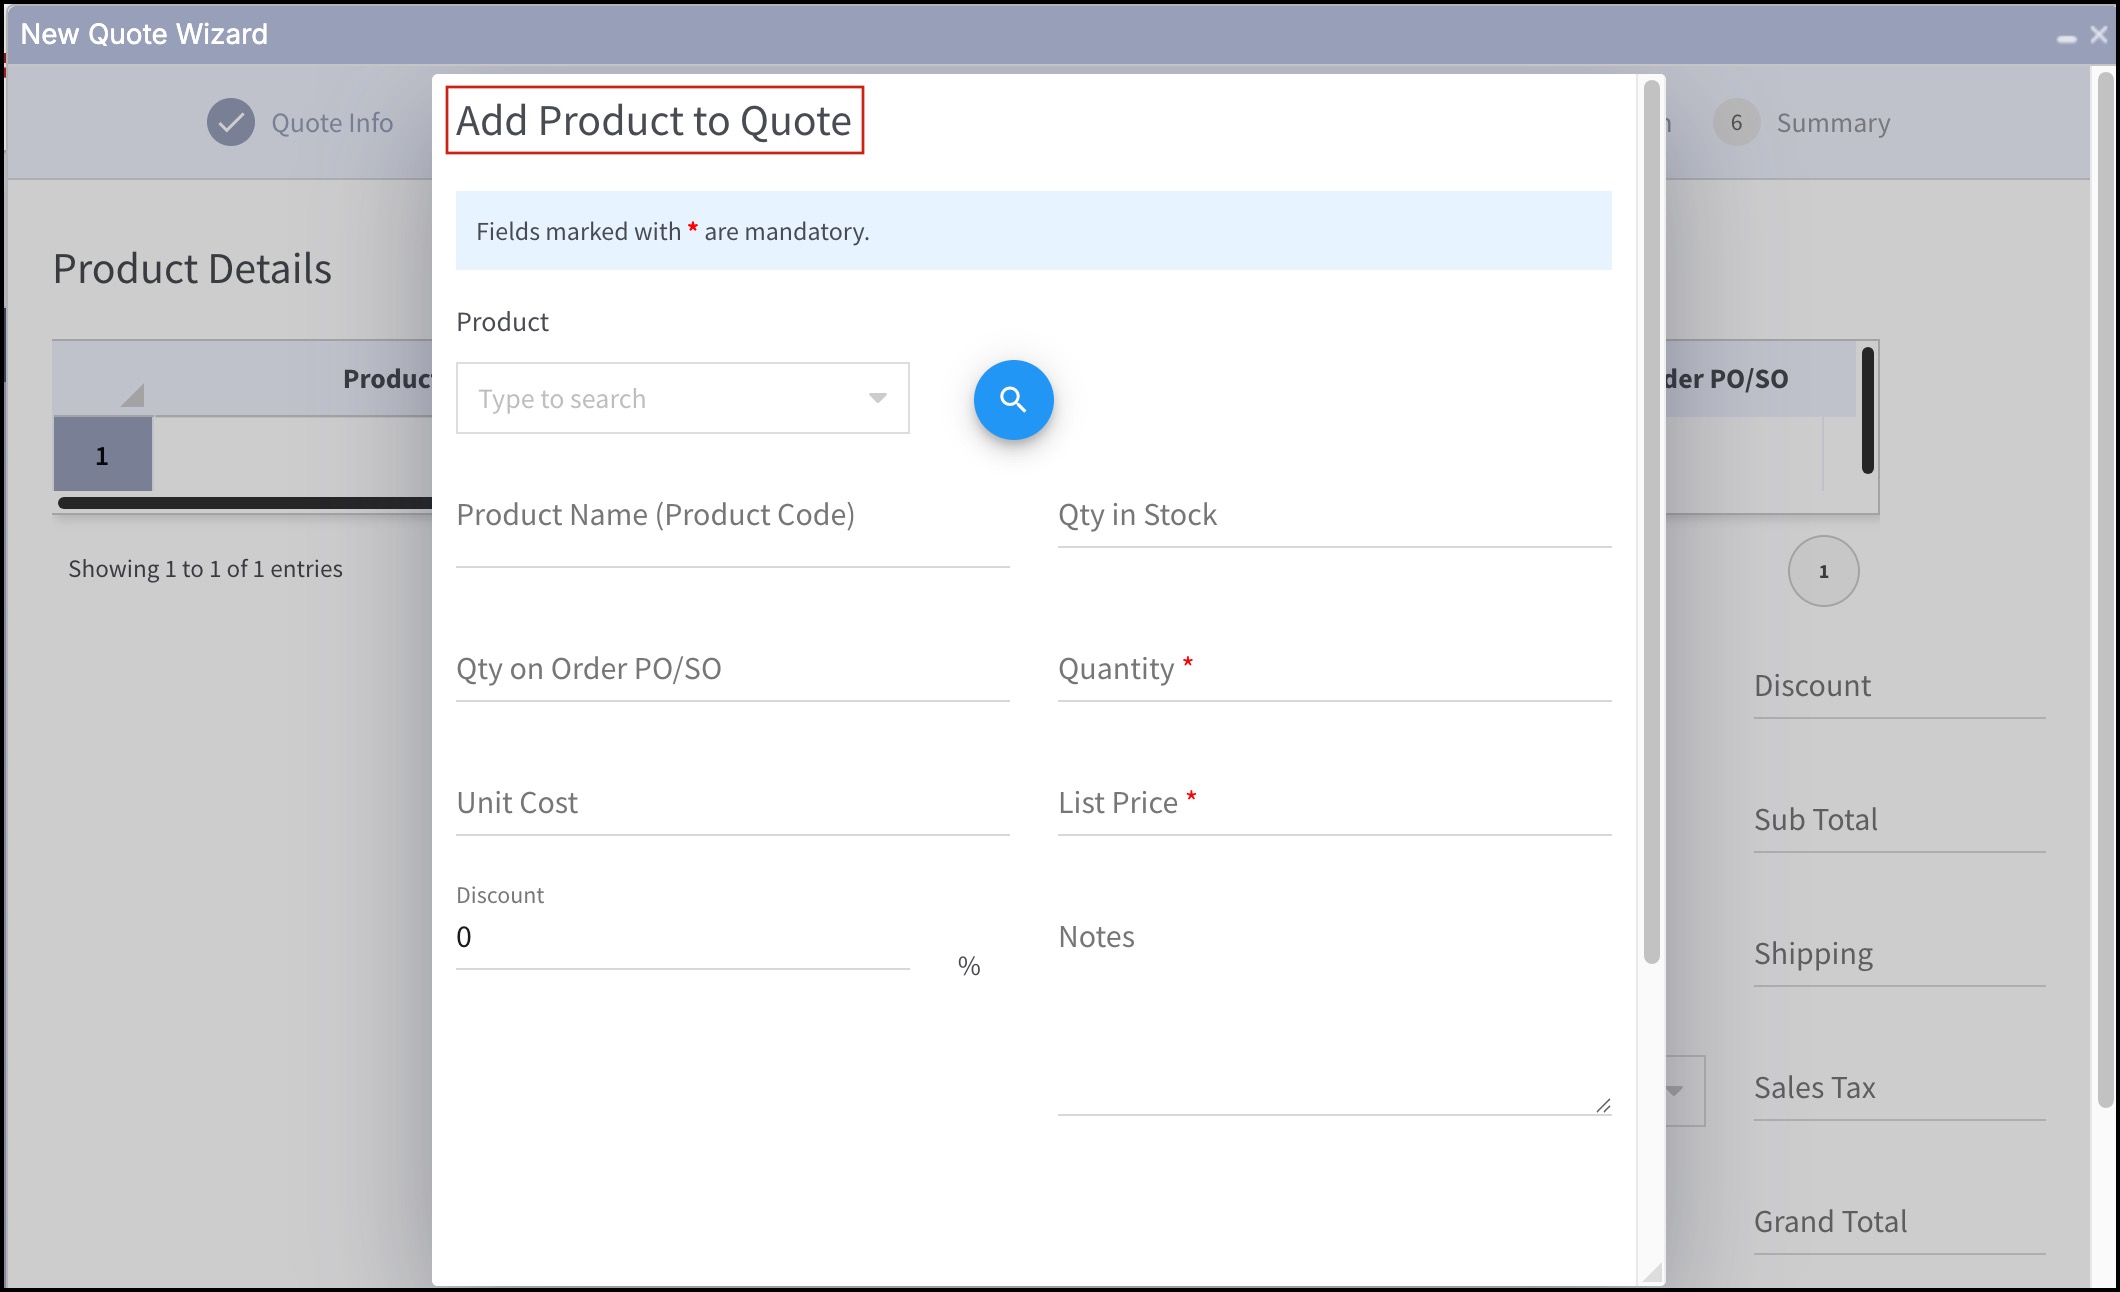
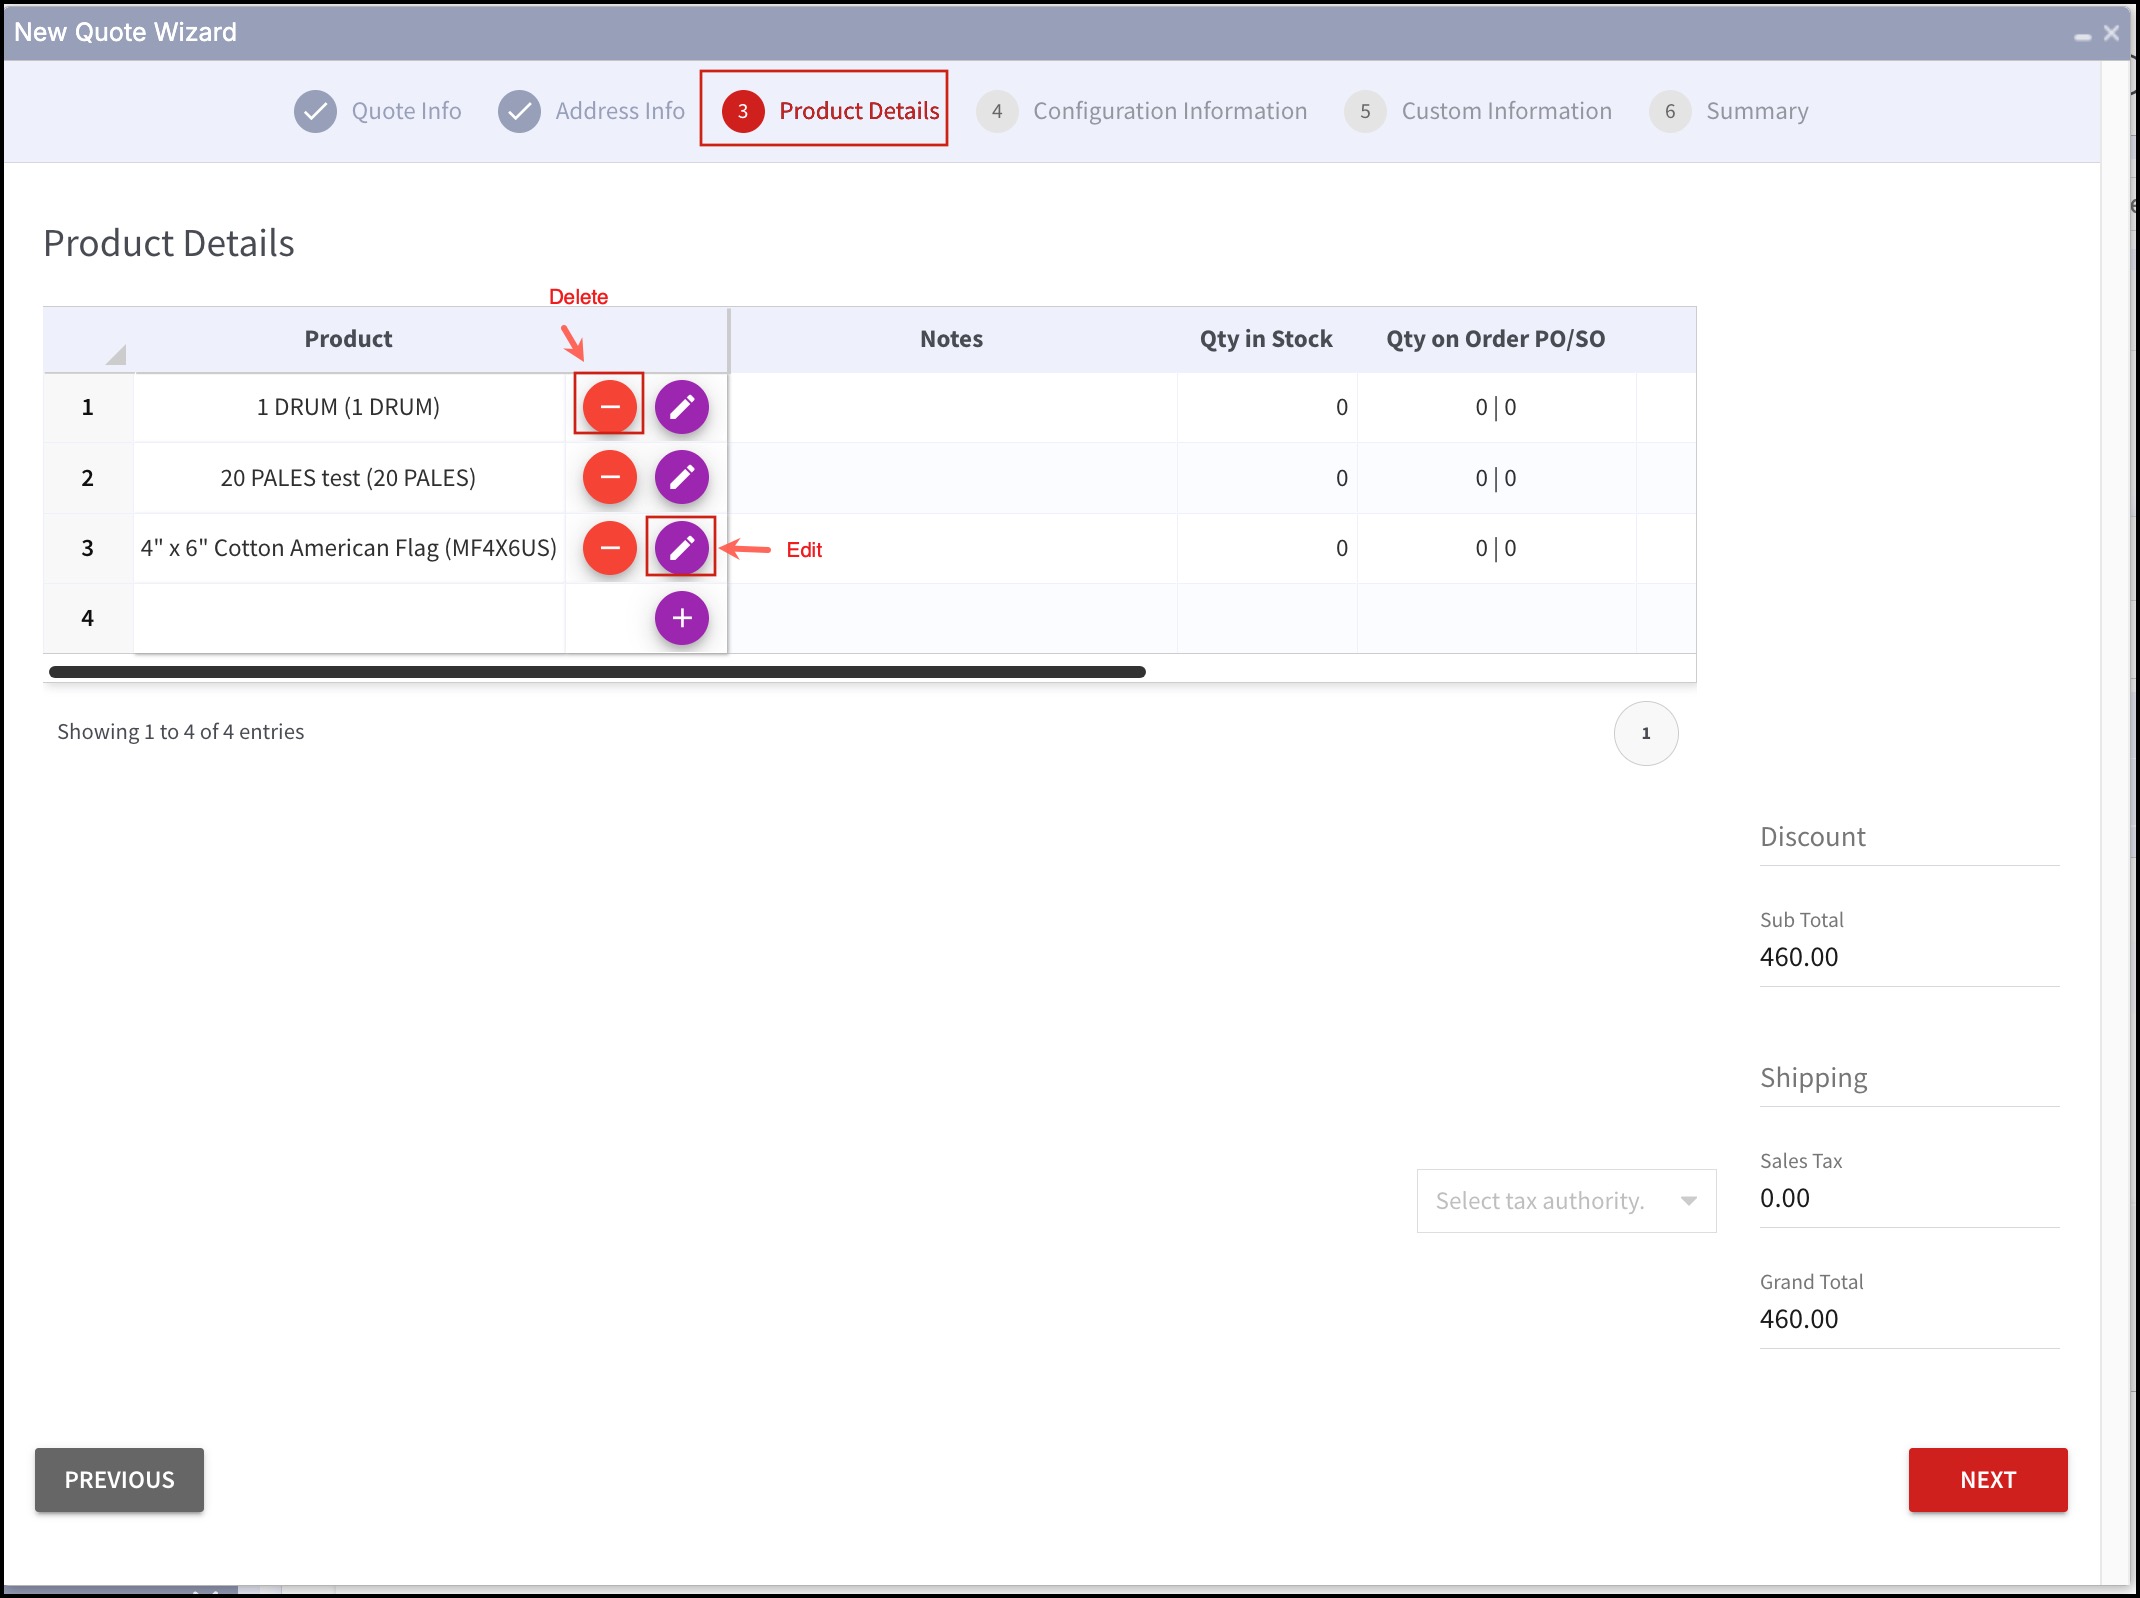
- Then comes the Product Details. In this step, first add the product information by clicking on the + sign.
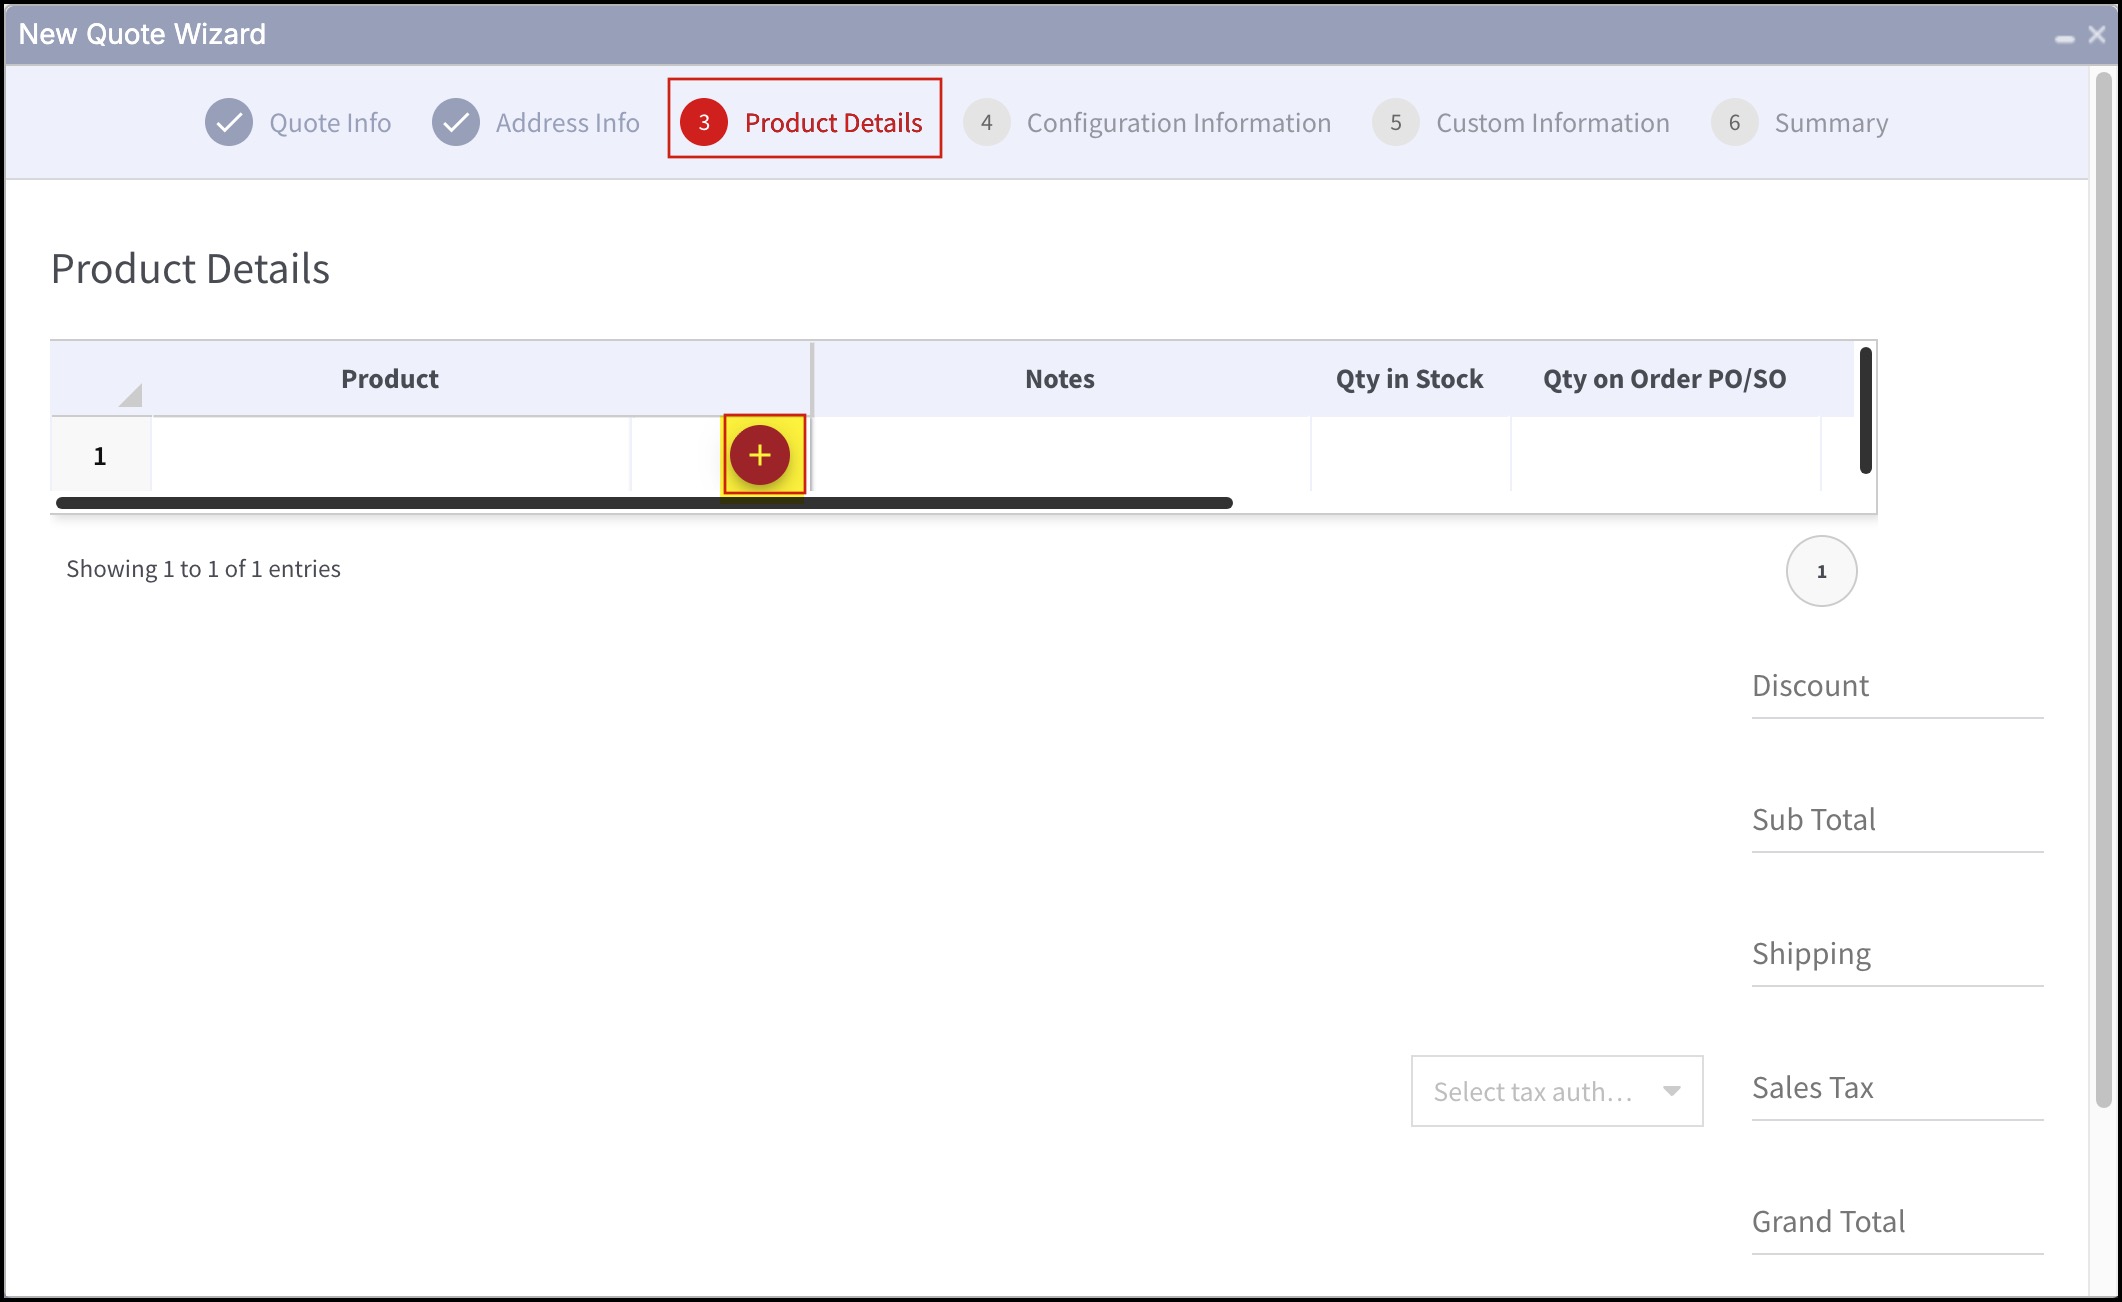
- Add Product to Quote pop-up window will appear.
There are 2 ways for adding products:
Way-1
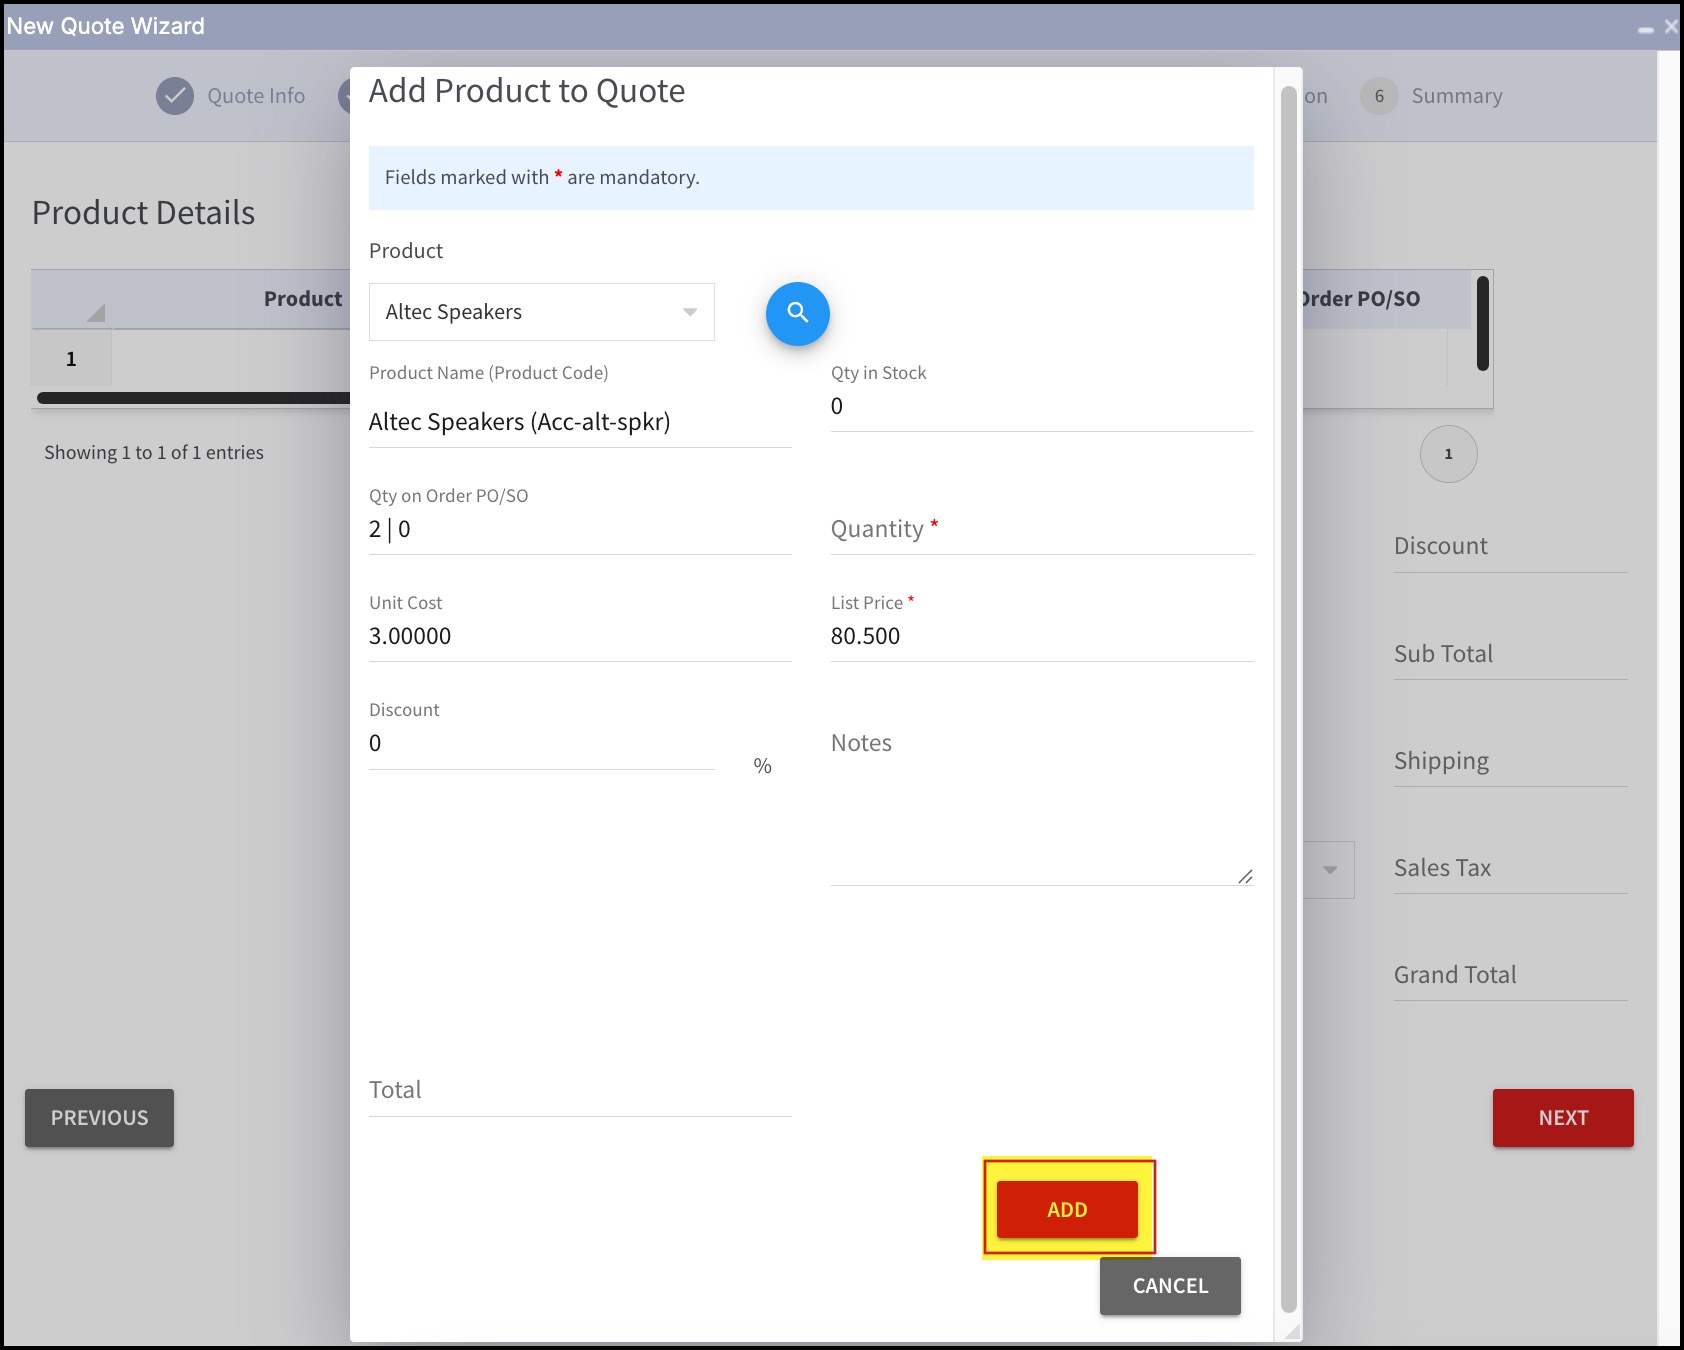
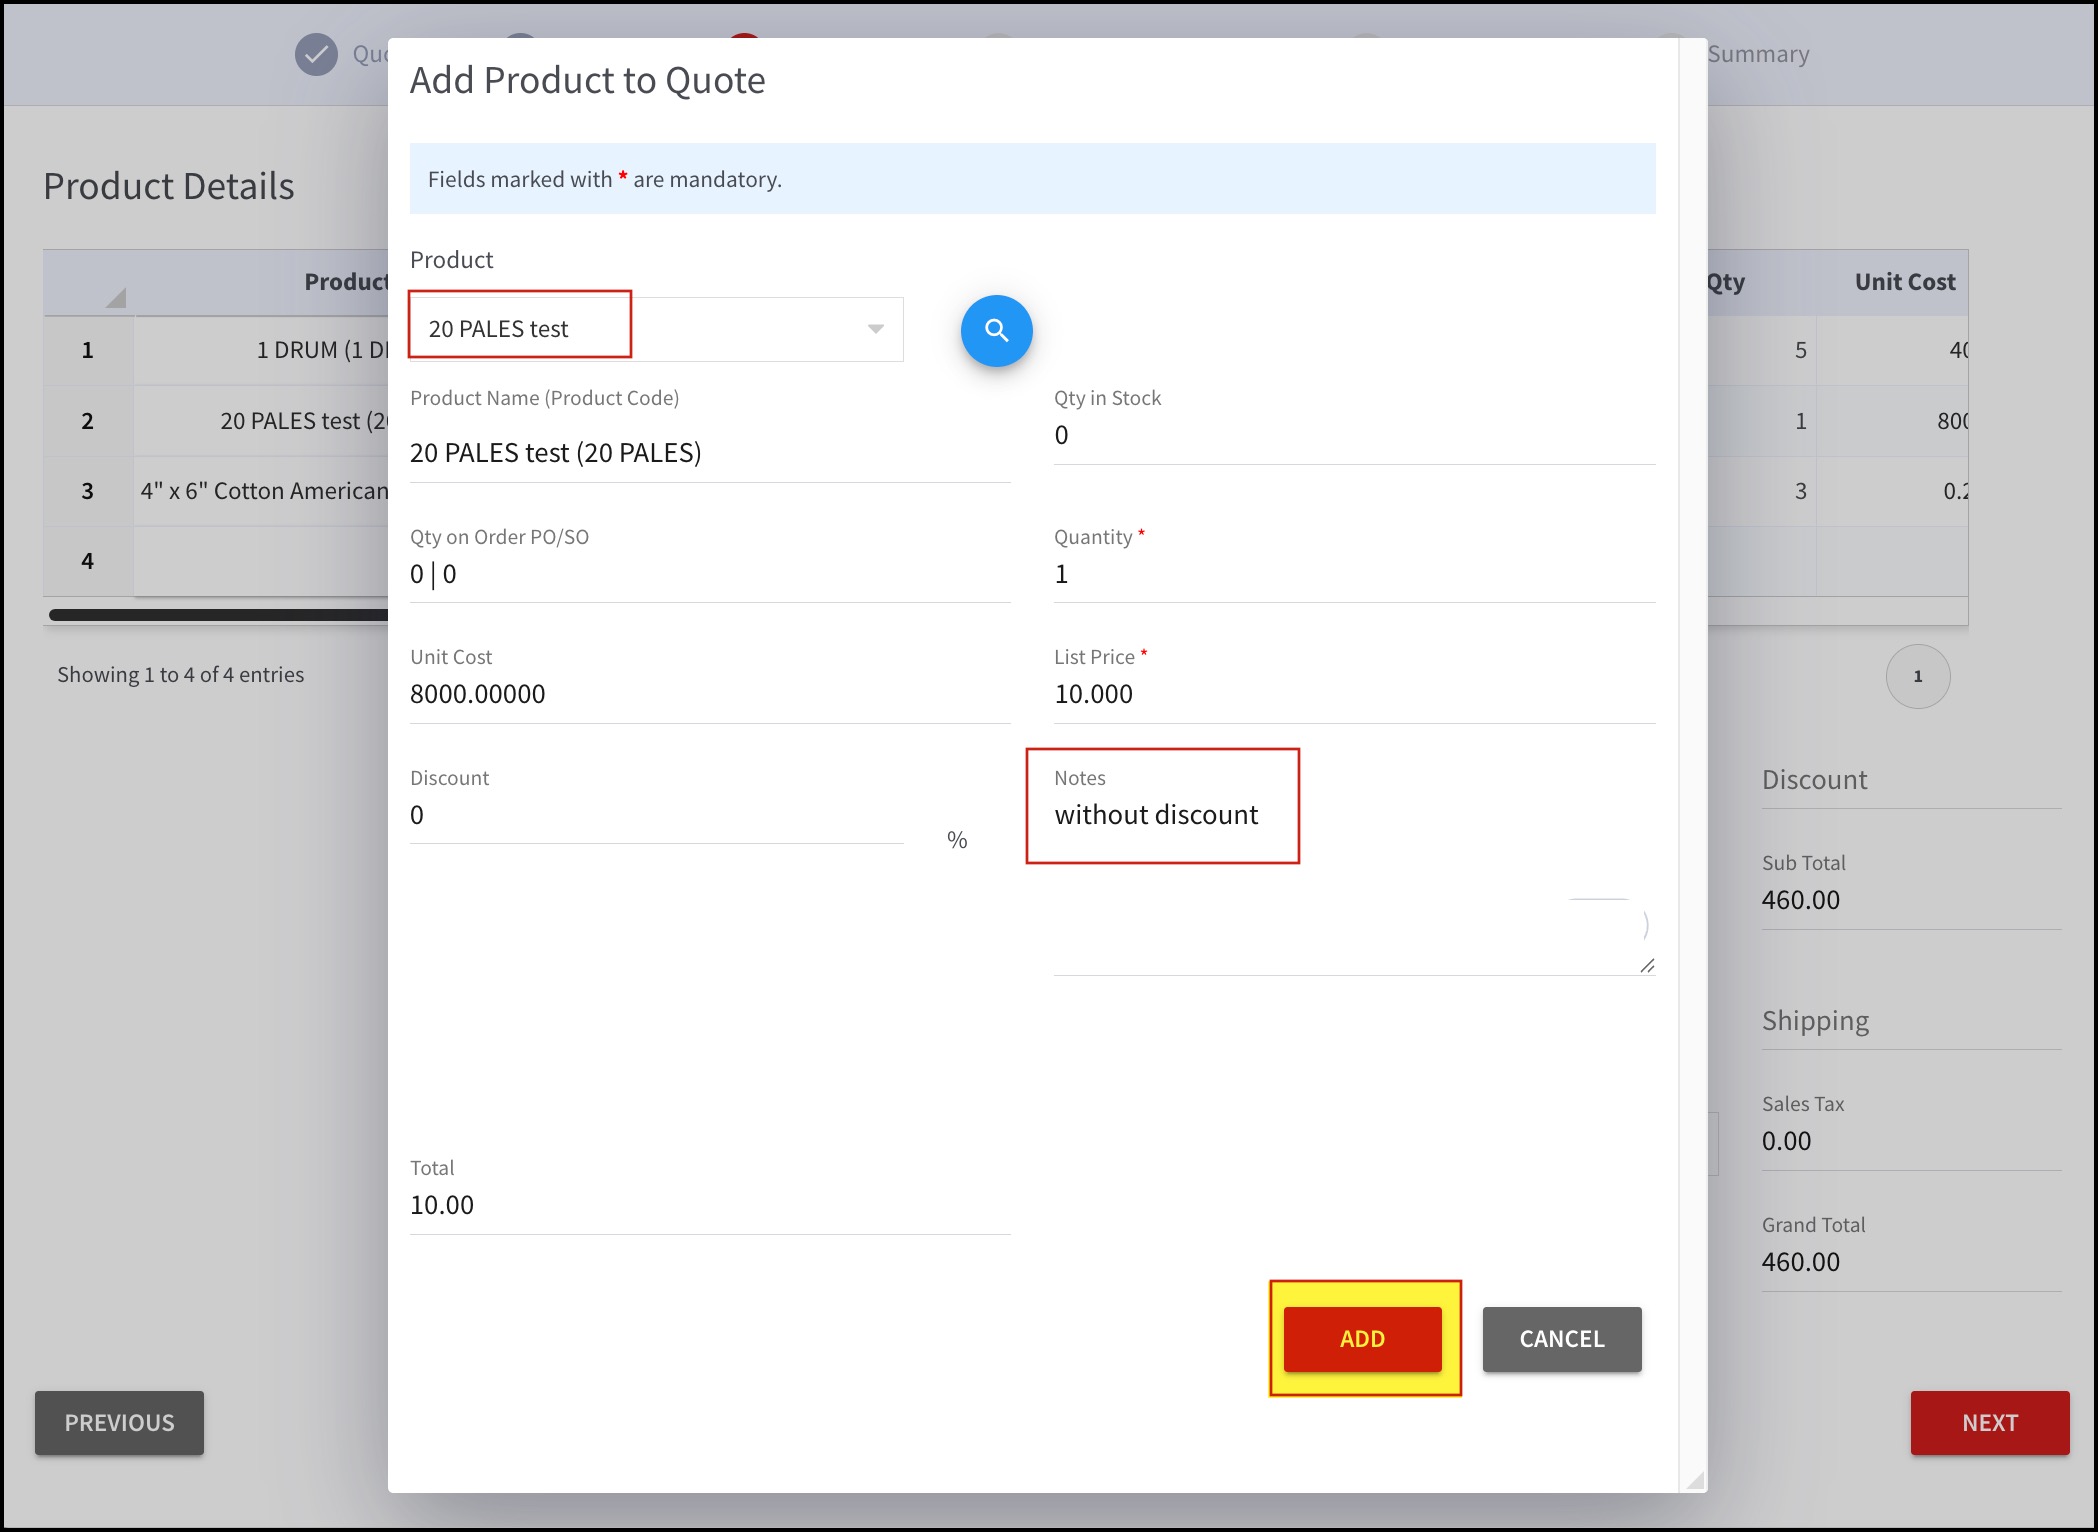
- Type to search the product/products. As soon as you begin typing in the text field, a drop-down list of products related to what you type will be displayed. Select a product from the drop-down list.
- Once the product is added, most of the fields automatically get filled, based on the product name. Make sure to enter the quantity of products that need to be added to the quote as it is mandatory.
- The pre-filled List Price and Discount fields can be edited as per requirement.
- The Total gets automatically calculated.
- If any necessary information needs to be included for the product, enter it in the Notes text field.
- Click on Add button, once done. The product will be added to the spreadsheet.
You can add more products by clicking on the + sign and repeating the above steps.
Way - 2
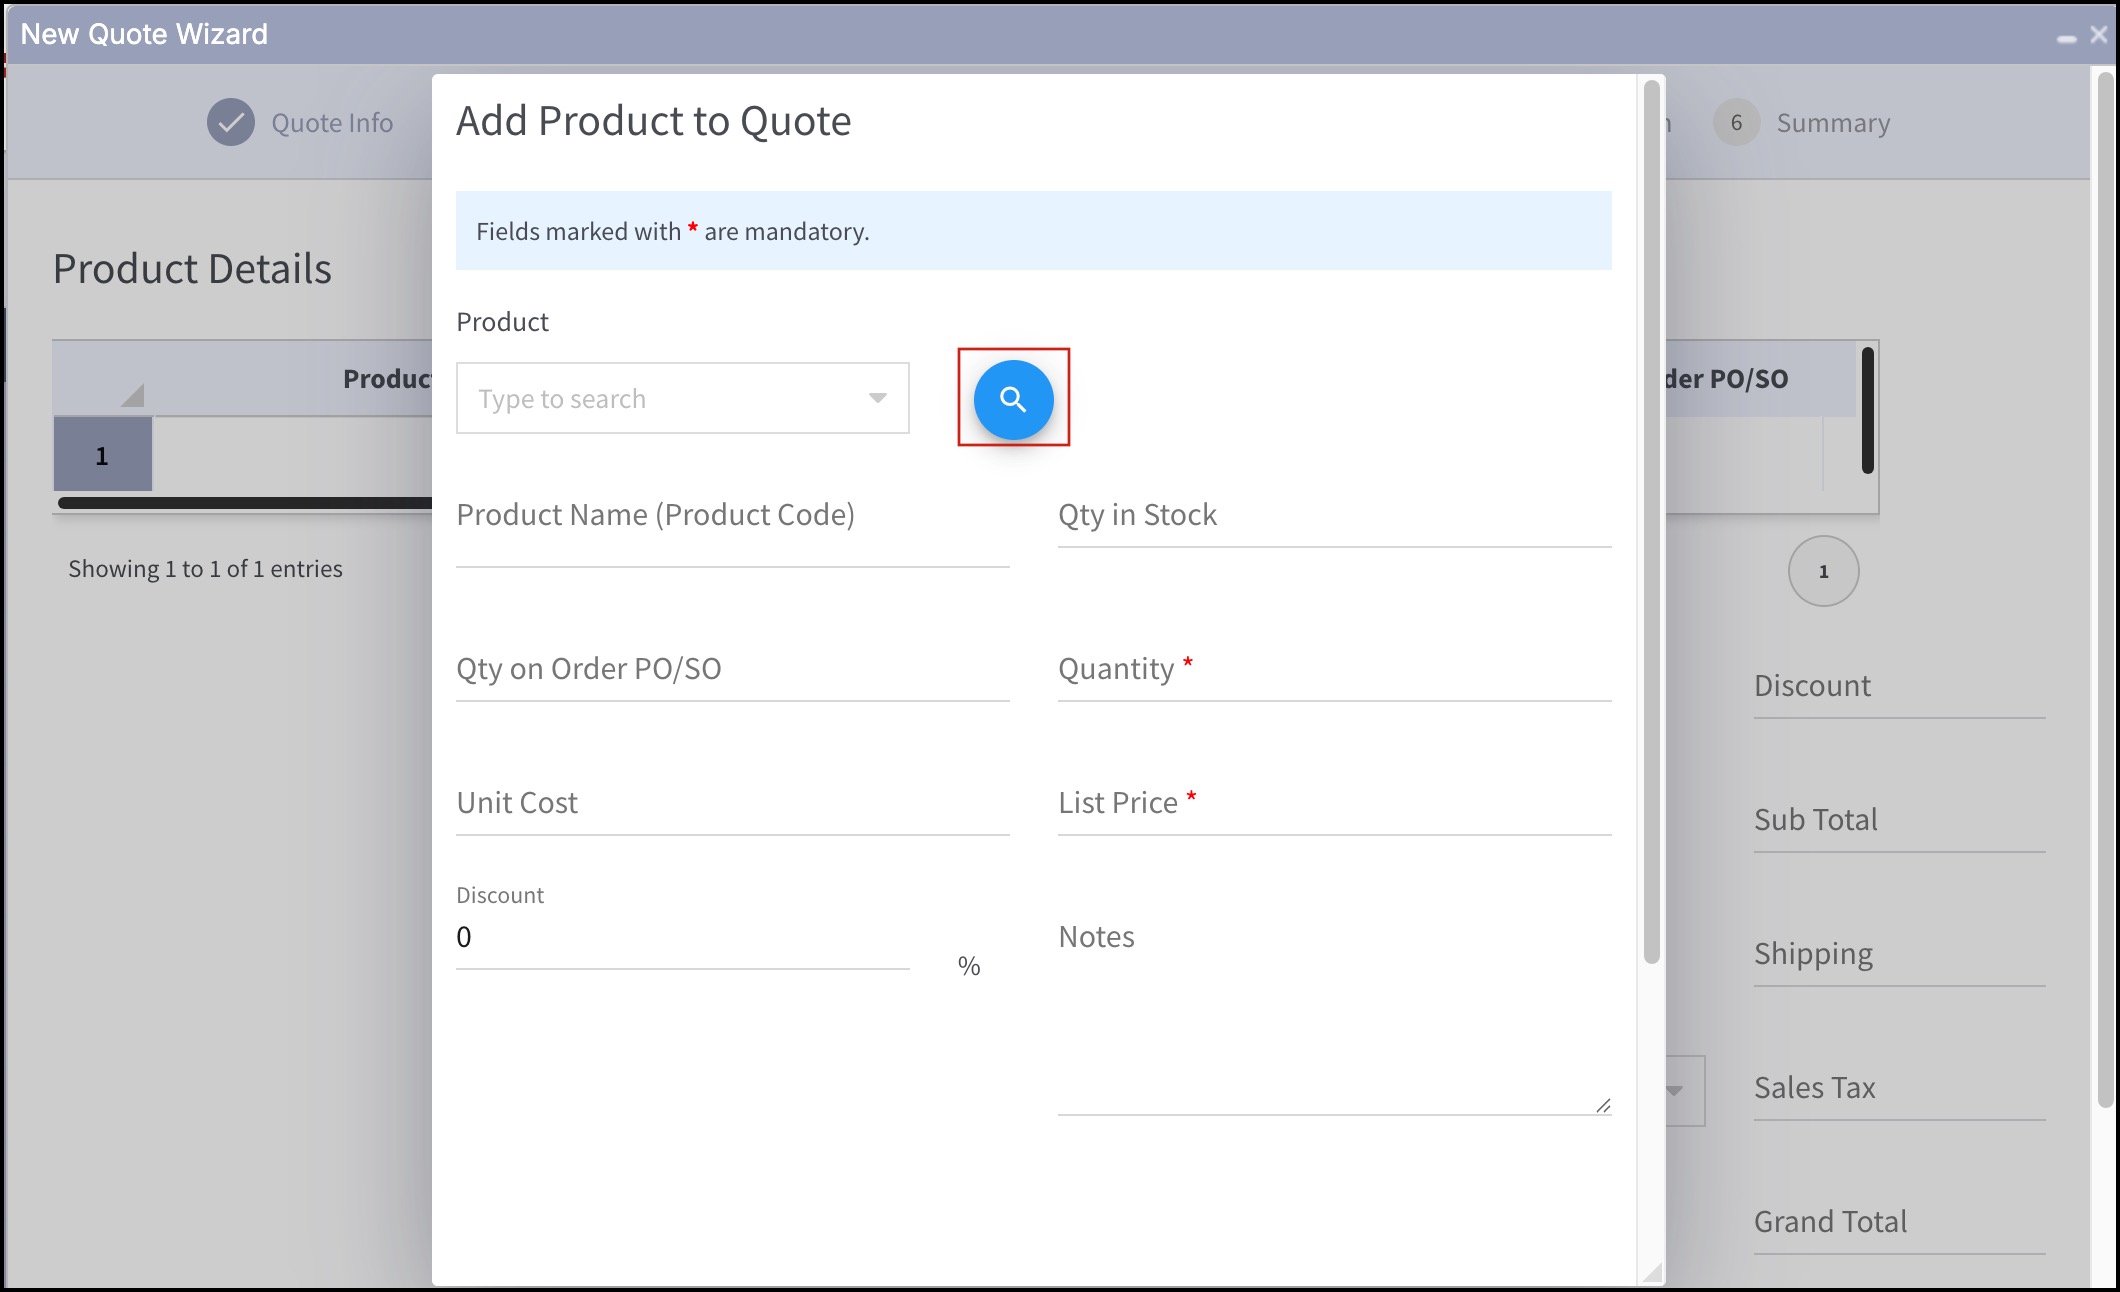
- The other way to add a product is by clicking on the 'magnifying glass' icon that appears in the Add Product to Quote window.
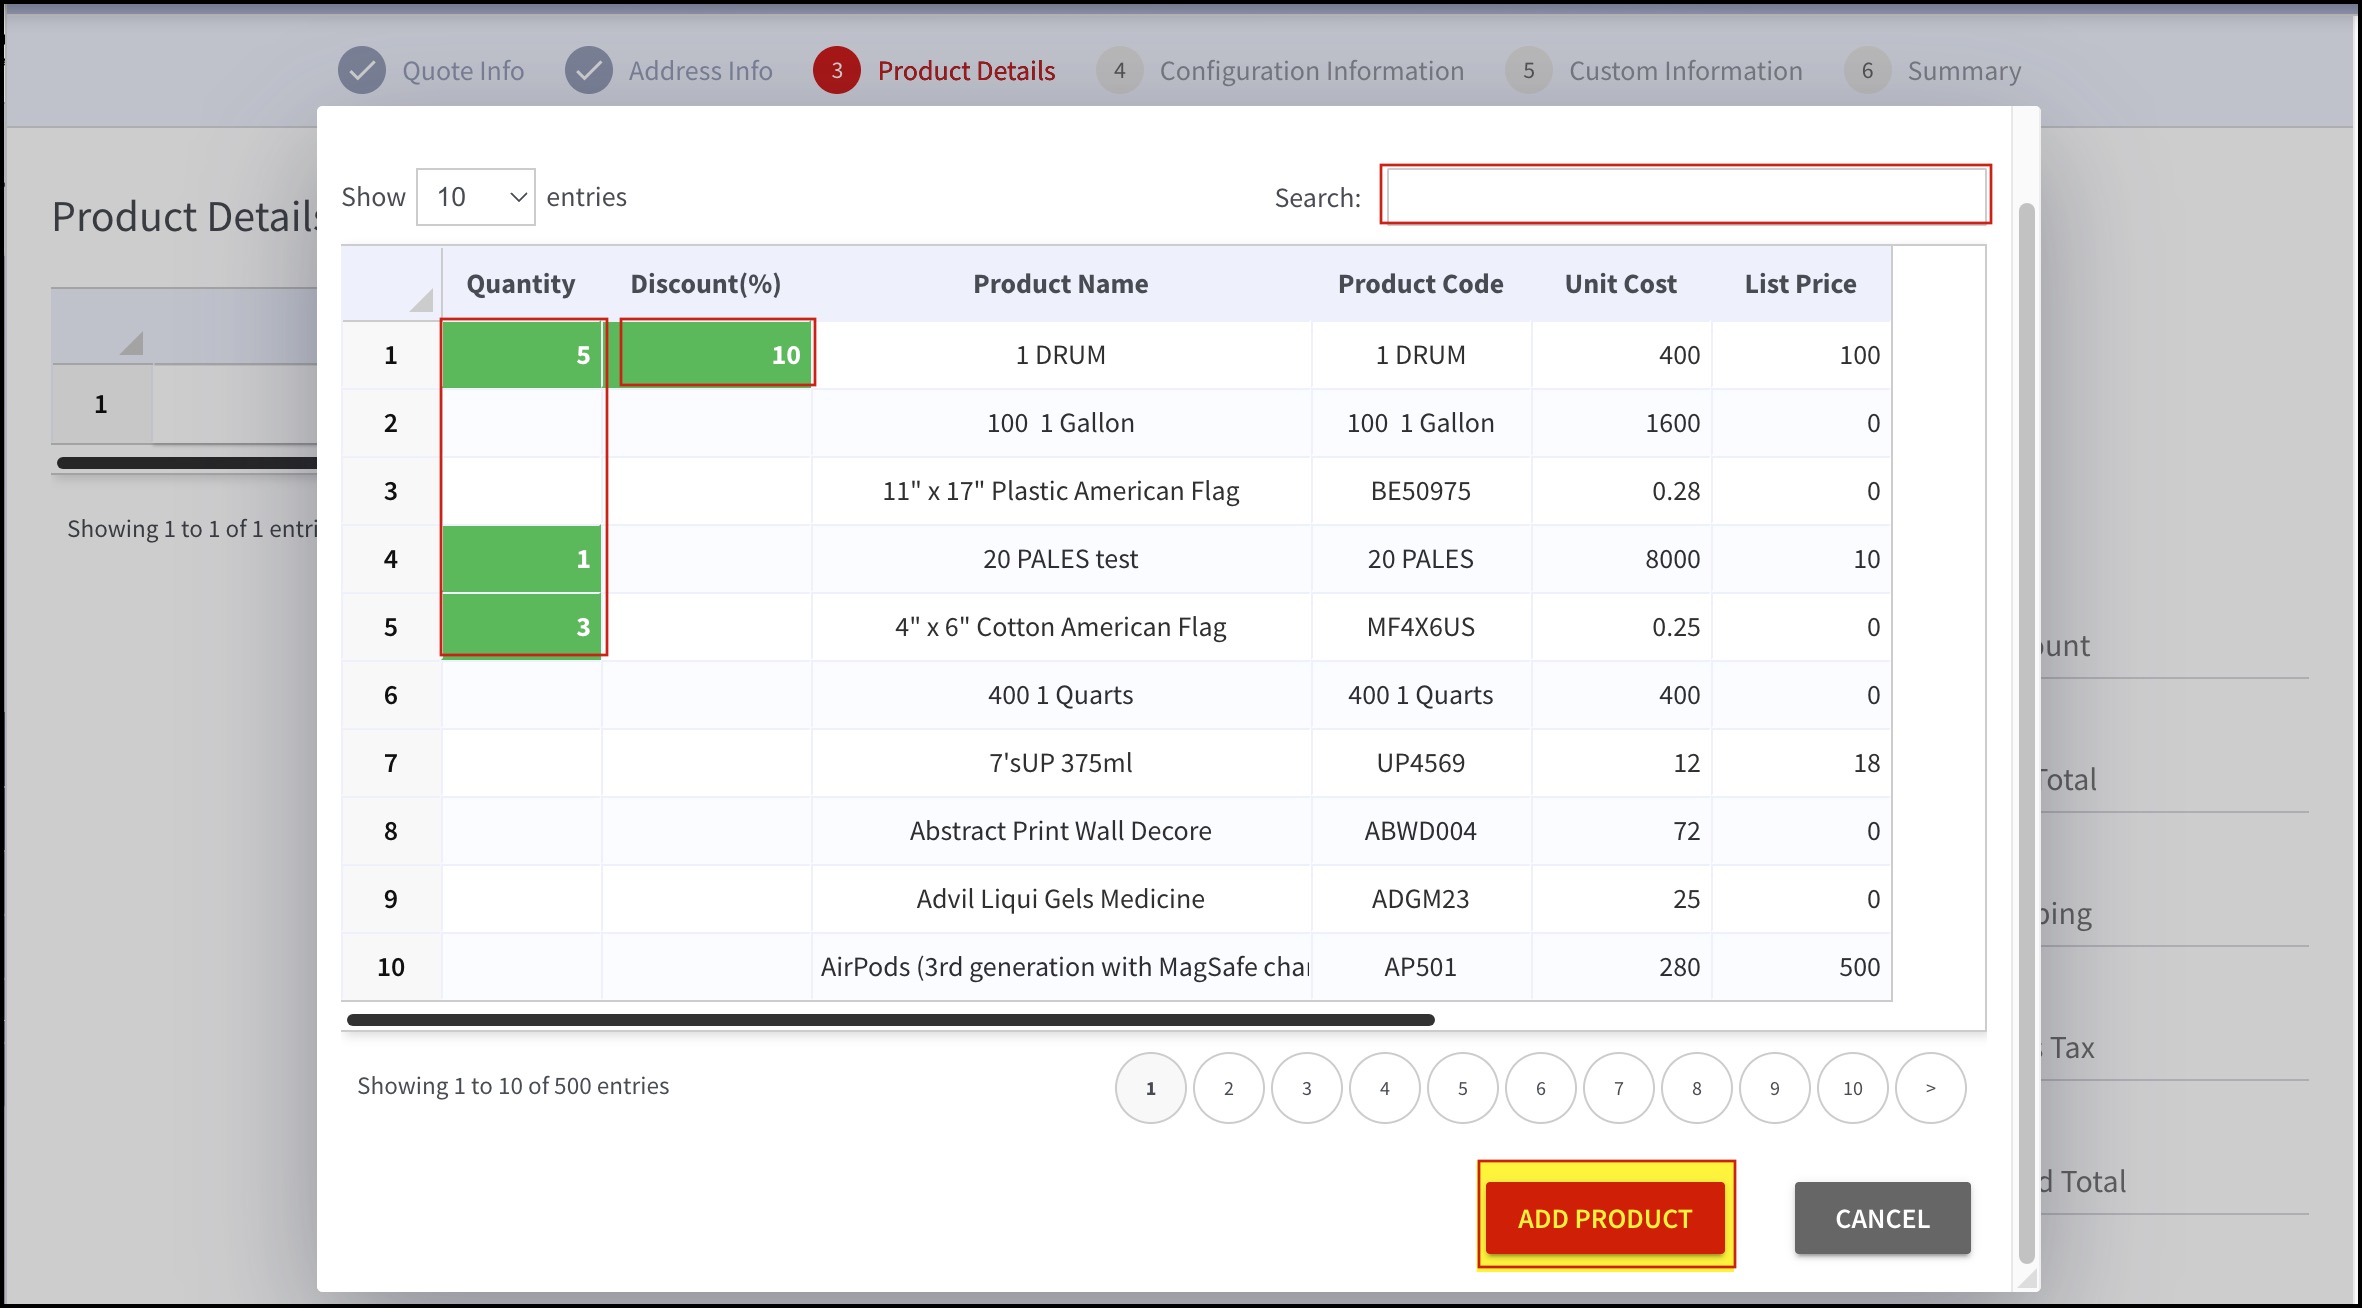
- In Search Products, either search for a particular product by typing the name in the Search field or select multiple products at a time by just entering the required quantity for each. The product cannot be added without entering the required quantity.
- You can also enter the discount for each product selected as per your need.
- Click on the Add Product button.
You can delete ("- "icon) or edit ("pen" icon) the added products to the quote.
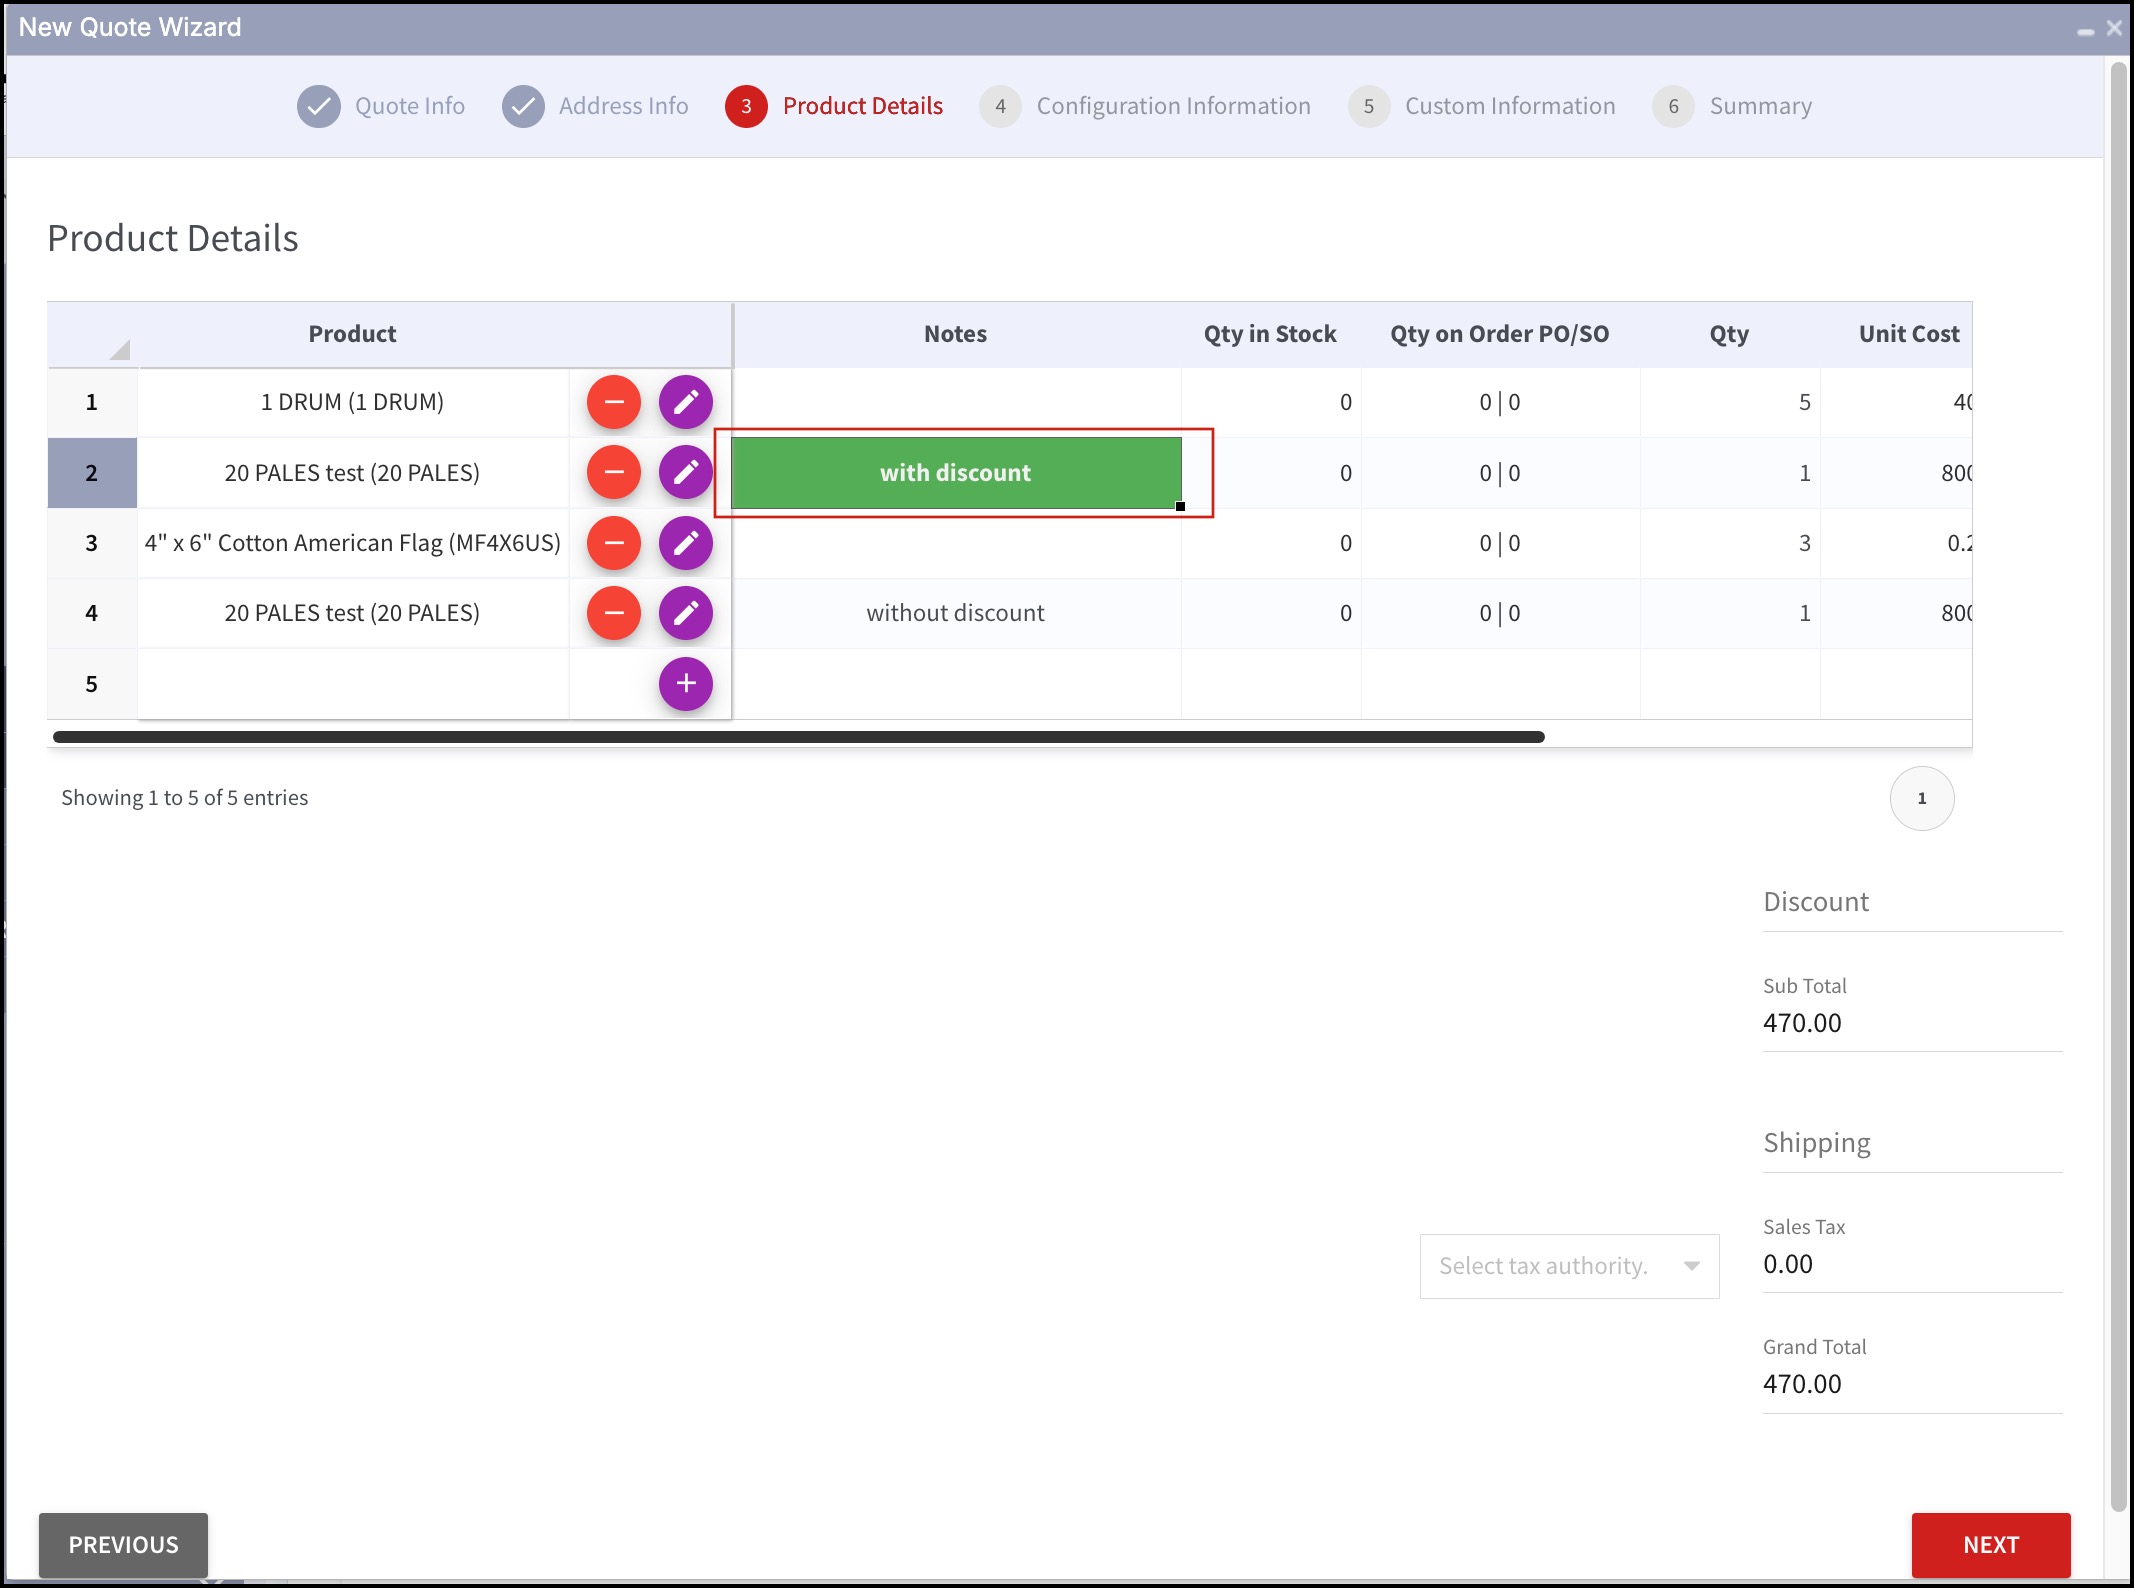
If you try to add duplicate products (the one that is already added to the quote) an error will occur.
For example, let's add 20 Pales test which is already added to the quote. You can see an error.

If you still wish to add duplicate products, write a Note in the Notes text field and then add.
You can even directly write Notes for the already added product in the Product Details spreadsheet and then add its duplicate.
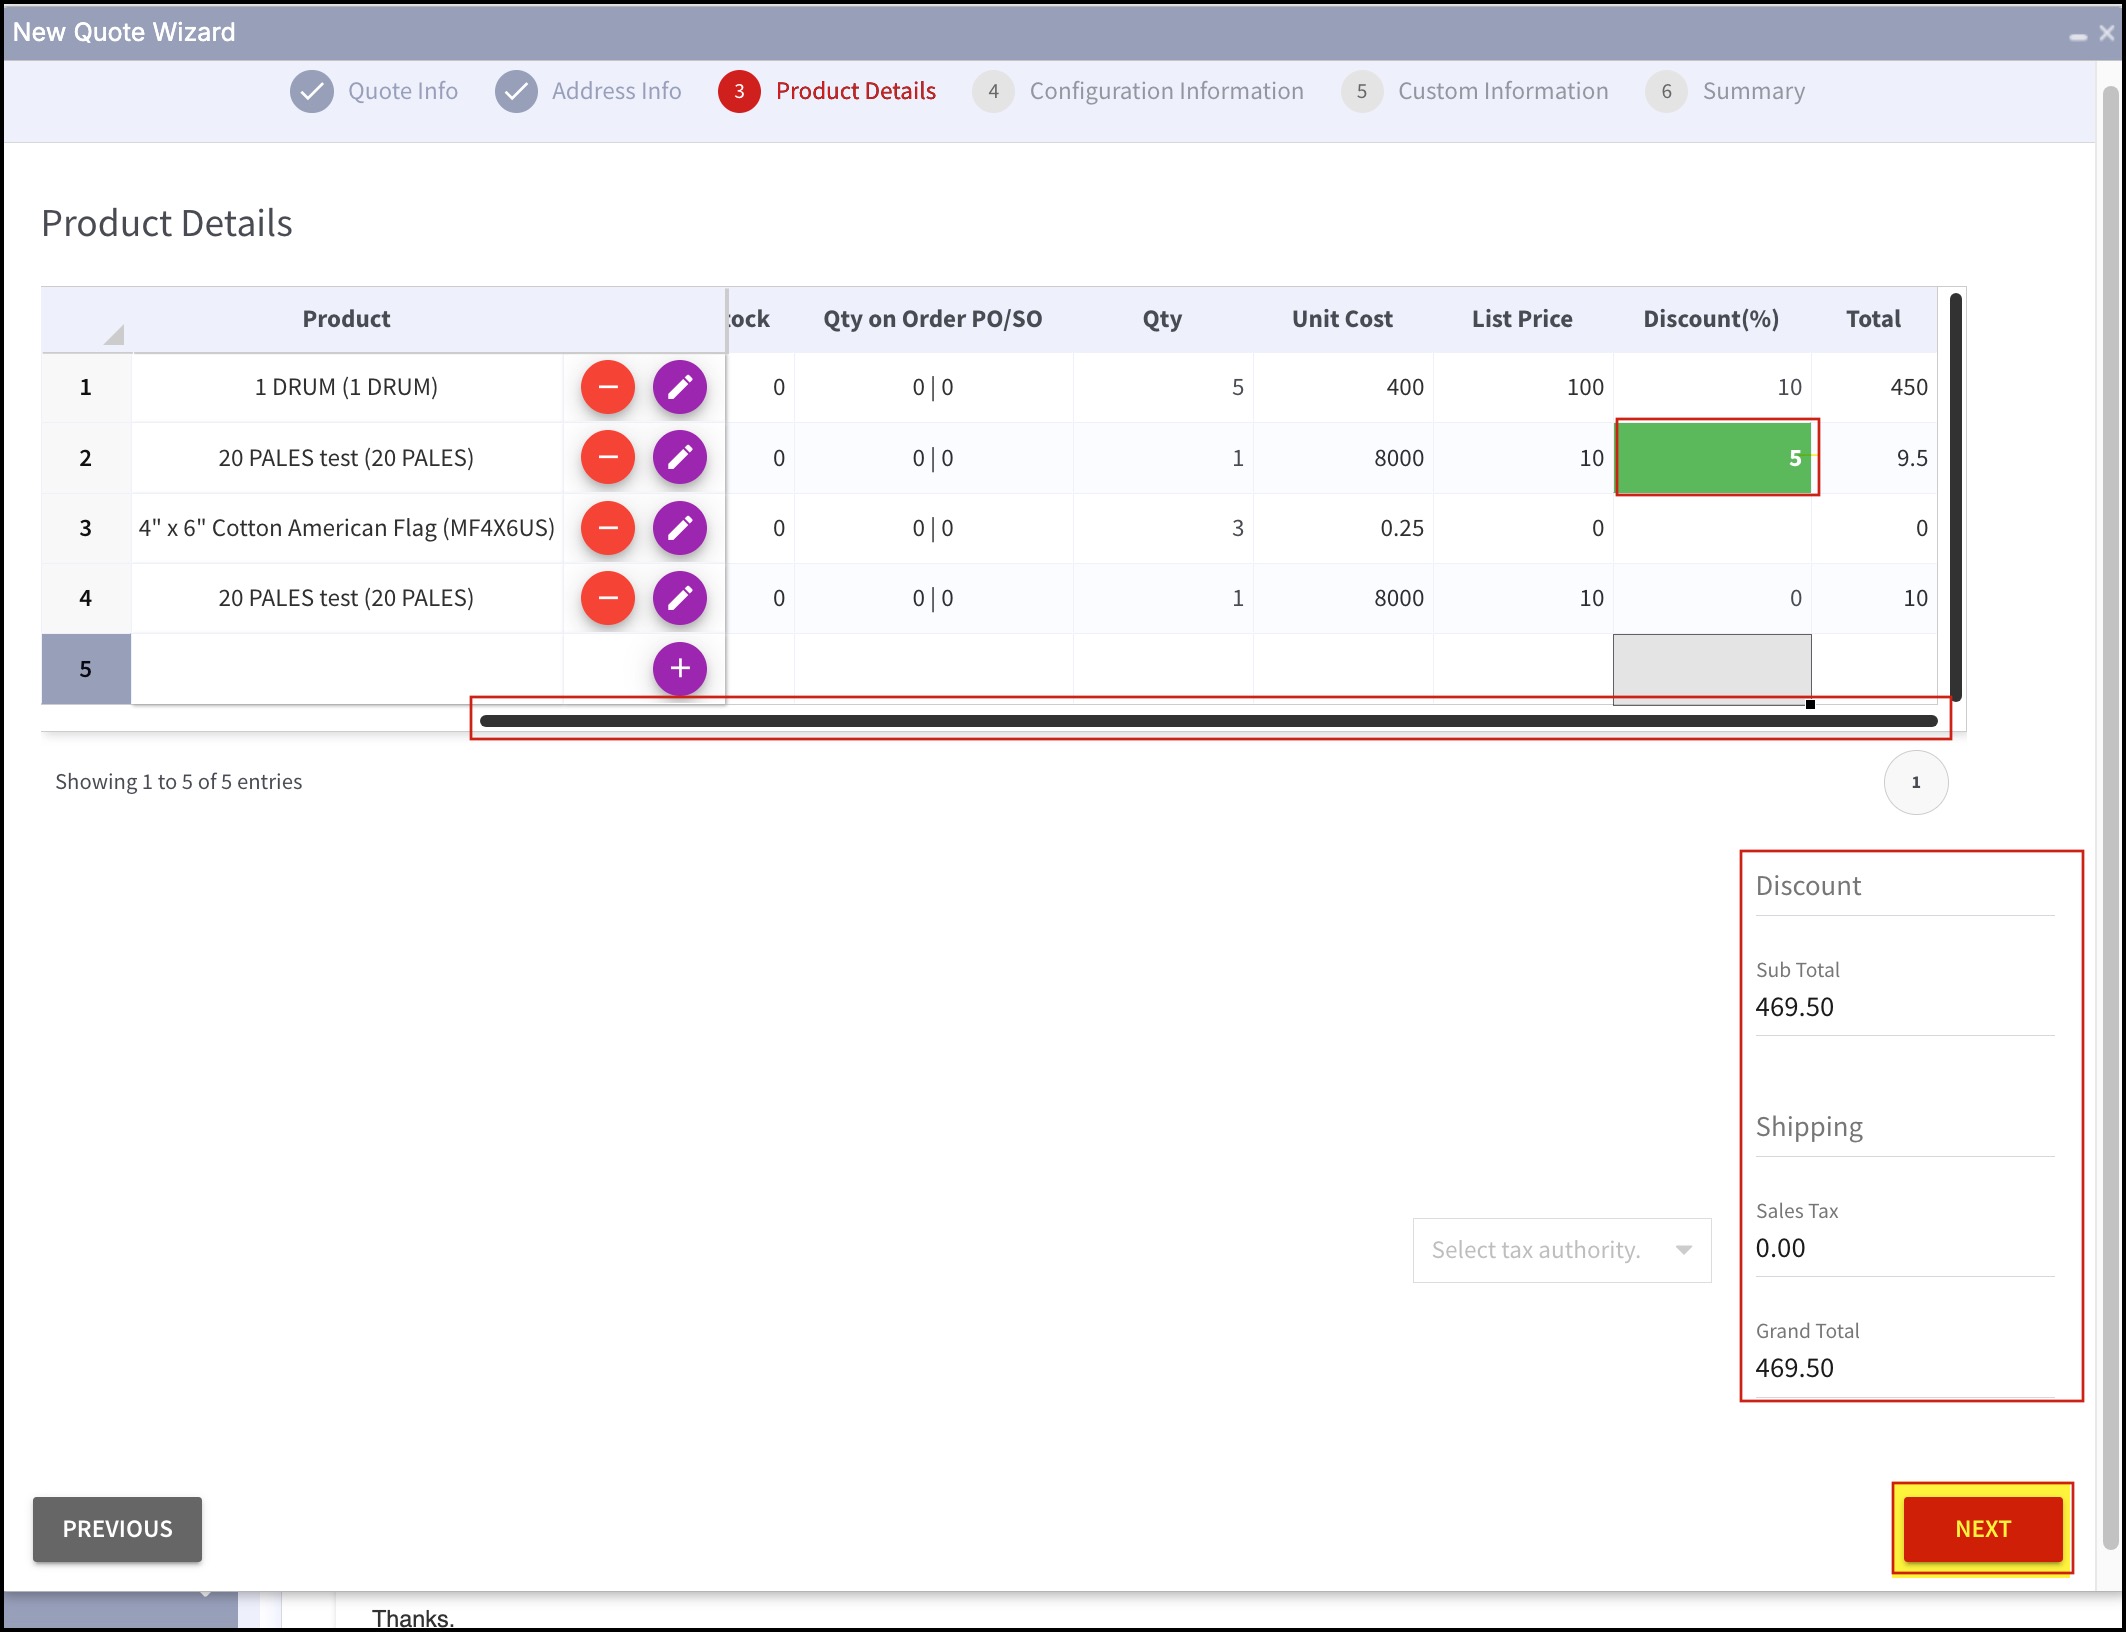
- If required, enter a discount for each product added to this quote or enter an order discount that will be applied to the entire quote or apply both discounts. (Scroll the horizontal bar to view columns).
- Enter shipping cost applied, if any, for this quote.
- Sales tax rate will be automatically calculated on the basis of the Tax Authority you select from the drop-down list.
- The grand total will be auto-calculated, including the shipping and taxes. It is the final quote total for the customer.
- Click on Next.
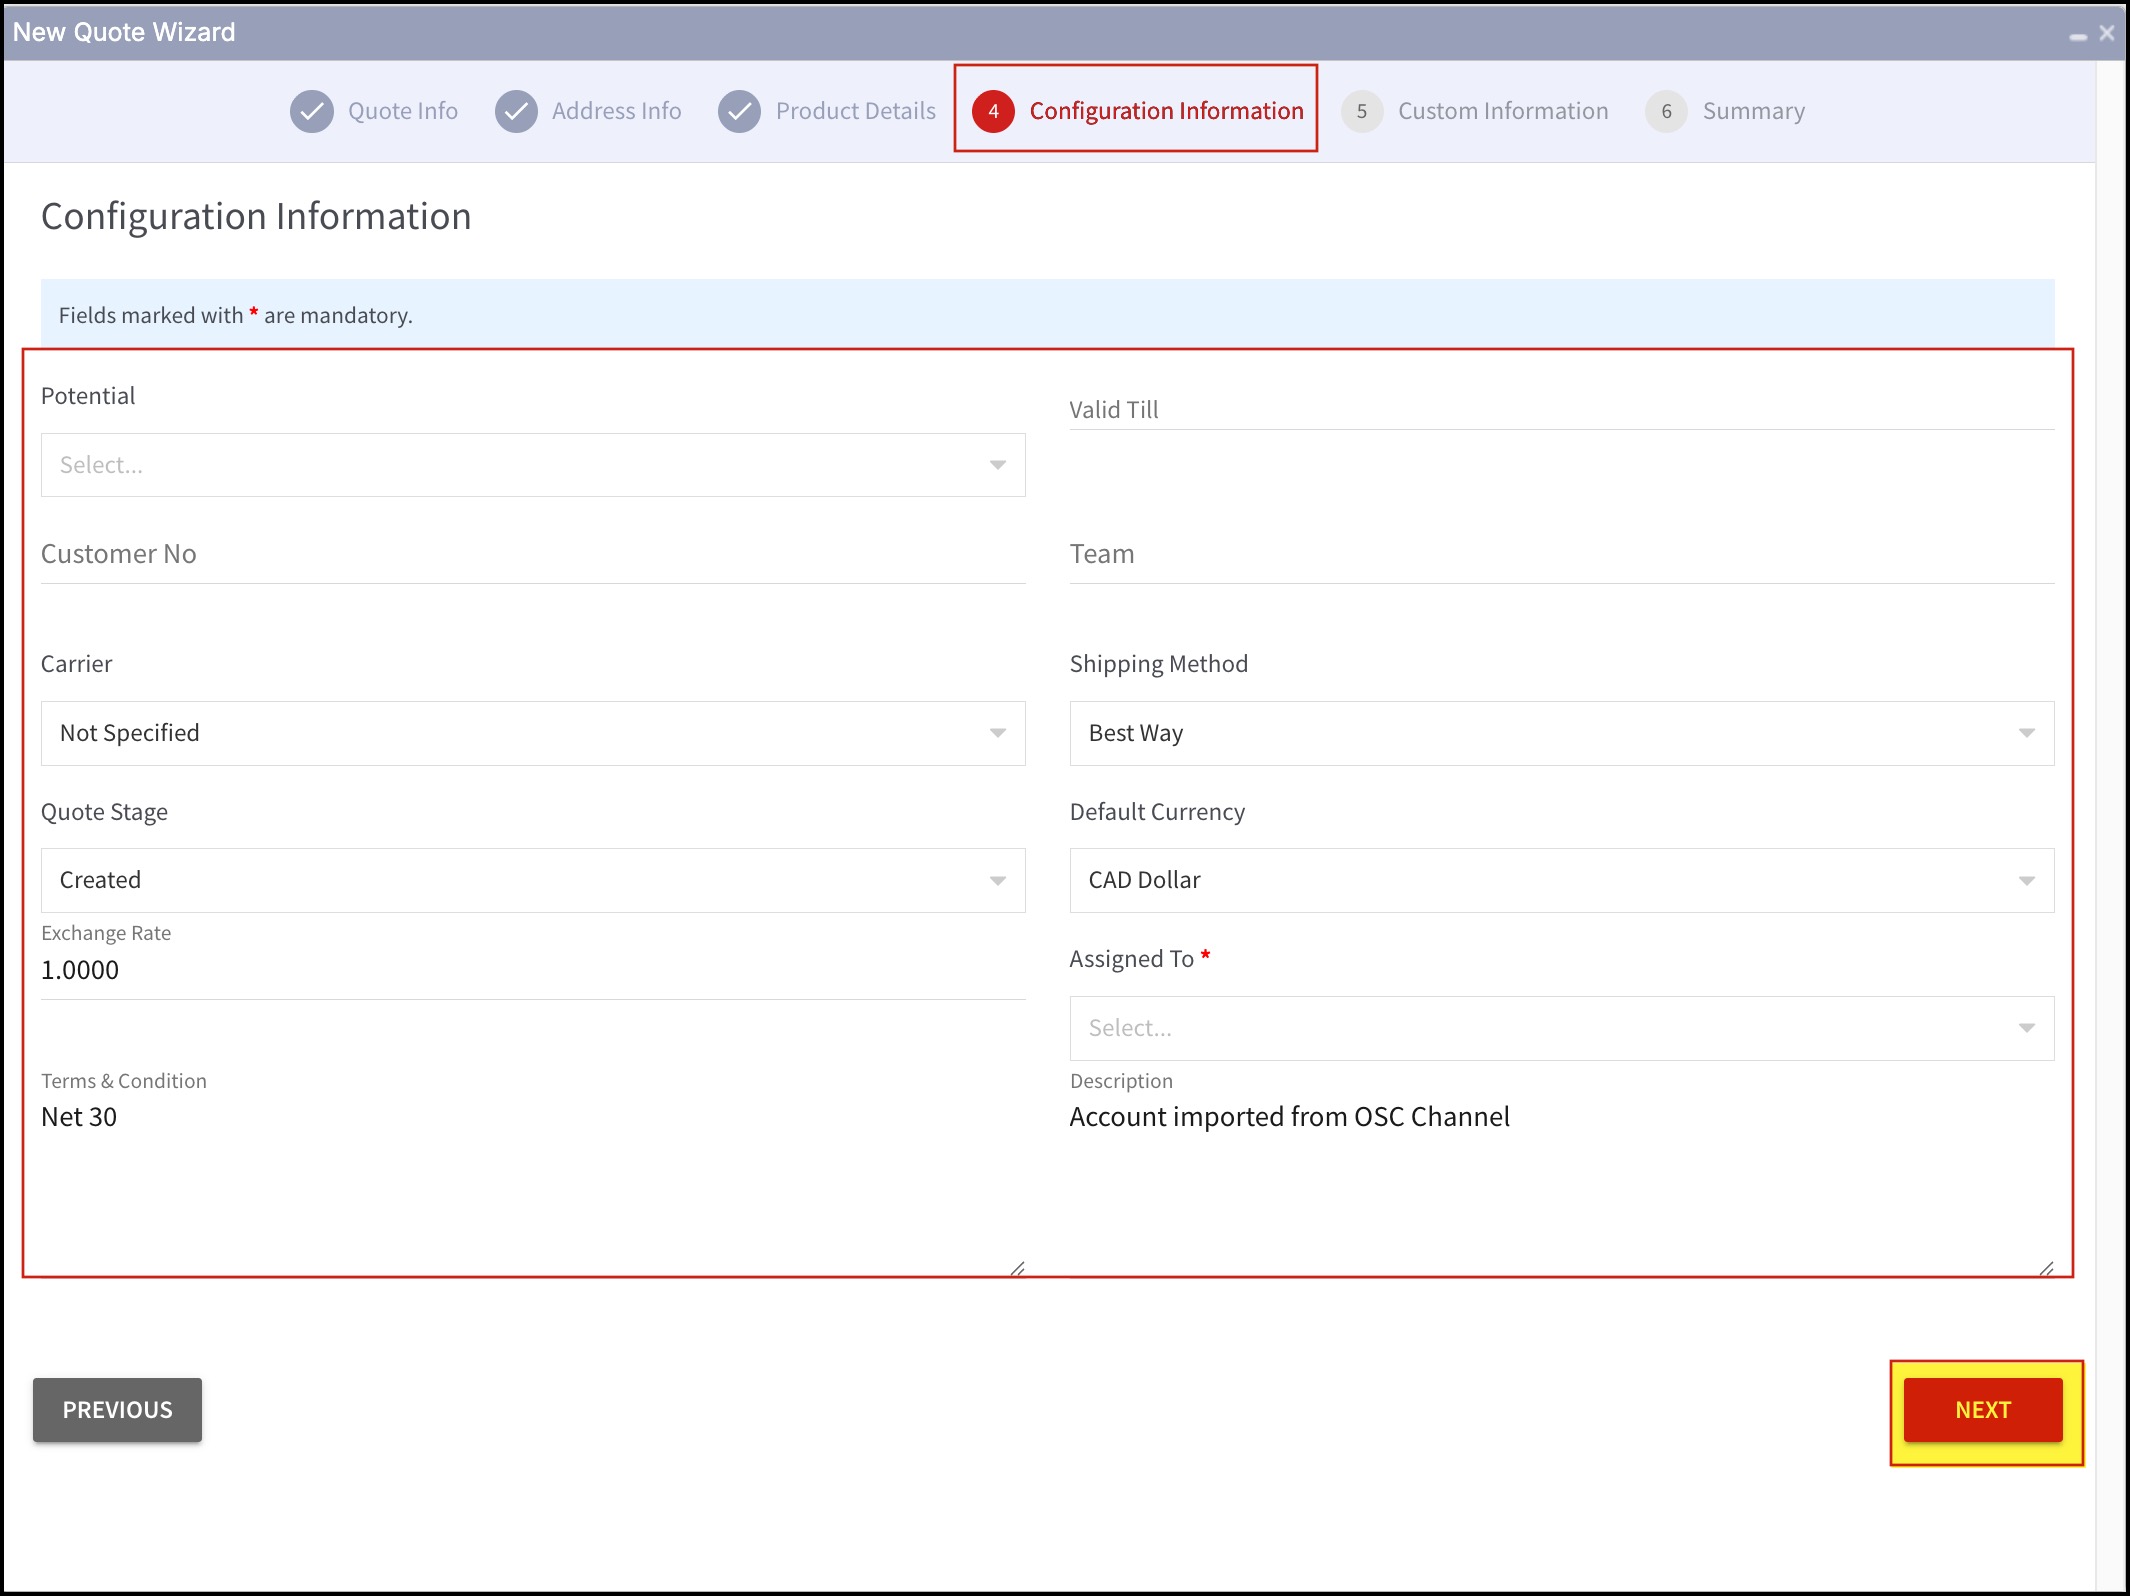
- Next comes the Configuration Information.
- If the recipient of the quote is a potential customer, type to search in the Potential text field.
- In valid till field, a calendar will open. Select the date when the quote expires.
- Enter Customer No. and Team name, if any in their respective fields.
- When the account name is selected, fields like Carrier, Shipping Method, Default Currency, Exchange Rate, Assigned To, Terms & Conditions are automatically filled if a default has been set up for customer's account. However, you can edit those fields.
- Choose the preferable Quote Stage from the drop-down list.
- In case of any additional information related to the quote, specify it in Description.
- After all the required information is filled, click on Next.
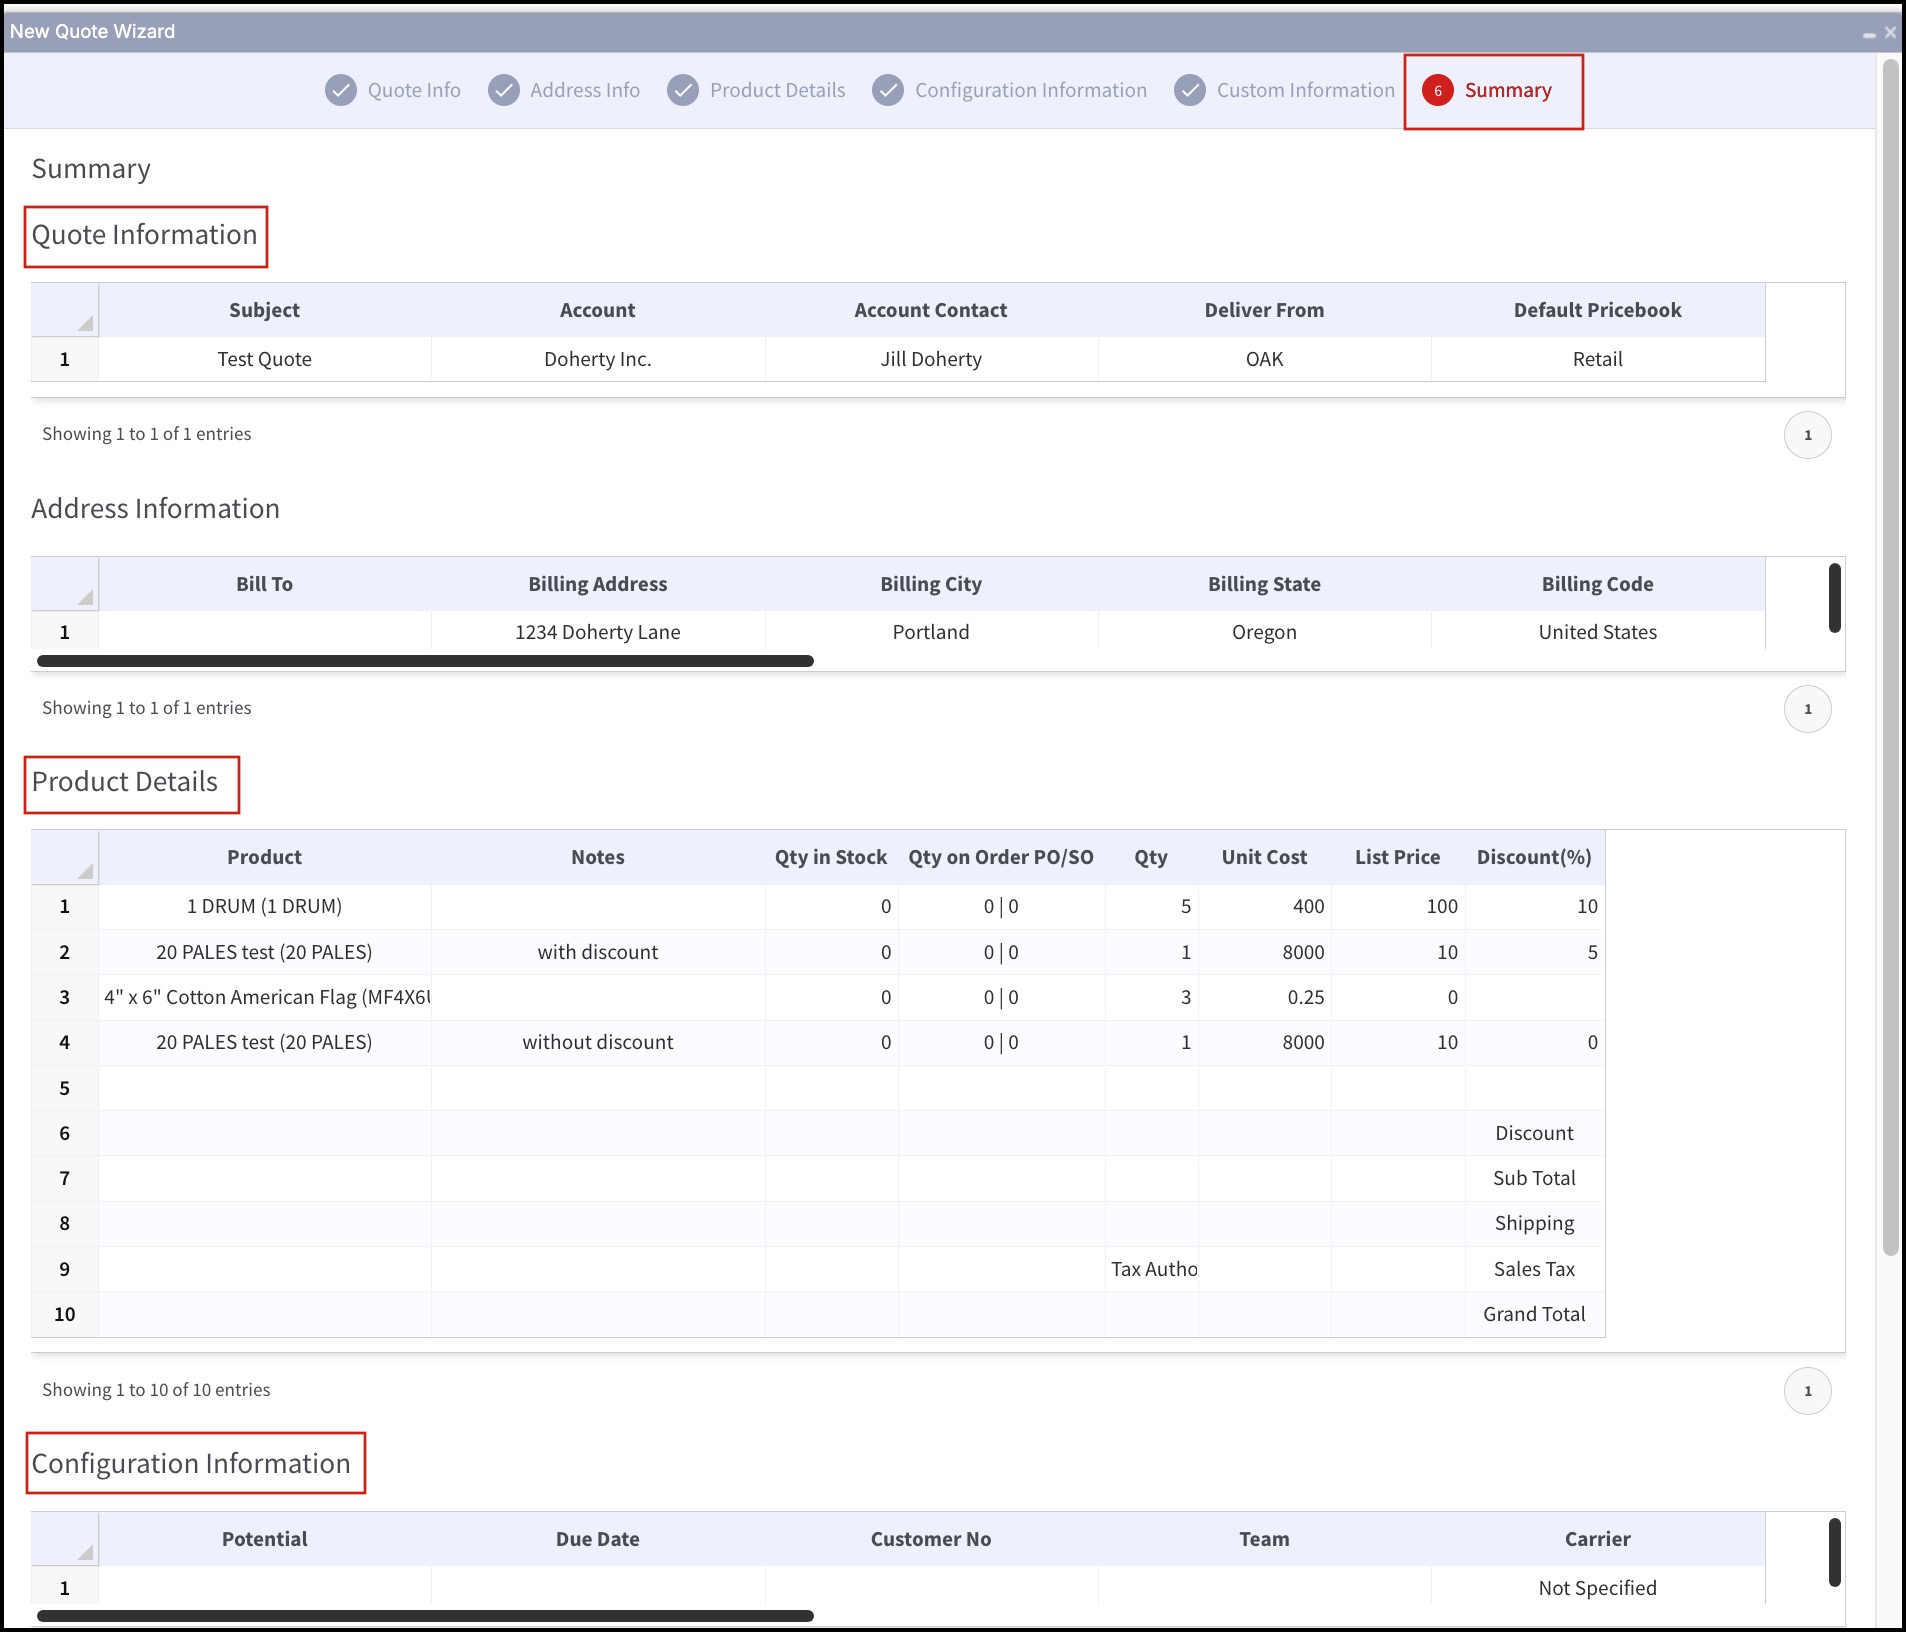
- All the information entered in previous steps/windows will be outlined in Summary.
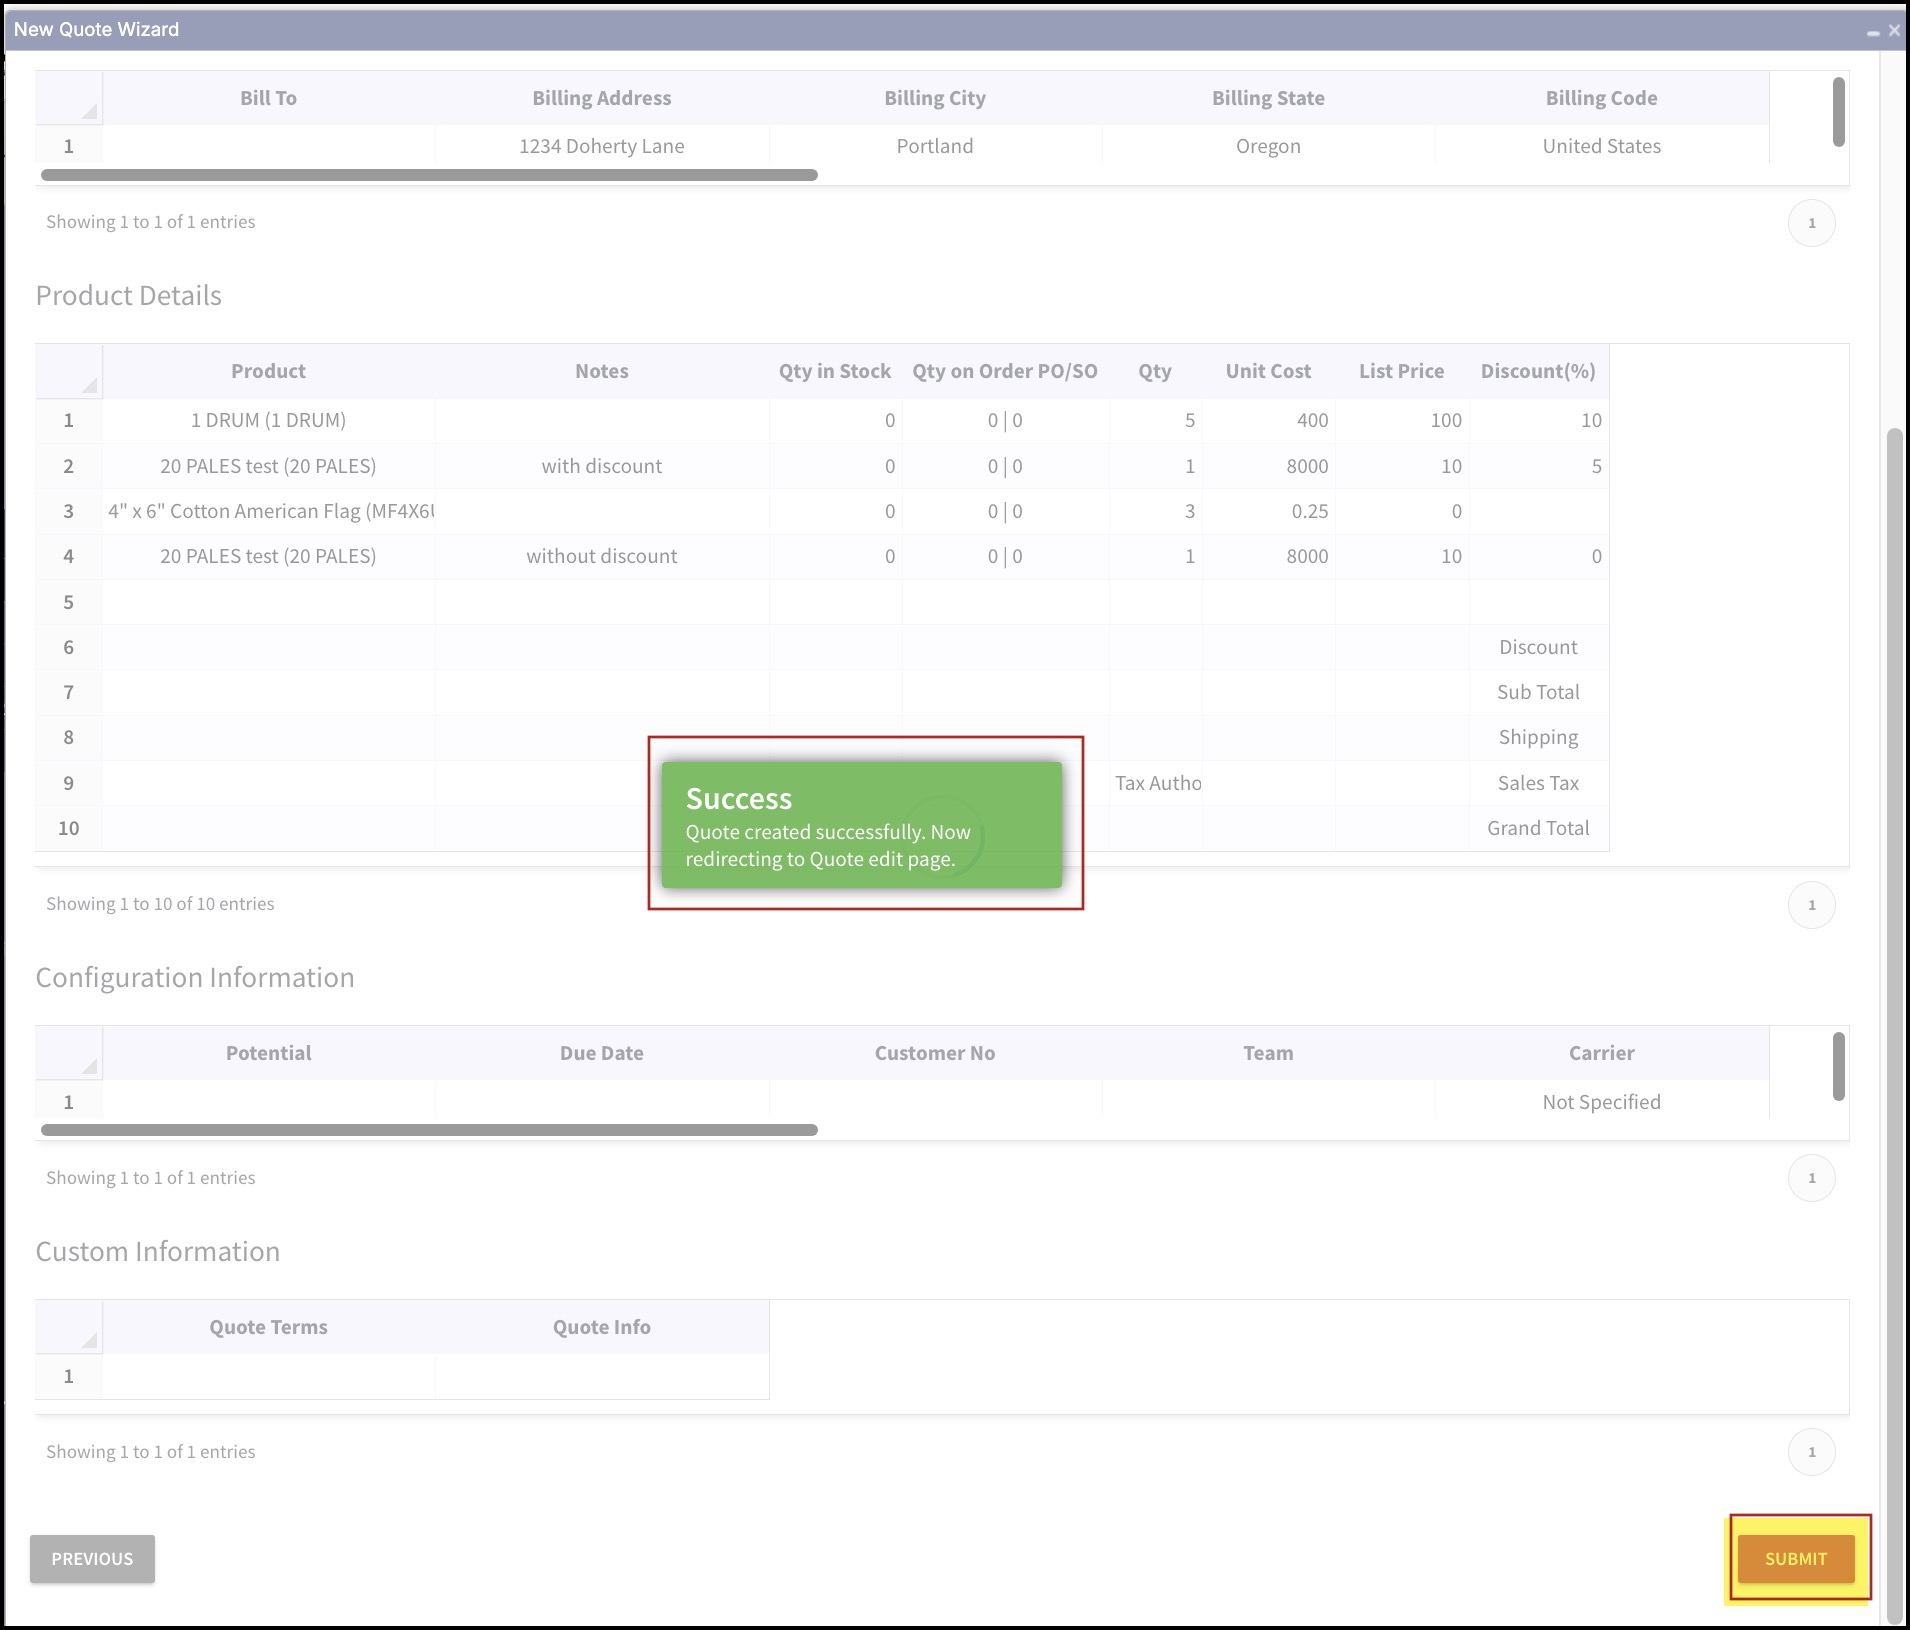
- Click on Submit.
- You'll then see a Success message.
- When you submit, the Quote edit window will open, where you can make any additional changes you want and click on Save.
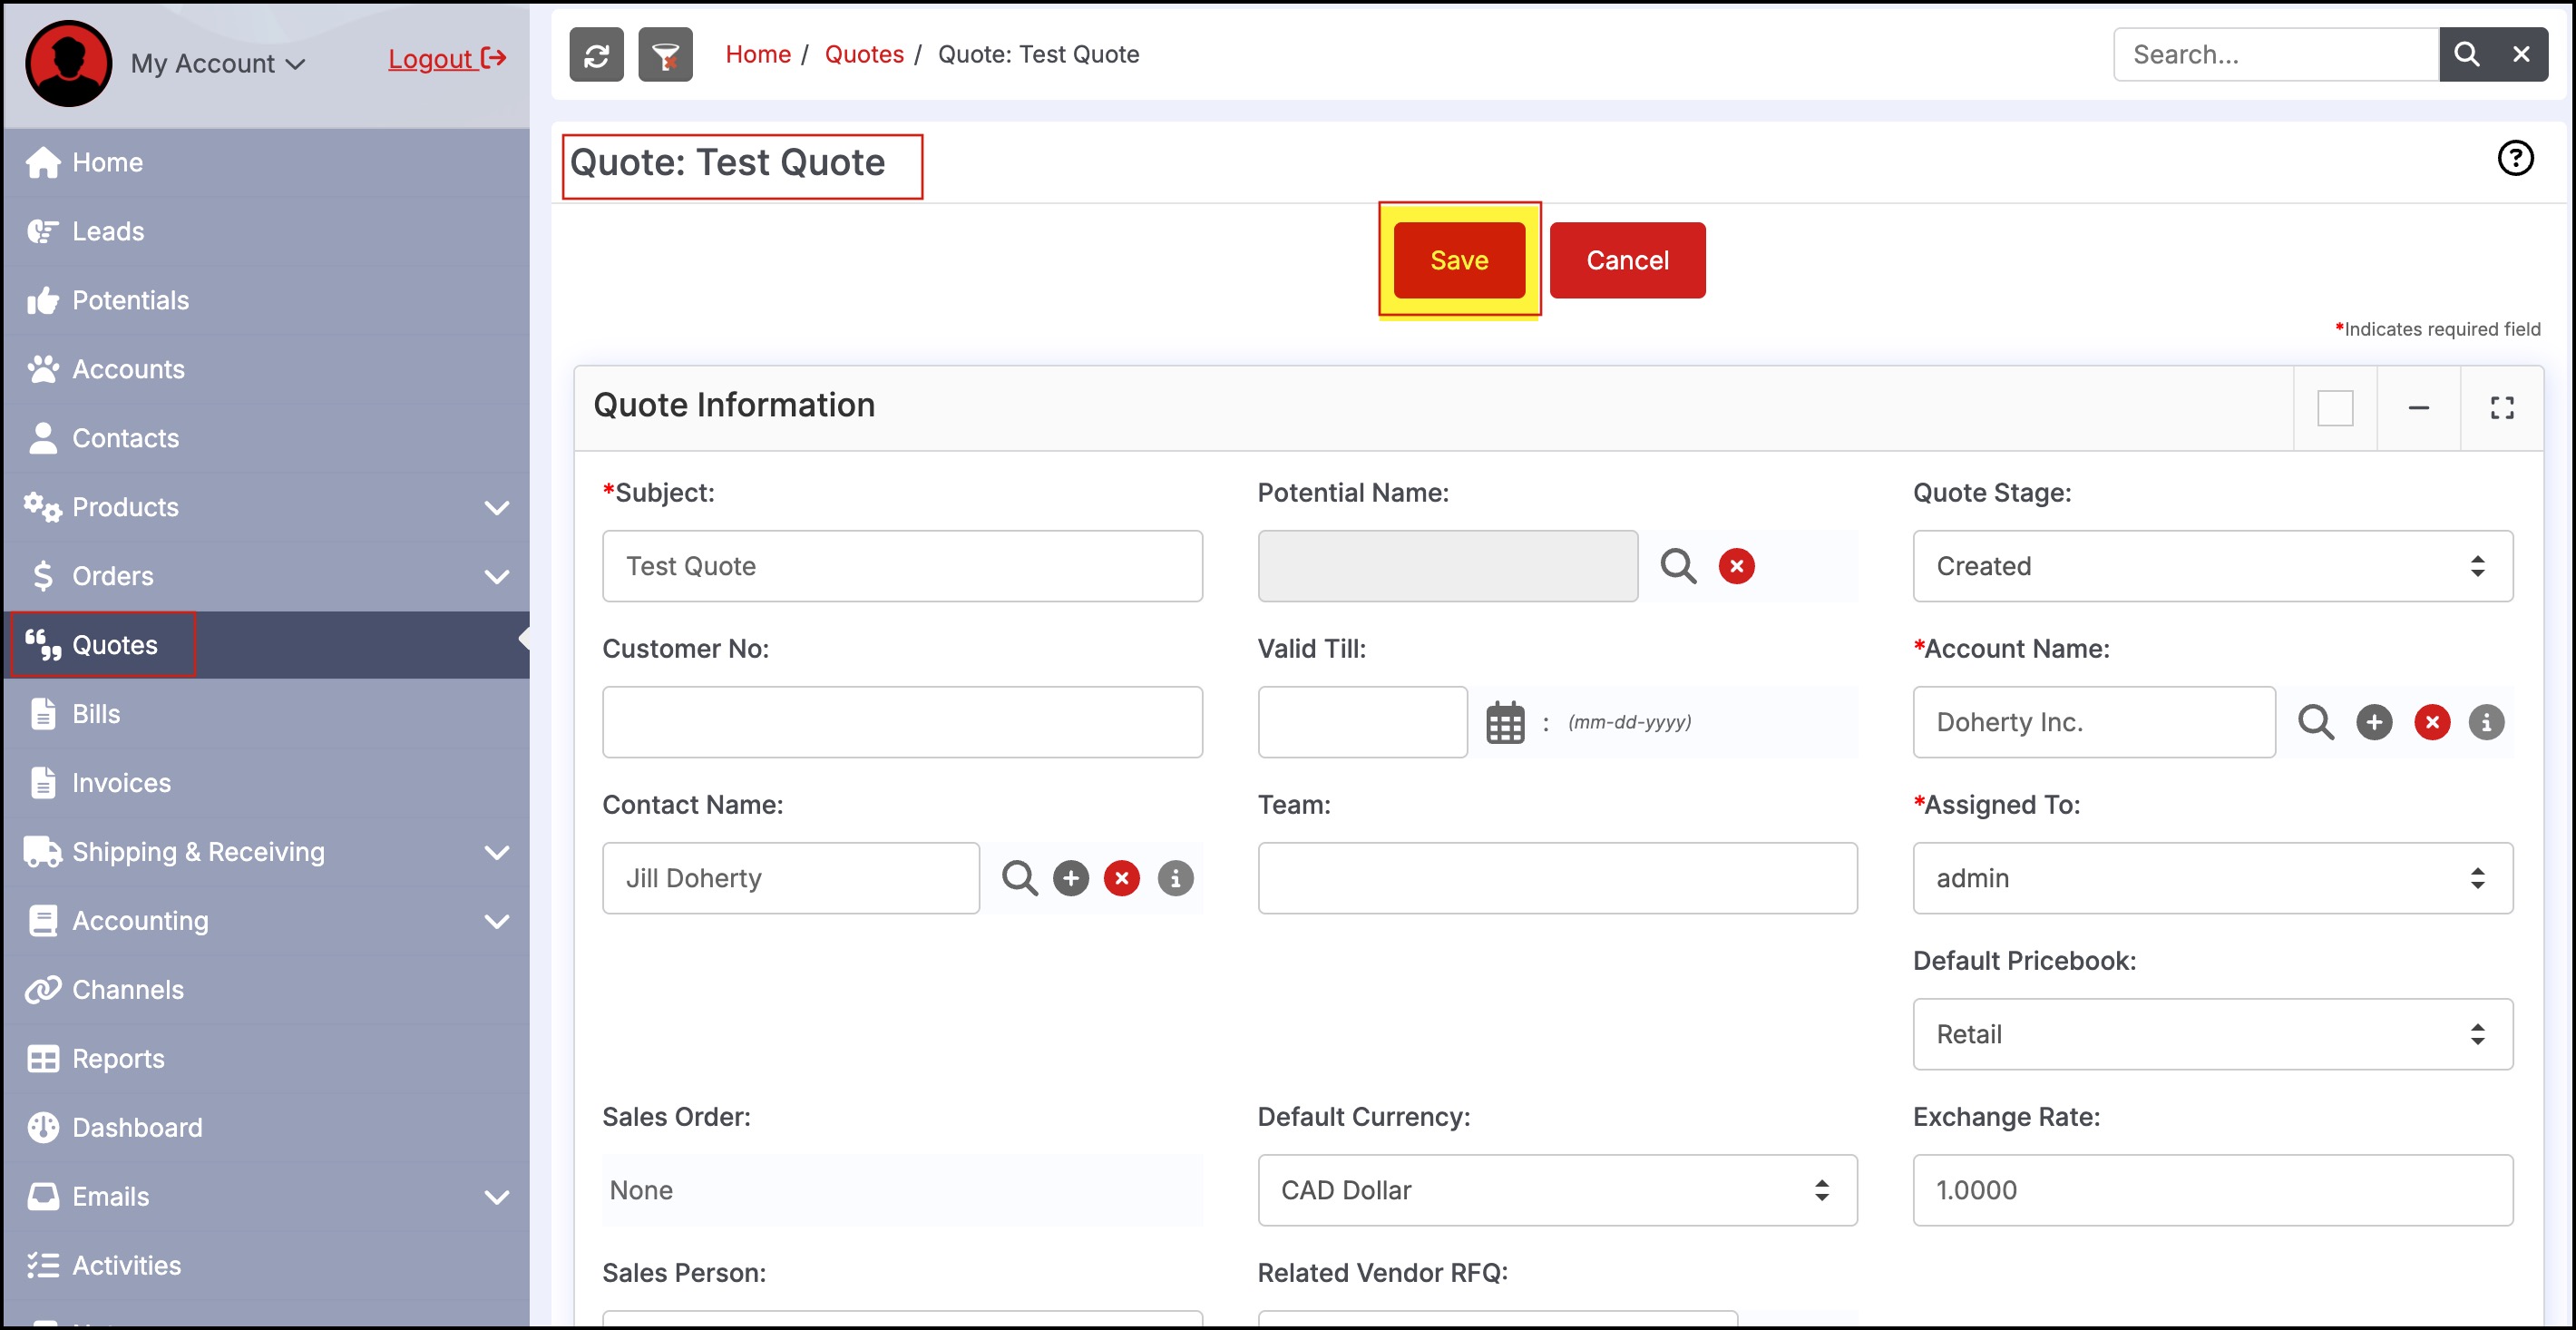
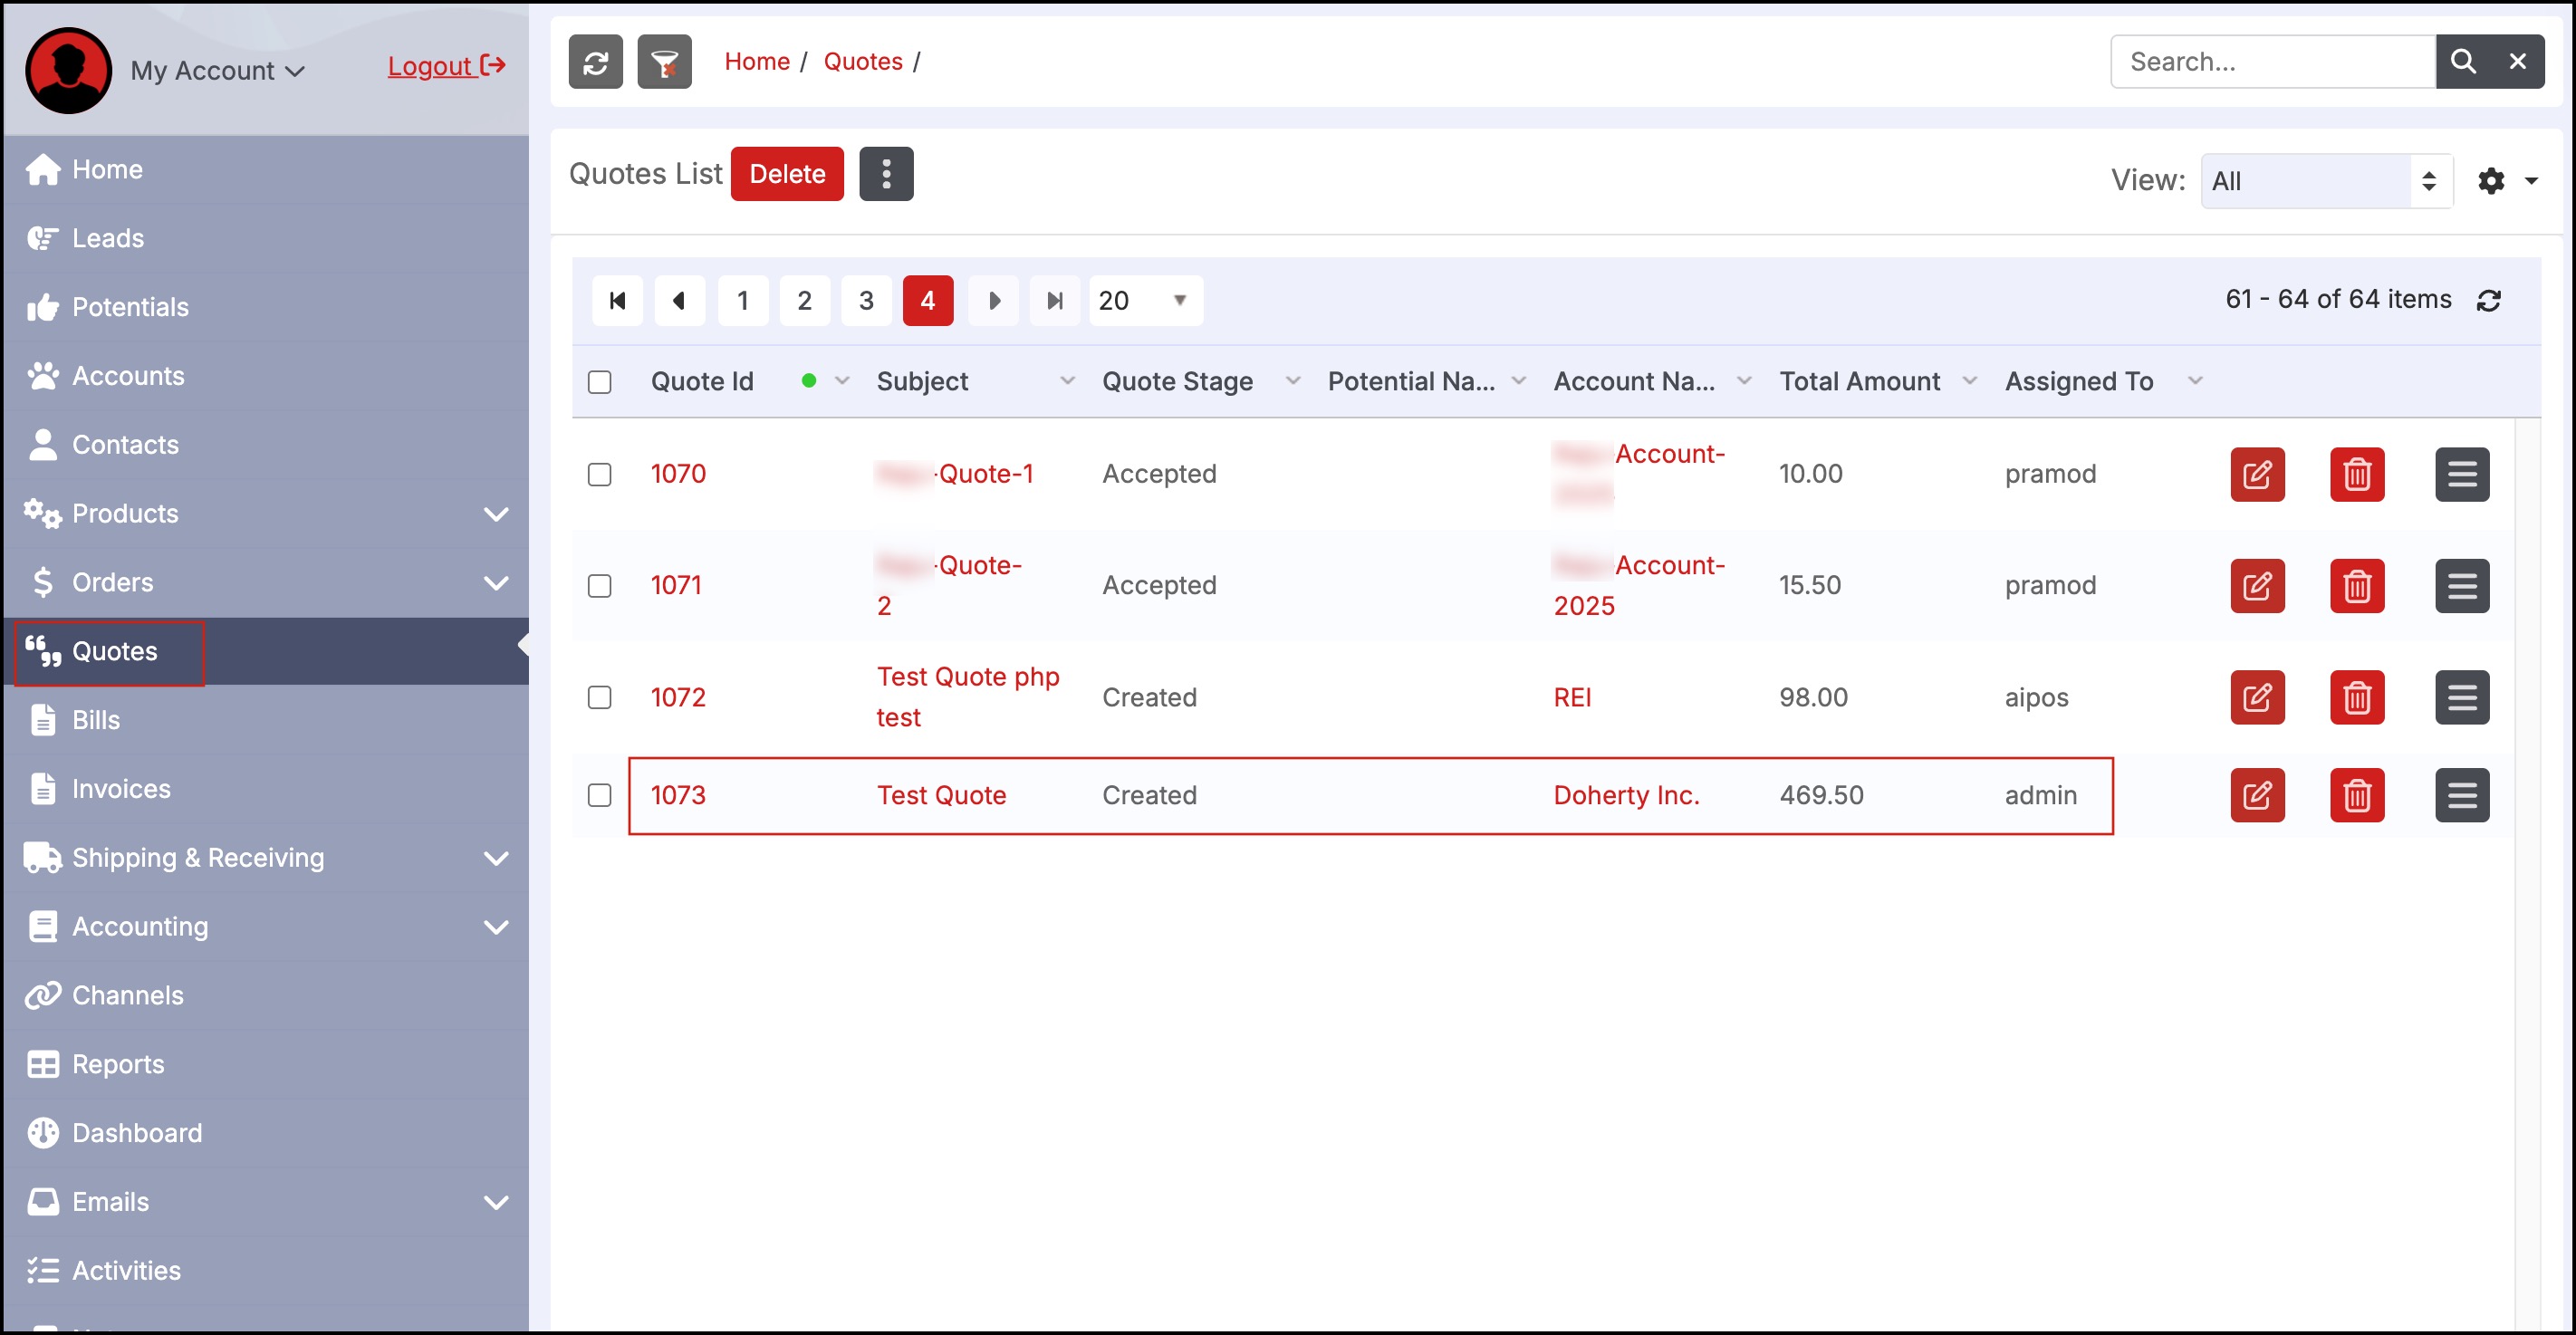
You can see the new quote created in the Quote list.
Updated 2 months ago