Setting Vendor Units Preferences for Product
This feature allows the user to order products as one specific quantity from the vendor, but receive them in inventory as a different quantity.
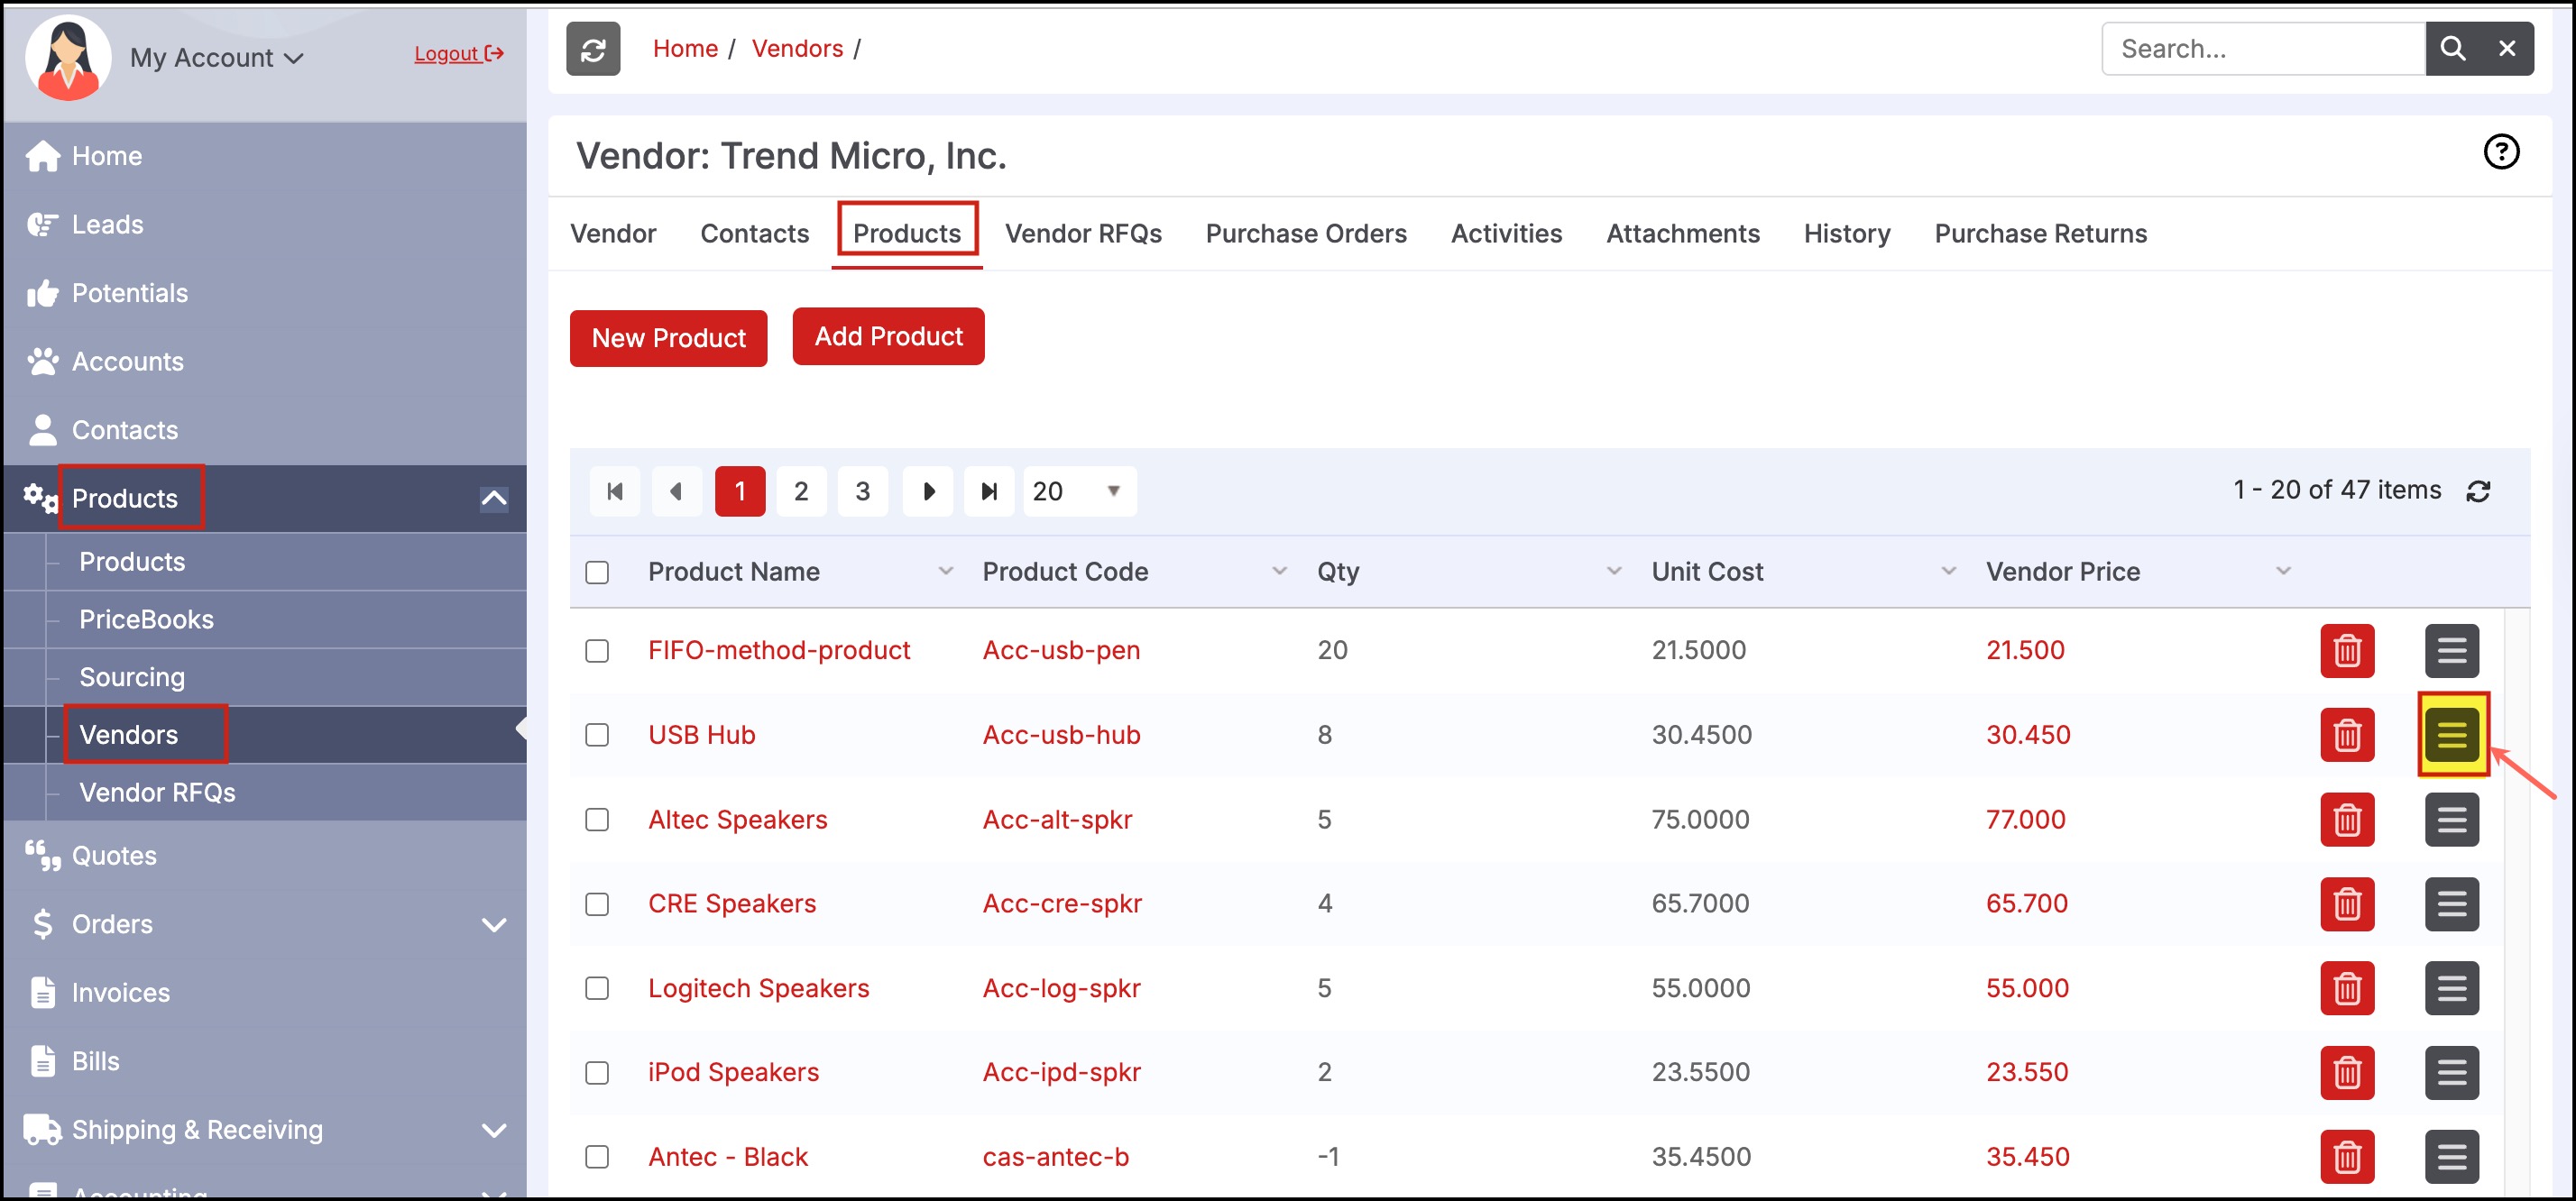
- Navigate to "Products > Vendors" on the left menu tab.
- Select the "Vendor" from the list by clicking on the "Vendor Name".
- Click the "Products" sub-tab.
- Click the "Edit All" icon for the product to set the default vendor and inventory units.
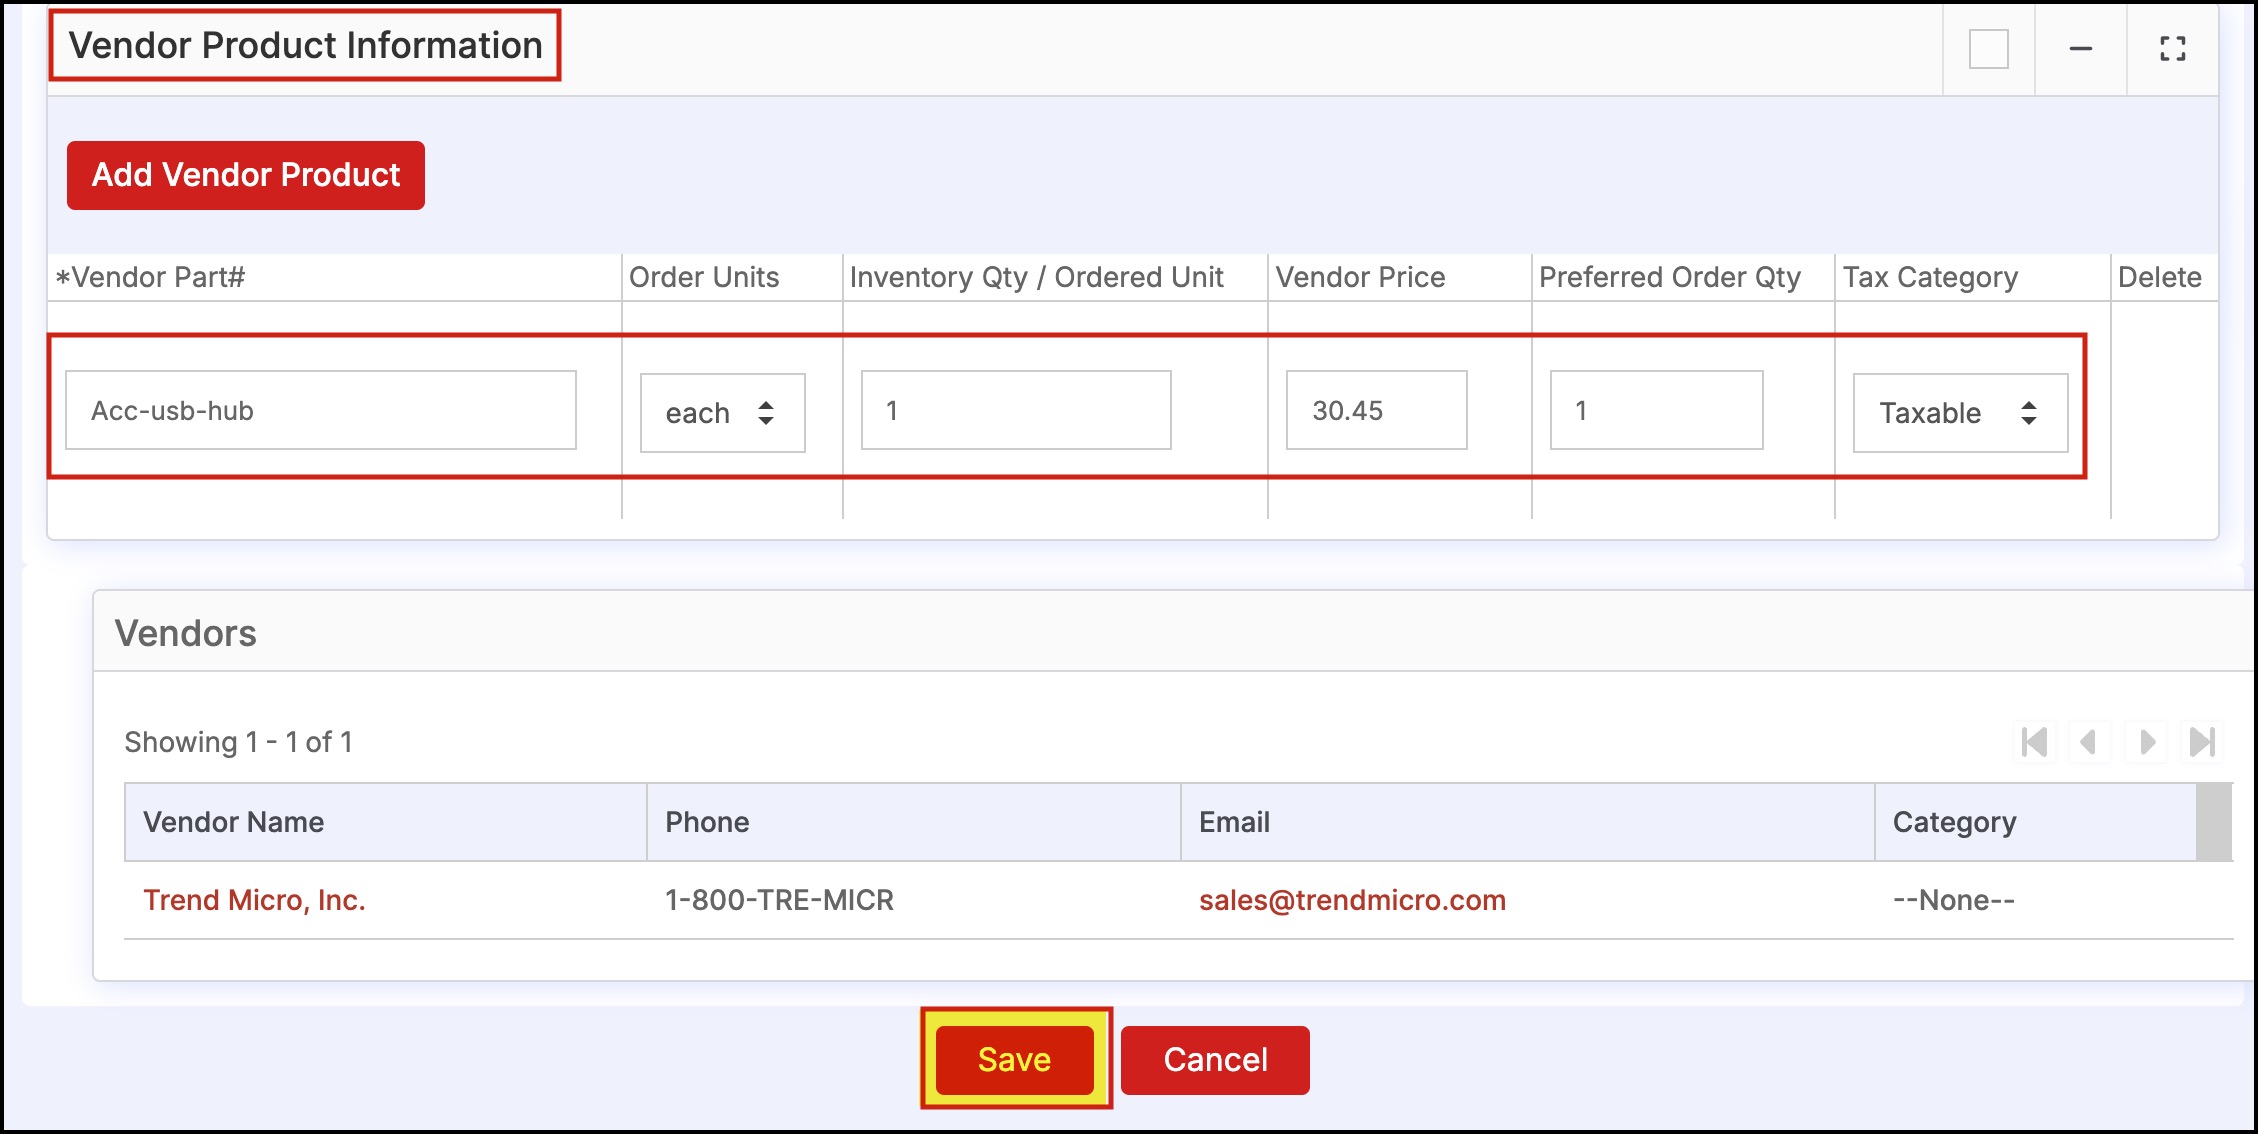
This brings up the form shown above to select the ordering preferences for the vendor for this product.
- Scroll down to the Vendor Product Information section.
- Select the "Order Units" from the drop-down to select a unit of measure in which the product will be ordered.
- This drop-down populates from "Settings > Picklist Settings > Edit Product PickList > Usage Unit"
- Enter the "Inventory Qty / Ordered Unit" in the text field.
- This number sets the conversion of units ordered from the vendor to units added to inventory when a purchase order is received in the warehouse (e.g. if the vendor purchase is a "pack" of four inventory units of this product, then enter 4 in this field. At "Receiving" when a purchase order is marked as received, 4 units of inventory will be added automatically).
- Enter the "Vendor Price" and the "Preferred Order Qty".
- If the vendor has multiple numbers (parts) for this product, click the "Add Vendor Product" button and fill in the fields as described above.
- These Vendor fields can also be imported along with Product Information (see Section Importing Products - "Preferred Vendor", "Preferred Vendor Part Number", "Preferred Vendor Price", "Preferred Vendor Order Qty" can also be imported. "Inventory Qty/Ordered Unit" is set to 1 by default for the Preferred Vendor Part Number during import). Once all the information has been entered, click the "Save" button.
Updated 12 months ago