Processing a Transaction
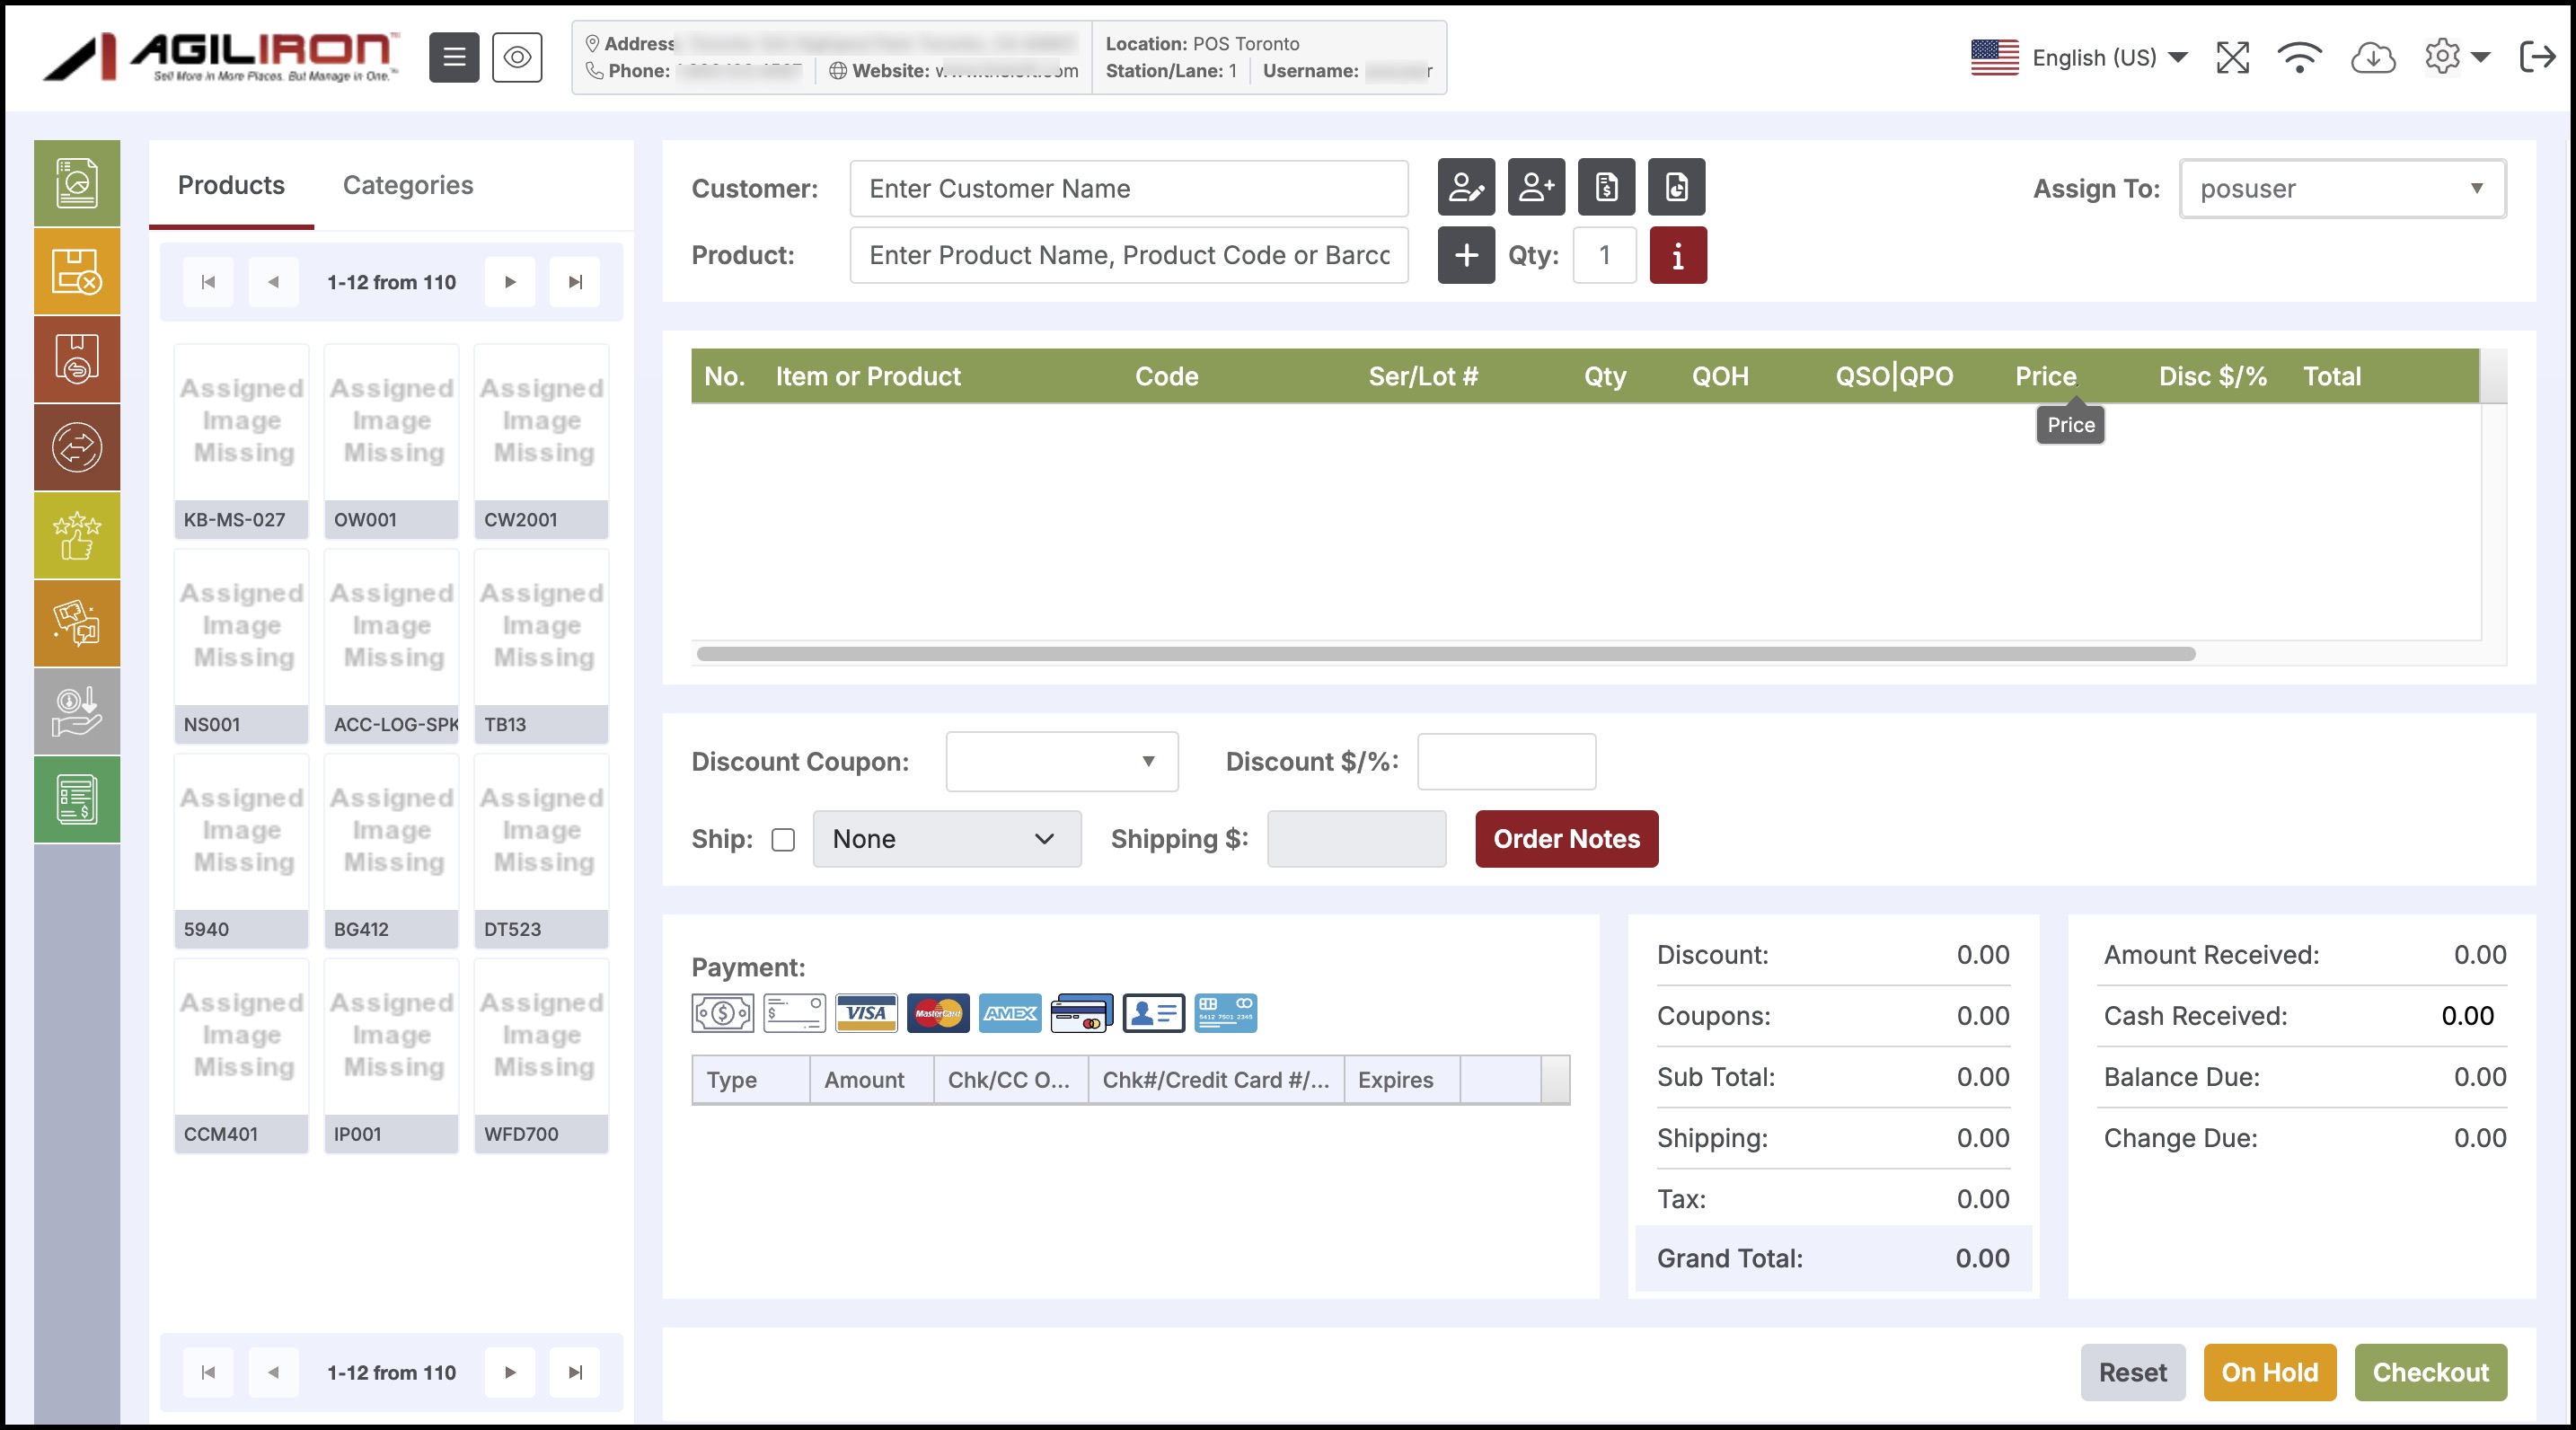
- Once the user logs in successfully, the following page is displayed.

- (Optional) Enter the name of the customer in the Customer field.
- Refer to Adding a Customer for more information.
- If no customer name is provided, the transaction is treated as a Retail Sale, which is the most common for B2C (business to consumer) sales.
- Enter the Product Name, Product Code or Barcode of the product in the Product text field.
- The list of products matching the name or code is displayed in the list as you type in the text field. The POS auto-completes this field by filtering the product catalog using the numbers/letters you entered and a drop-down menu shows you the product list that matches that filter.
- Select a product/item from the drop-down list. This will add that item to the purchased item list in the box below.
- If a Barcode is scanned, then the matching product is automatically detected and selected to the ticket.

- The product can be selected using one of the following methods:
- Scanning a Barcode - this can be done by placing the cursor in the text field next to "Product" and scanning the barcode using a barcode scanner. If the bar code is recognized the product is entered into the purchased item list.
- Entering the Product Name, Product Code using the keyboard - as you type in the text field, the POS auto-completes by filtering the product catalog using the numbers/letters you entered and a drop-down menu shows you the product list that matches that filter. Select a product/item from the drop-down list. This will add that item to the purchased item list in the box below.
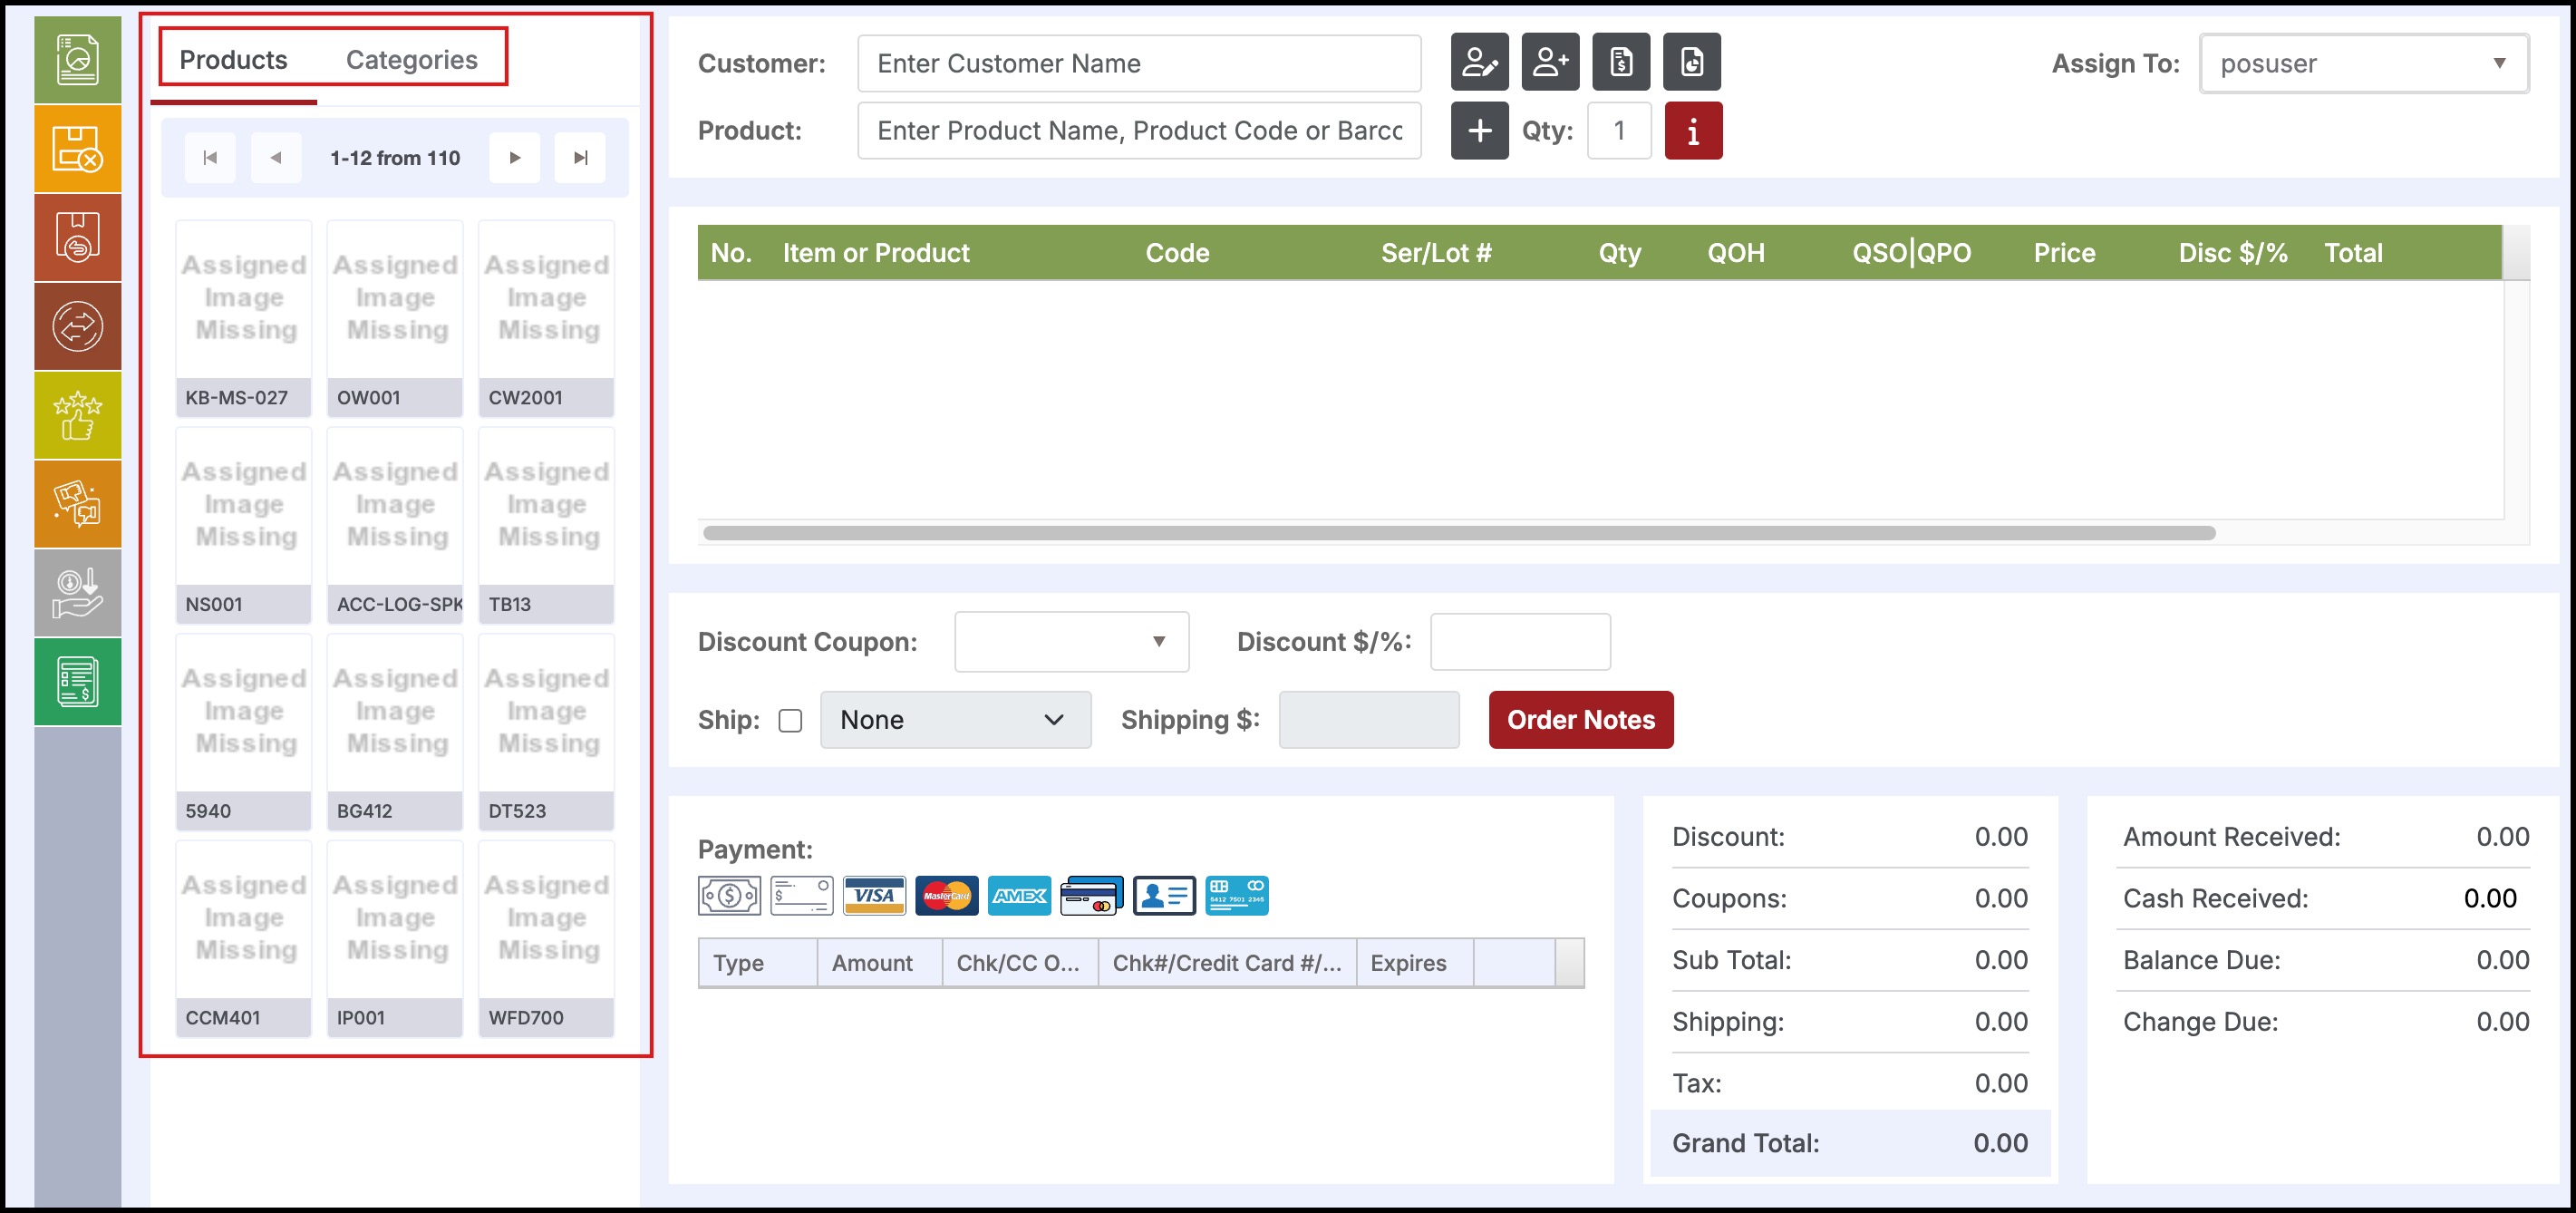
- Clicking on one of the Quick Access (QA) buttons on the left column that has been assigned to the Product / Category to be selected. Refer to the sections for assigning products - Products Tab and Category Tab.
- If the Quick Access tab is hidden click on the icon shown in the below screenshot.


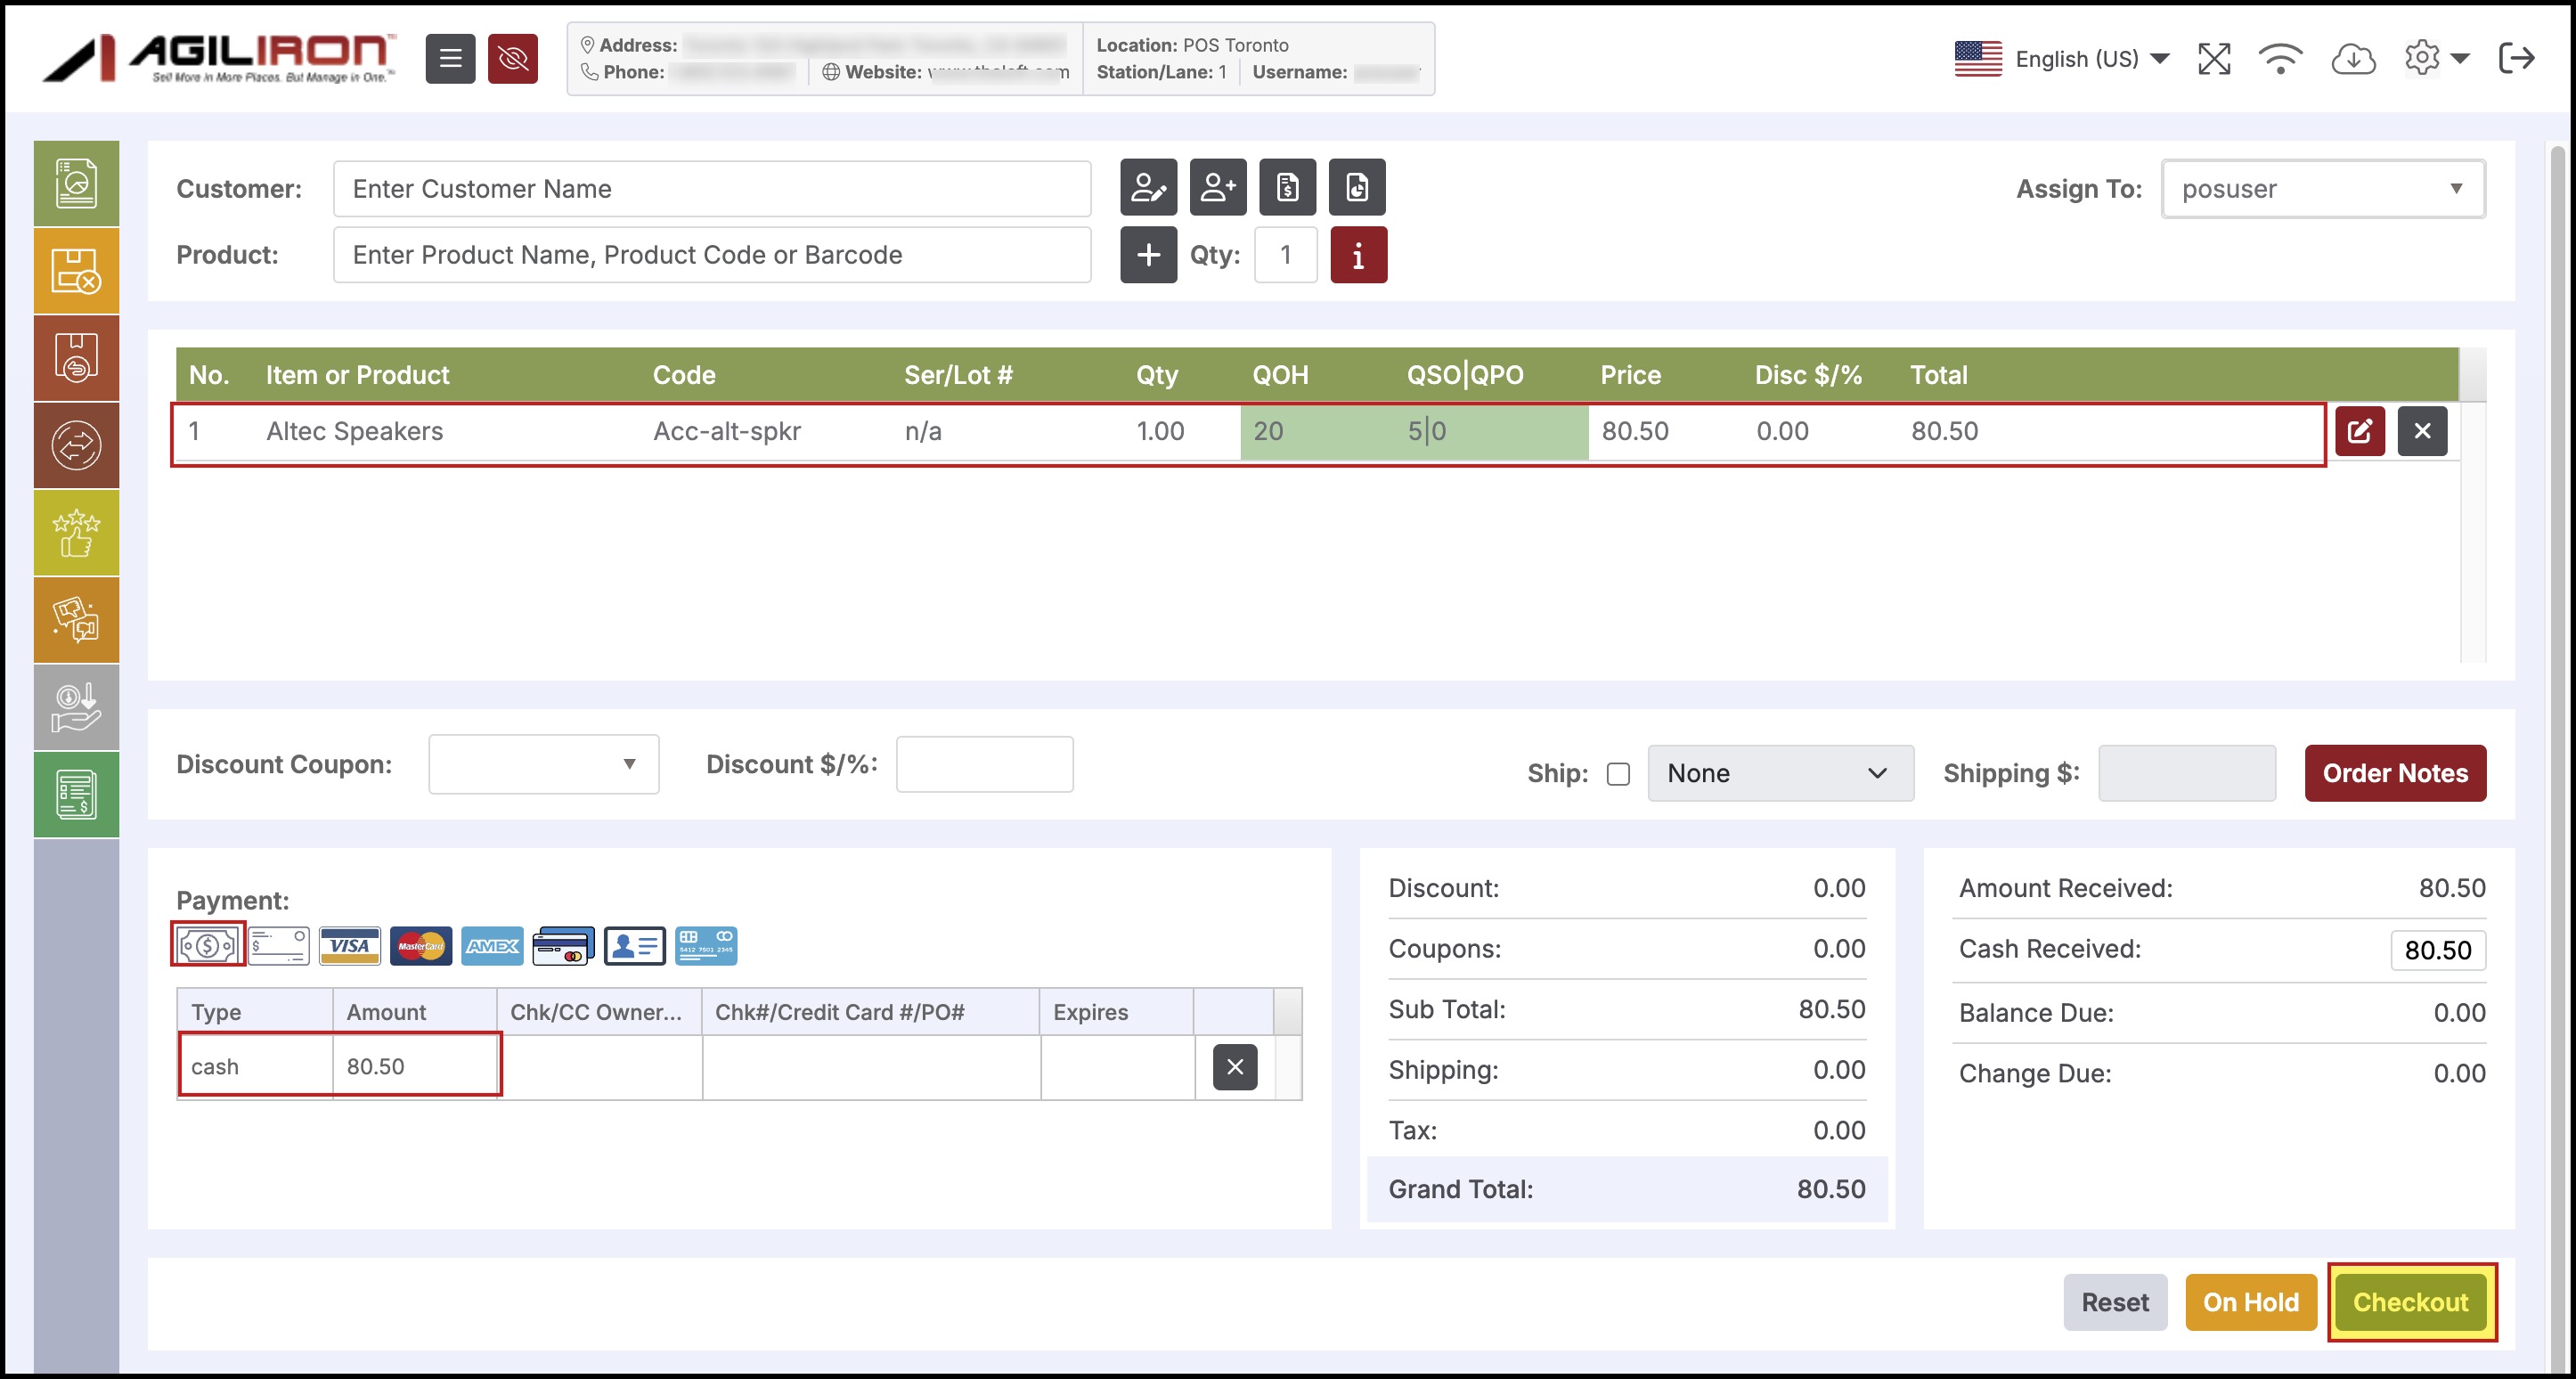
- On selecting the required product, the product is displayed as shown.

- To add to the product quantity click the icon adjacent to the QTY field. You can also enter the product quantity in the Qty text field.
- To view the product information, click the icon.
- Refer to Product Information for more information.
- Line item Pricing and Discount can be changed in the respective columns for the line item.
- For Discount, a $ Discount is applied if a number is entered (e.g. 10.50) and a % Discount is applied if a number followed by % is entered (e,g. 10%).
- The ability to make these changes is controlled by the settings in "Settings > Channels" for the POS channel in the Back-Office.
- Enter the discount code if any in the Discount Code field.
- Enter the total order discount in dollars or percentage in the Discount $/% field.
- A $ Discount is applied if a number is entered (e.g. 10.50) and a % Discount is applied if a number followed by % is entered (e,g. 10%).
- To add additional notes to the transaction, click the Order Notes button.
- Refer to Adding Order Notes for more information.
- Select the required payment option from the Payment section.
- Refer to Payment Details for more information.
- Click the Checkout button to process payment and complete the transaction.

Upon checkout, one of the following options for receipt printing will be available depending on configuration setup in the sales channel:
(A) The printable version of the receipt and the printer selection dialog for printing. (Only if the "Customer Receipt Option" was set to "Print" during the POS channel setup).
(B) An email entry dialog to email receipt to the customer (Only if the "Customer Receipt Option" was set to "Email" during the POS channel setup).
(C) Nothing if the "Customer Receipt Option" was set to "None" during the POS channel setup.
Updated about 1 year ago
