- Text Customization Options
This option allows customers to enter personalization text onto a product. For example, a seller who wants to allow customers to engrave their name onto a glass would use this option.
- Verify that the custom text field does not exist before adding a new custom field:
- Navigate to Settings > Custom Field Settings > Product Custom Fields
-
If the field currently exists, move to step 4. Otherwise, continue to the next step.
-
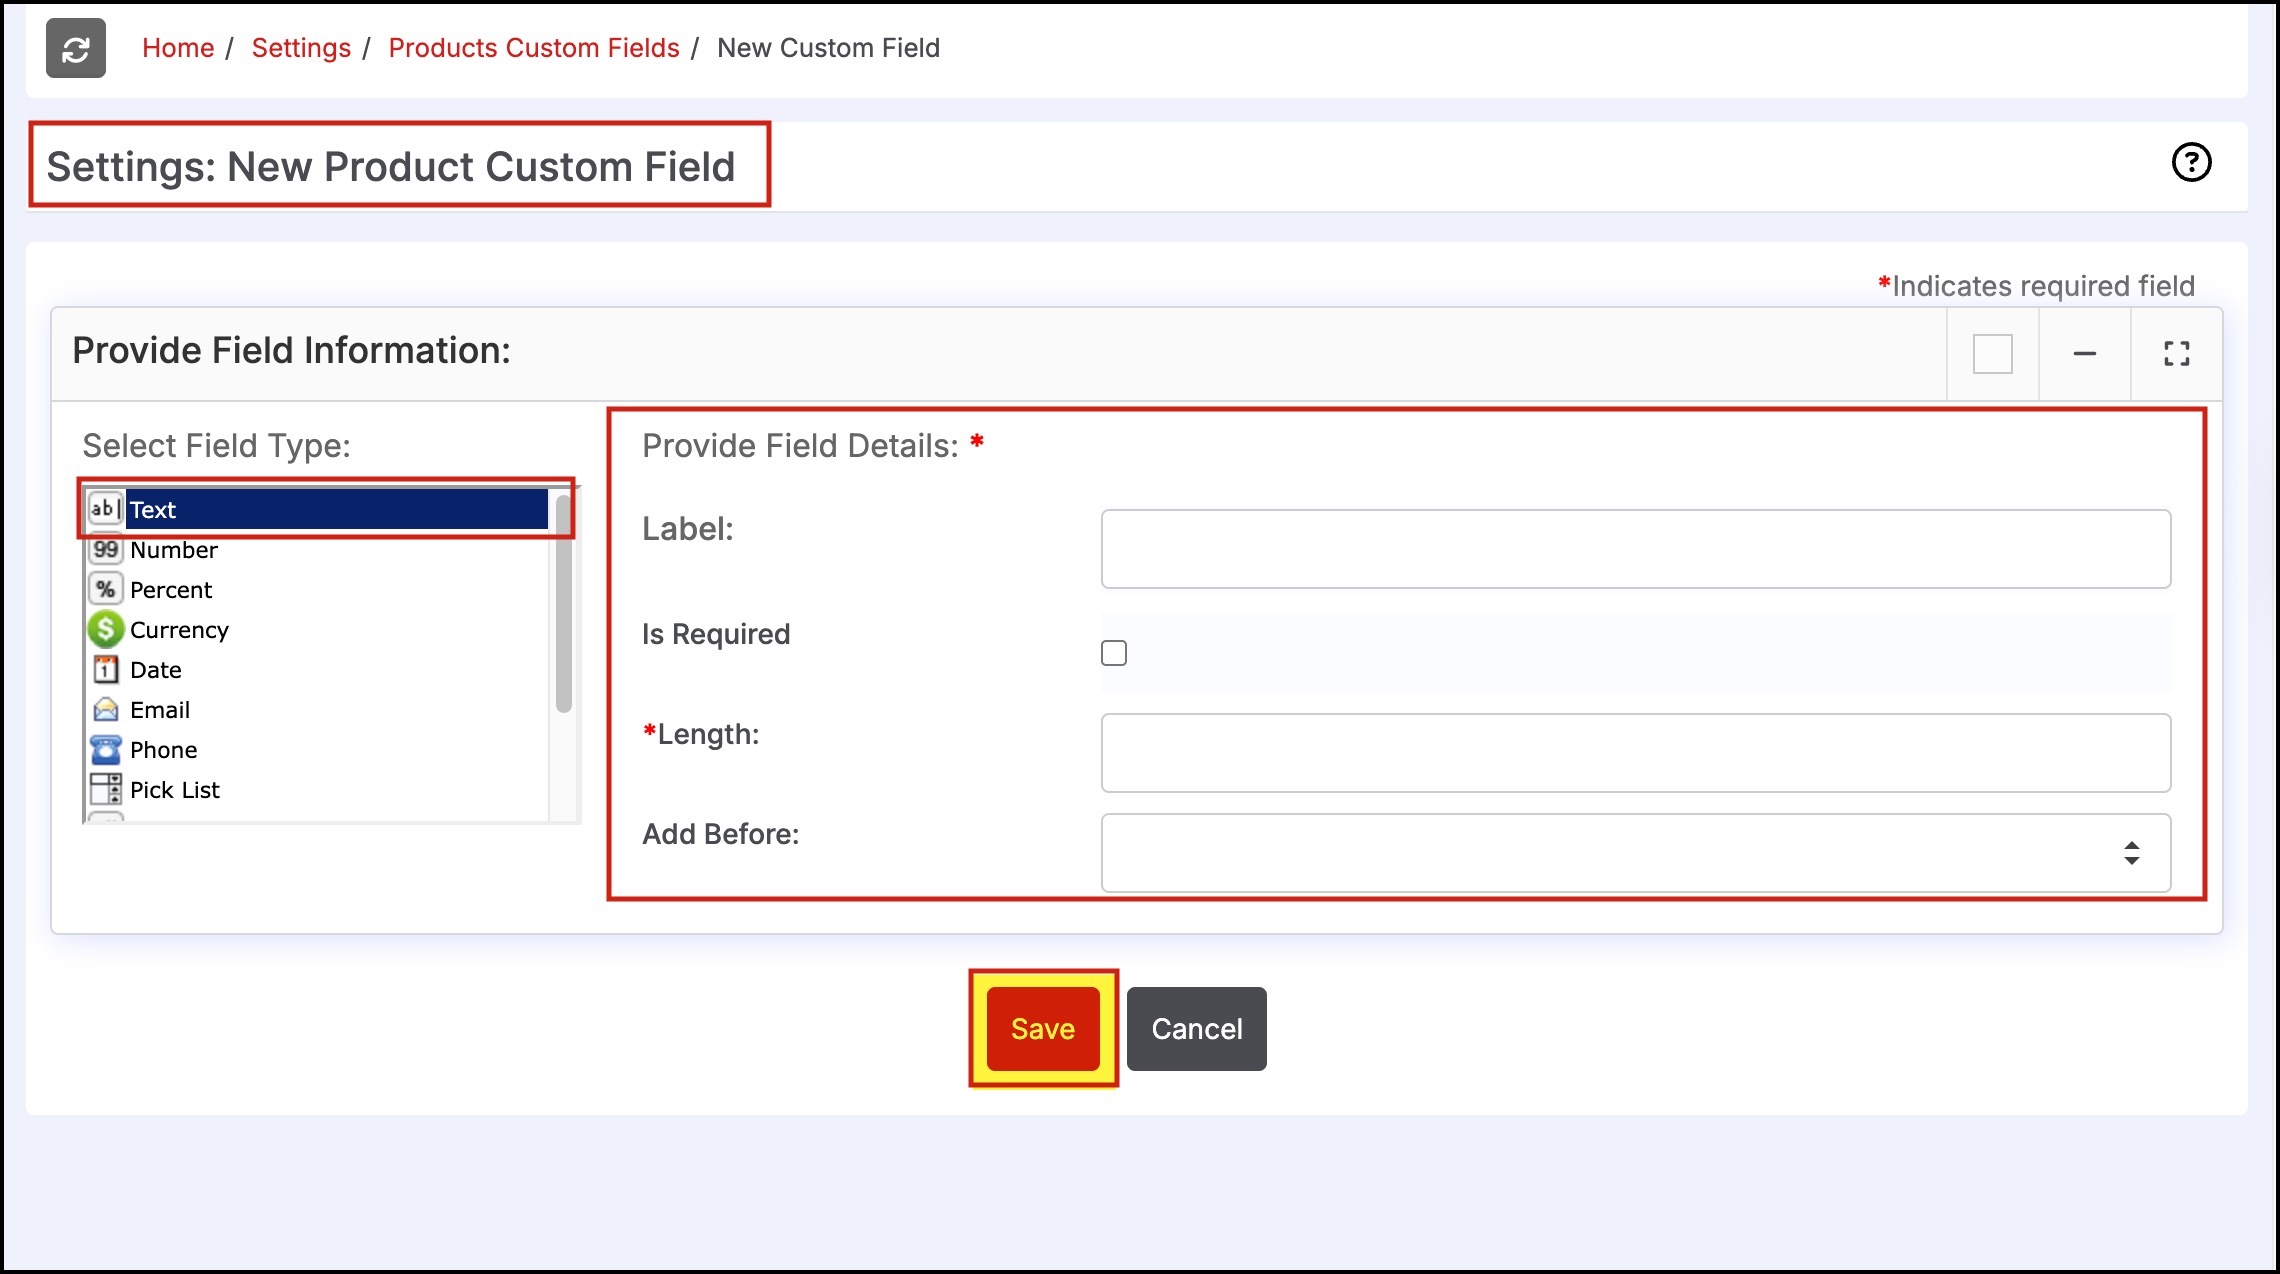
If the custom text field does not exist, click "New Custom Field" and select "Text" as the field type.
- Enter the "Label" name and the "Length" of the text field and click save. For example, if a customer should enter their name as a text field, you could use "Name" as the label.
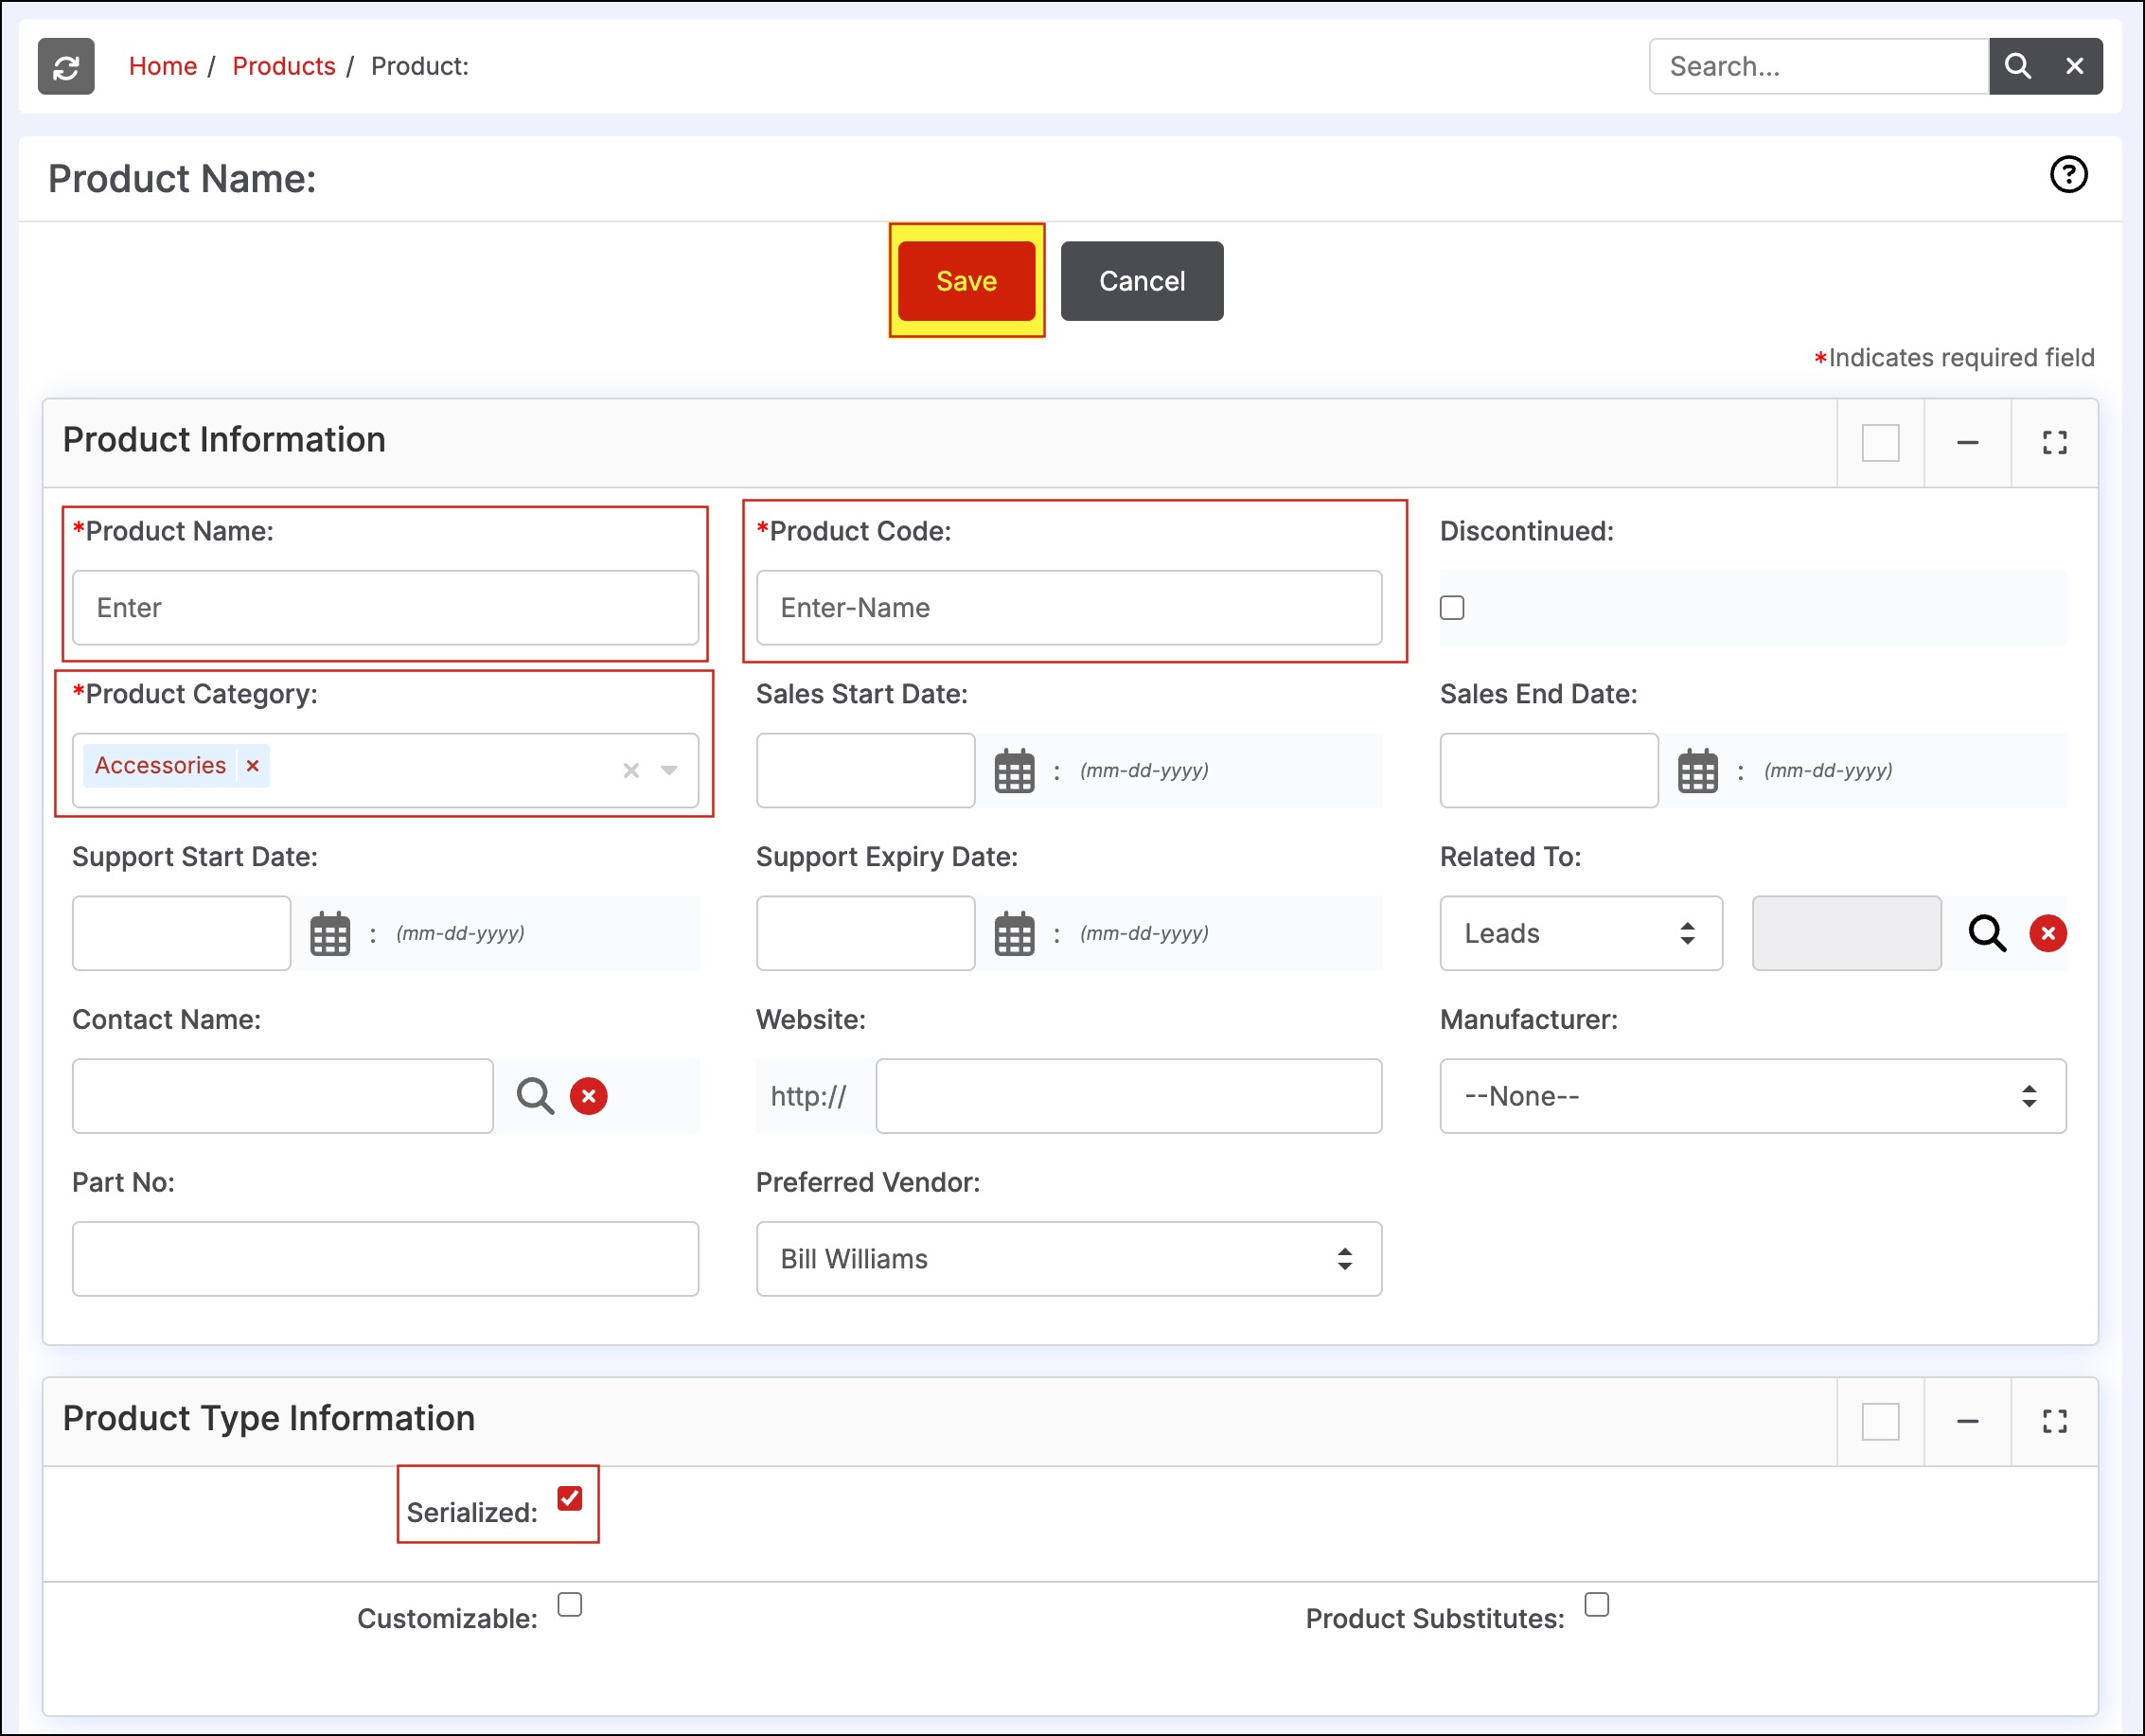
- Now select the "New Product" link on the toolbar and create a new product.
- Enter the name for the field, for example, if the customer needs to enter a name, name the item "Enter".
- The product code can be "Enter-Name" this identifies the step in the product list so you can easily select this option for your items.
- Select the category (you will need to set this up if it does not currently exist).
- Select the "Serialized" checkbox (this ensures the item will not be treated as inventory).
- Click Save.
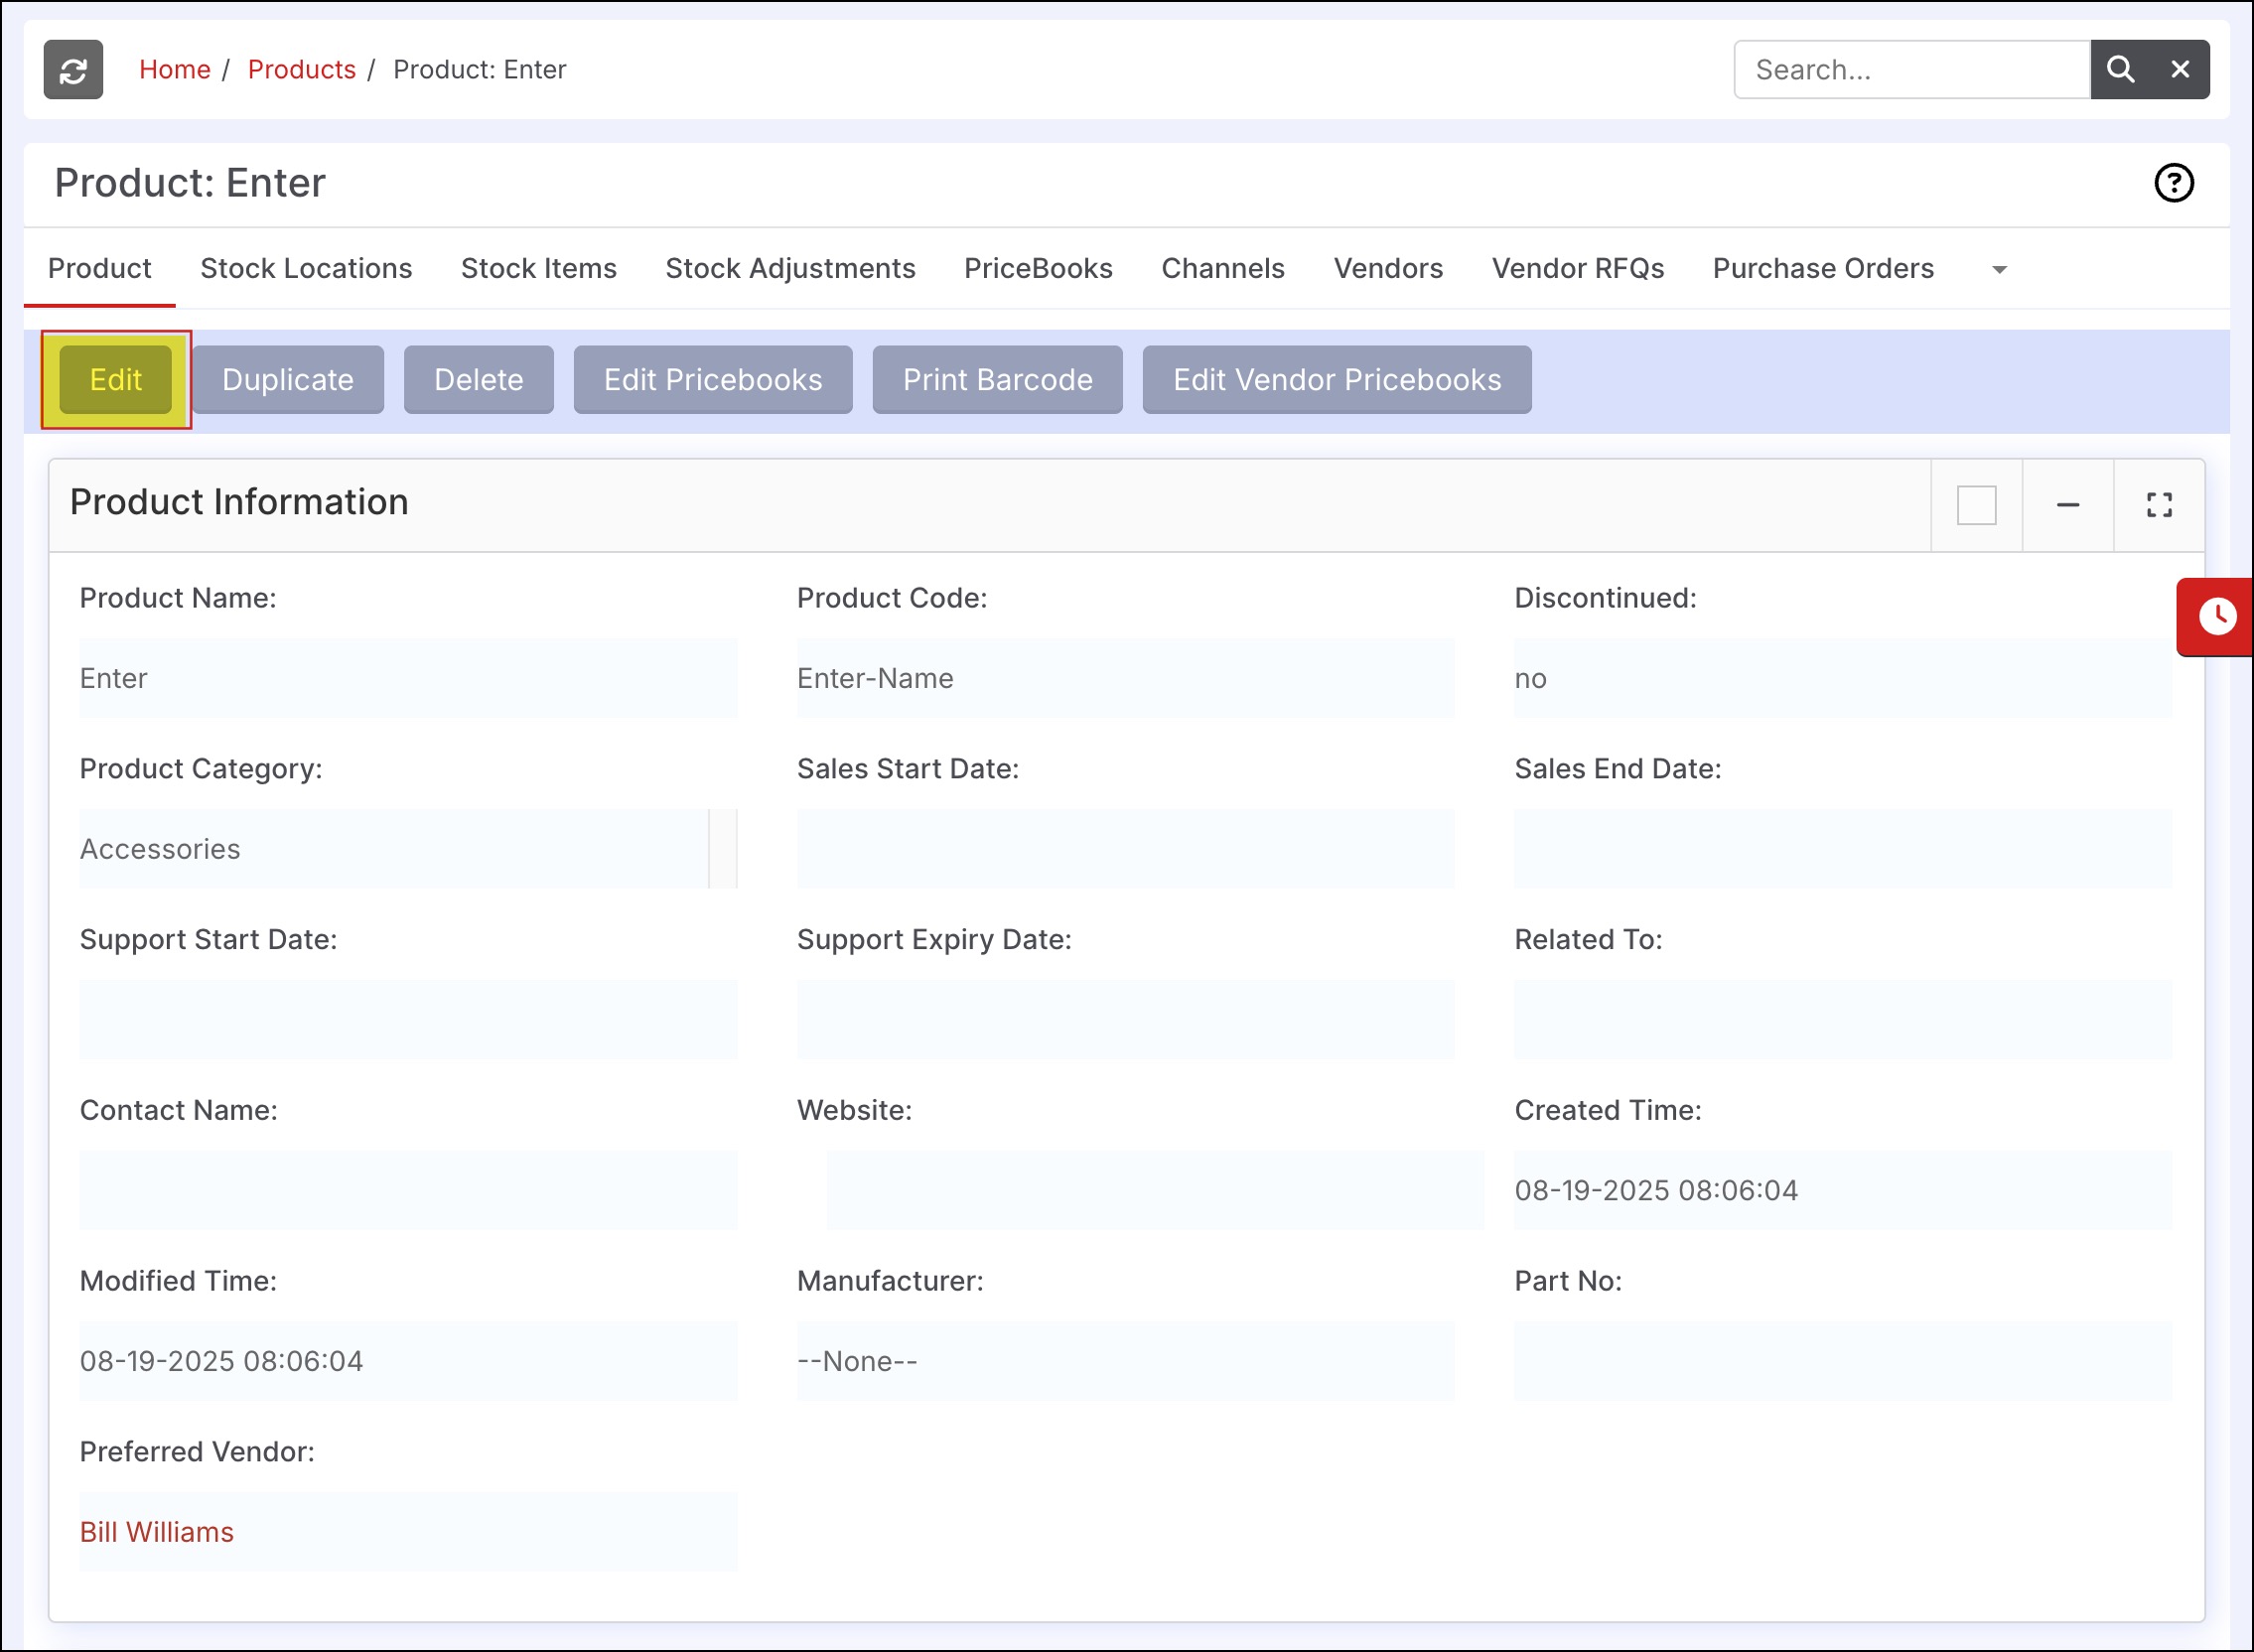
- The custom product has been created, but now you need to edit the custom fields in which the customer will enter text.
- Click Edit.
- Scroll down to the "Custom Information" section and click "Manage Custom Fields".
- Select the fields on the right-hand side that you do NOT want to appear on the page. (CTRL + Left Mouse click to select multiple fields) For example, leave the field titled "Name" in the list on the right-hand side of the box so the customer can enter a name into this field.
- Click the "<<" arrow button to remove unwanted fields.
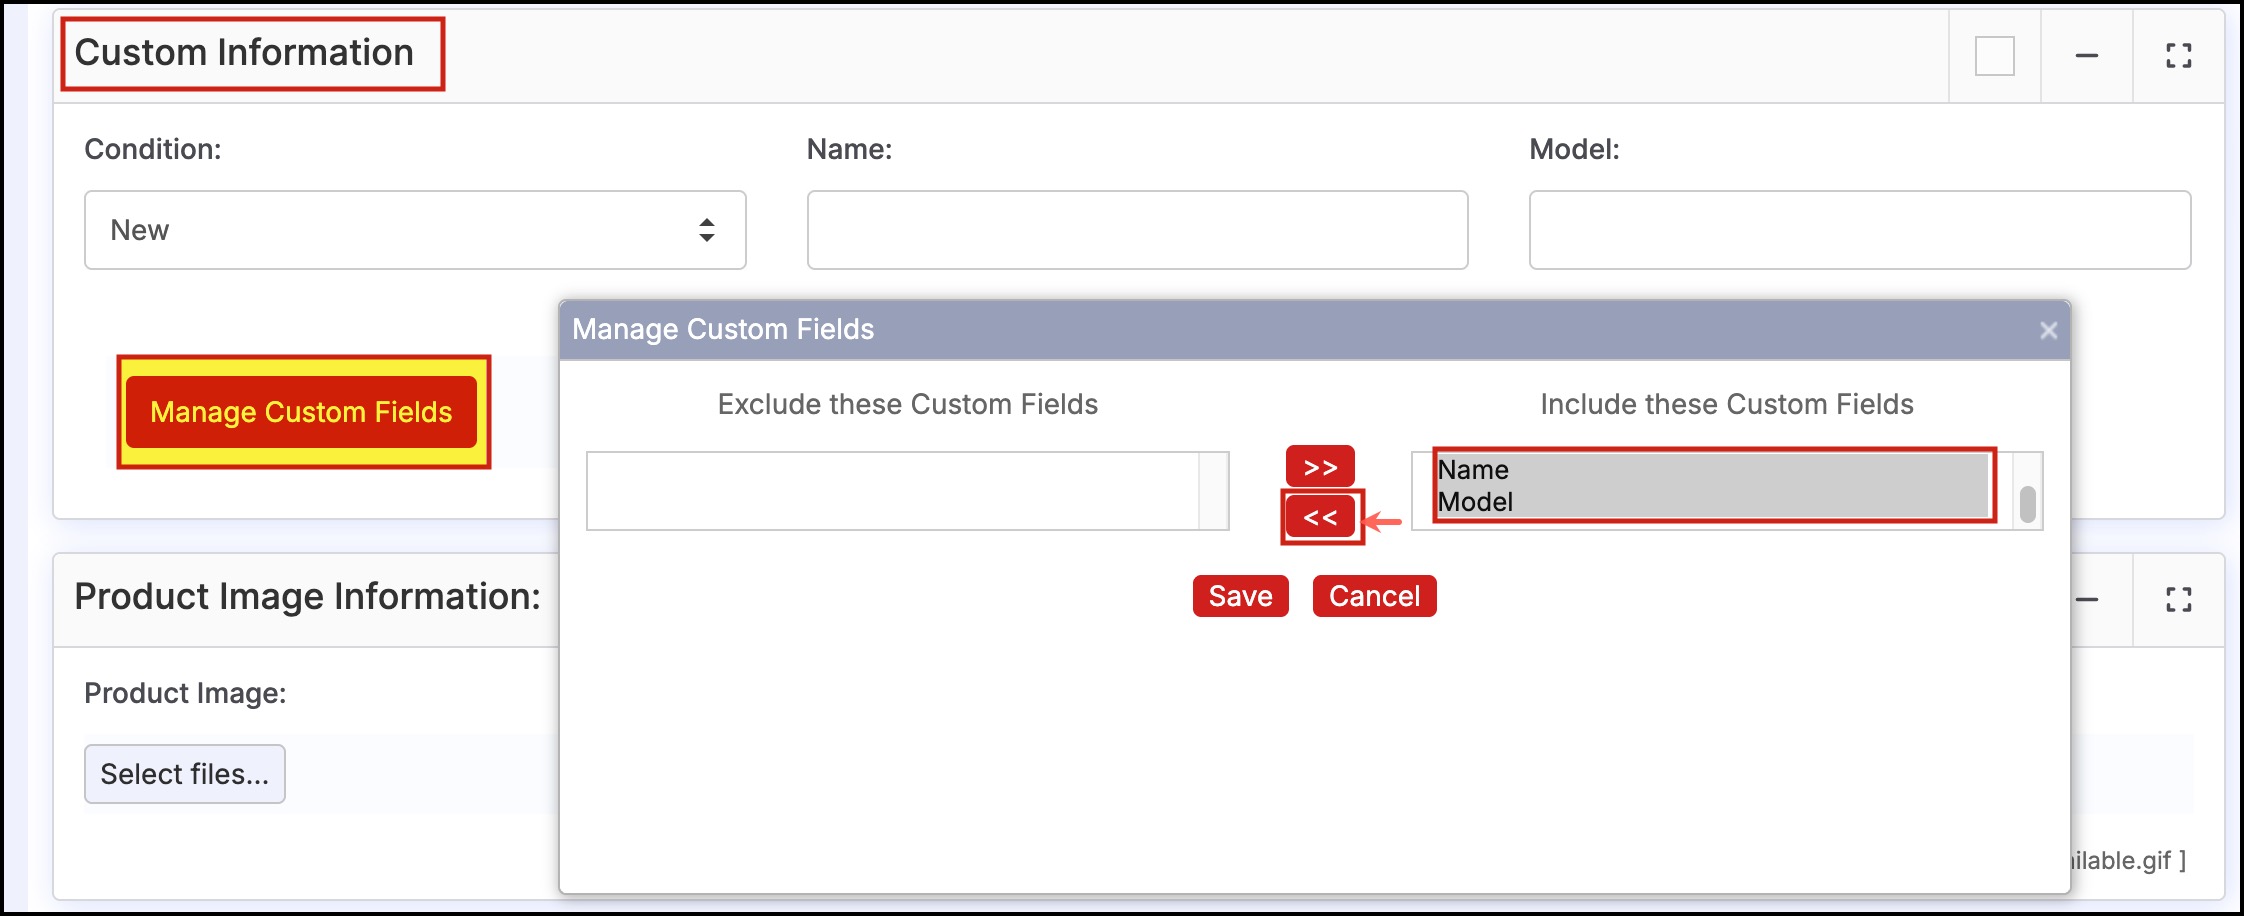
The box containing "Include these Custom Fields" should now only contain fields that will be edited by the customer.

- Click Save.
- Click "Save" again at either the top or bottom of the screen.
This field is now ready for use.