HTML Editor
In various modules, you will find an "HTML editor" available for providing content. The capabilities of the HTML editor are described below and is common to all the modules that use the editor for the definition of appropriate fields, descriptions and messages.
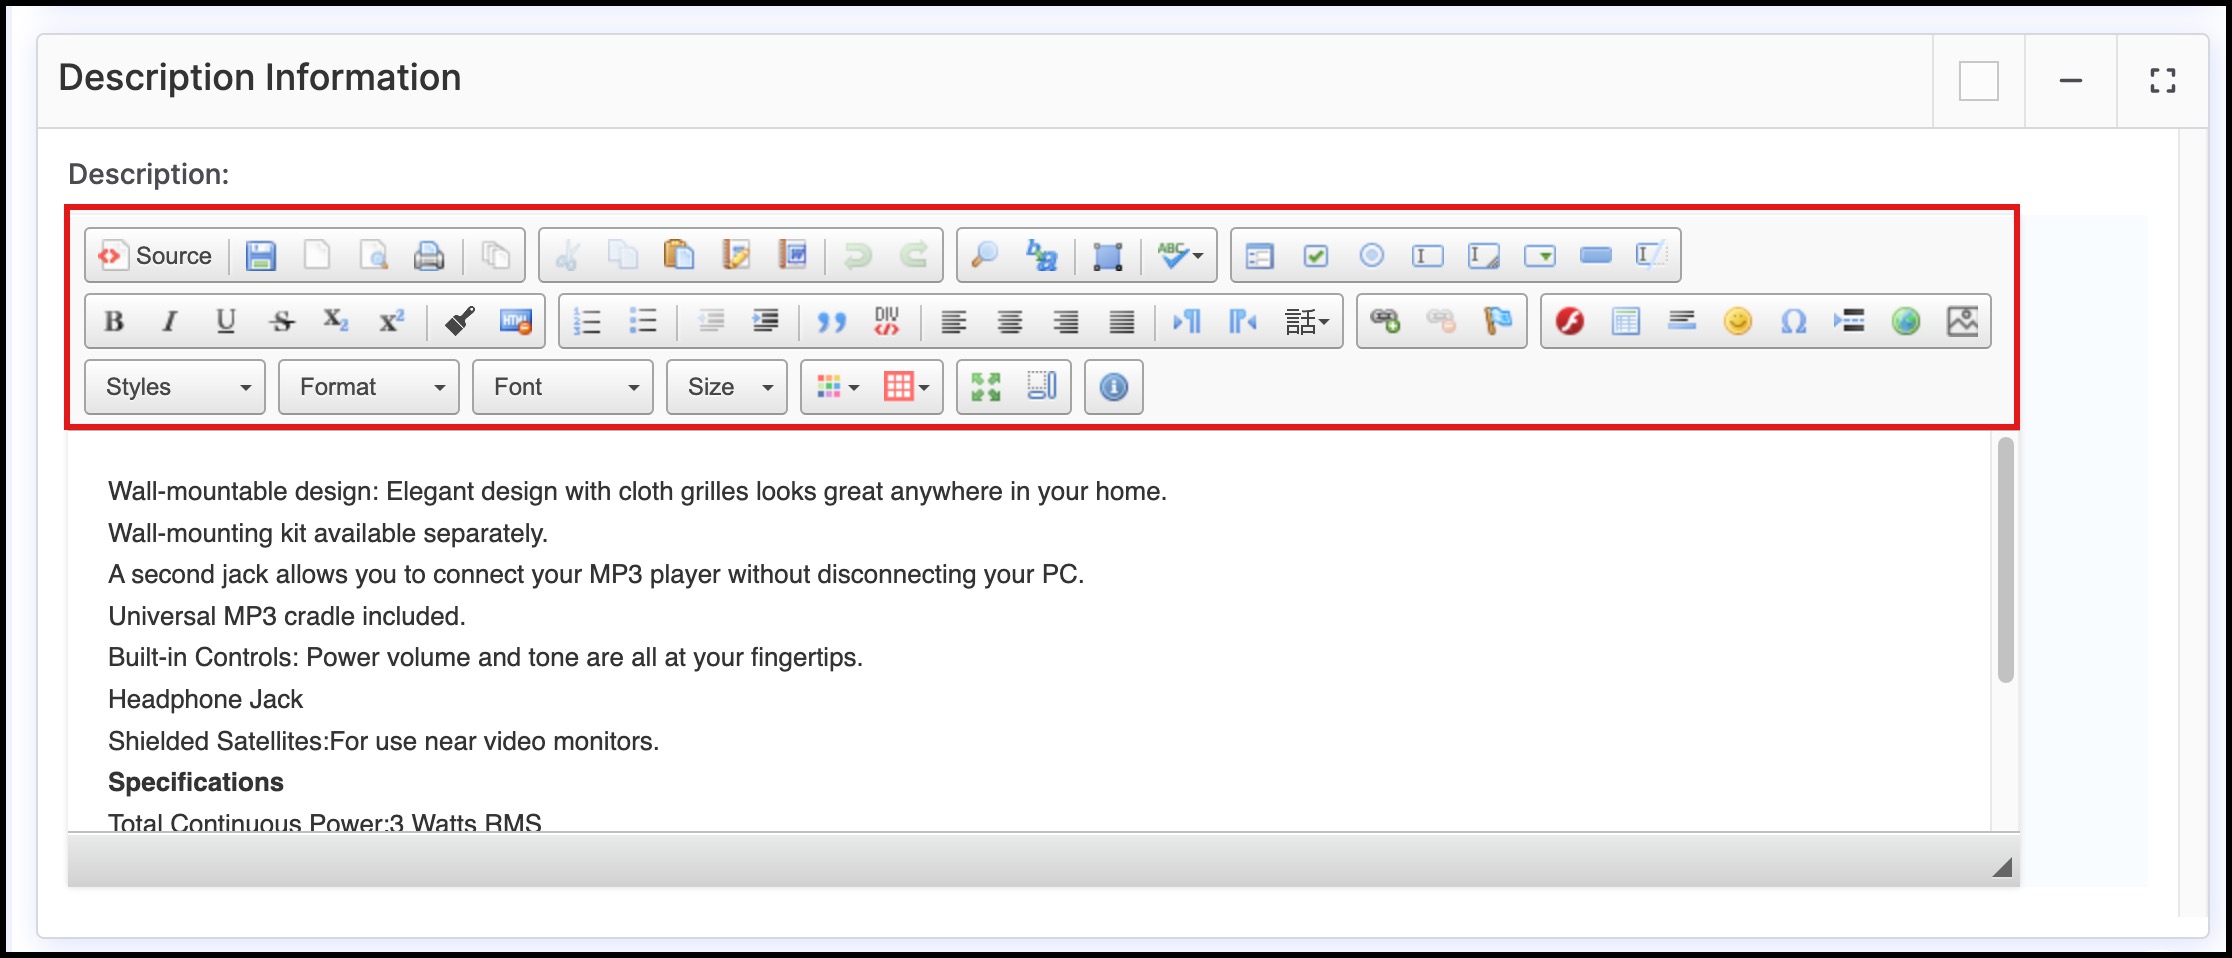
The functions of the various buttons in the HTML Editor shown above are listed below:
First Row of Buttons
- Source
- Switches the editor to HTML markup mode where the user can directly edit the HTML format tags and content. Clicking it again returns the user to the normal content entry mode.
- Save
- Save data entered into the editor
- New Page
- Clears the content to start with a fresh slate
- Preview
- Shows a Preview of the content in a Web Browser window
- Prints the content to the user selected printer
- Templates
- Allows for selection from a set of standard content templates
- Cut/Copy/Paste
- Cuts/Copies content to clipboard, Pastes content from clipboard
- Paste as Plain Text
- Pastes from clipboard without formatting
- Paste from Word
- If you are copying and pasting content from MS-Word, use this button. This ensures that MS-Word specific formatting and tags are managed appropriately.
- Undo/Redo
- Let's the user cycle back or forward thru the content changes
- Find/Replace
- Allows the user to search the content for specific text and if necessary replace with other content
- Select All
- Selects the entire content for follow up operations
- Spell Checker
- Checks spelling of text entered
- HTML Elements
- Insert a Form, Checkbox, Radio Button, Text Field, Text Area, Selection Field (Drop-down list), Button, Image Button, Hidden Field
- Upon clicking any of these button, a dialog will be presented to user to define the respective properties
Second Row of Buttons
- Bold/Italic/Underline/Strikethrough/Subscript/Superscript
- Content formatting options akin to word processing applications
- Remove Format
- Select content and then click on this format to remove HTML formatting for the selected content
- Numbered/Bulleted list
- Creates/Deletes Numbered and Bulleted list
- Indents
- Moves content to the right of left with tab indents
- Block Quotes
- Inserts a block quote around selected text
- Create DIV Container
- Used to create containers around groups of content on Web pages, it is usually given a unique id to distinguish it from other div elements on the same page
- Left/Center/Right/Justify
- Justify the content
- Text Direction from Left to Right/Right to Left
- Sets the paragraph text direction
- Set Languages
- Set the text language
- Link/Unlink/Anchor
- Insert/Delete web links or Anchor text
- Image
- Insert an image, dialog will be presented to select Image or URL
- Flash
- Insert Flash content, dialog will be presented to select content
- Table
- Inserts a table into the content
- Horizontal Rule/Smiley/Special Character/Print Page Break/IFrame/Custom Image Uploader
- Additional HTML constructs
Third Row of Buttons
- Style/Font/Size
- Change the text style, type, font and size
- Text Color/Background Color
- Changes the text color or the background color of the text
- Maximize
- Expands the editor window to full screen. It is convenient when working on the content to have a large size editor.
- Show Blocks
- Displays the HTML Blocks
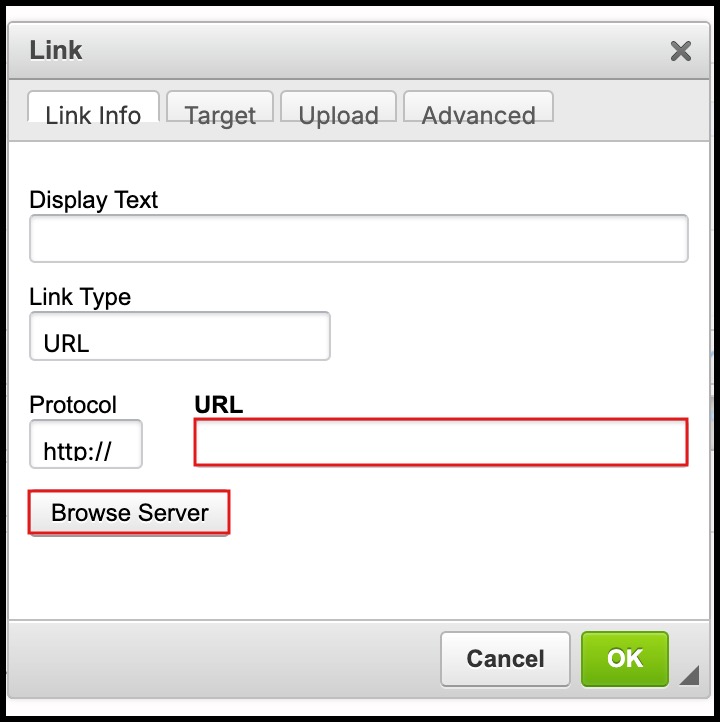
Inserting "Links" into content
- Links can be inserted into the description that customers can click on to see images and other files.
- In addition, the "Upload" sub-tab in the Link dialog allows for uploading files to the server.
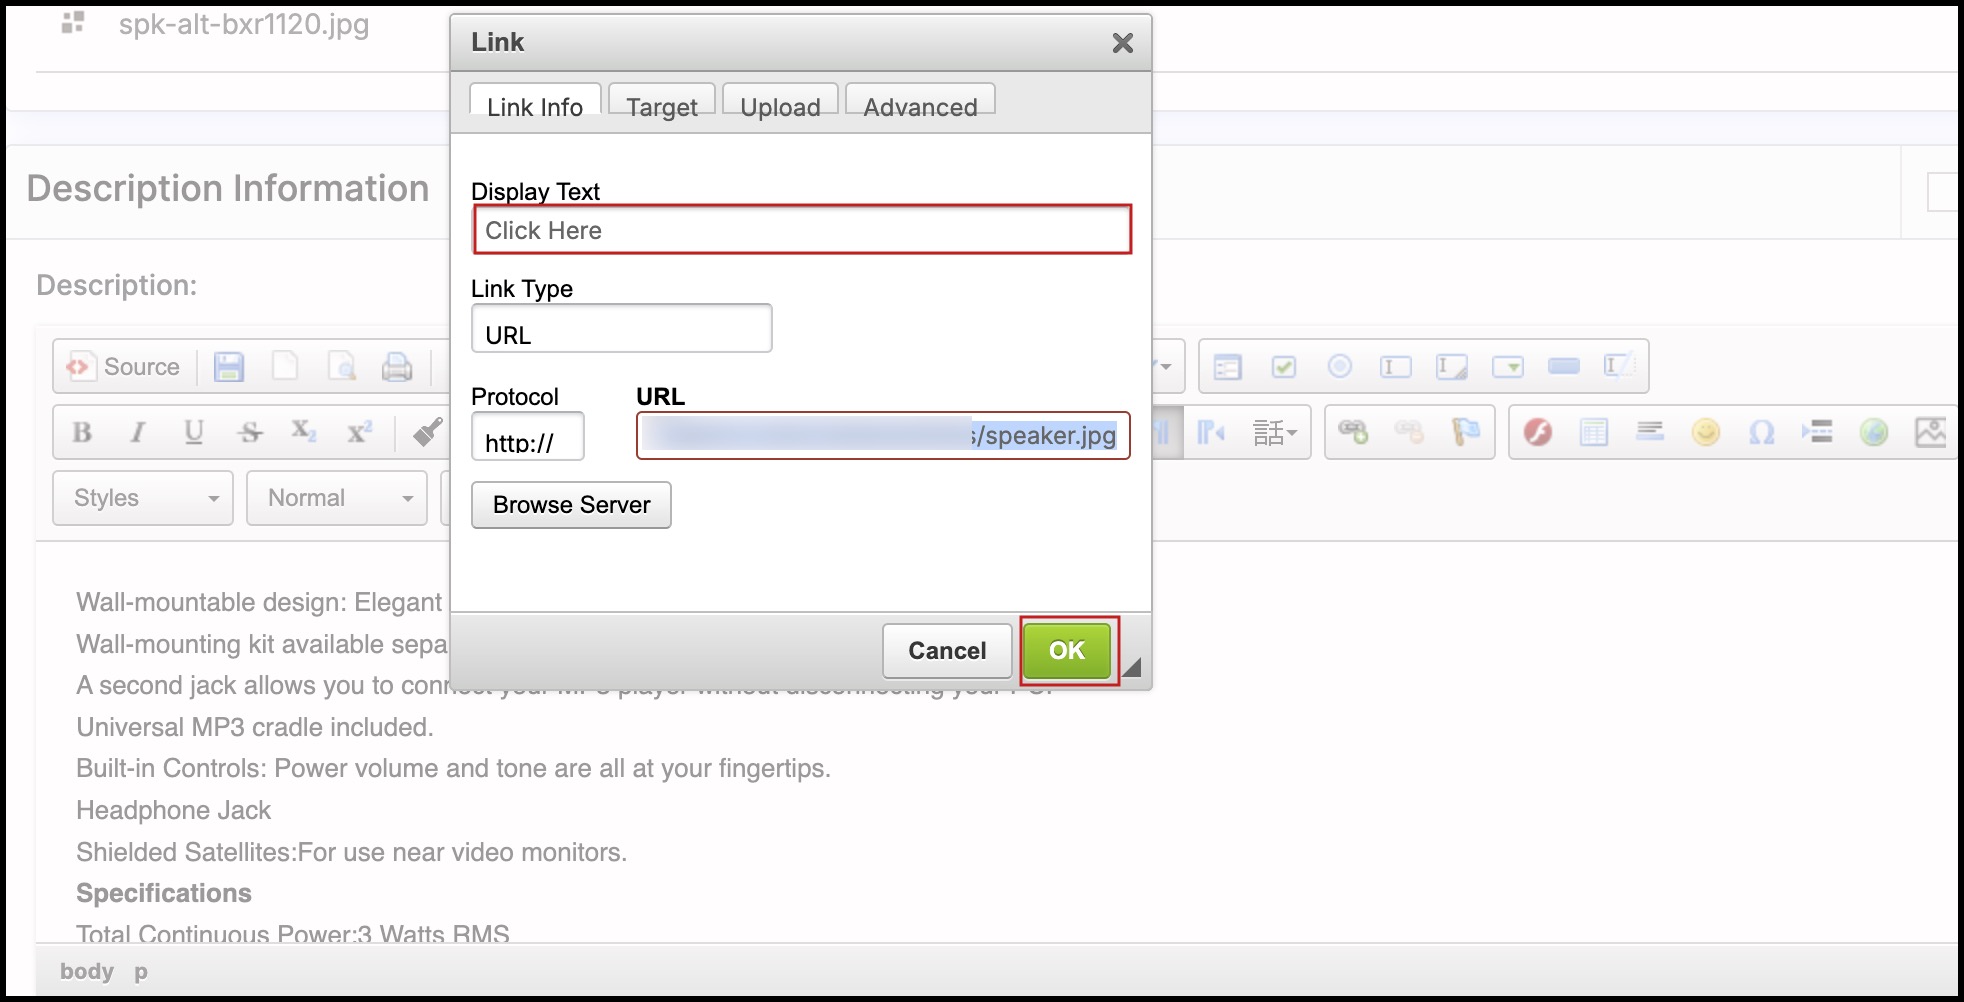
- Click the "Link" button to begin. This will bring up a dialog for the entering the URL or selecting files from the server.
- To select files from the server, click the "Browse Server" button.
- This will bring up a "Server File Browser" dialog for selection of files. Using the buttons at the top of the dialog ( "Upload" and "Multiple Files Upload" ), additional files can be uploaded to the server and then selected as needed. Additional directories can be created under the "Files" directory to create a hierarchy of content.
- Only files of the following types may be uploaded -
- 7z,ai,aiff,asf,avi,bmp,csv,doc,docx,fla,flv,gif,gz,gzip,html,htm,jpeg,jpg, js,mid,mov,mp3,mp4,mpc,mpeg,mpg,ods,odt,pdf,png,ppt,pptx,psd,pxd, qt,ram,rar,rm,rmi,rmvb,rtf,sdc,sitd,swf,sxc,sxw,tar,tgz,tif,tiff, ttf,txt,vsd,wav,wma,wmv,xls,xlsx,xml,zip,sbp.
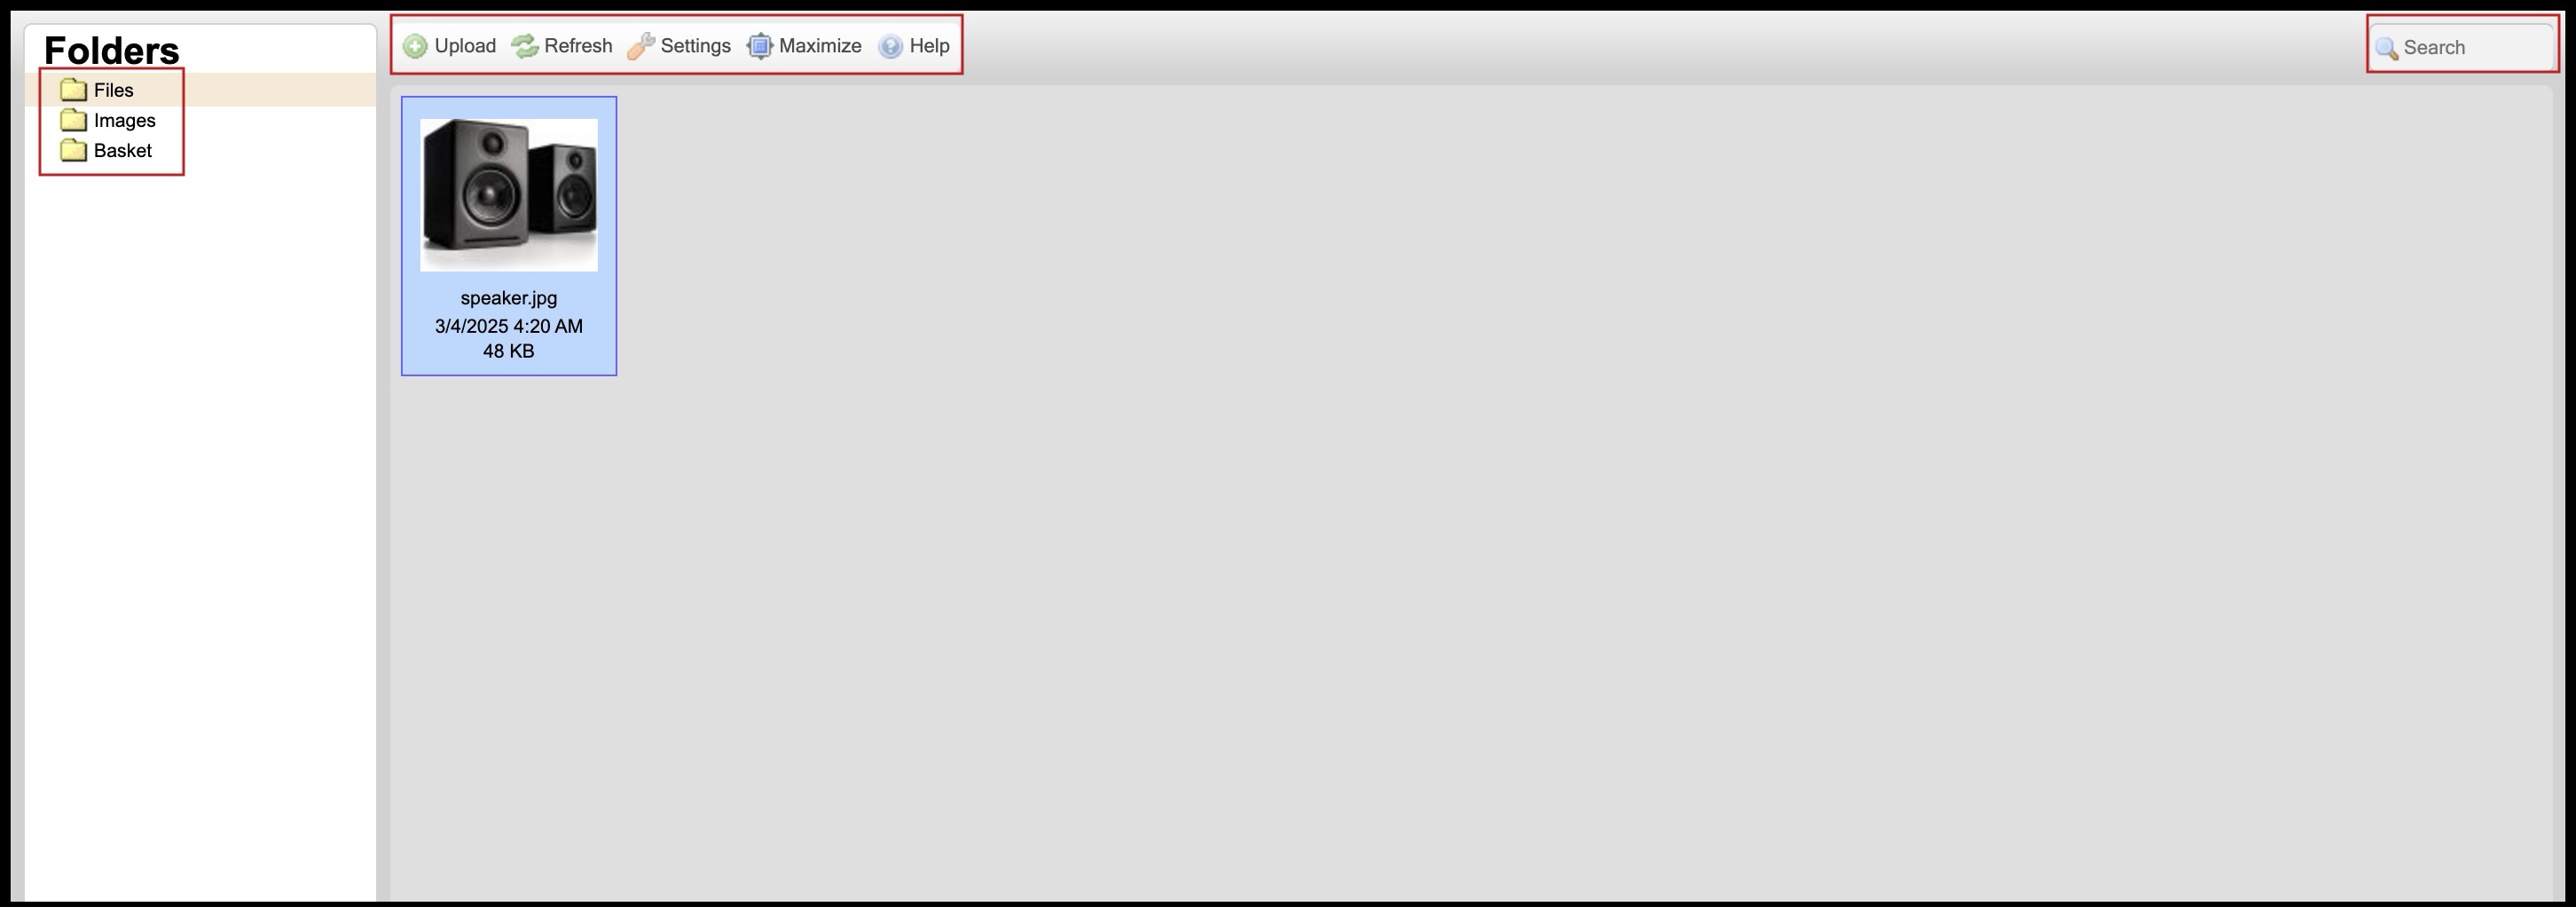
- Select the folder in which you want to view content.
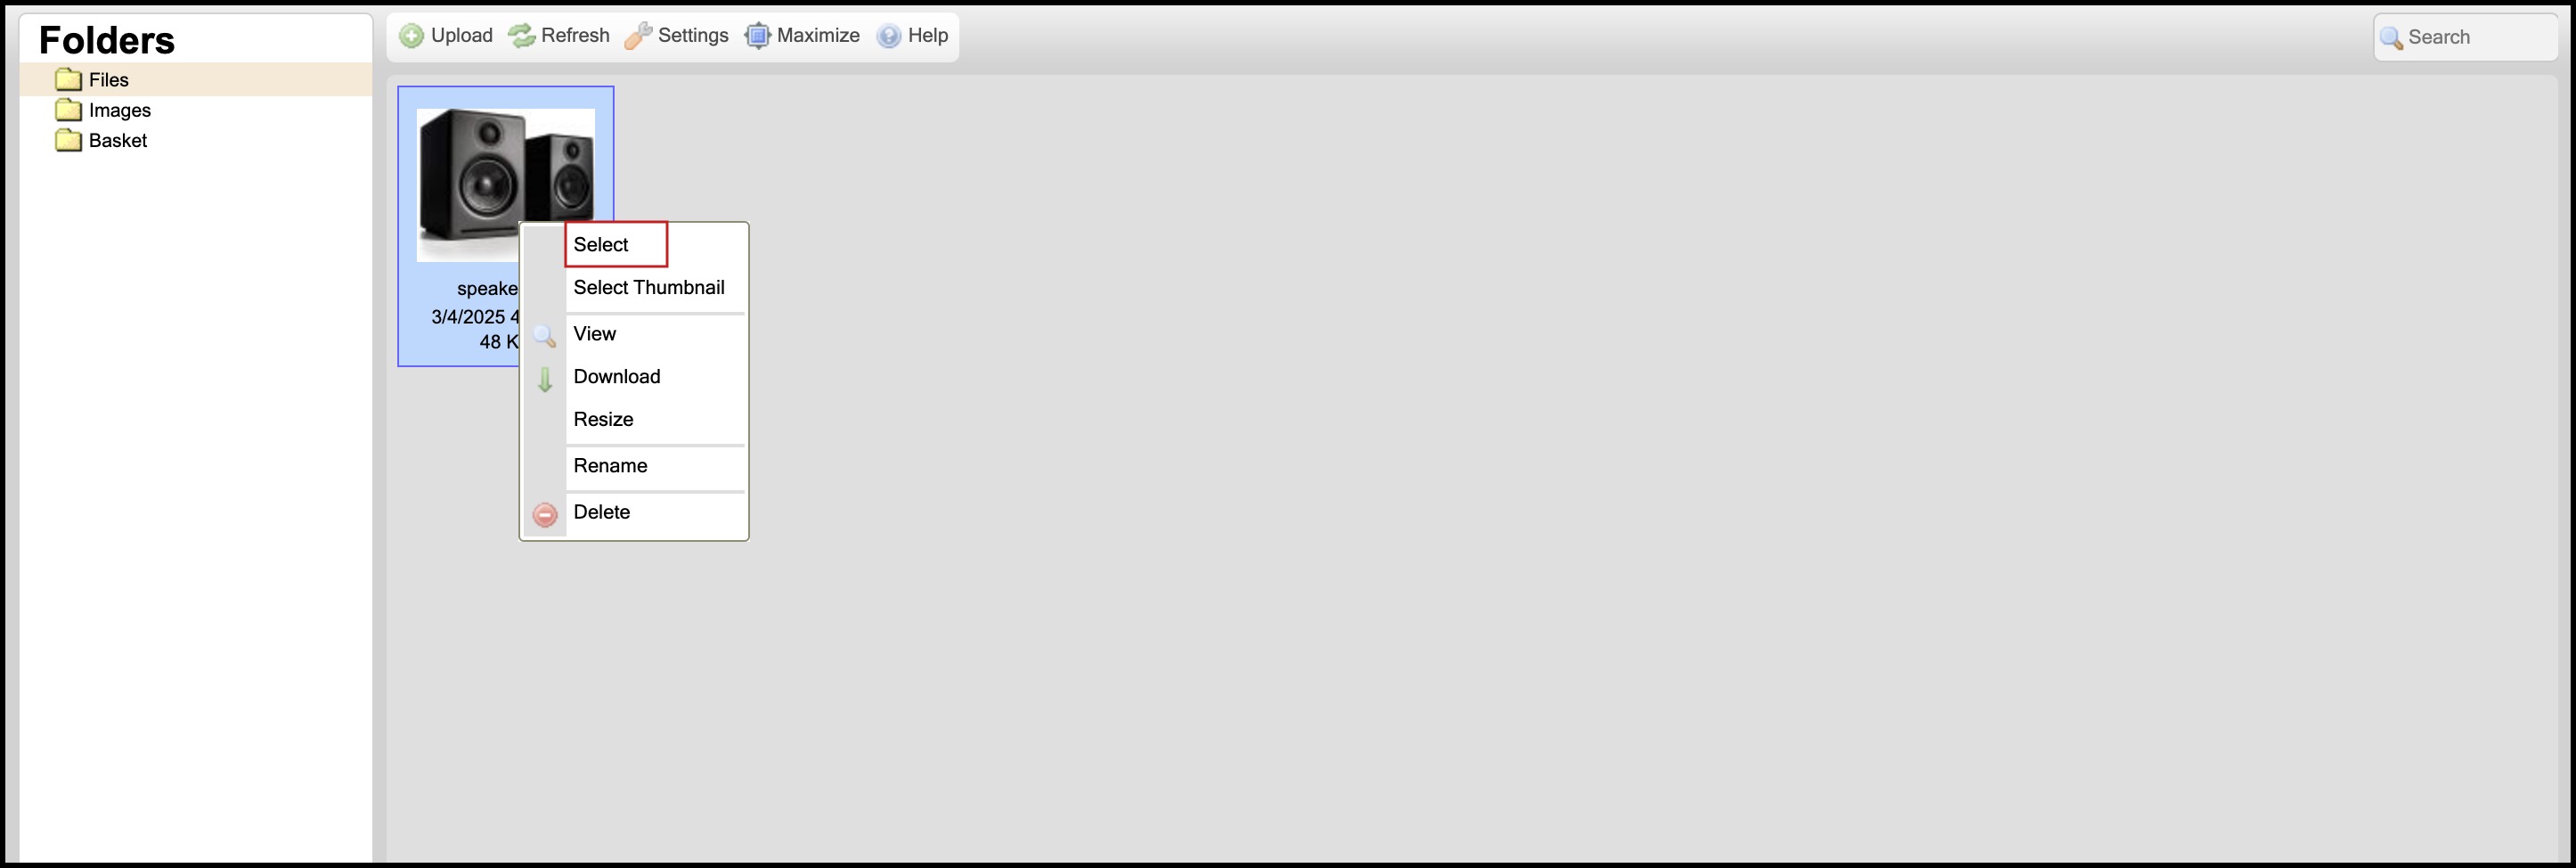
- "Right-Click" on an item in the file and click "Select" to select the file. This will add the file URL to the Link dialog as shown below. The same can be accomplished by "double-clicking" the file icon as well.
- Enter image text in the "Display Text" field and click "OK" to finish.
Inserting "IMAGES" into content
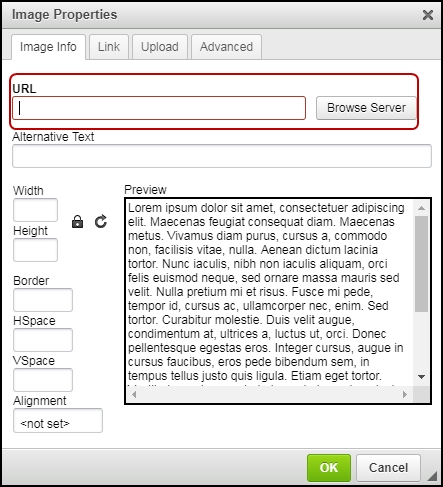
Click the "Image" button in Second row, this will bring up a dialog for the entering the image URL or selecting an image from the server.
To select files from the server, click the "Browse Server" button.
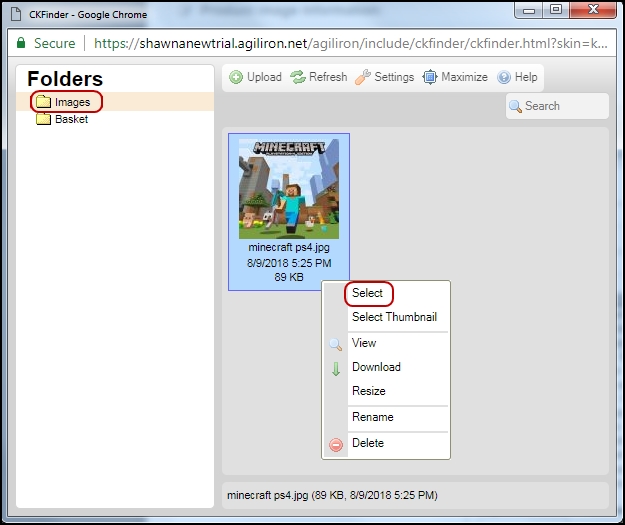
- This will bring up a "Server File Browser" dialog for selection of files. Using the buttons at the top of the dialog ( "Upload" and "Multiple Files Upload" ), additional files can be uploaded to the server and then selected as needed. Additional directories can be created under the "Images" directory to create a hierarchy of content.
- Only image files of following types (and size less than 2MB) may be uploaded - jpg, jpeg, png, gif, tiff, tif
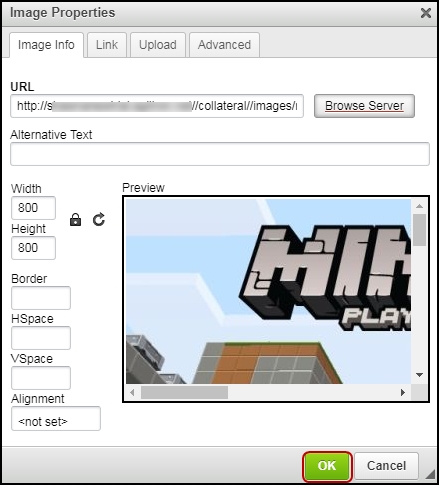
- "Right-Click" on a file icon and click the "Select" item from the menu to select the file, this will add the image URL to the Image dialog as shown below along with offering a preview of the image just selected. The same can be accomplished by "double-clicking" the image icon as well.
Enter image text in the "Alternative Text" field if desired and click "OK" to finish.
Inserting LINE and Paragraph Breaks into the content
- As you type text into the HTML editor content area, typing
<Enter>will add a Paragraph break into the content - <p>content</p> HTML markup
- As you type text into the HTML editor content area, typing
<Shift+Enter>will introduce a Line break into the content - < br/> HTML markup
Updated over 1 year ago