PayInvoice Feature for Customer Payments
The PayInvoice feature enables the user to include a URL on each invoice that allows the customer to enter credit card payment information online.
The customer clicks on the link, reviews the invoice, enters credit card details and submits their payment information. Note: At this time, the payment isnot automatically processed and will need to be manually processed in order to receive funds.
Once payment has been made, a notification email is sent stating that payment has been made on a customer account. The payment can then be processed in the back office (or through your credit card processor if using the offline credit card option).
The PayInvoice URL must first be added to the invoice template located under Settings > Templates.
- Select "Invoice - Customizable"
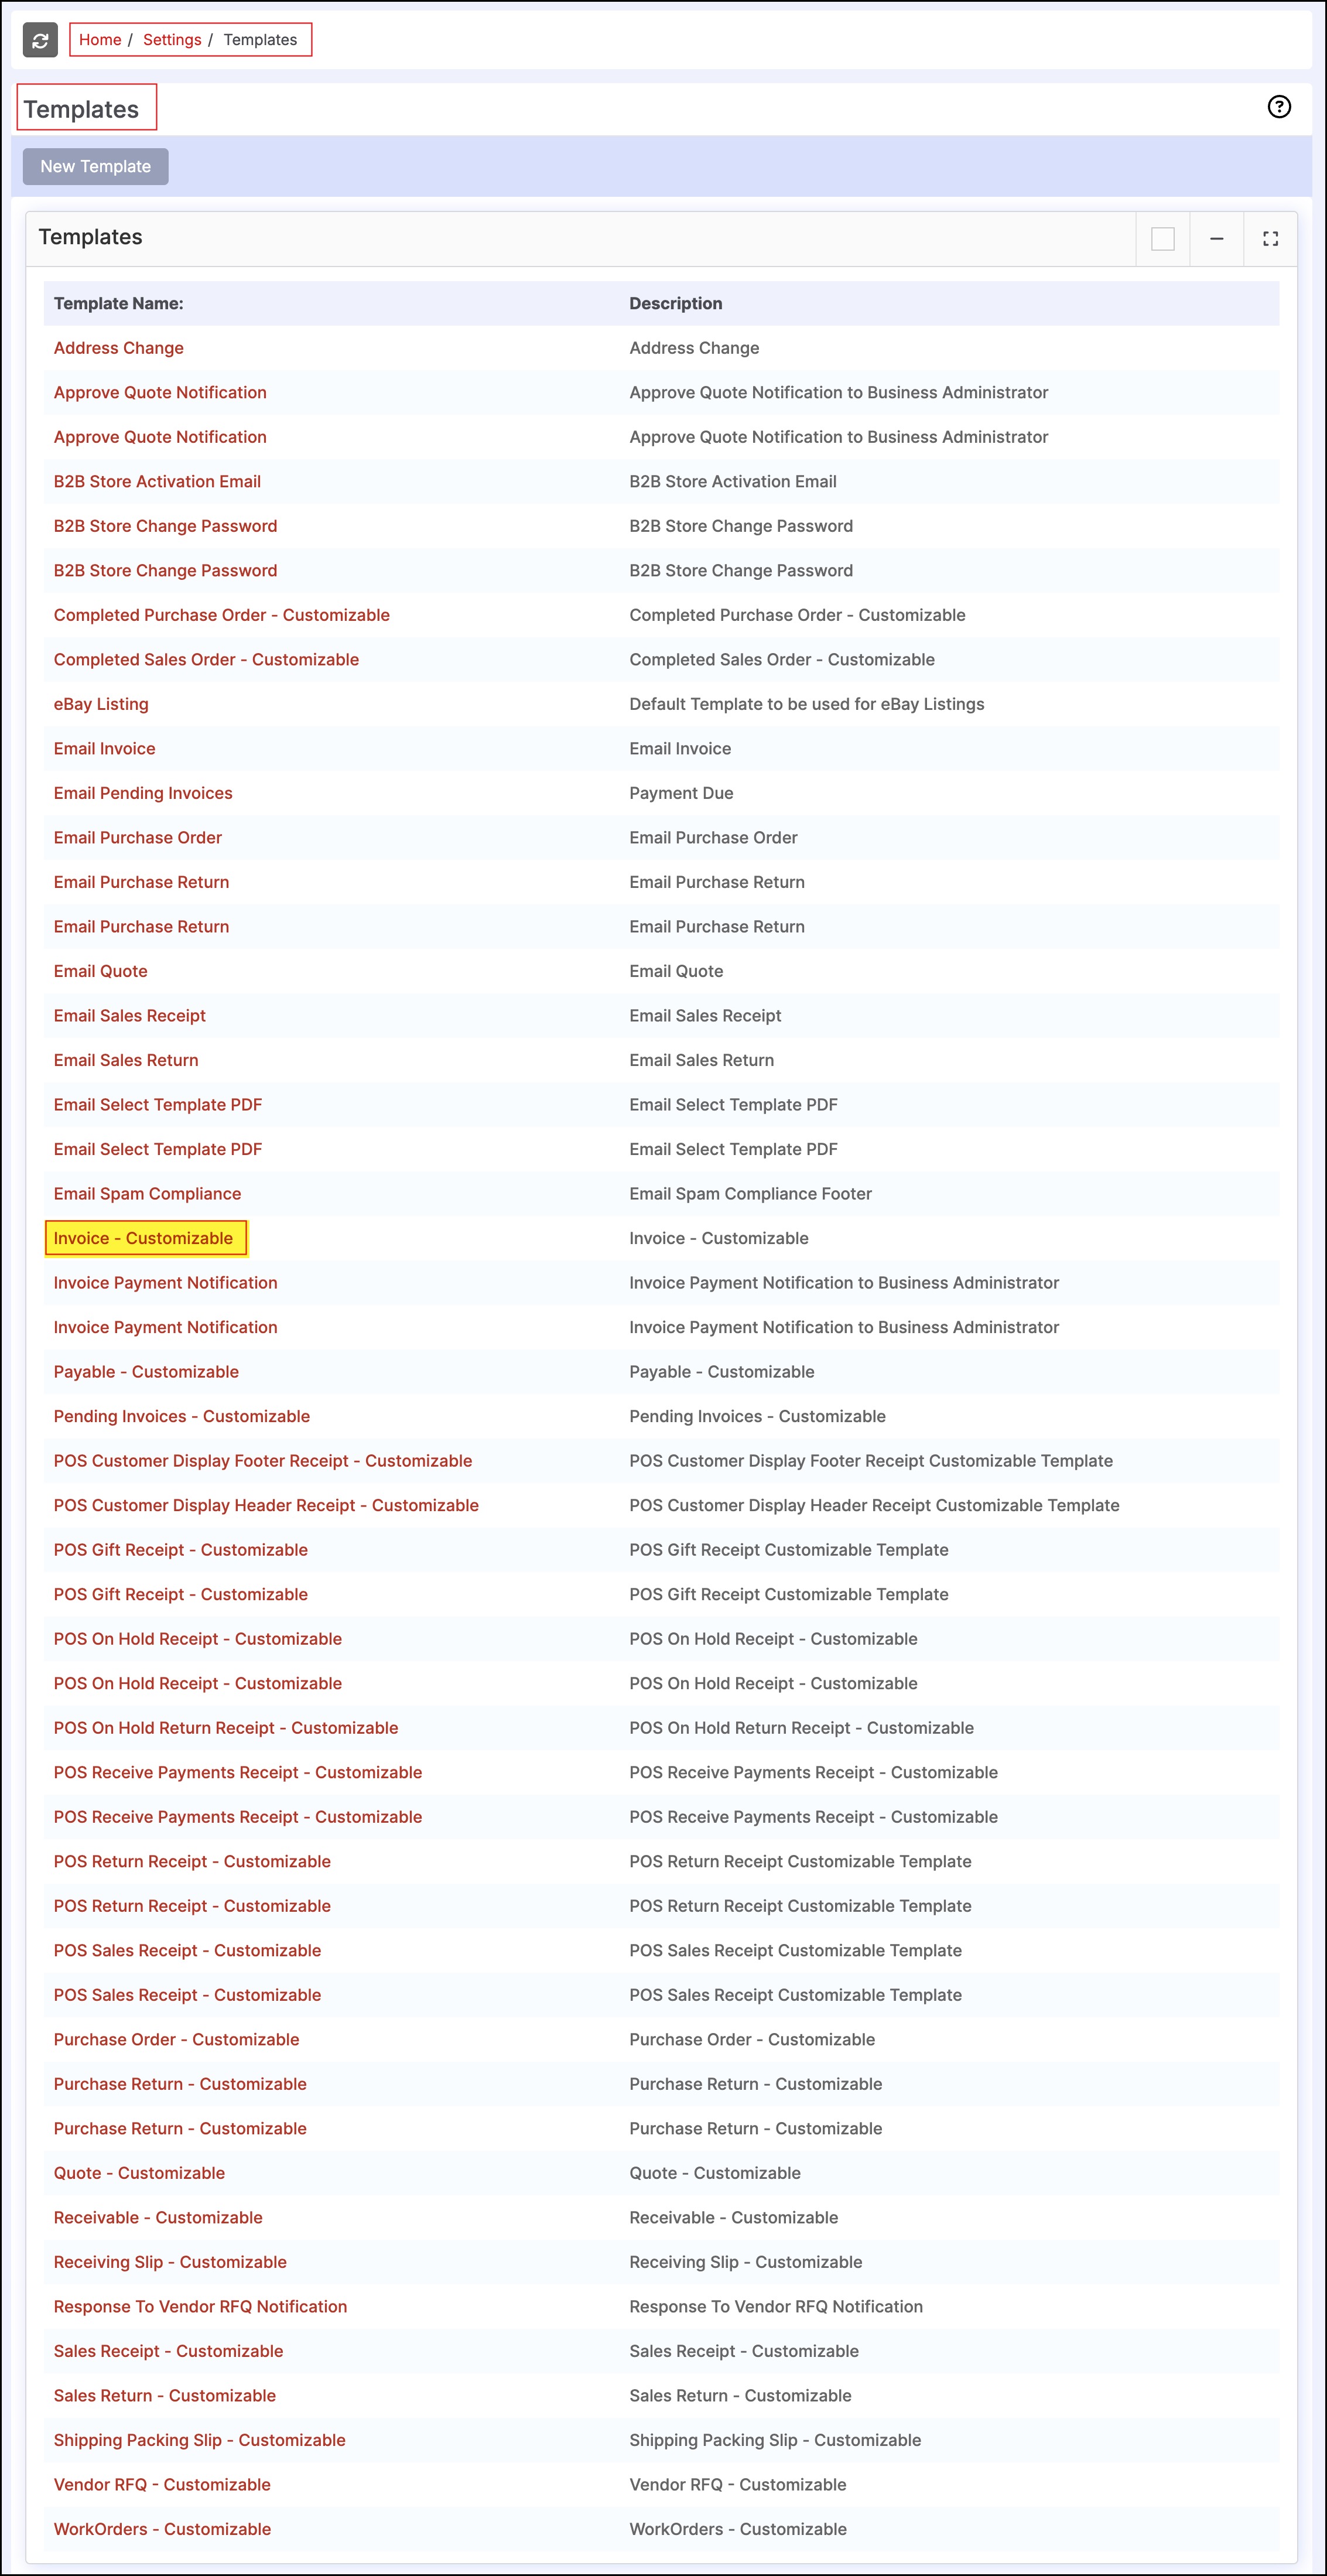
- Click "Edit" to begin editing the template.
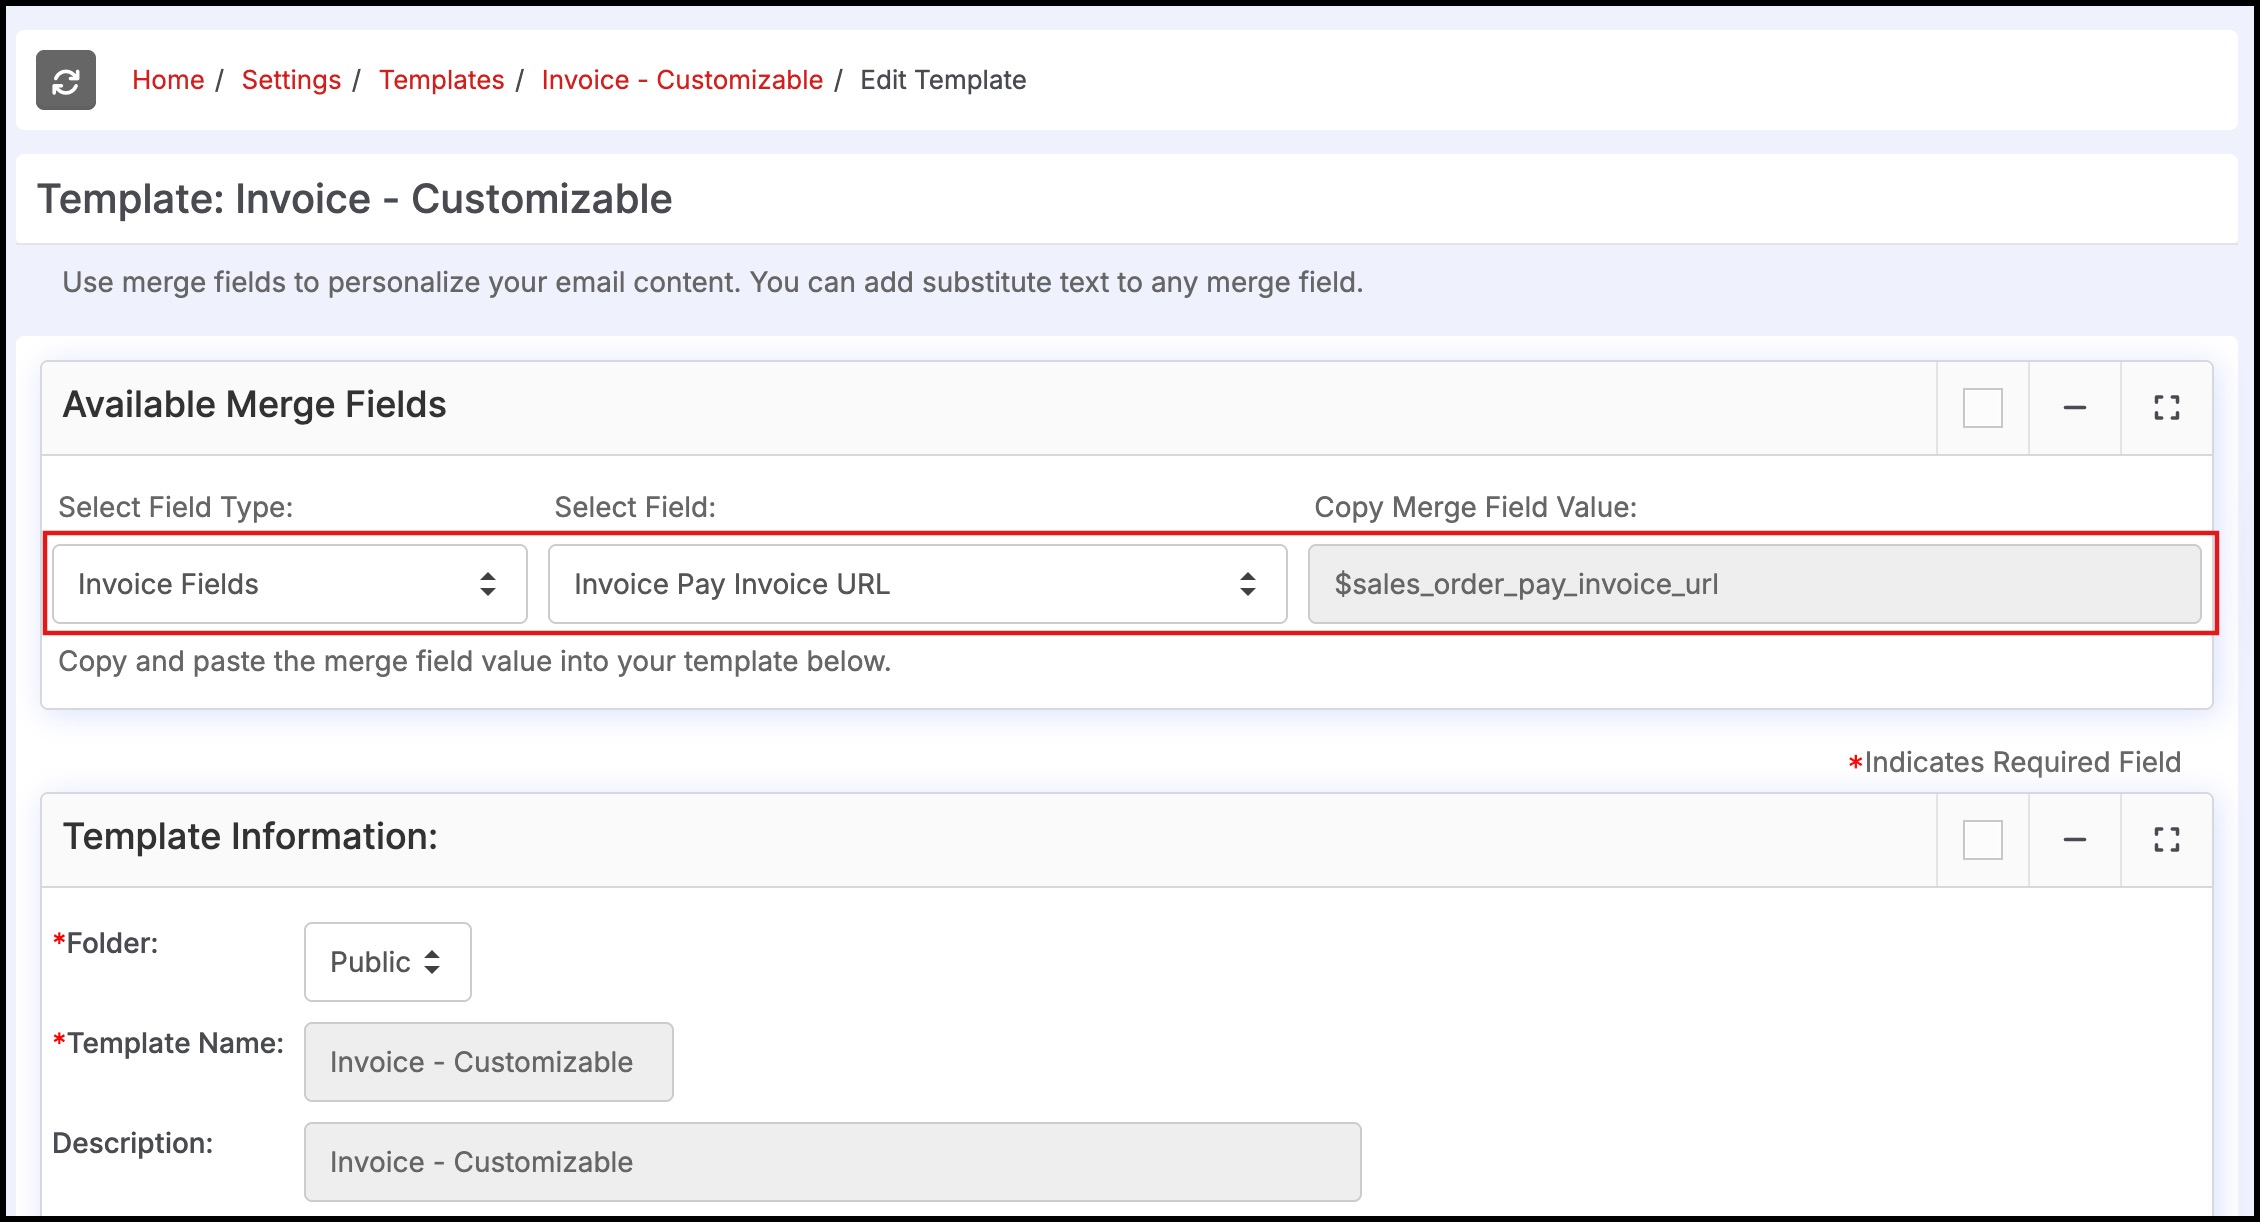
- Click the Select Field Type drop-down box and select "Invoice Fields".
- Click the Select Field drop-down box and select "Invoice Pay Invoice Url"
- The text "$sales_order_pay_invoice_url" should now appear in the "Copy Merge Field Value" box.
- Copy this text (select the field with the mouse cursor and drag, then right click and select copy).
- Scroll down to the "Email Body" section and find an area in which the PayInvoice URL will display on the customer invoice.
- In the example below, we have added the text "Pay Online" above the "Comments" section of the invoice.
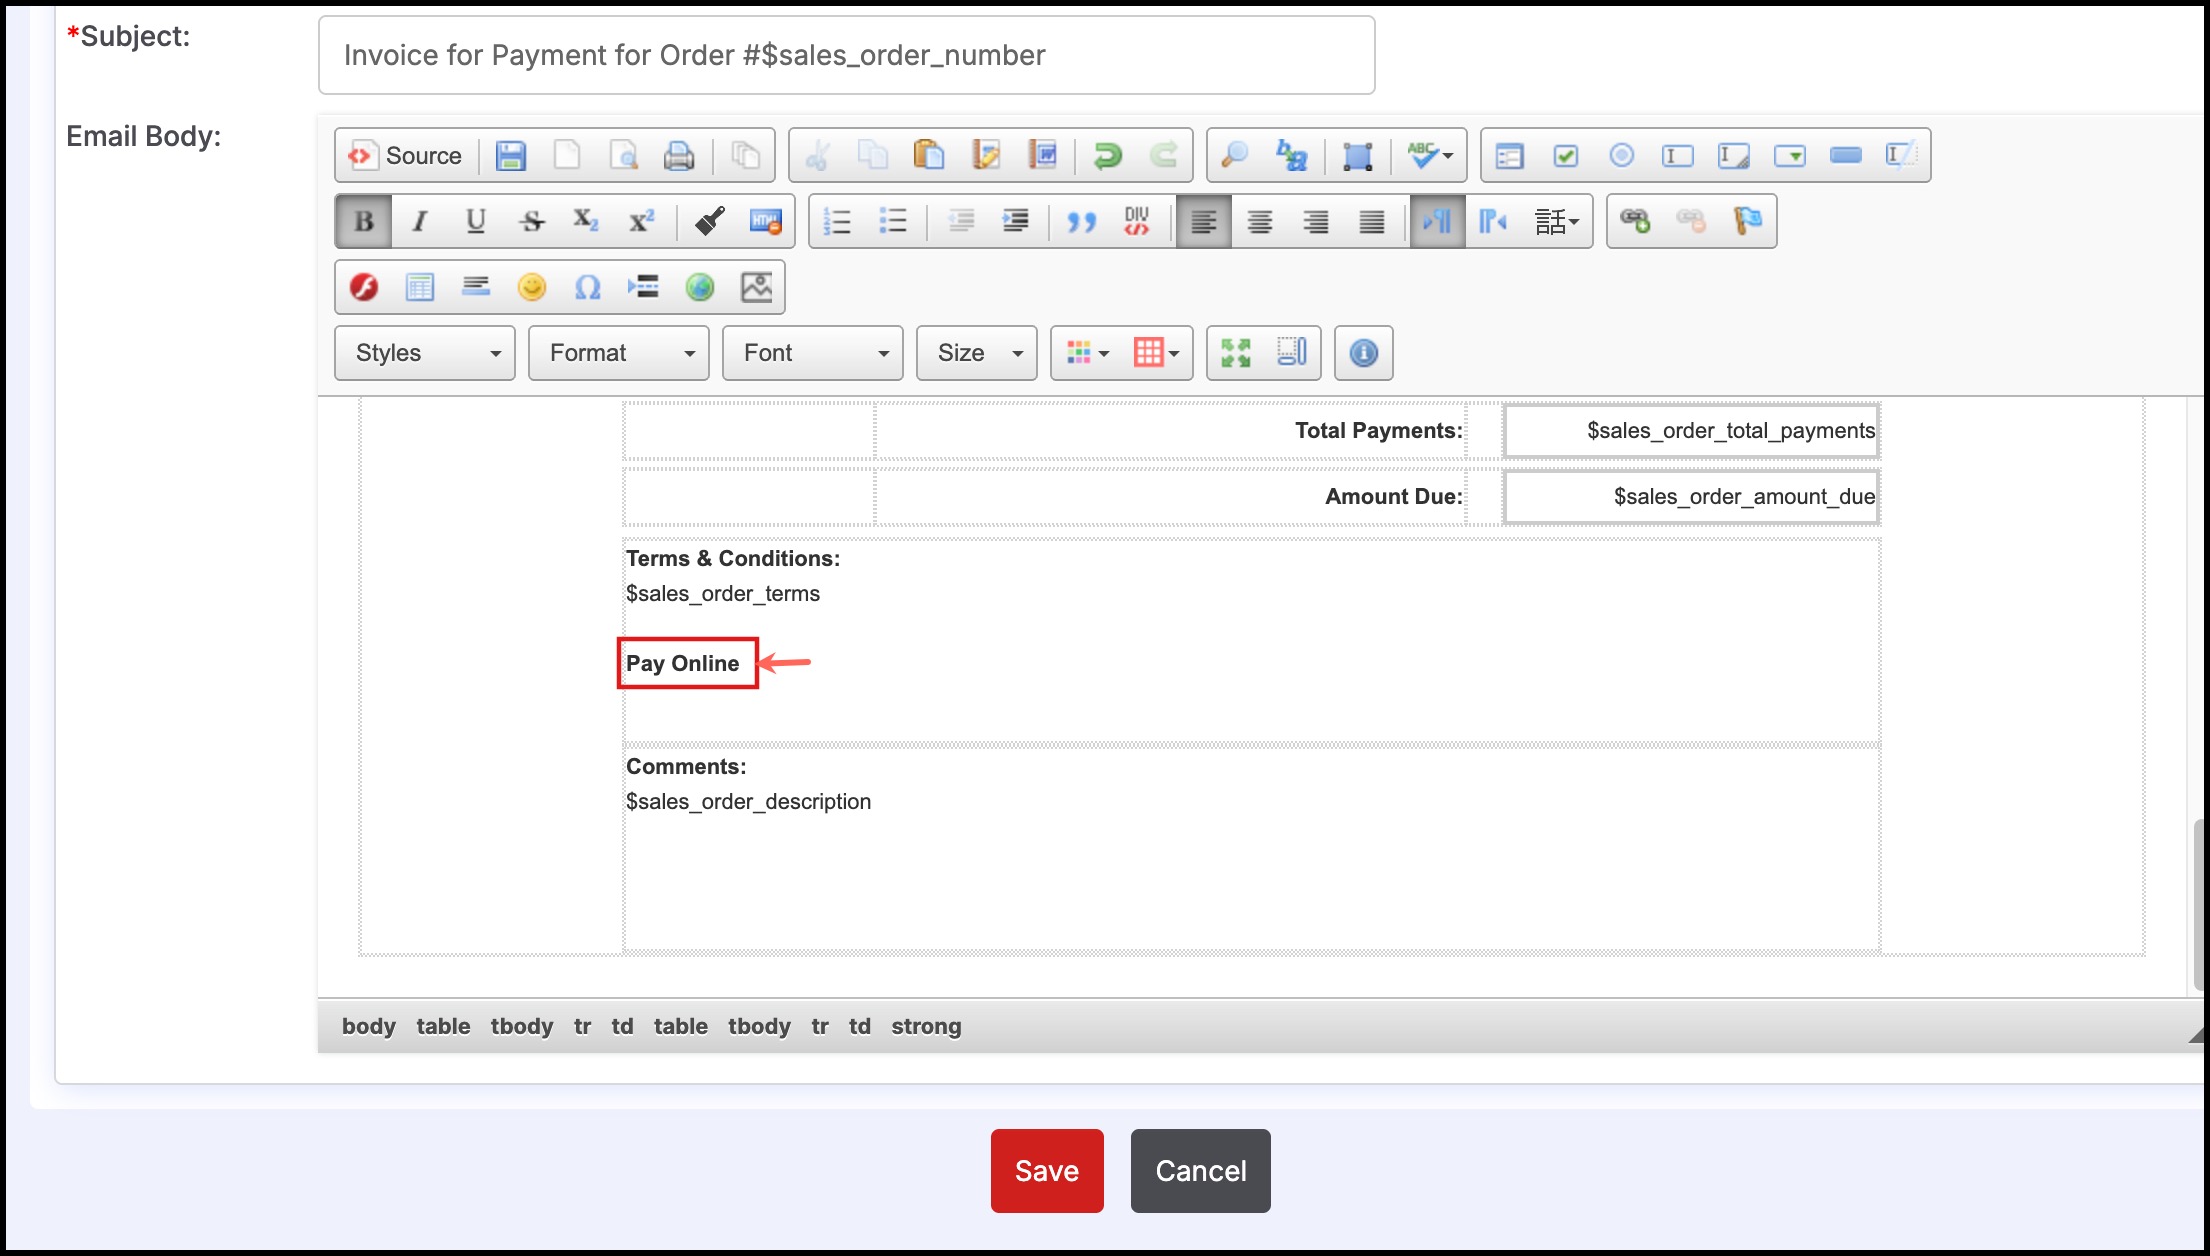
- Paste the copied text to the desired location.
- Click "Save" to save changes.
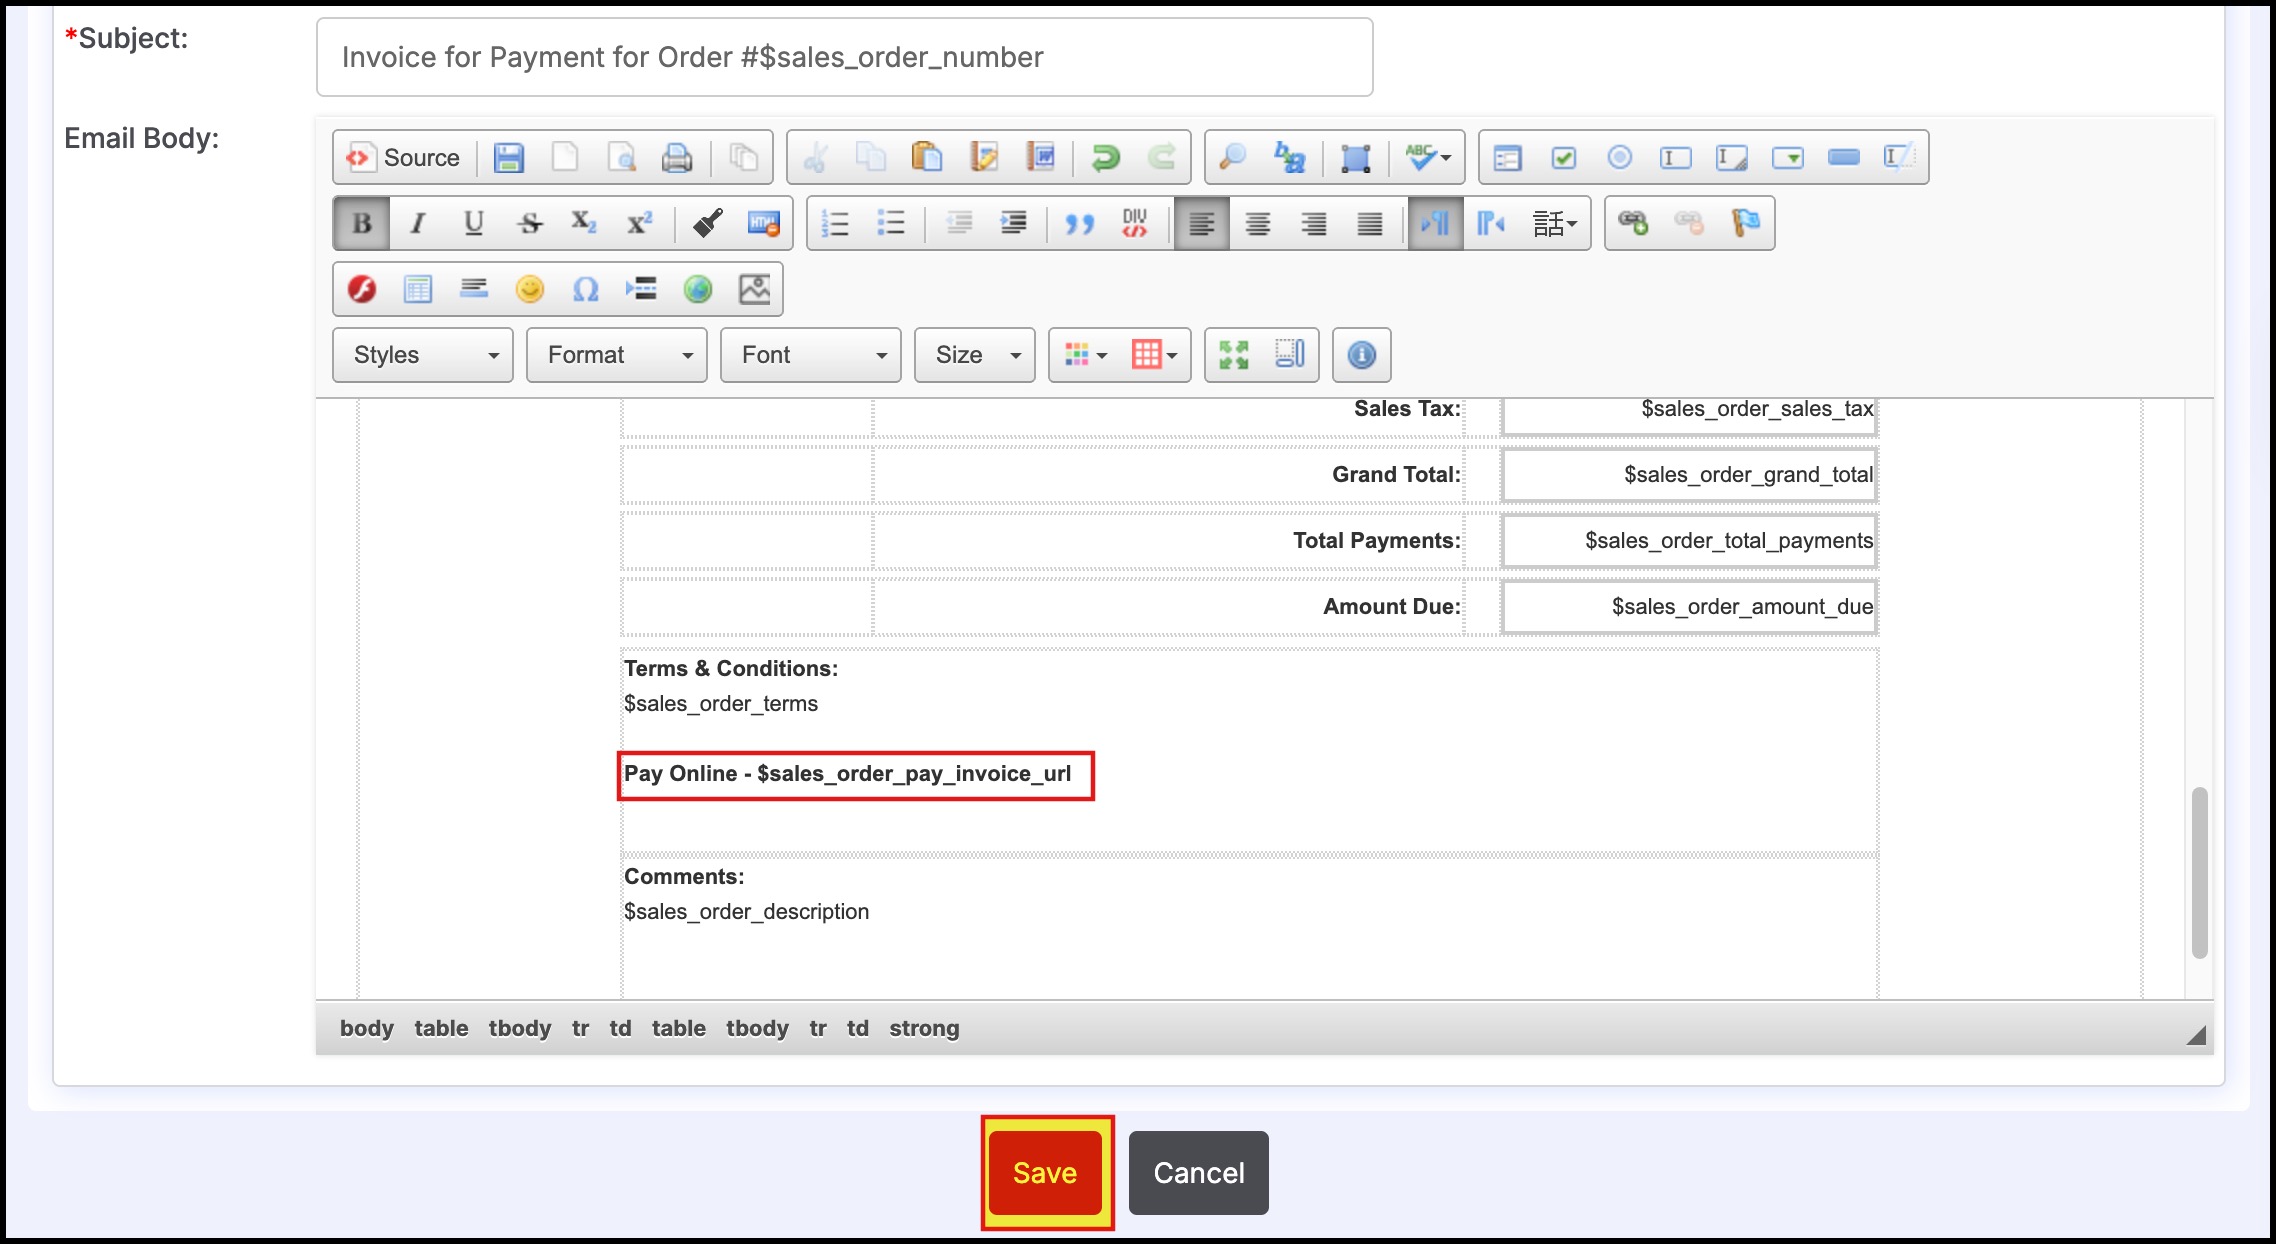
- The URL will now display on the invoice when the PDF is generated.
- When the customer clicks on this link, they will be sent to an external page where they will enter their credit card information. This process is outlined here.

The PayInvoice link can be customized with text if preferred. Follow the instructions from above on how to edit the Invoice Template.
Once the template is open:
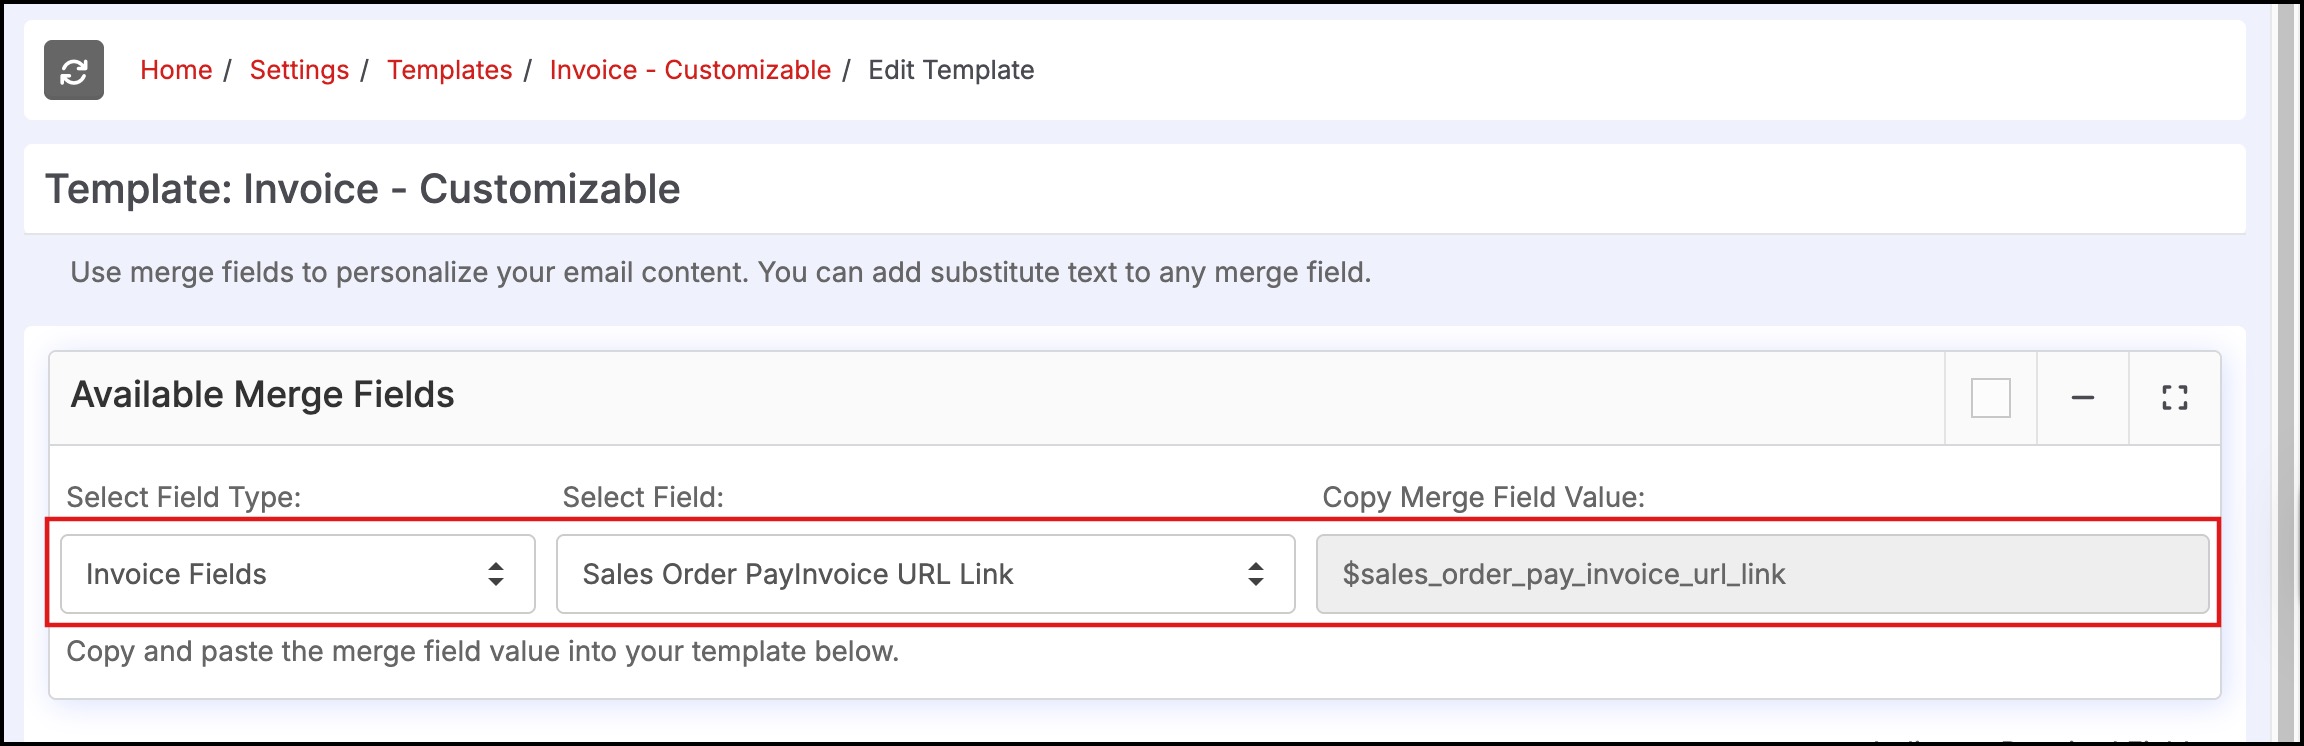
- Click the Select Field Type drop-down box and select "Invoice Fields".
- Click the Select Field drop-down box and select "Sales Order PayInvoice URL Link"
- The text "$sales_order_pay_invoice_url_link" should now appear in the "Copy Merge Field Value" box.
- Copy this text (select the field with the mouse cursor and drag, then right click and select copy).
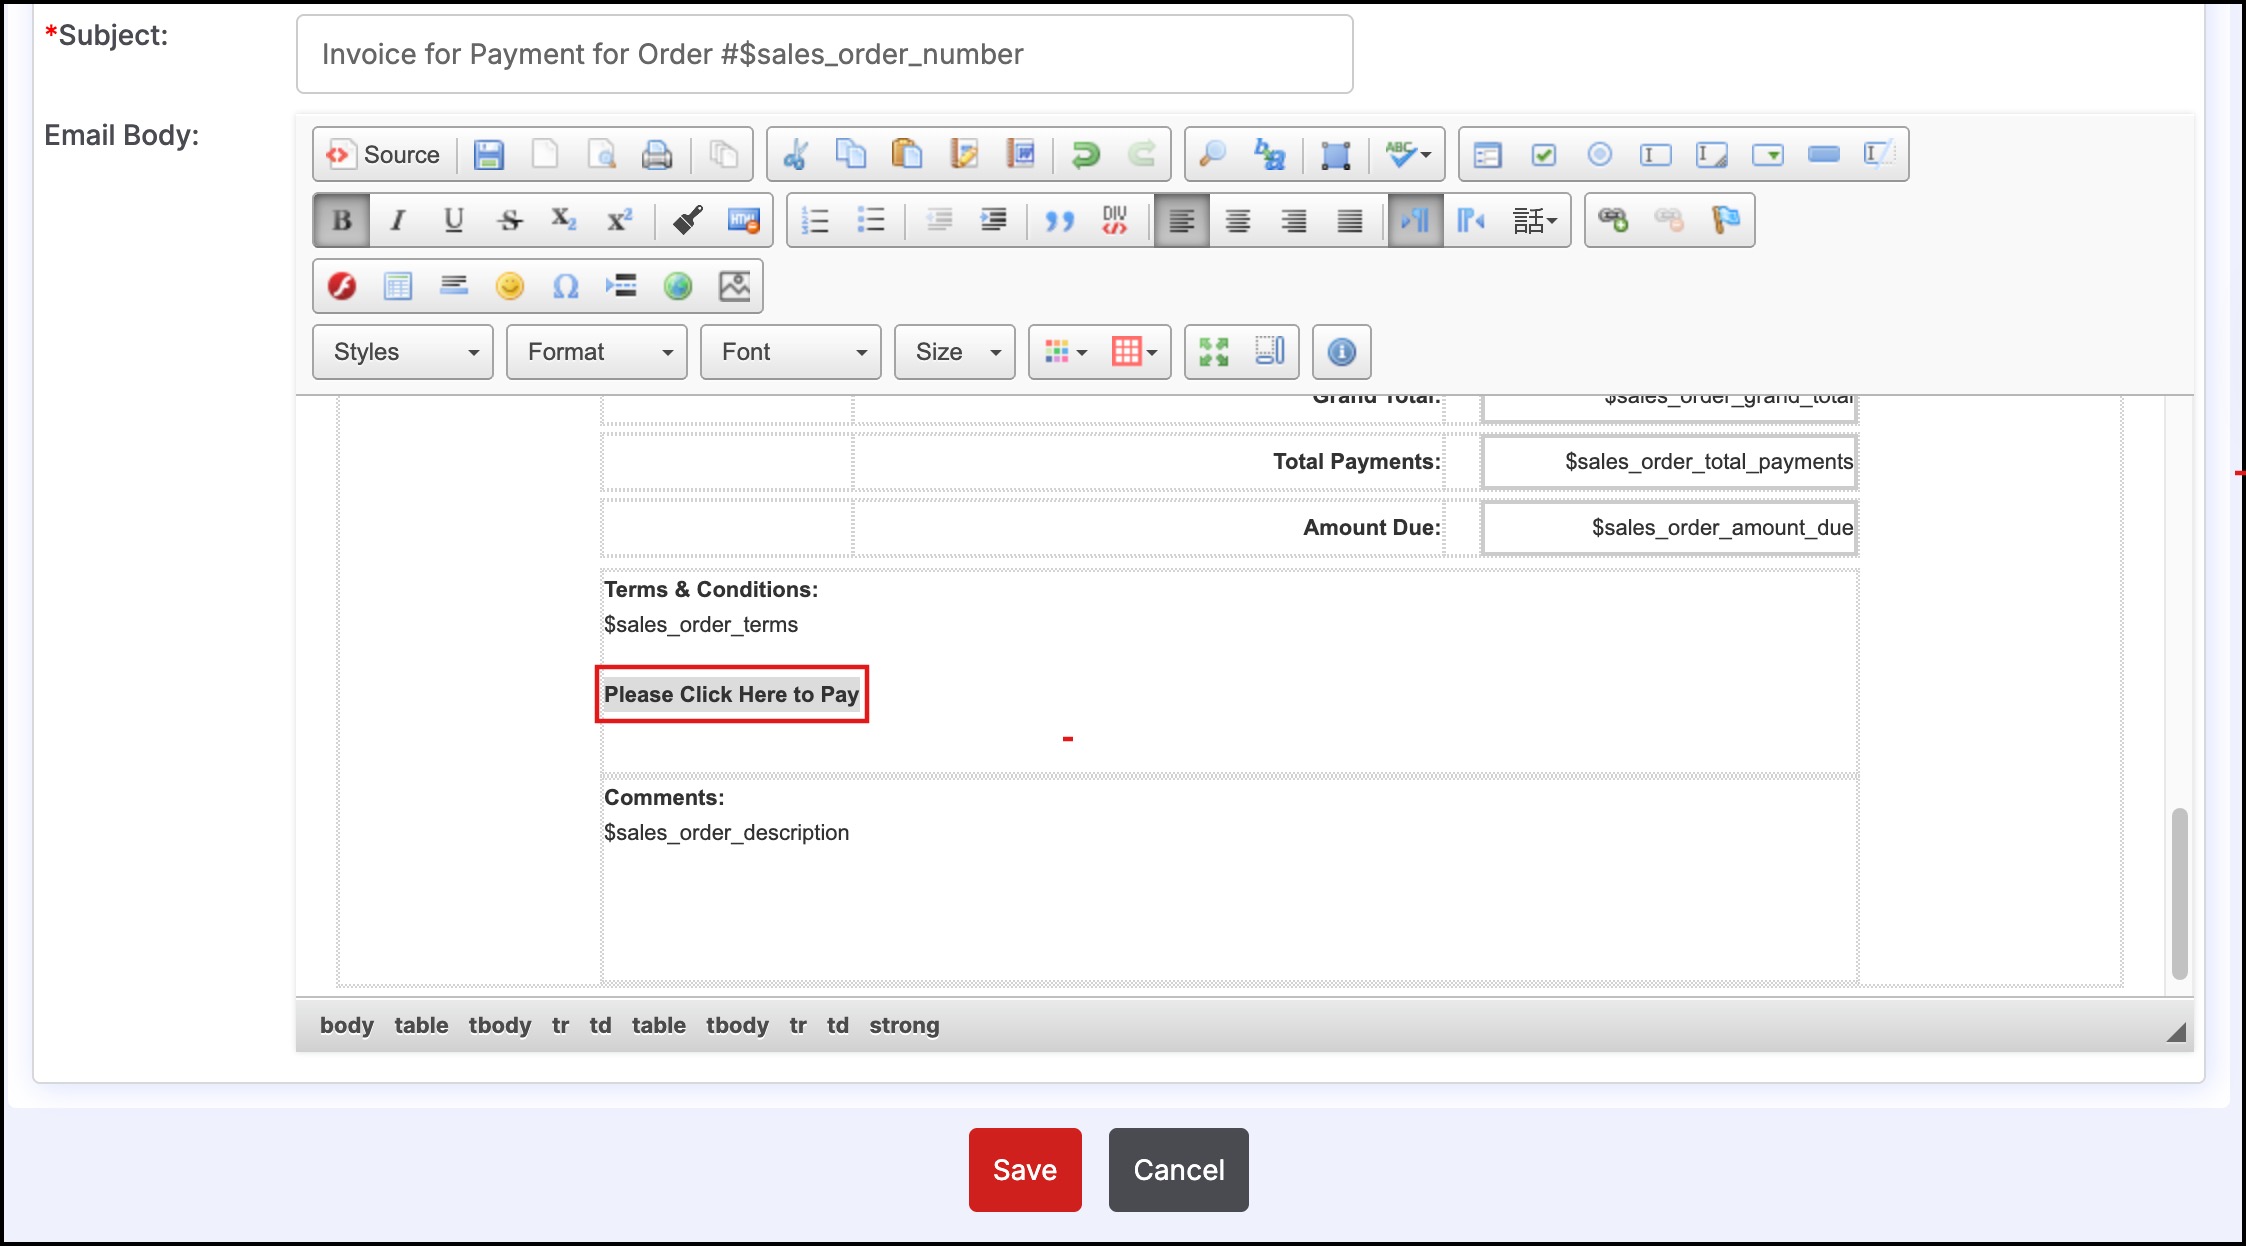
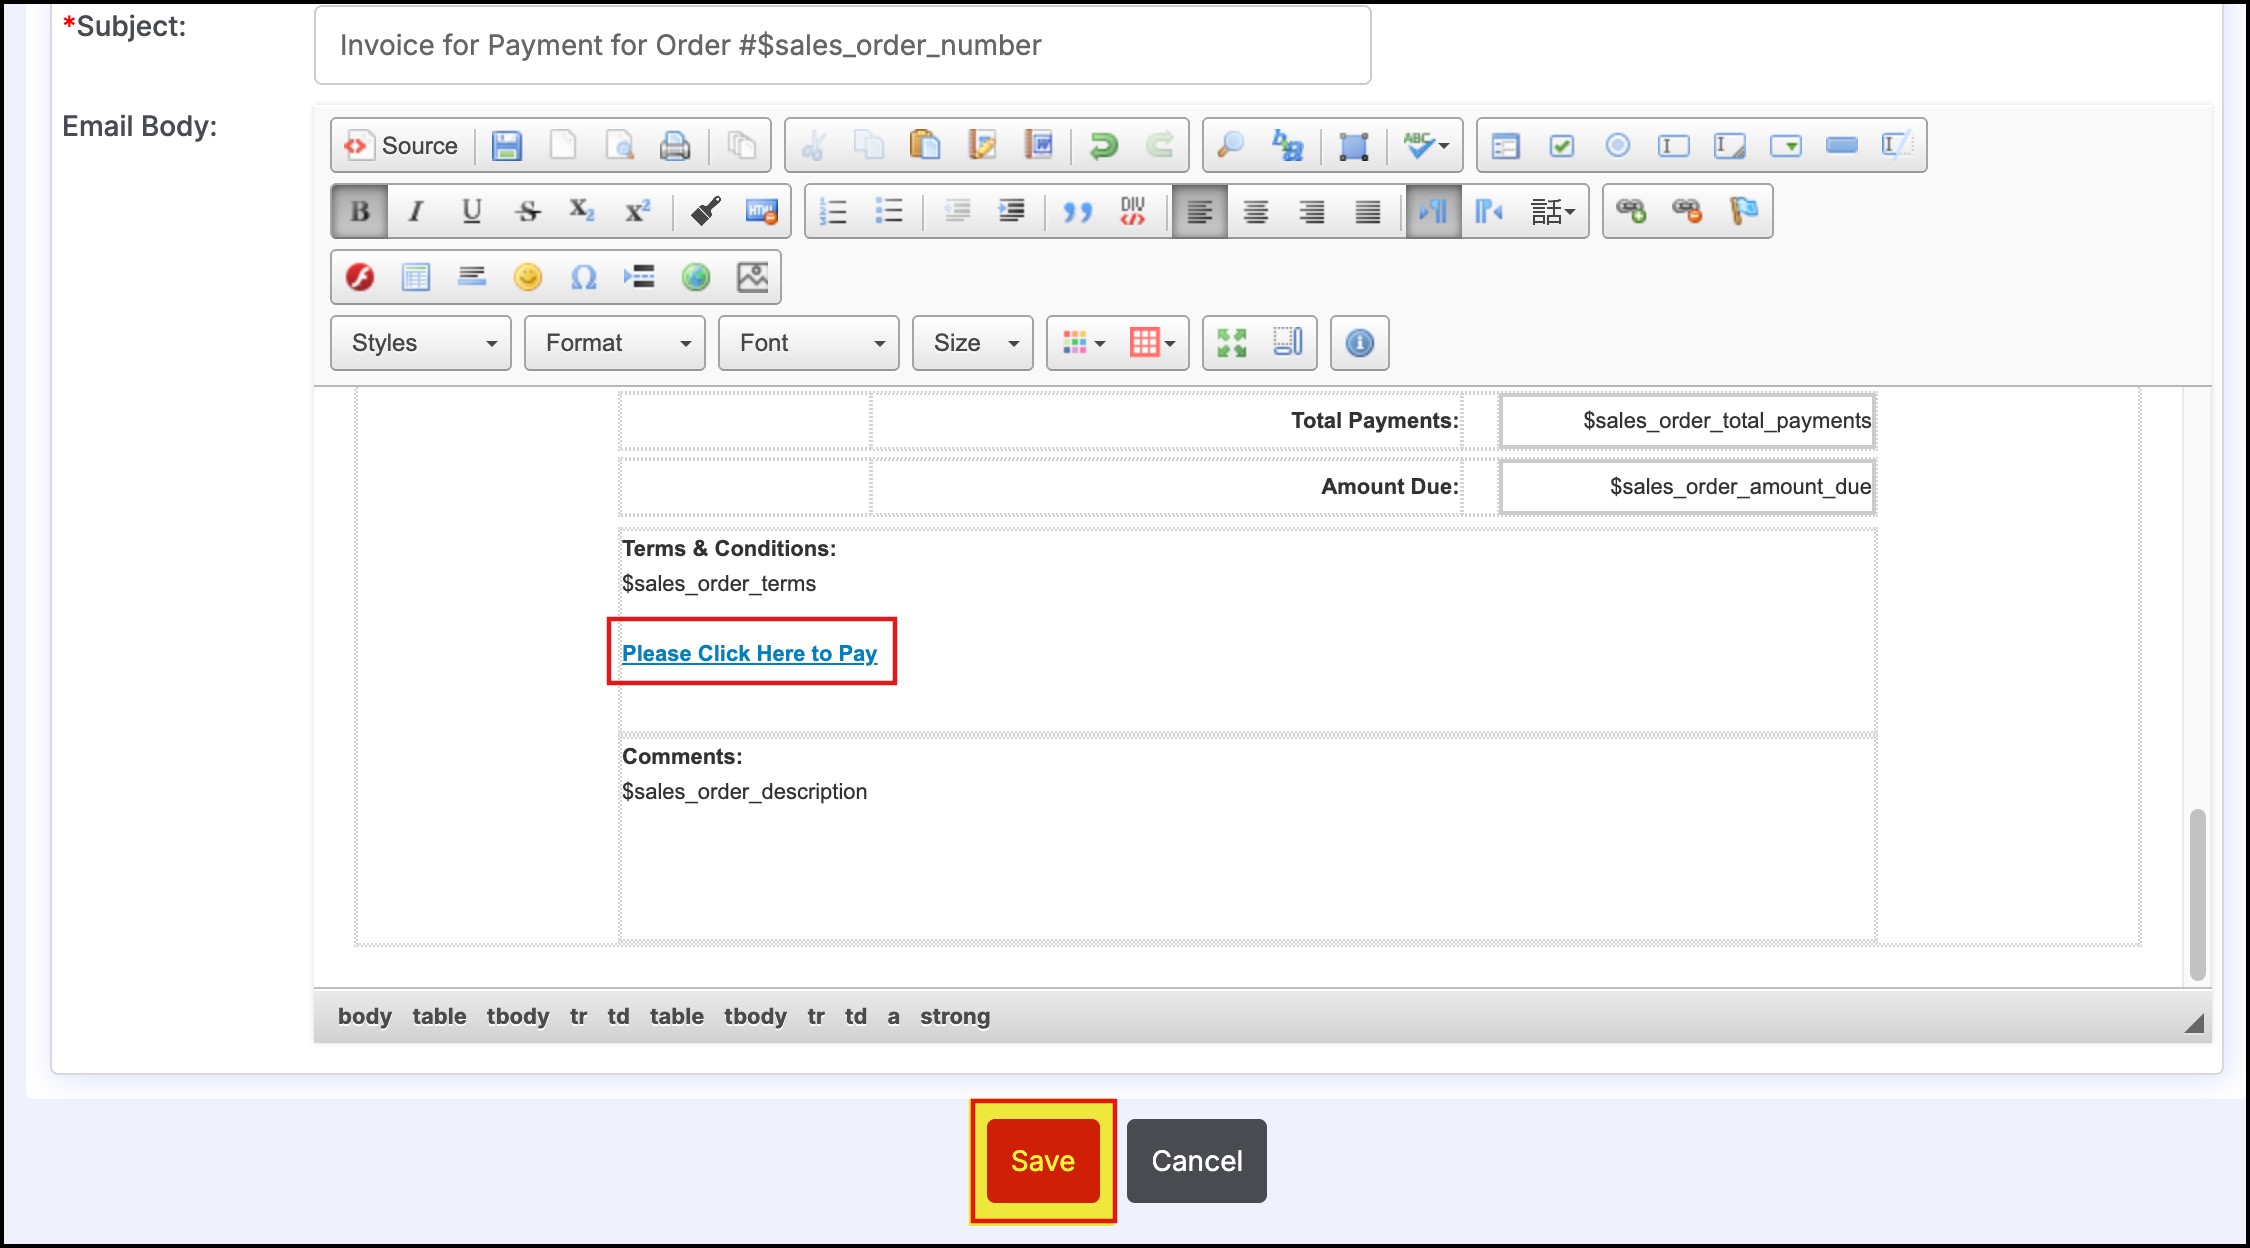
- Scroll down to the "Email Body" section and enter the text that should appear on the invoice.
- For this example we have entered "Please click here to pay this invoice".
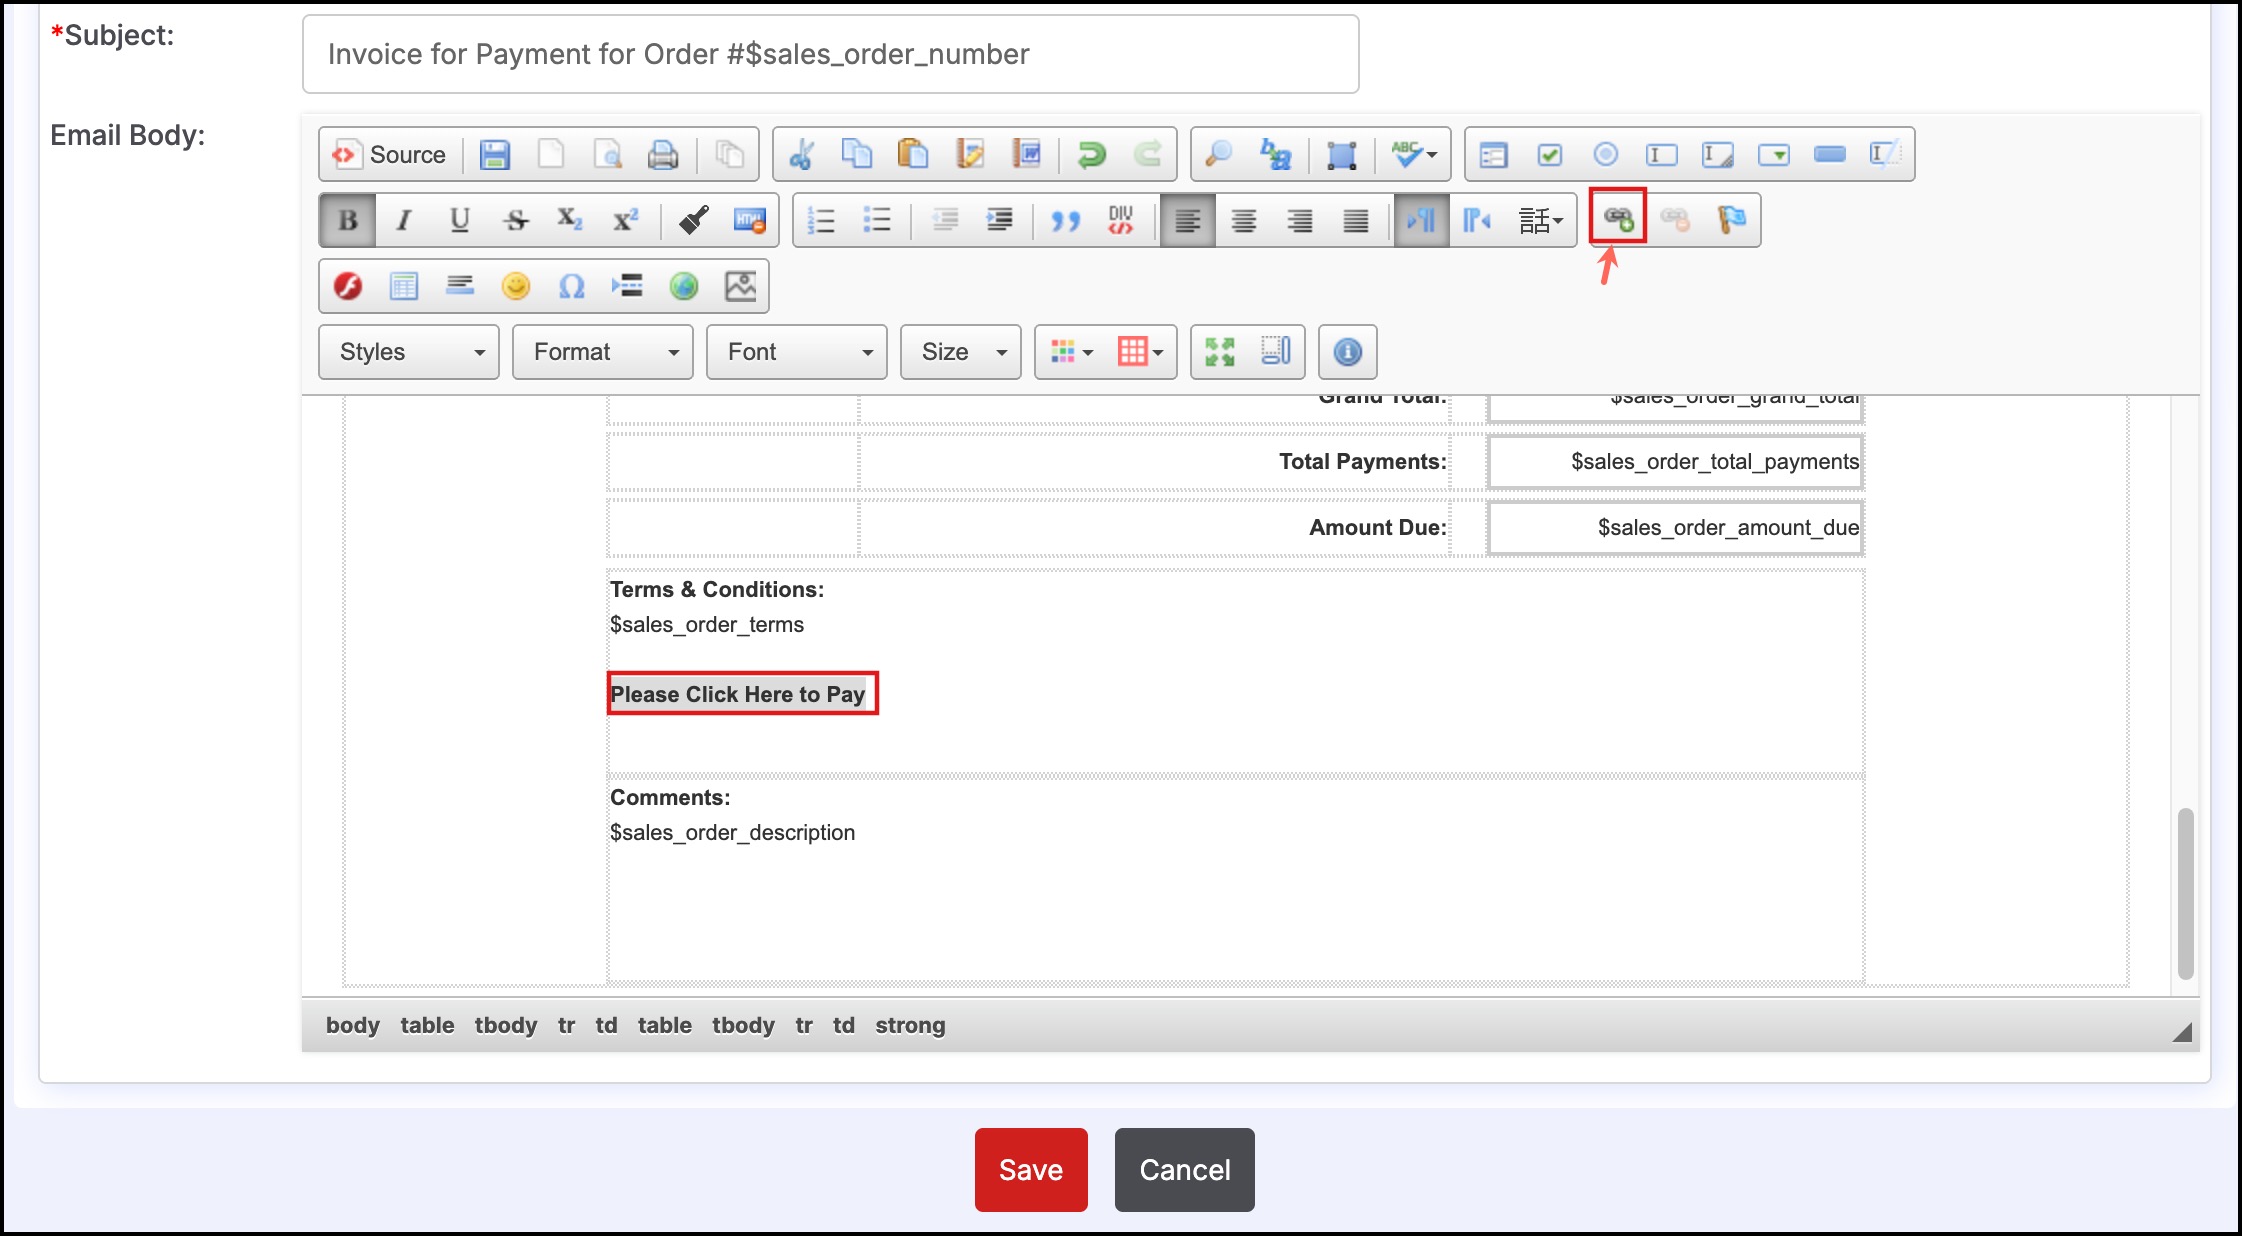
- Highlight this text, then select the "Link" icon on the Email Body Toolbar.
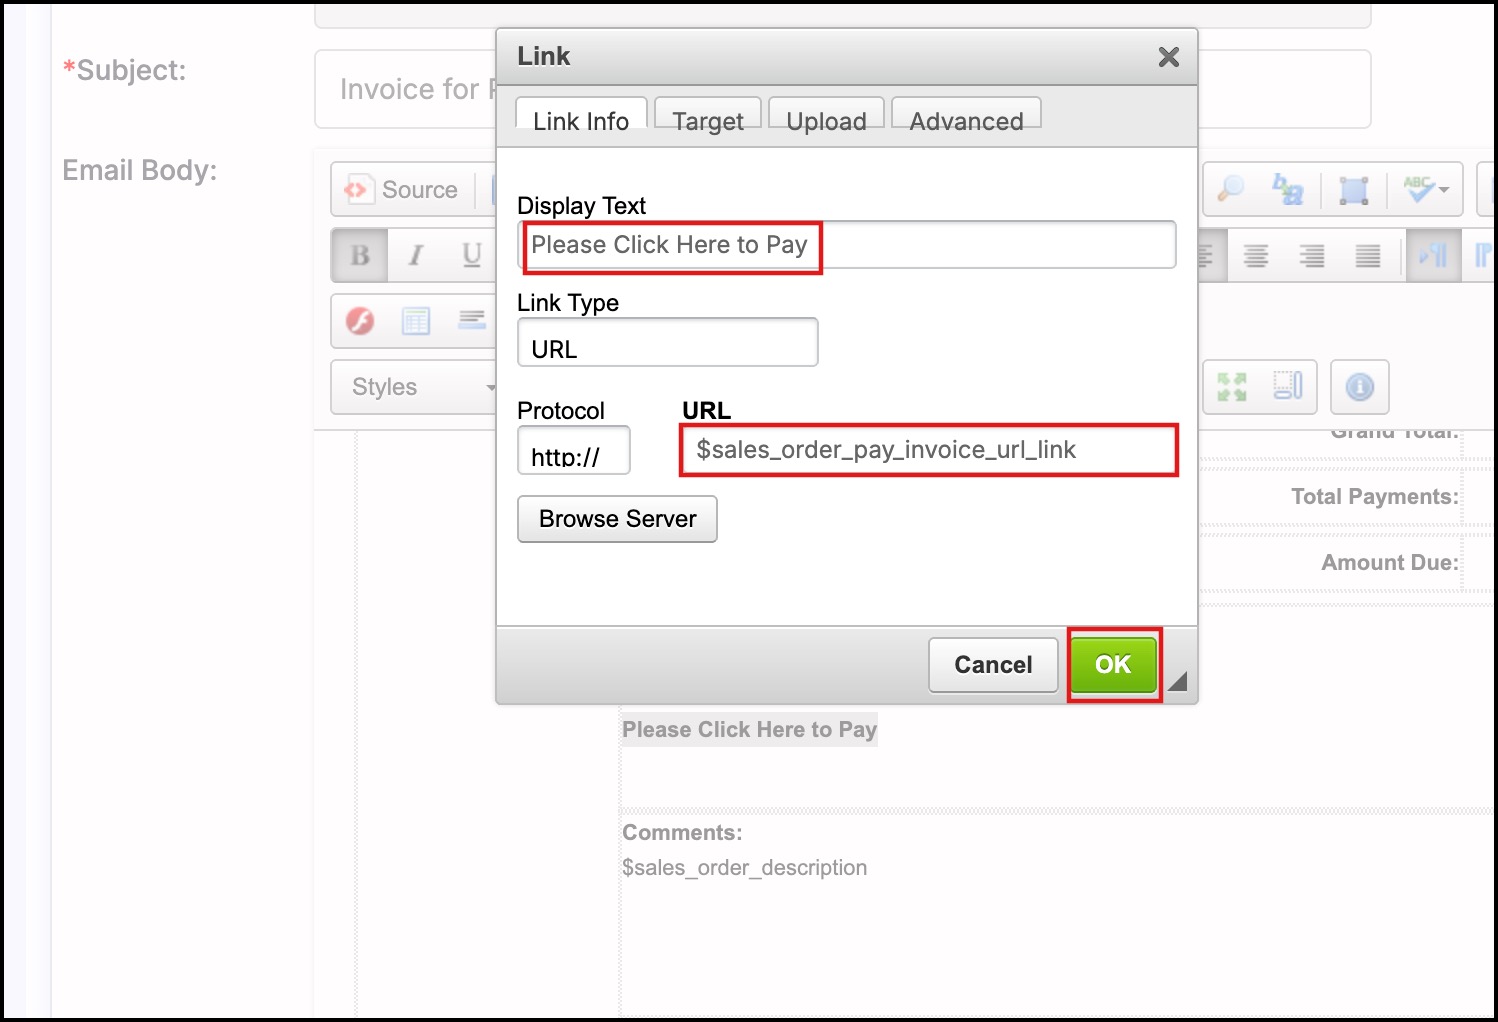
- Paste the field marker $sales_order_pay_invoice_url_link into this field.
- Click "OK".
- This creates a hyperlink so that when the customer selects the text a web page will open allowing them to enter payment information.
- Click "Save" to finish.
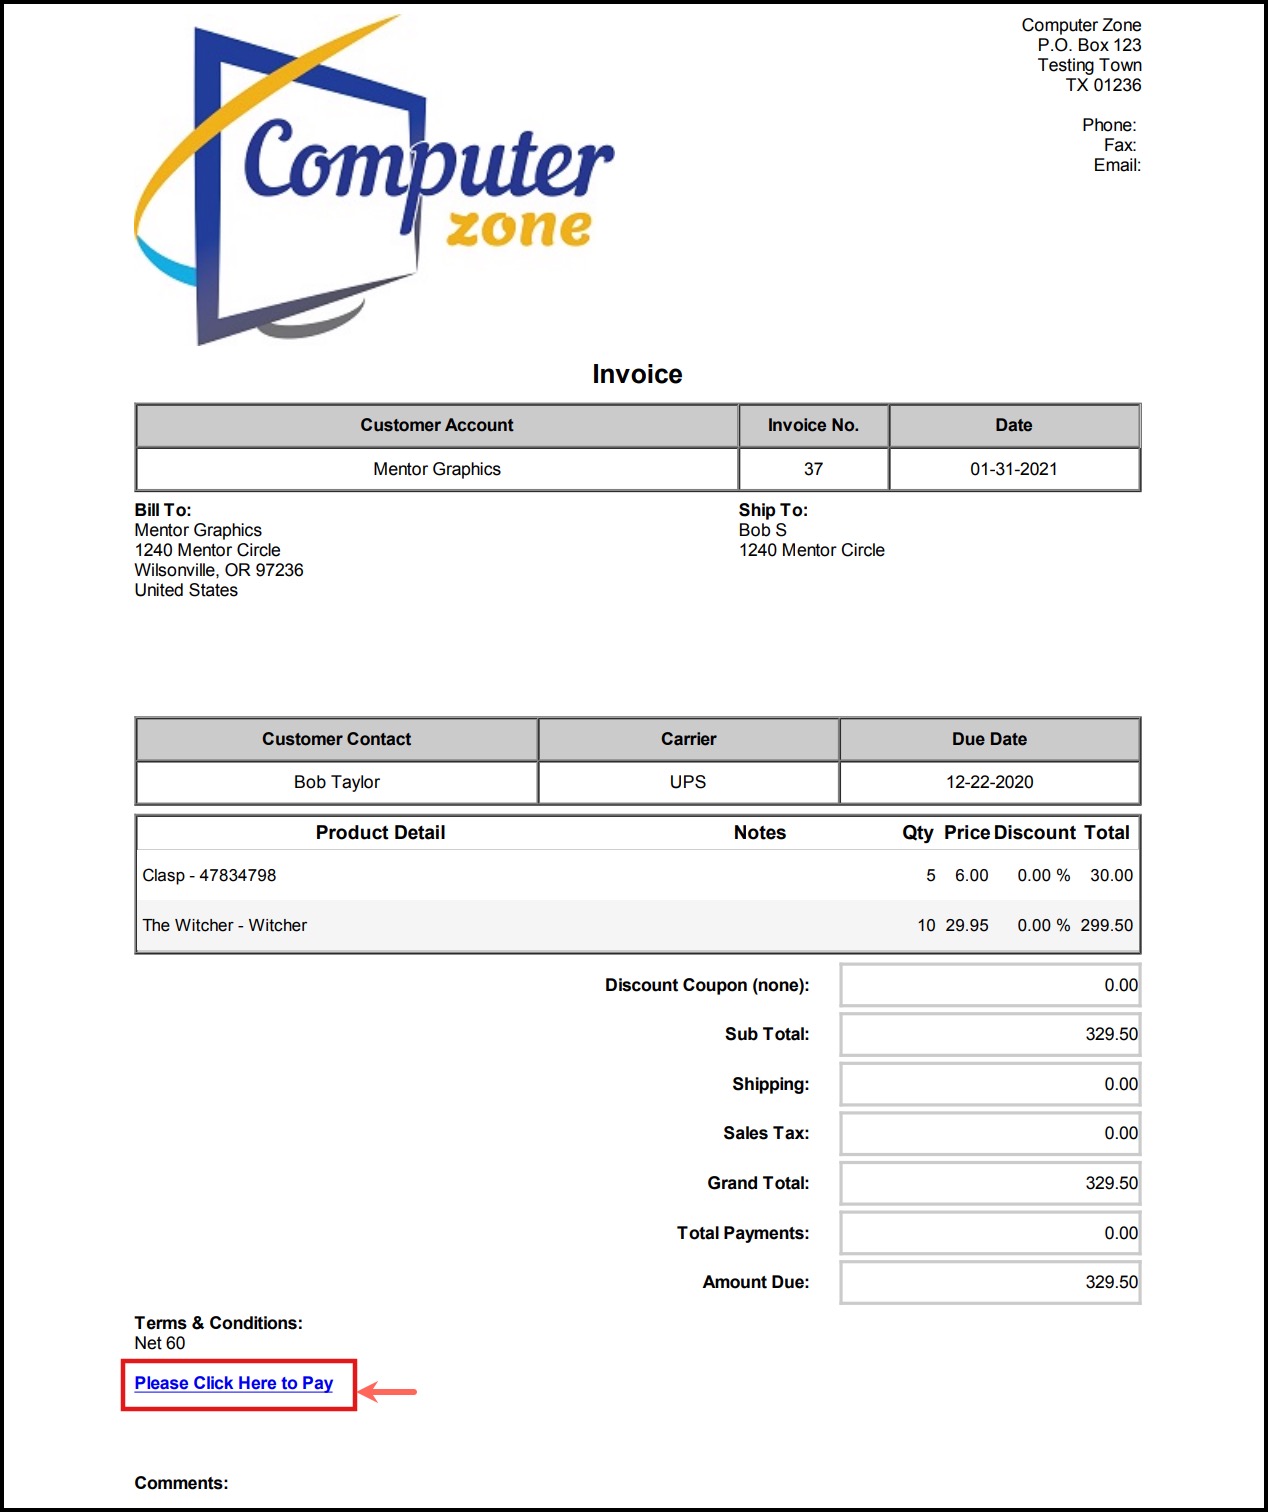
- The URL will now display on the invoice.
- When the customer clicks on this link, they will be sent to an external page where they will enter their credit card information. This process is outlined here.
Updated 12 months ago