Warehouse App Settings - By Location
In the back office now, you can select a specific location, and for that location specifically, the user will be able to set up the Warehouse App Configuration. So this will create/select a view for the warehouse management app per location.
Let's understand how this setting works with an example.
- Firstly you need to go to the Backoffice -> Settings -> Warehouse App Configuration tab.
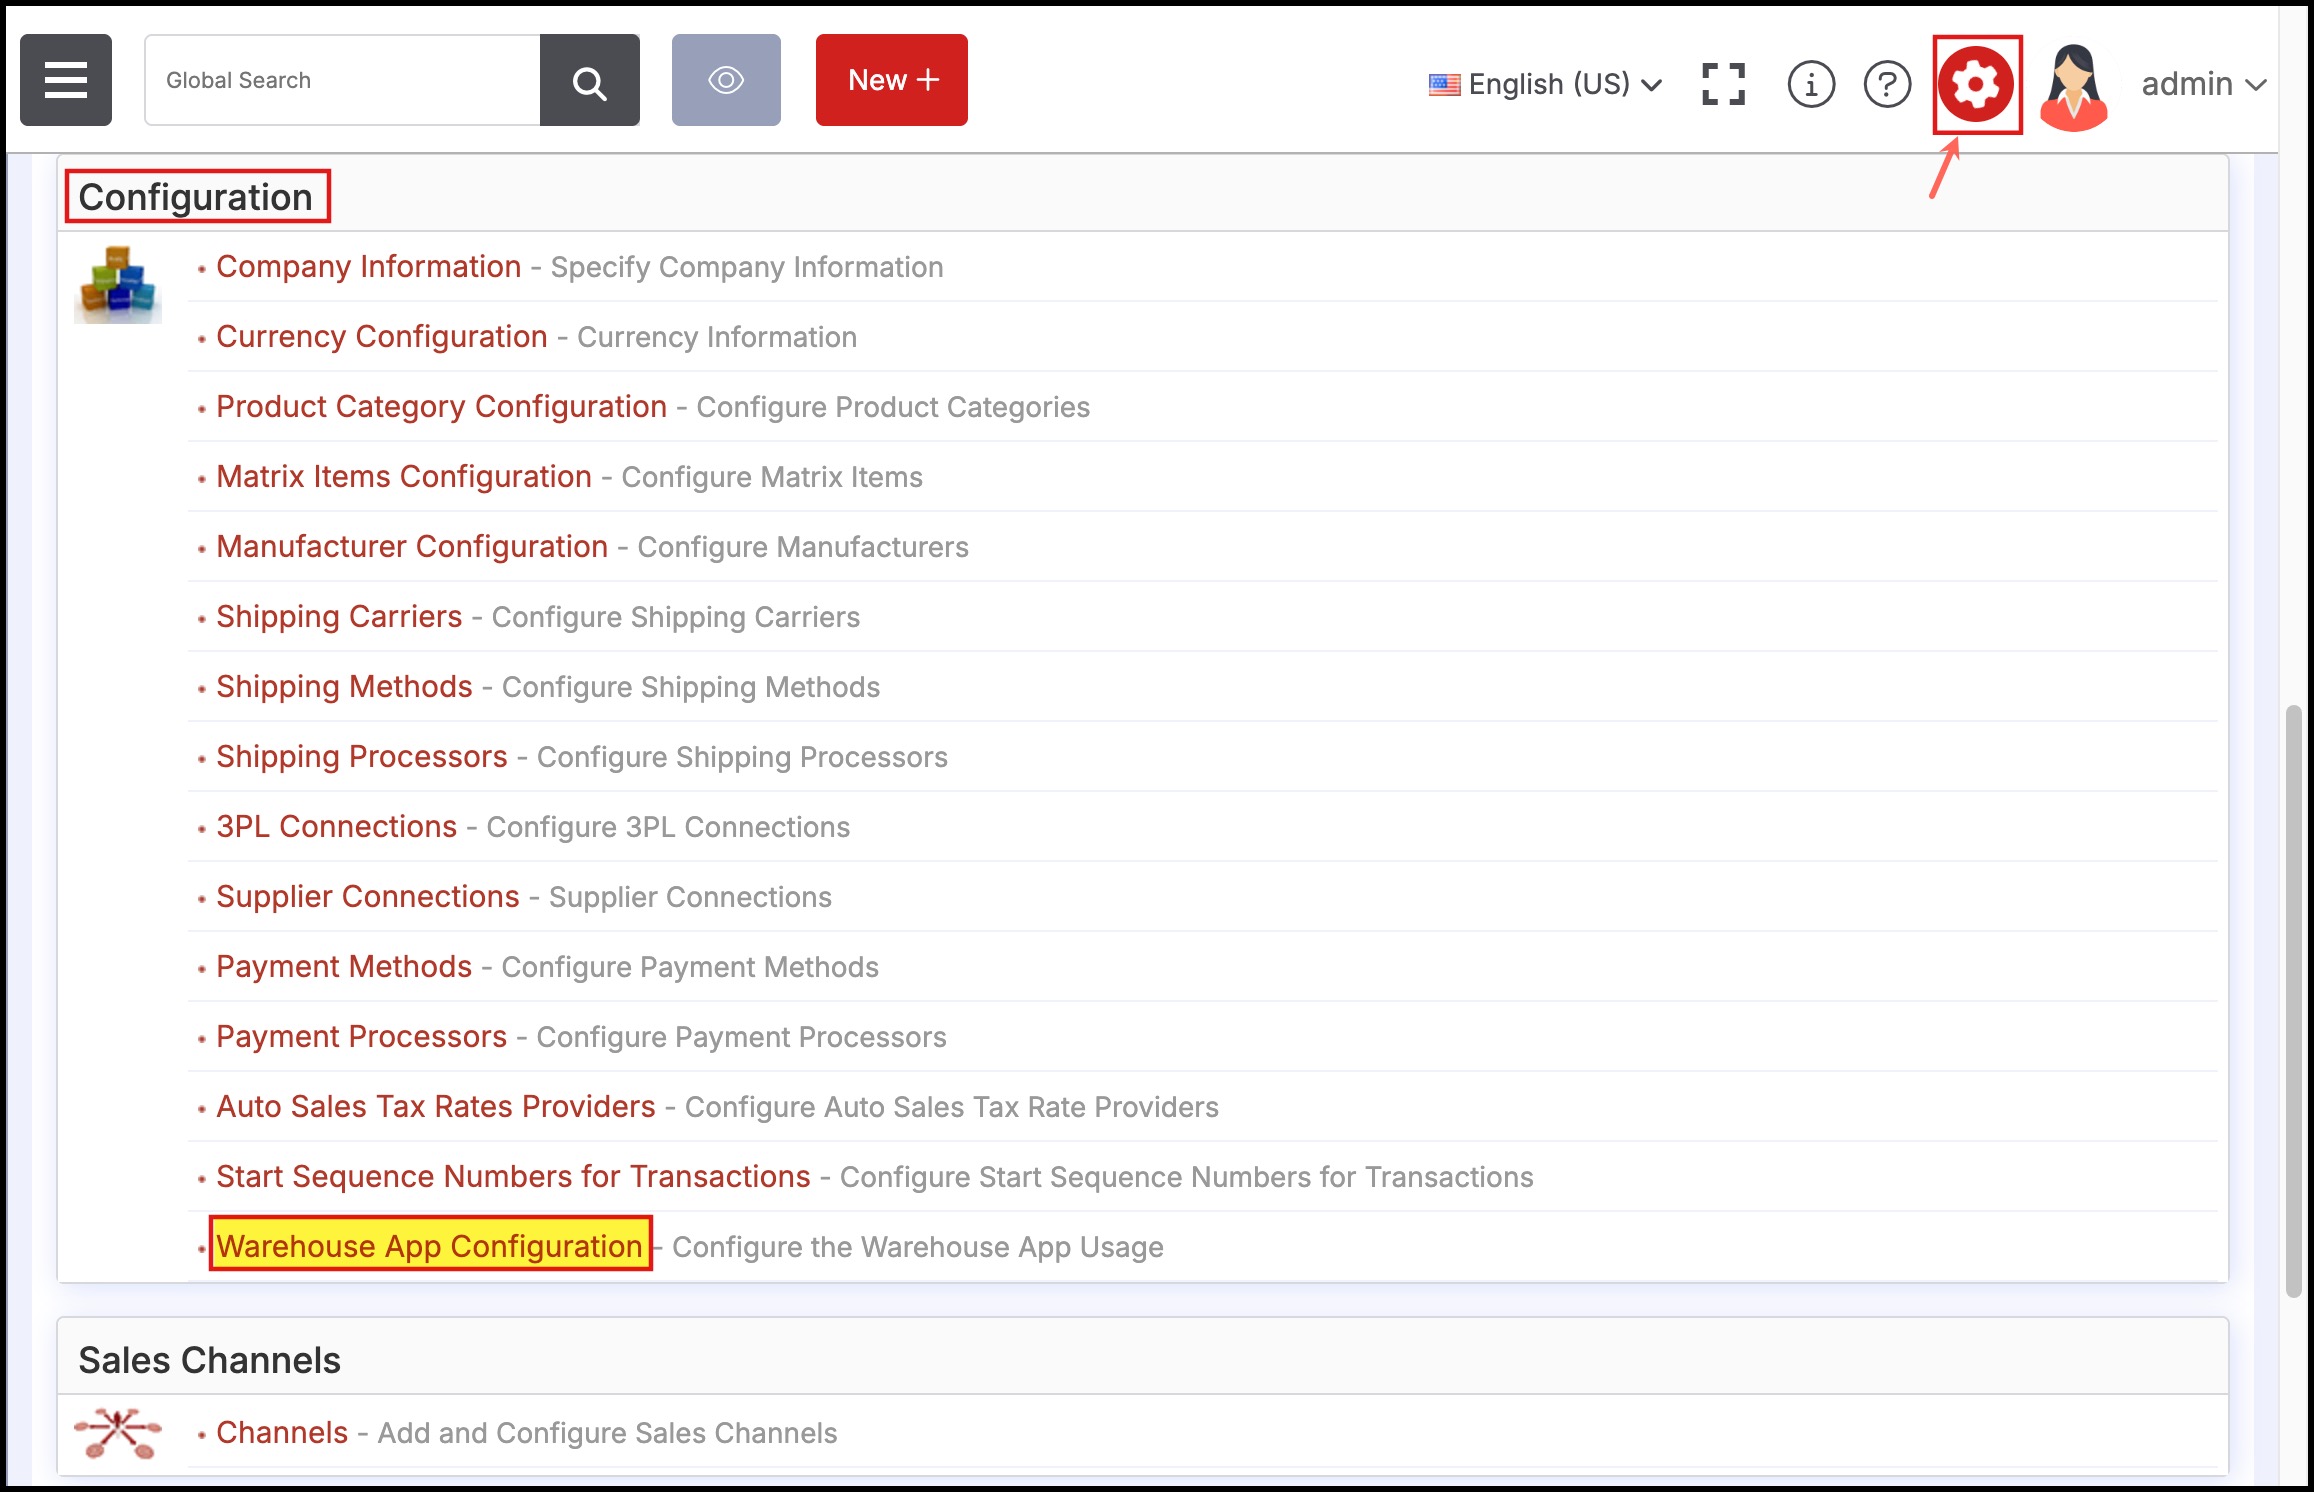
Here, you can see that by default, the Warehouse App Configuration - Stock Location is set to All Stock Locations.
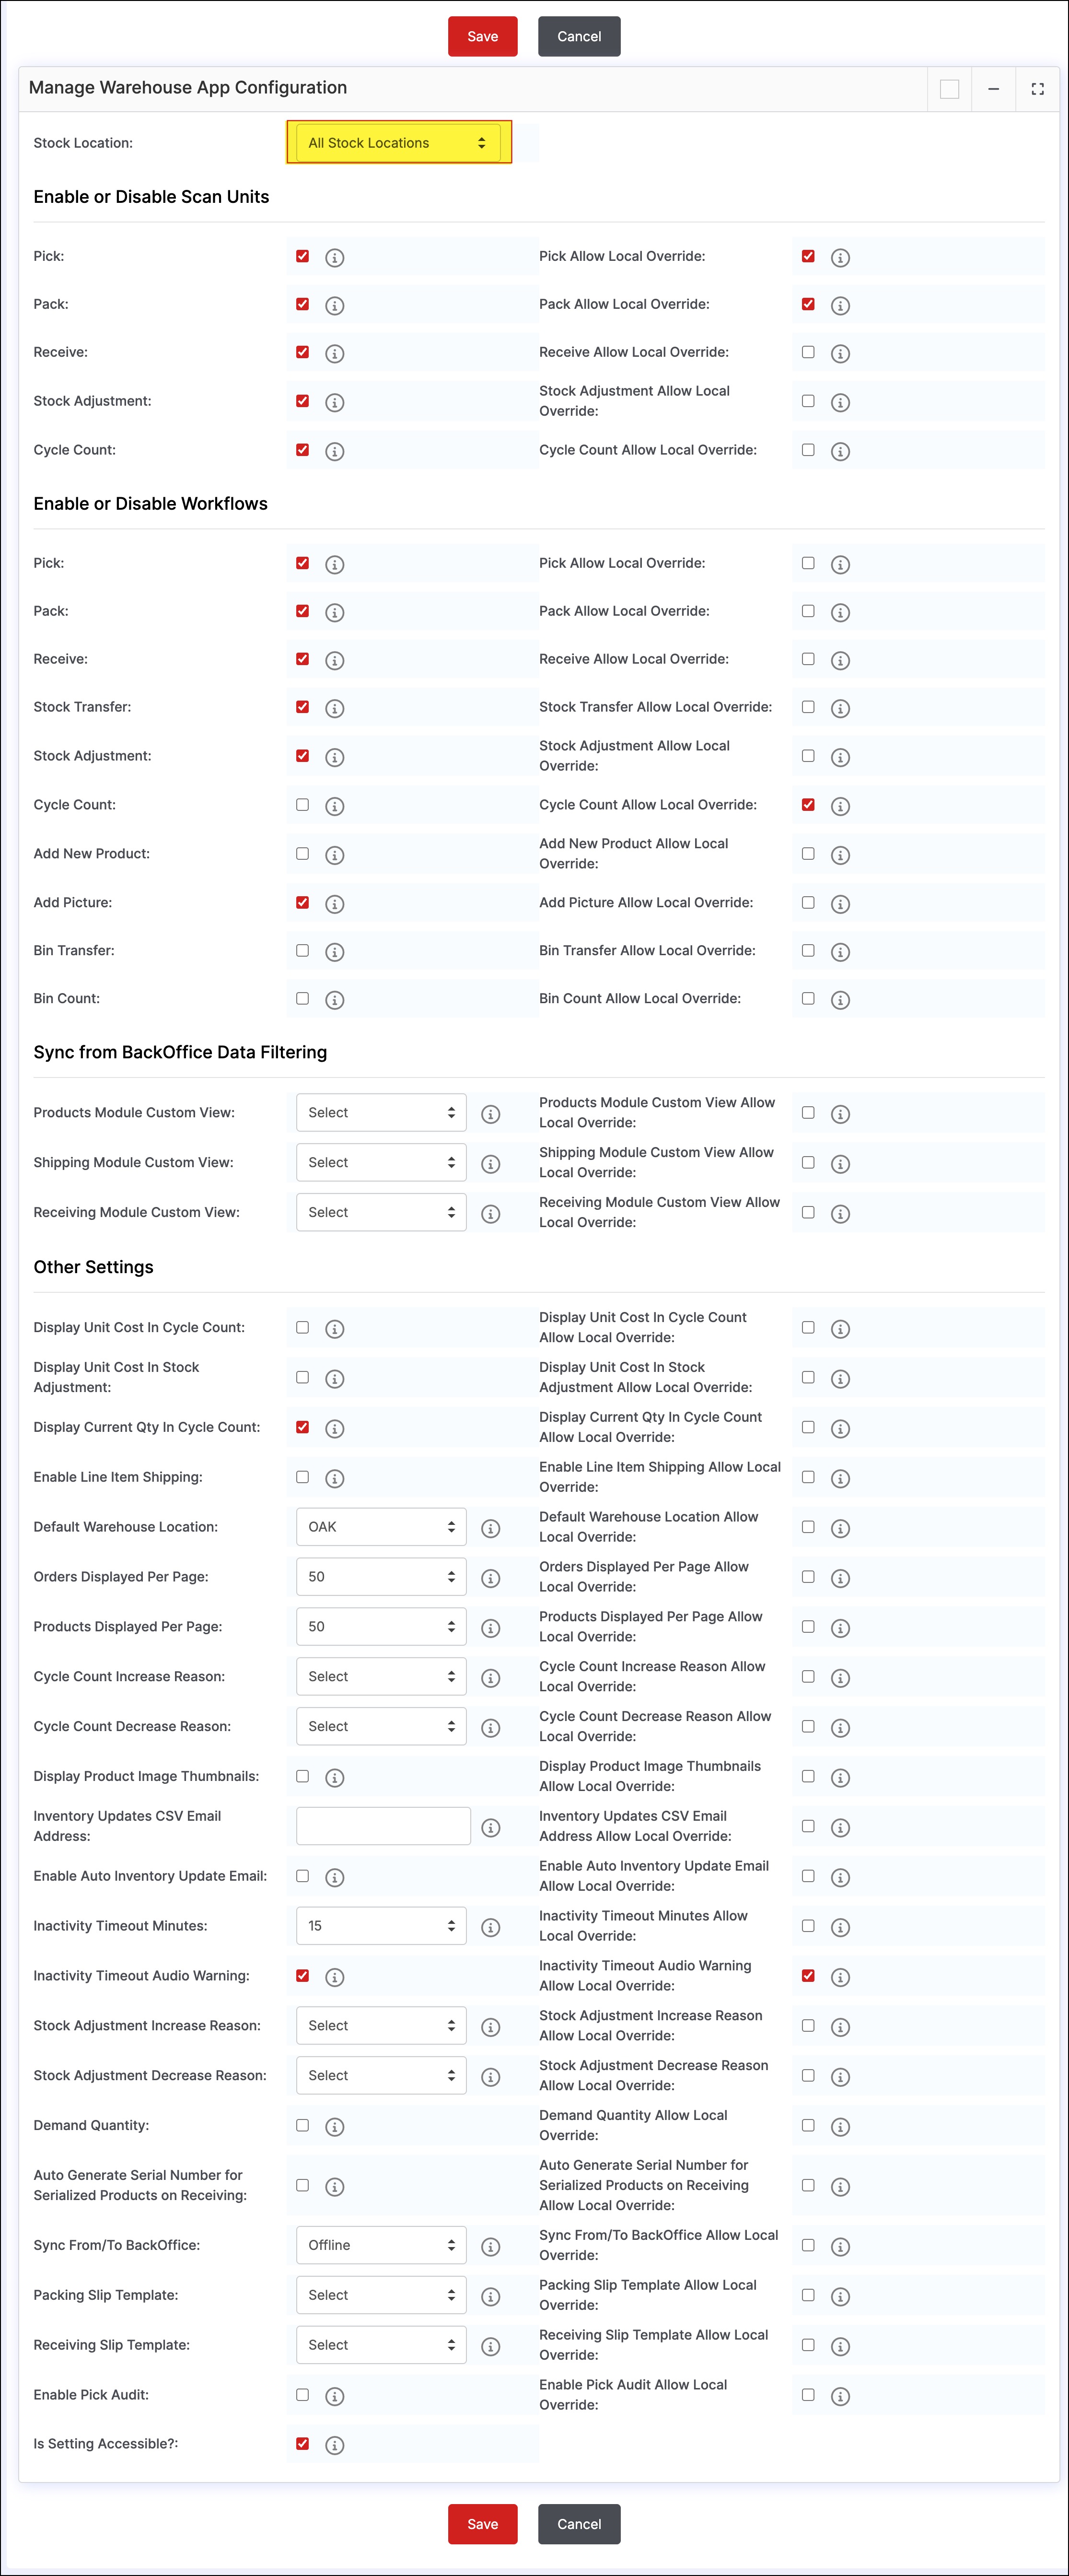
- Next, select the location from the drop-down list for which you want to specifically set up the warehouse app configuration.
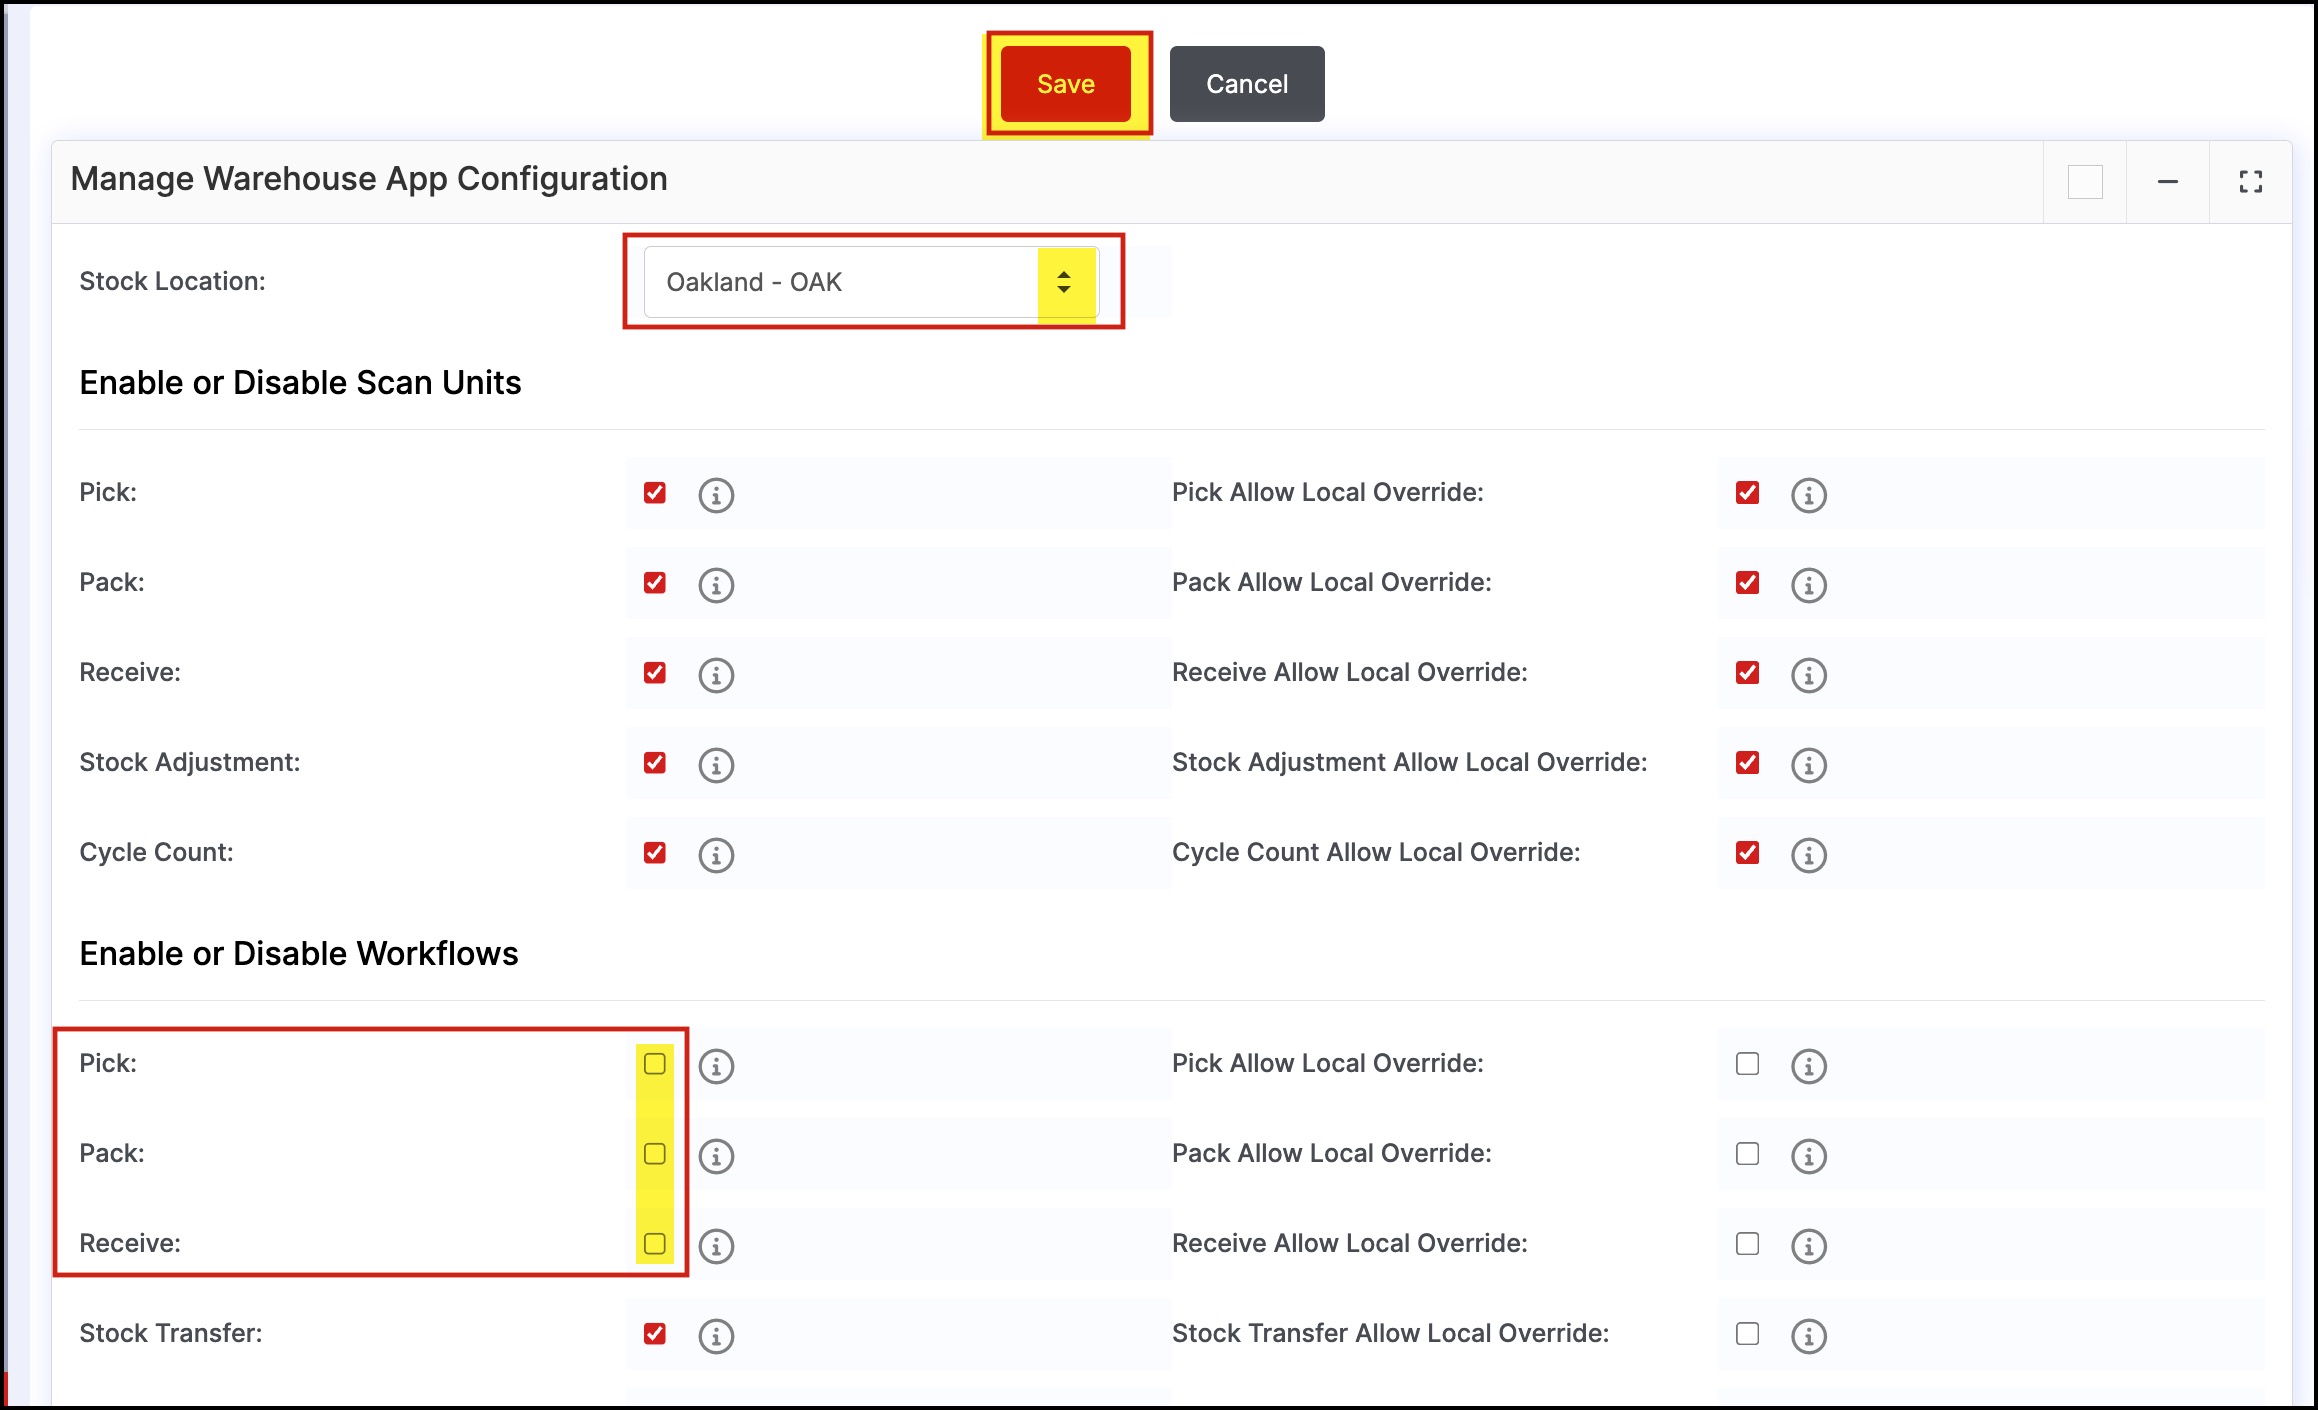
- Once selected, update the settings as per your requirements.
Here as an example, let's set Location - Oakland and disable workflows - Pick, Pack, and Receive.
- Save the updates done.
Note -If you are disabling any setting for a particular location, then make sure the local override is set to Off for that Setting. This will disallow the user from making any changes through WMA
When you go to your Warehouse Management App, and switch to the location for which you had updated Settings, you can see the changes made.
- In this case you can see, the Pick-Ship, Pack-Ship and Receive workflows are disabled for Oakland location.

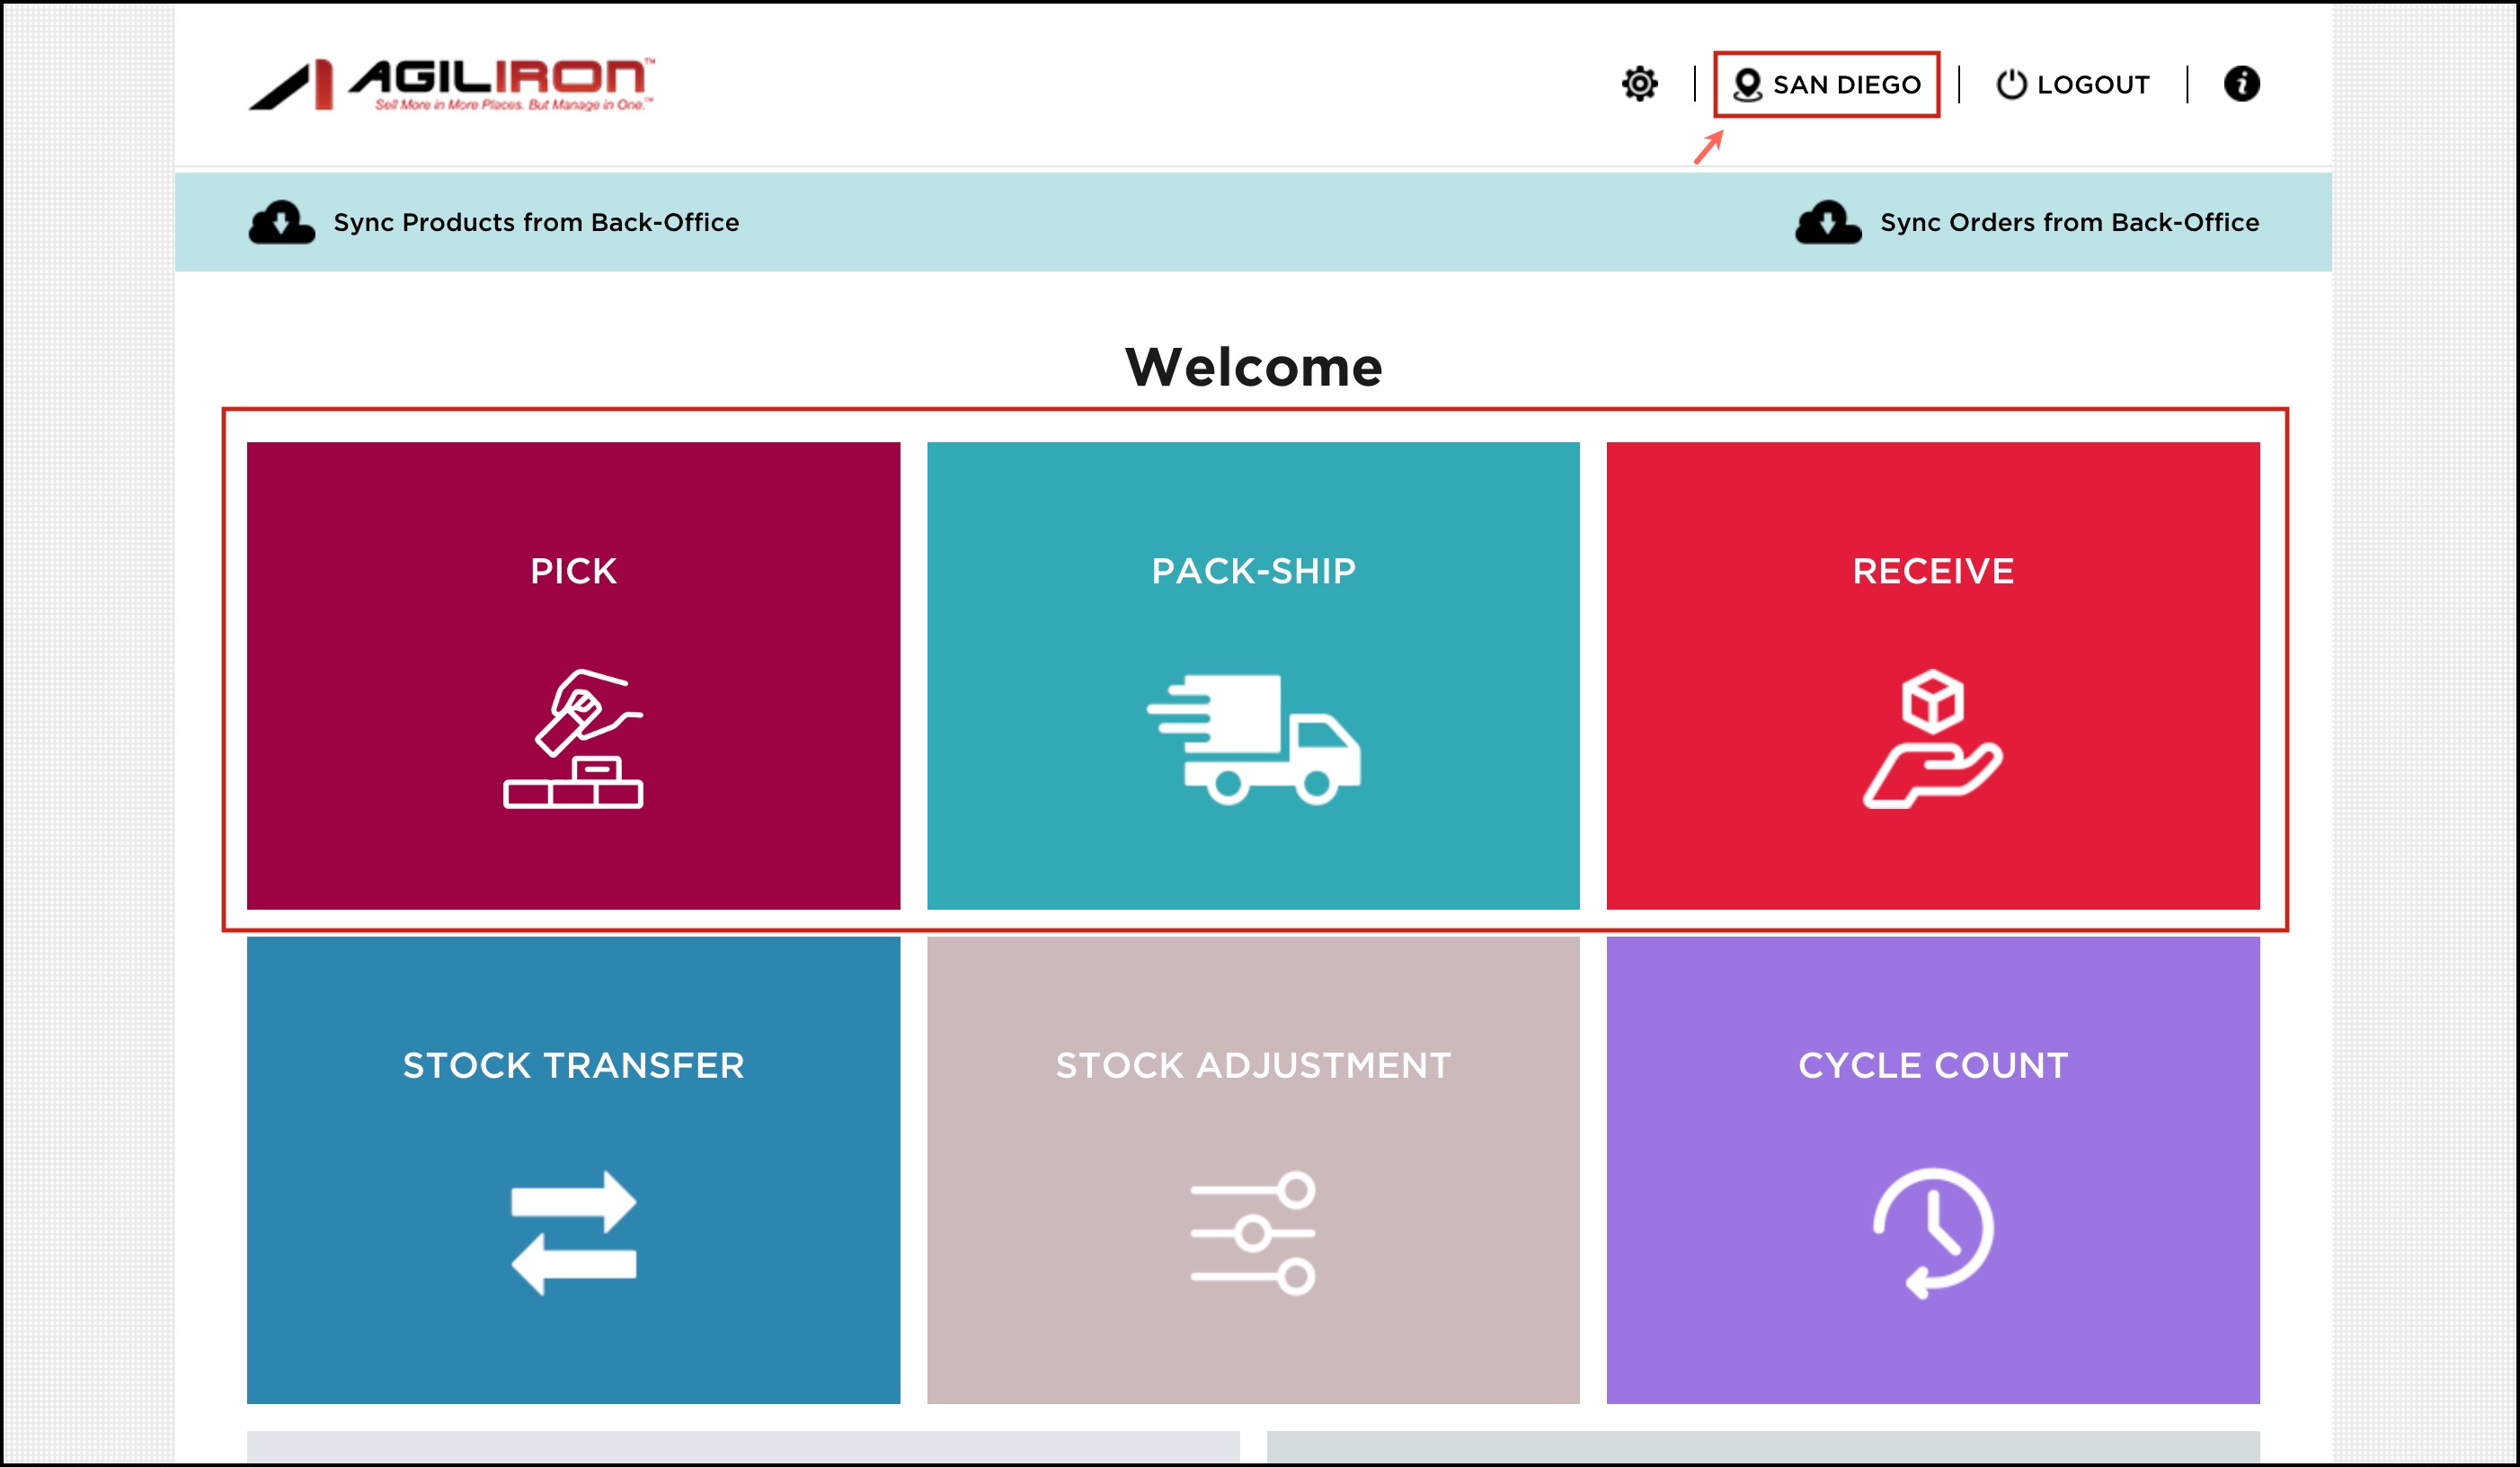
Since these Settings were only set for the Oakland location, if you change the location (for example, we are changing the location to San Diego), the updates won't reflect.
- Here you can see, Pick-Ship, Pack-Ship and Receive workflows are enabled as no Settings update was done for San Diego.
Updated 7 months ago