Stock Adjustment Workflow
With the stock adjustment feature, users can change the number of units in the stock. Adjustments can be made for various reasons like item damage, breakage, transferred, disassembly, unfurnished, etc.
To perform Stock Adjustment
- Login to Warehouse management account.
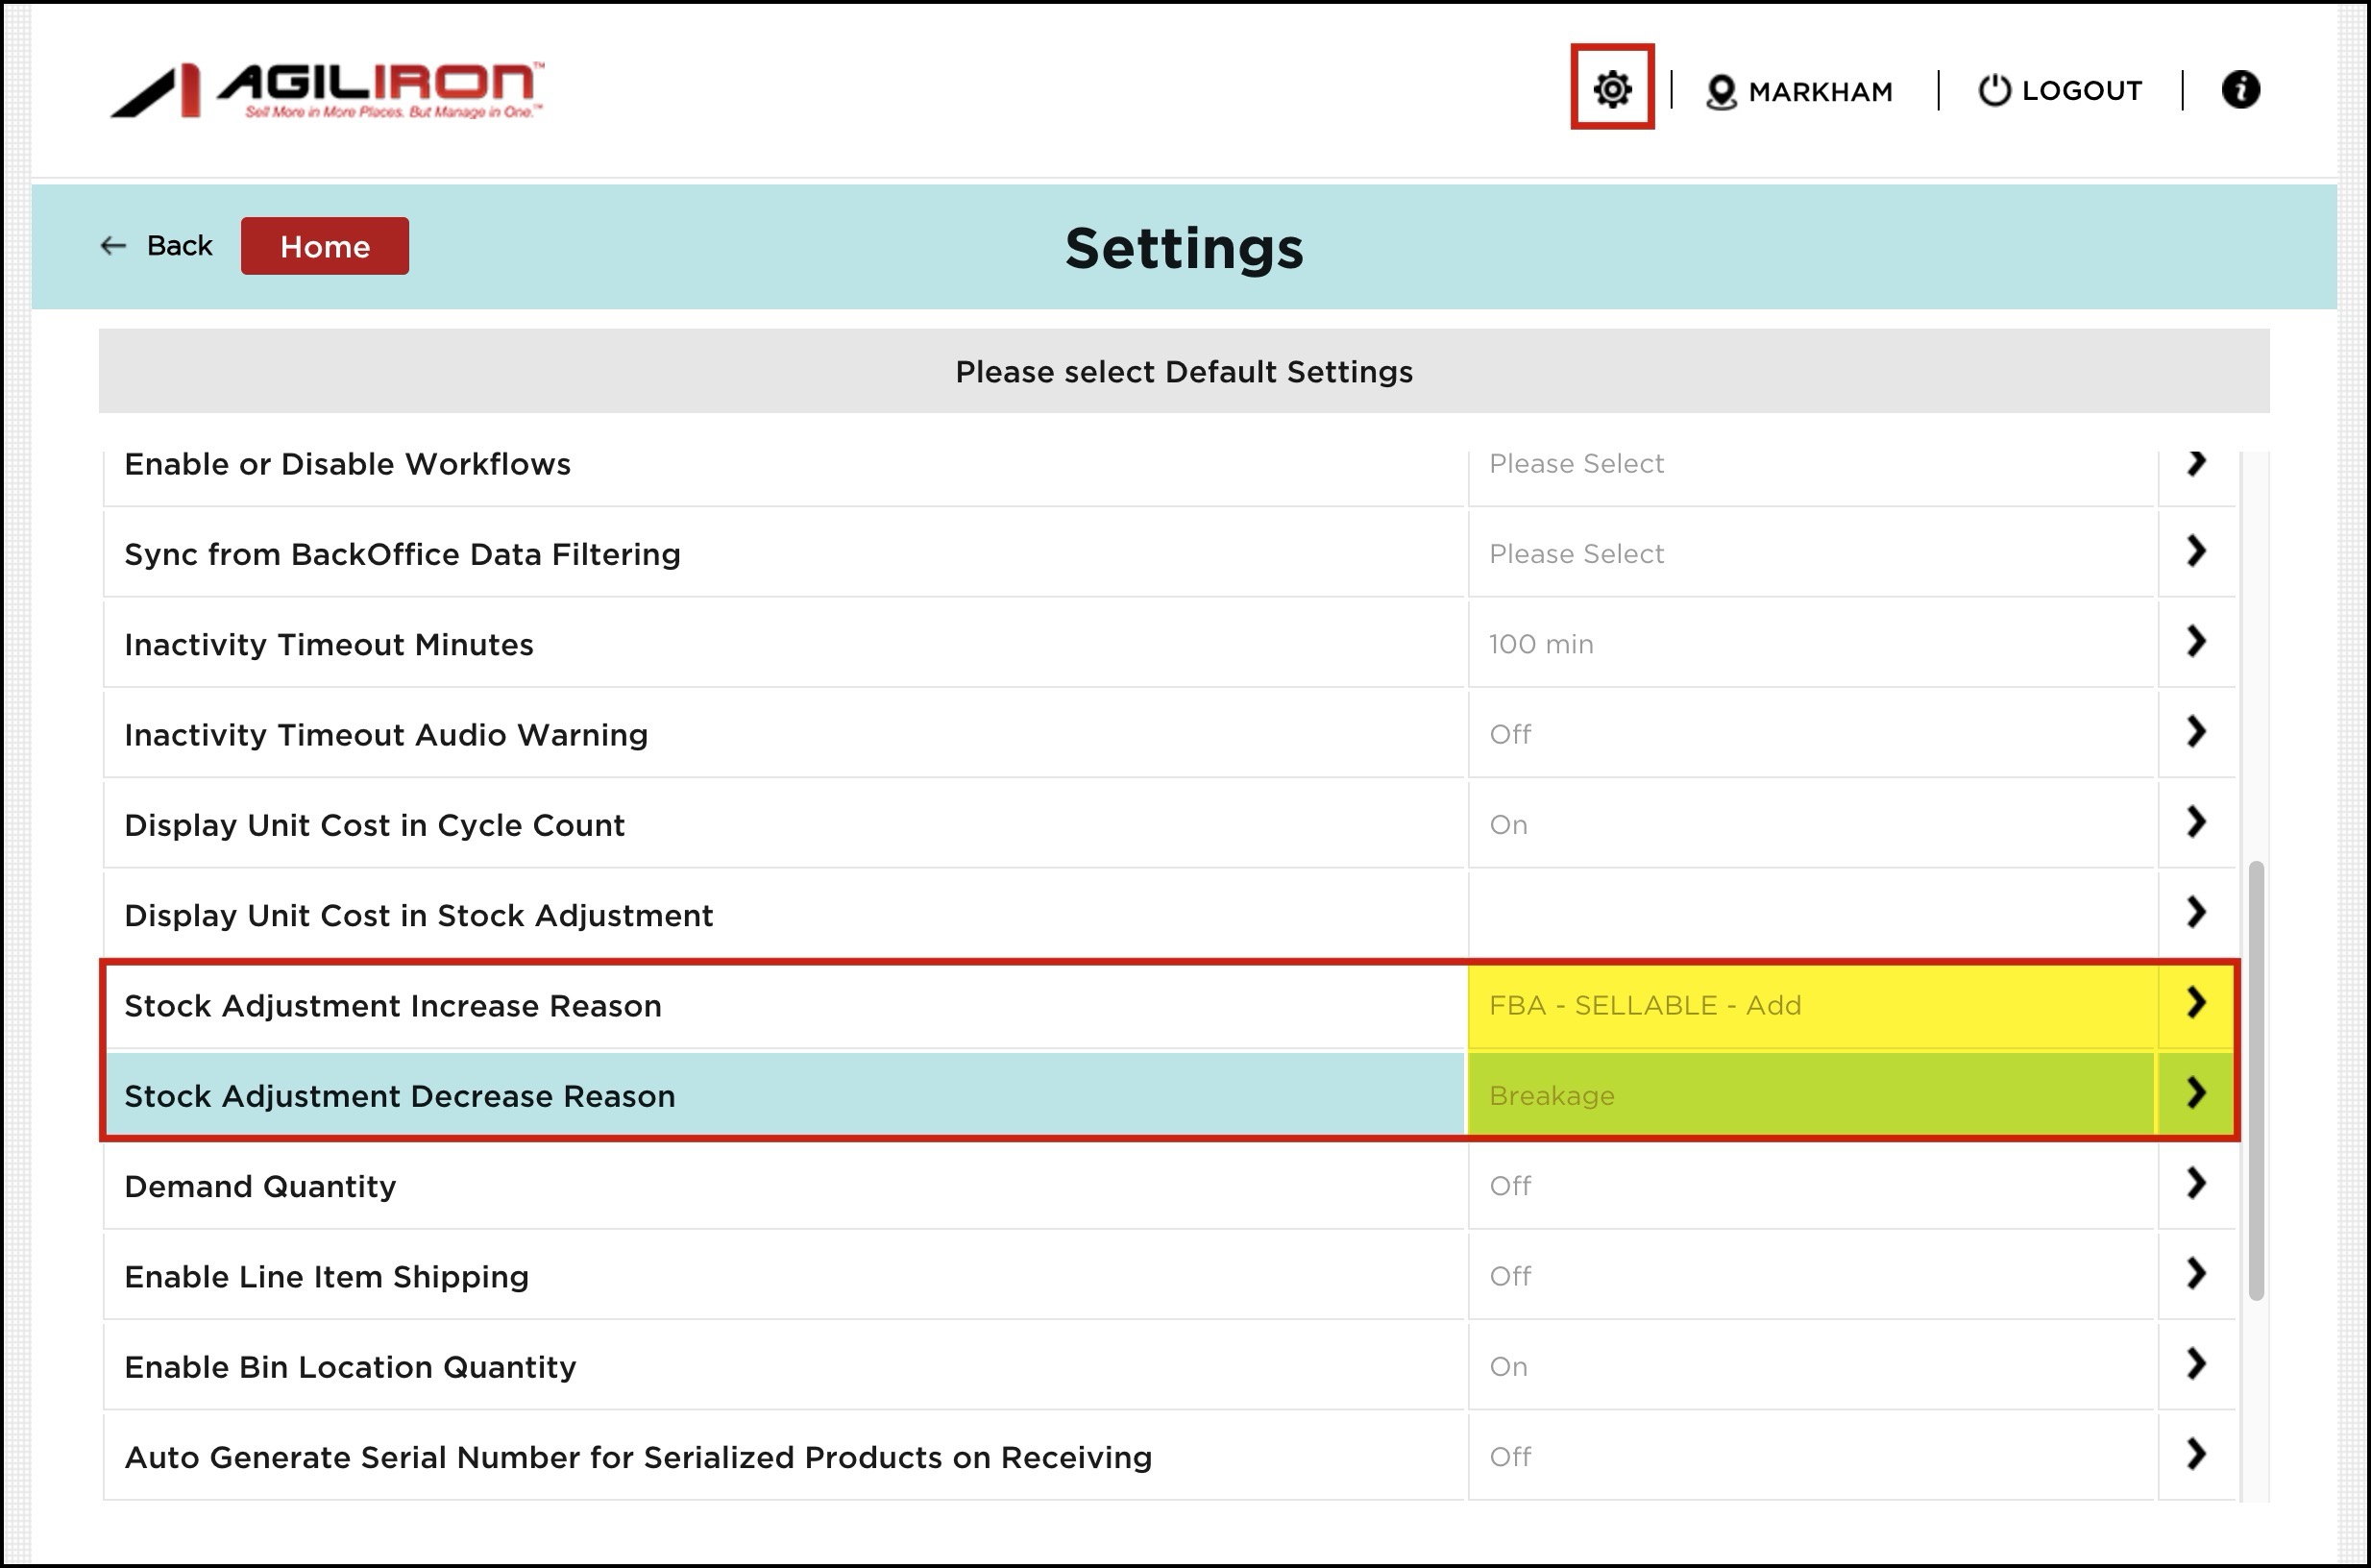
Note - First, make sure in Settings, you select the Stock Adjustment Increase and Decrease Reason.
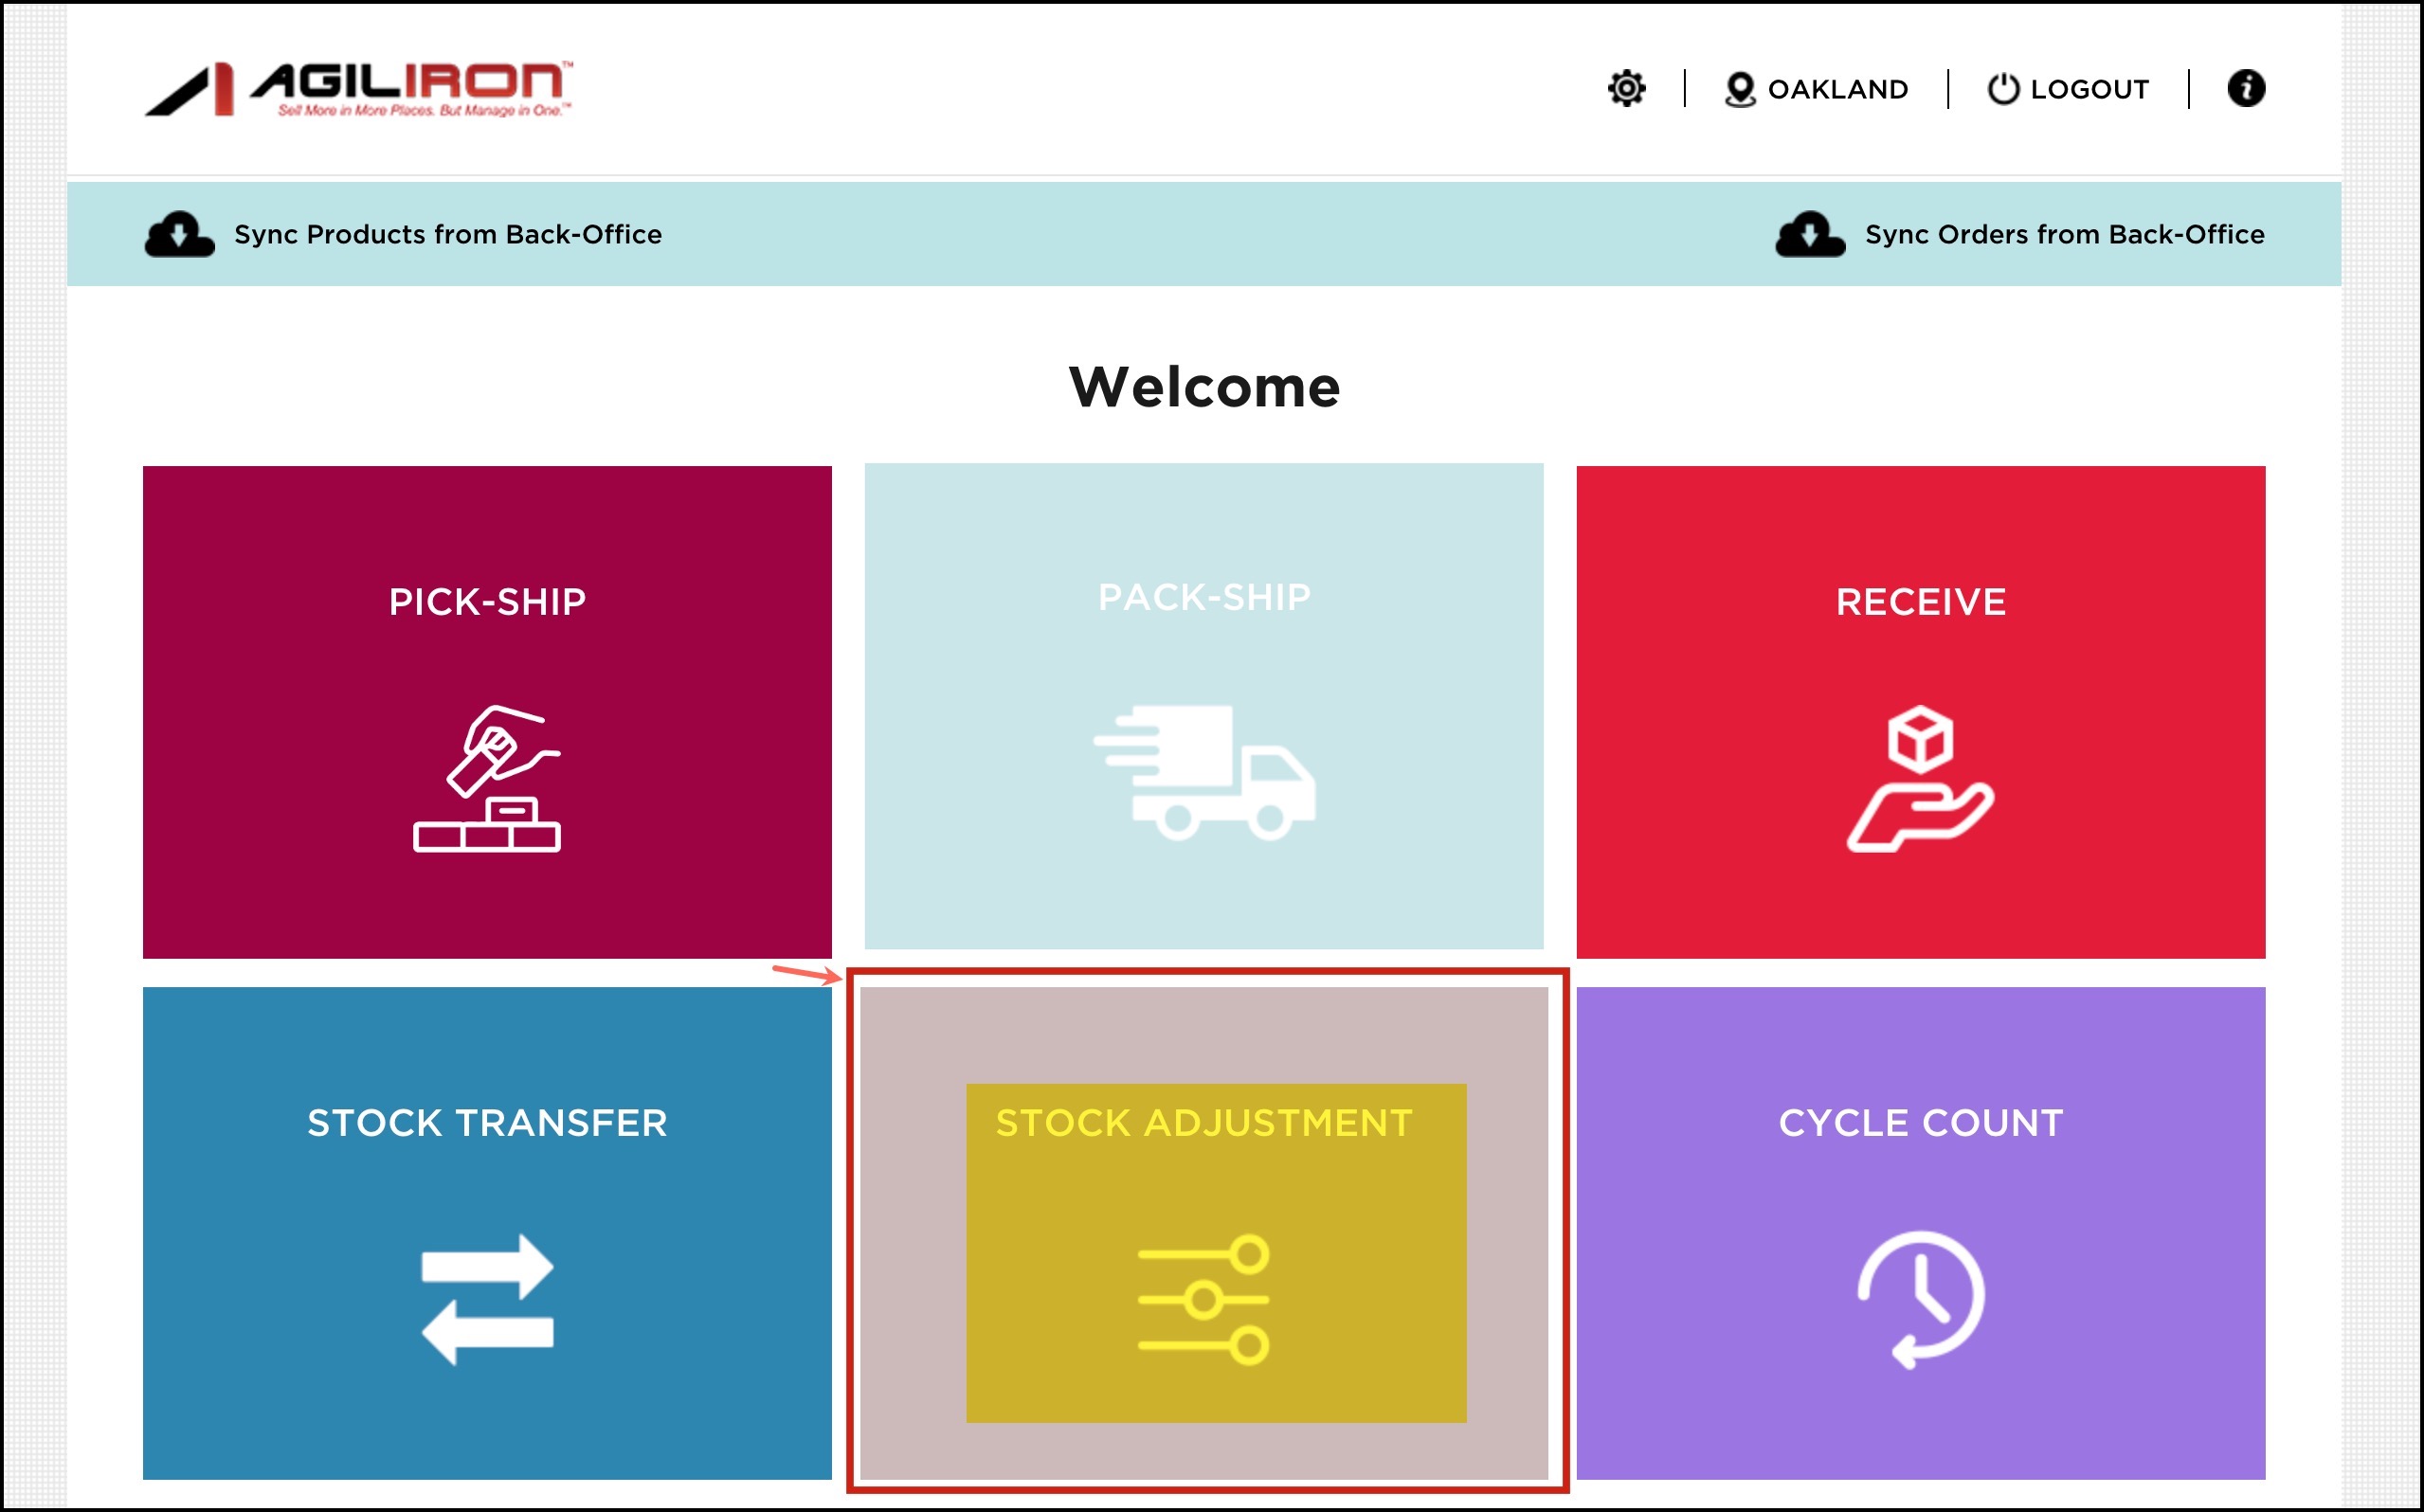
- Now on the home page, click on Stock Adjustment.
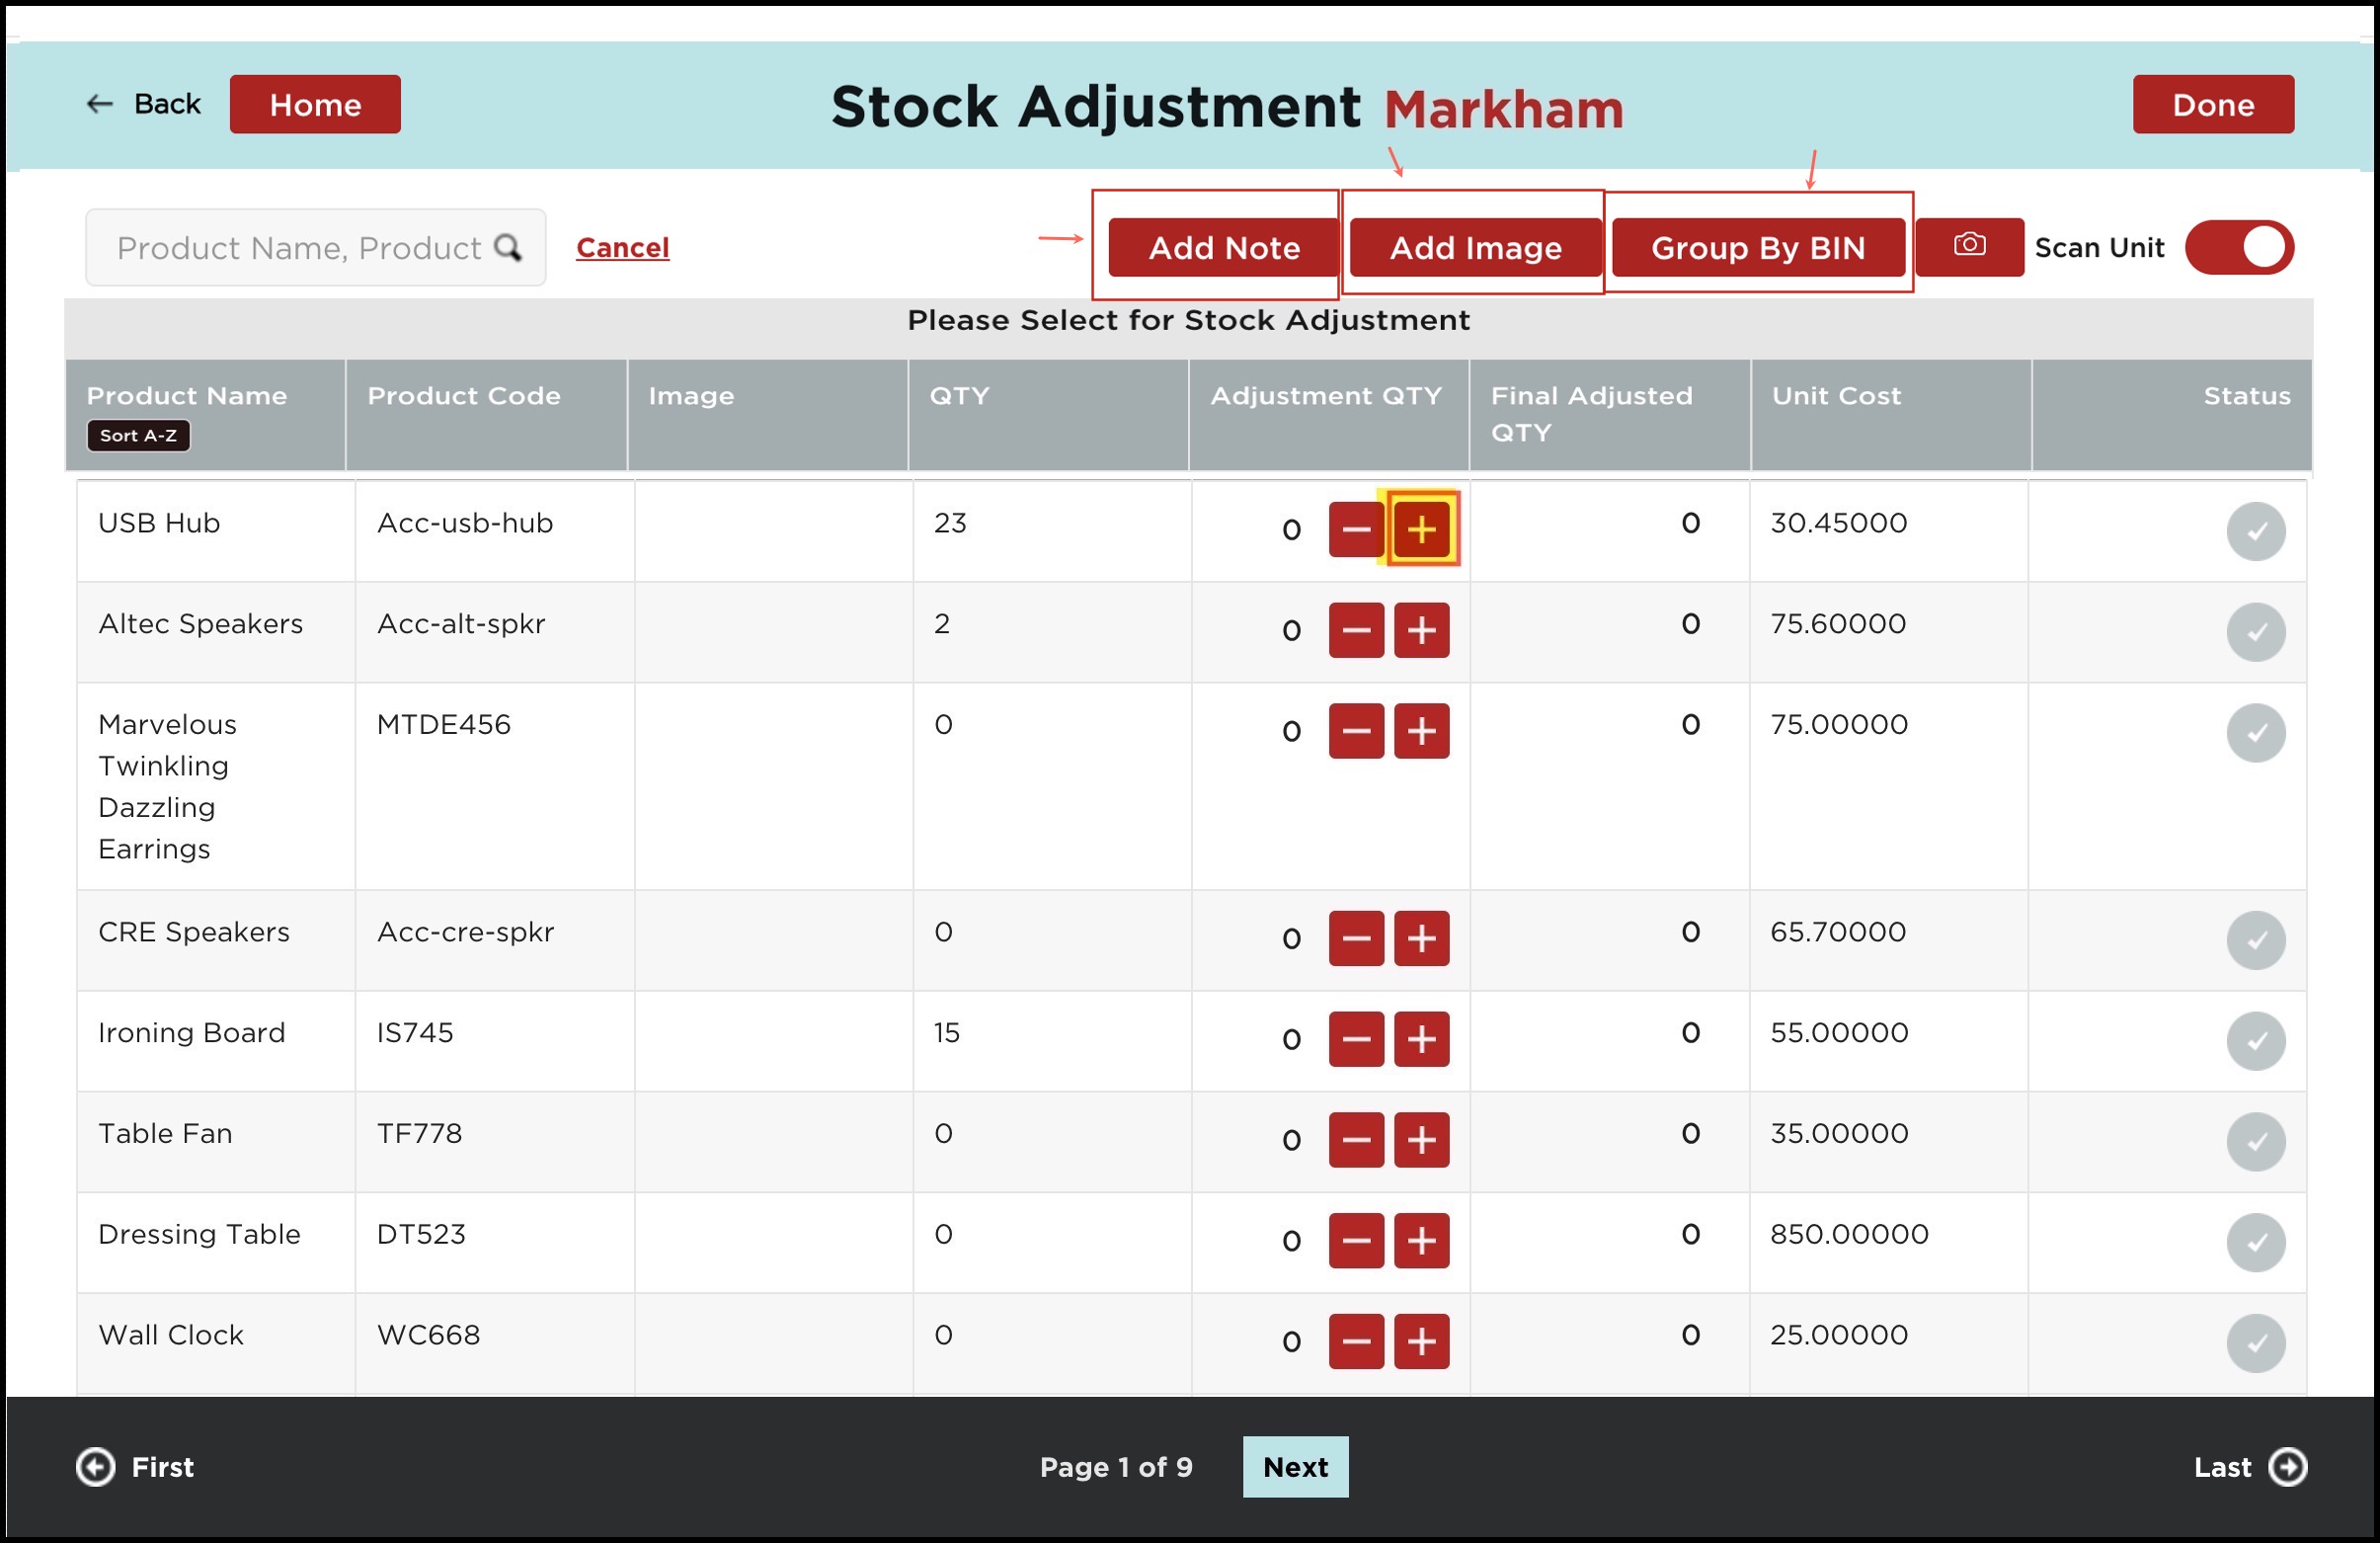
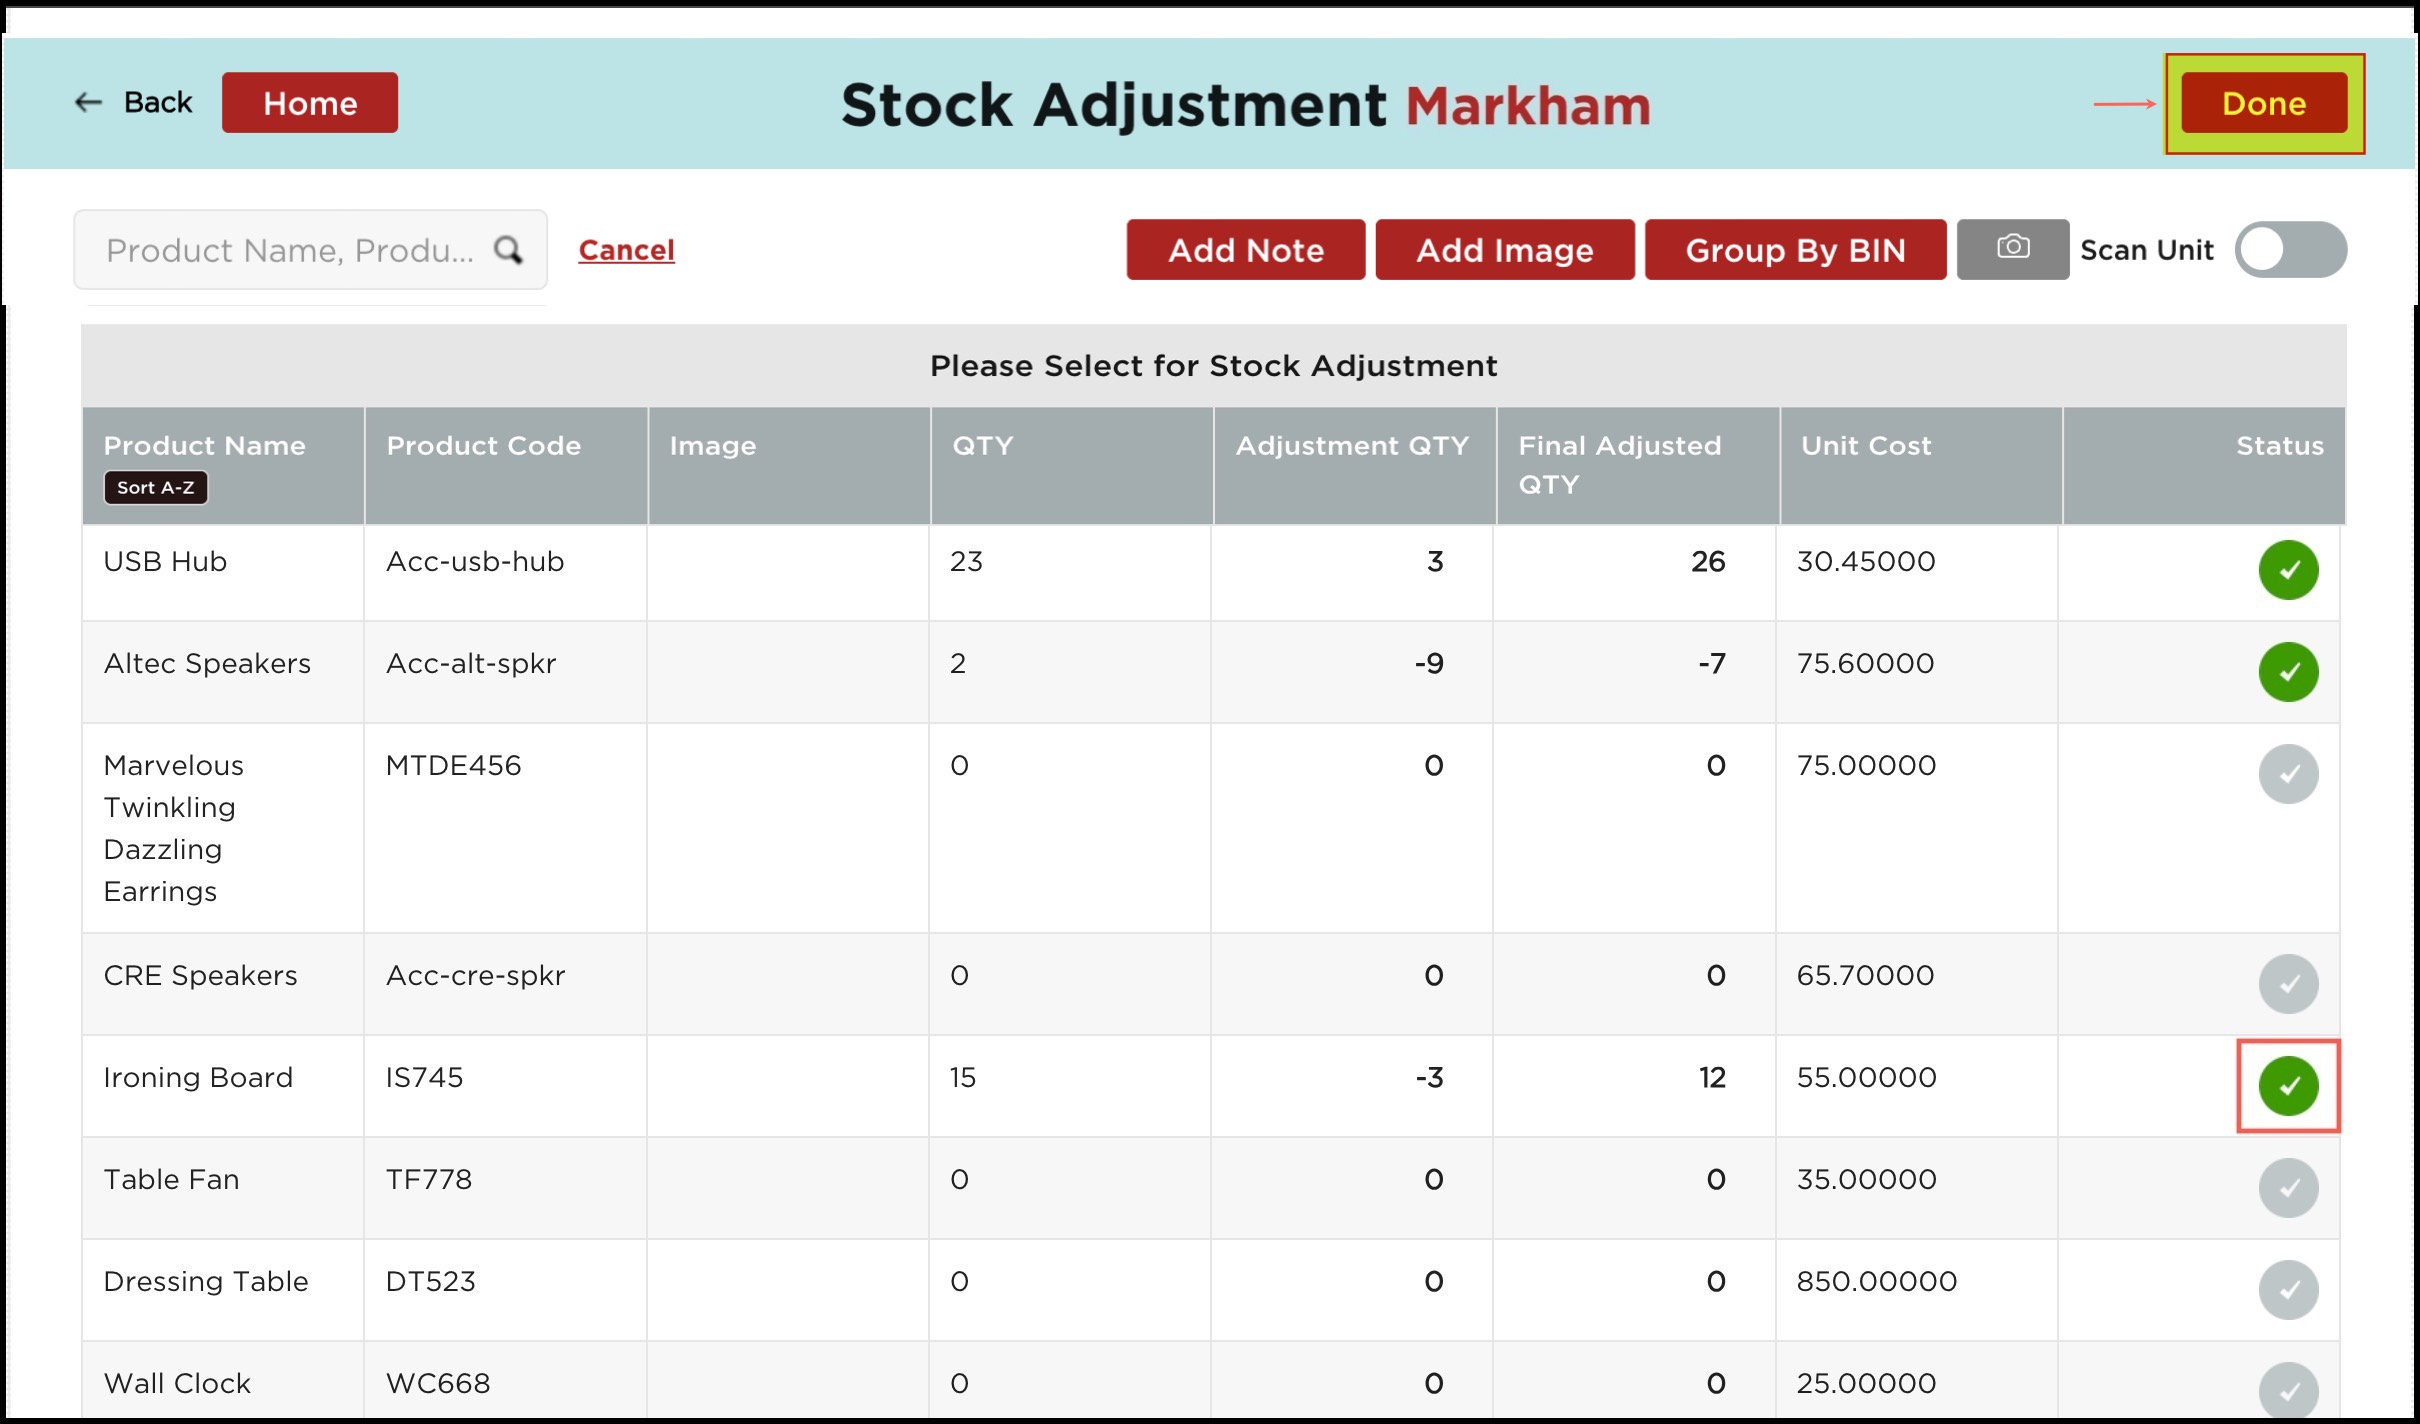
When the Stock Adjustment opens, you can see the products and their details in a tabular format.
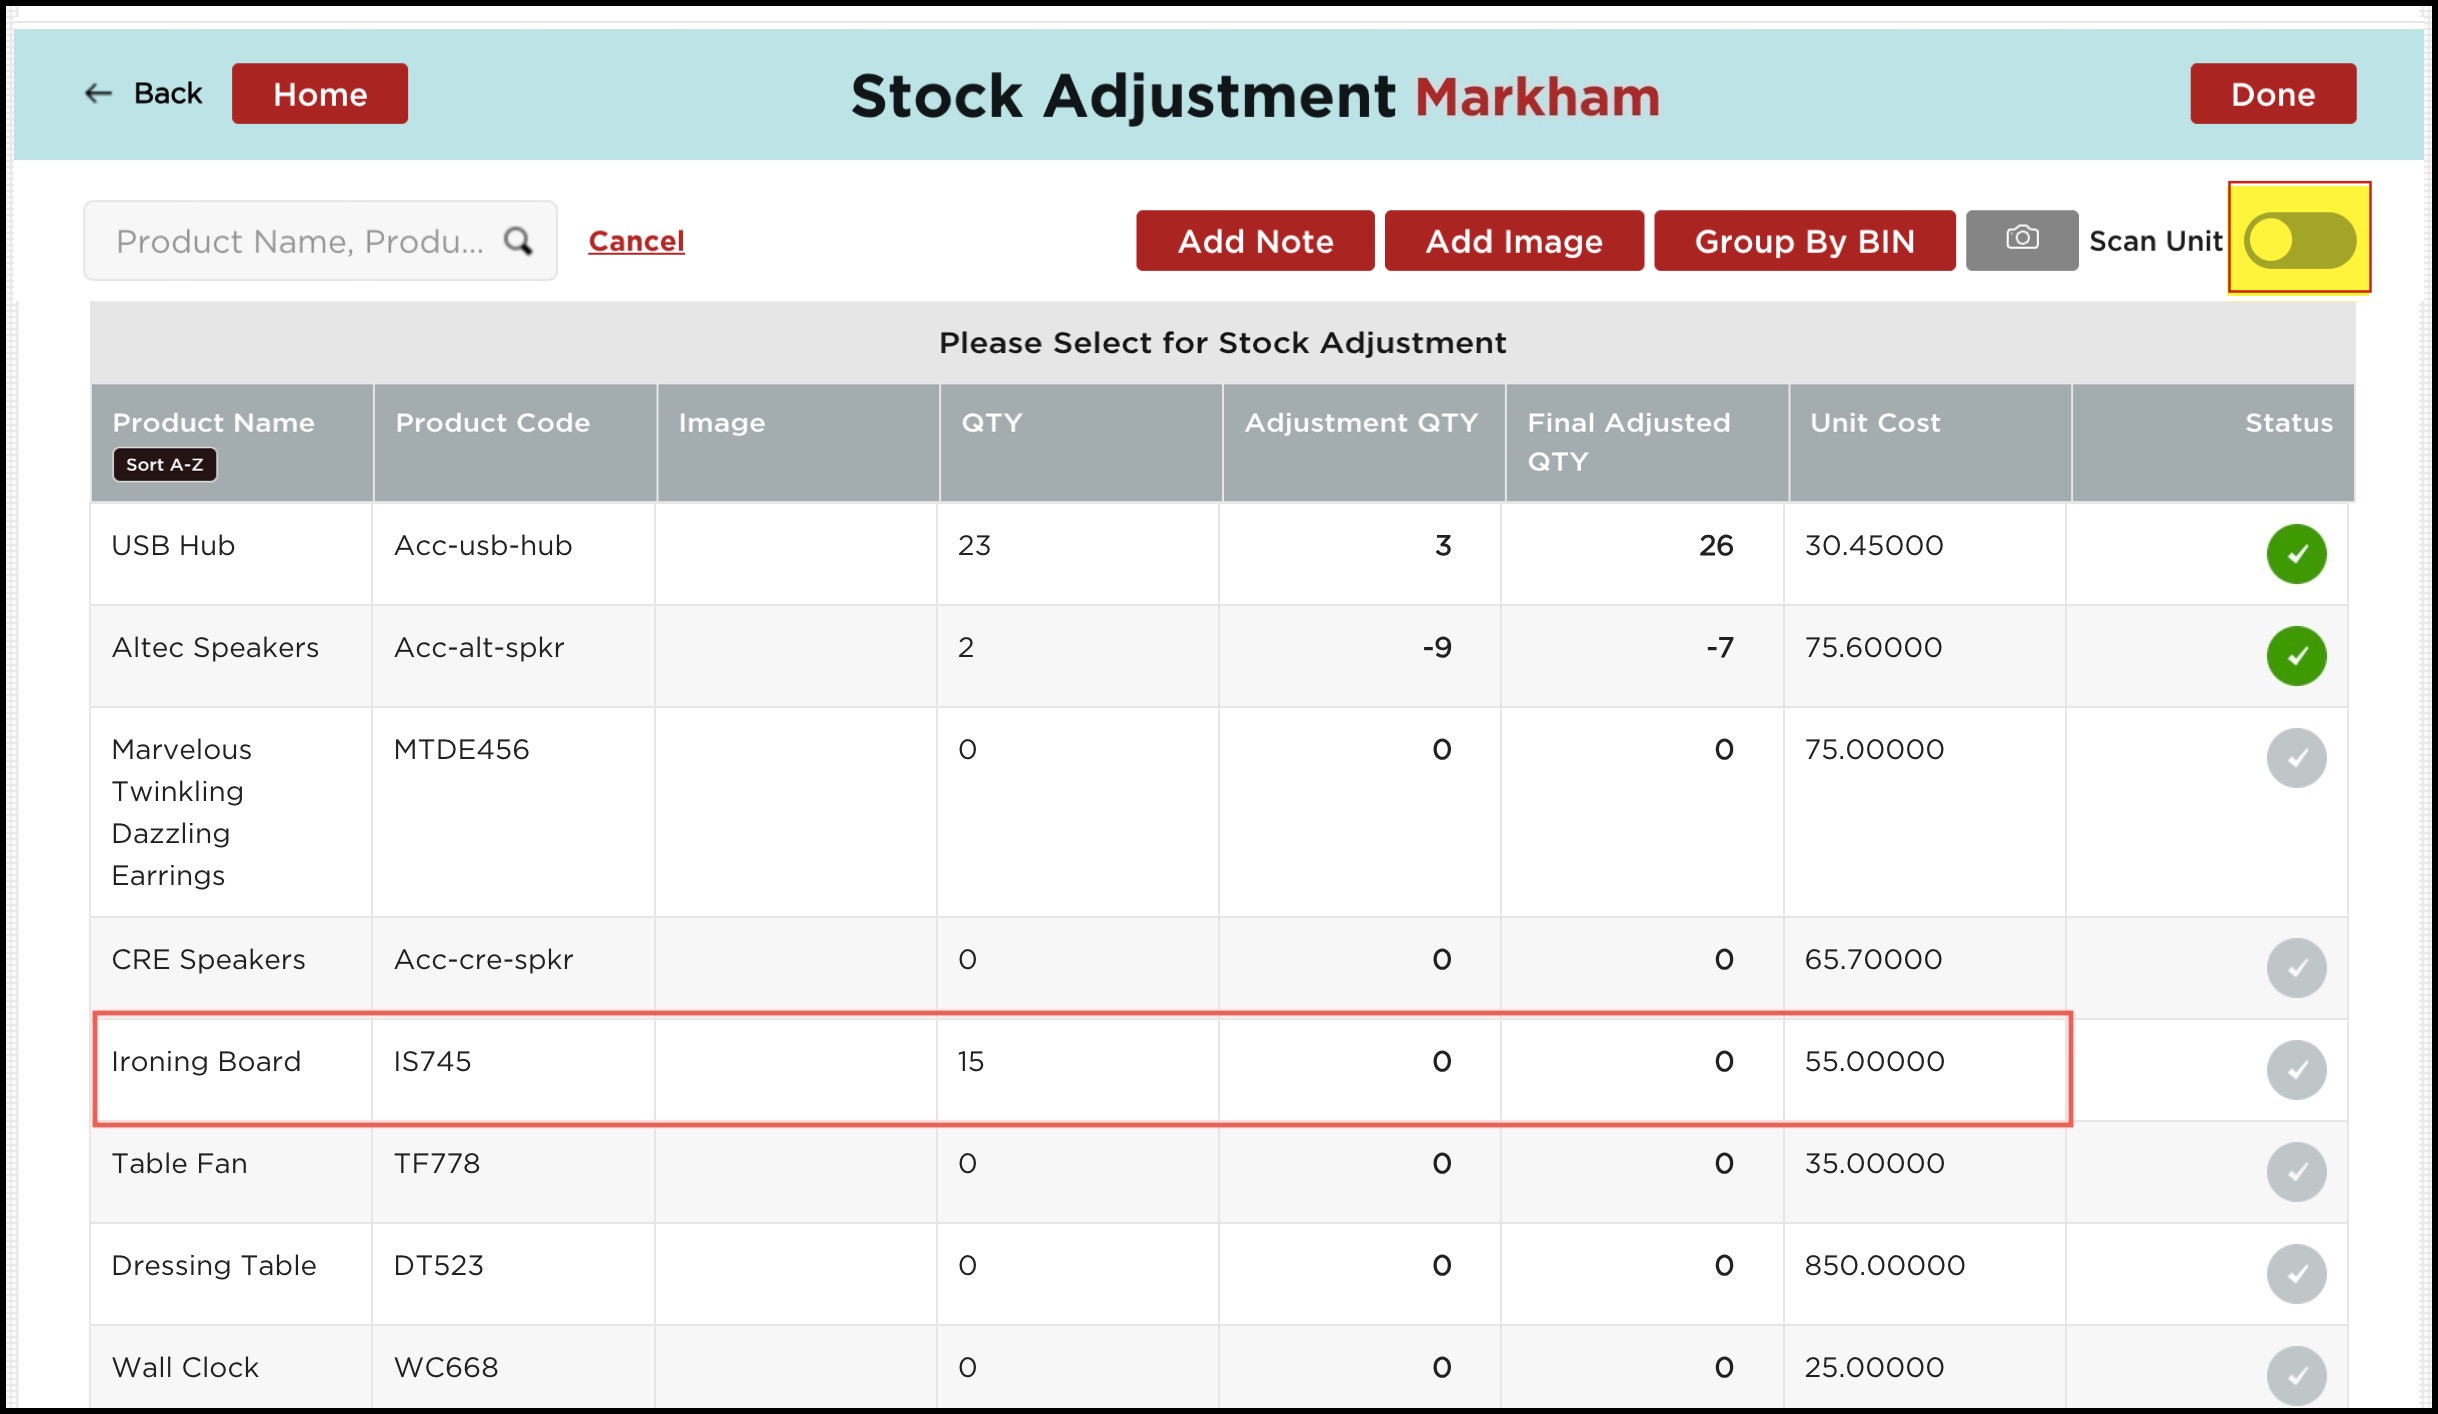
- If the scan unit is enabled for Stock Adjustment then you can see the "+" and "-" sign under the Adjustment Qty column (against each product) to modify the quantity up or down.
General features (Scan unit enabled or disabled)
- Selecting Group By Bin allows for the grouping of products by bin location.
- Clicking on the Add Note button will bring up a screen where you can add a general stock adjustment note.
- You can also add image/images to the stock adjustment by clicking on the Add Image button.
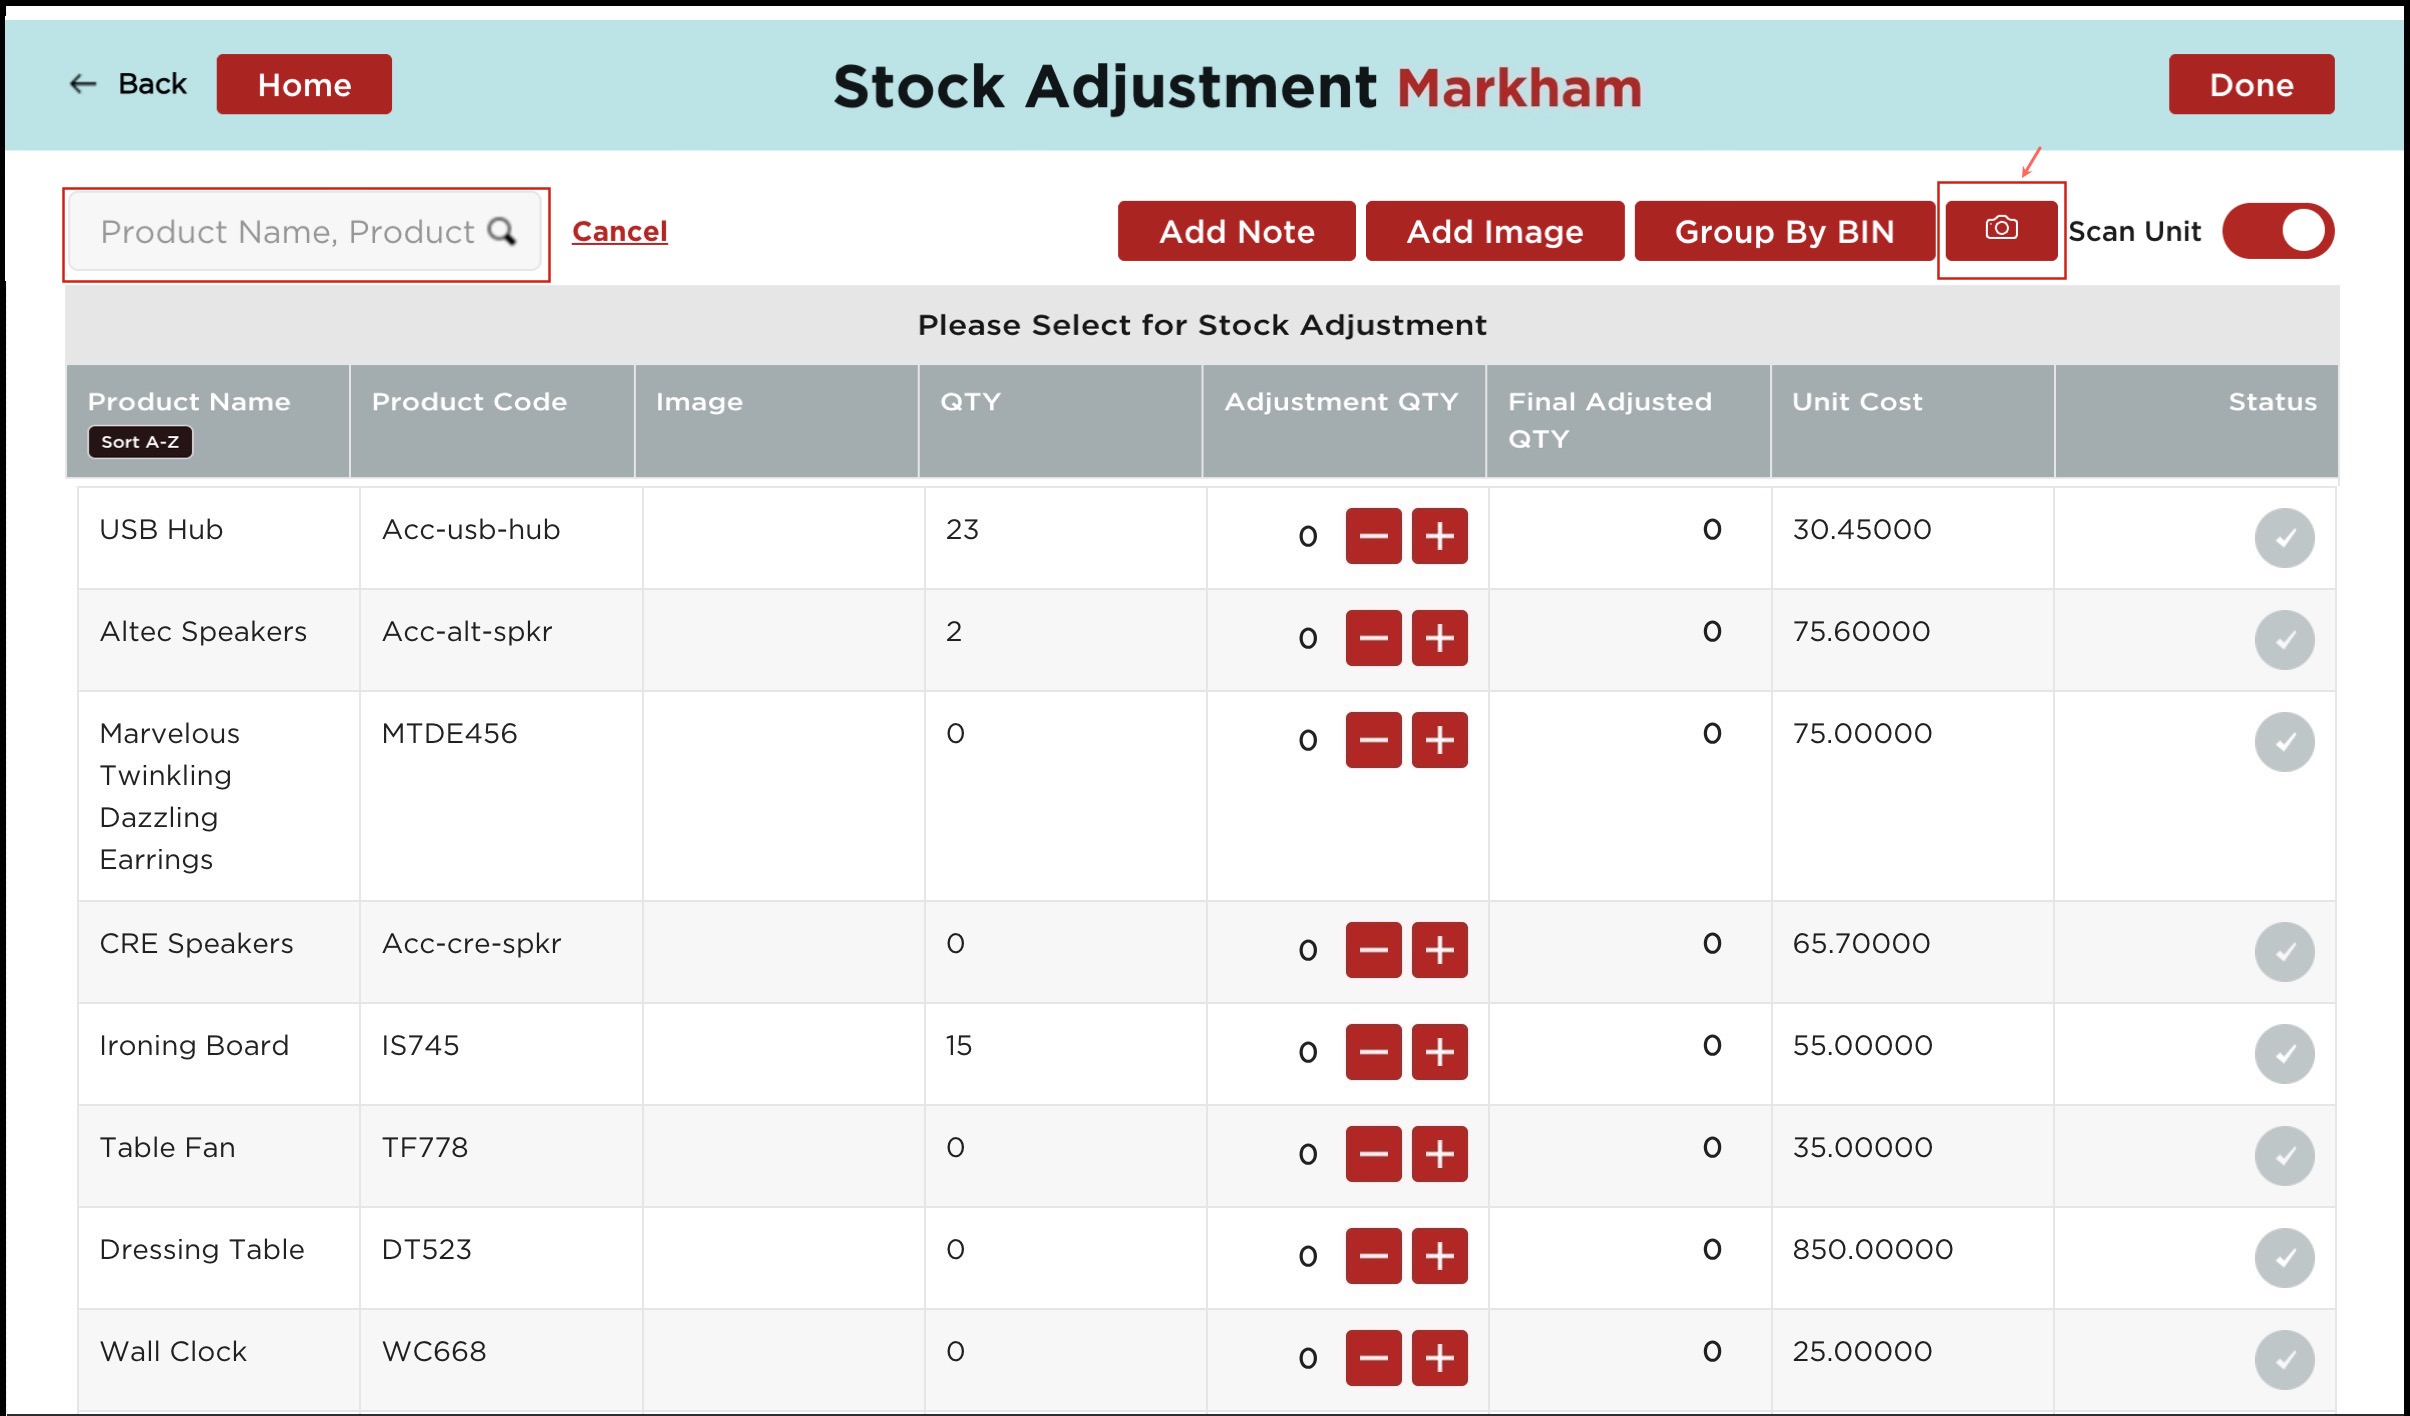
Note - In case there are many products, you can search for a particular product by entering product details like product name or code in the search box. Or you can click on the camera icon and scan the product barcode (this works when the scan unit is enabled).
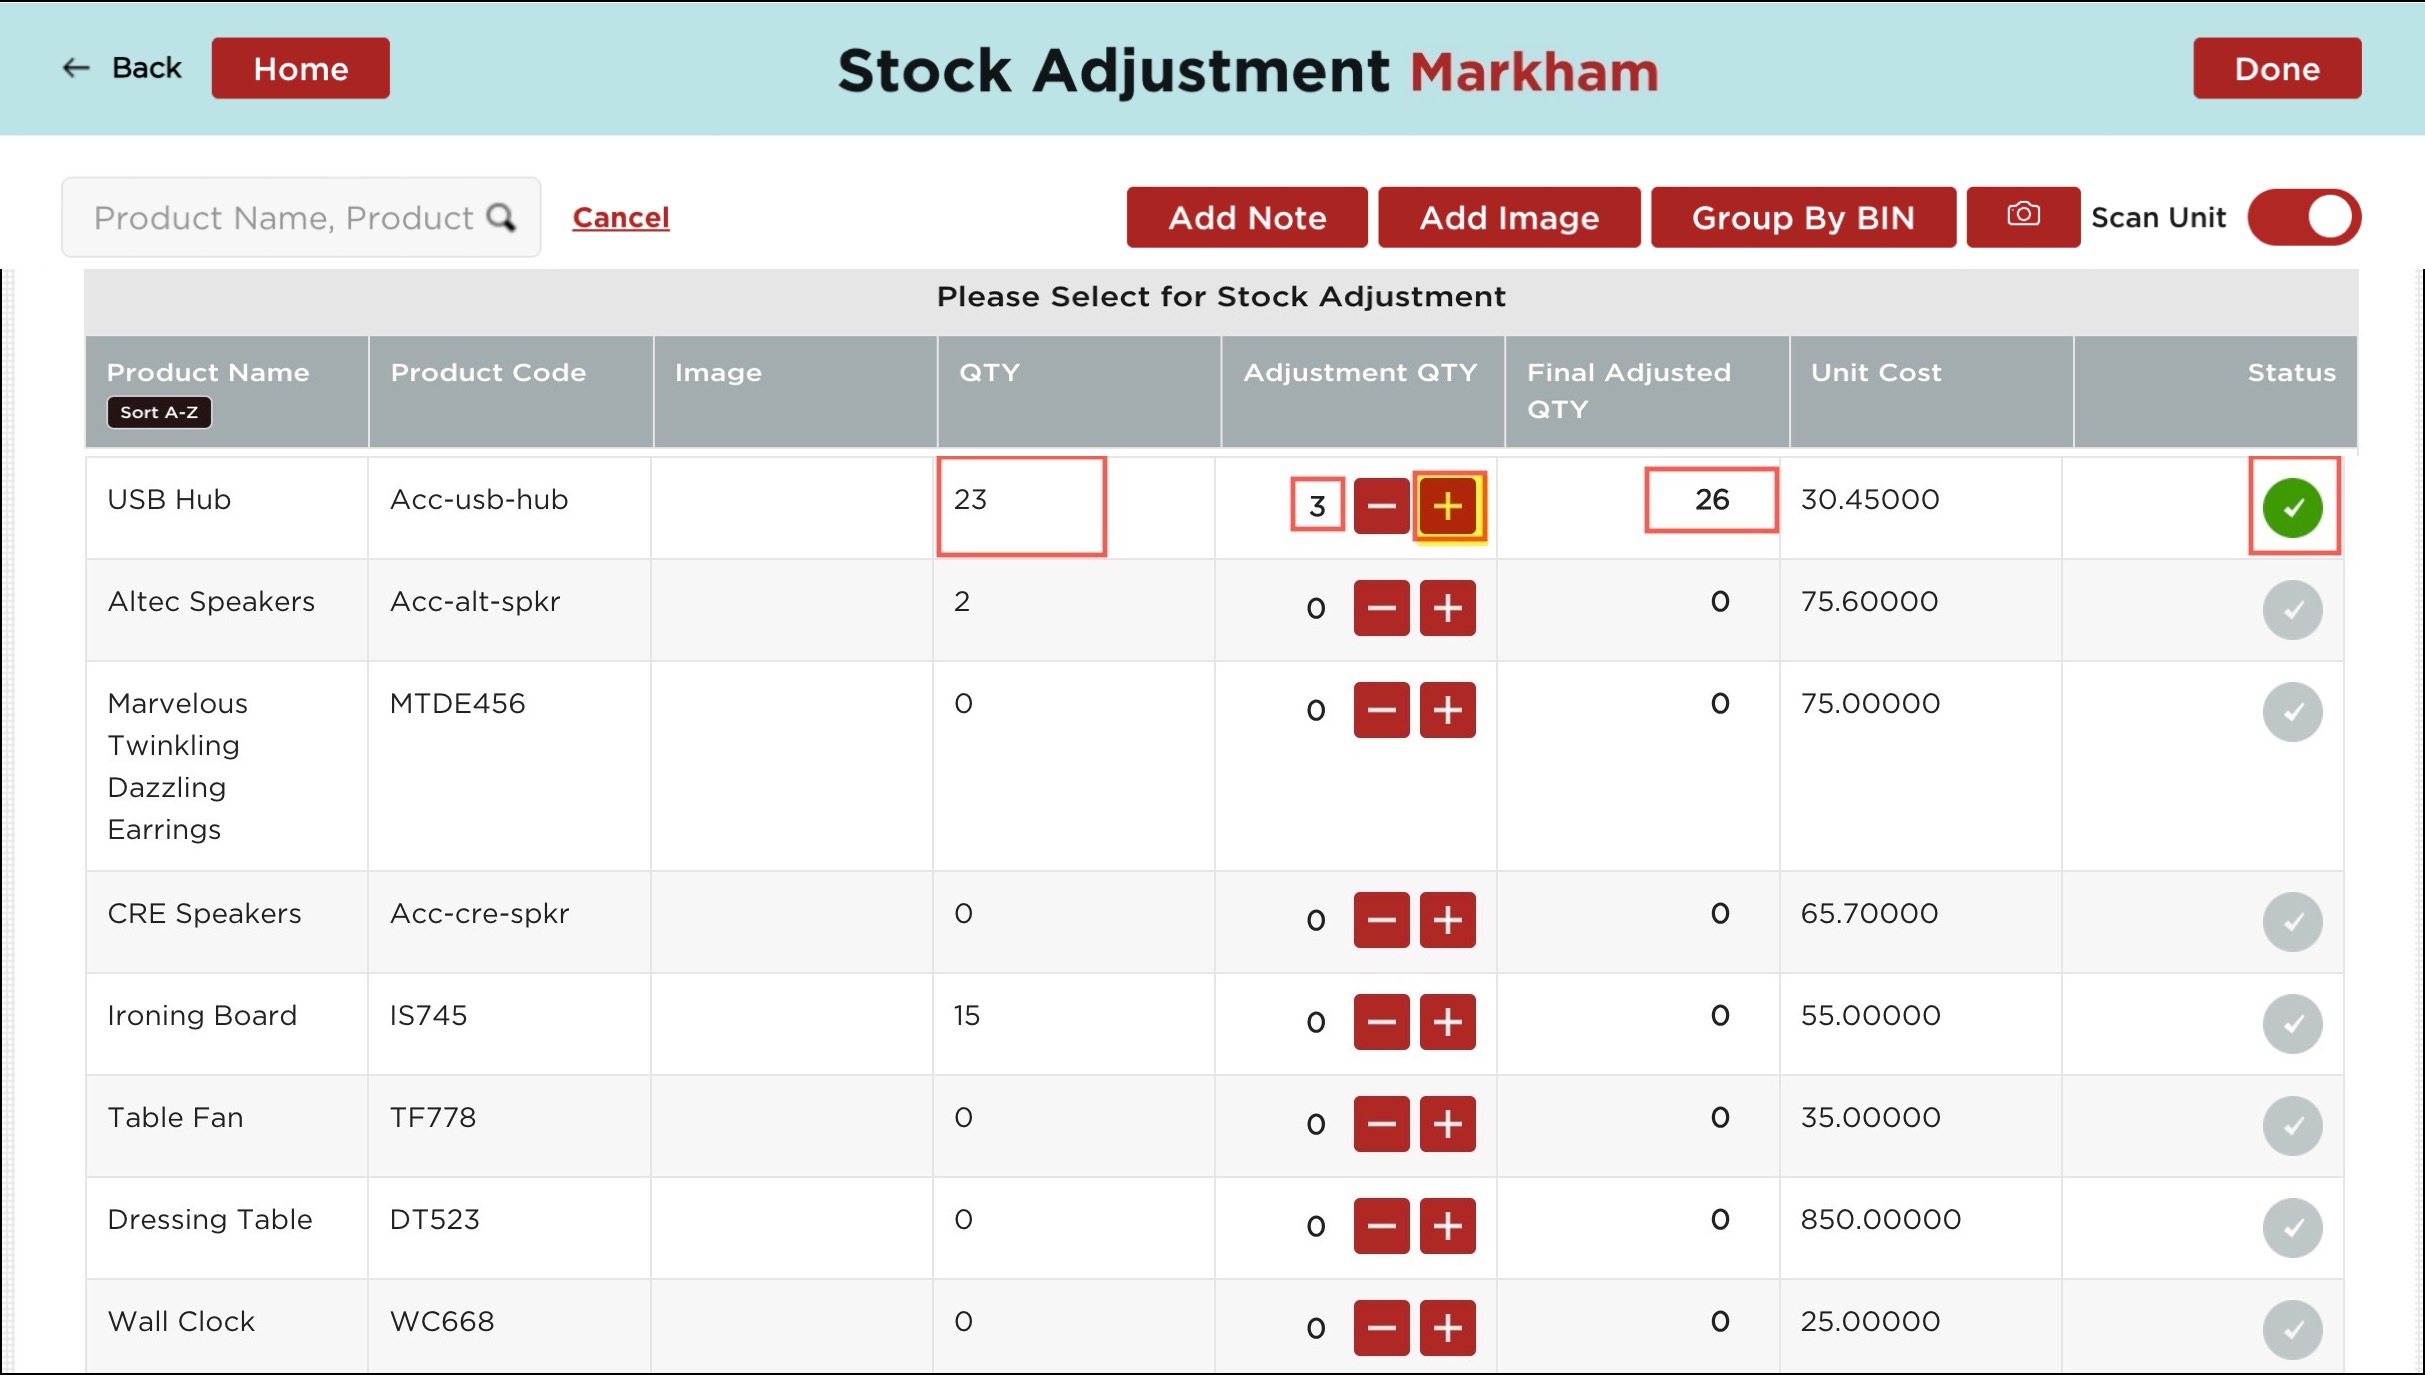
- Now for example, if you check the screenshot, the total Quantity (Qty) of the product USB Hub is 23. Now if you add quantity (Adjustment Qty) by 3, you'll see the Adjusted Qty becomes 26 (i.e. 23+3)
Also the Status turns Green.
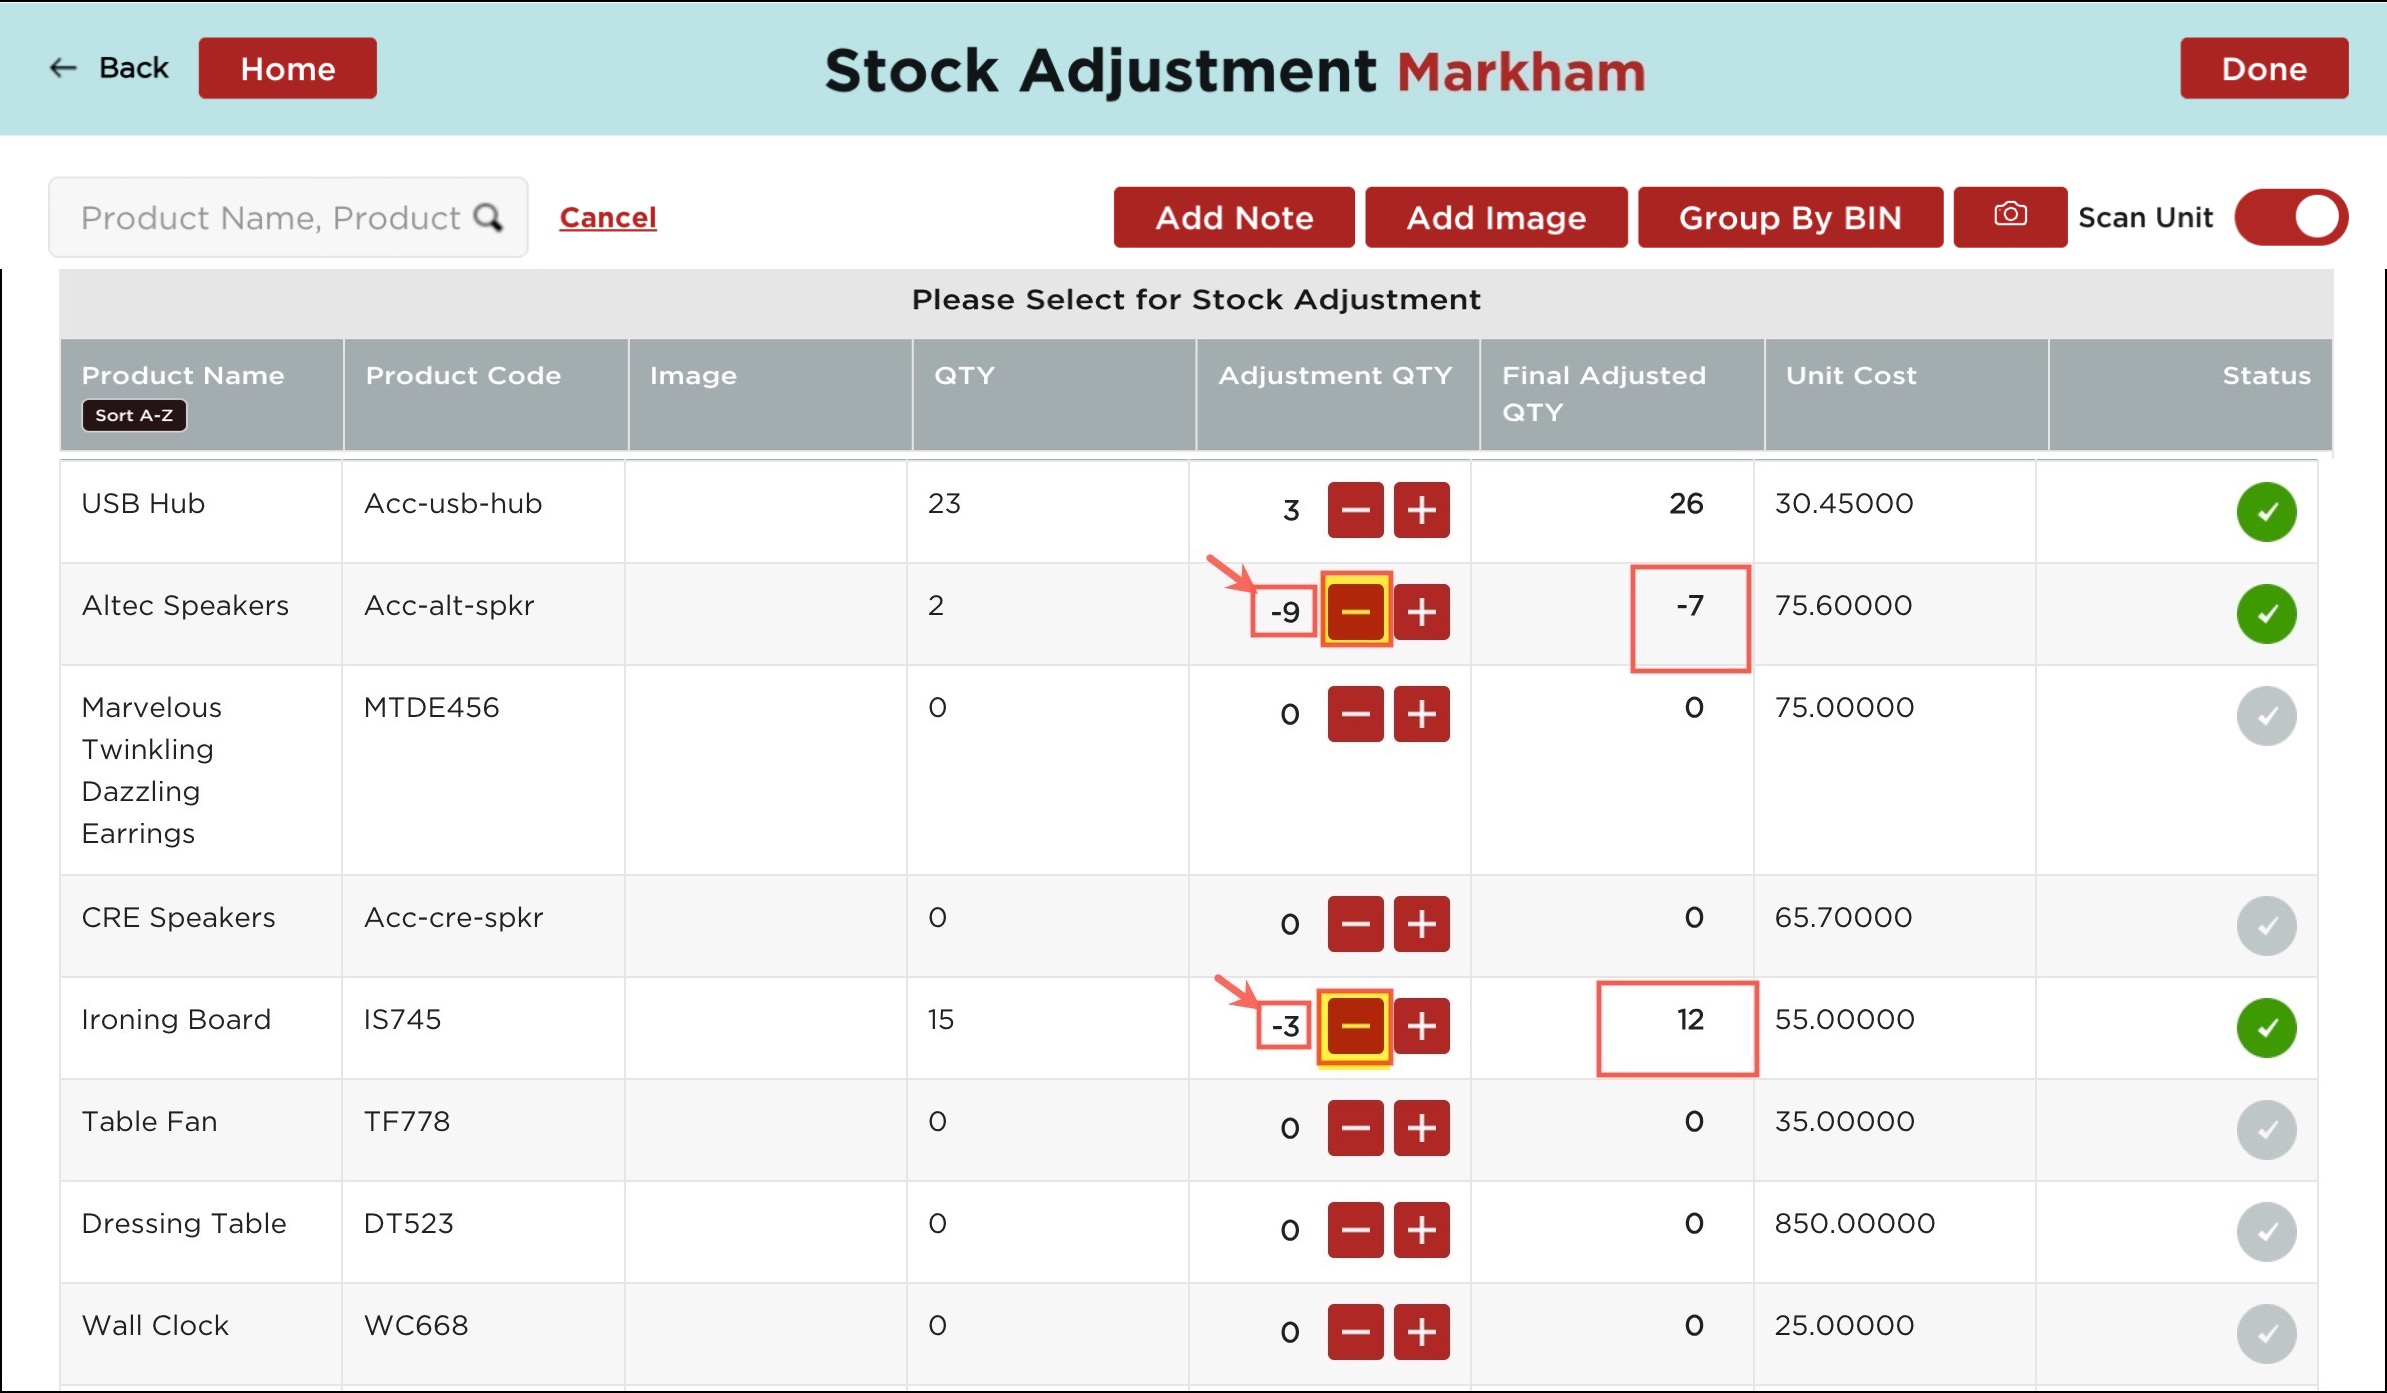
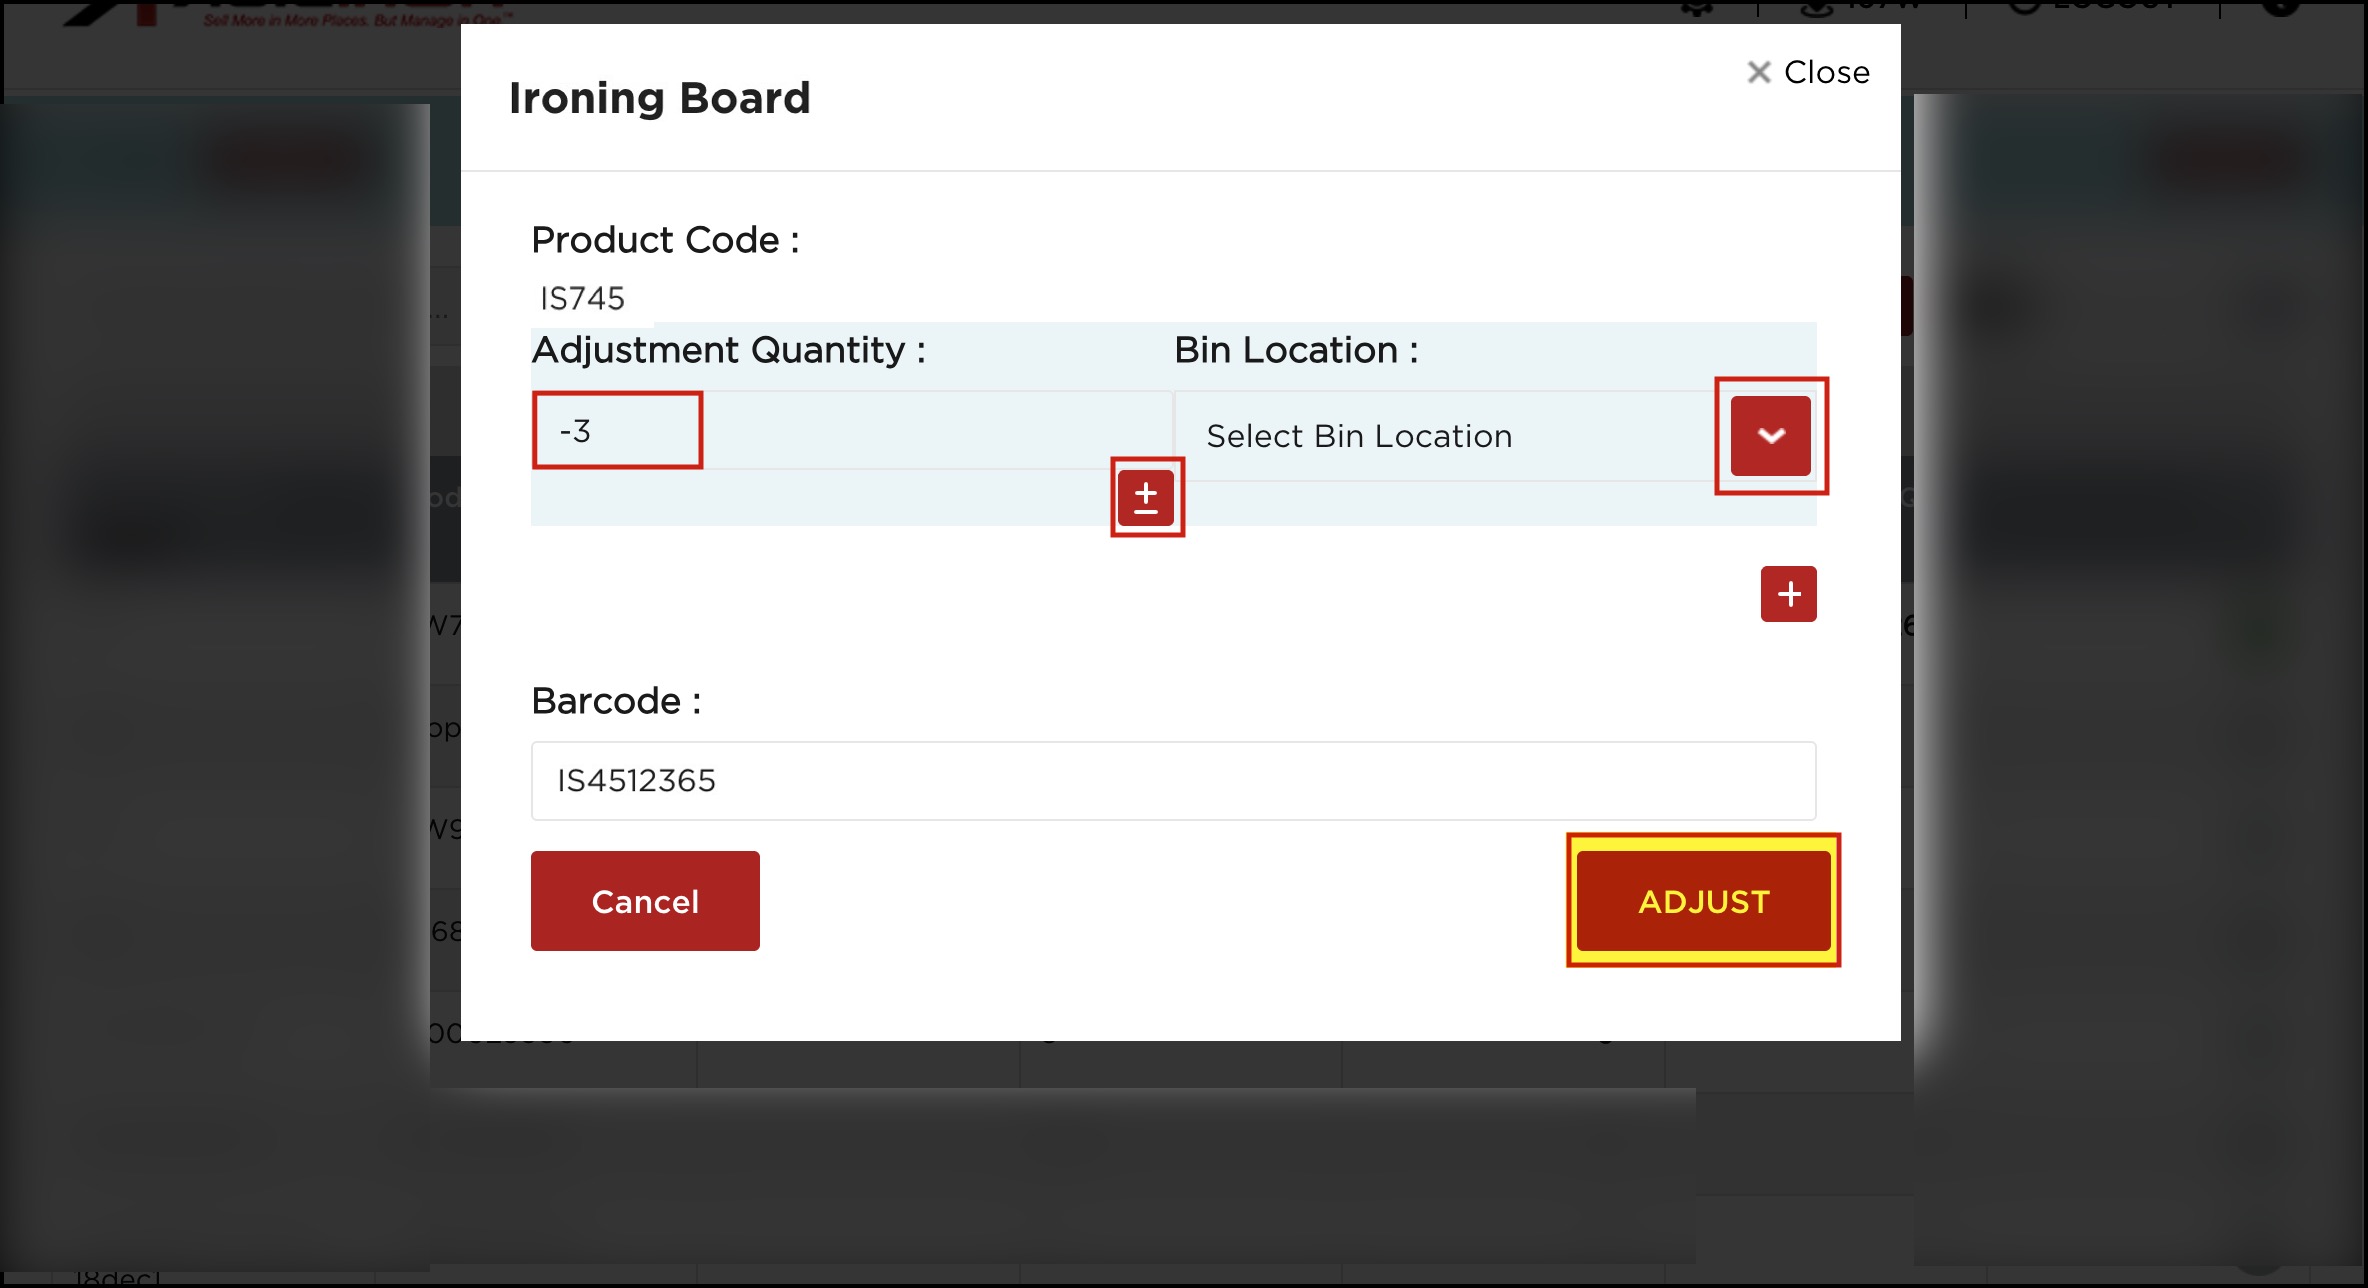
- If the “Adjusted Qty” is less than “Qty”, then "Adjustment Qty" will be in negative. For example here the Qty for product ironing board is 15. If you lessen the quantity (Adjustment Qty) by 3, you'll see the Adjusted Qty gets decreased by 3 and (15-3) i.e. 12.
- If the scan unit is disabled, select the product for which you want to do the stock adjustment.
- A pop-up screen will appear where you must enter the adjustment quantity.
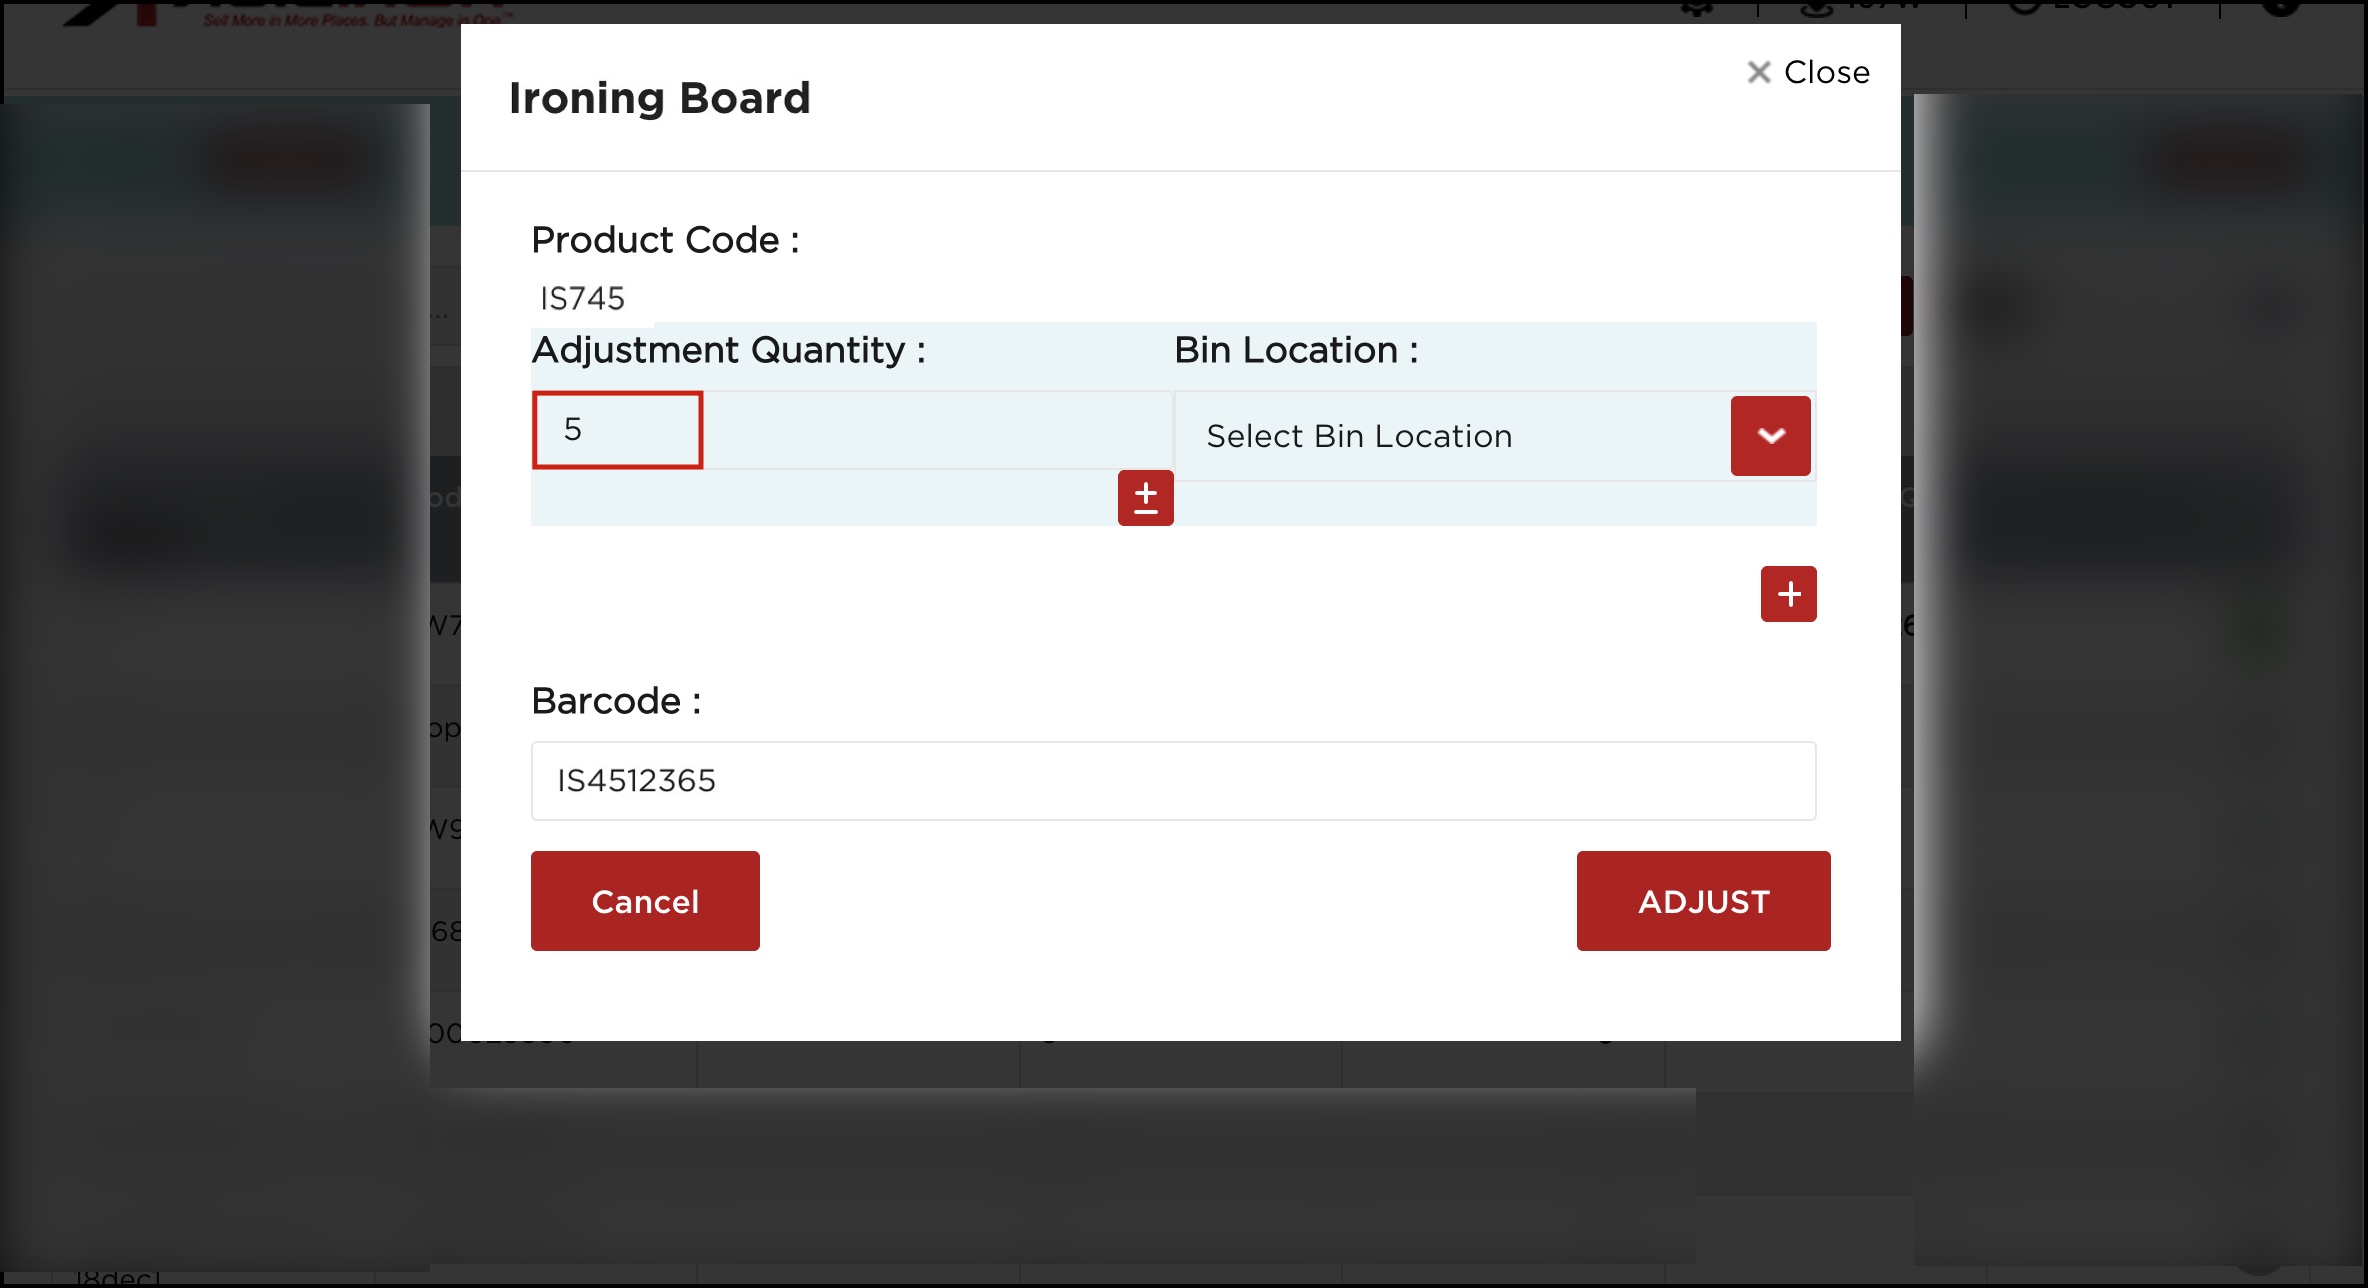
- If you want to modify the stock quantity down, then enter the adjustment quantity and click on the +/- button. Clicking this button should toggle between +ve and -ve if the “Adjustment Qty” is non-zero.
- You can also select a bin location or add a new bin location.
- Next, click on the Adjust button.
You will notice the status of the product for which you did the stock adjustment has turned green.
- Next, click on Done to return to Home Screen.
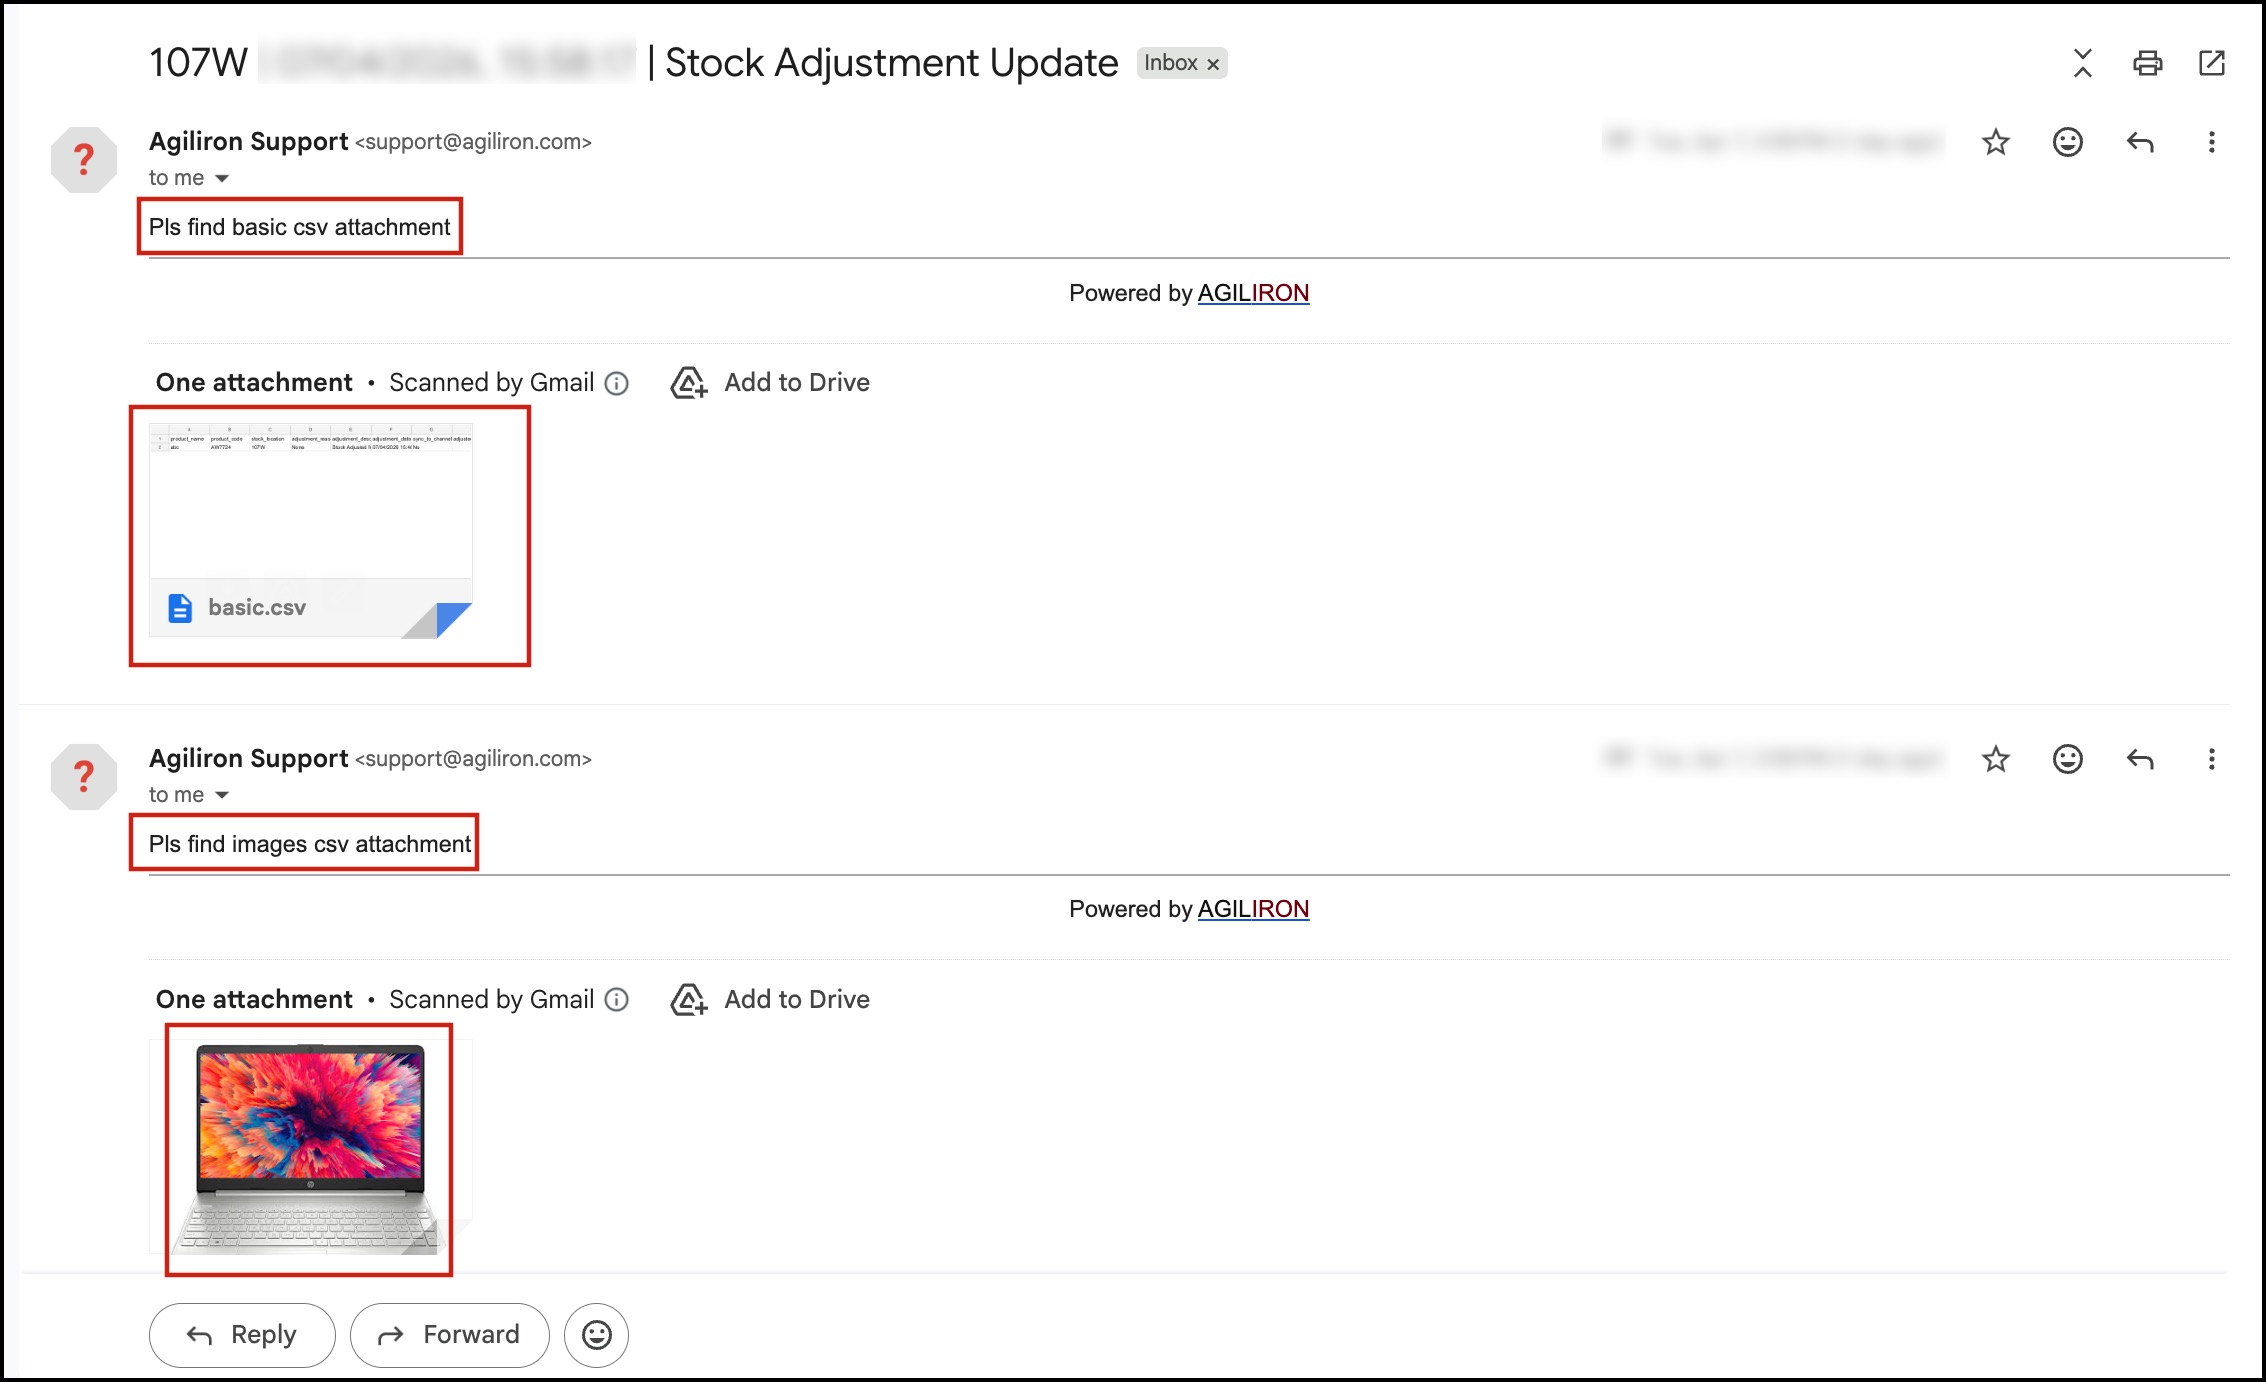
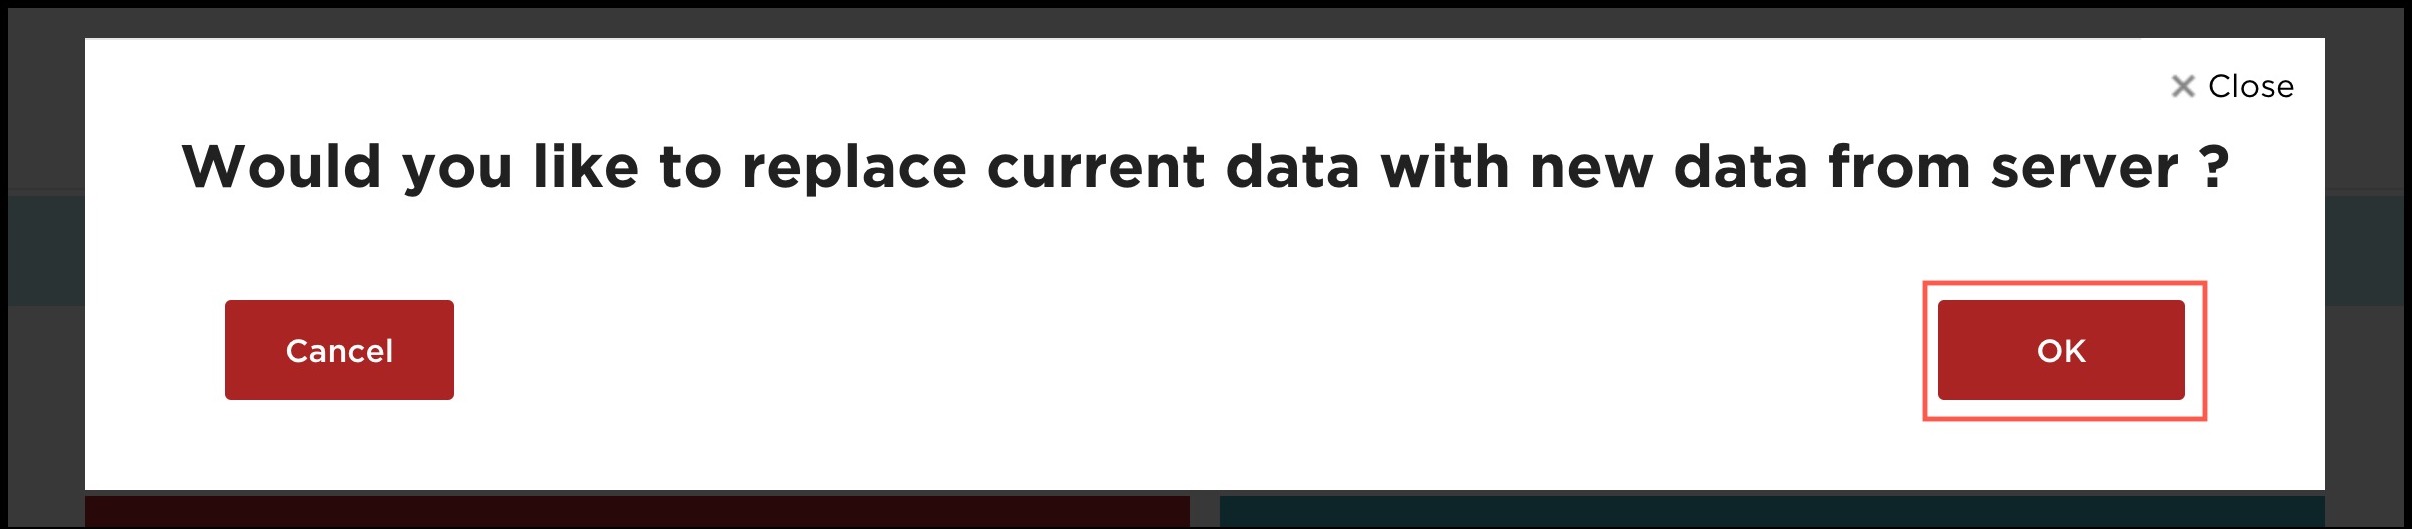
- If the Enable Auto Inventory Update Email setting is set to On, then you will see a message asking if you want to send an inventory update CSV email. Stock Adjustment update will be emailed after clicking on OK.

The email will be sent to the email recipients added to the Inventory Update CSV Email Address list.
Along with the Stock Adjustment updates, if you have added any image, you can see that as well as an email attachment.
- Lastly, you need to click on the Sync Inventory Updates to Back-Office button present on the home page, so that whatever updates you've made get reflected in the back office.

- Next, you'll see the message on the screen. Click on OK.

Updated 4 months ago