- Channel Specific Notification Schedulers Customization
Users can now customize the default notification settings for each sales channel, including the email content, subject, and recipients.
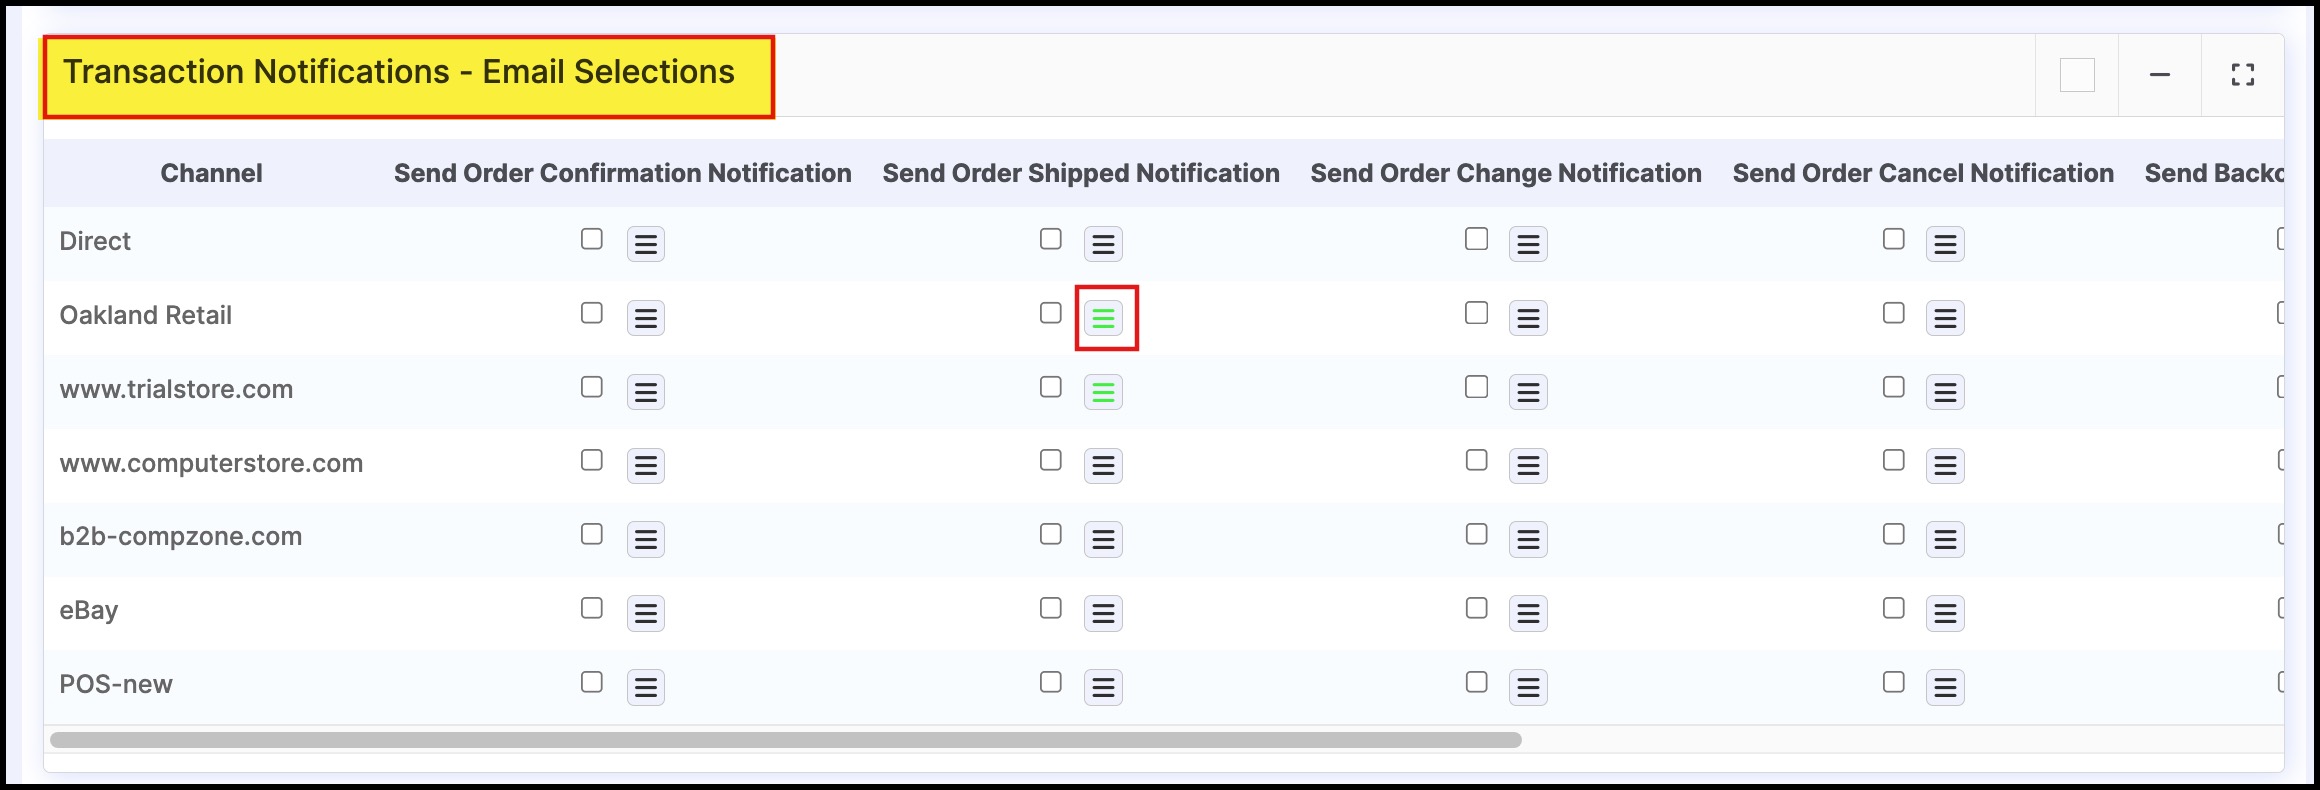
To customize the email notification schedulers:
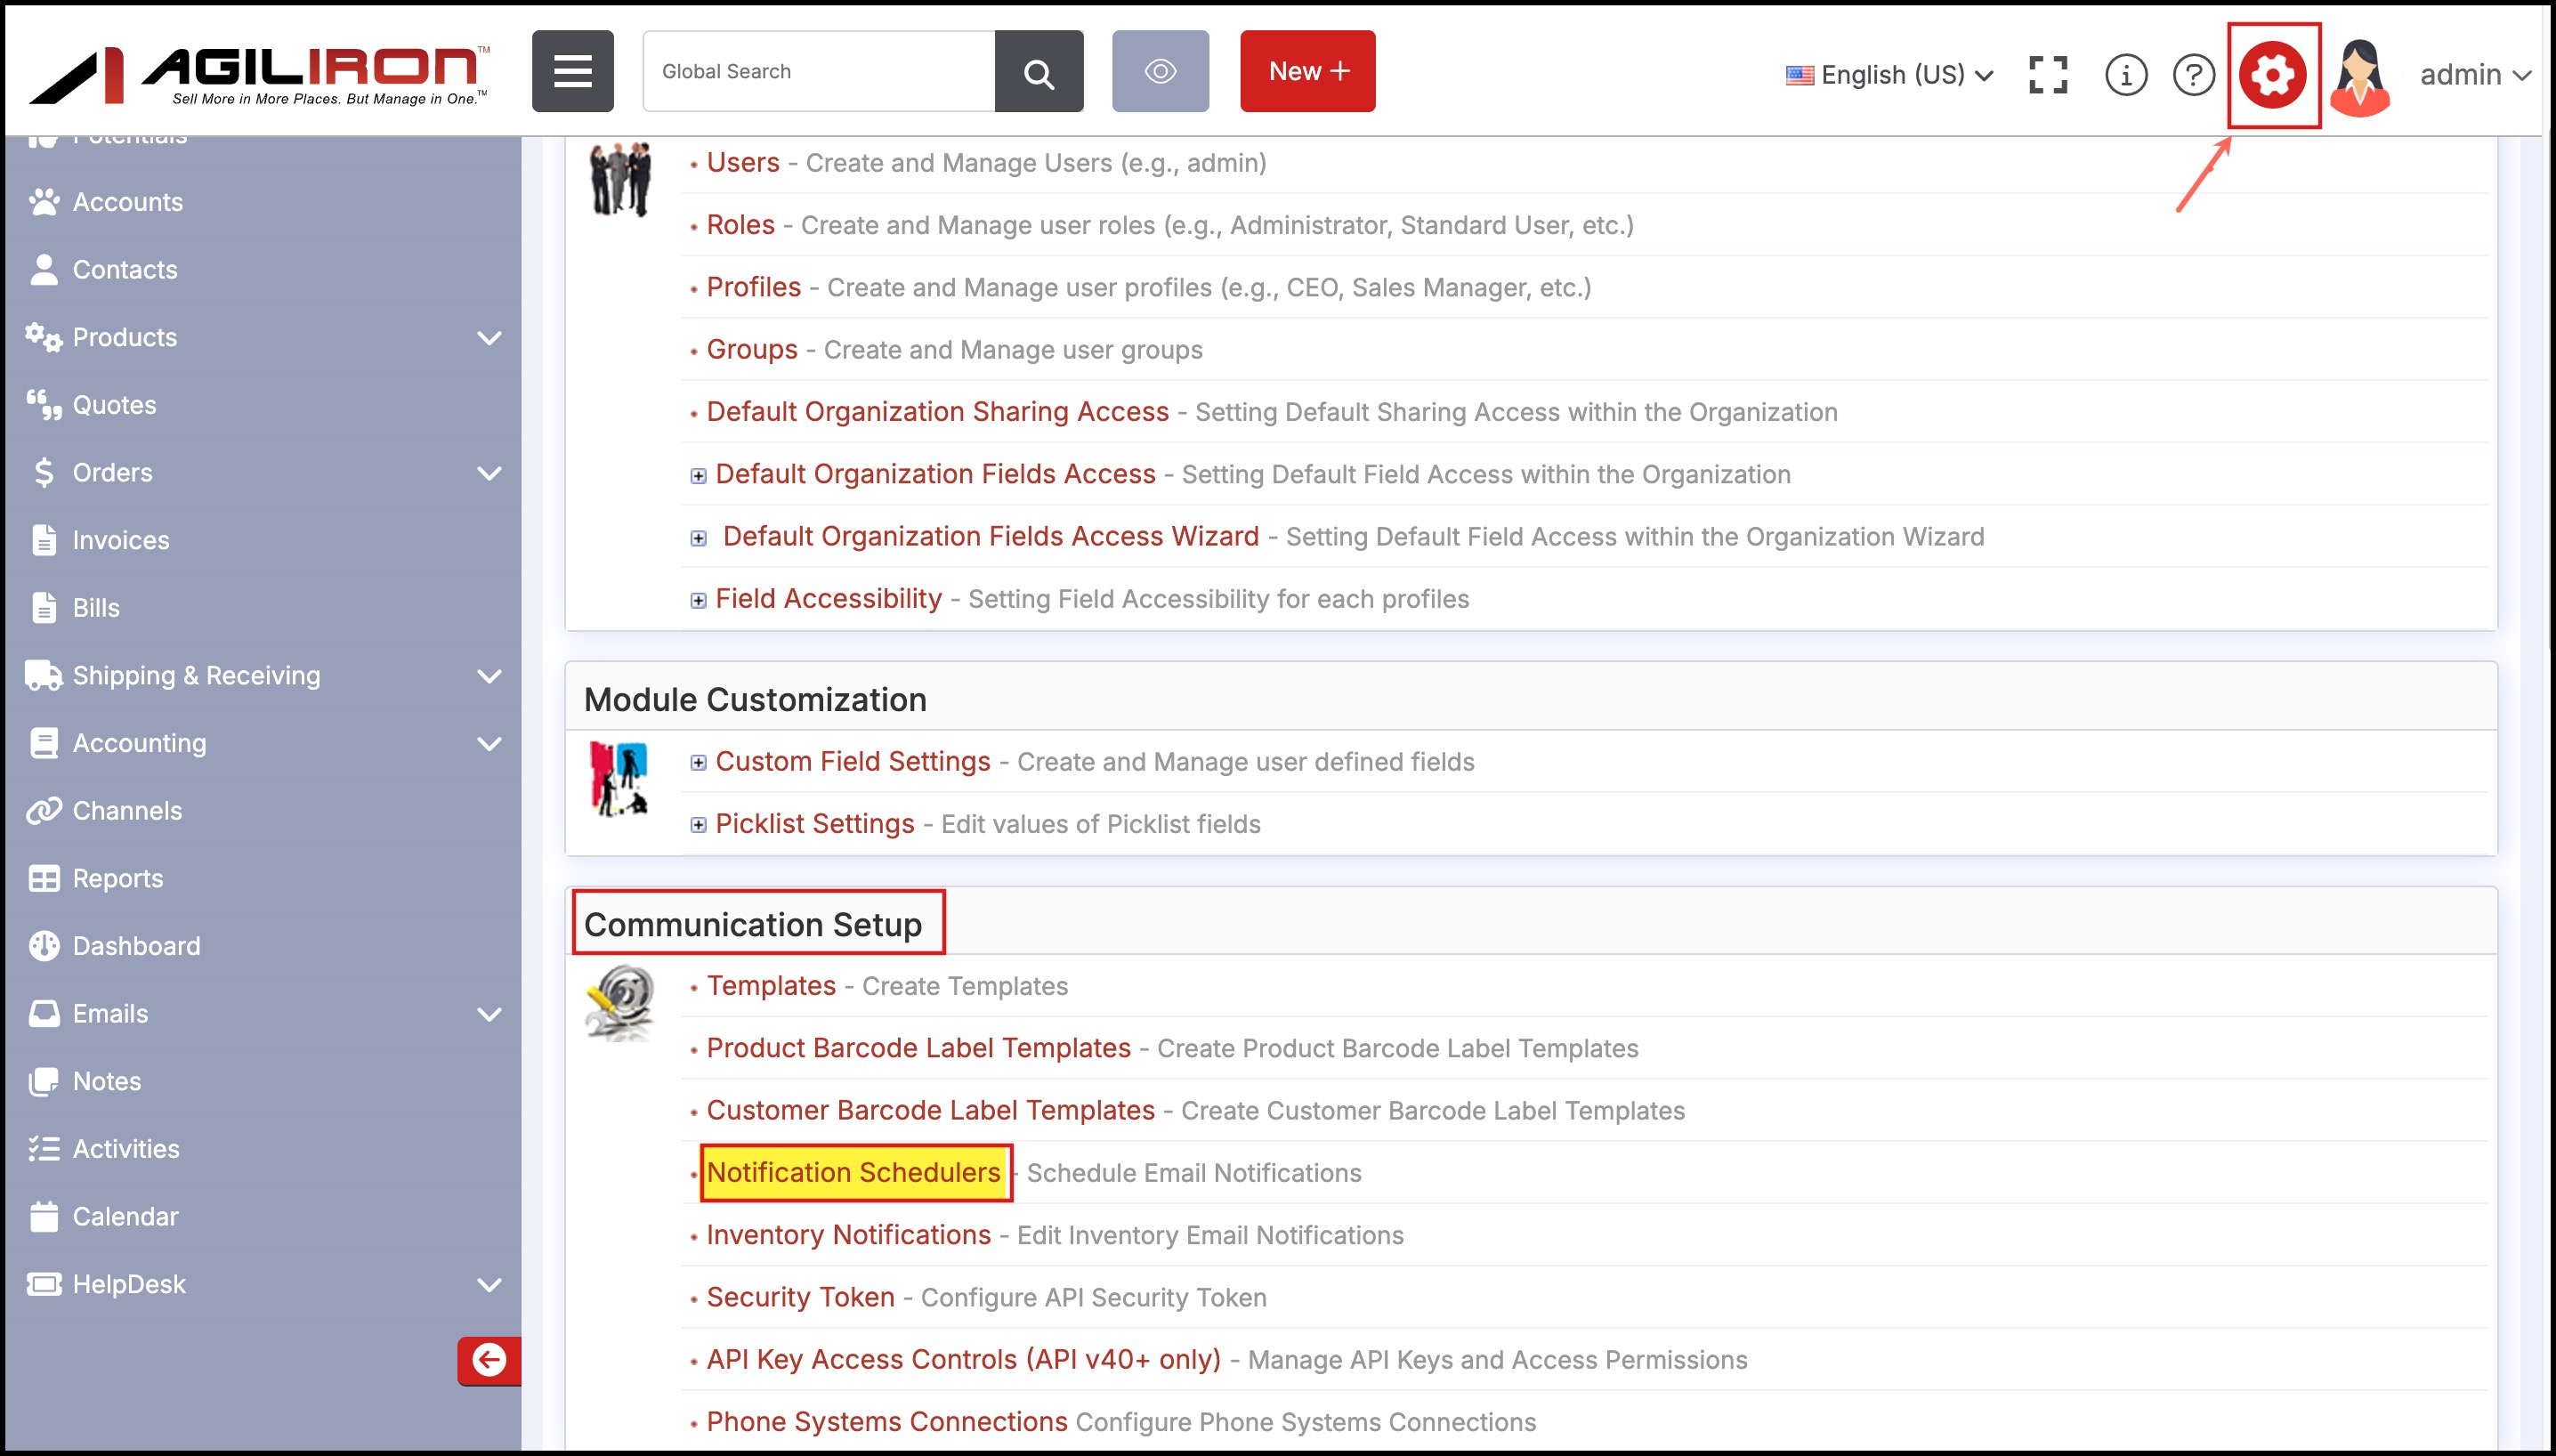
- Go to Settings-> Notification Schedulers
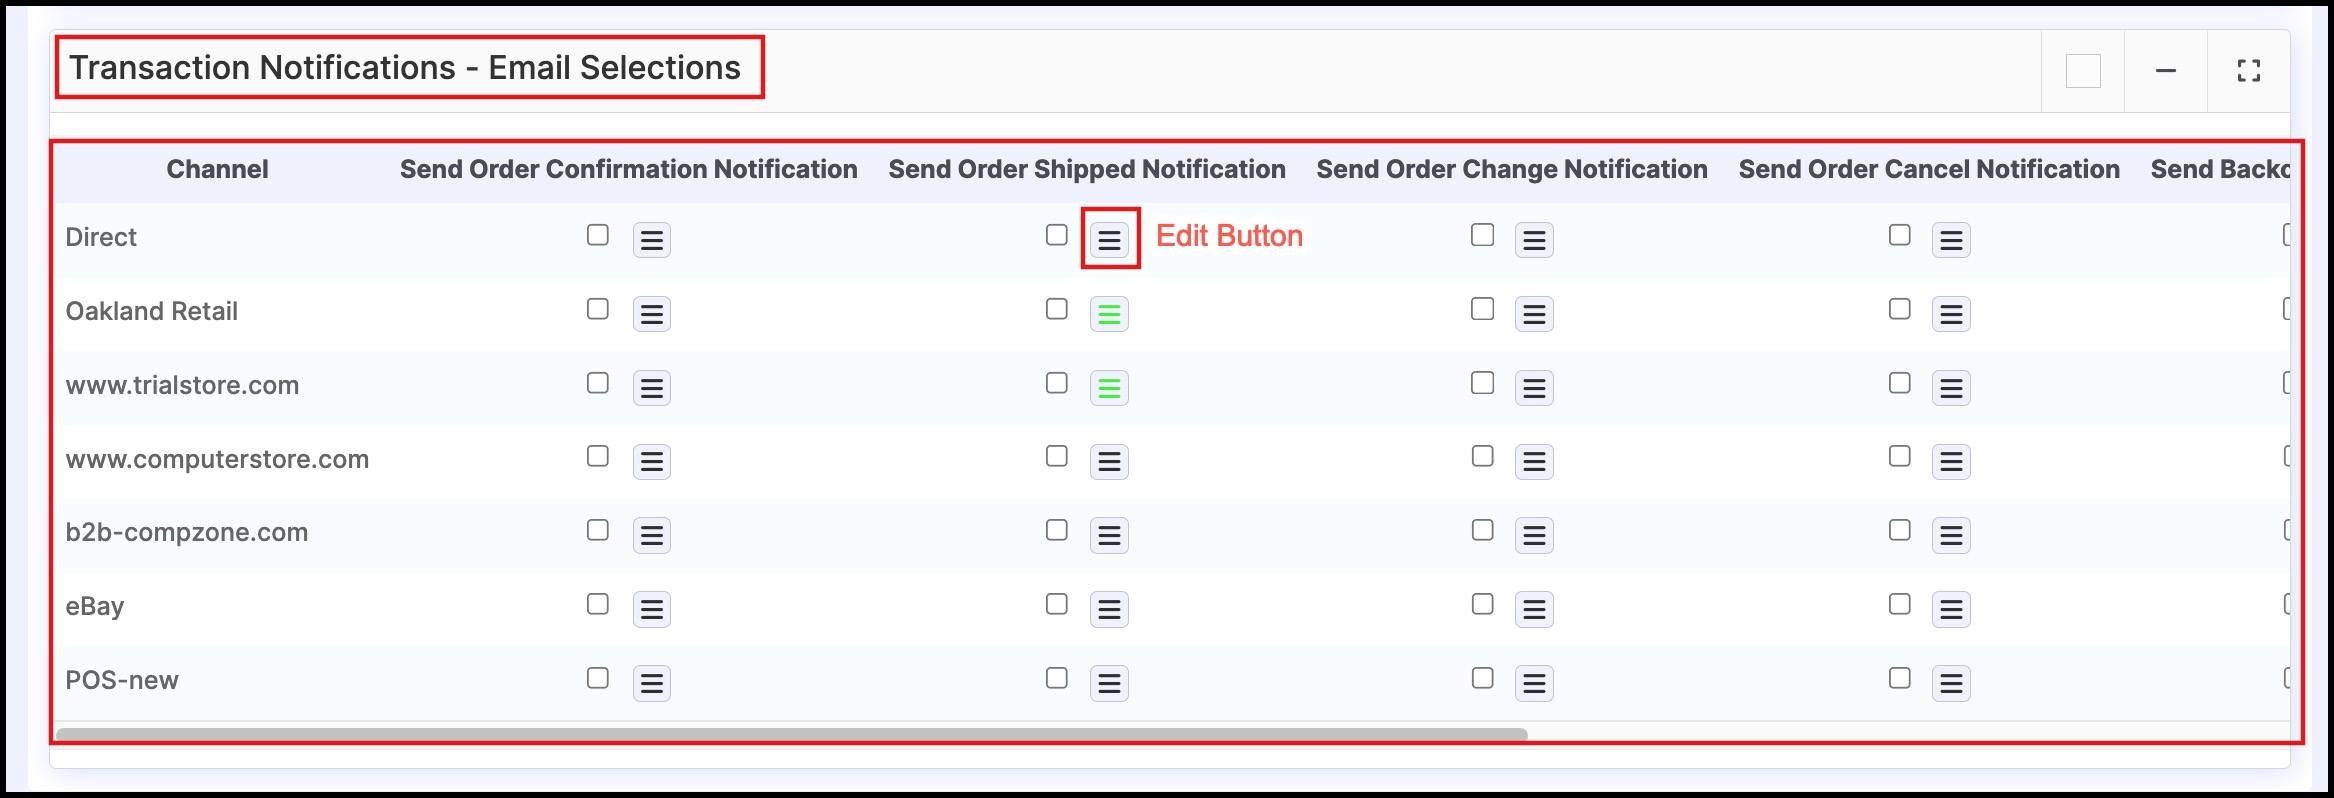
- Go to Transaction notifications-Email Selections section.
- Besides, each notification of each channel, you can spot an Edit button (three horizontal lines icon). Click on the Edit button.
- It brings up a dialog, Notification Settings, displaying the default notification content (of that particular notification and channel).
Note - If the notification content has been customized previously, the edit button will appear green.
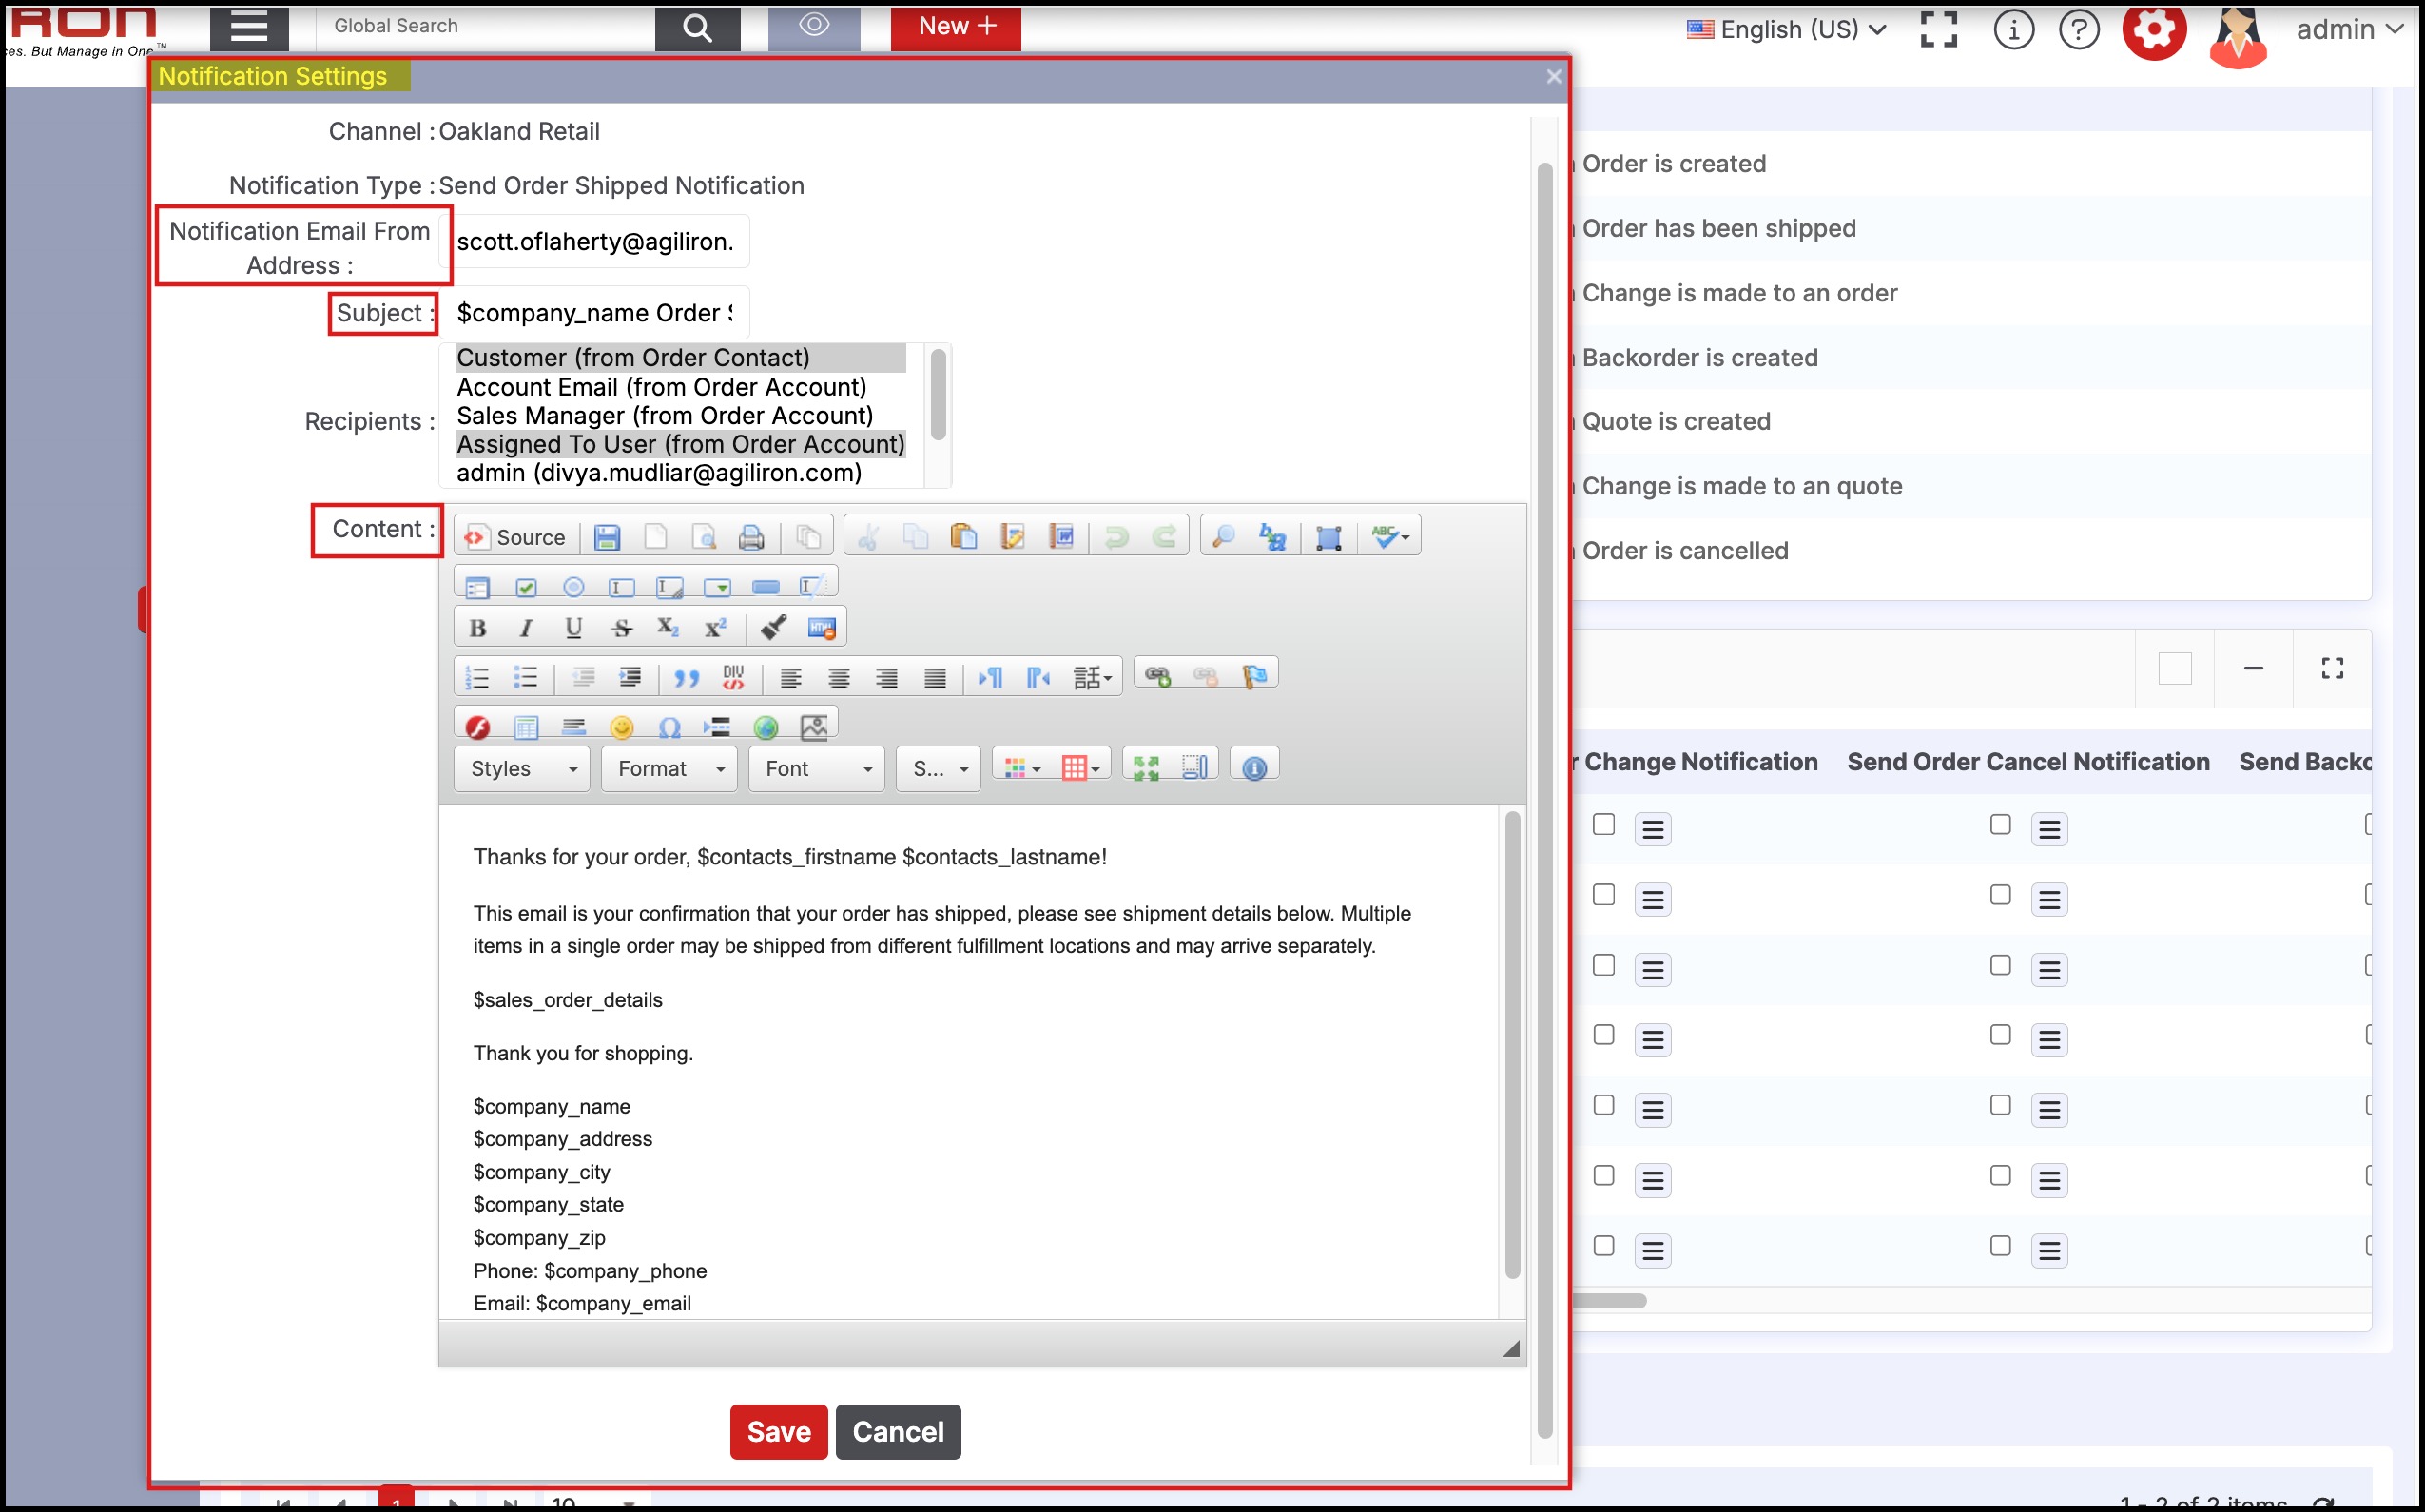
- The content will be auto-populated. However, you can change the values and content in the fields as per your need and click on Save.
- You cannot keep Notification Email From Address blank.
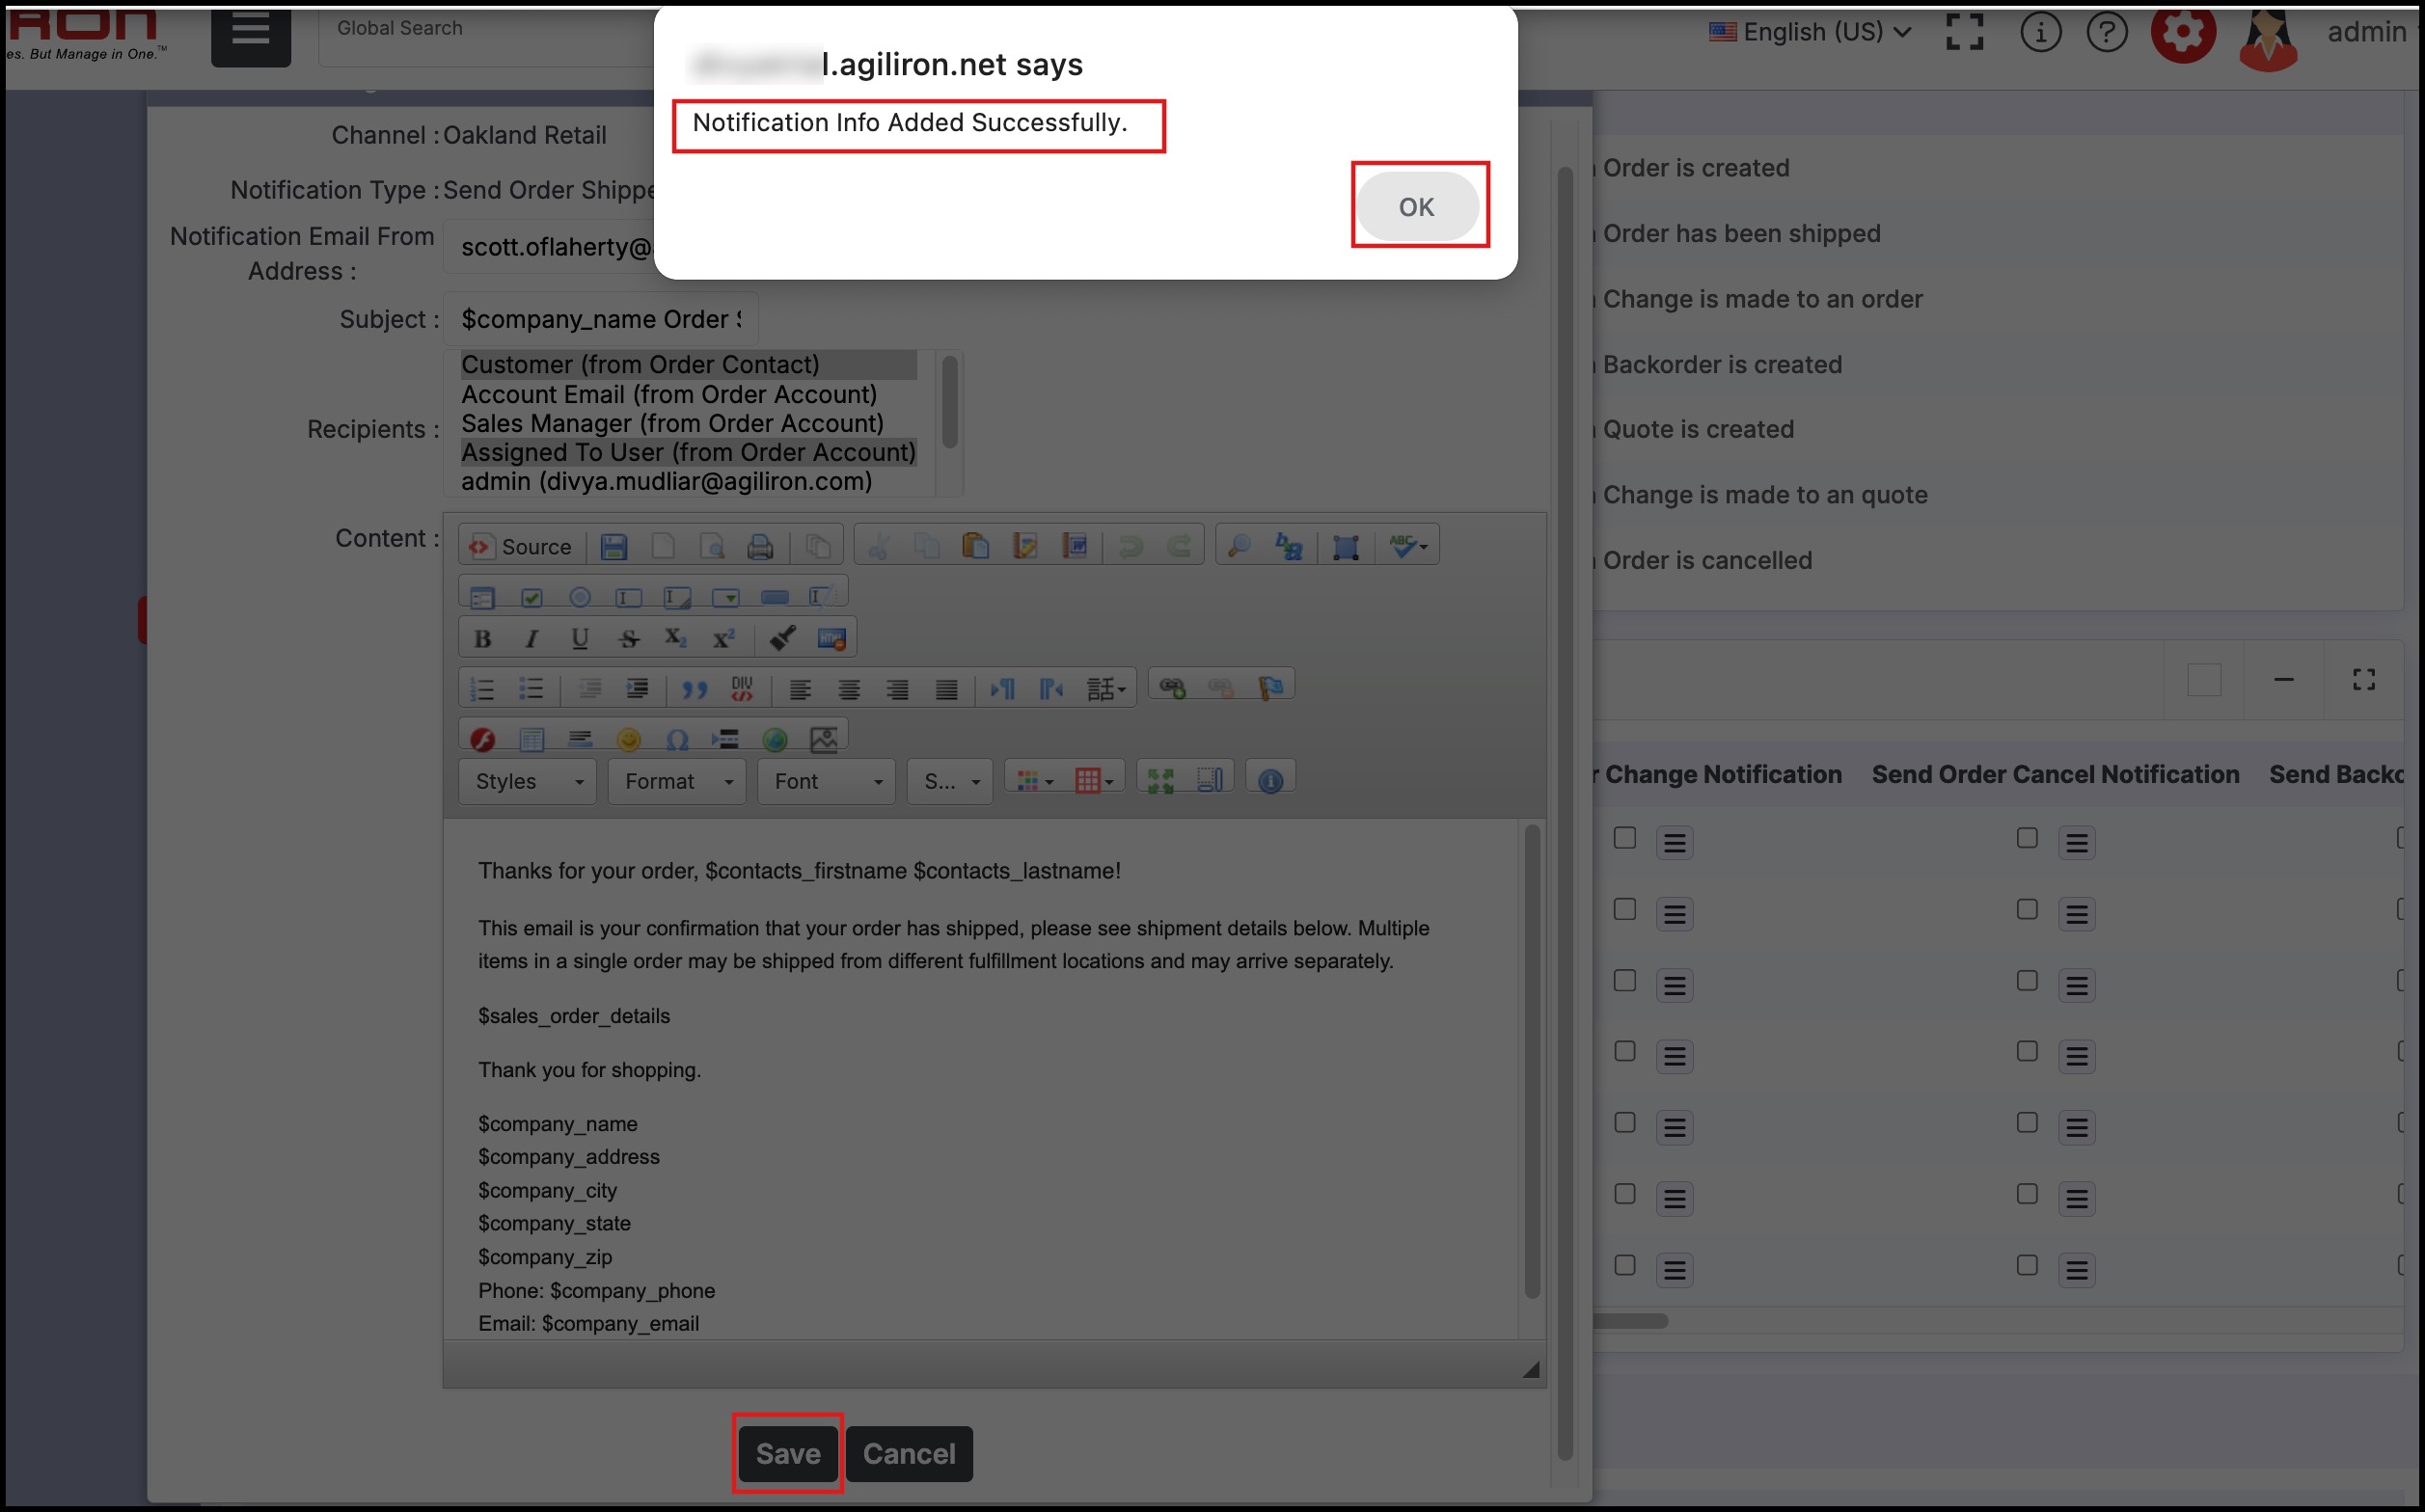
- Clicking on Save, the edit button immediately turns green.
Check out the demo video
Updated about 1 year ago