Marketing Automation to Customer Accounts, Contacts, Leads, Sales Orders
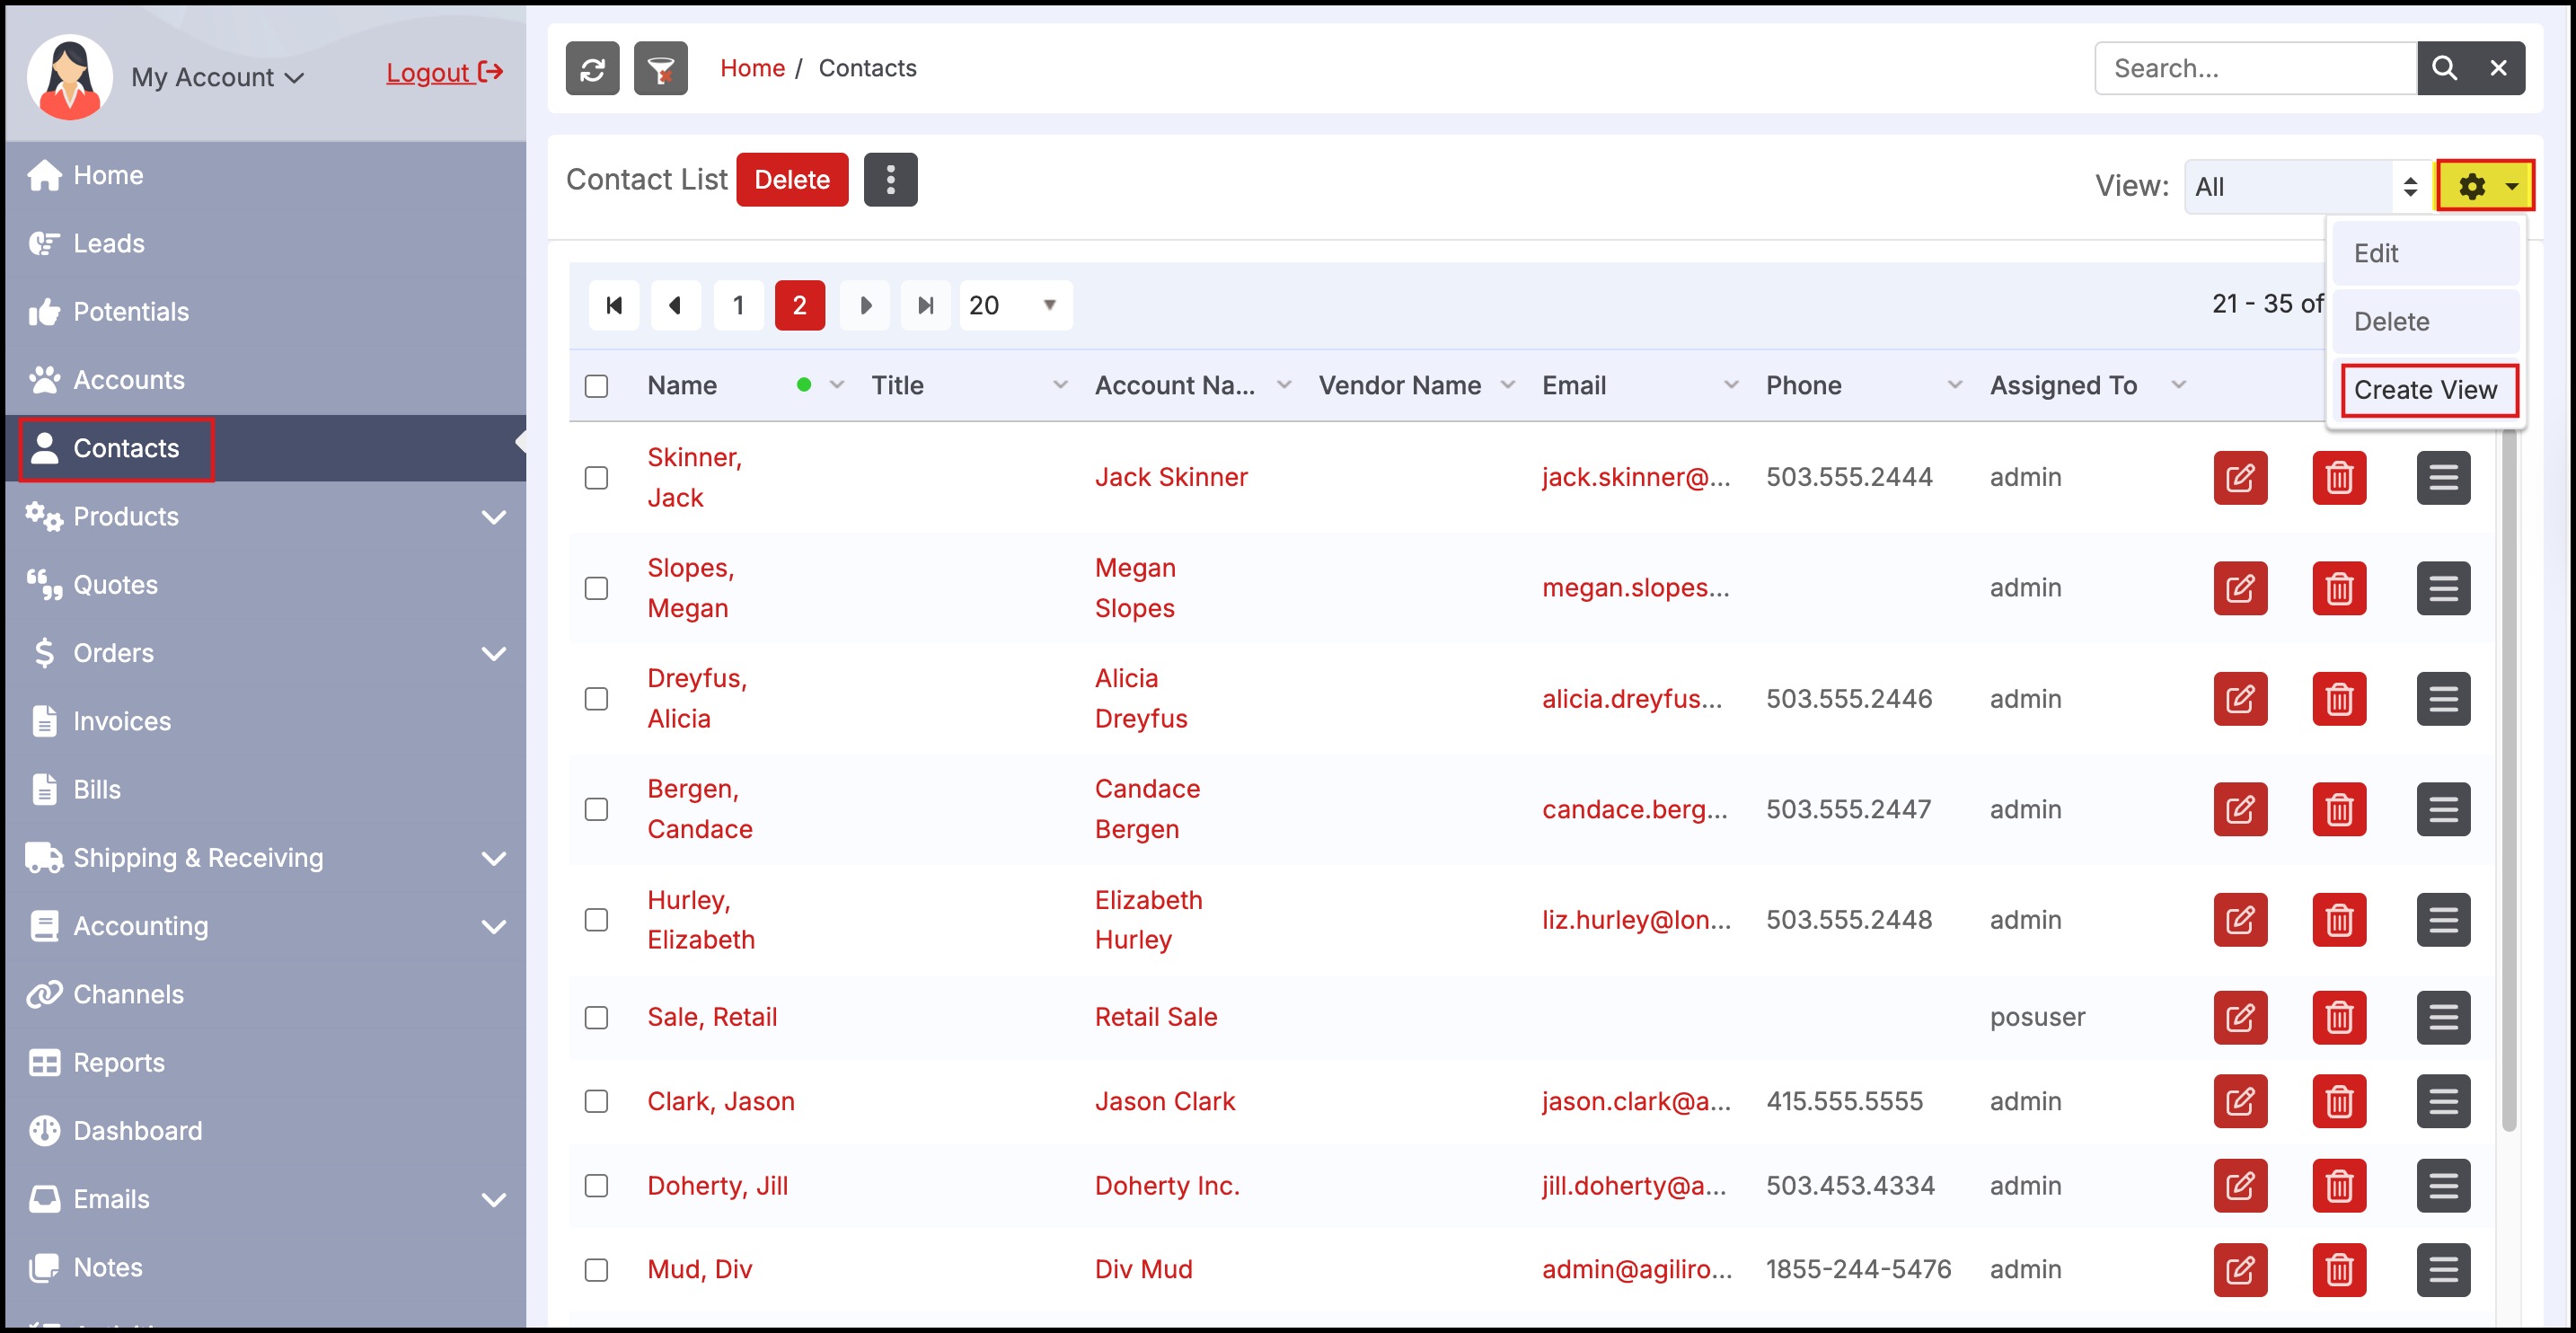
The application allows the business to automate the process of communicating with customers especially in the context of marketing campaigns targeted at specific customer groups. This section covers the process associated with marketing automation. Go to the "Contacts" tab and select the "Create View" link.
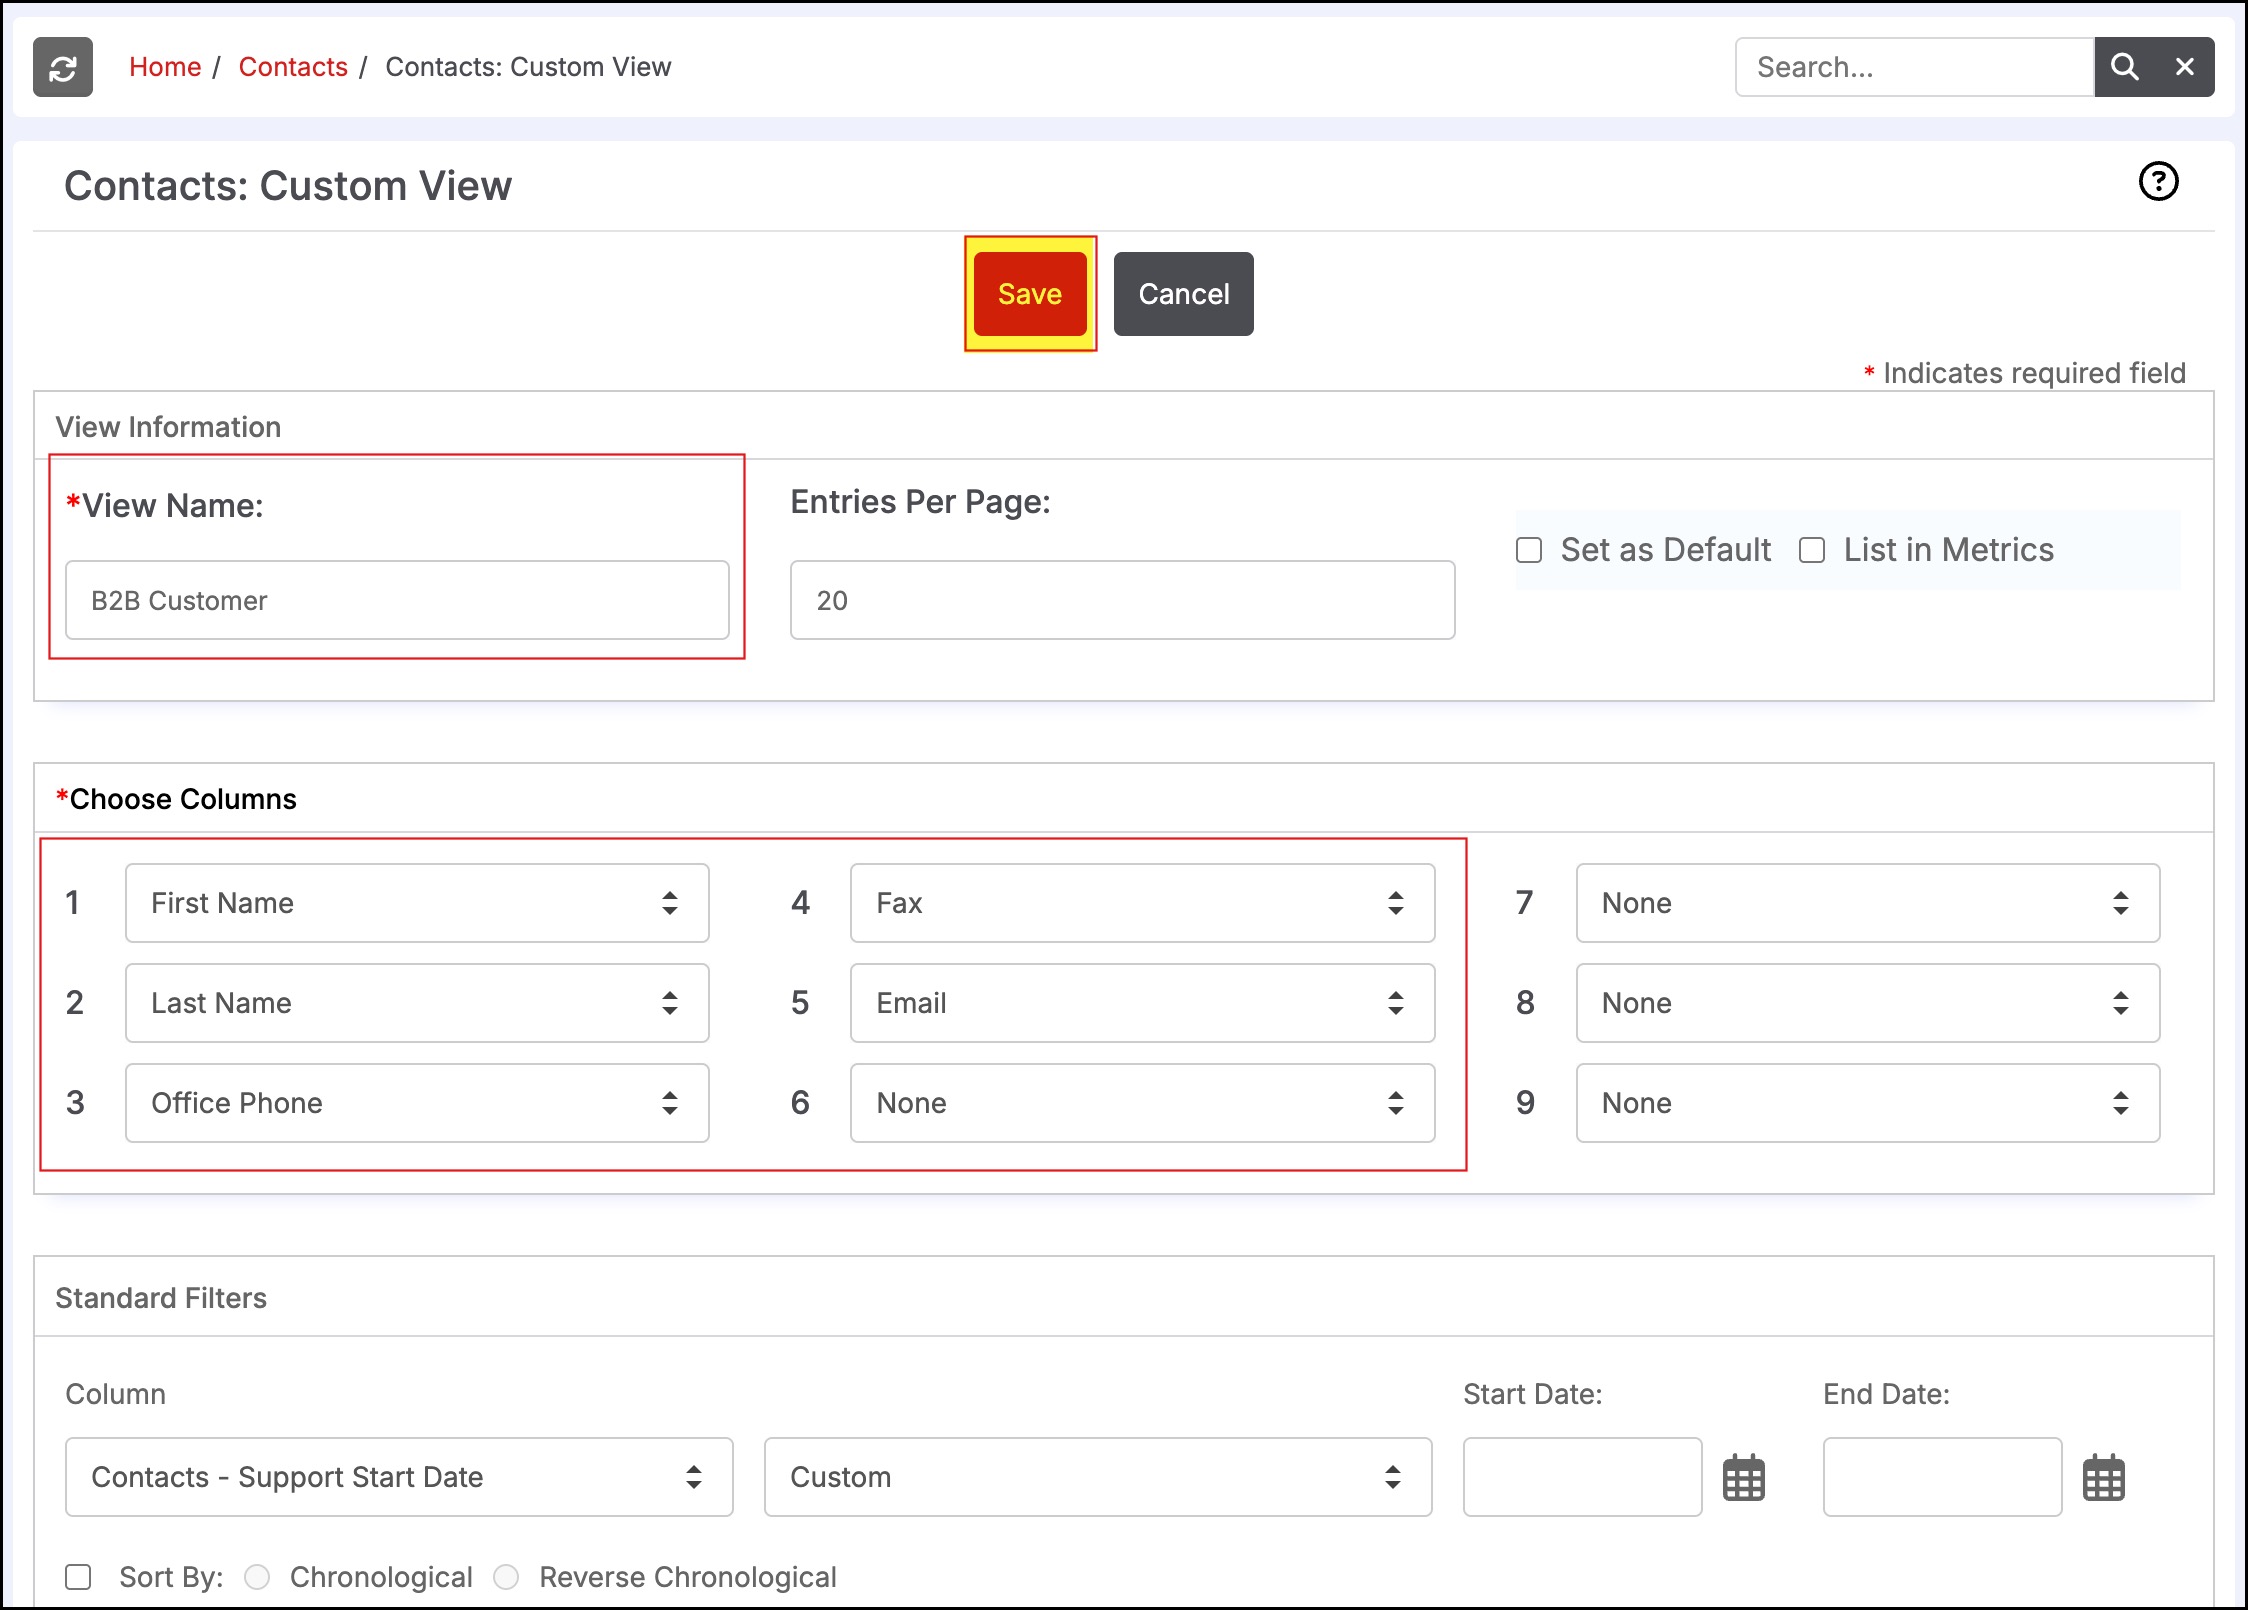
This will bring up the form shown below. Give the view a "Name", select the columns of information you would like to view associated with each Contact, and then select the necessary filters to select the relevant customer Contacts. Below, all the customer contacts that fall in the "B2B Customers" Type are selected.
- Click the "Save" button to create this view of customer contacts, this view of Contacts is now shown as below.
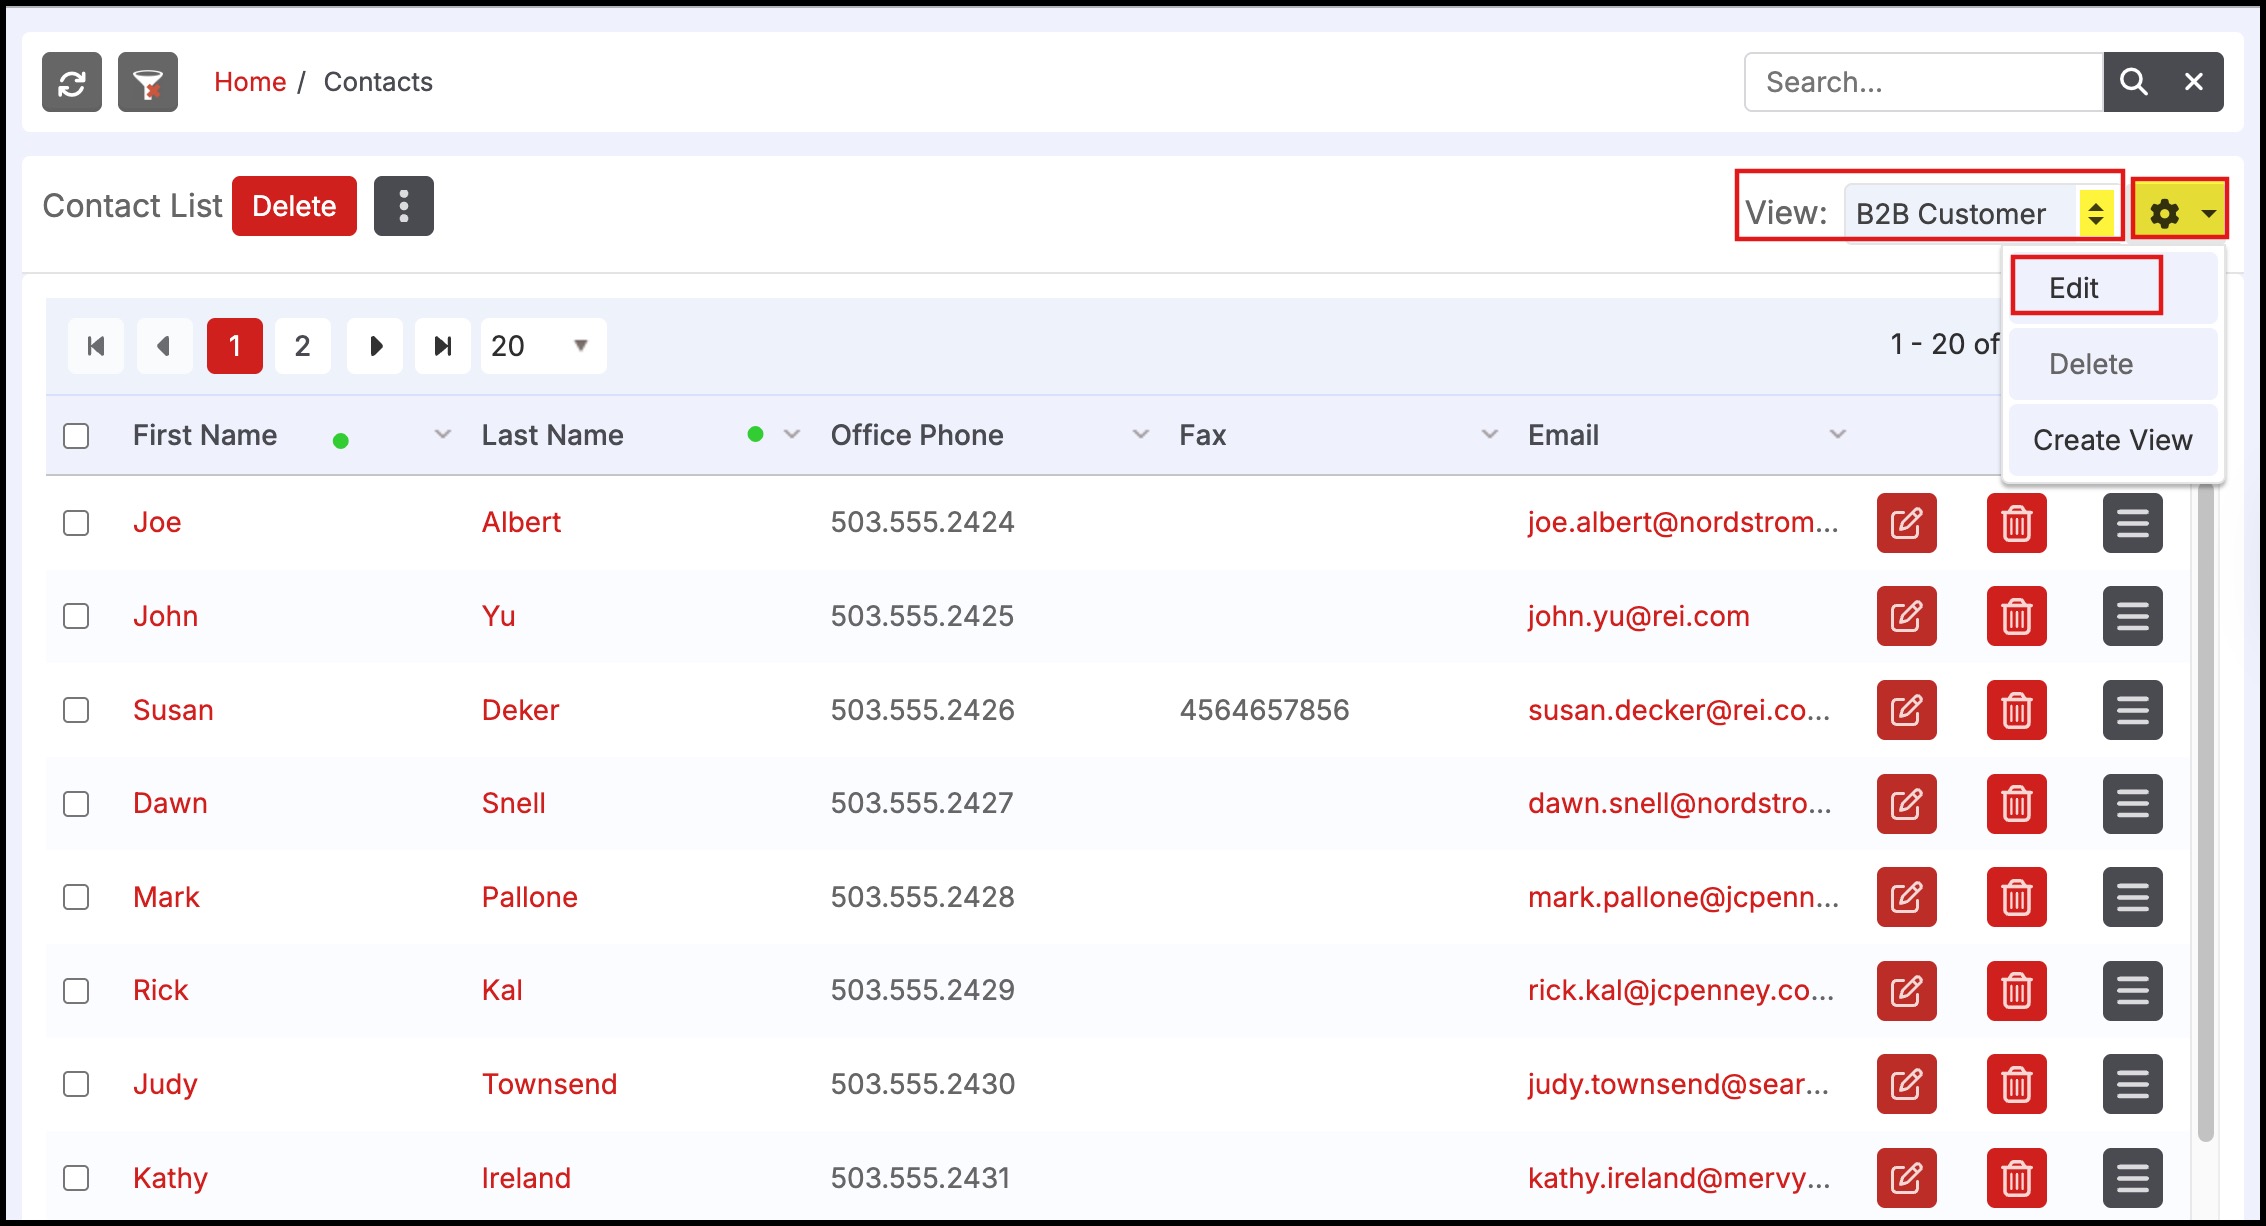
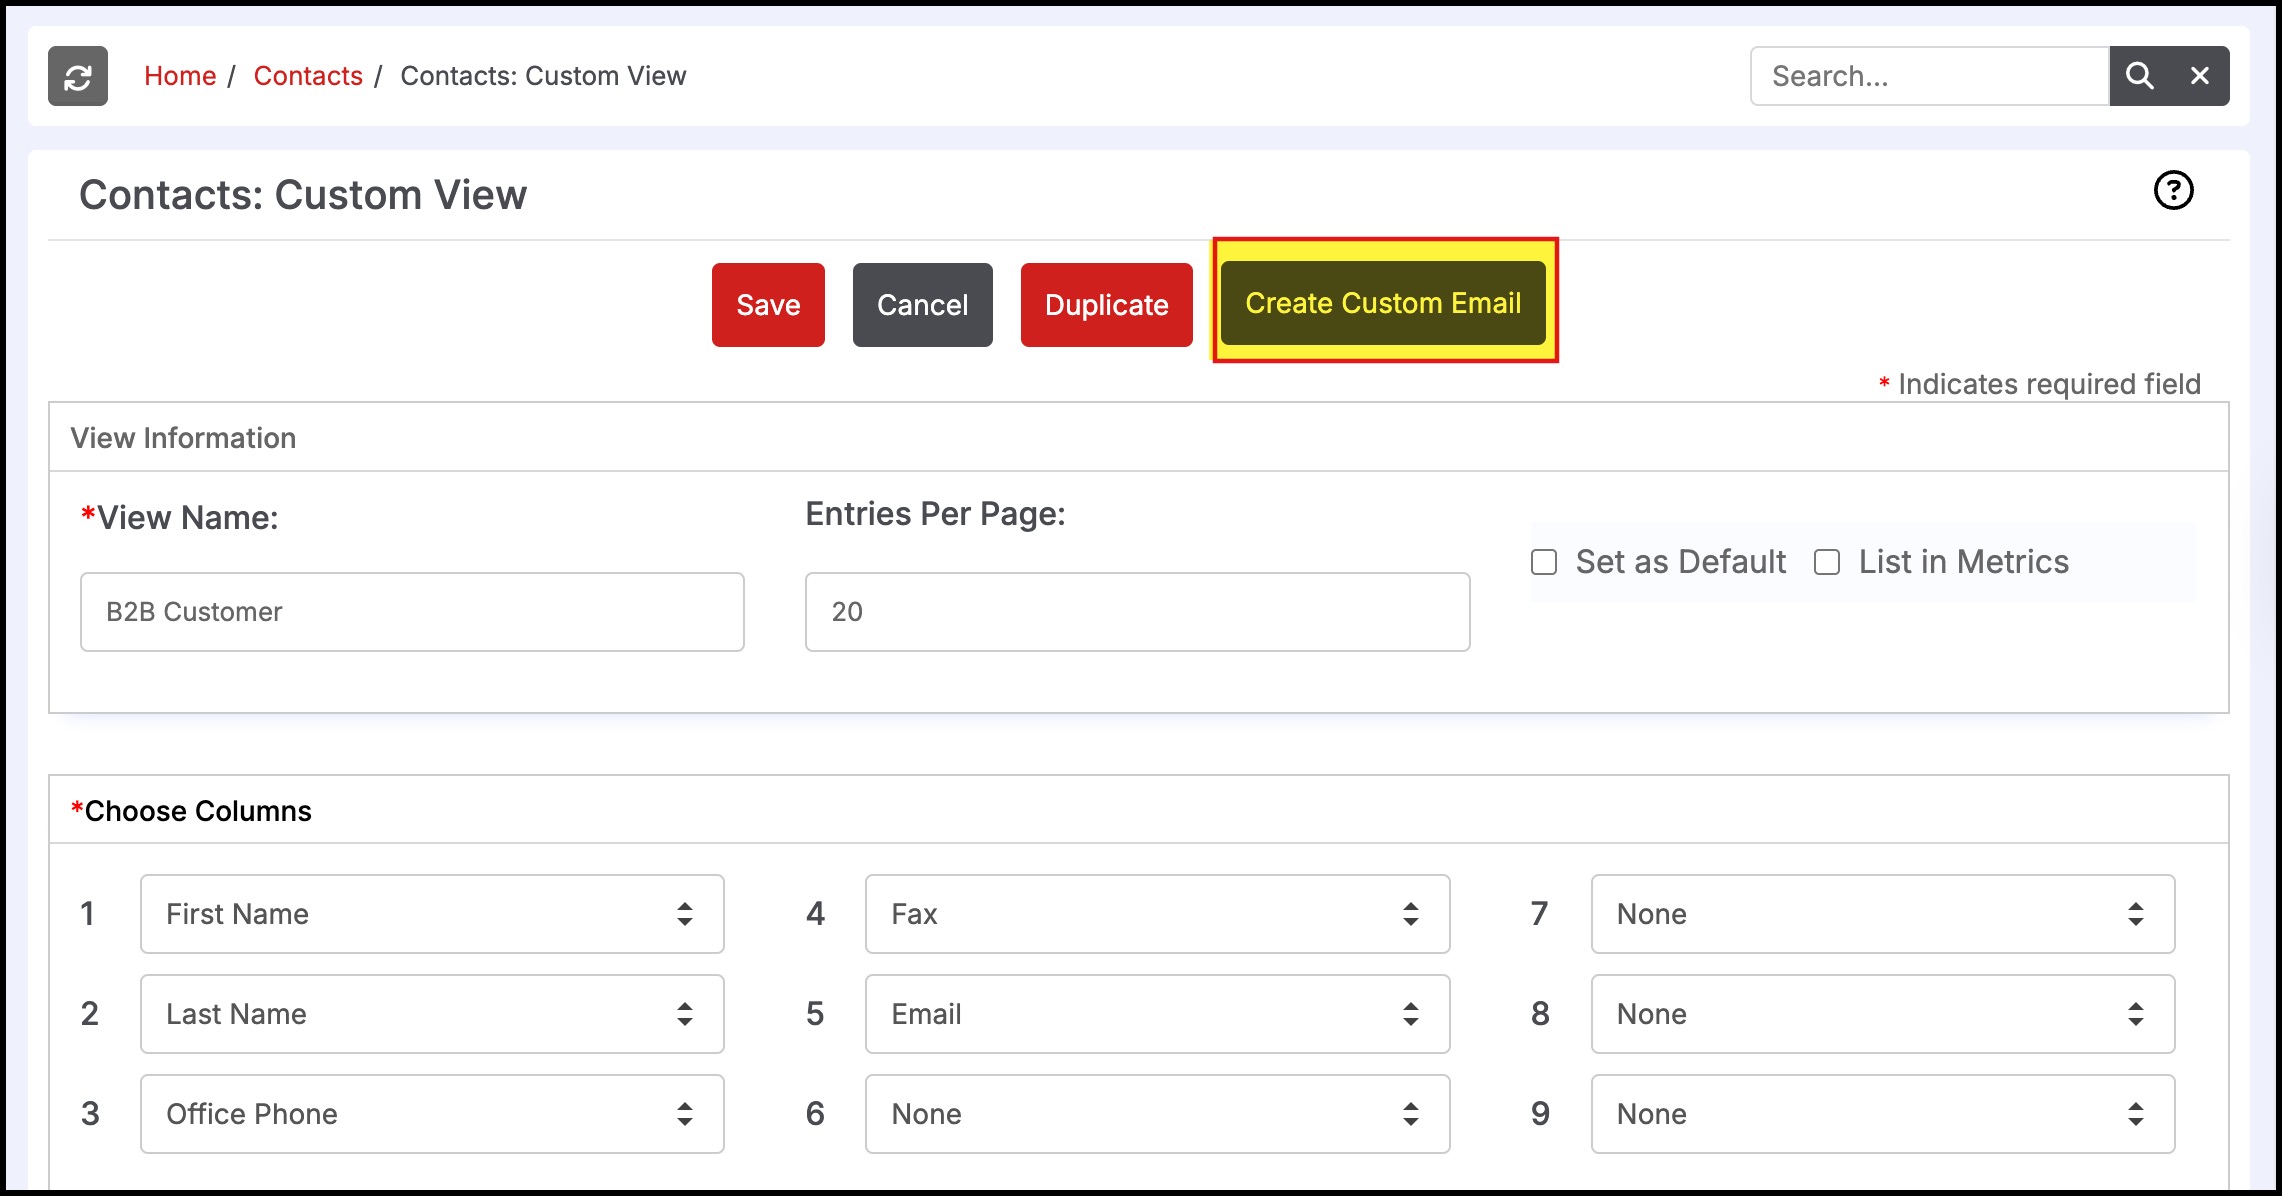
Click the "Edit" link next to the selected View. This form now includes a "Create Custom Email" button, select this
.
This brings up the editor as shown below for crafting the marketing message. In addition, the buttons presented in the "Contacts" tab for sending the email can be customized here. Check the "Use in Button Label" checkbox to customize the button label and fill in the text in the text field provided as shown below. To display the "Send All Mail" button, check the "Show Send All" box.
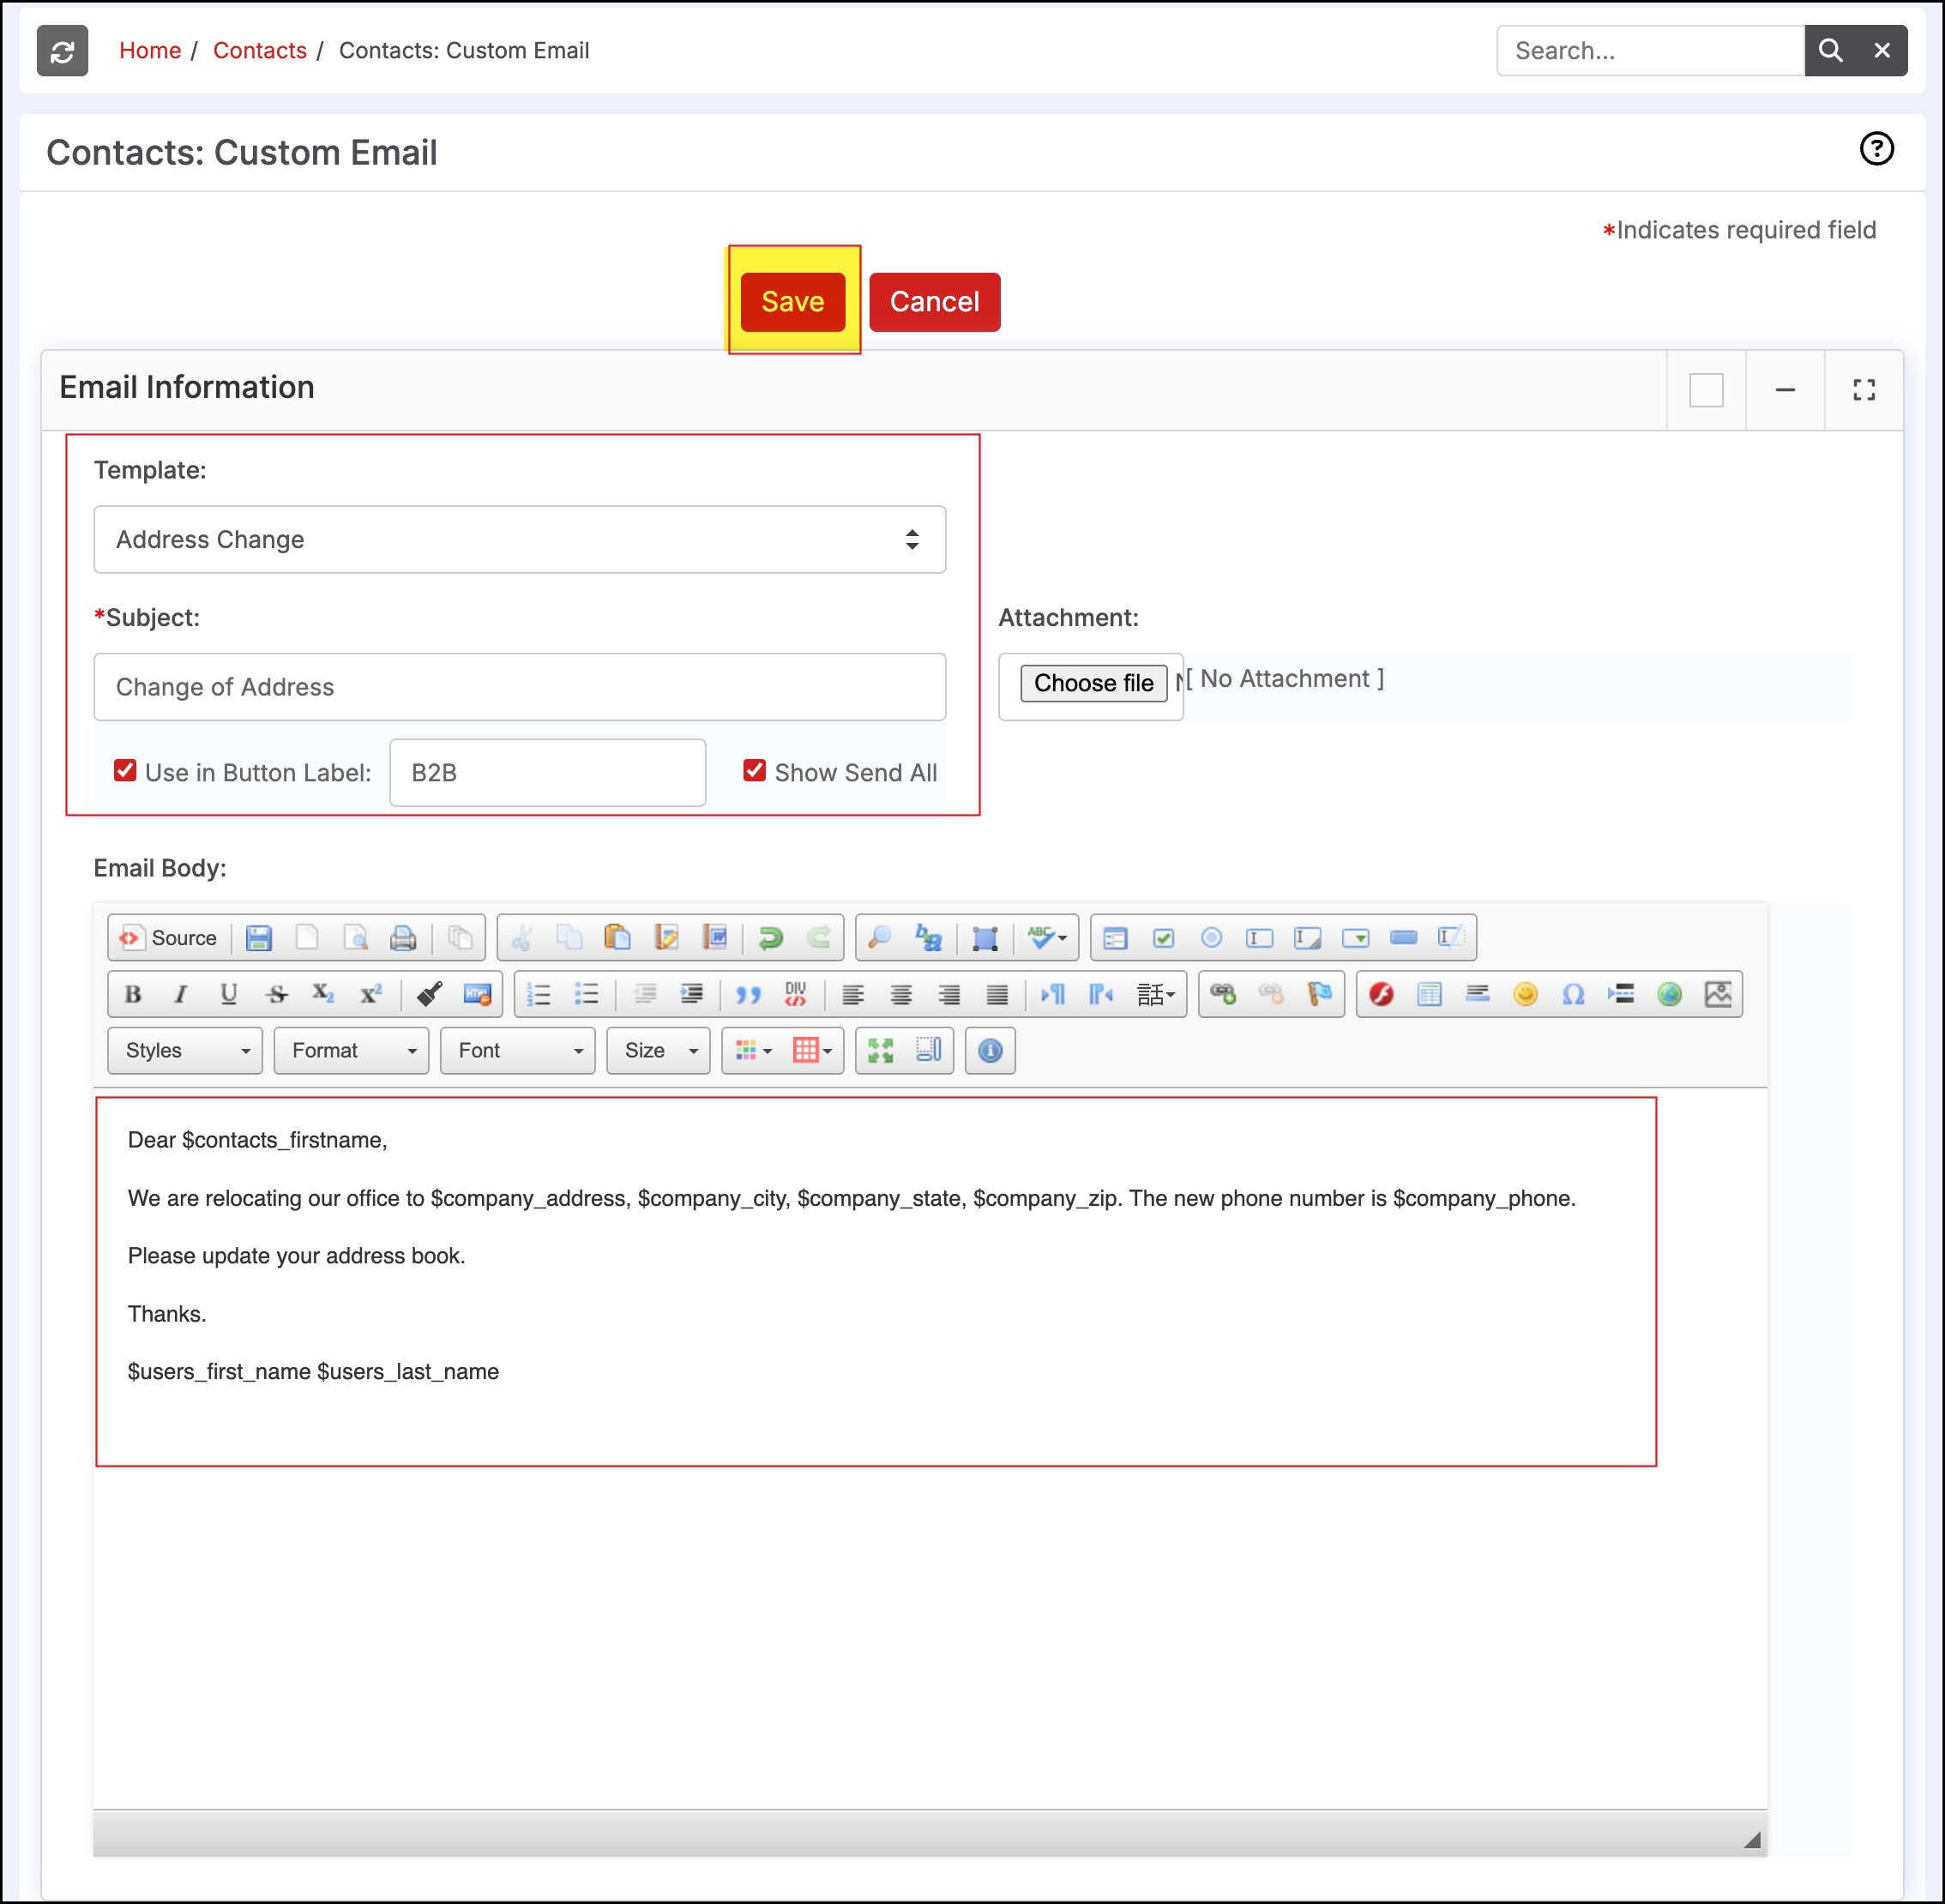
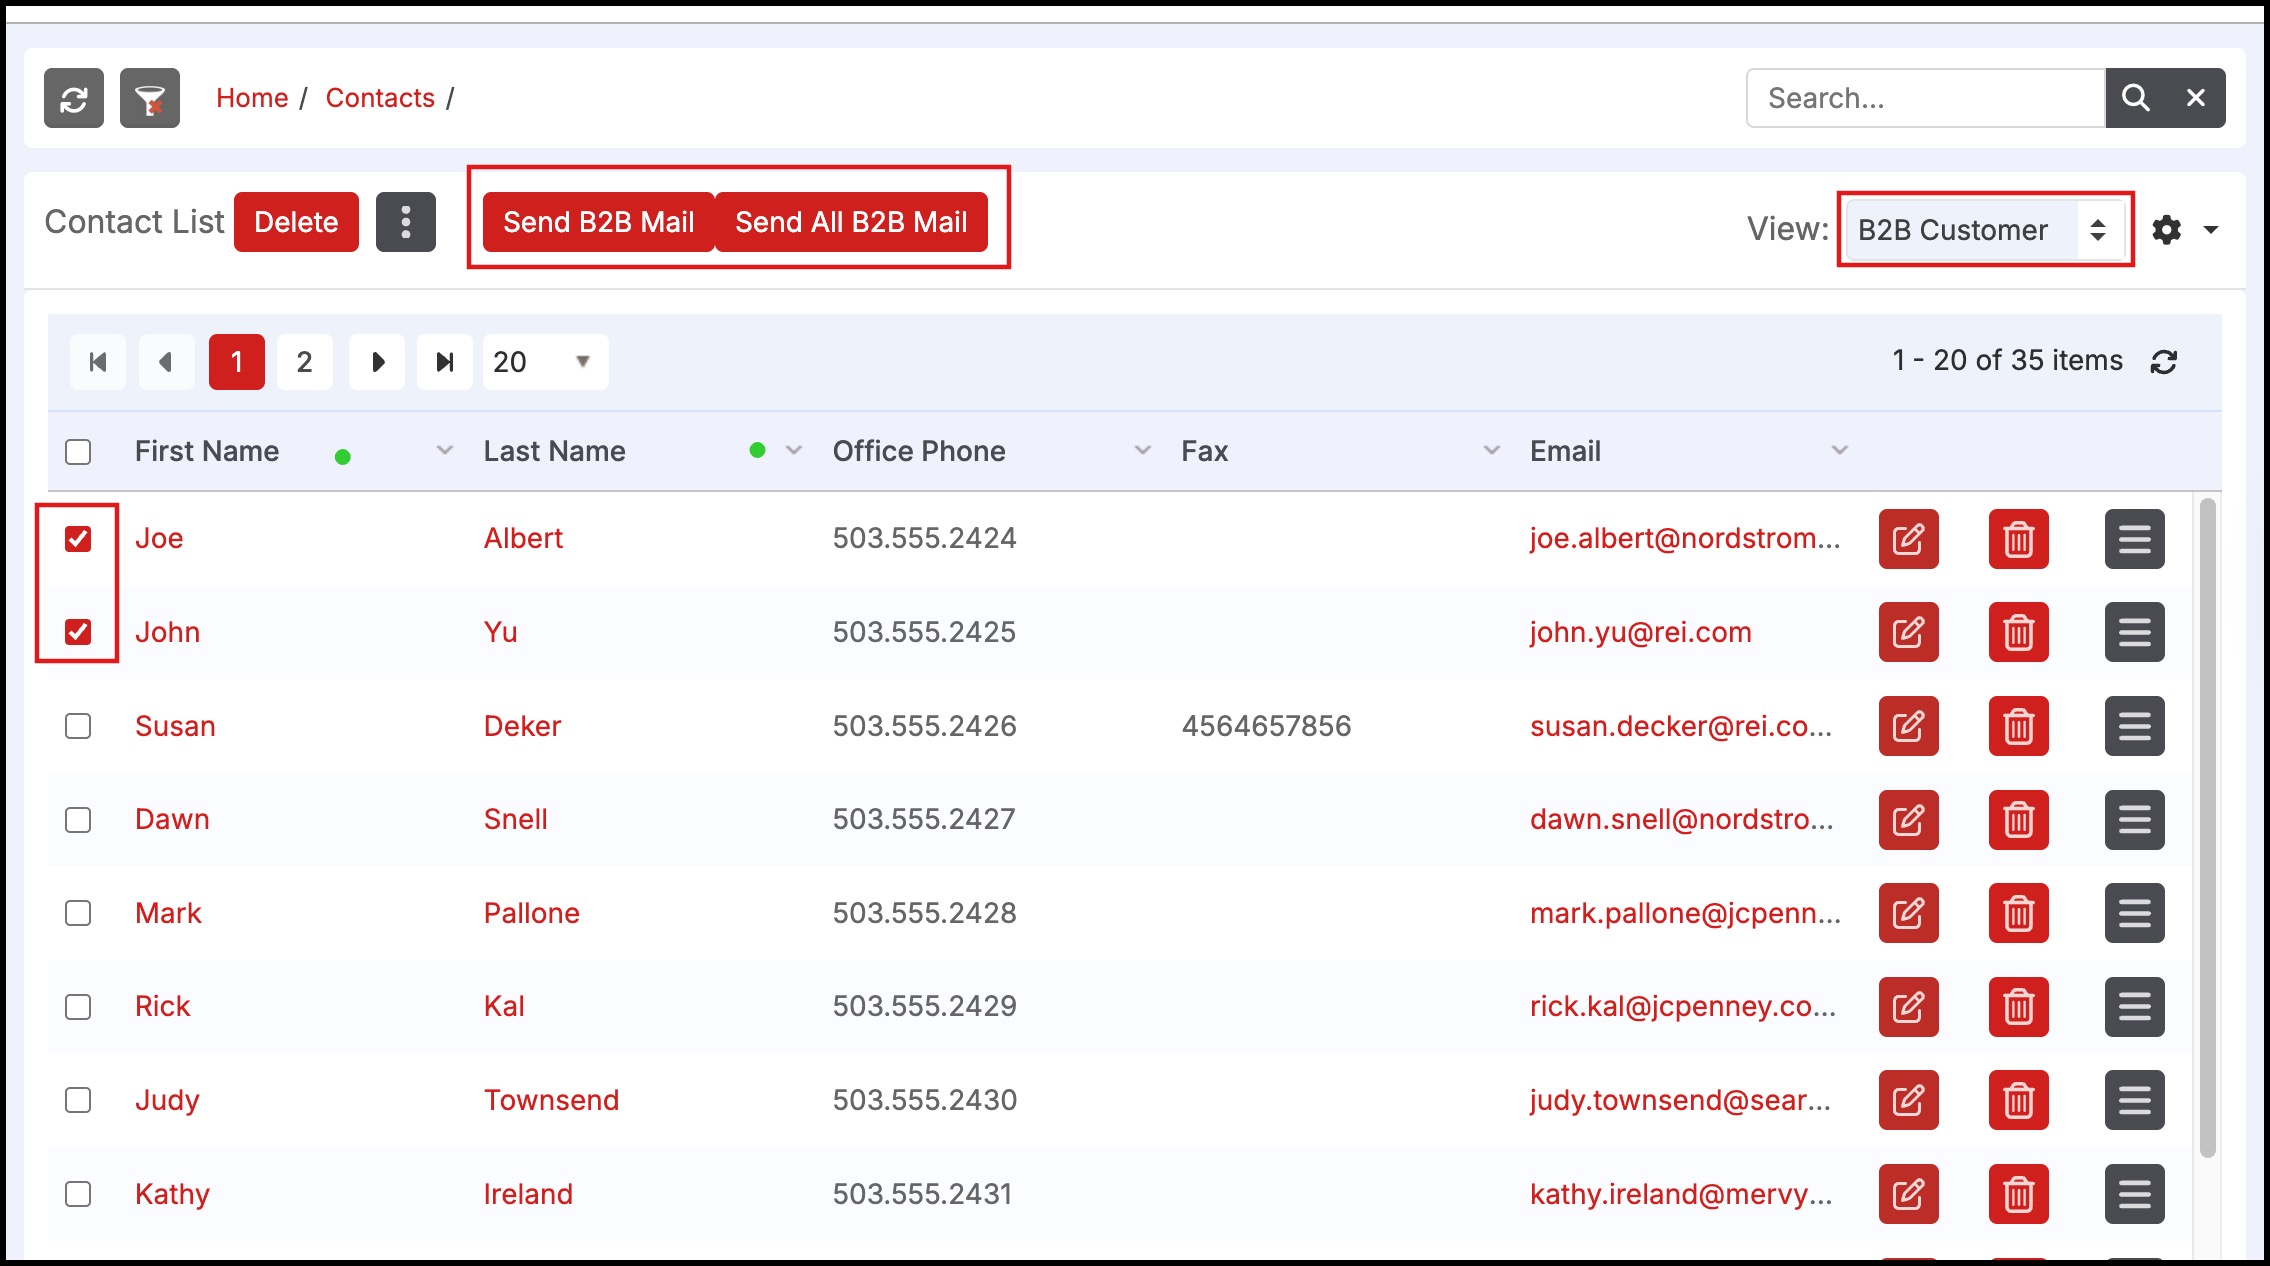
The buttons highlighted in the image above now include the button label specified. Once this message has been created and saved, the campaign can be launched by clicking the "Send B2B Mail" button as shown in the screen above. In addition, you can also send bulk email to all the contacts in that view (not just the ones shown on the first page) by clicking the "Send All B2B Mail" button.
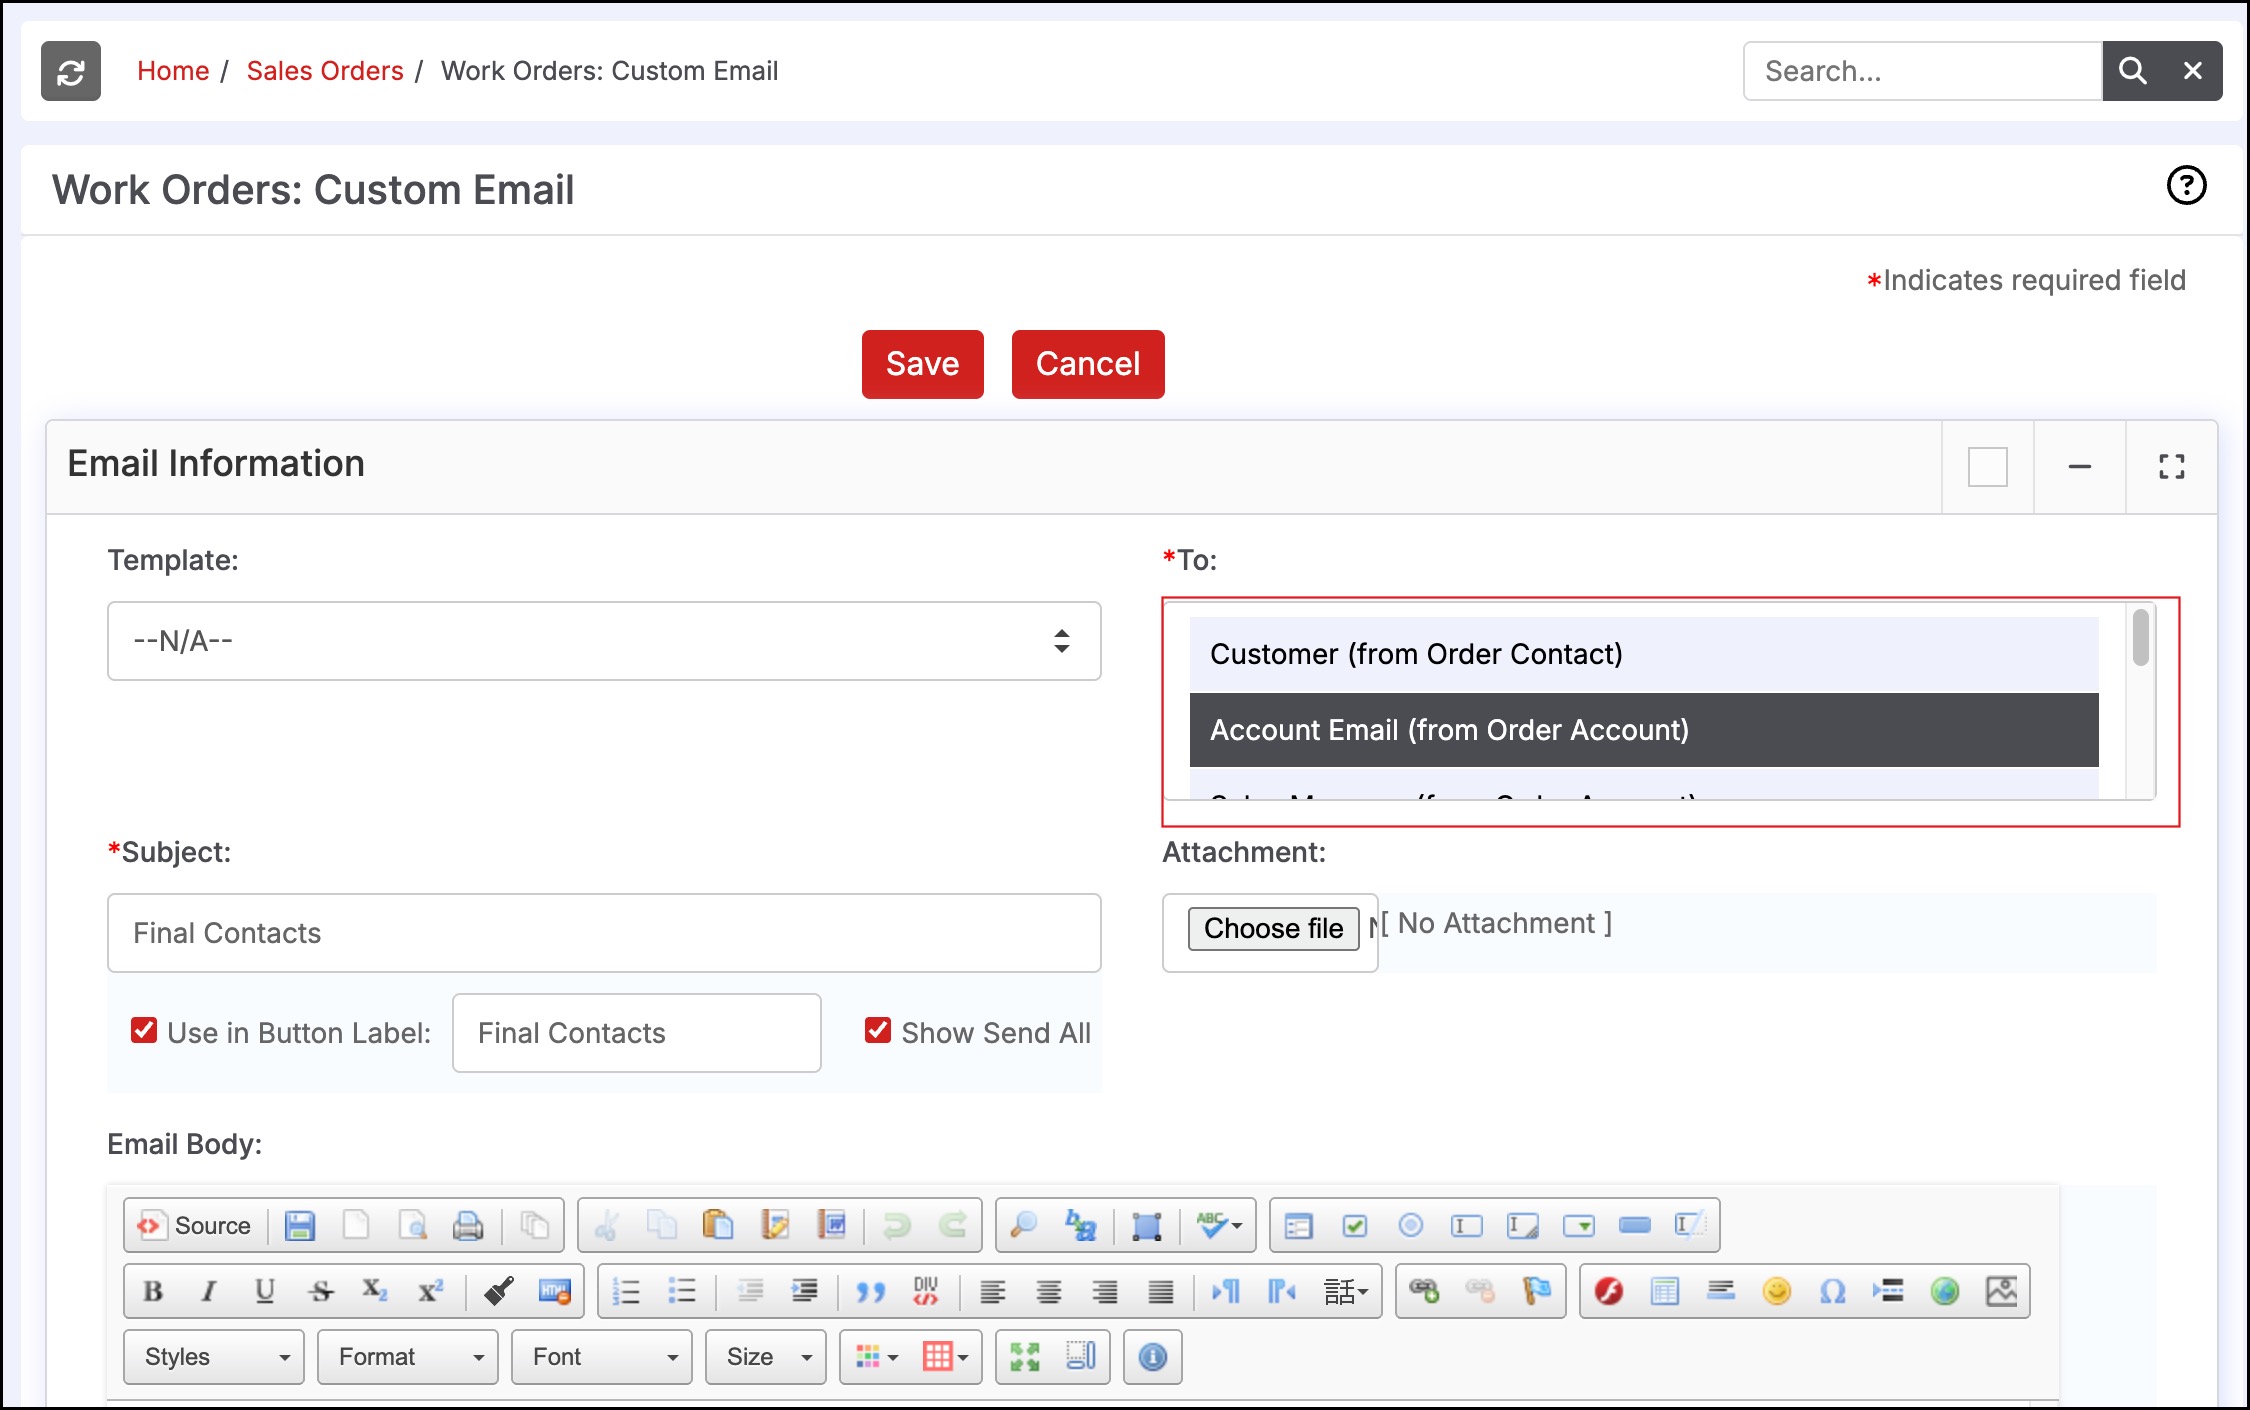
In the case of Sales Orders ("Orders" tab), it is also possible to specify additional recipients for emails sent as shown below.
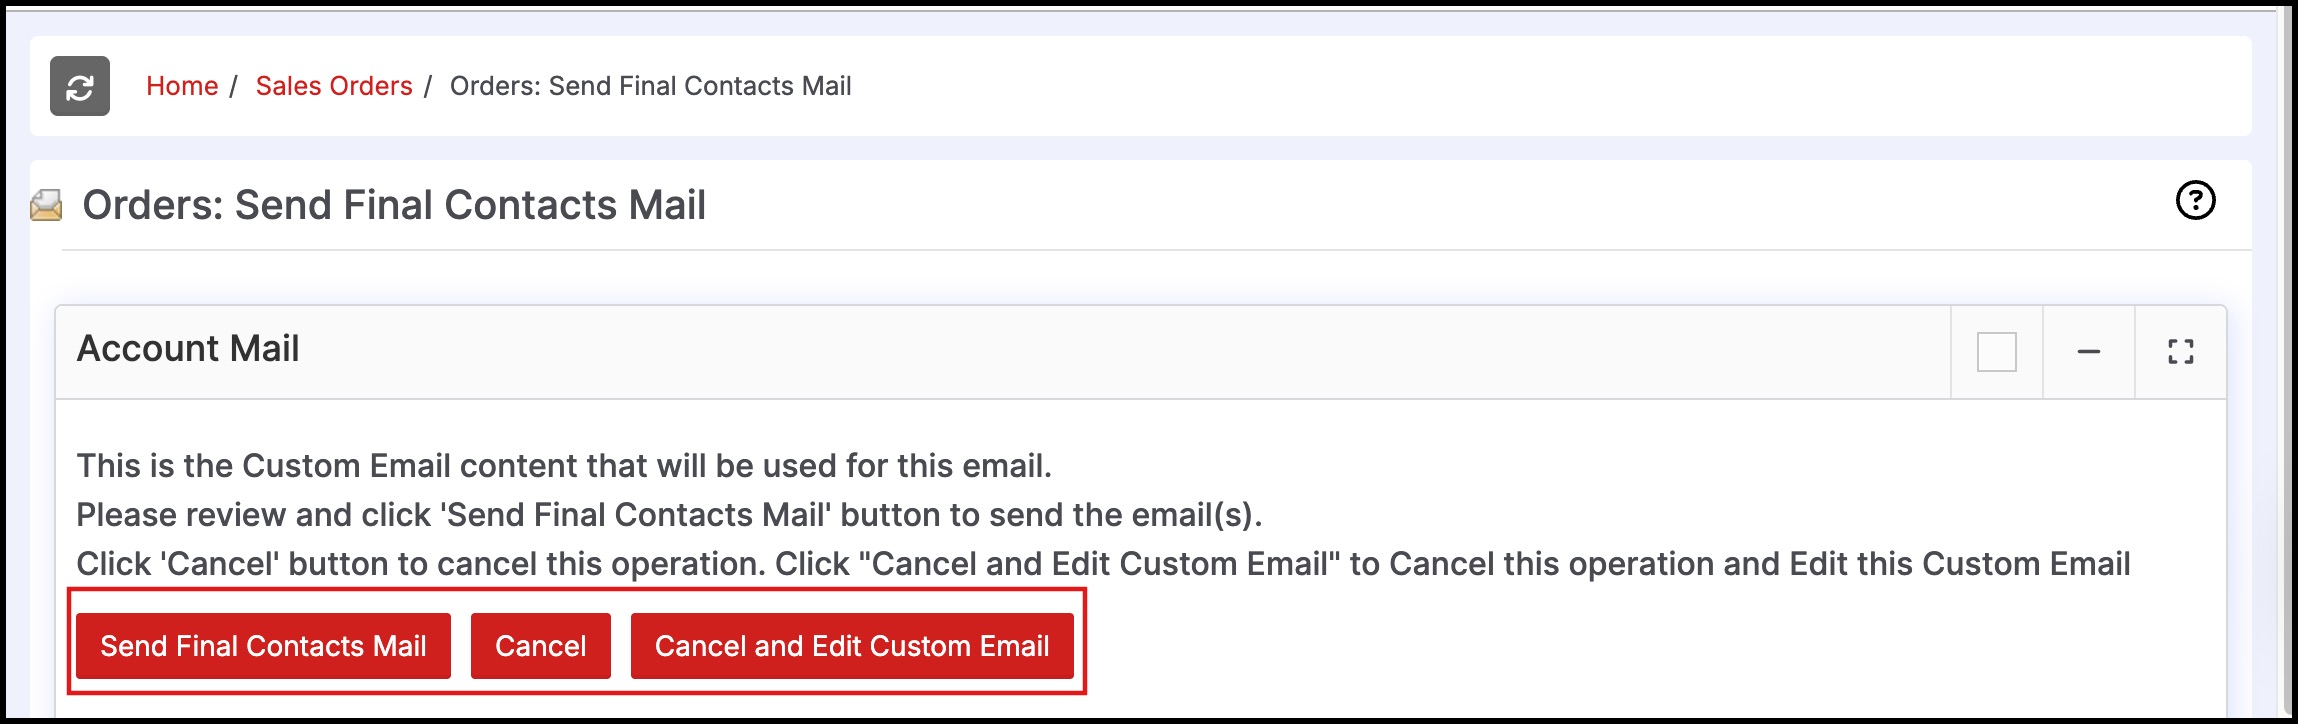
When the button is clicked to send the email to the selected/all recipients, the system generates a preview page to review the email before it is sent out.
The user can take one of the following actions on the preview screen:
- Send Mail - If the preview of the email looks good, click the "Send Mail" button to send the email to all selected recipients
- Cancel - Click the "Cancel" button to NOT send the email and return to the previous screen
- Cancel and Edit Custom Email - Click this button to NOT send the email but be taken to the email editing screen to modify the content of the email. Please note that changes made to the content email are saved for the custom view (not just for this email) so it is available the next time you choose to use it.
Updated 3 months ago