Receive Orders - Add Image and Add Signature
While receiving orders in the cross-platform warehouse app, you can also add one or more pictures related to the particular product. Also, you can add a signature.
- When you select Receive workflow,
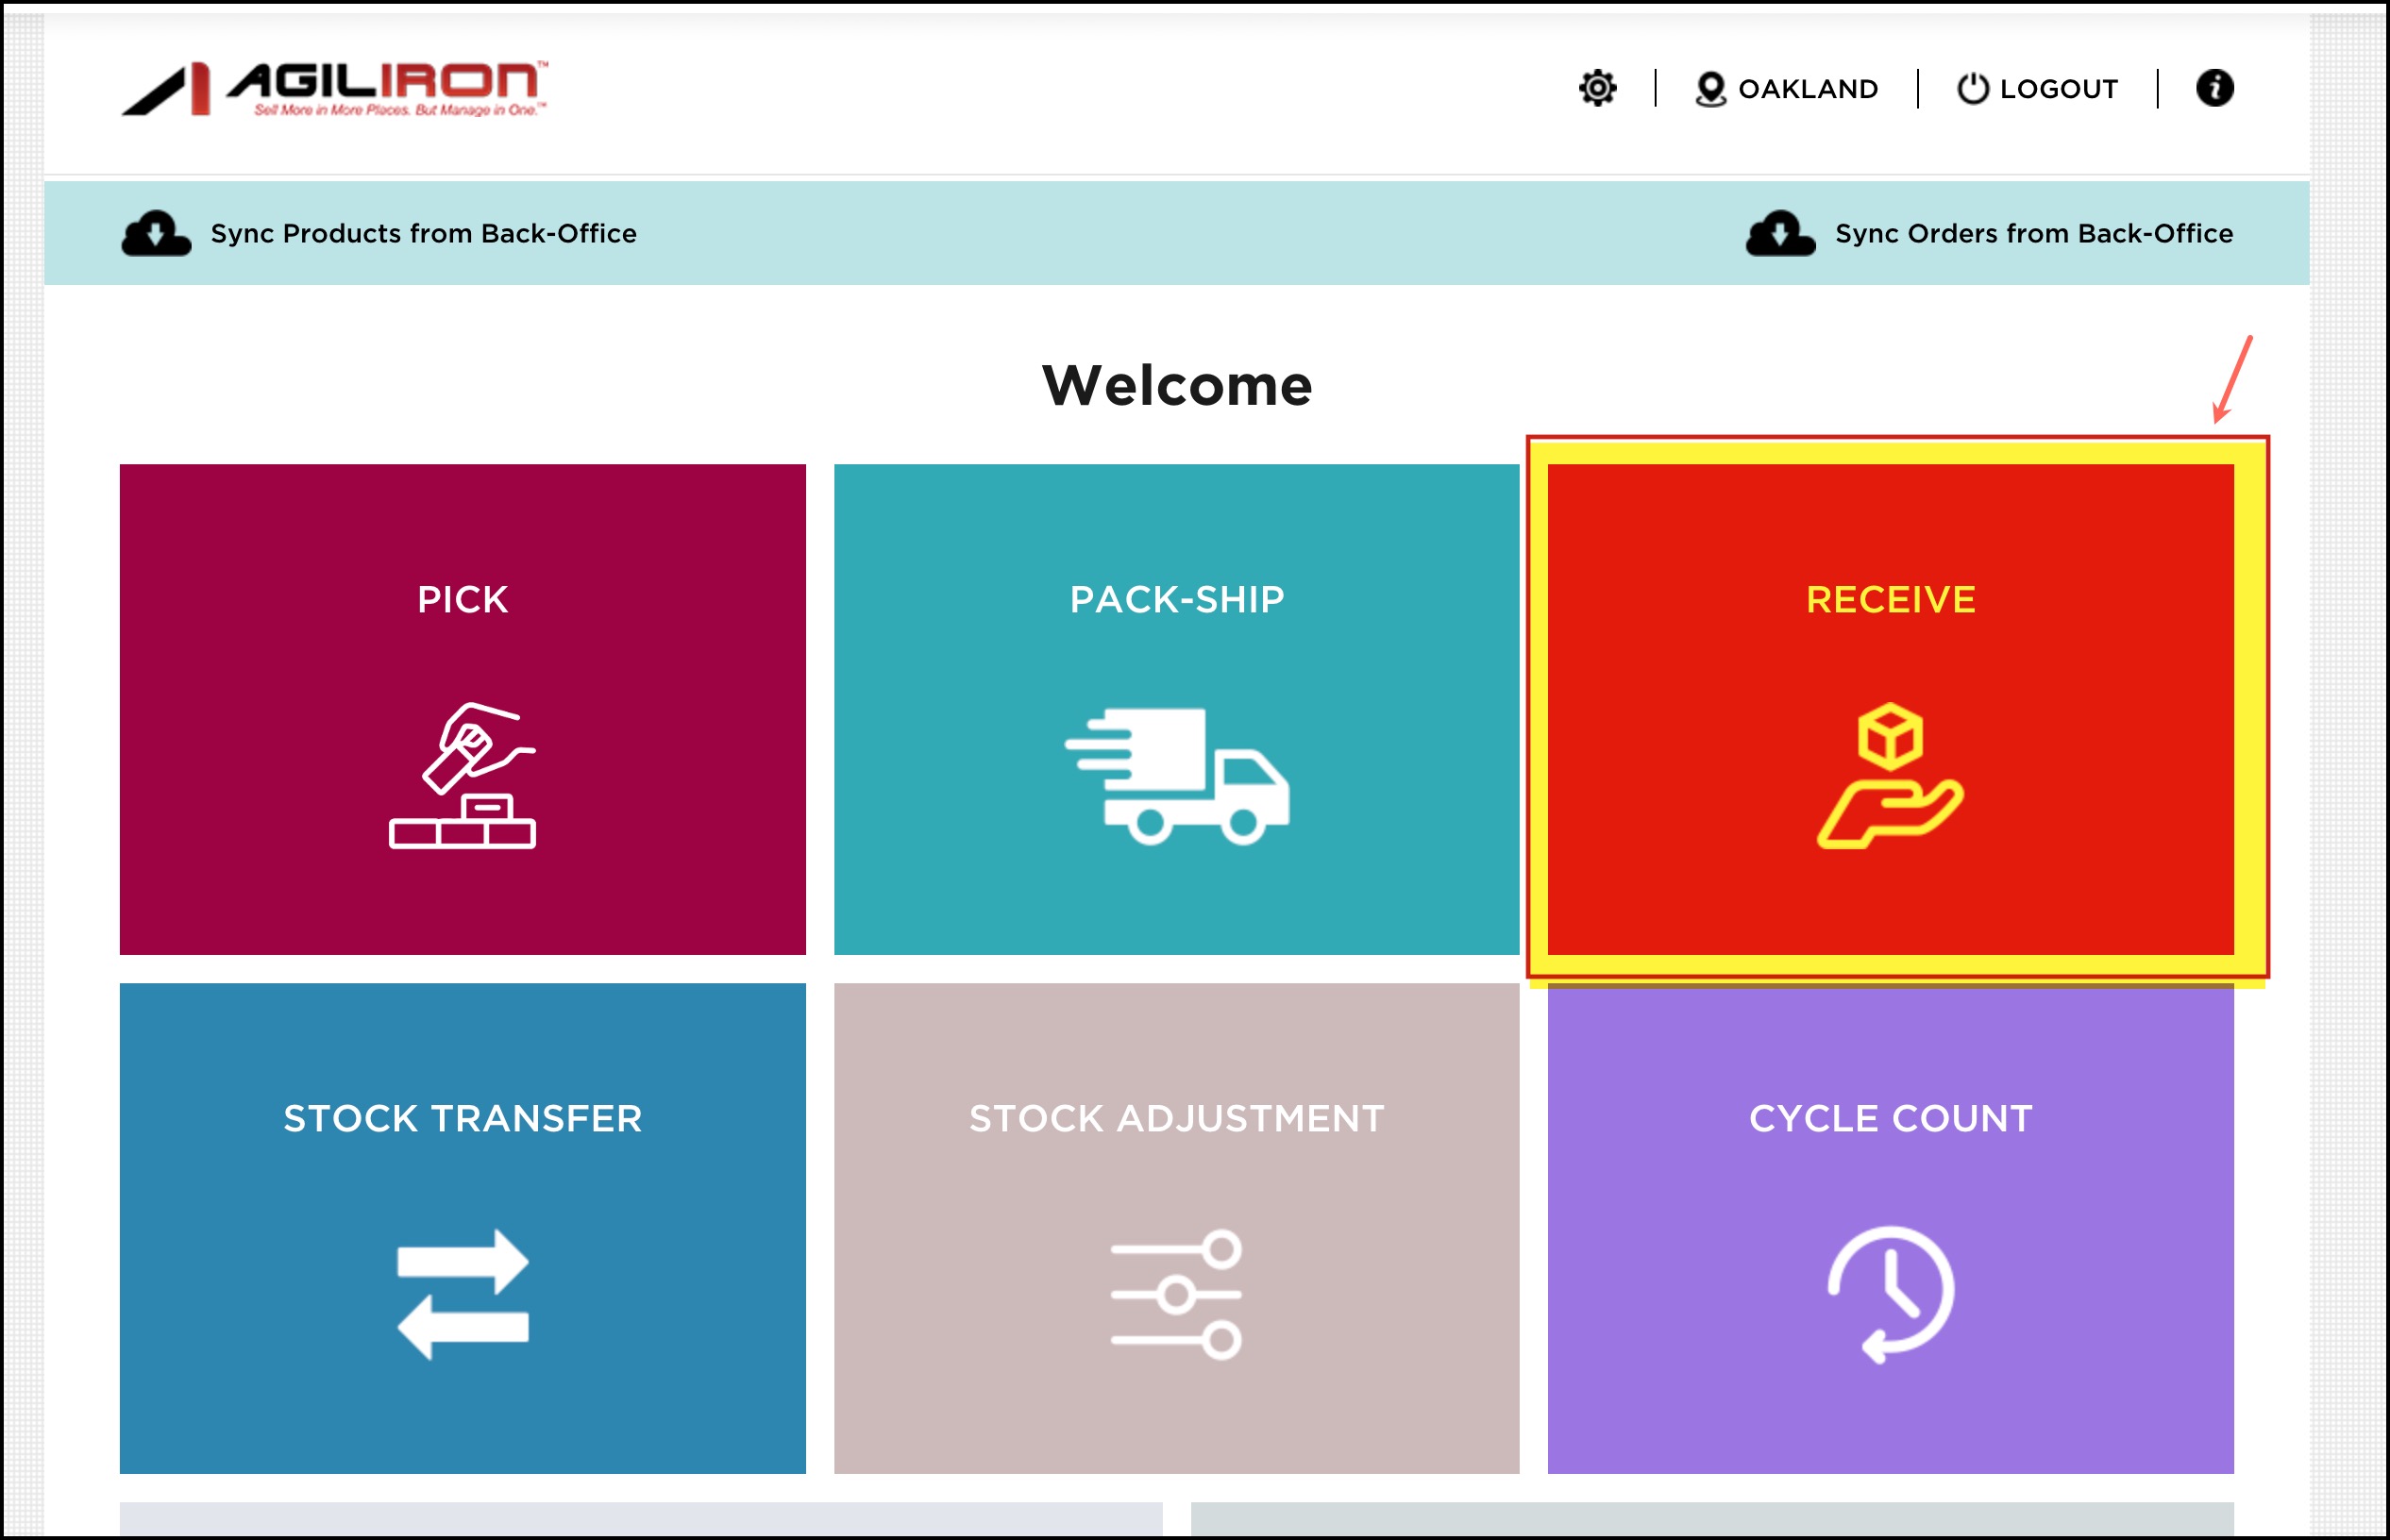
- Click on the necessary order and then the product.

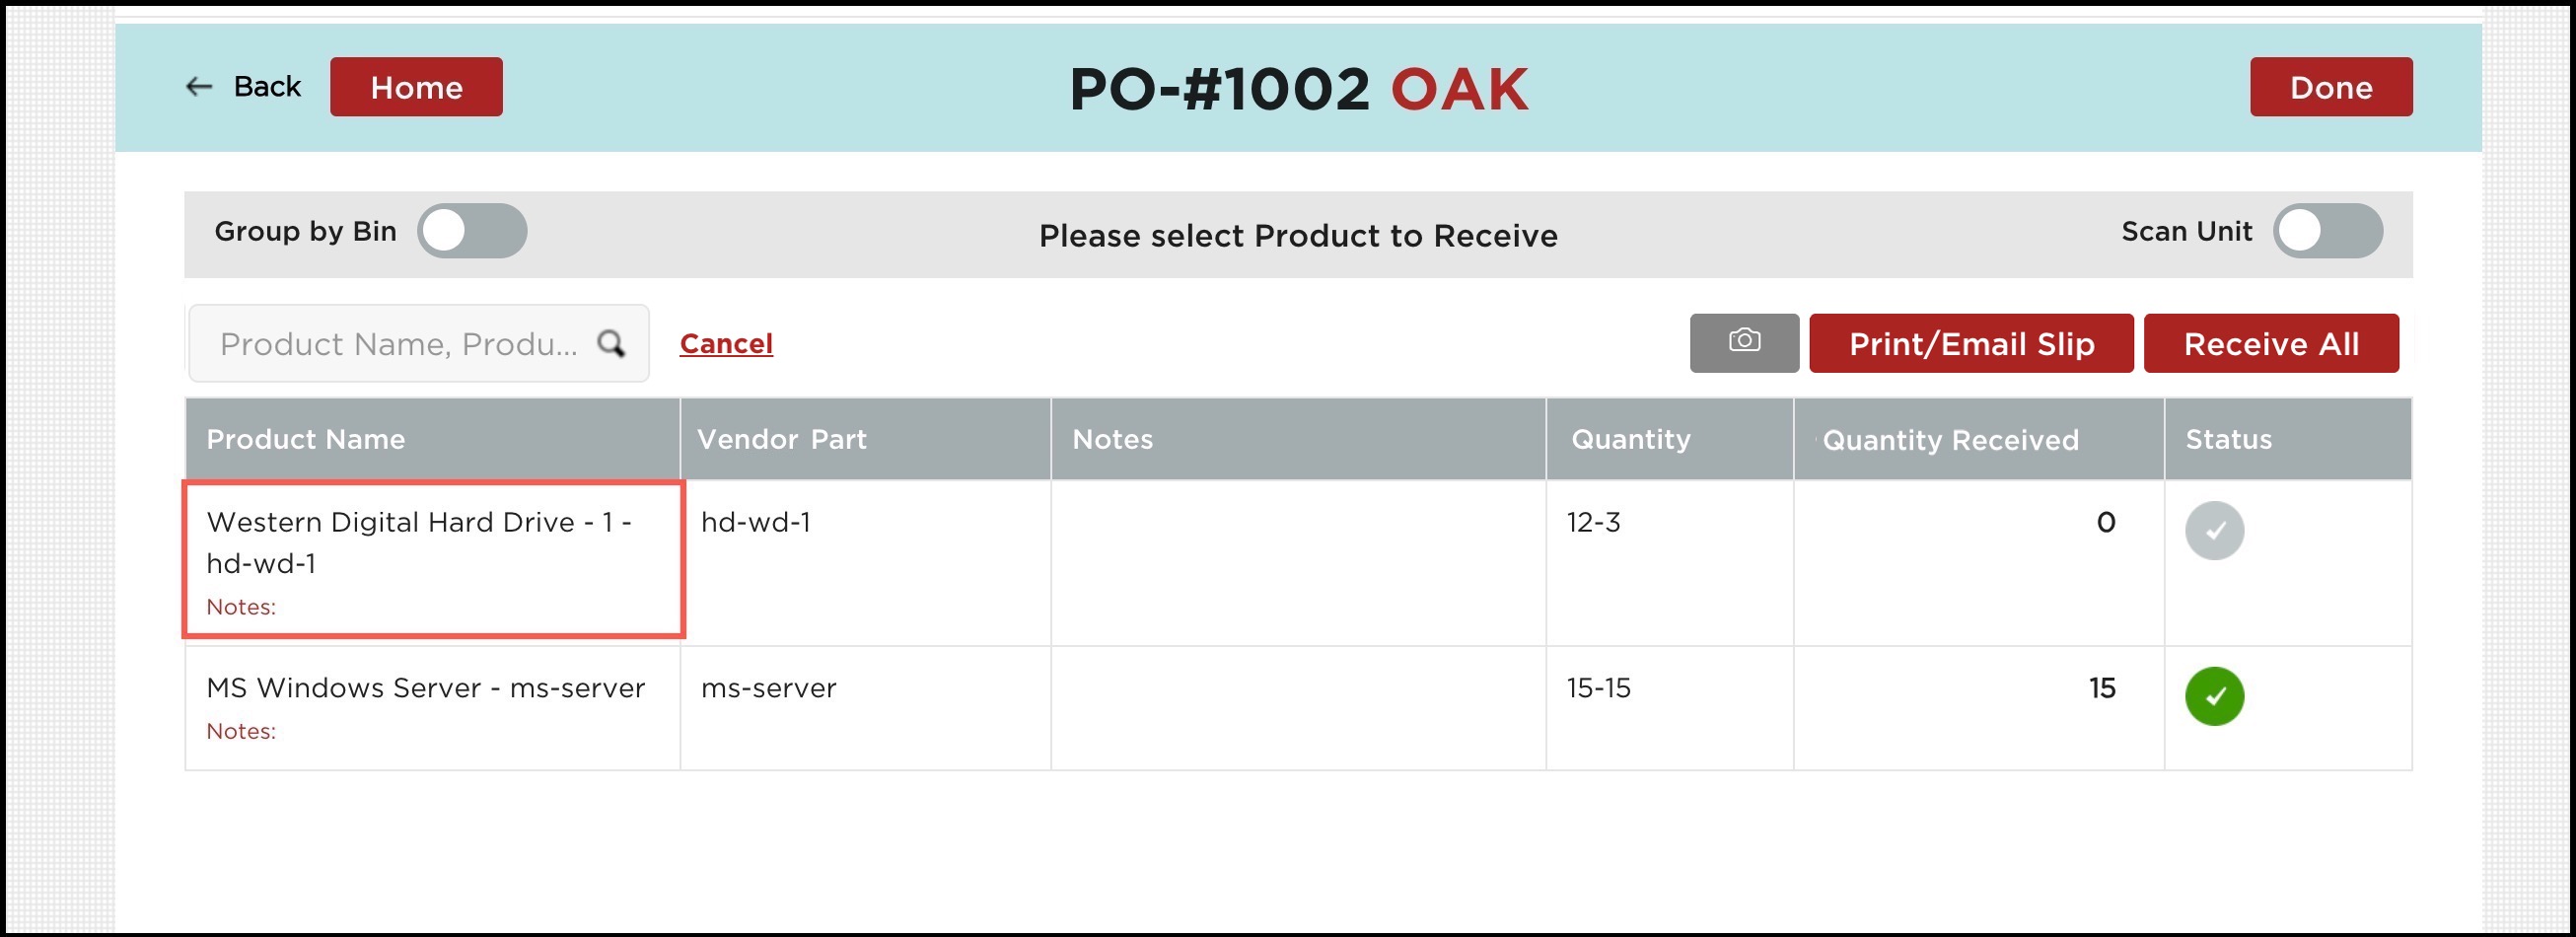
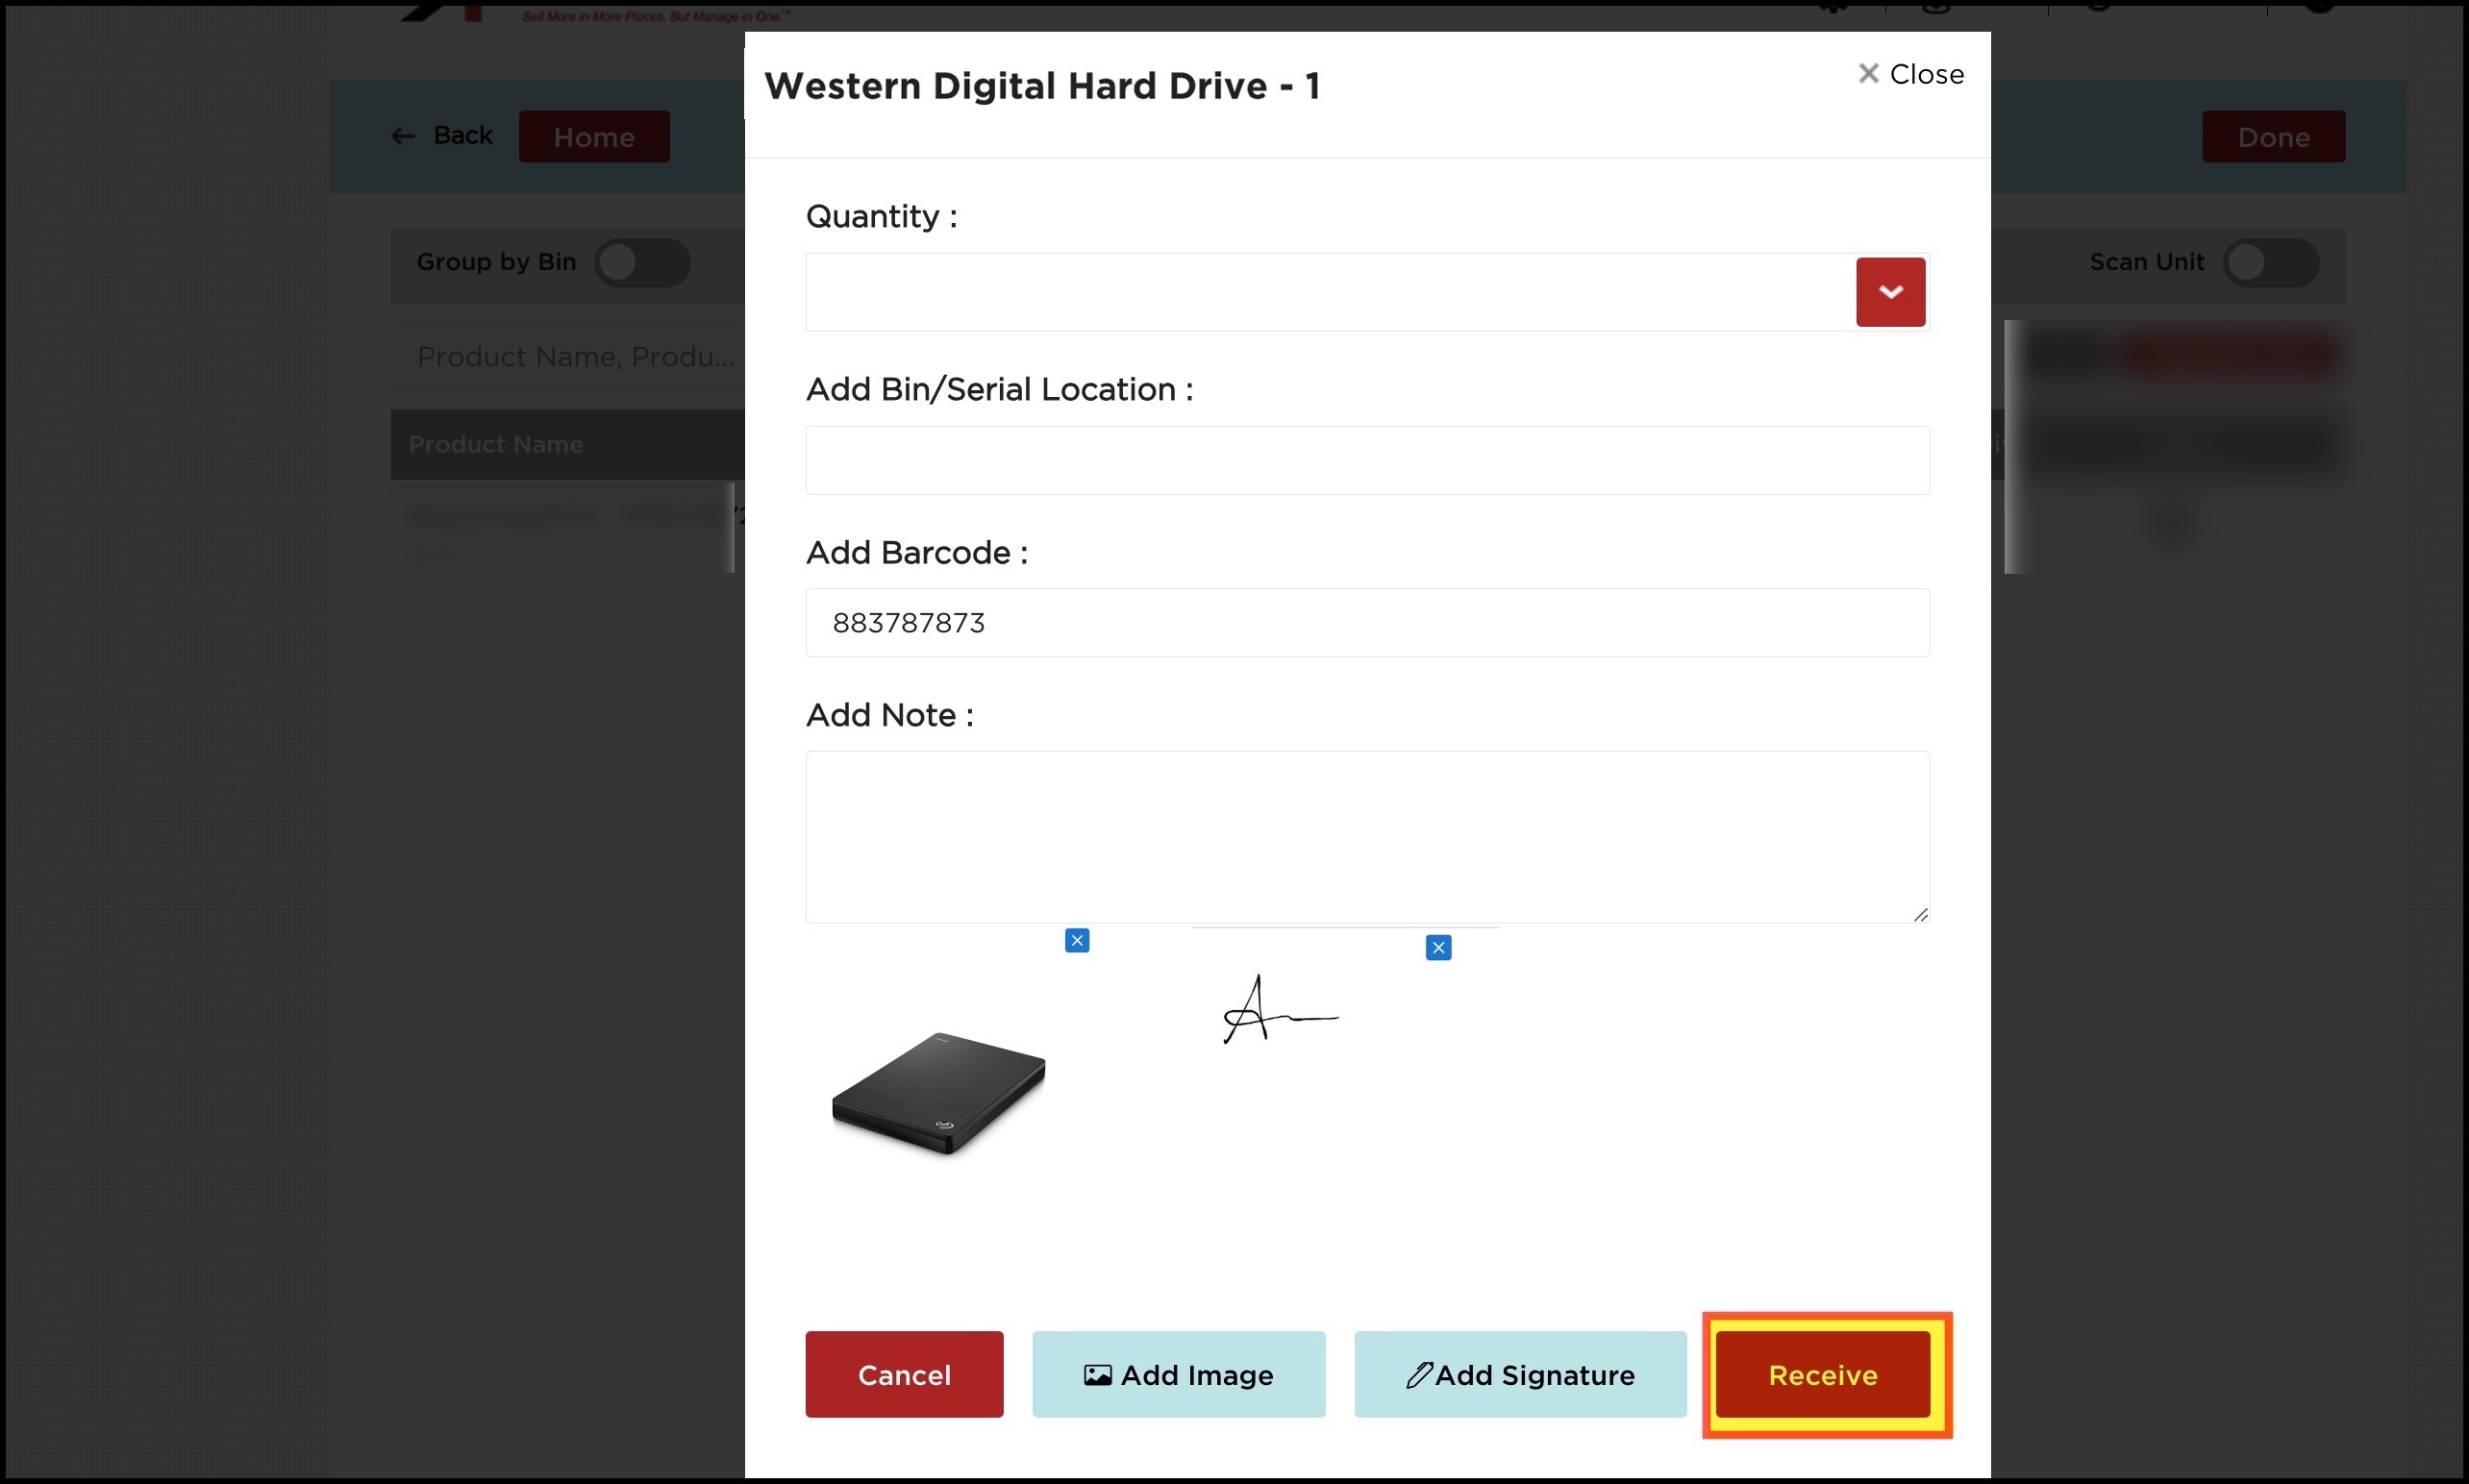
- When the scan units are disabled after selecting the product, you can see a black pop-up screen where, in addition to entering the quantity, notes, and bin location, you can add one or more product images and a signature.
Note - Add Image and Add Signature options are also available when you group products by Bin or SKU.
Add Picture
- To add pictures, click on Add Image button.
- You can either select the Open camera option - click an image using your device camera, and upload.
or
- Select Gallery option - pick image from your device.
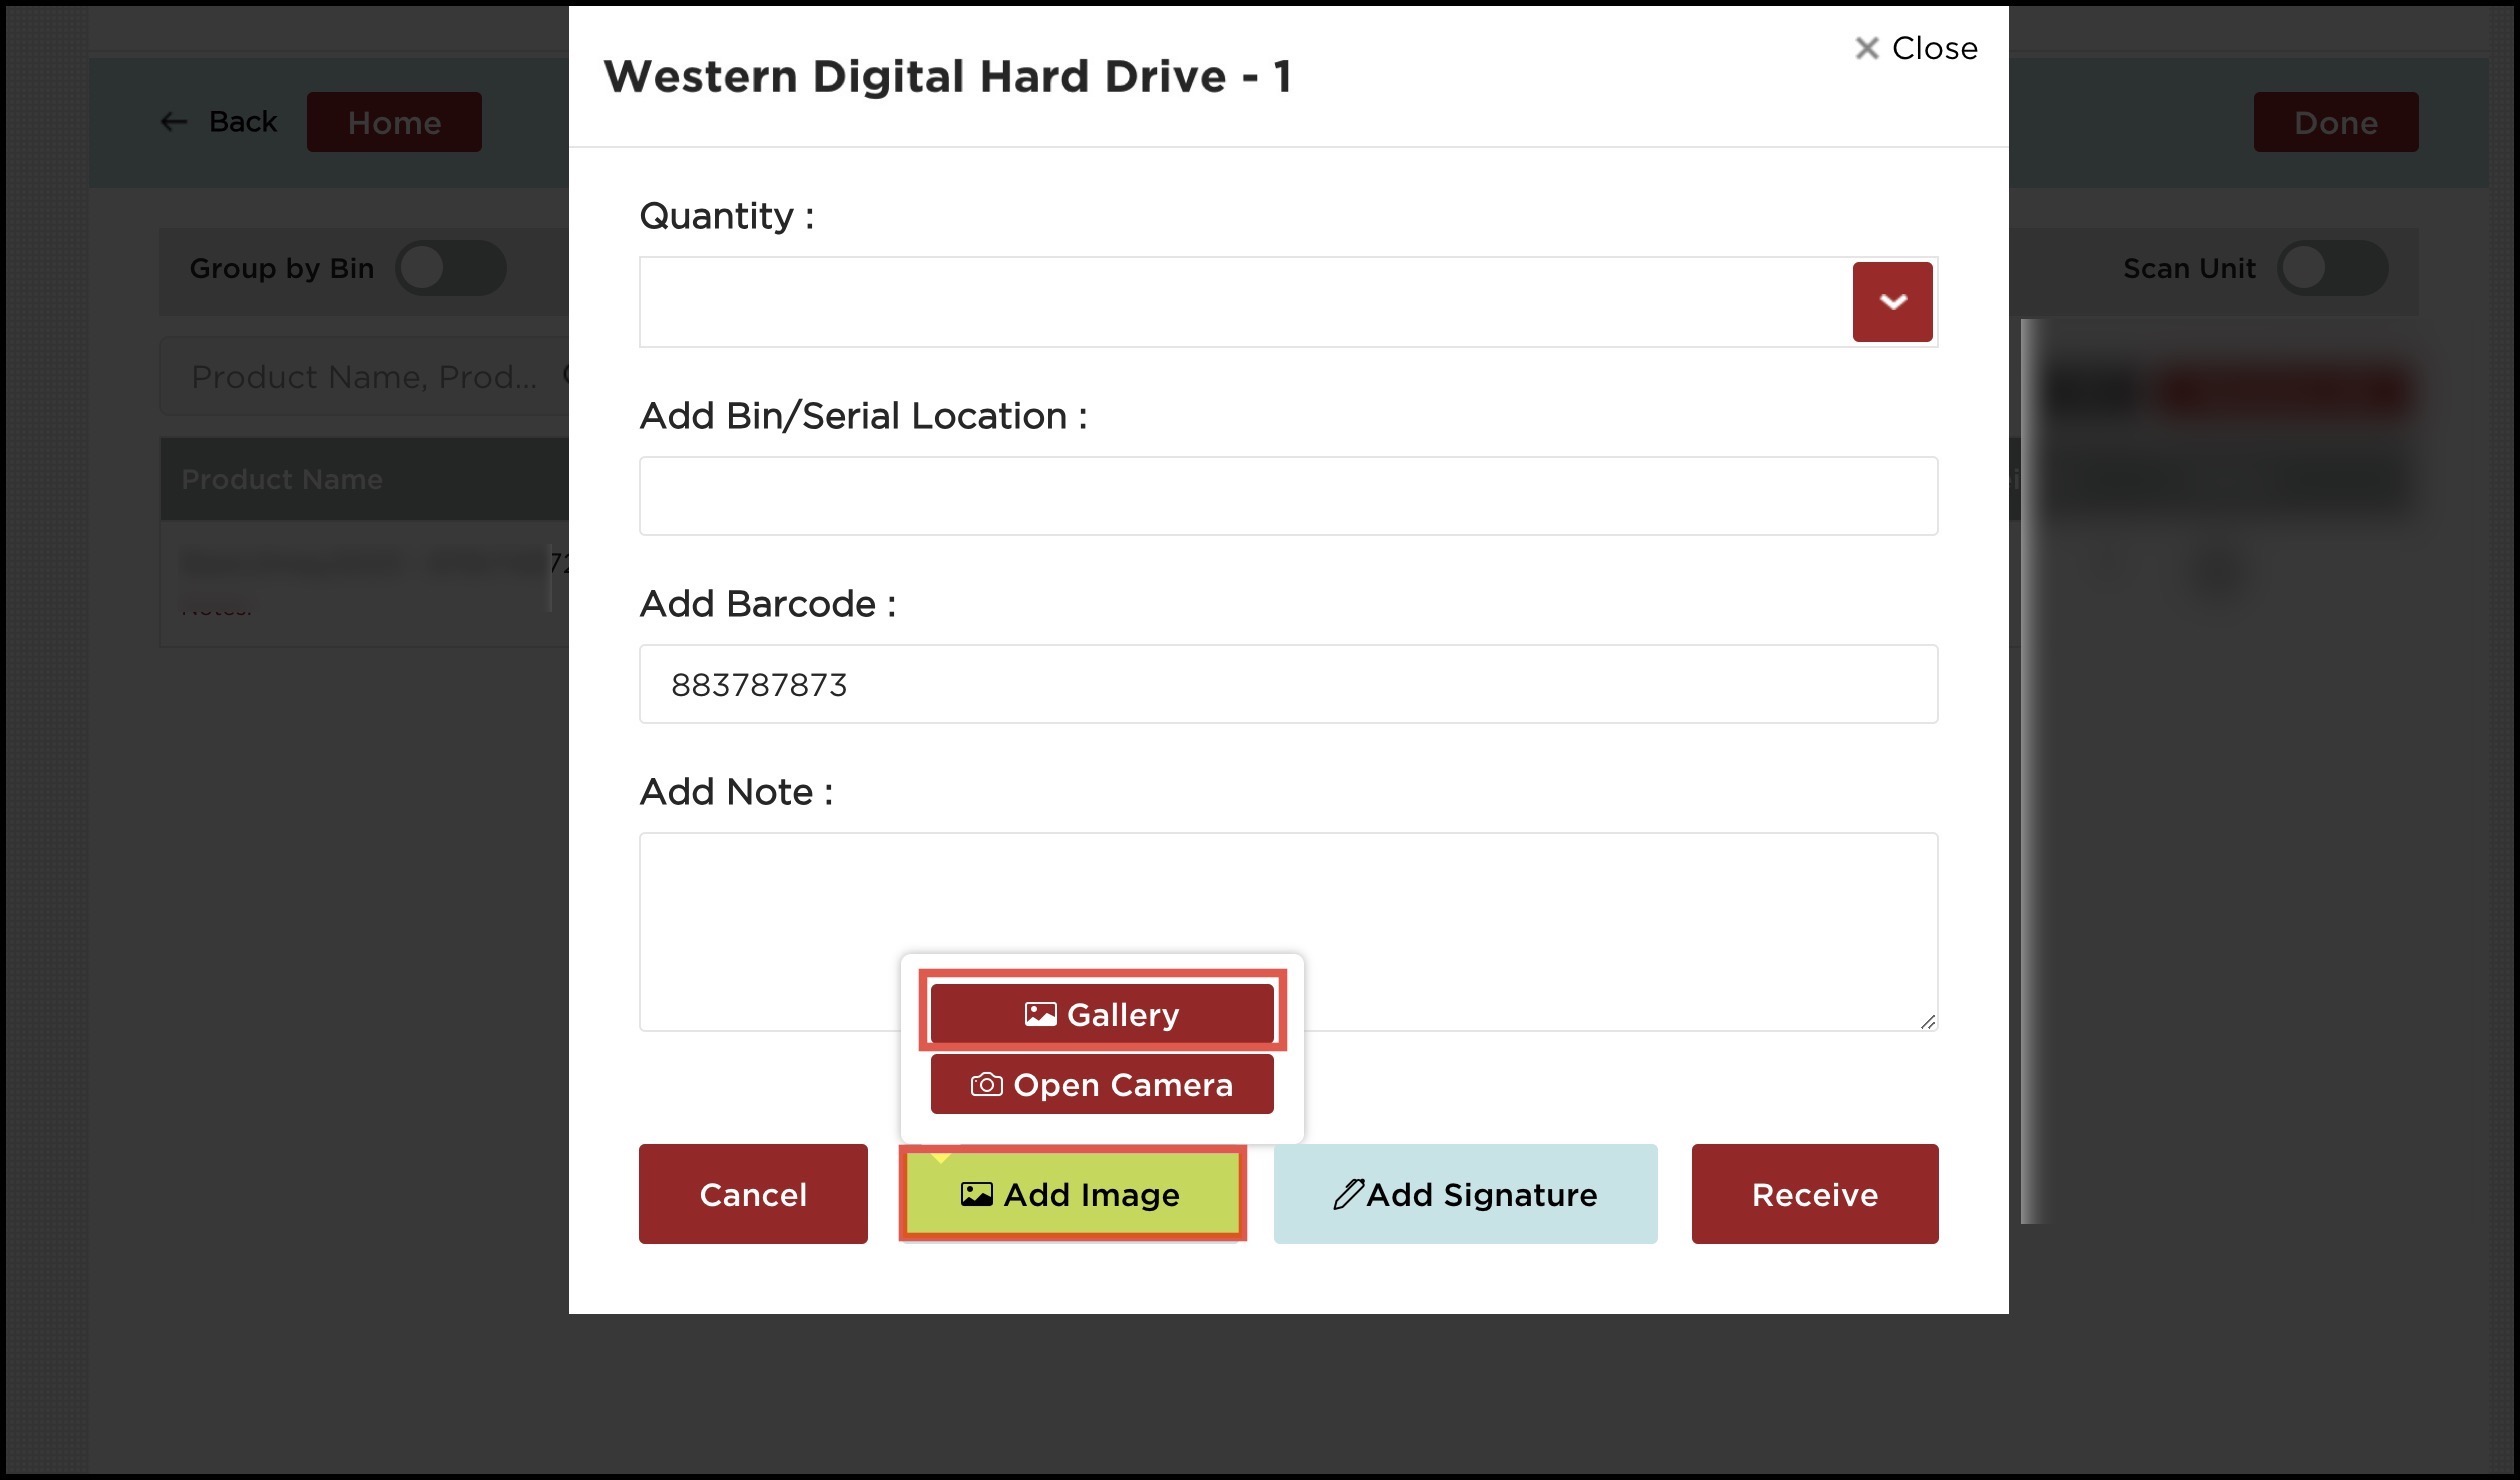

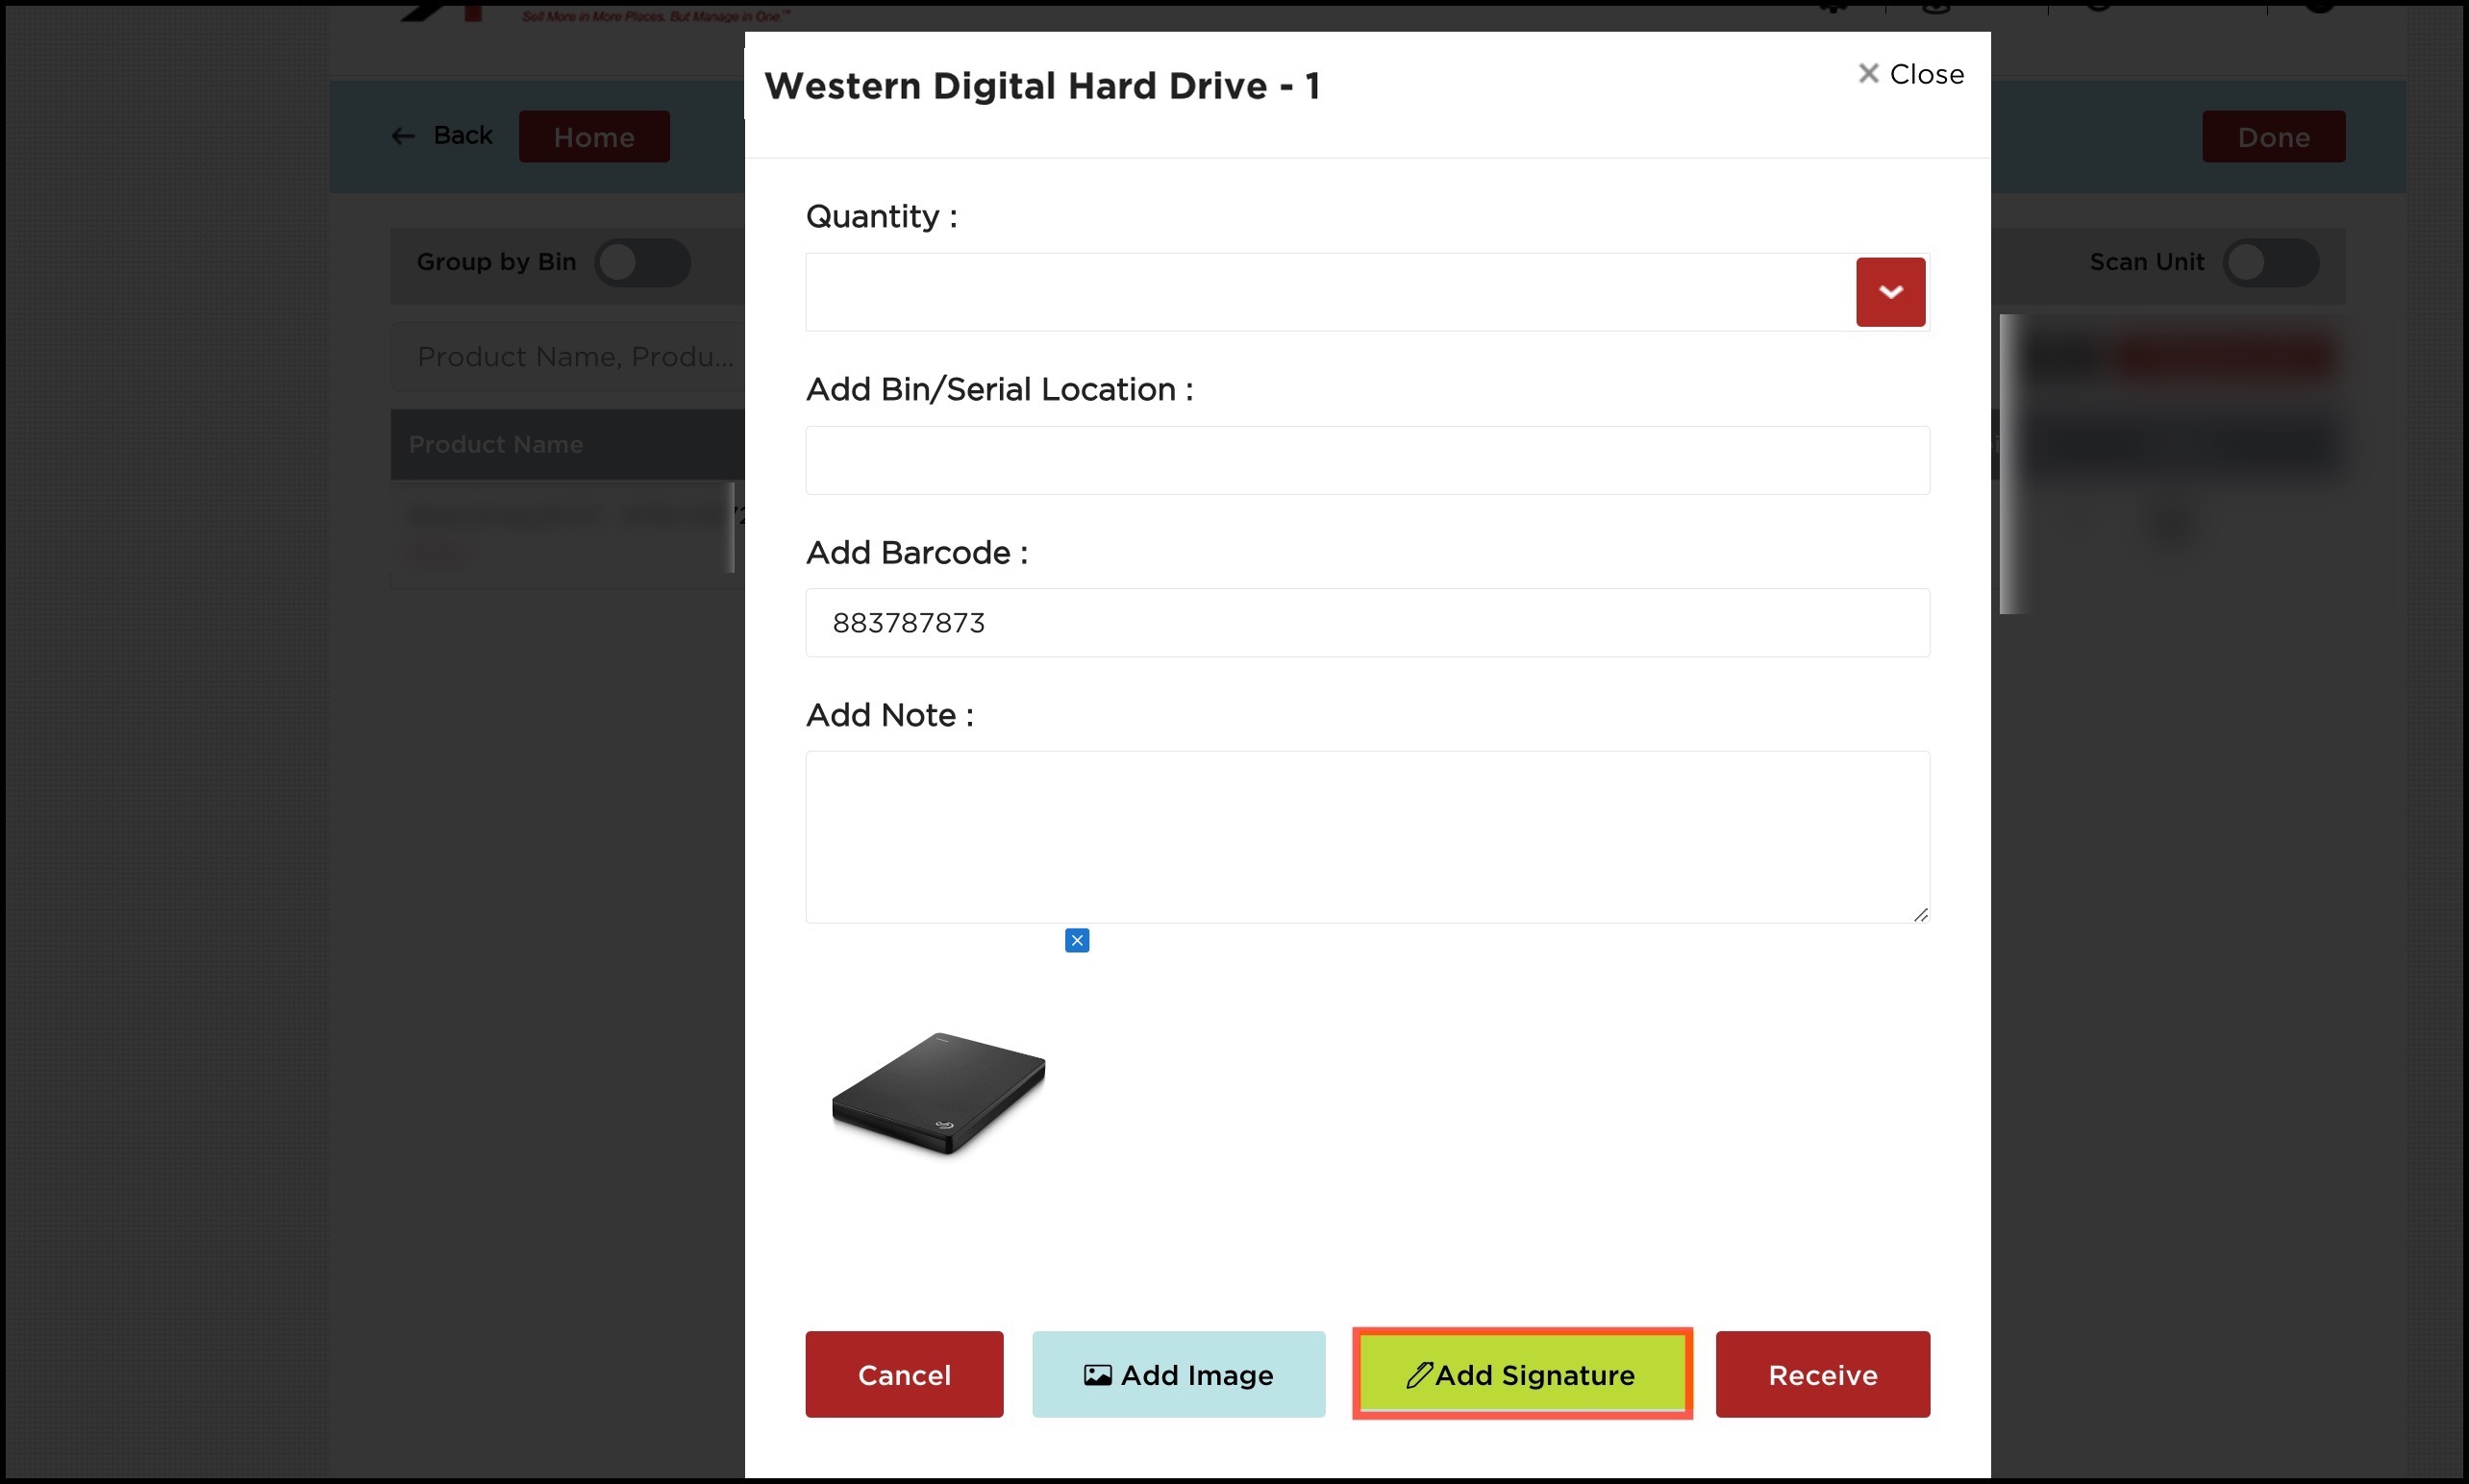
You can add multiple images, by clicking on Add Image again.
Add Signature
- Similar to add image, you will find a button to Add Signature, click on it.
- Draw the signature
- If it's final, click on Save or you can click on Clear and draw again.
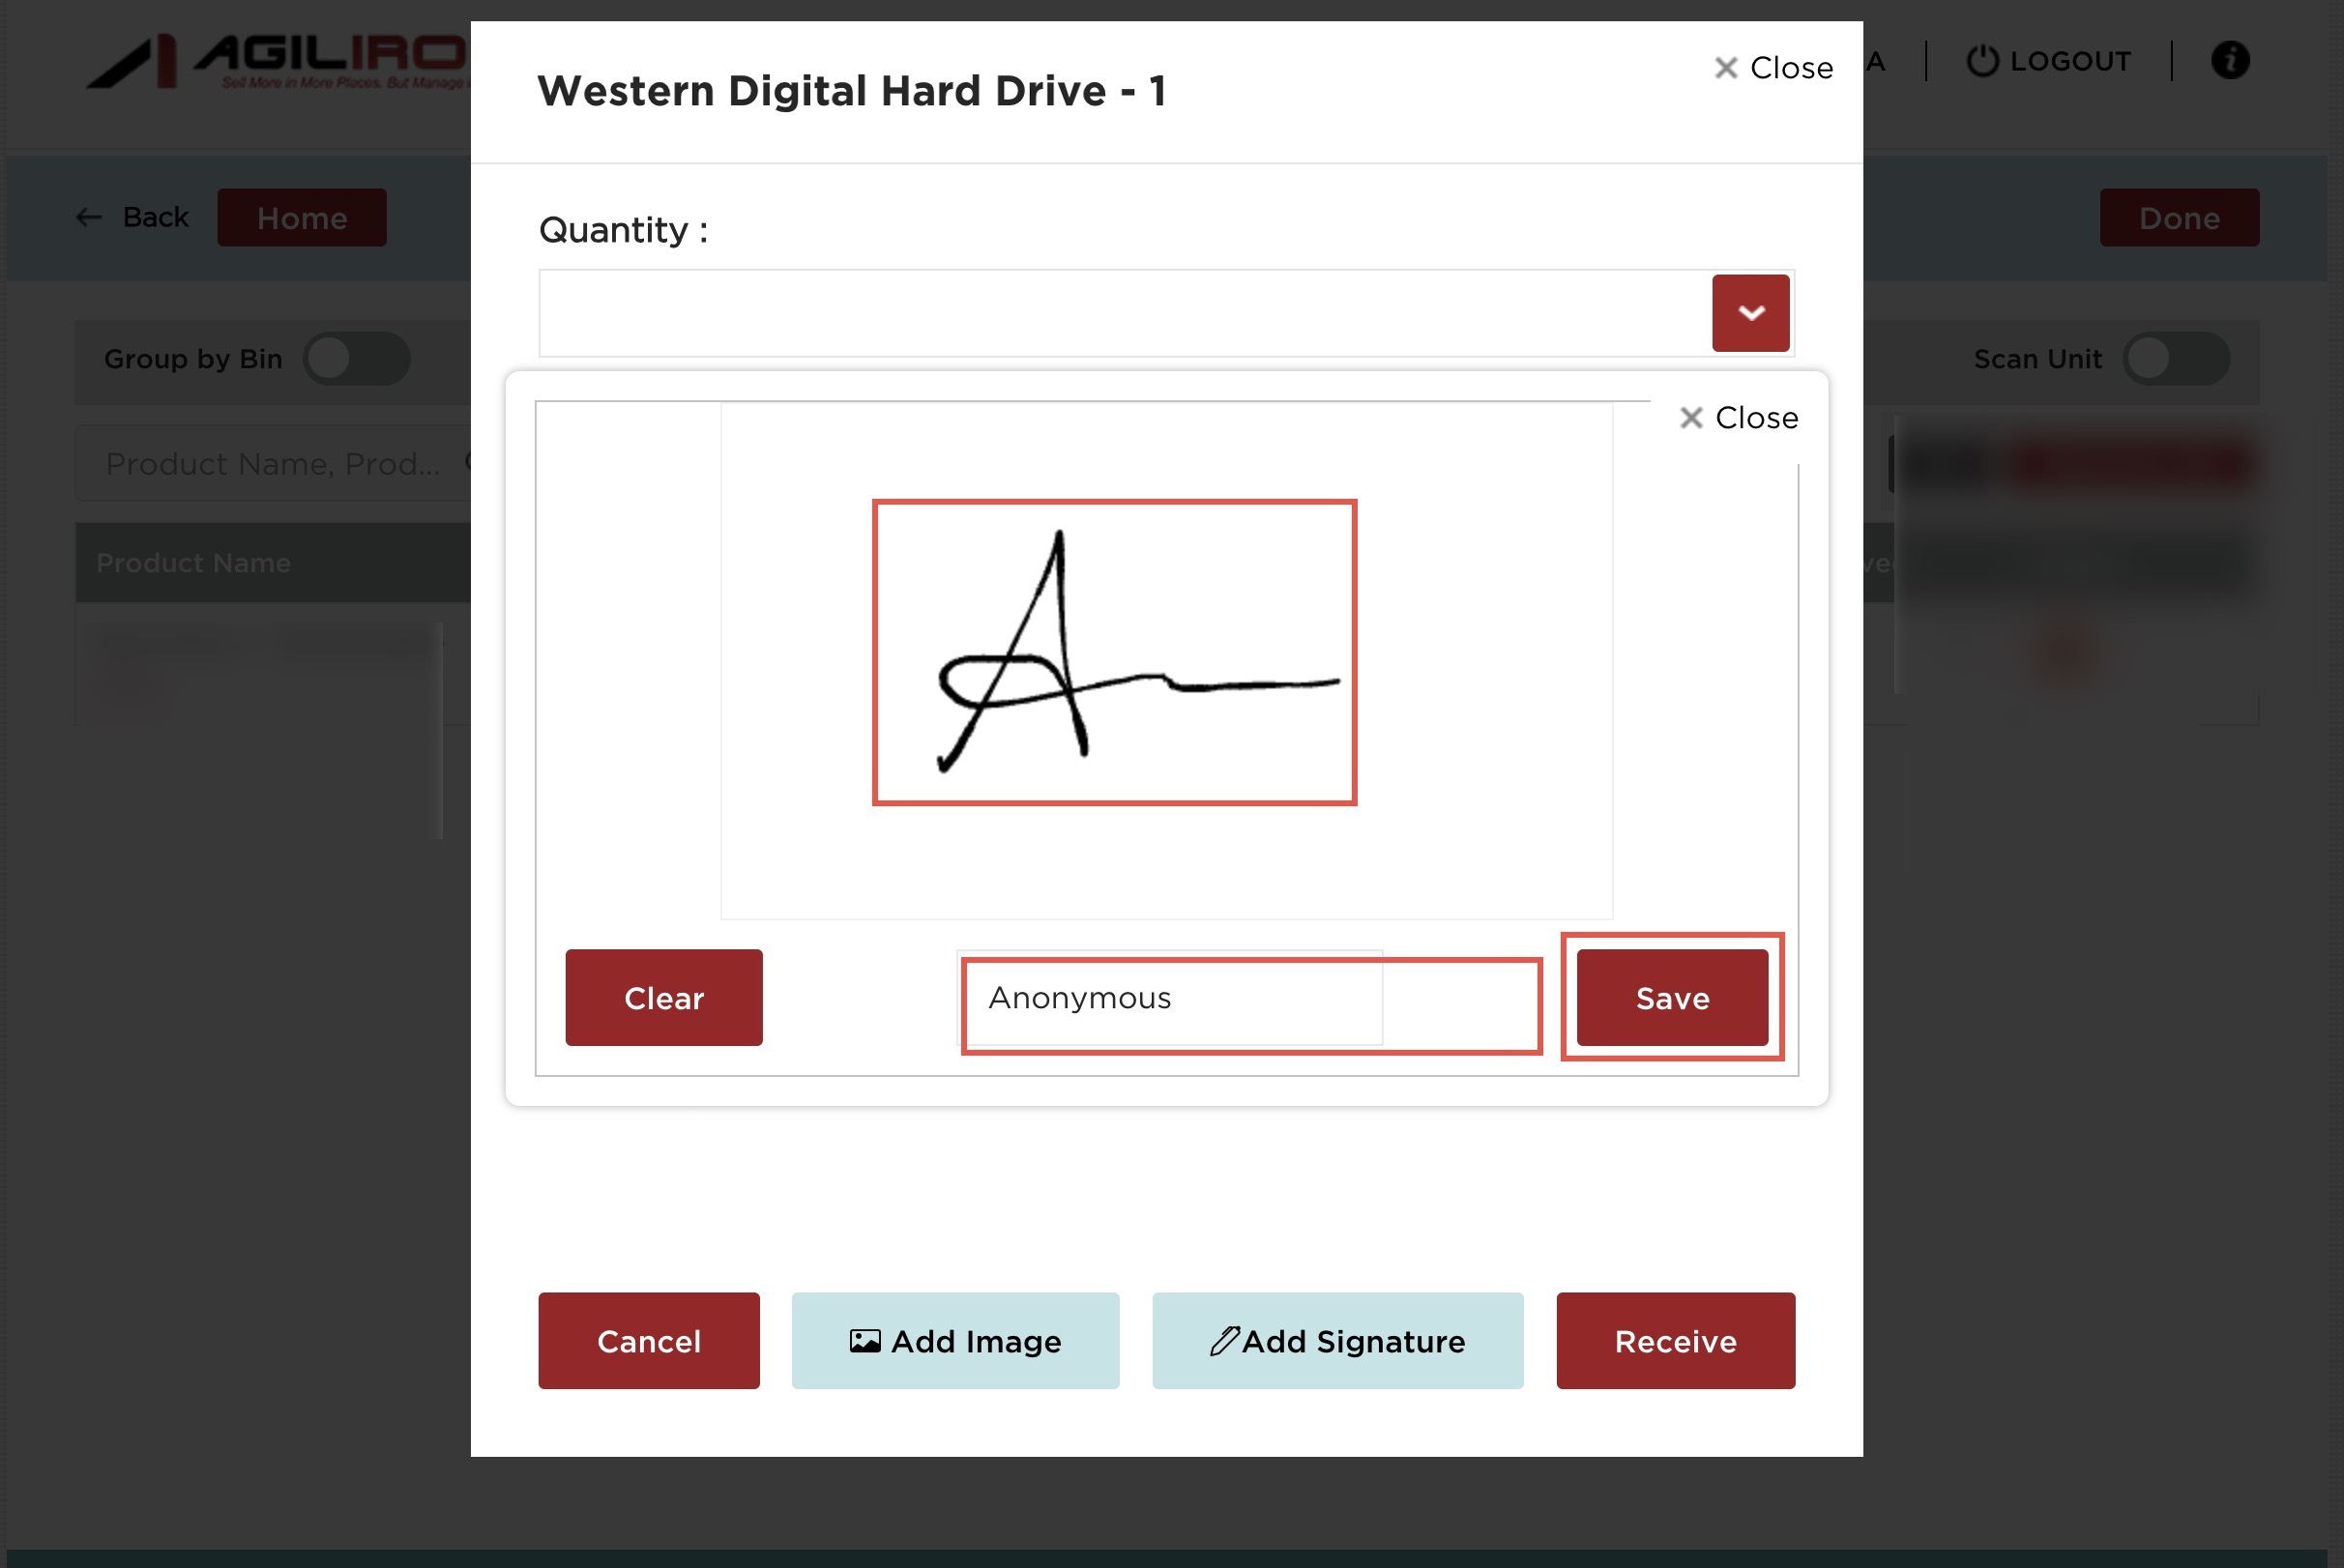
- Once the images and signature are added, click on the Receive button.
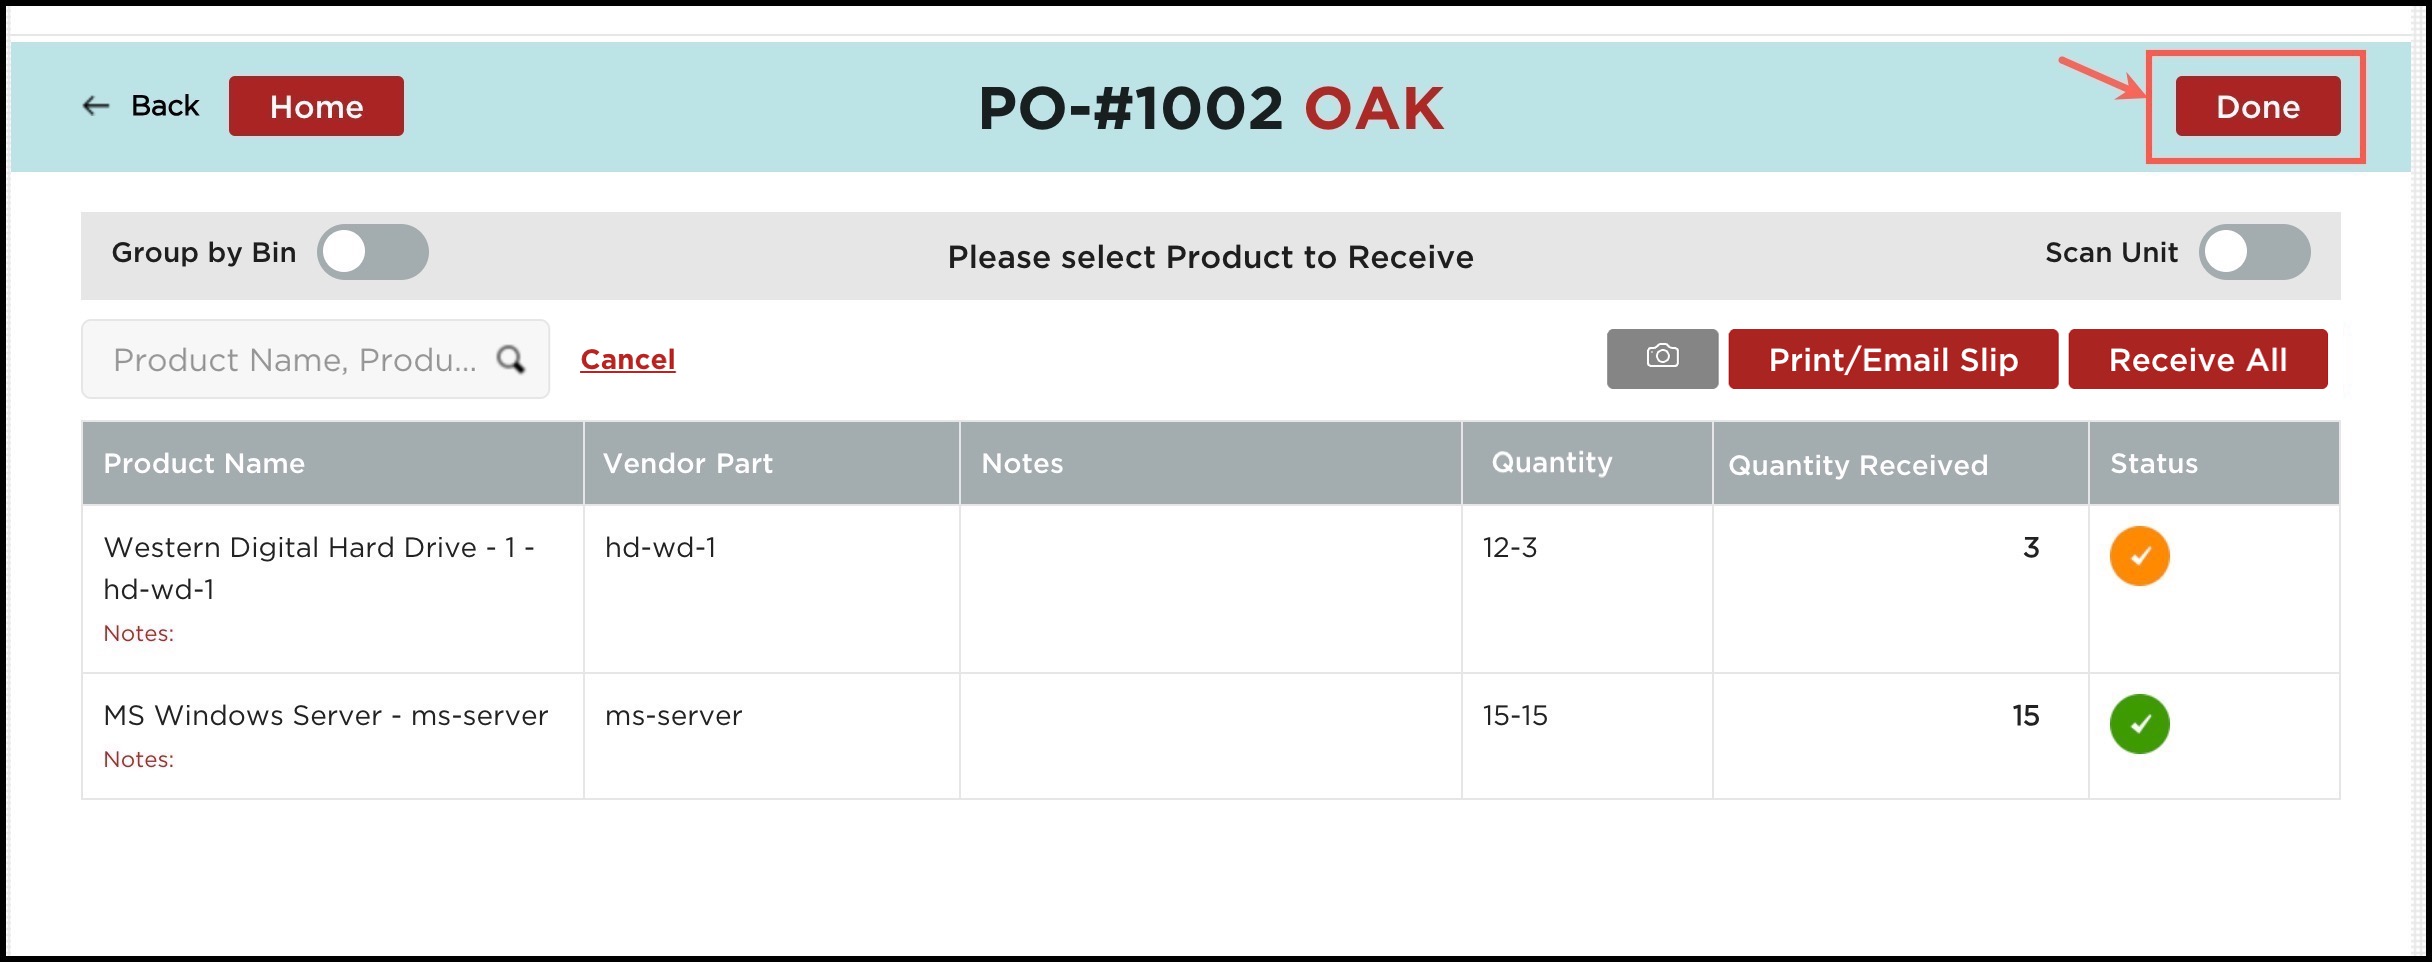
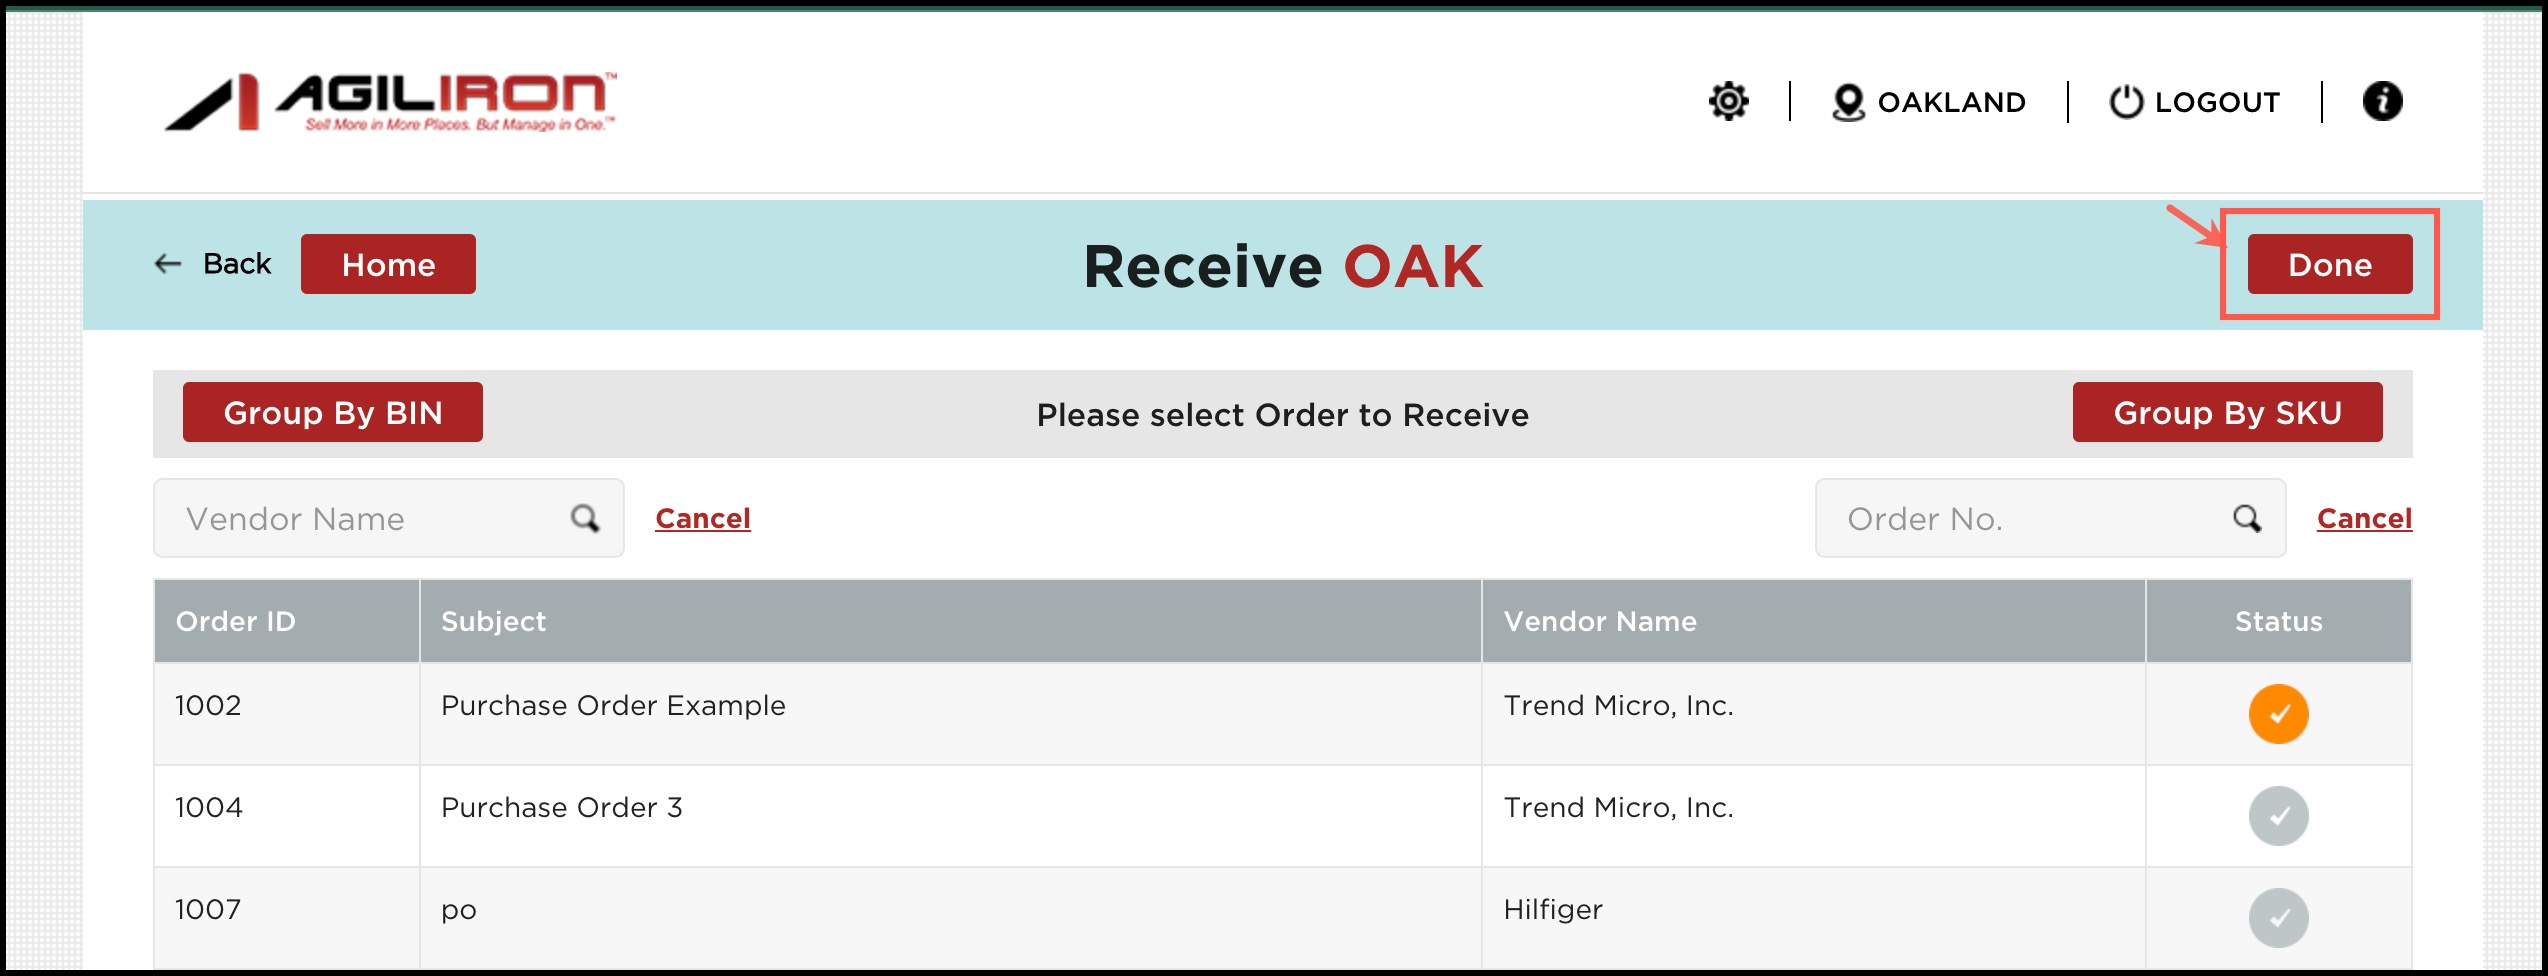
- Click on Done.
- Then again, click on Done and return to home screen.
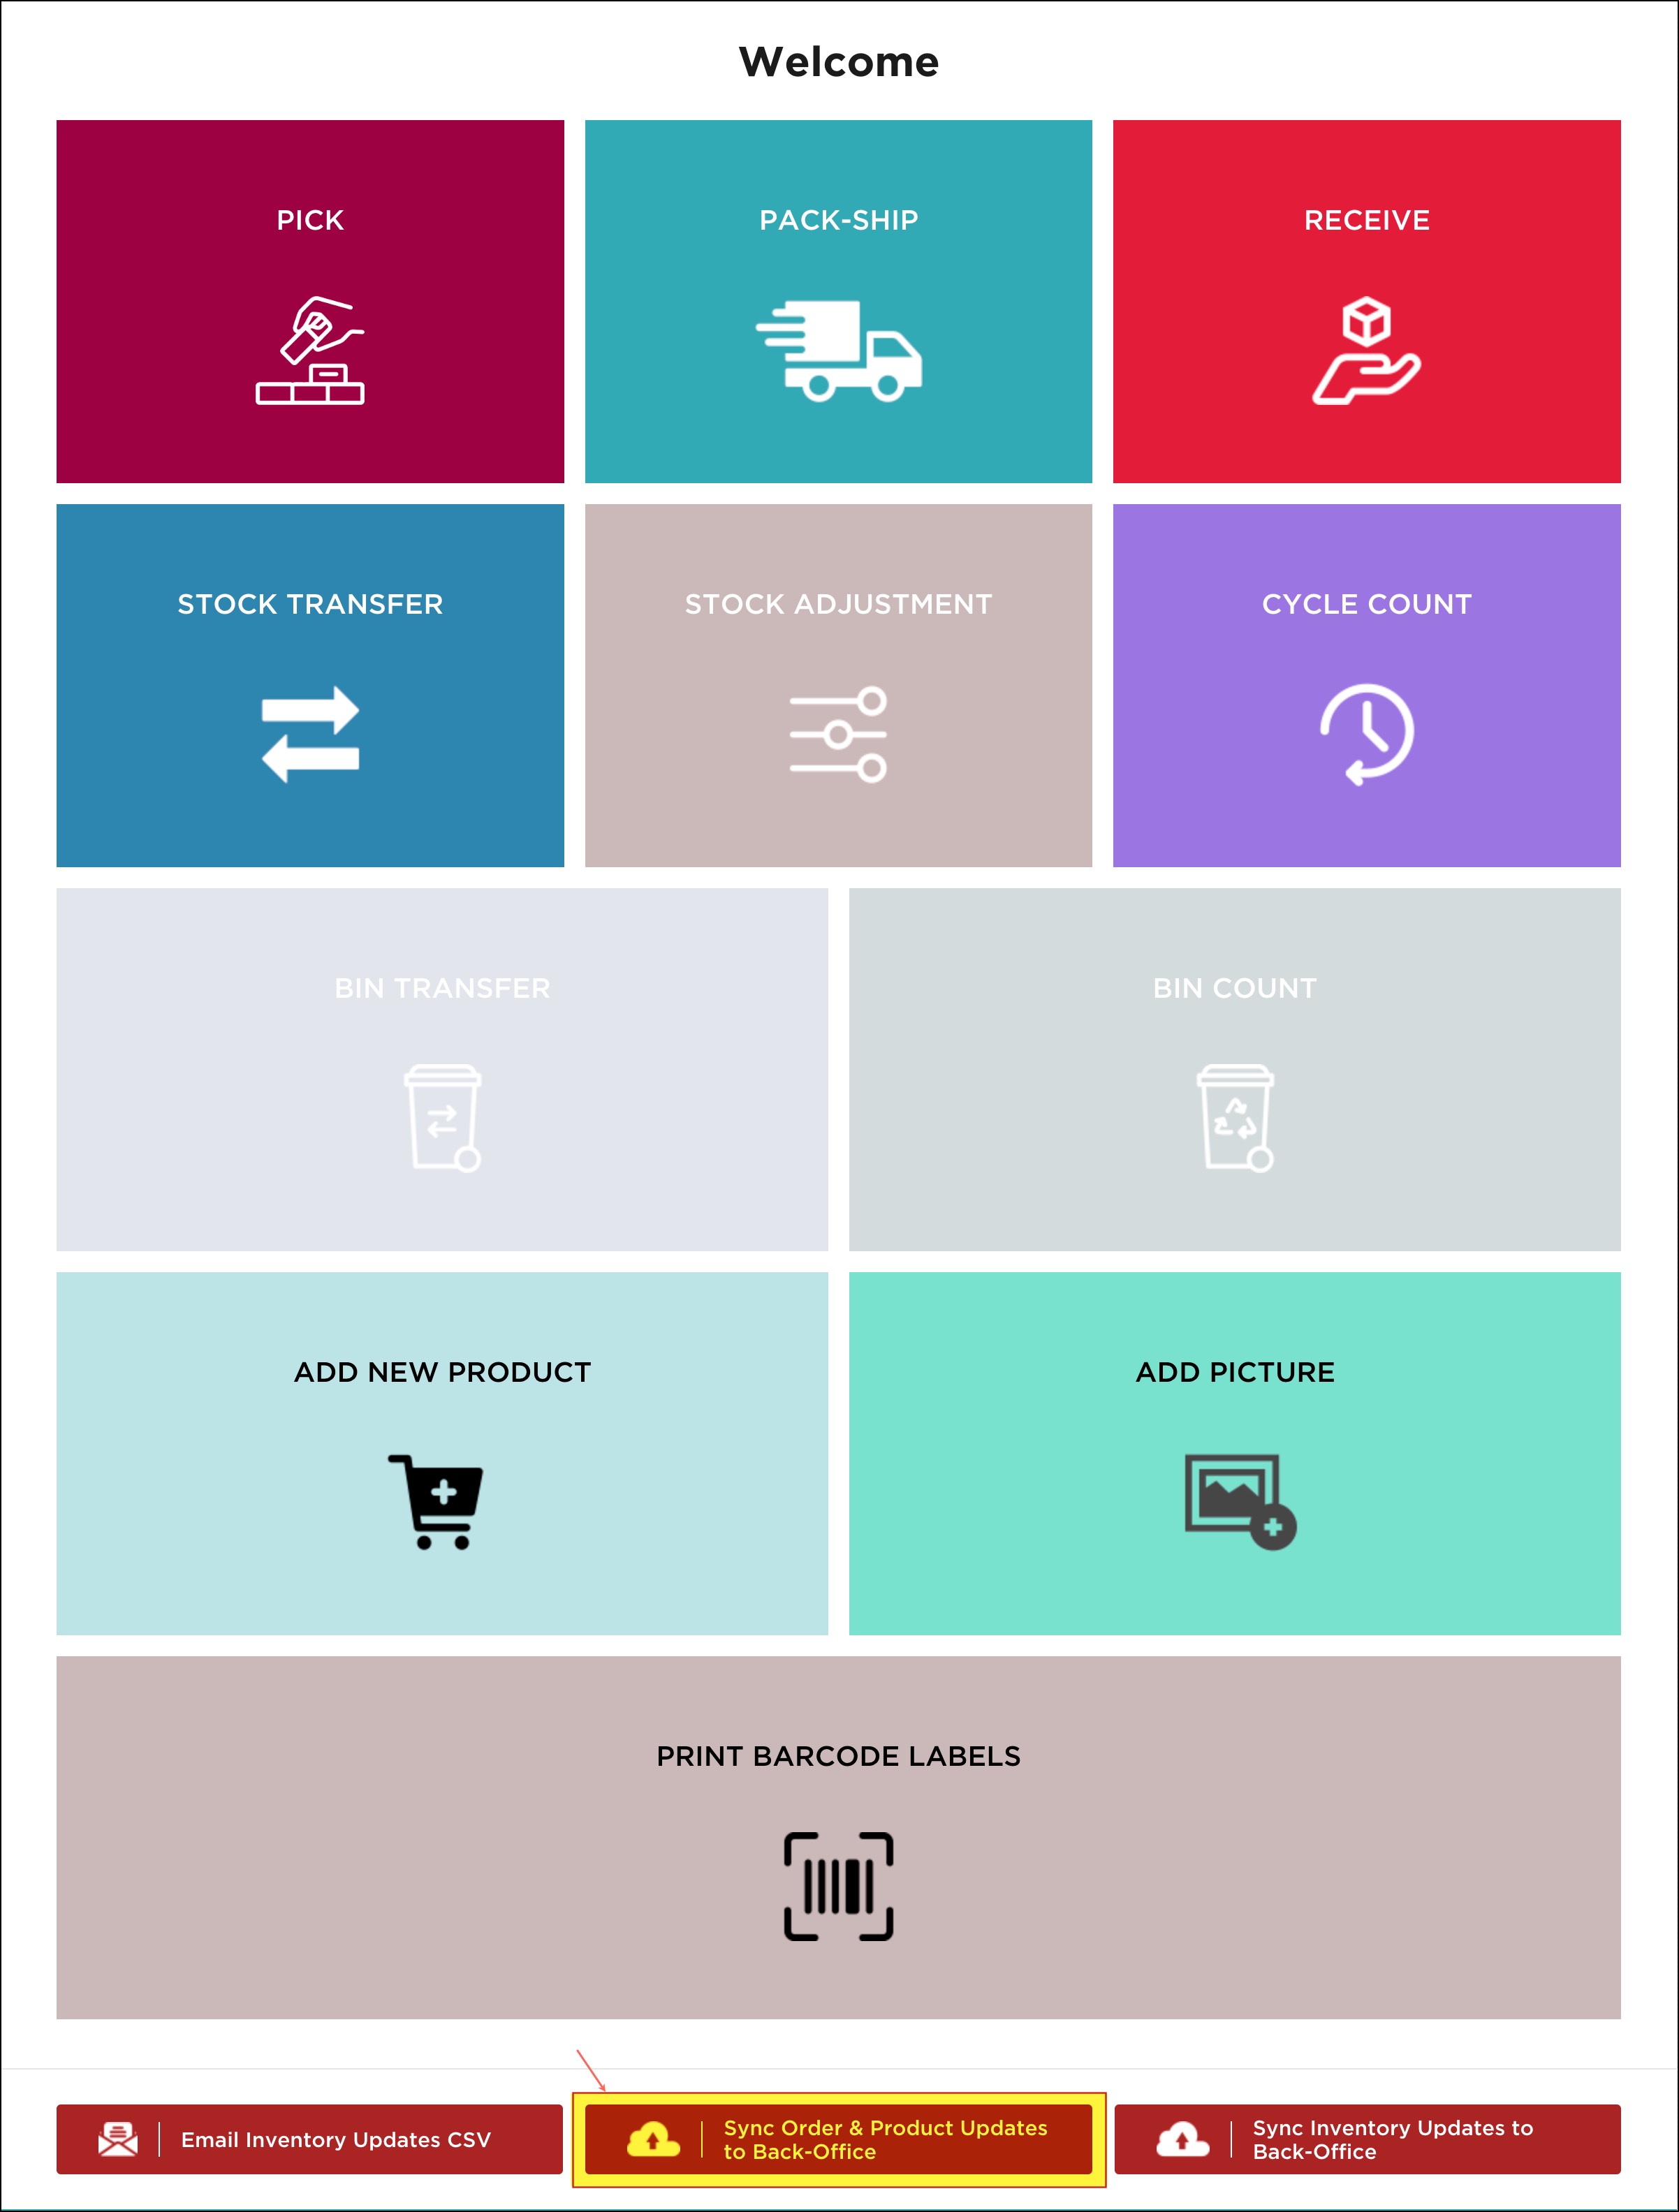
- Now on the home screen, you need to click on Sync Order & Updates to BackOffice to update the pictures in back office.
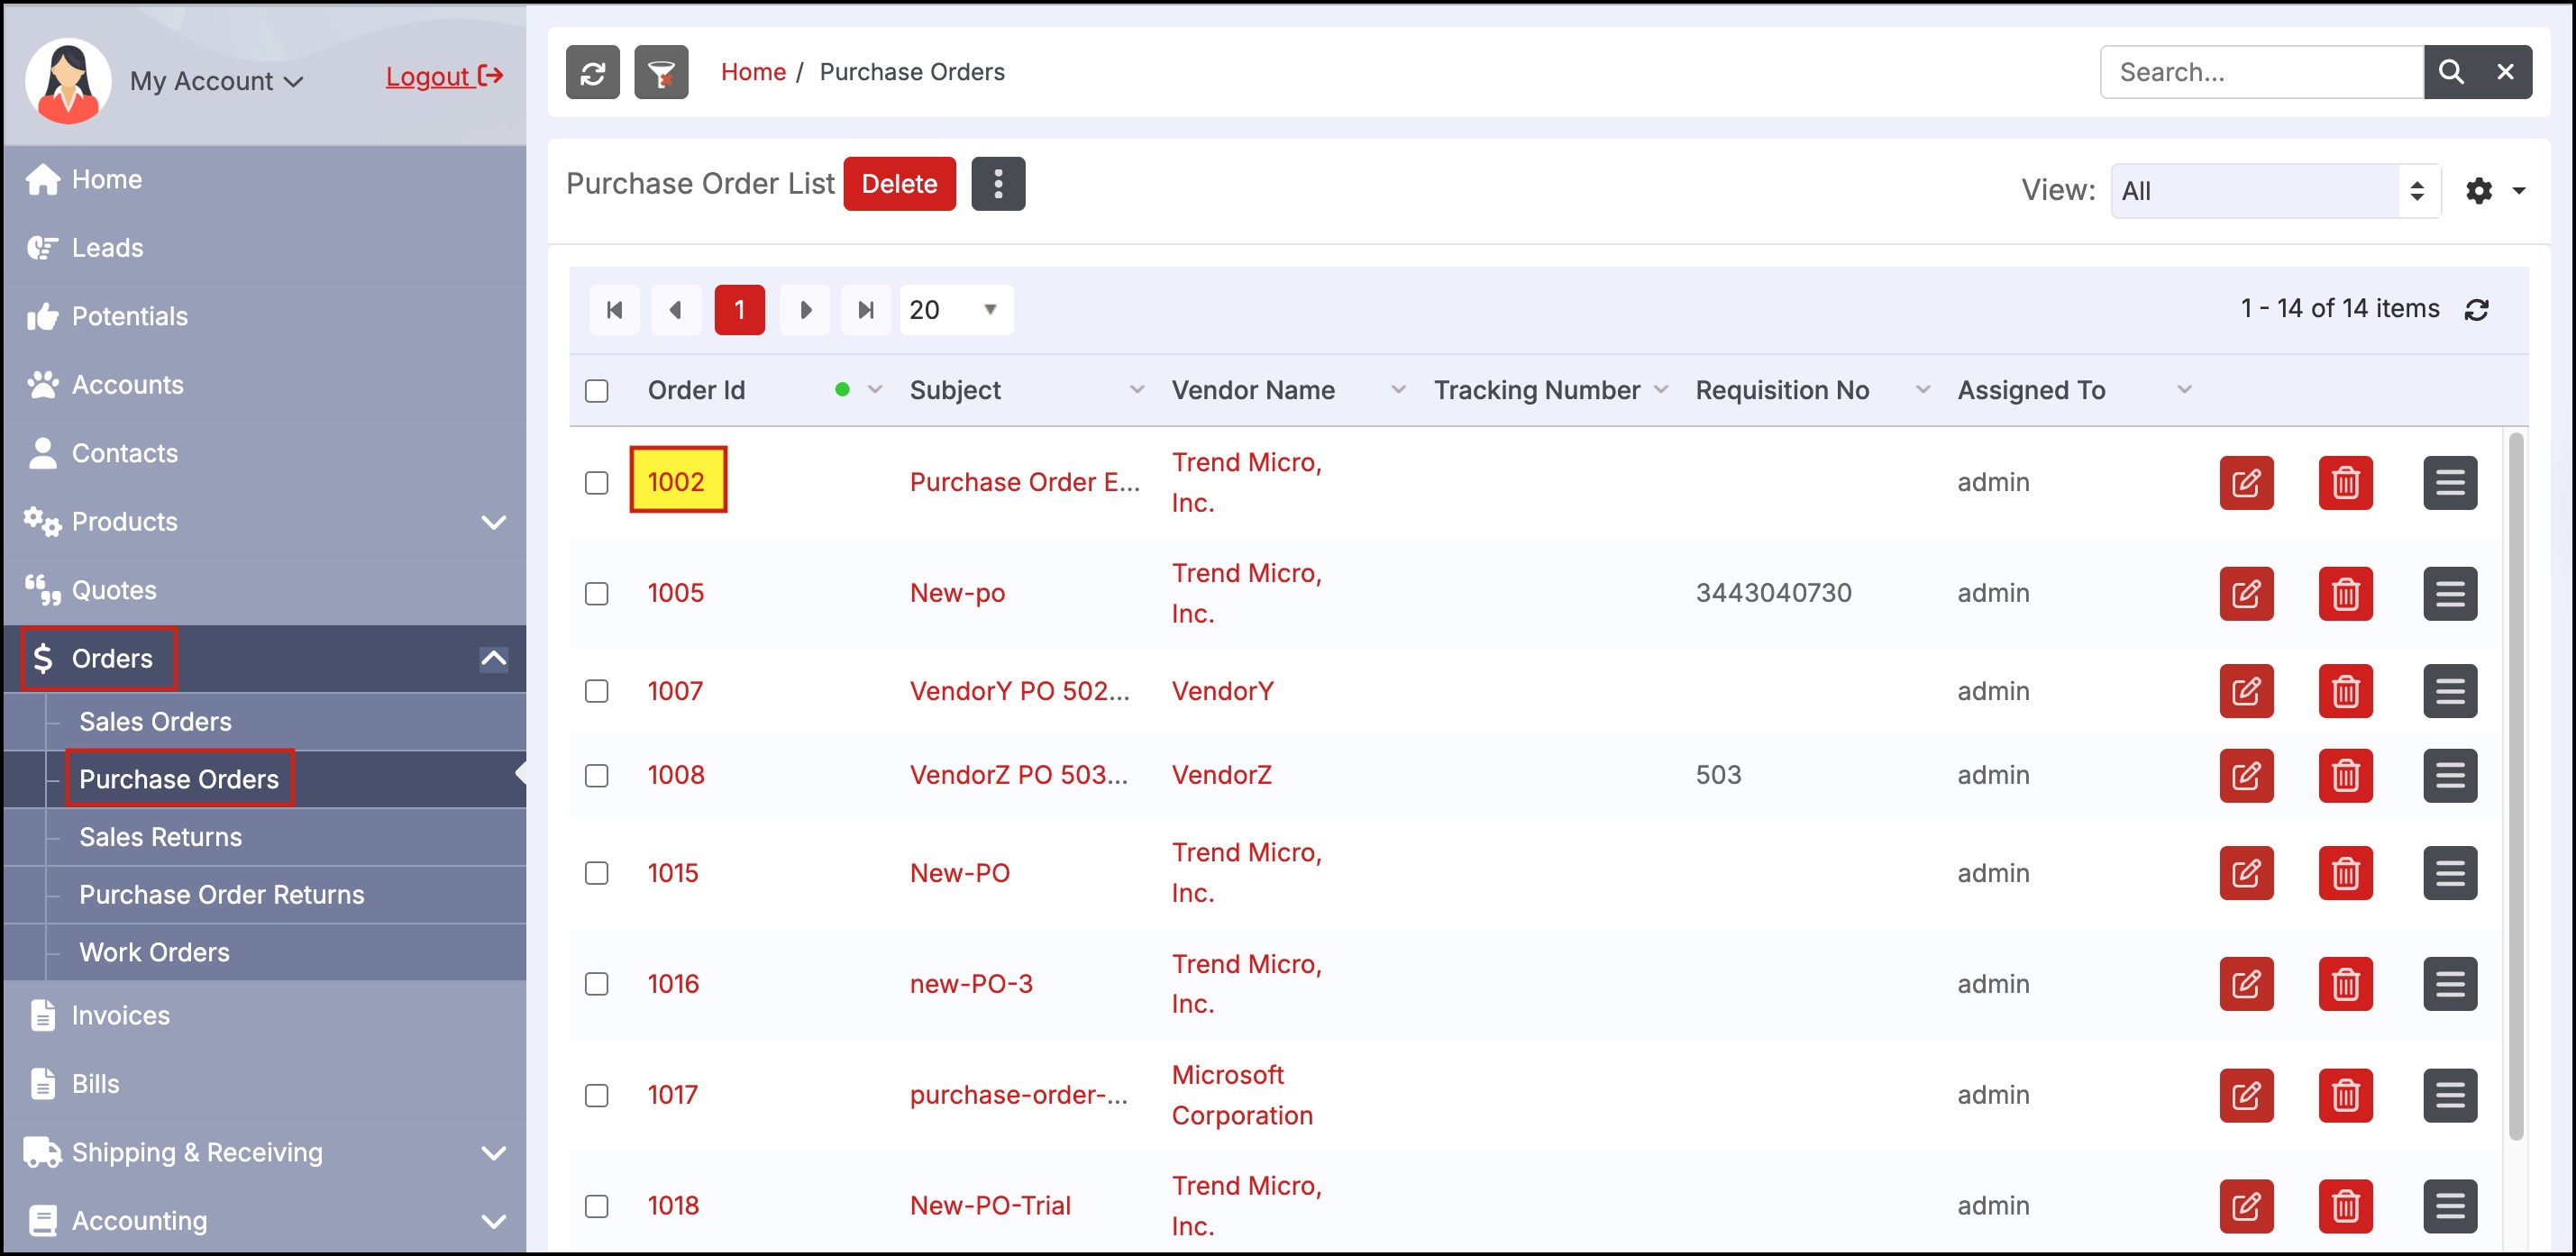
- In your backoffice, go to Orders -> Purchase Orders and then click on respective order ID.
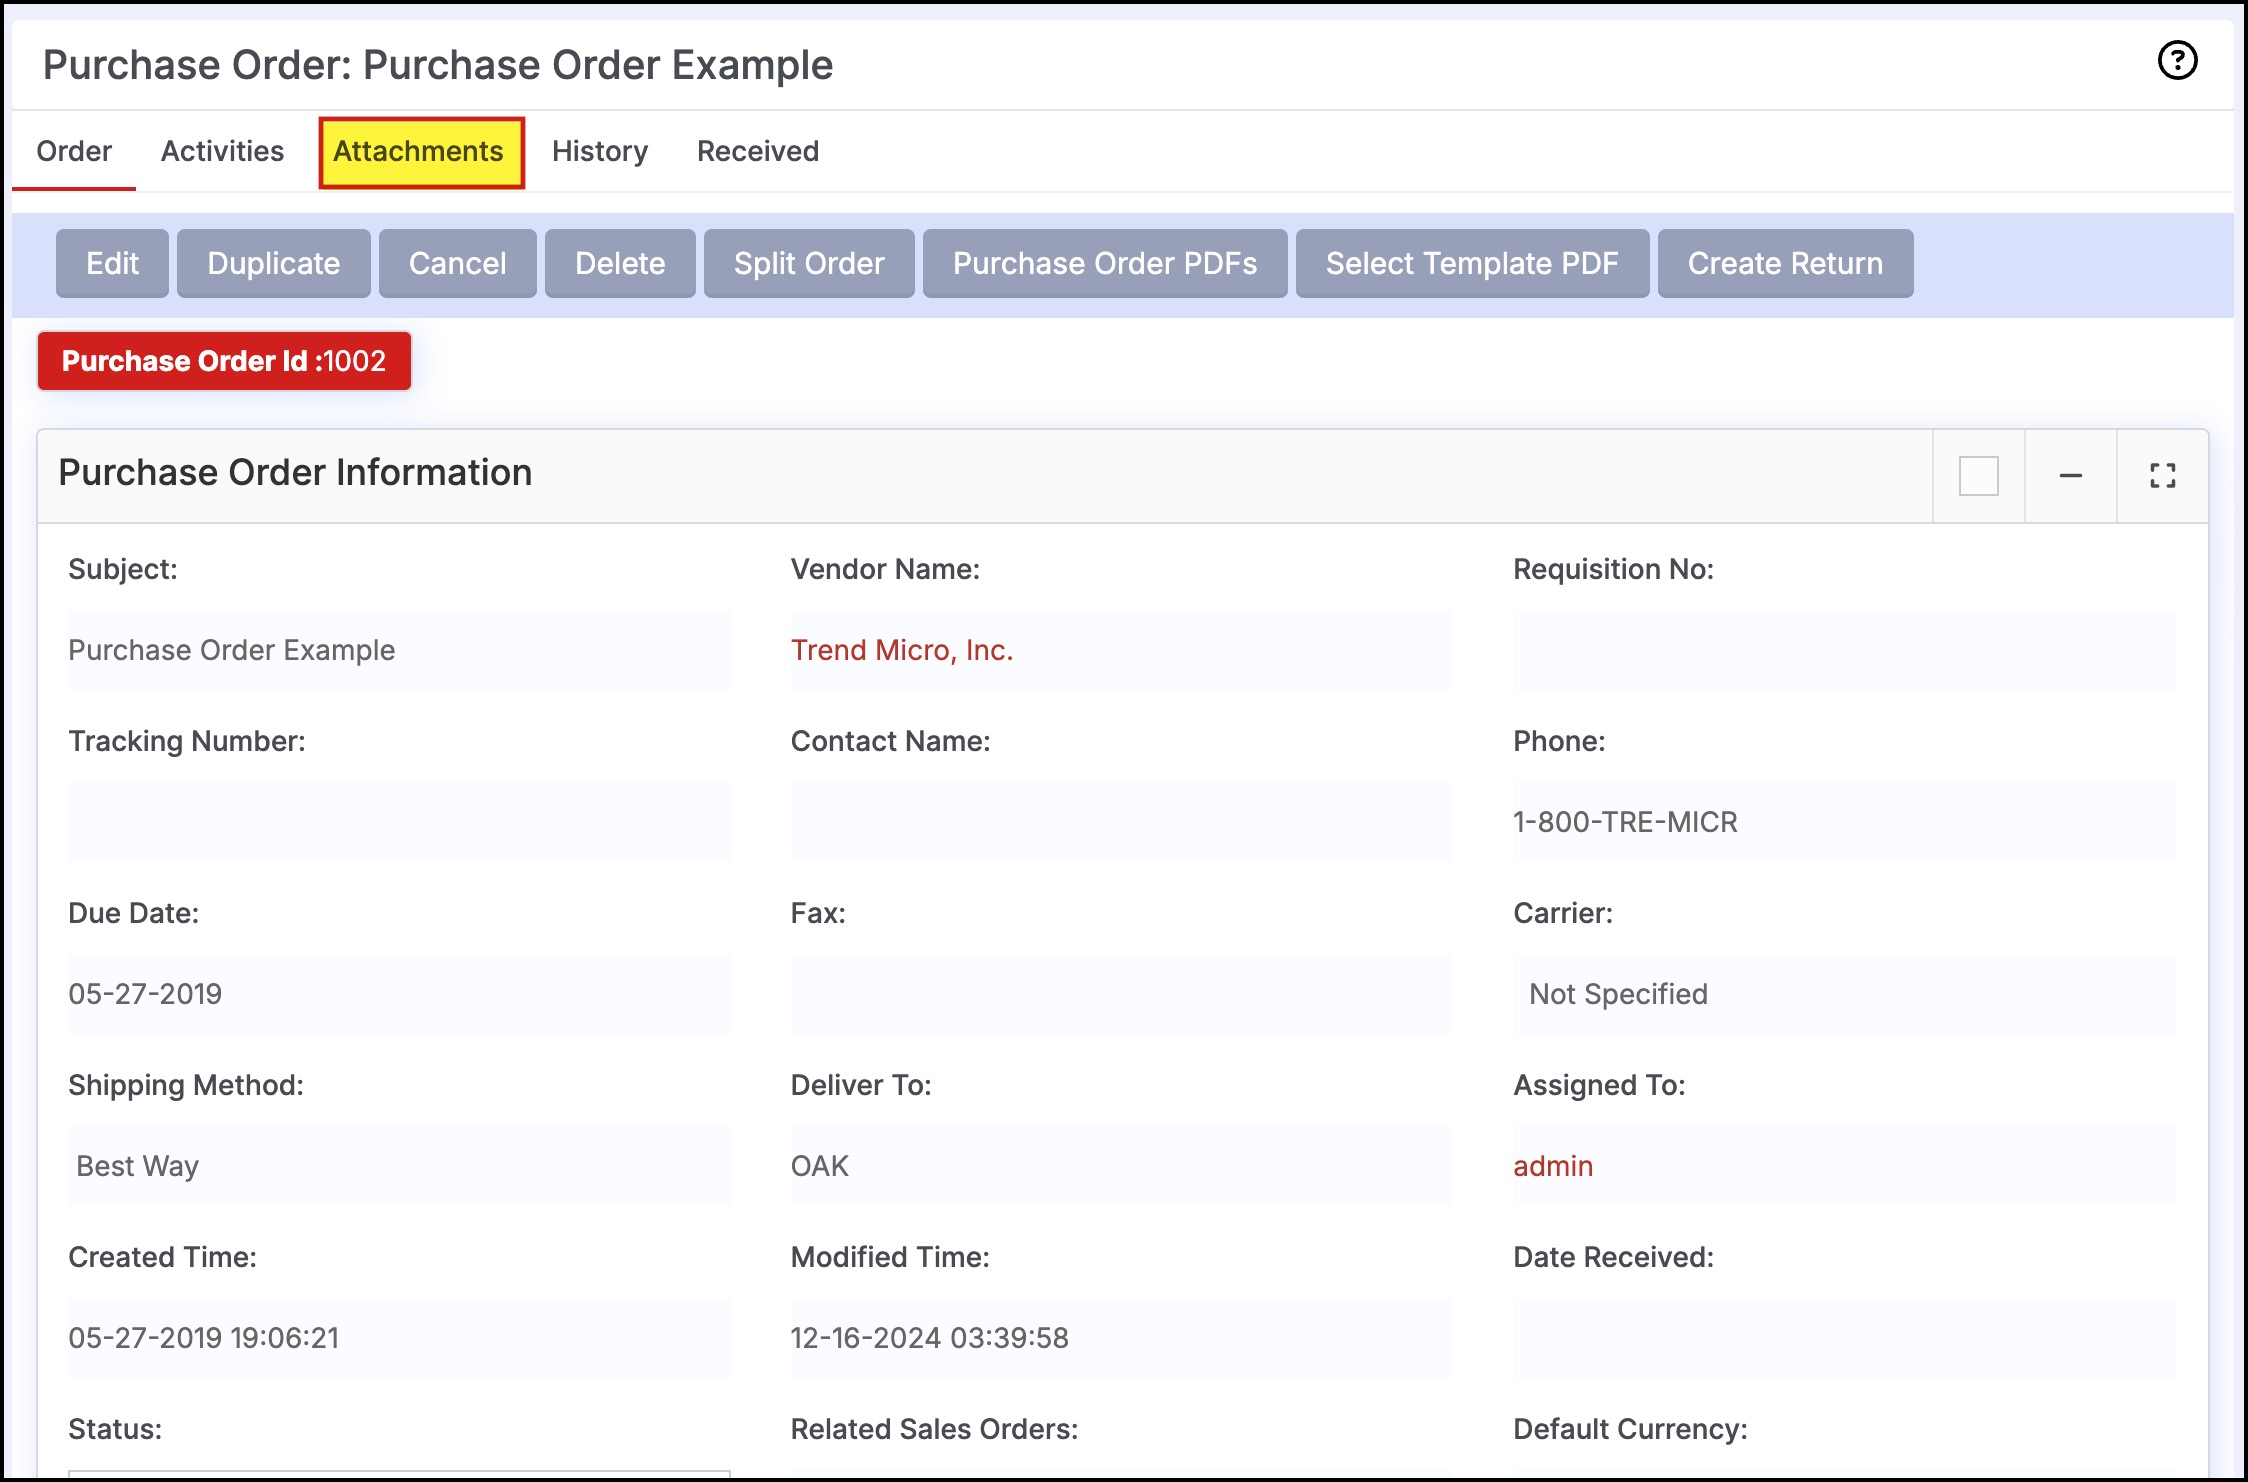
- Next, click on Attachments.
Here you can see the images and signature added as attachments.
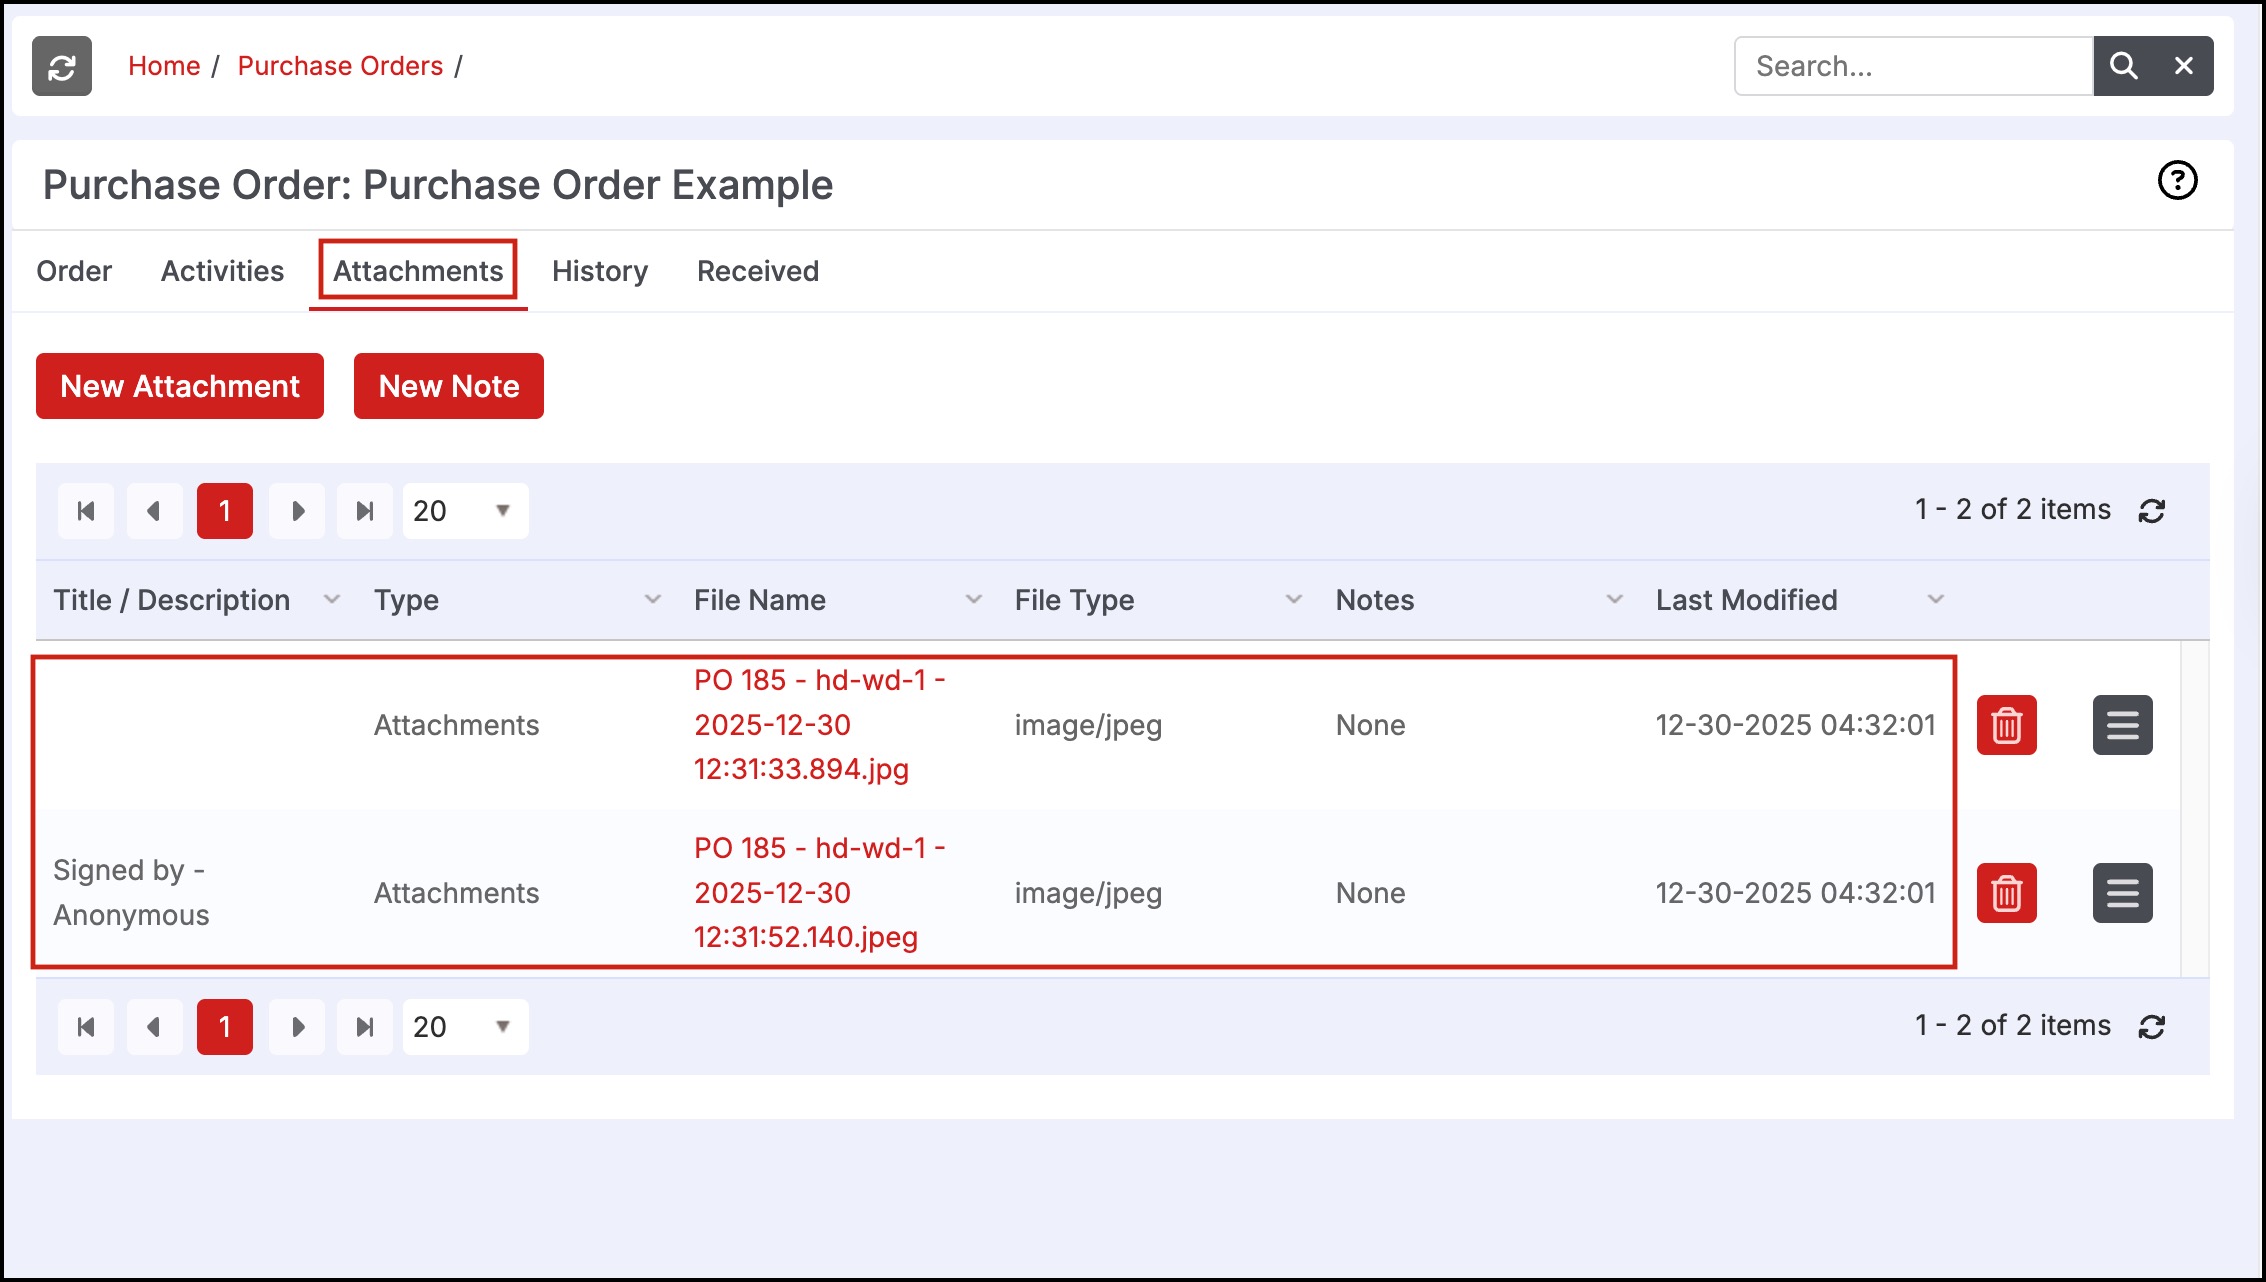
When you click on the image, the image gets downloaded. It is the same image added in the warehouse management app.
Note - Neither adding images nor a signature is mandatory, so you can proceed with the Receive order process even without adding.
Updated 7 months ago