Default Organization Fields Access
Some fields of modules might be mandatory while some may not be that relevant. The Default Organization Fields Access Wizard has support for field control (Mandatory or Optional). All modules in the system come with a pre-defined set of fields relevant to that module. You can make them is visible or is required or turn them off as per your organization's needs.
This is valid while creating any new module which includes Lead, Account, Contact, Potential, HelpDesk, Product, Note, Email, Task, Event, Vendor, PriceBook, Quote, Purchase Order, Sales Order and Invoice. The settings made will also reflect in the bulk edit process and while updating the existing modules.
To set field level access:
- Login to your Agiliron account, go to Settings and in User Management, click on Default Organization Fields Access Wizard.
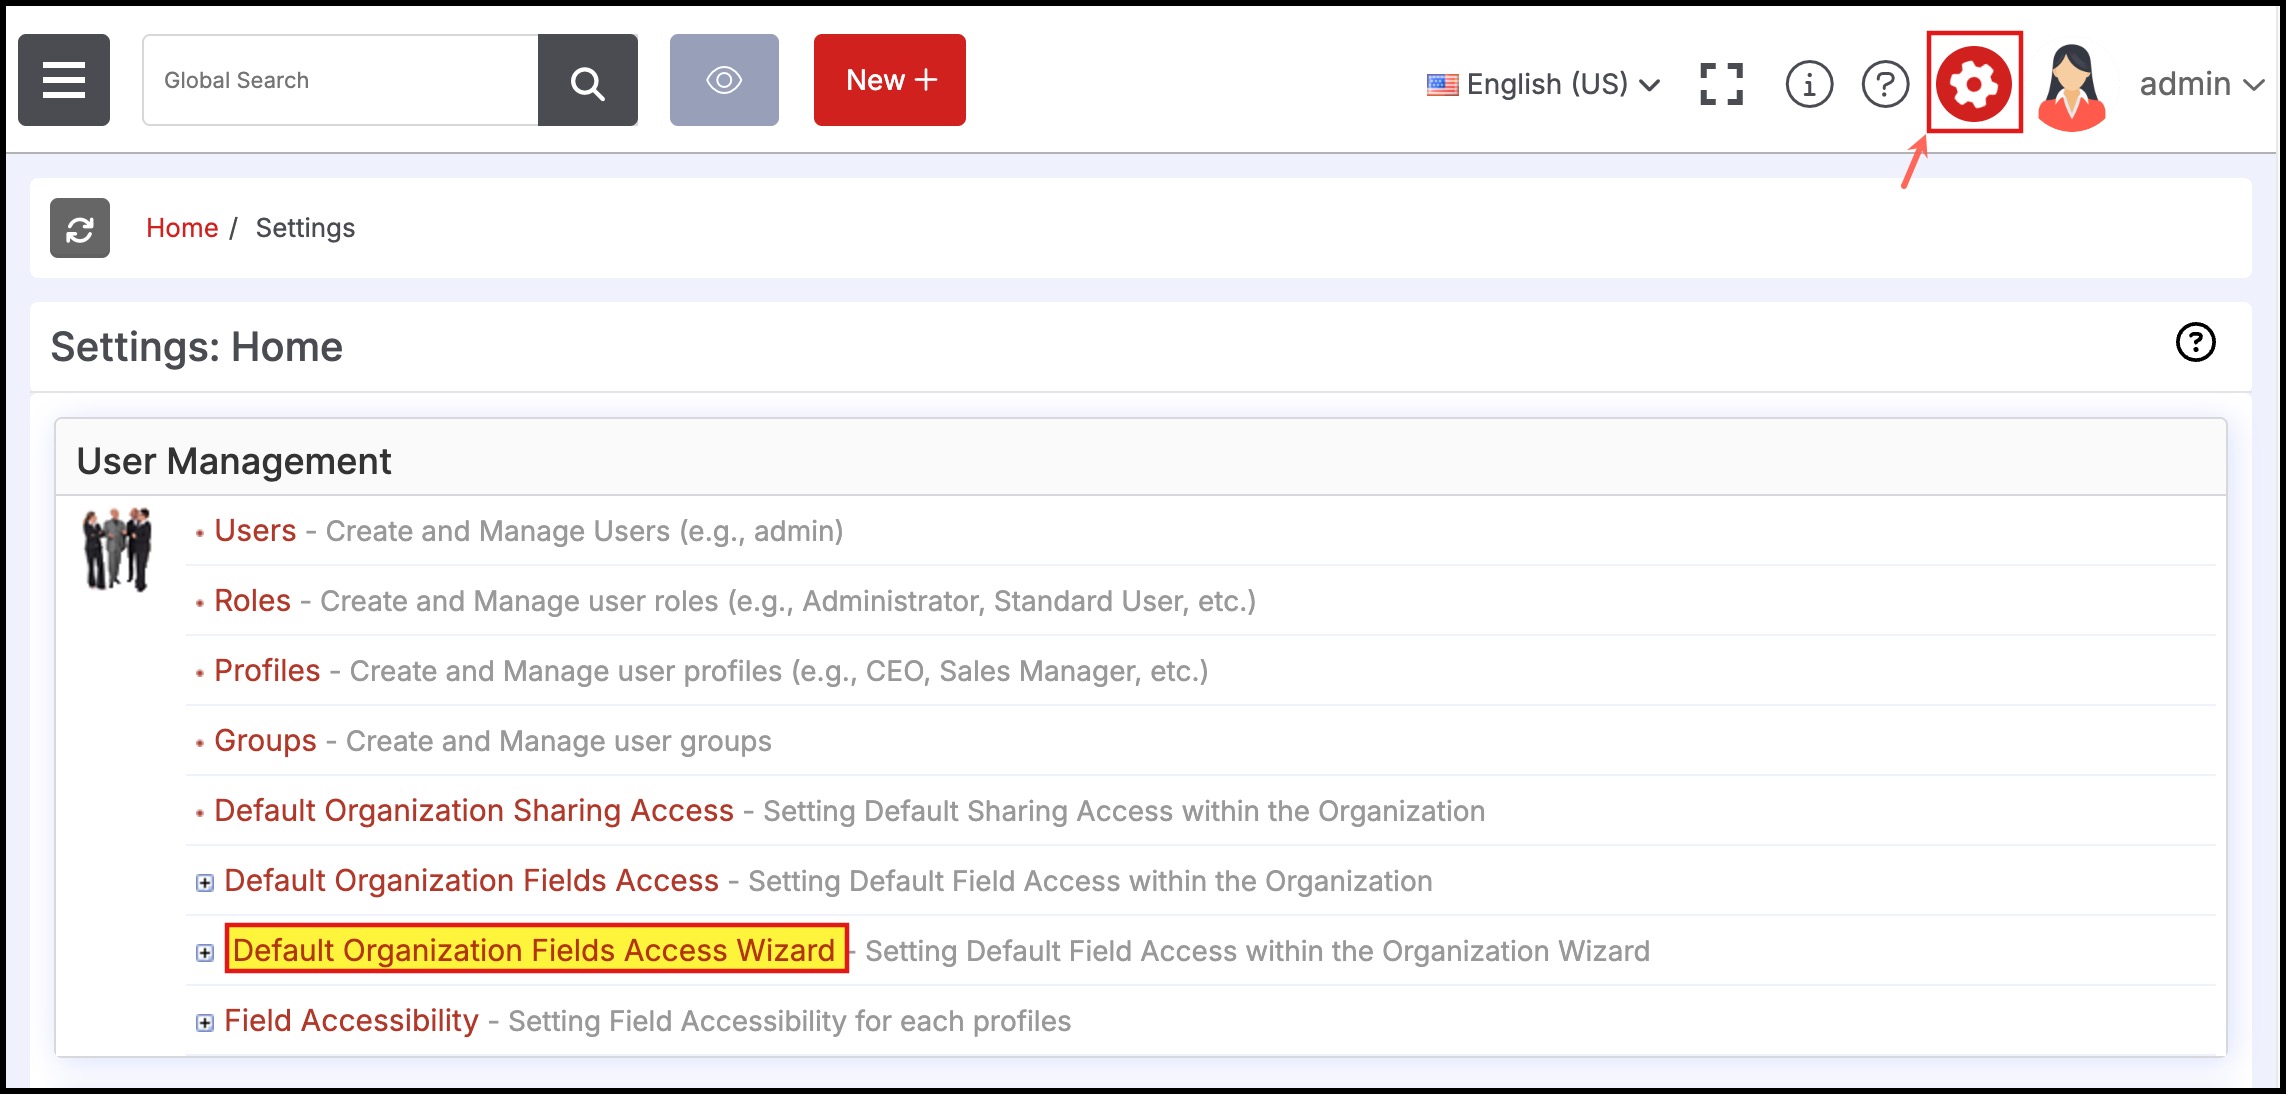
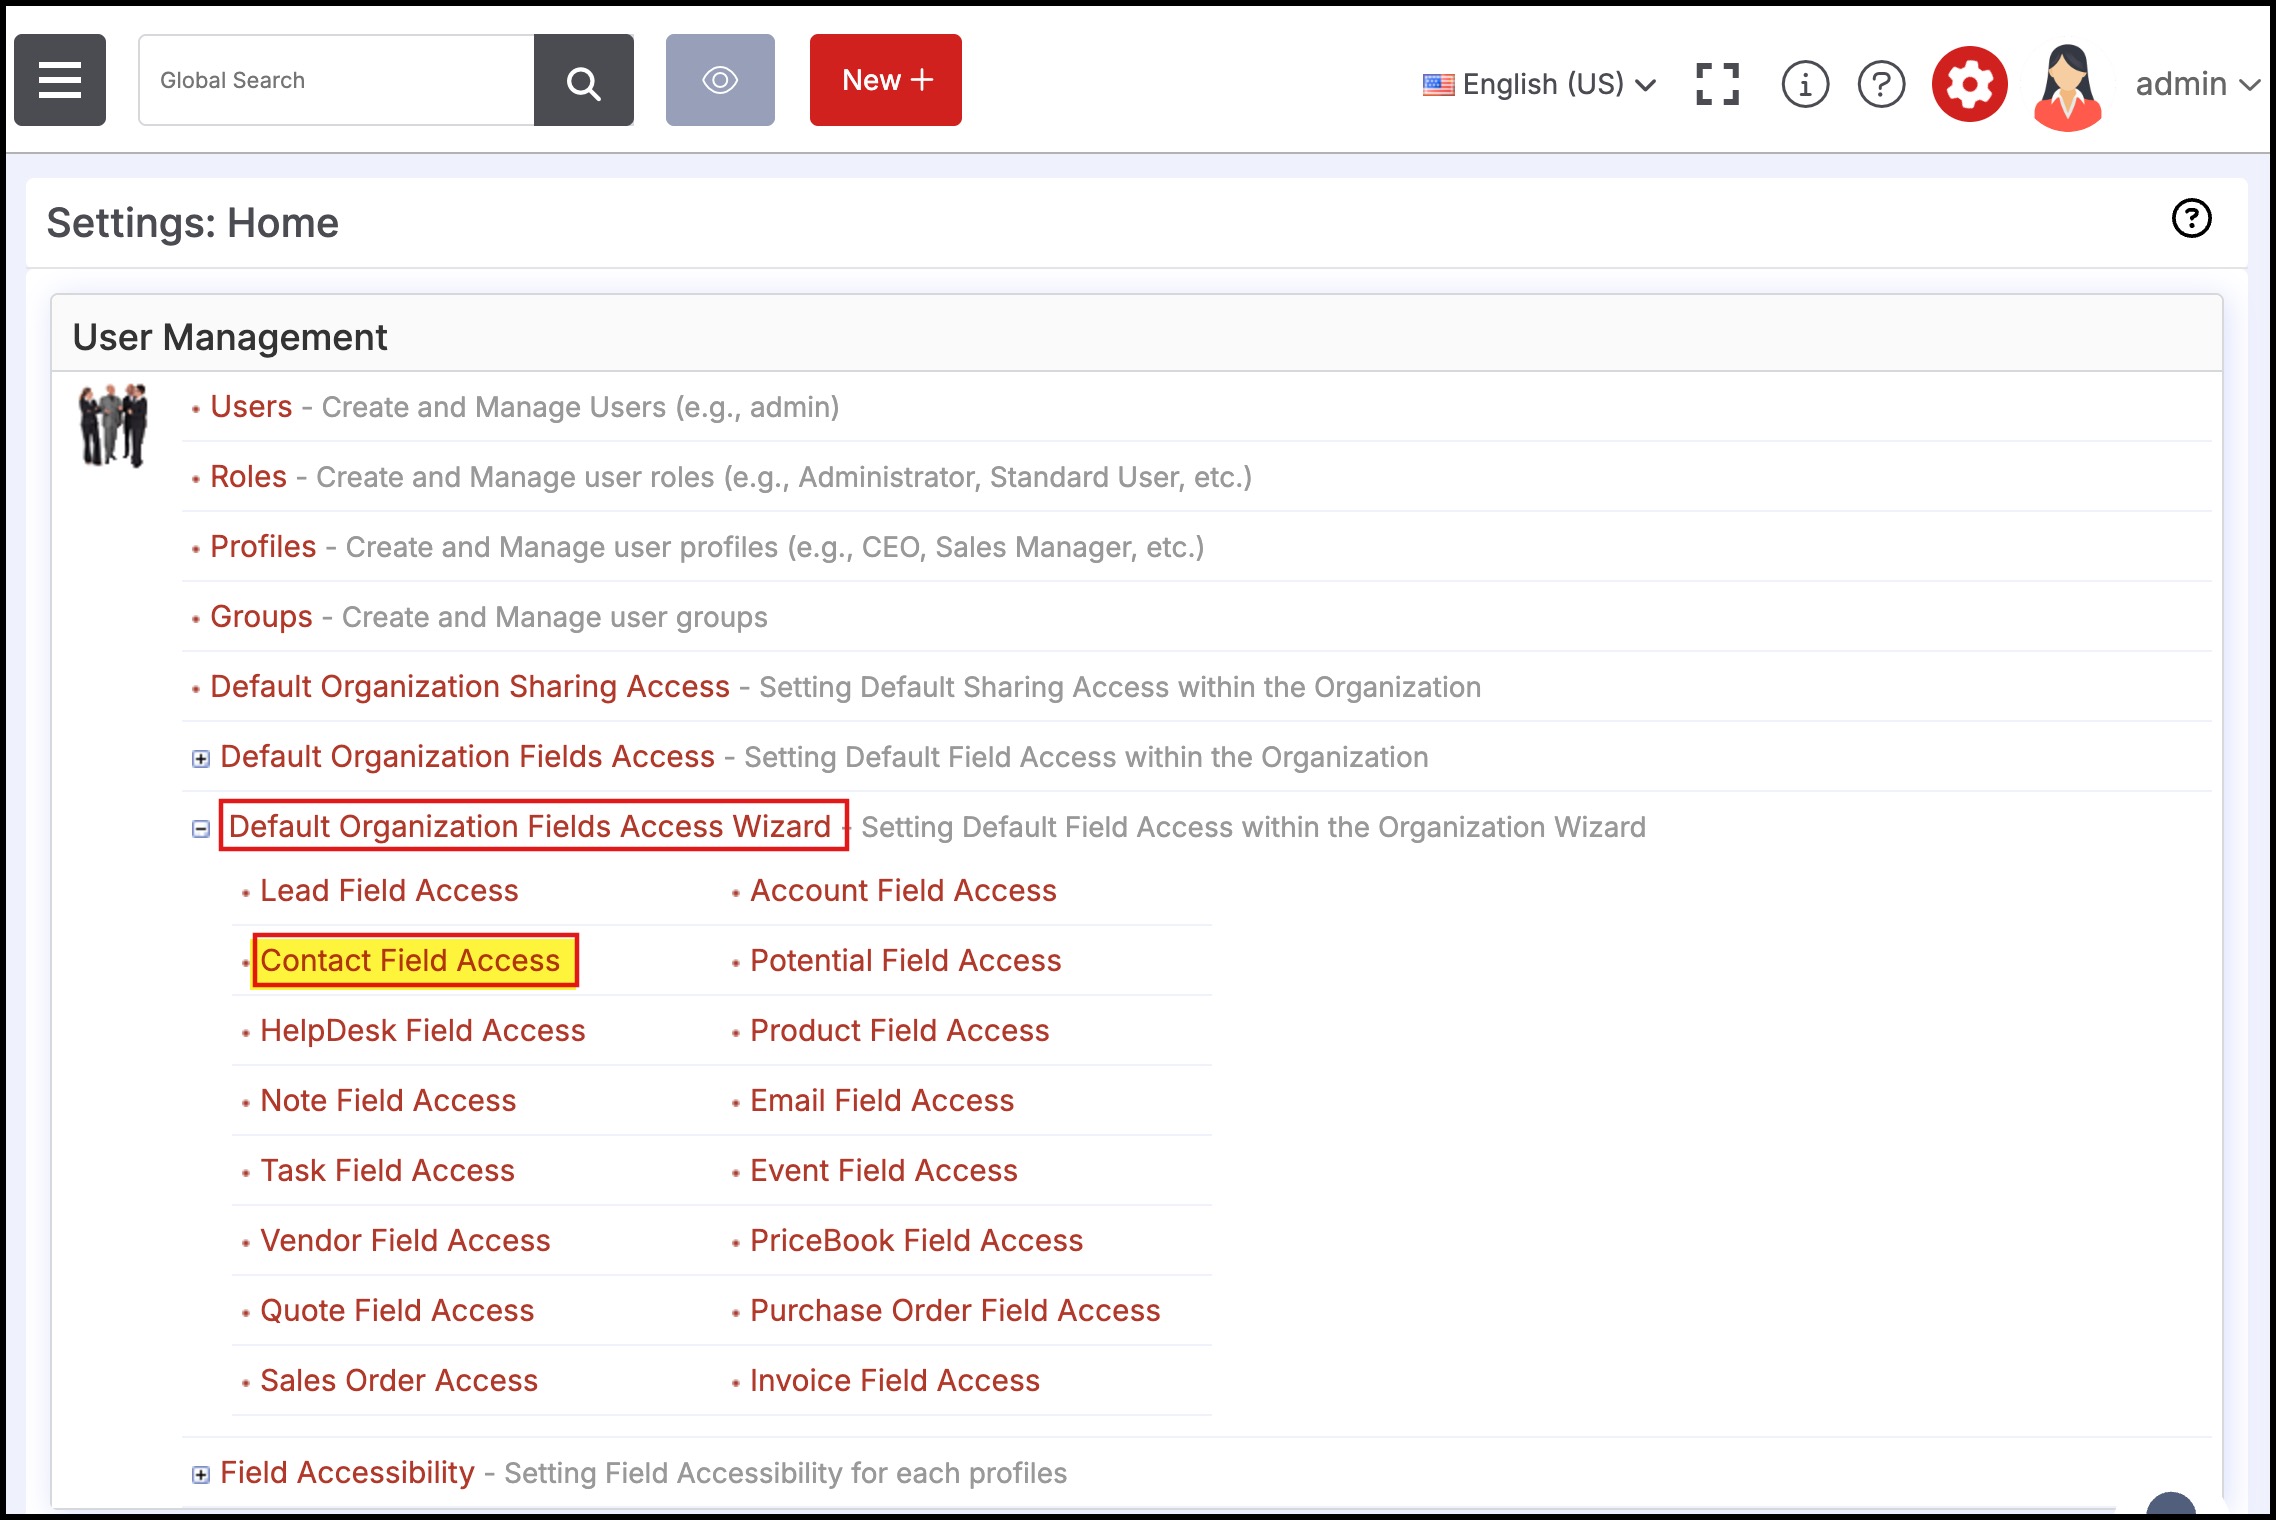
- Now choose the module for which you want to set default field access within the organization.
As an example, we are choosing Contact Field Access.
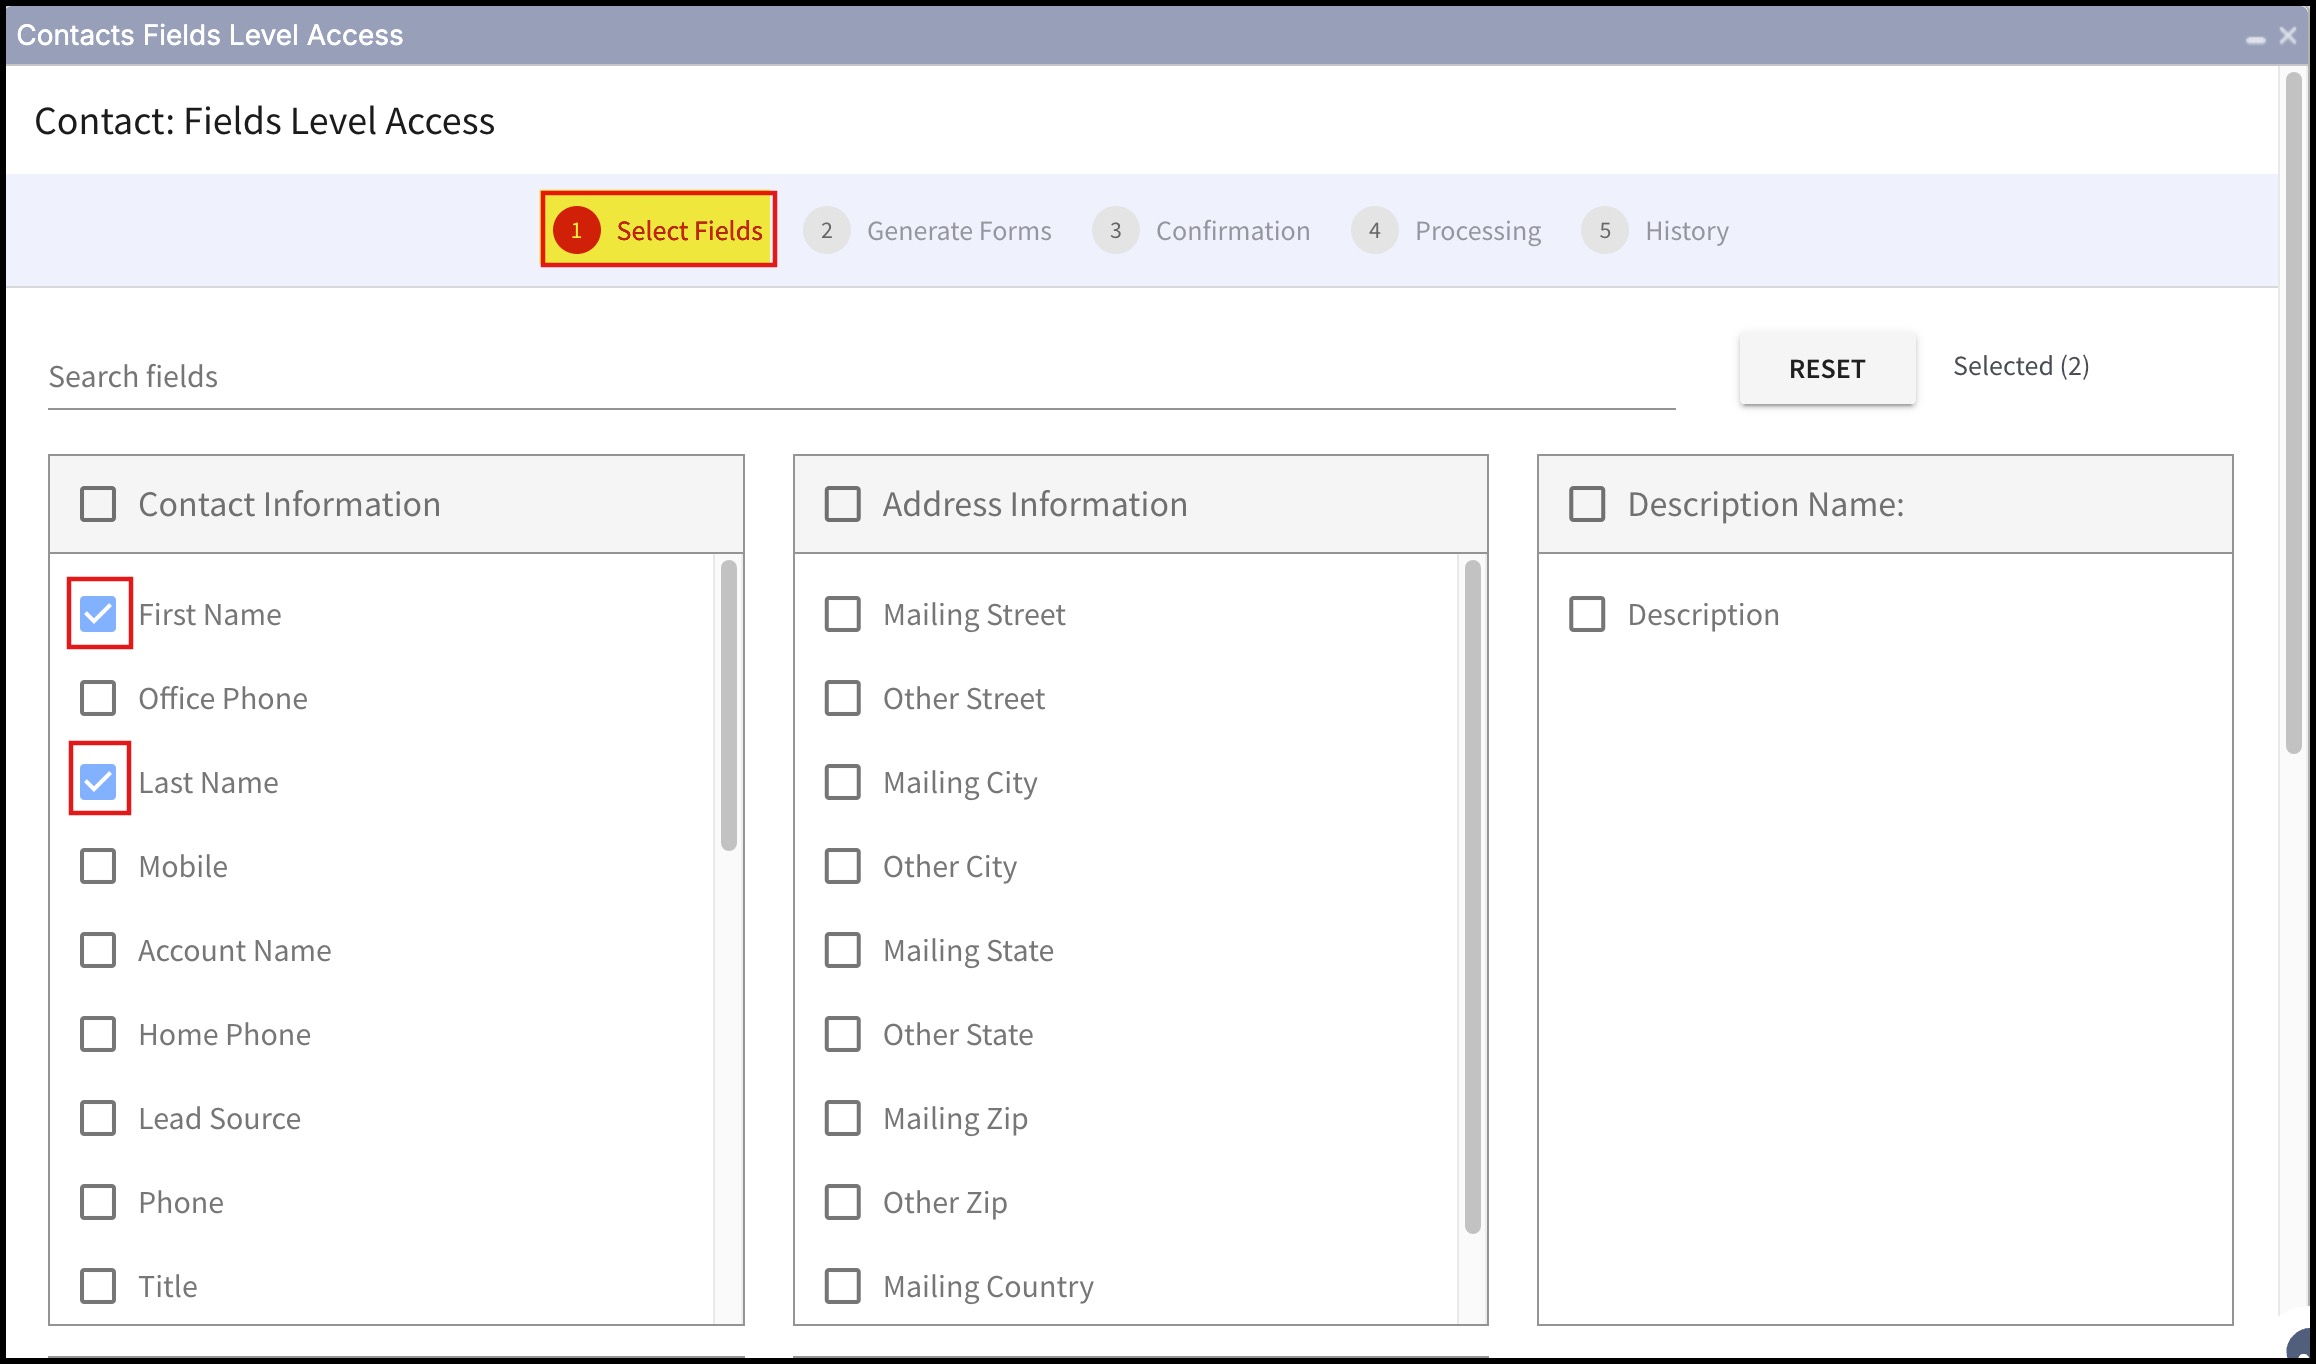
Step 1 - Select Fields
Contact: Fields Level Access window will open where you can choose the fields.
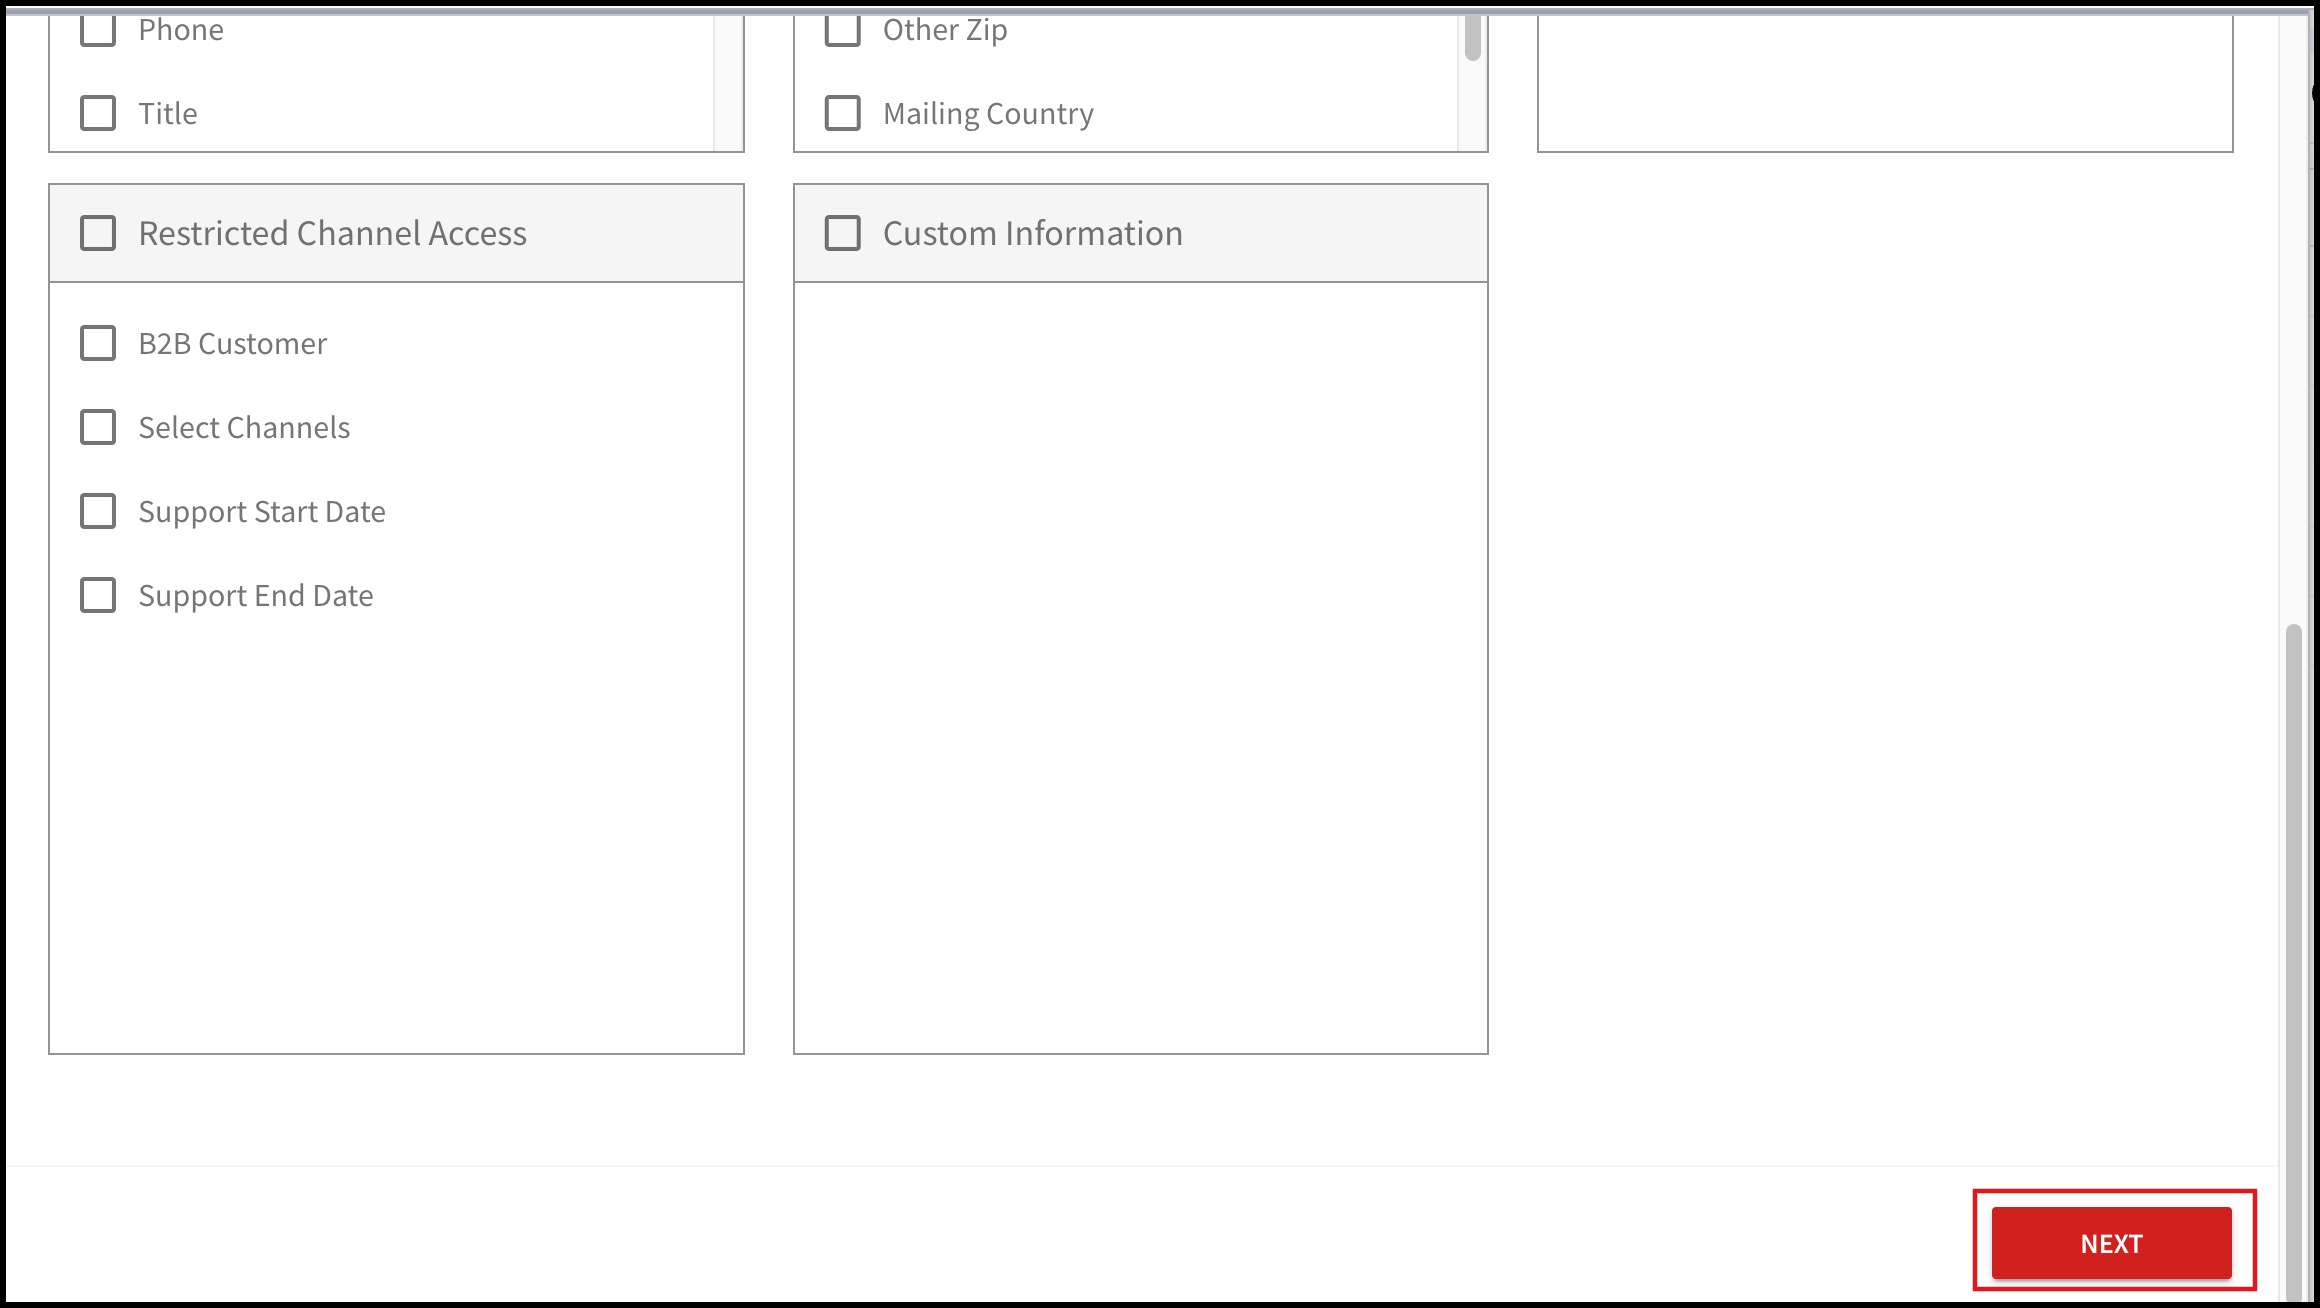
- Let's select the fields.
- Now scroll down, click on Next.
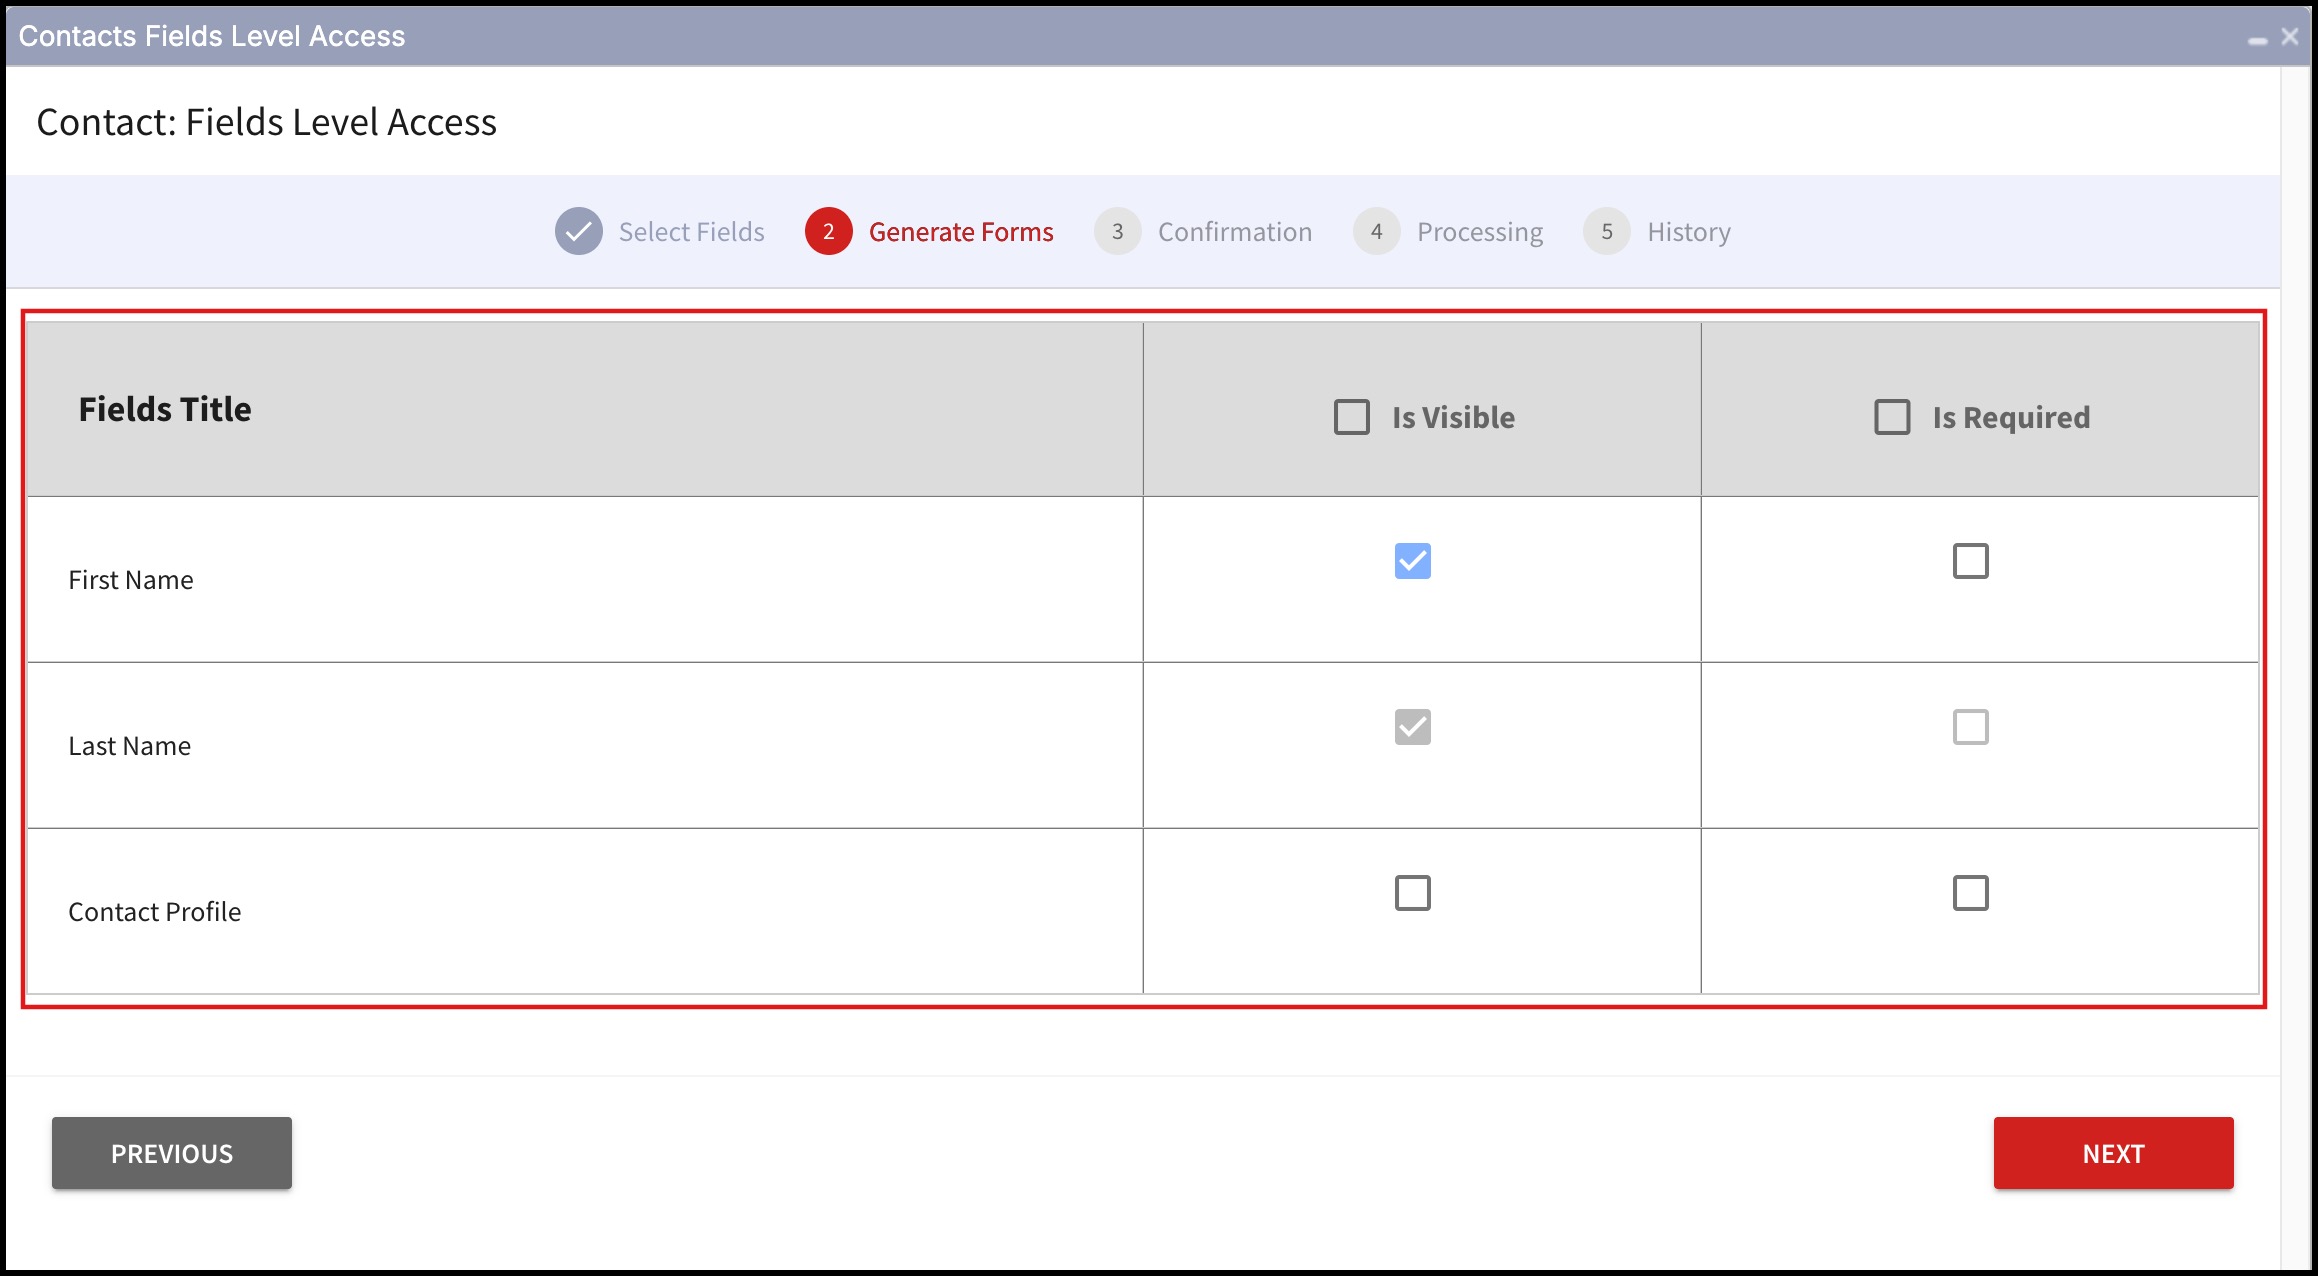
Step 2 - Generate Forms
Here you can see the First Name is visible but not is required that means it is visible but not mandatory.
Some fields are by default mandatory. They will be visible with a gray checkbox like the Last Name.
Contact Profile neither is visible nor is required that means you cannot see the field.
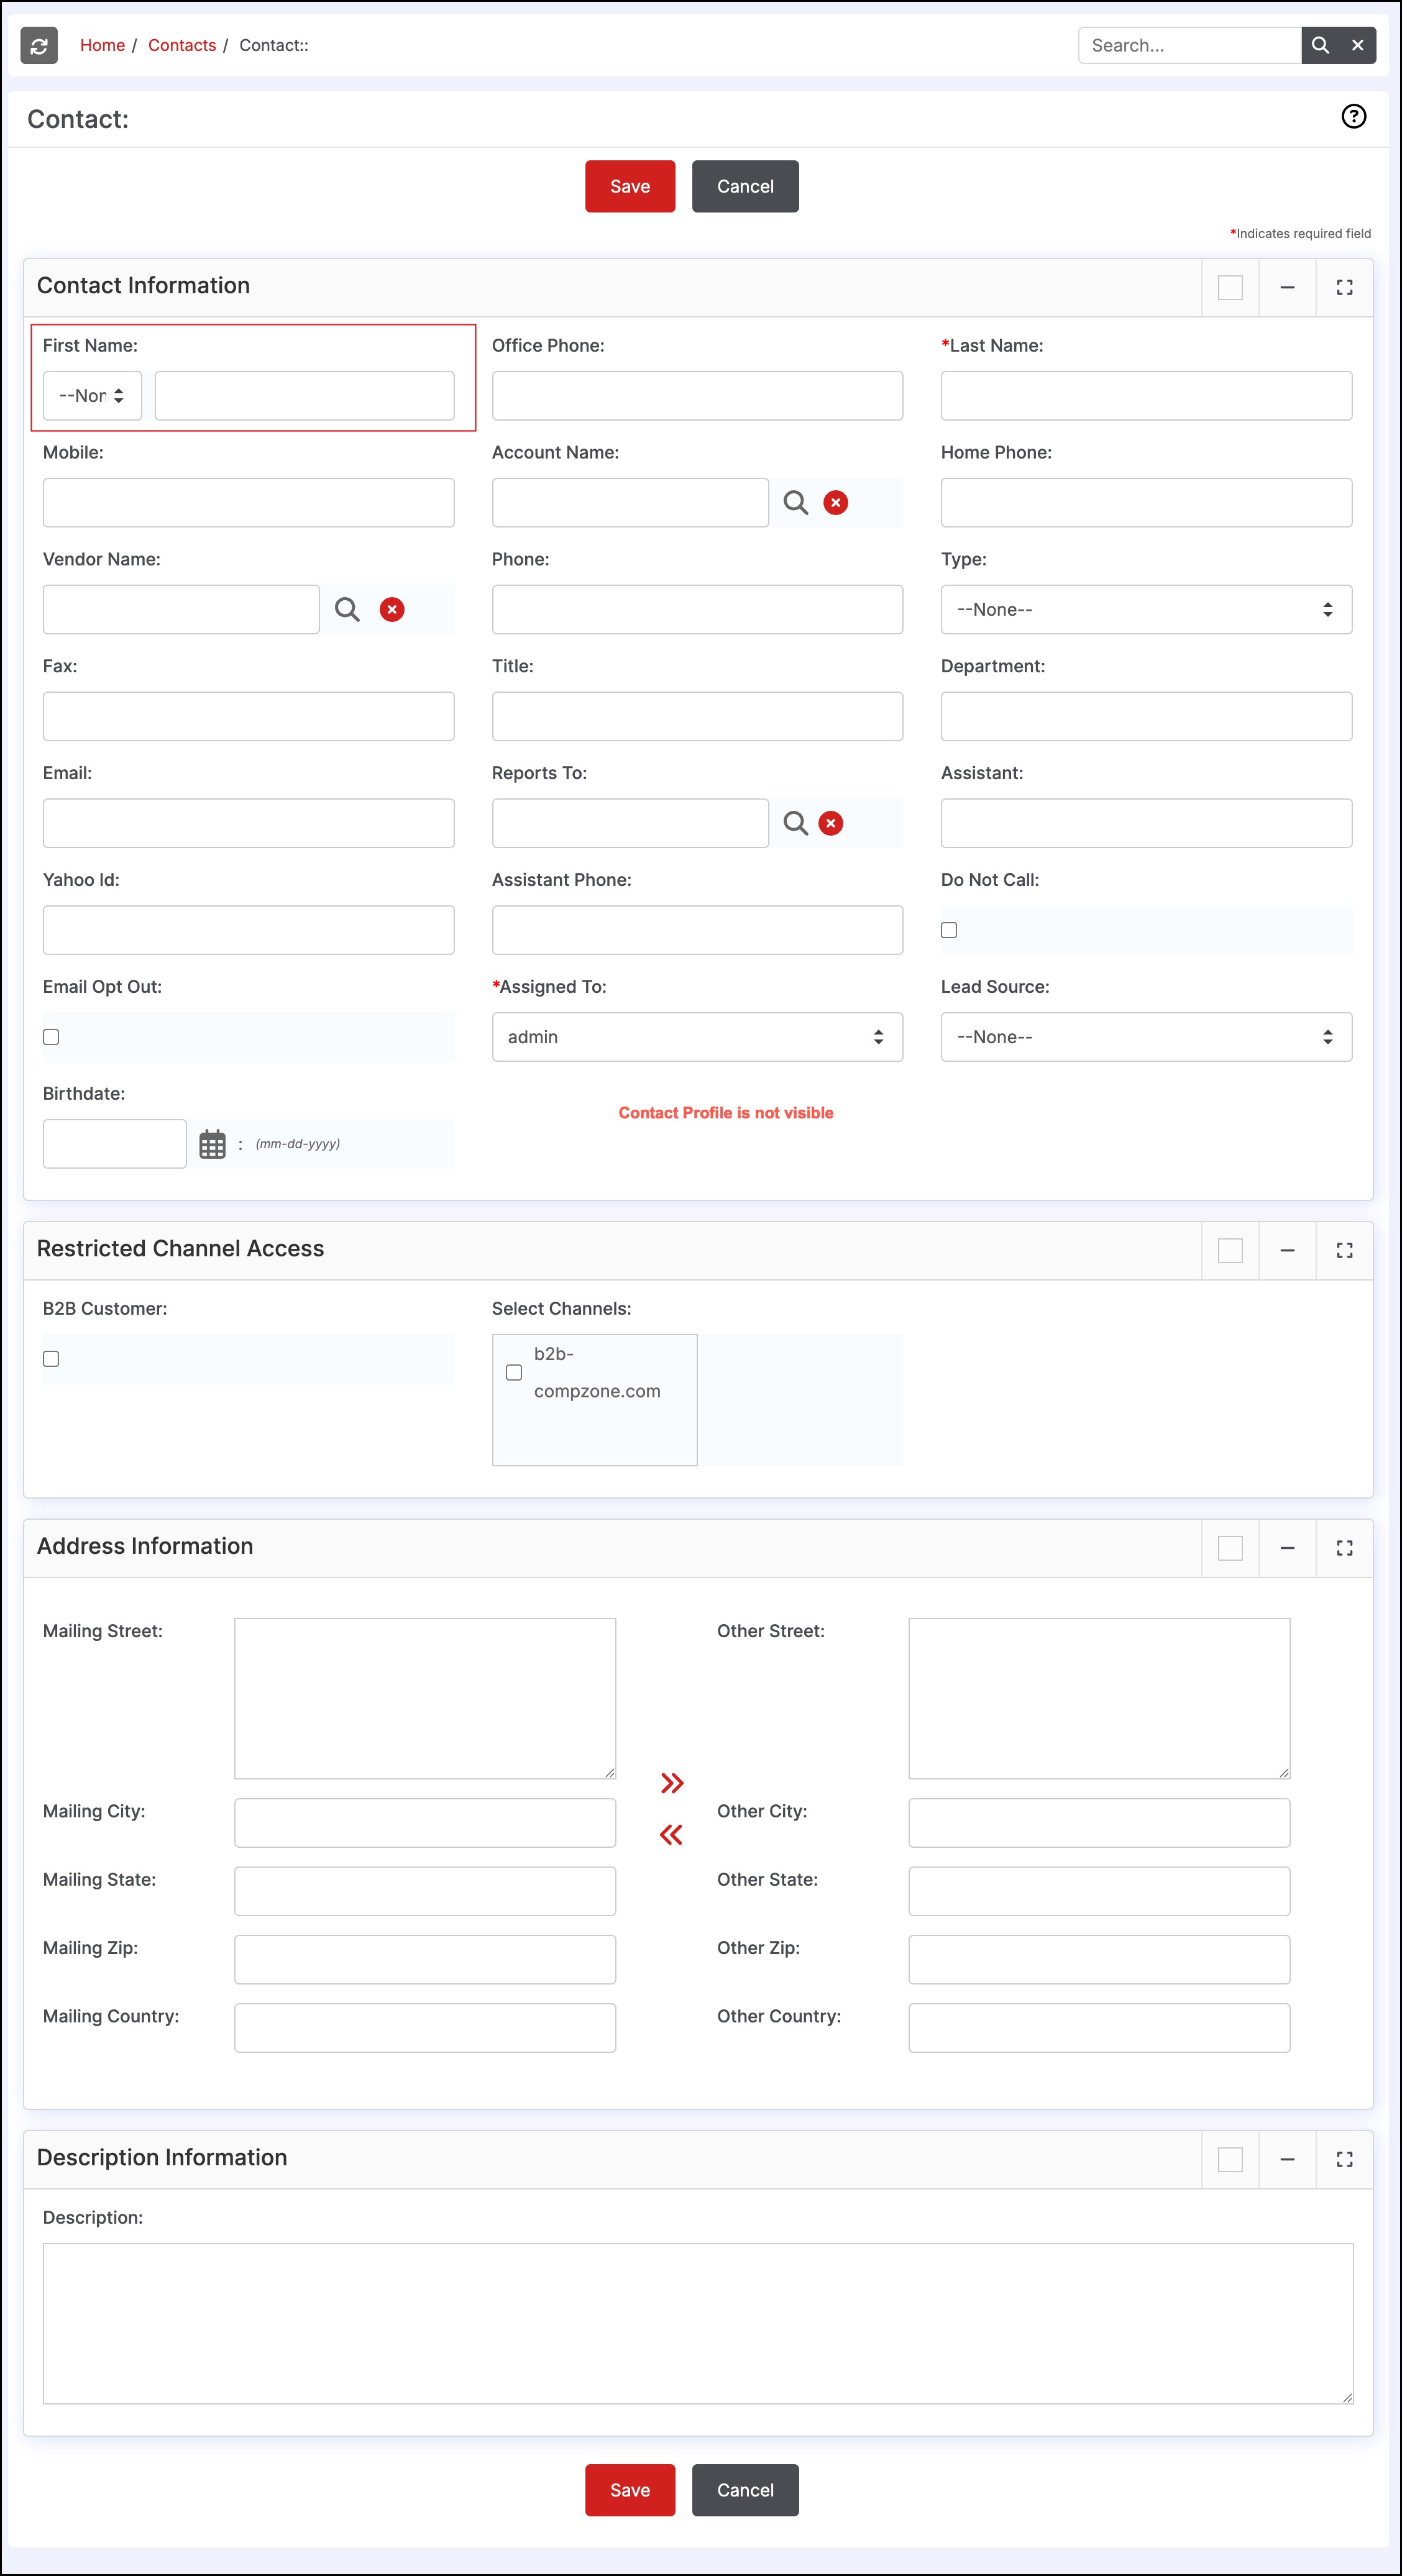
Below is the contact form with unchanged default field access.
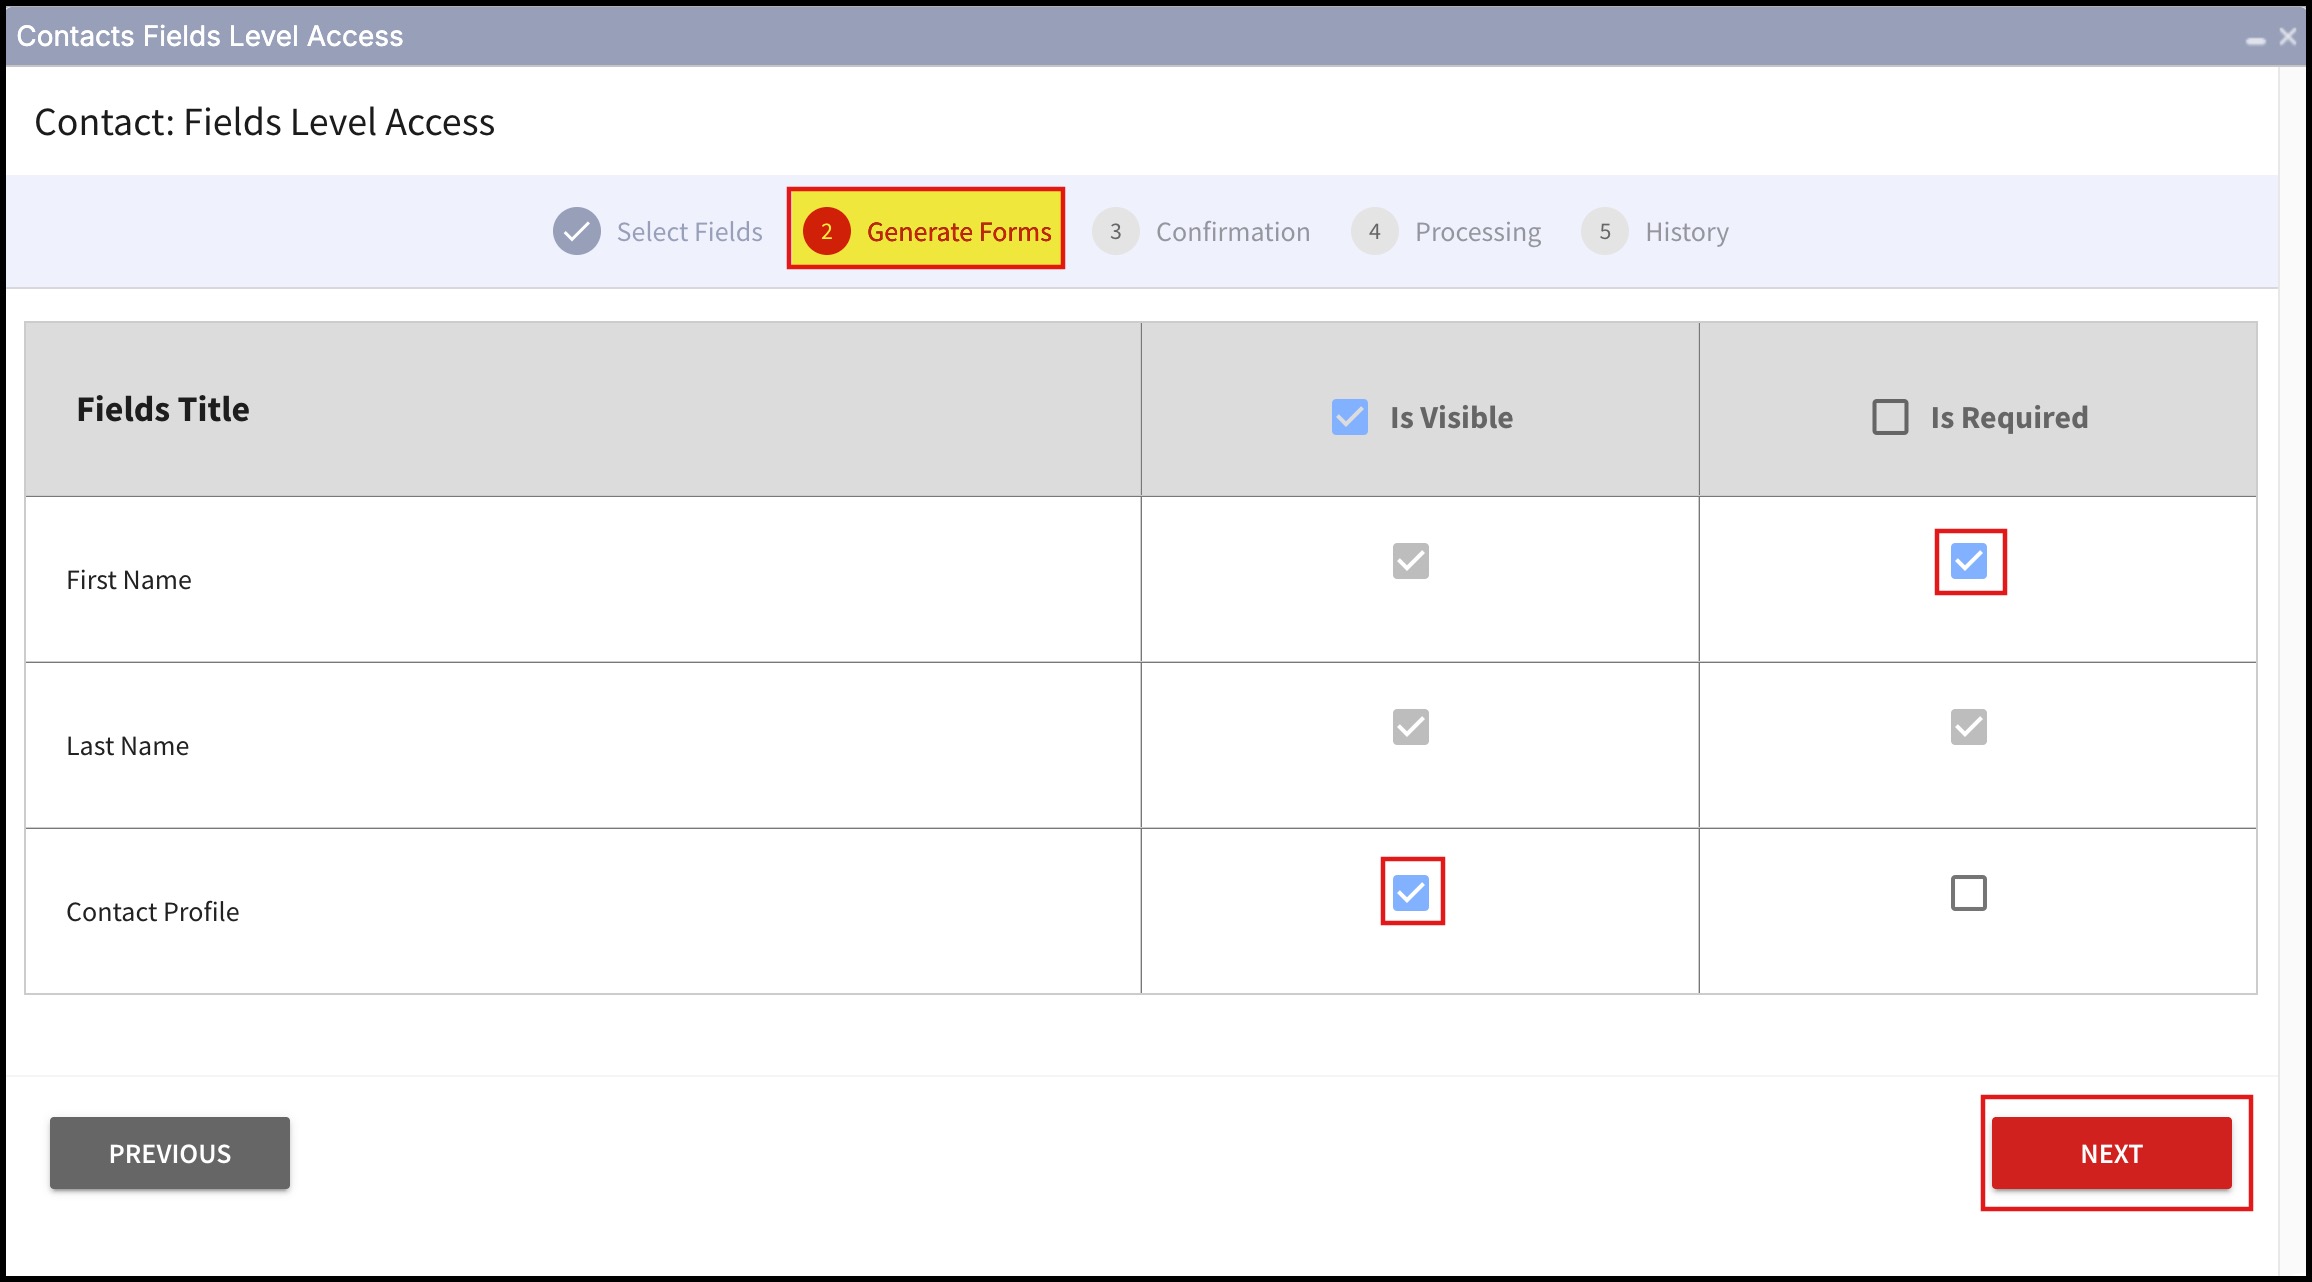
Now let's make the changes
- For First Name, let's click on is required checkbox.
- Let's make the Contact Profile visible in the new form by clicking on is visible checkbox.
- Once done, click on Next.
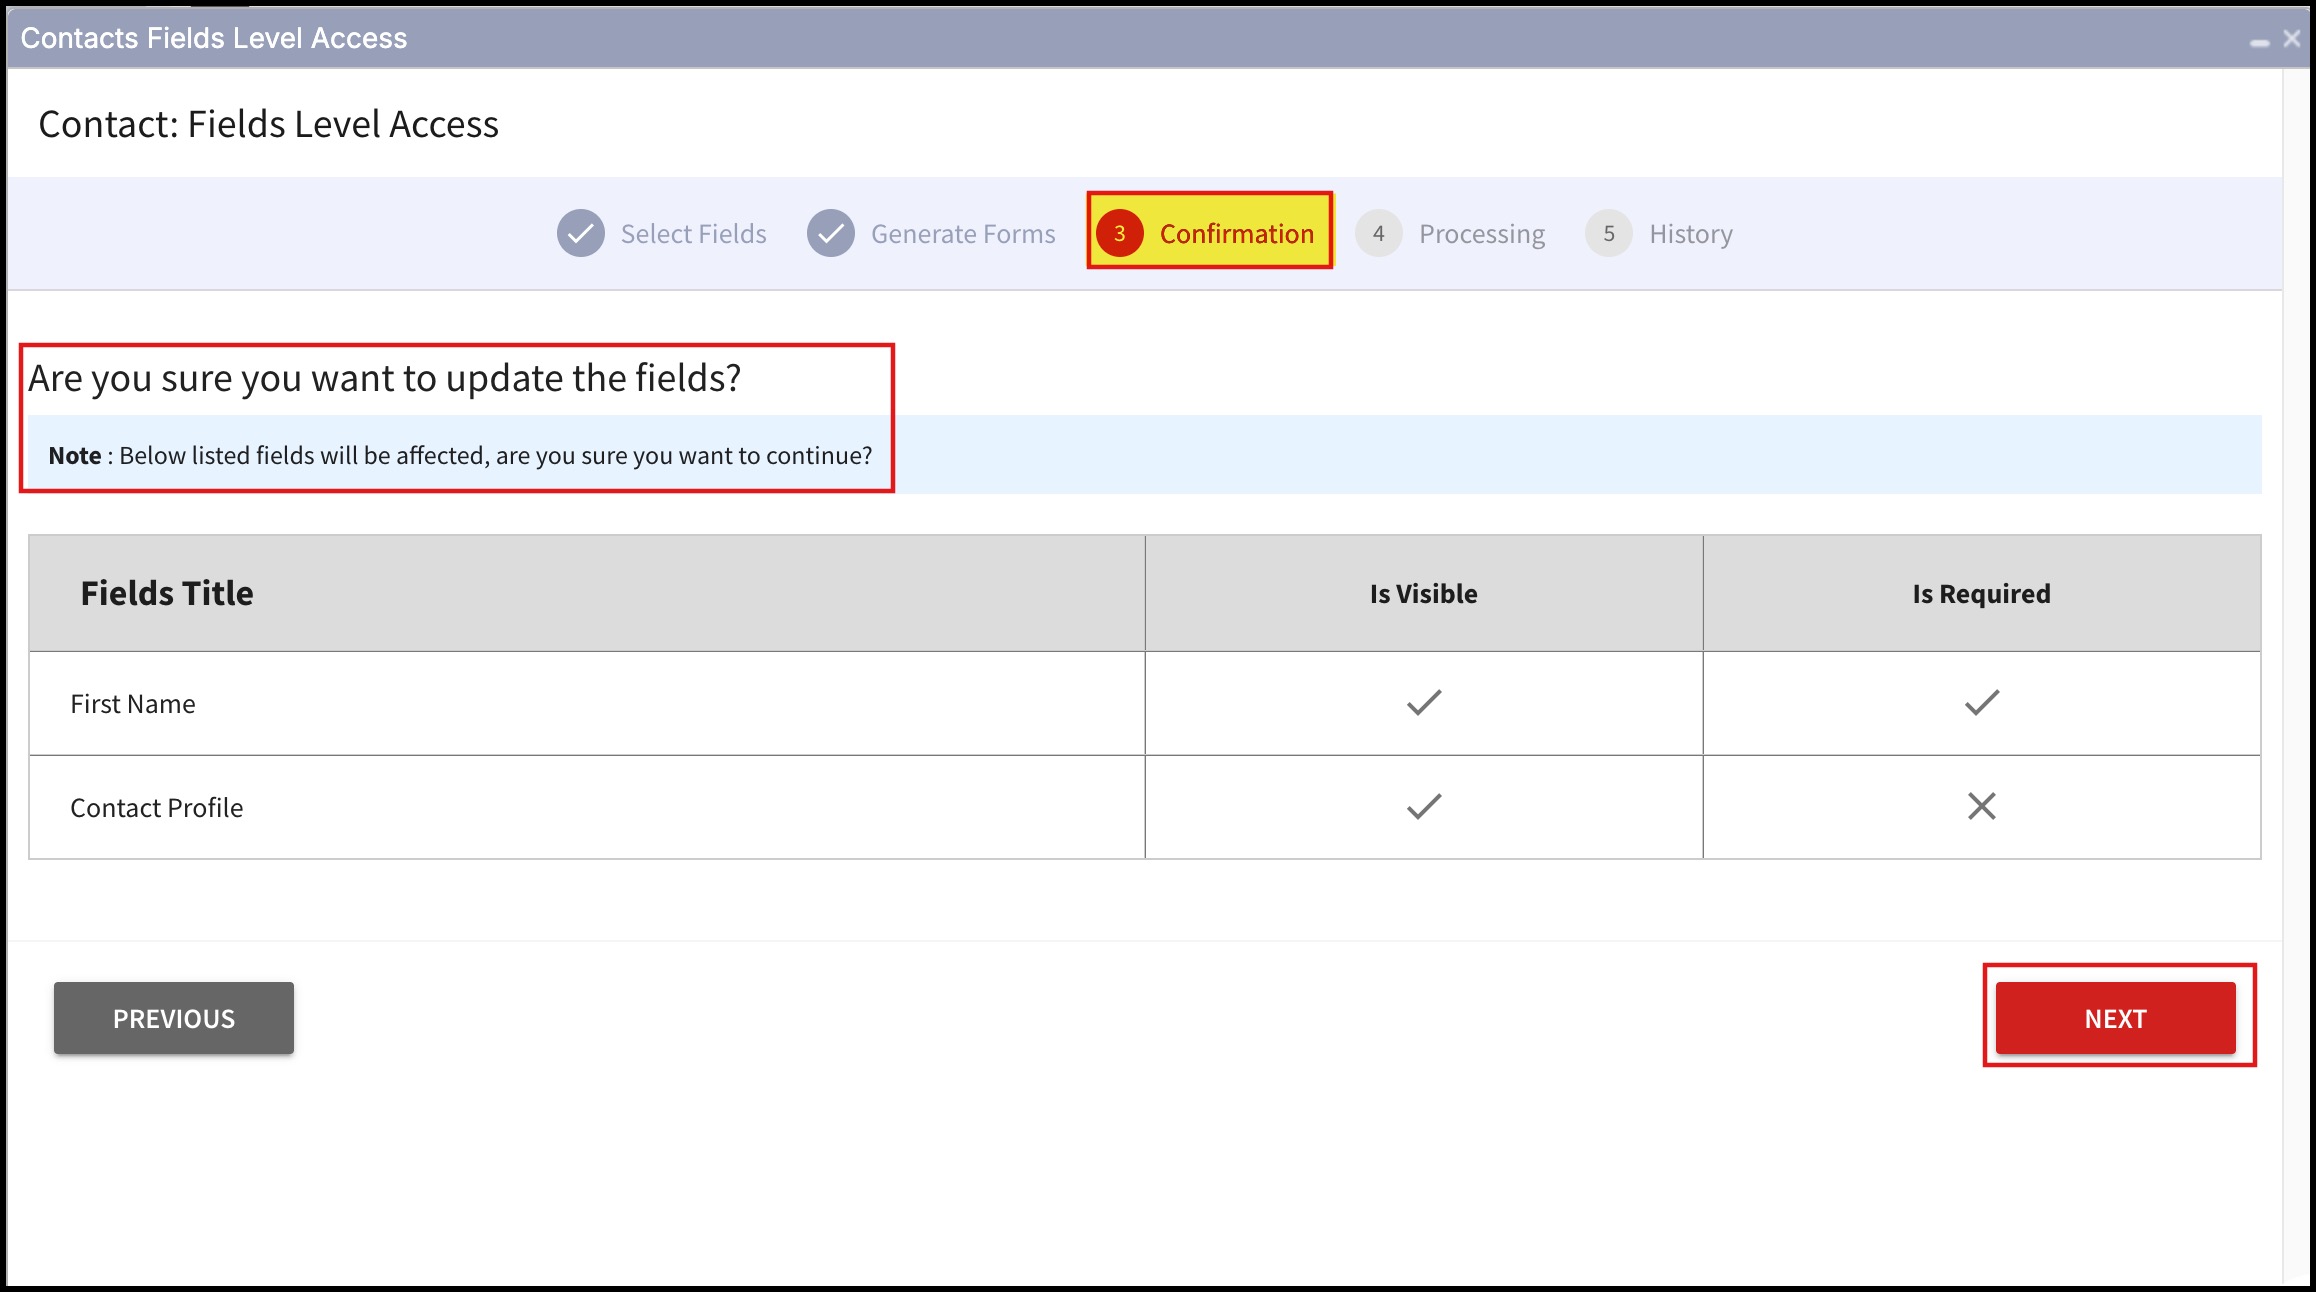
Step 3 - Confirmation
- In this step you'll be asked if you are sure about updating the fields. If yes, proceed by clicking on Next. If you want to make additional changes, click on the Previous button.
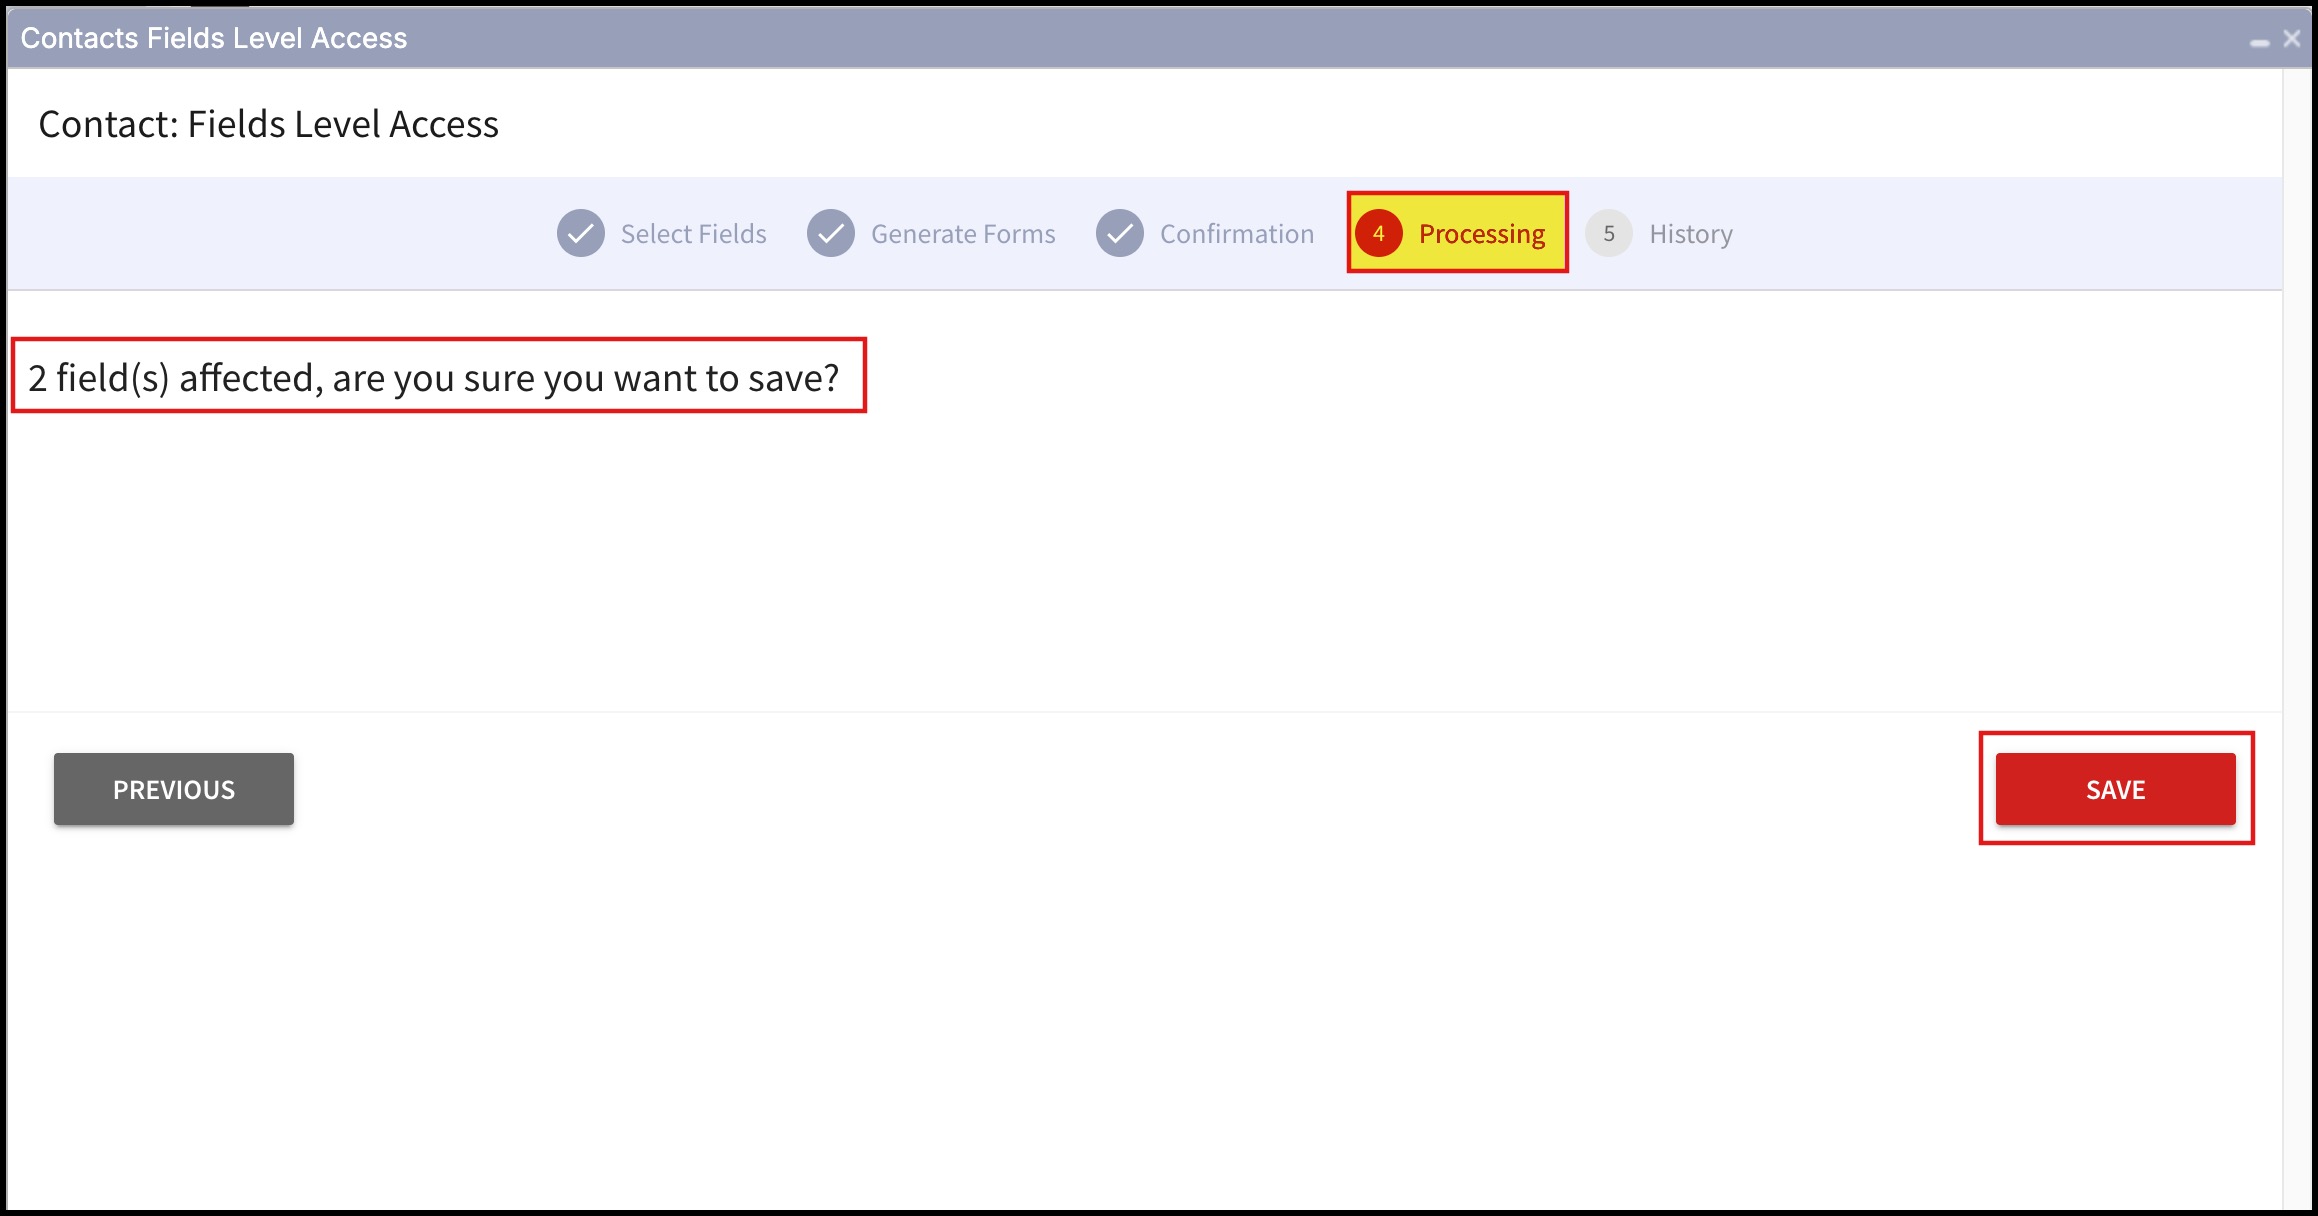
Step 4 - Processing
- In this step you will be asked if you are sure to save the changes to the fields selected. Proceed by clicking on Save.
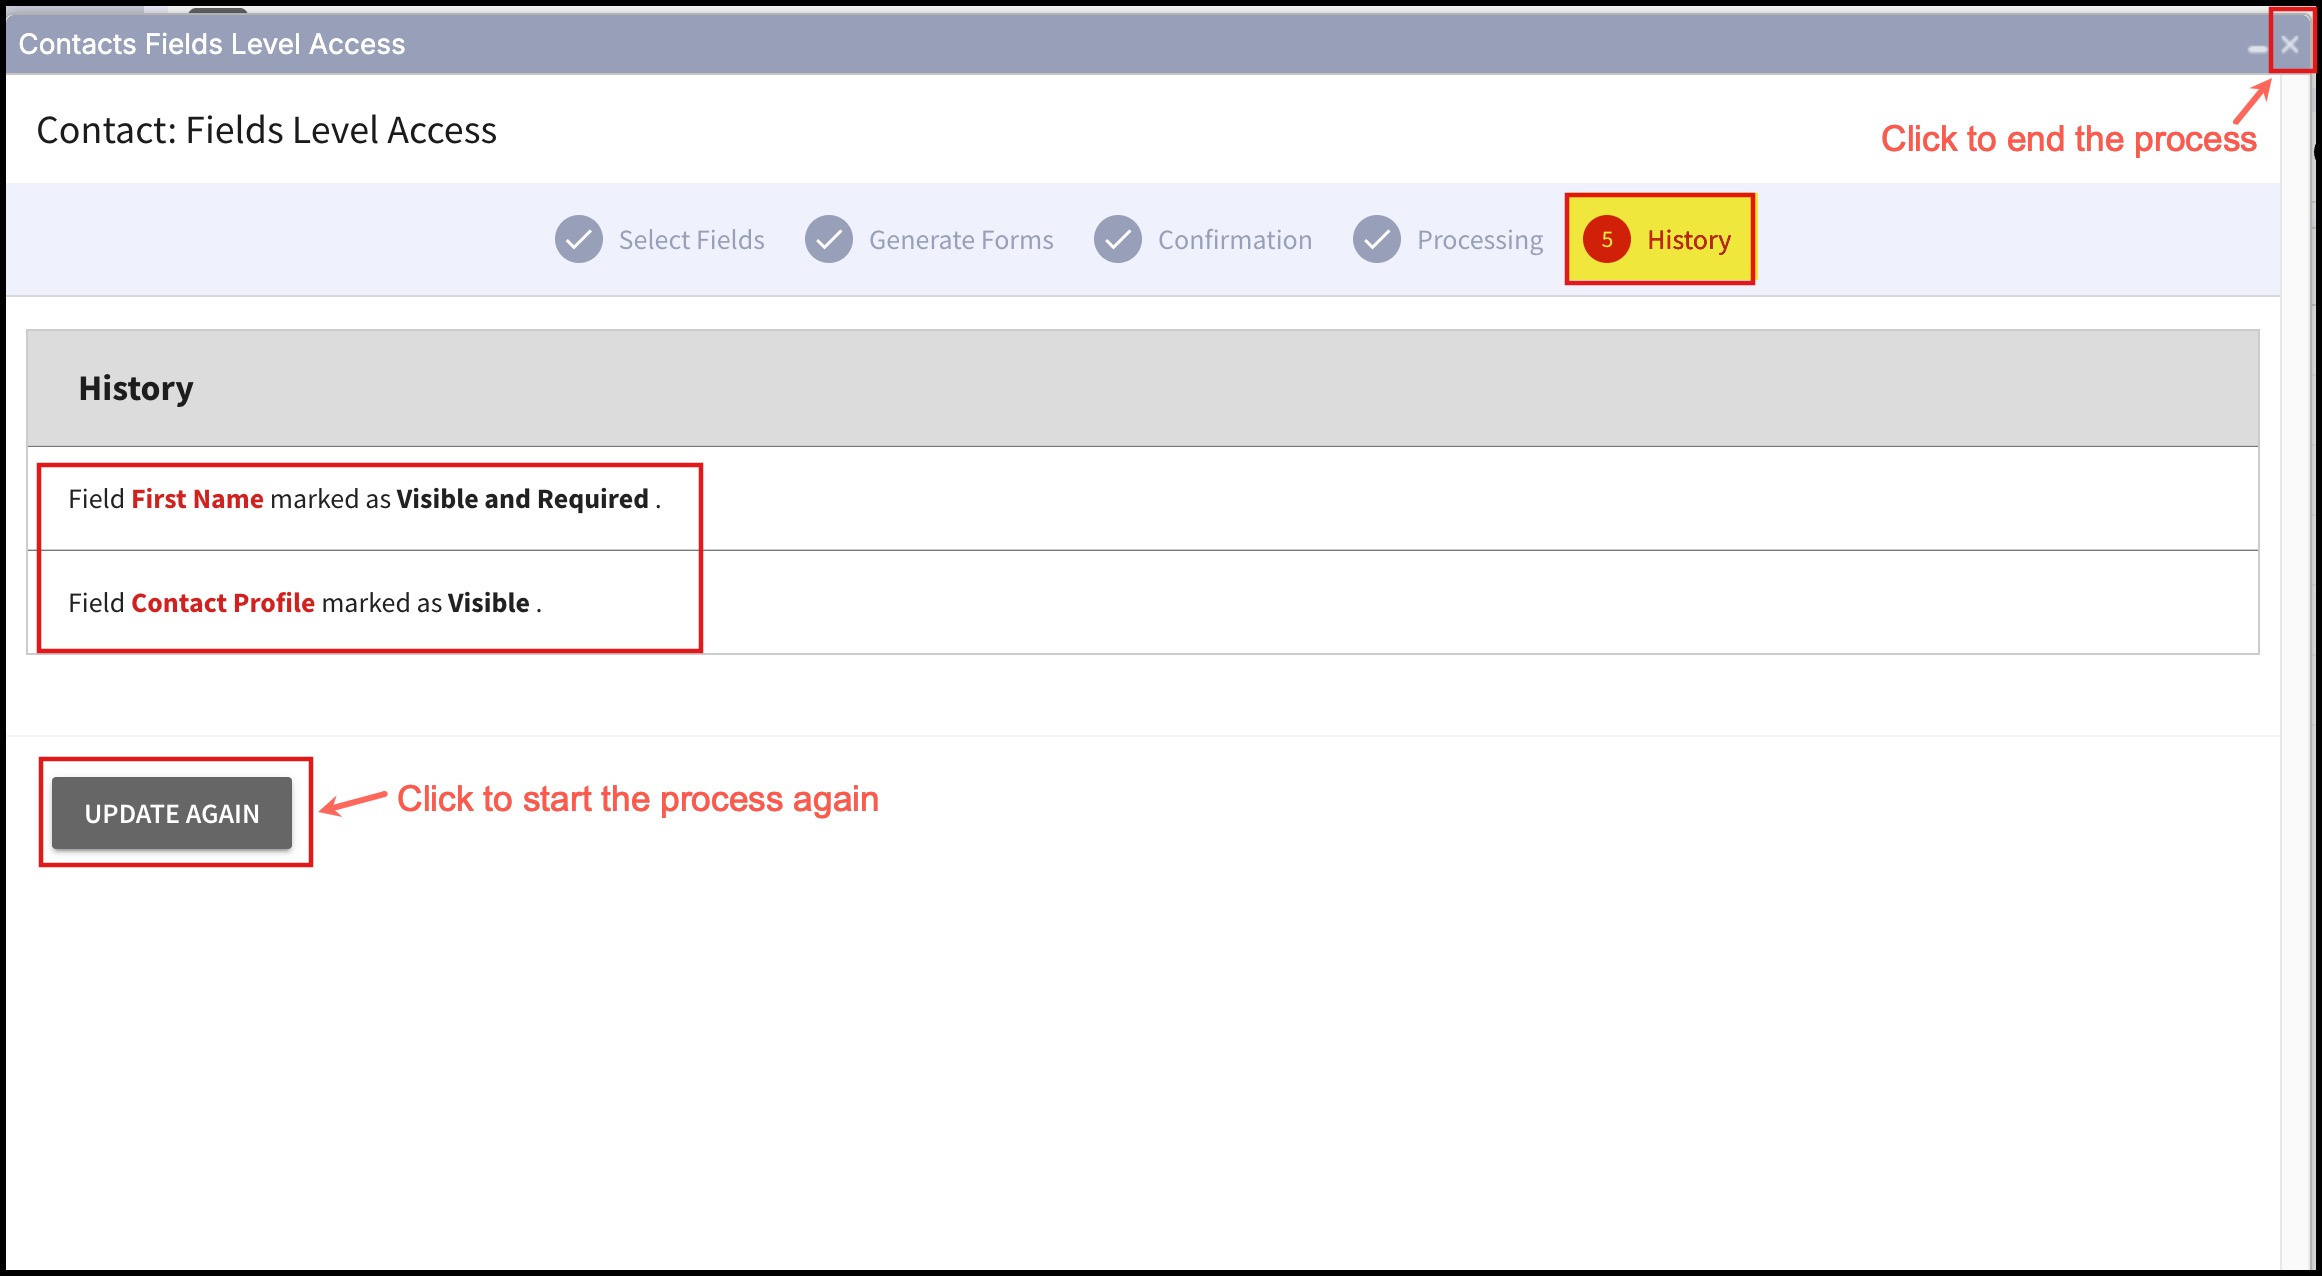
Step 5 - History
- Whatever changes you've made to the fields will be visible in History. If you want to continue with the Contact field level access, click on Update Again or else simply close the window (x).
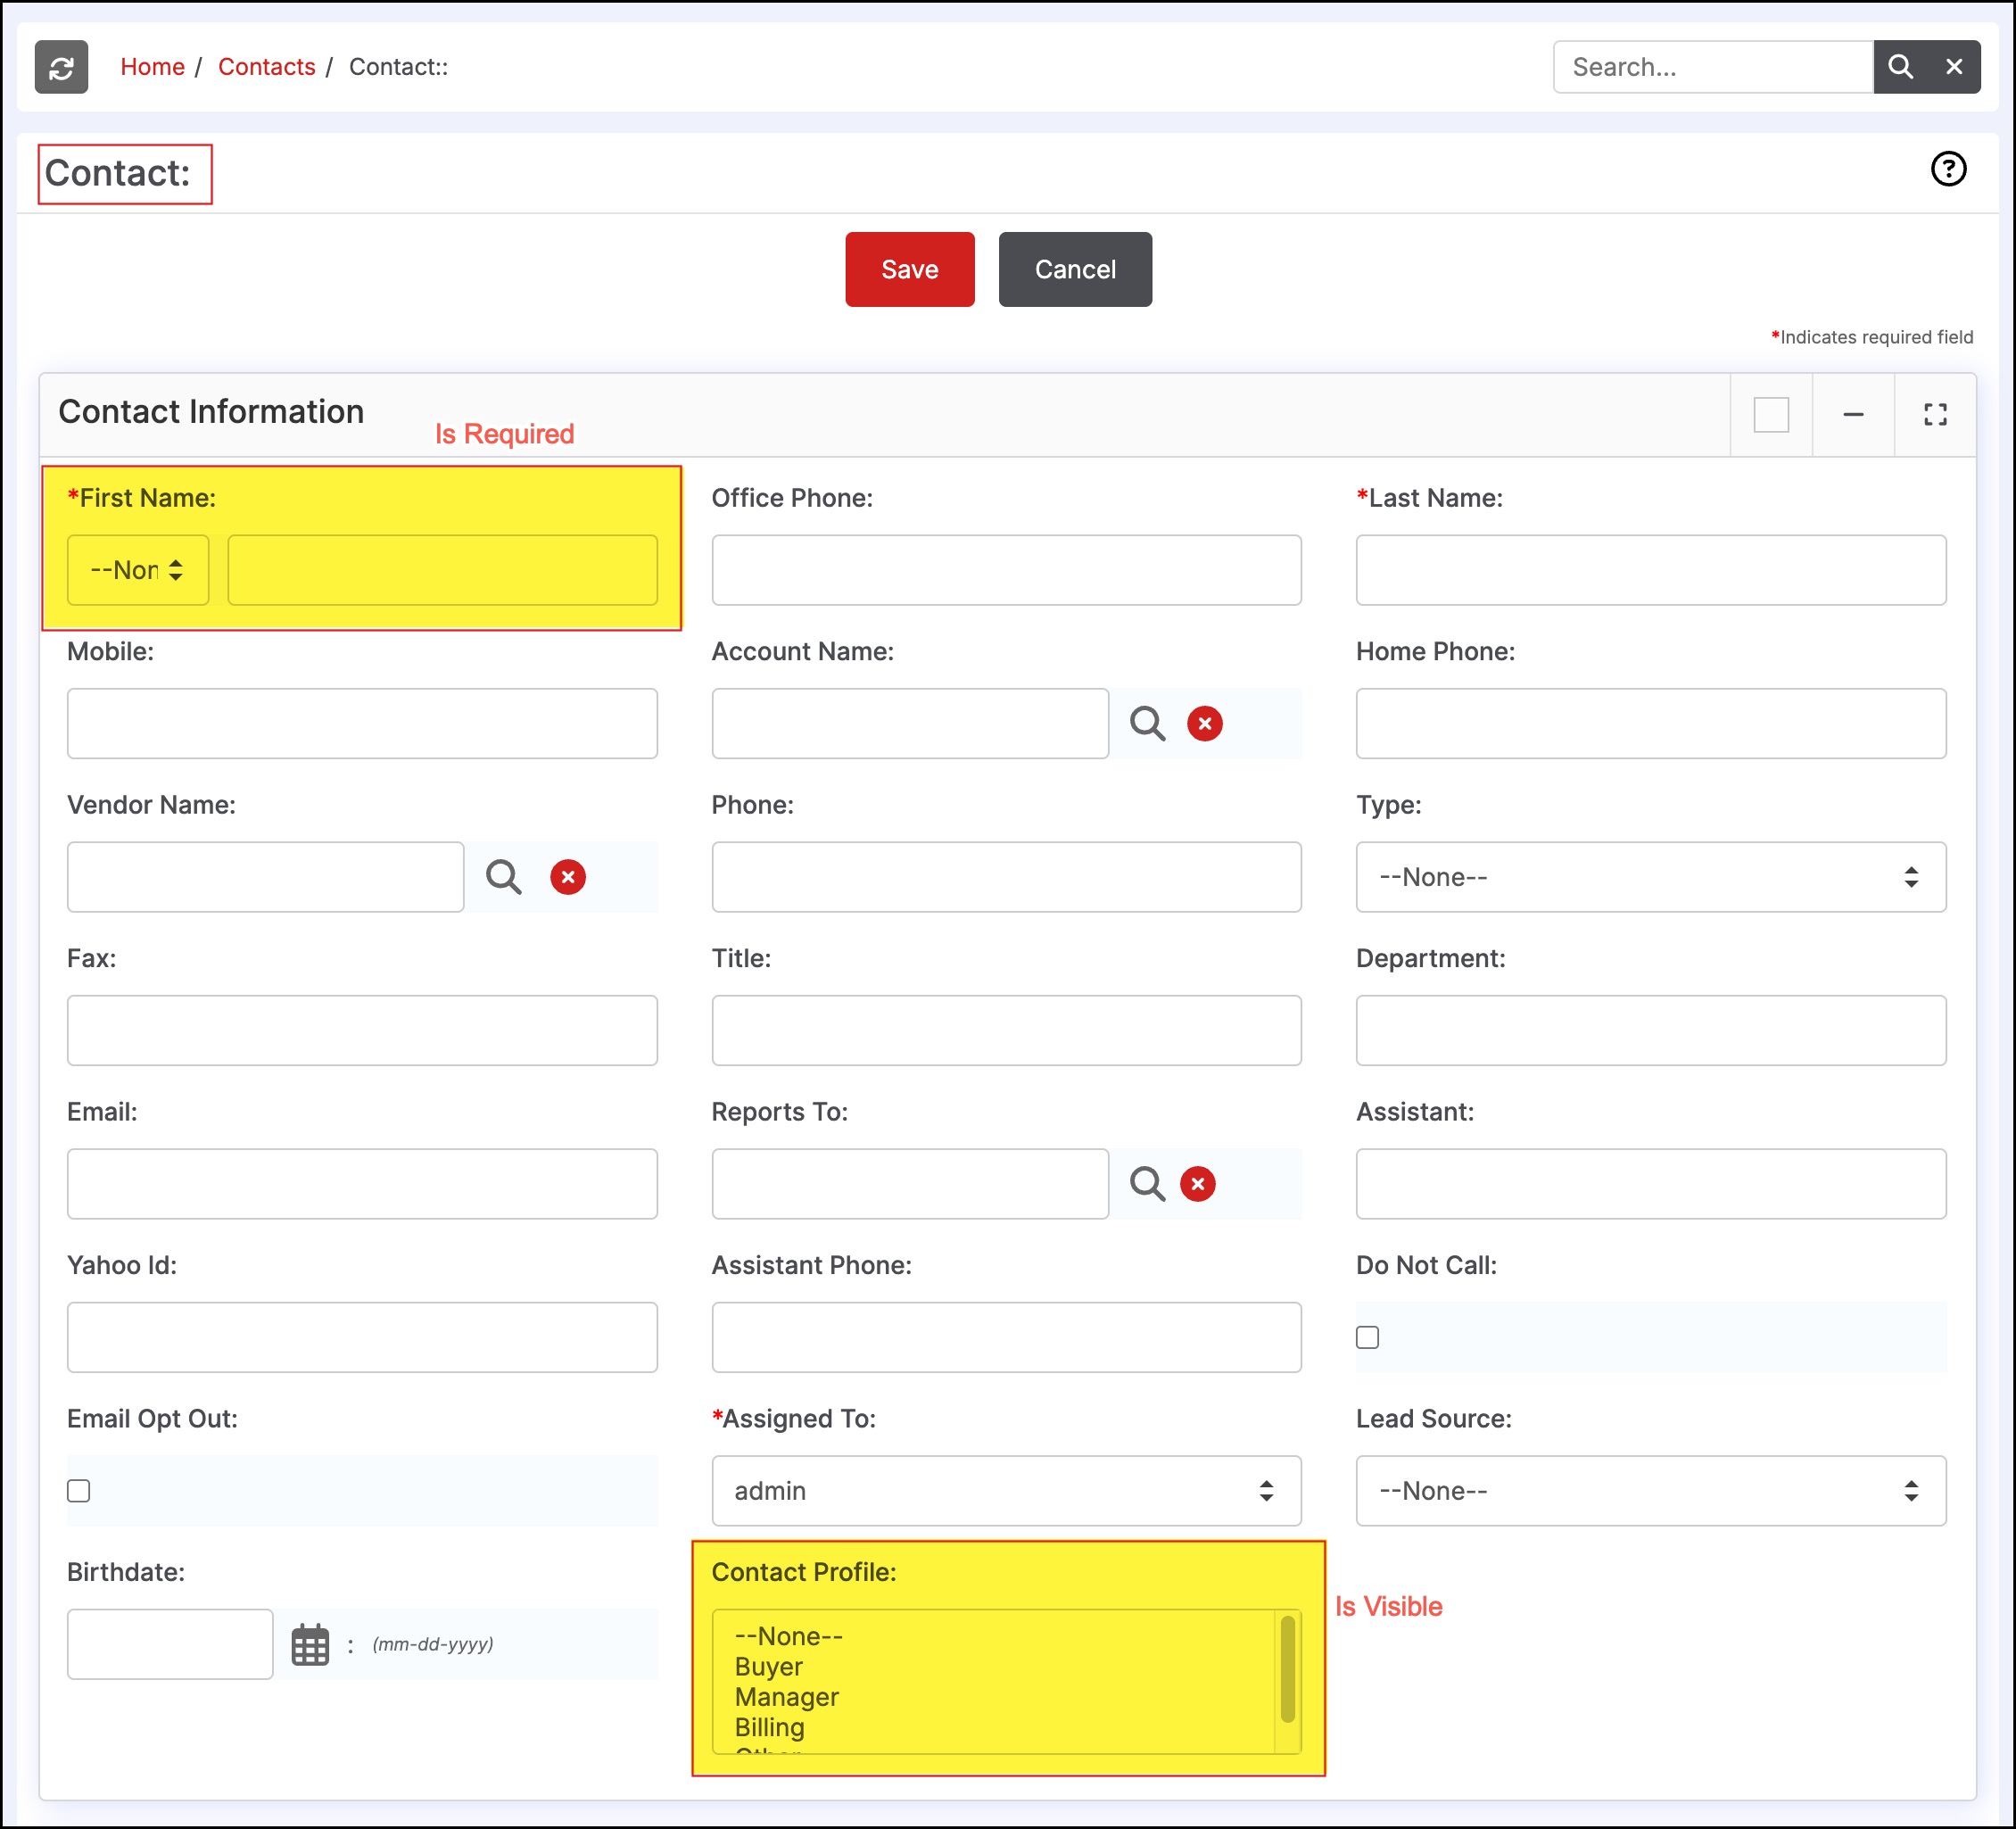
Now when you'll create a New Contact, perform bulk edit process, or edit the existing contacts, you can see the field access changes made.
Updated over 1 year ago