Pick Workflow
This section will demonstrate how to pick customer orders for fulfillment.
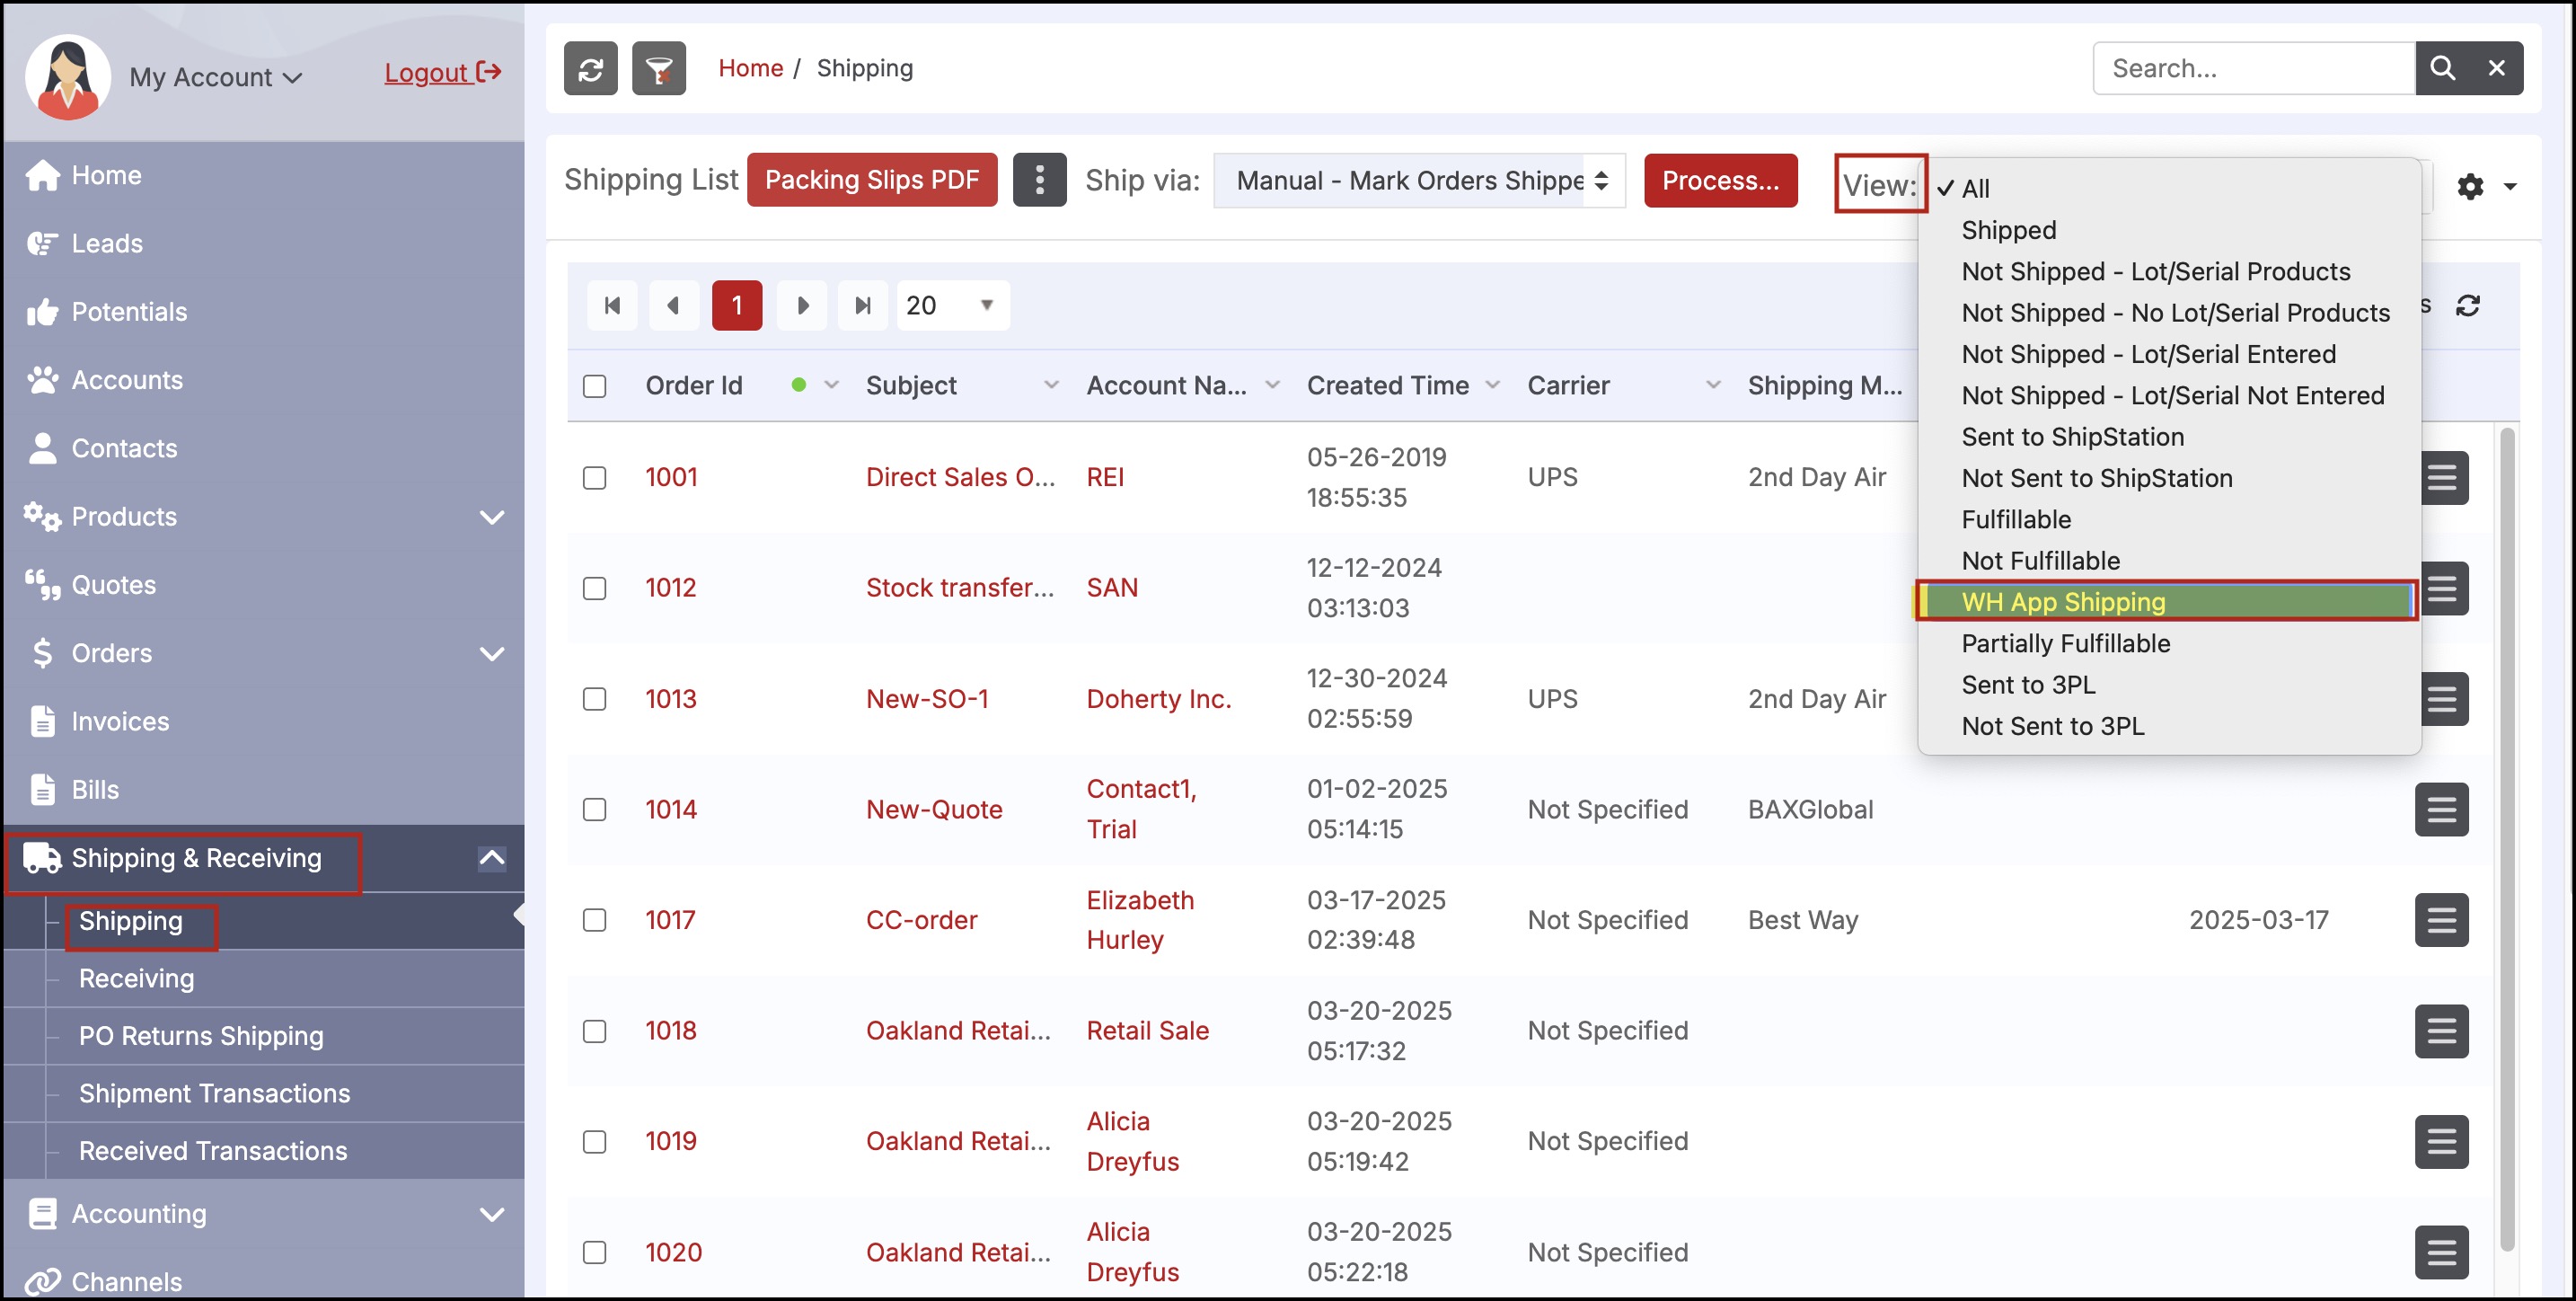
You can control which products appear in the app for picking by editing the custom view "WH App Shipping" in the Agiliron back office.
- Navigate to Shipping & Receiving -> Shipping in the back office.
- Select the drop-down icon next to "View" and select WH App Shipping.
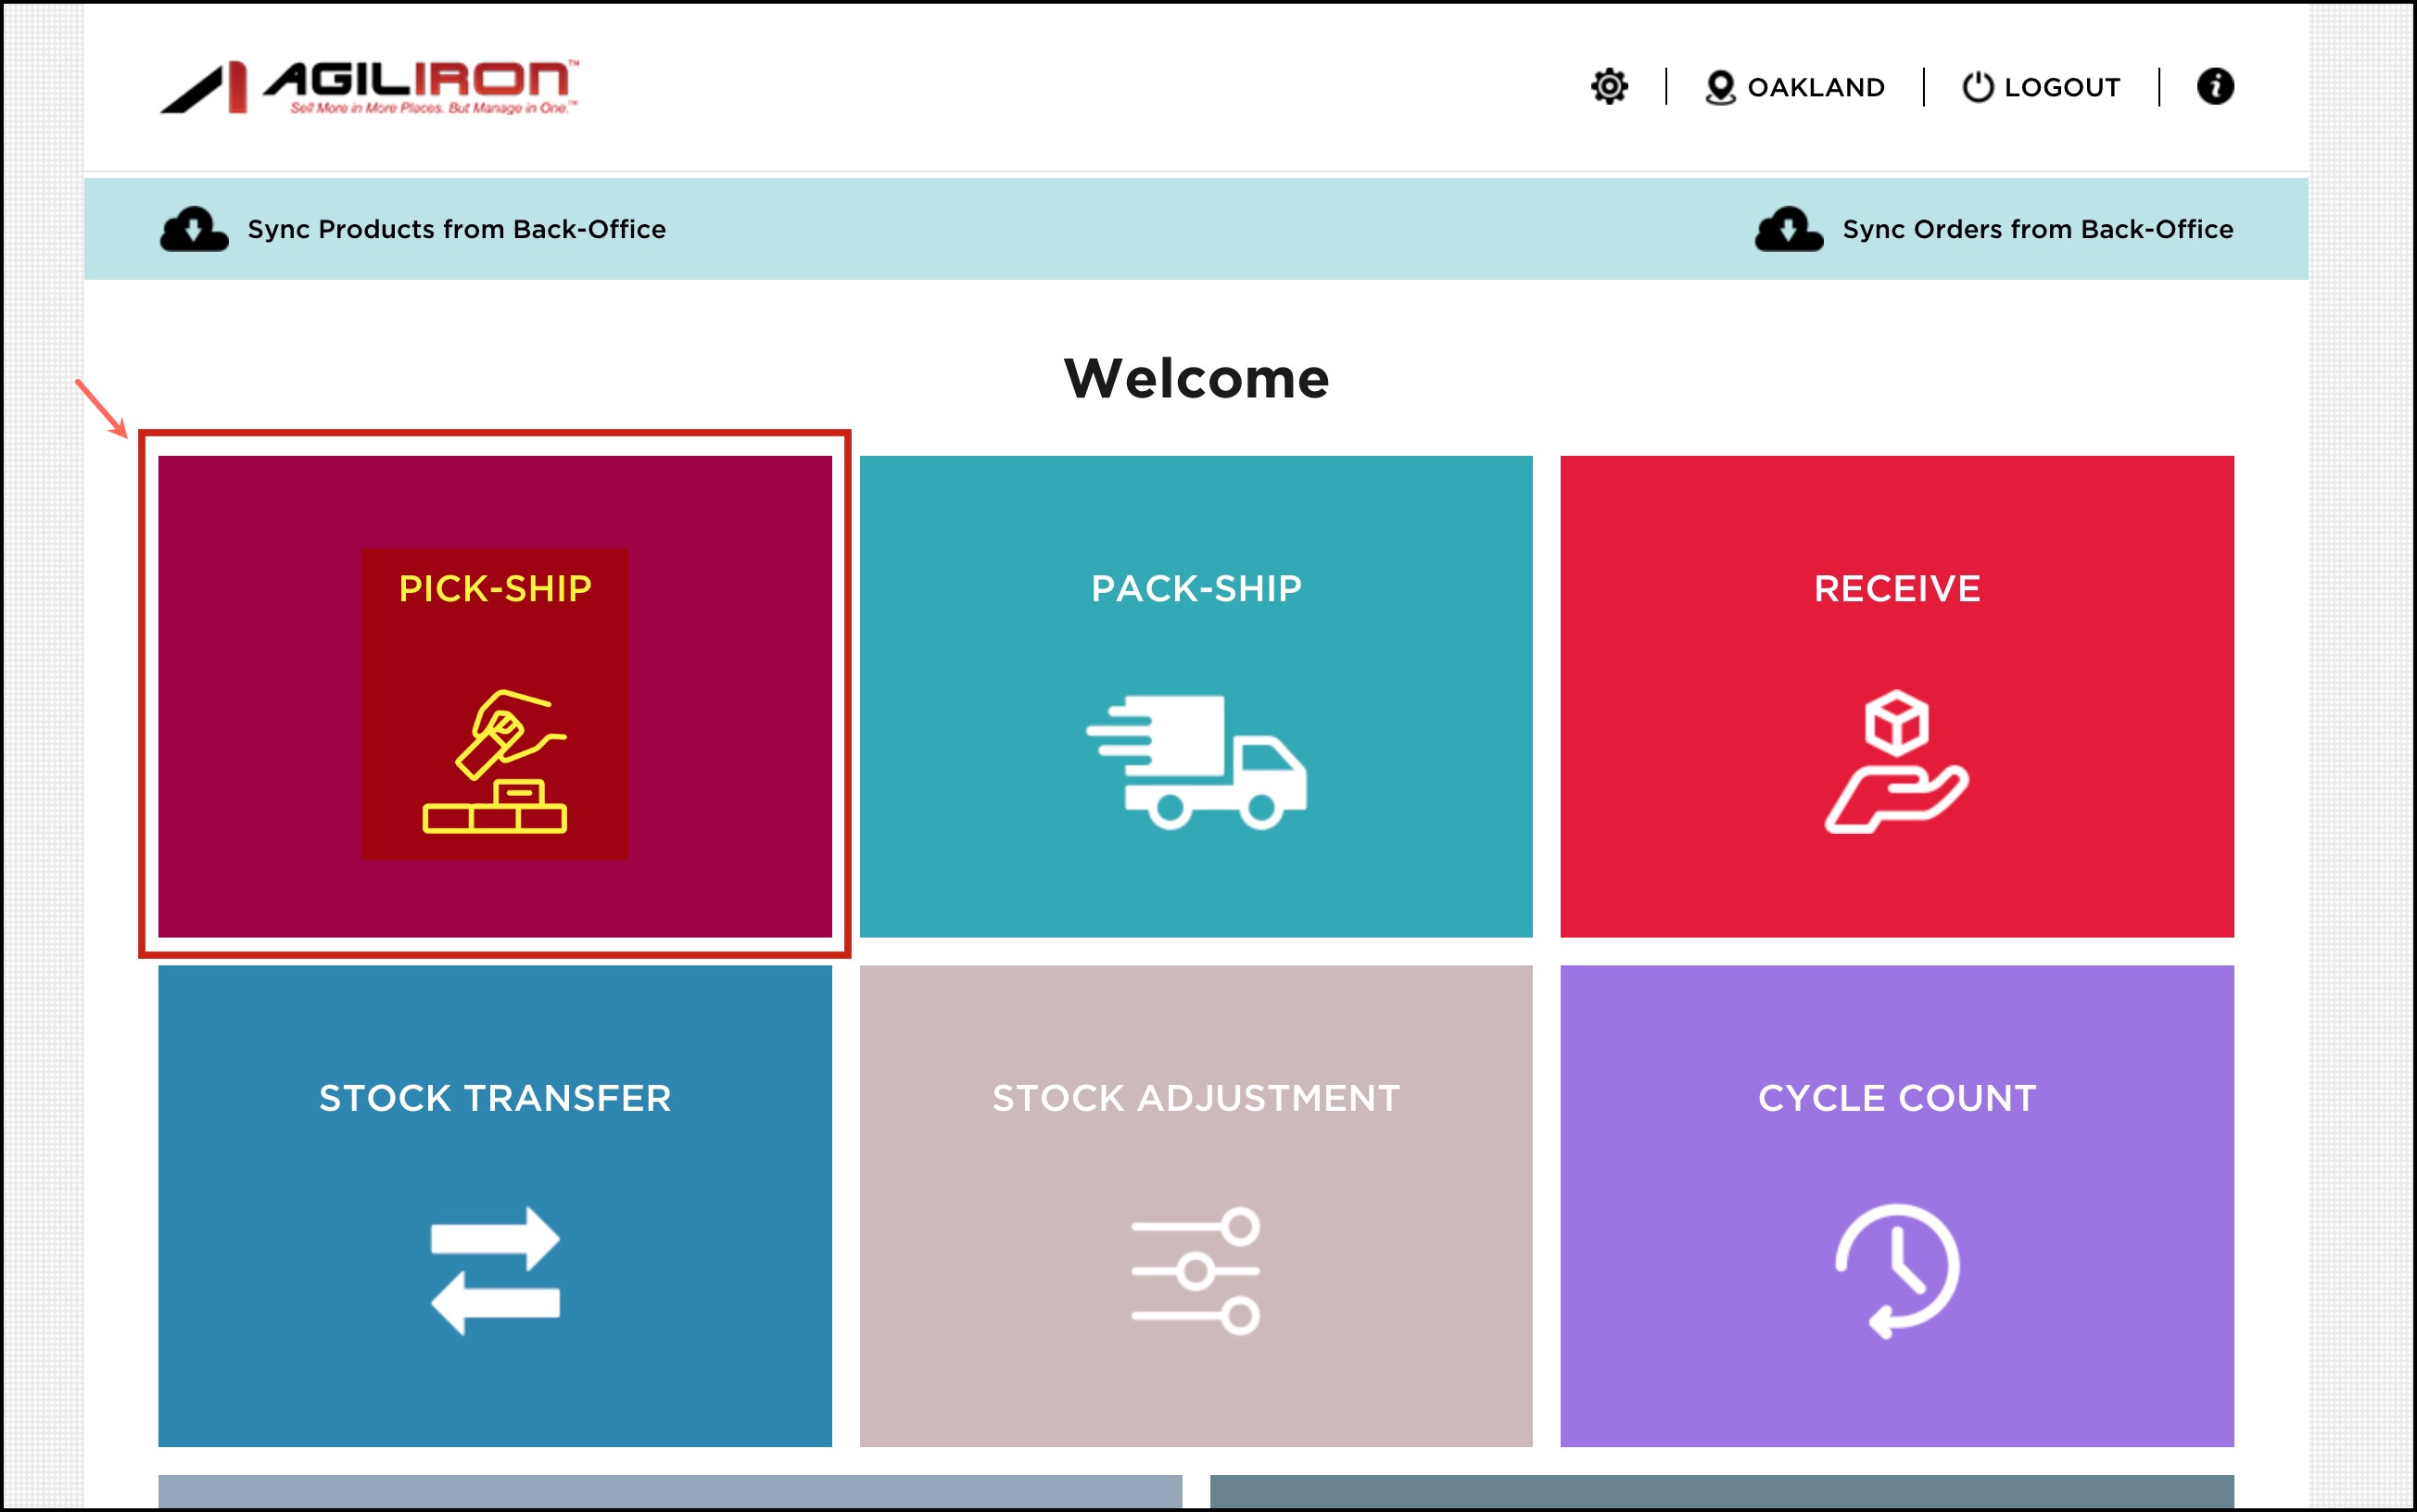
- Once done, login to the warehouse app and click the "Pick-Ship" button to view the orders.
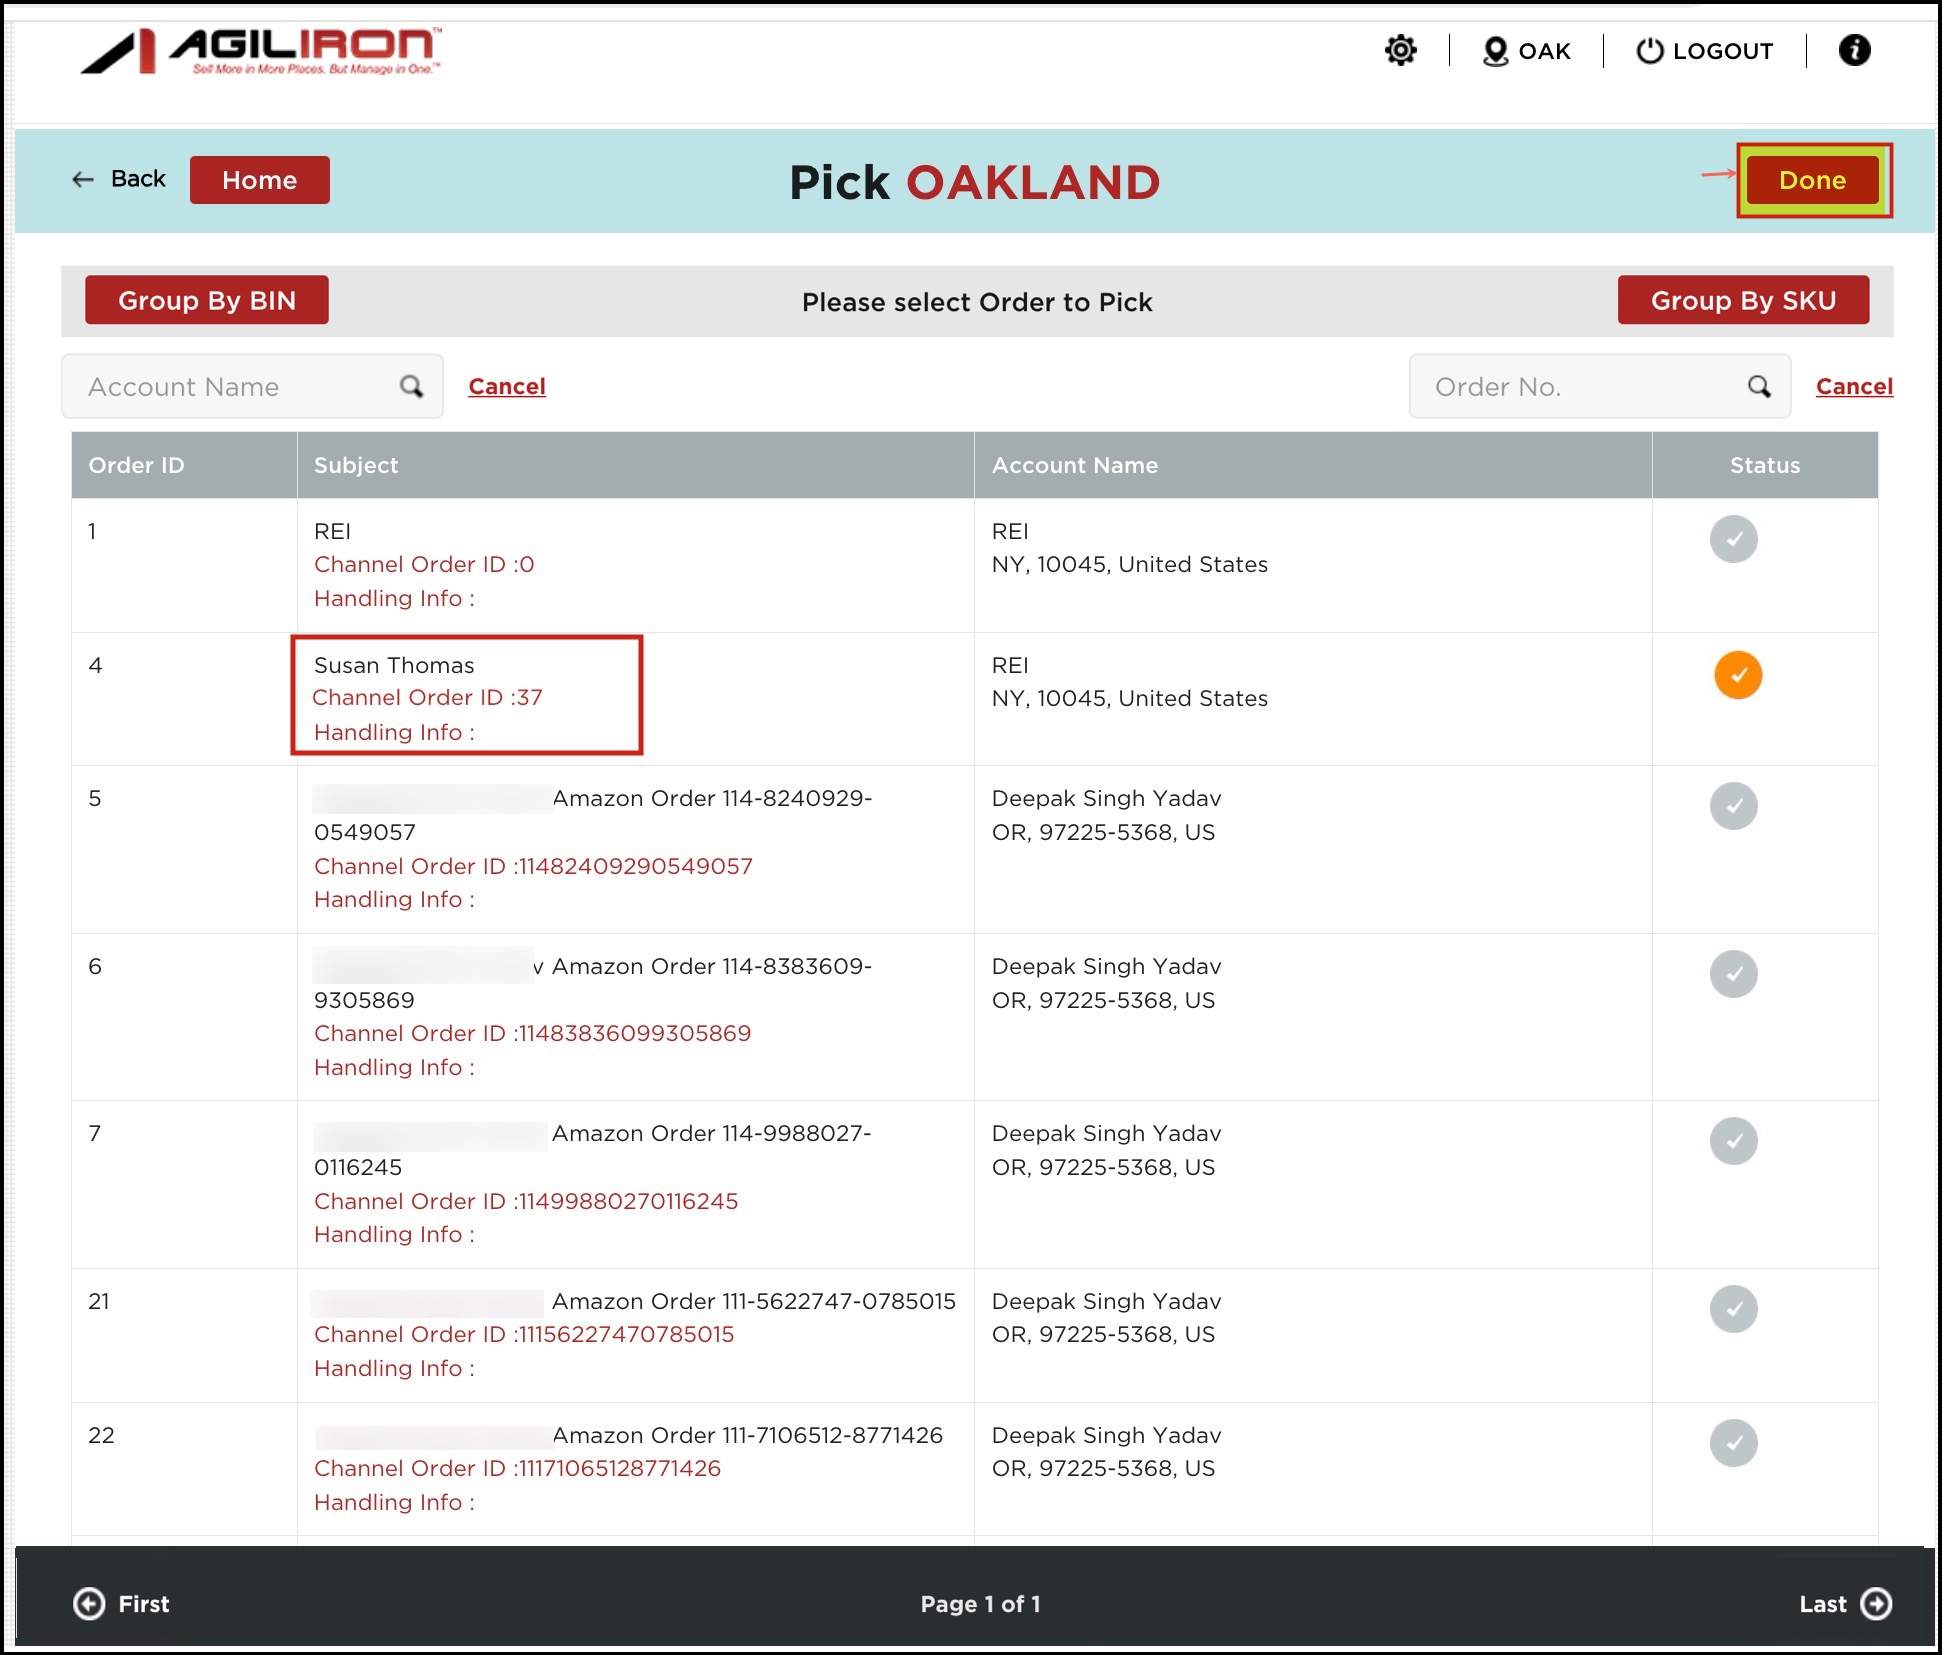
- The user can search for an order by Account Name or Order Number.
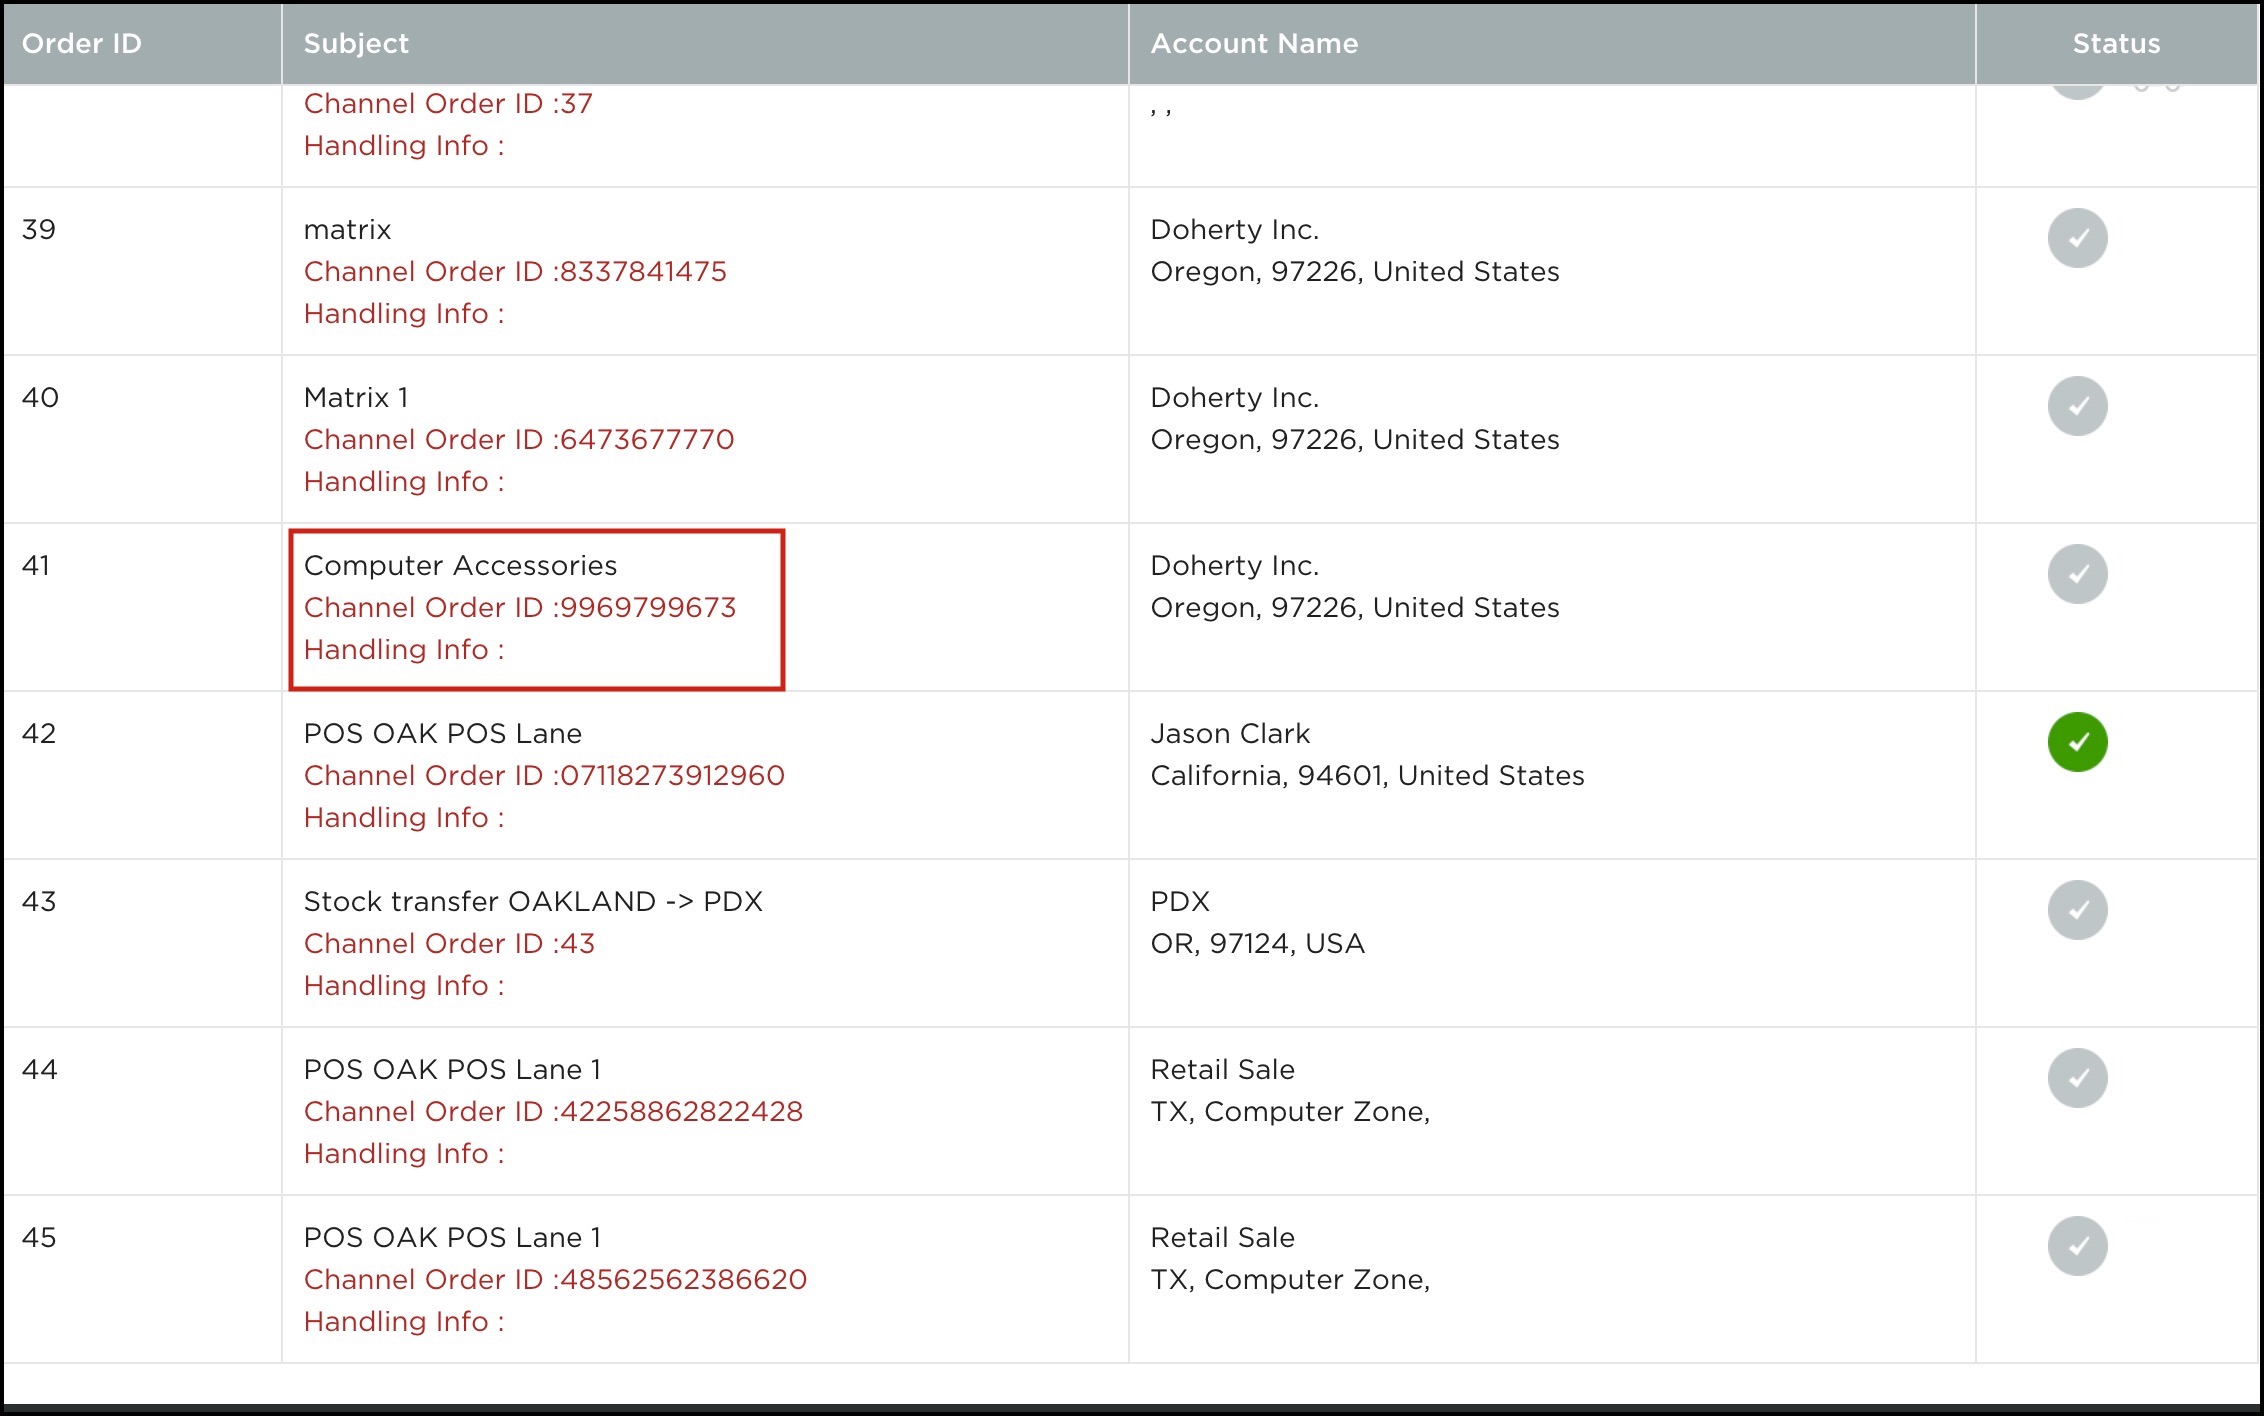
- The Channel Order ID is displayed for the order to identify the sales channel in which it originated.
- The Handling Info: includes shipping-specific information of the Warehouse for that order
Note -_The handling info is derived from theSpecial Handling Information field in Sales Orders. Even during the stock transfer process, if you enter any Special Handling Information, it will be seen here._
- The navigation buttons at the bottom of the screen allow for searching through multiple pages of customer orders.
- Selecting Group By Bin allows for the grouping of products by bin location.
- Selecting Group By SKU allows for the grouping of products by SKU code.

- Select the Order from the list.
When selecting an order, line item notes for each line item in the order is also displayed (adds another line "Notes: ....." in the "Product" column) on the screen where you display Products (this could be when you click into the order OR when you Group by Bin/Sku).
- For each product, you can see Bin Locations, if added, and also QOH (Quantity on Hand) which is the quantity in stock for that product if bin location quantity is enabled. QOH is based on the bin.
- If the Scan Unit is enabled, when you select any Product Id, you will see a '+', '-' under _Qty Picked _column. It signifies that you can scan the product with a barcode scanner. As soon as you scan the product barcode, the quantity will increase by 1. You can increase or decrease the quantity with the respective + and - signs.
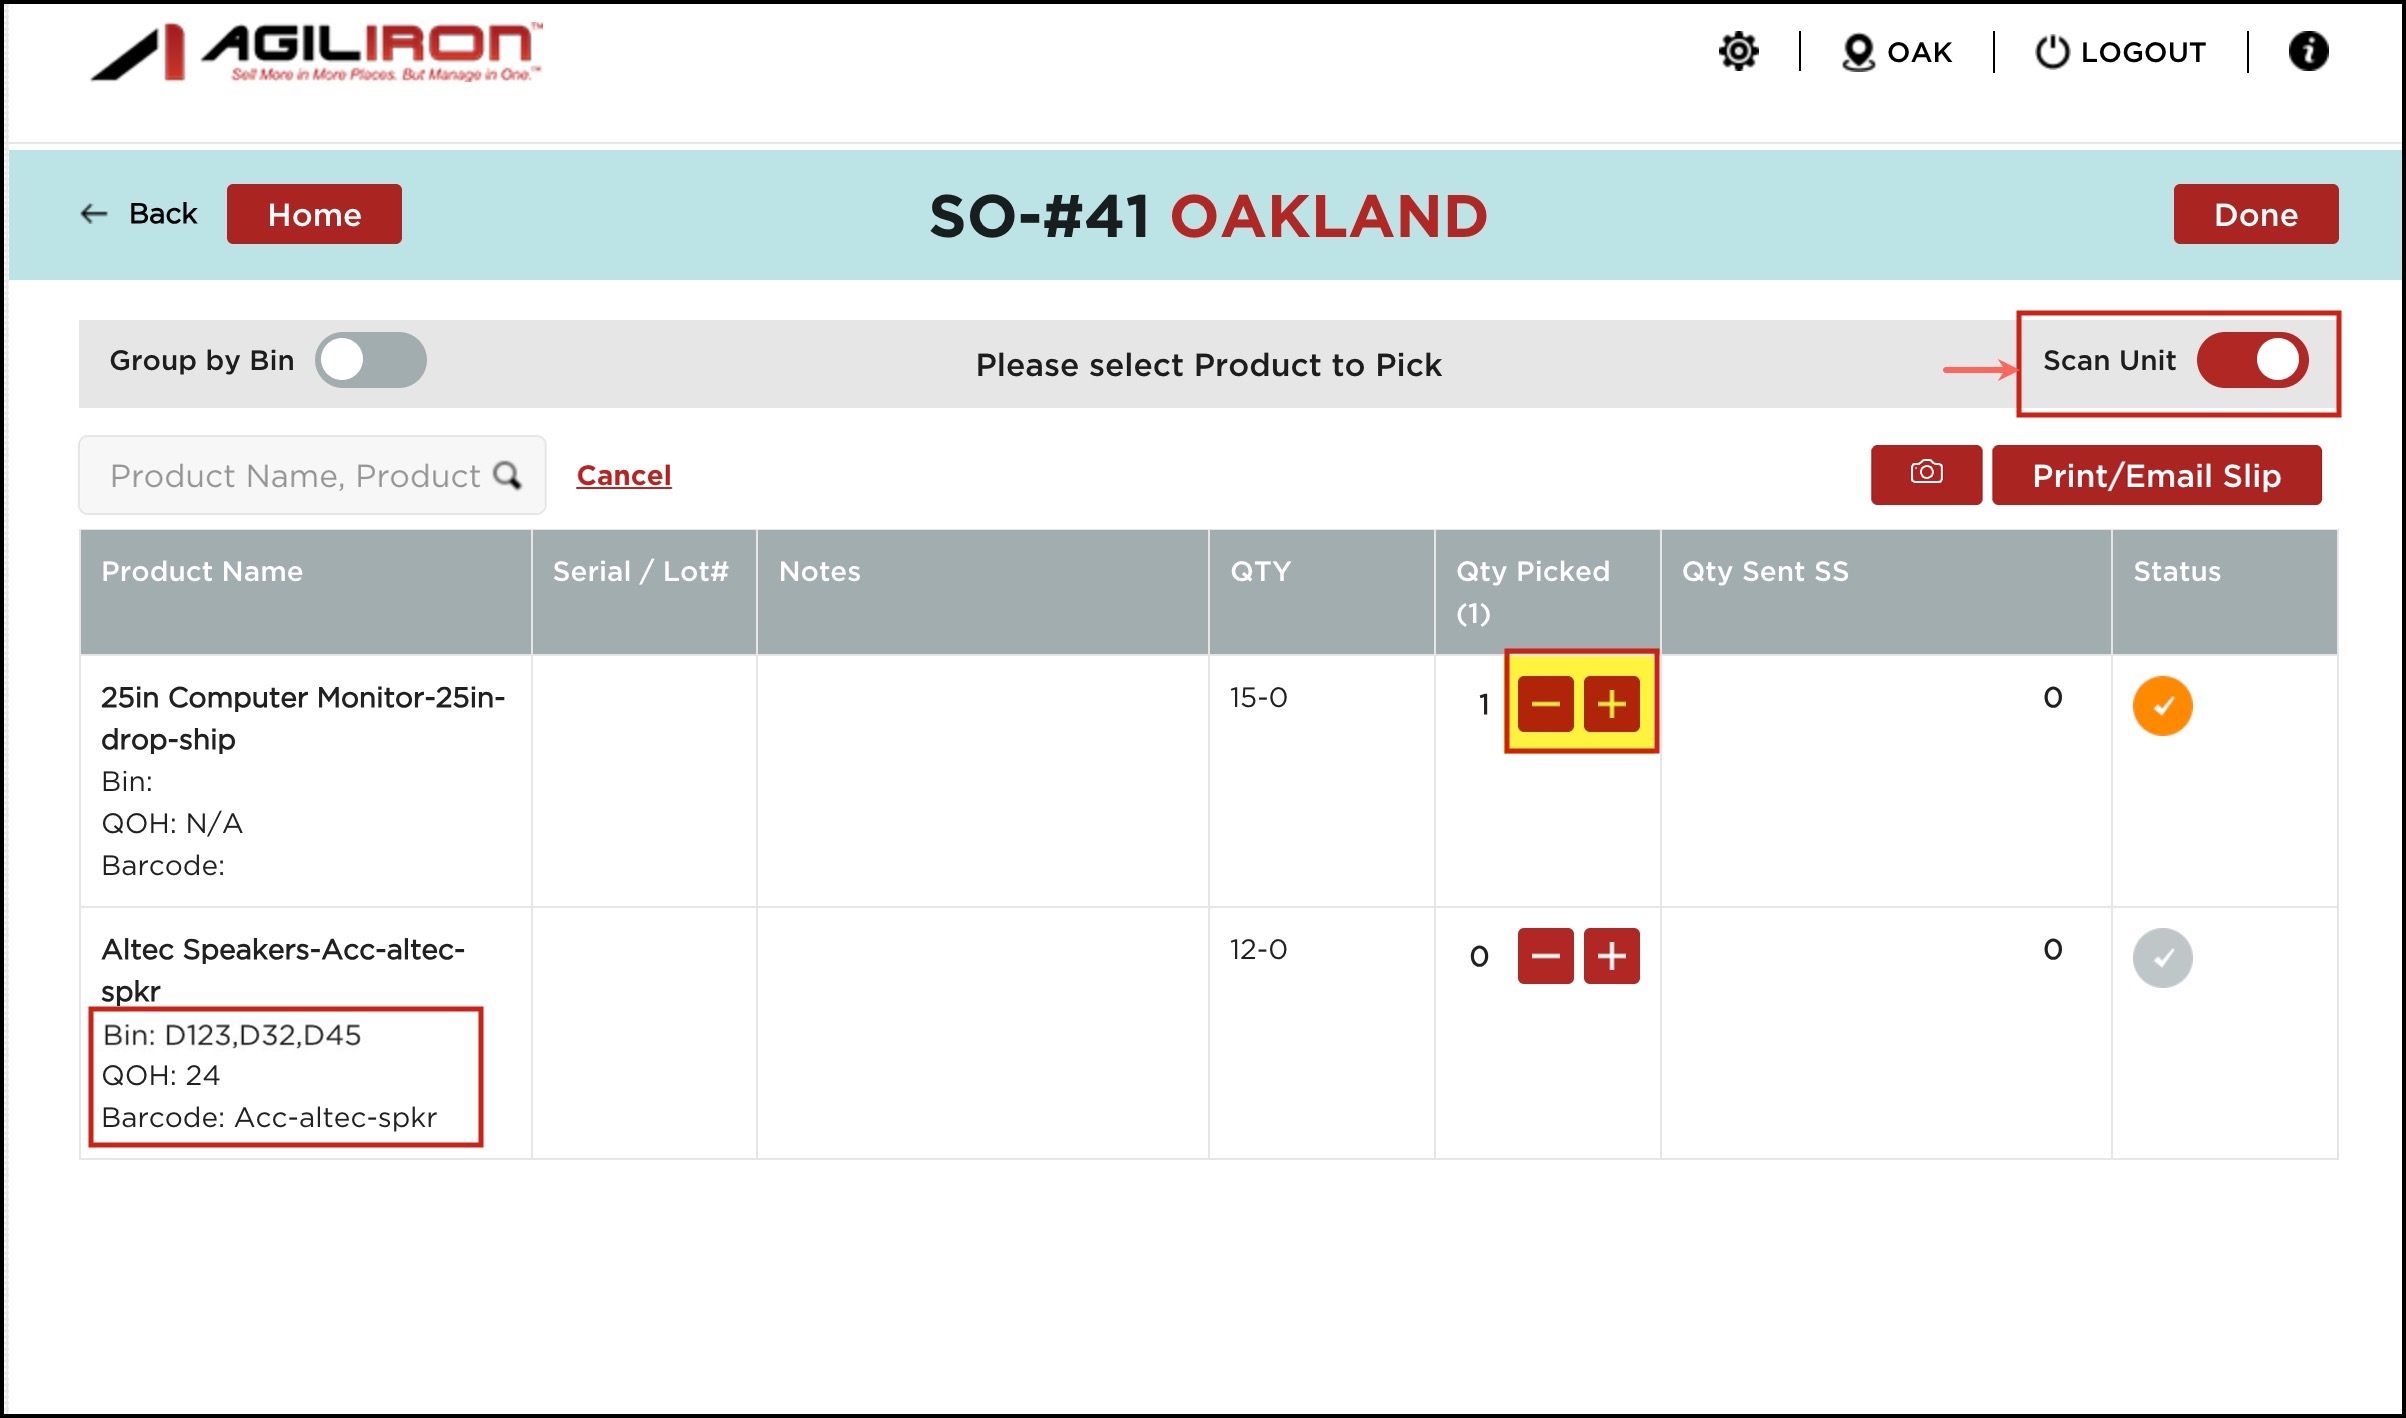
- You can also scan the product barcode using your device camera. Just click on the camera icon and scan the barcode.

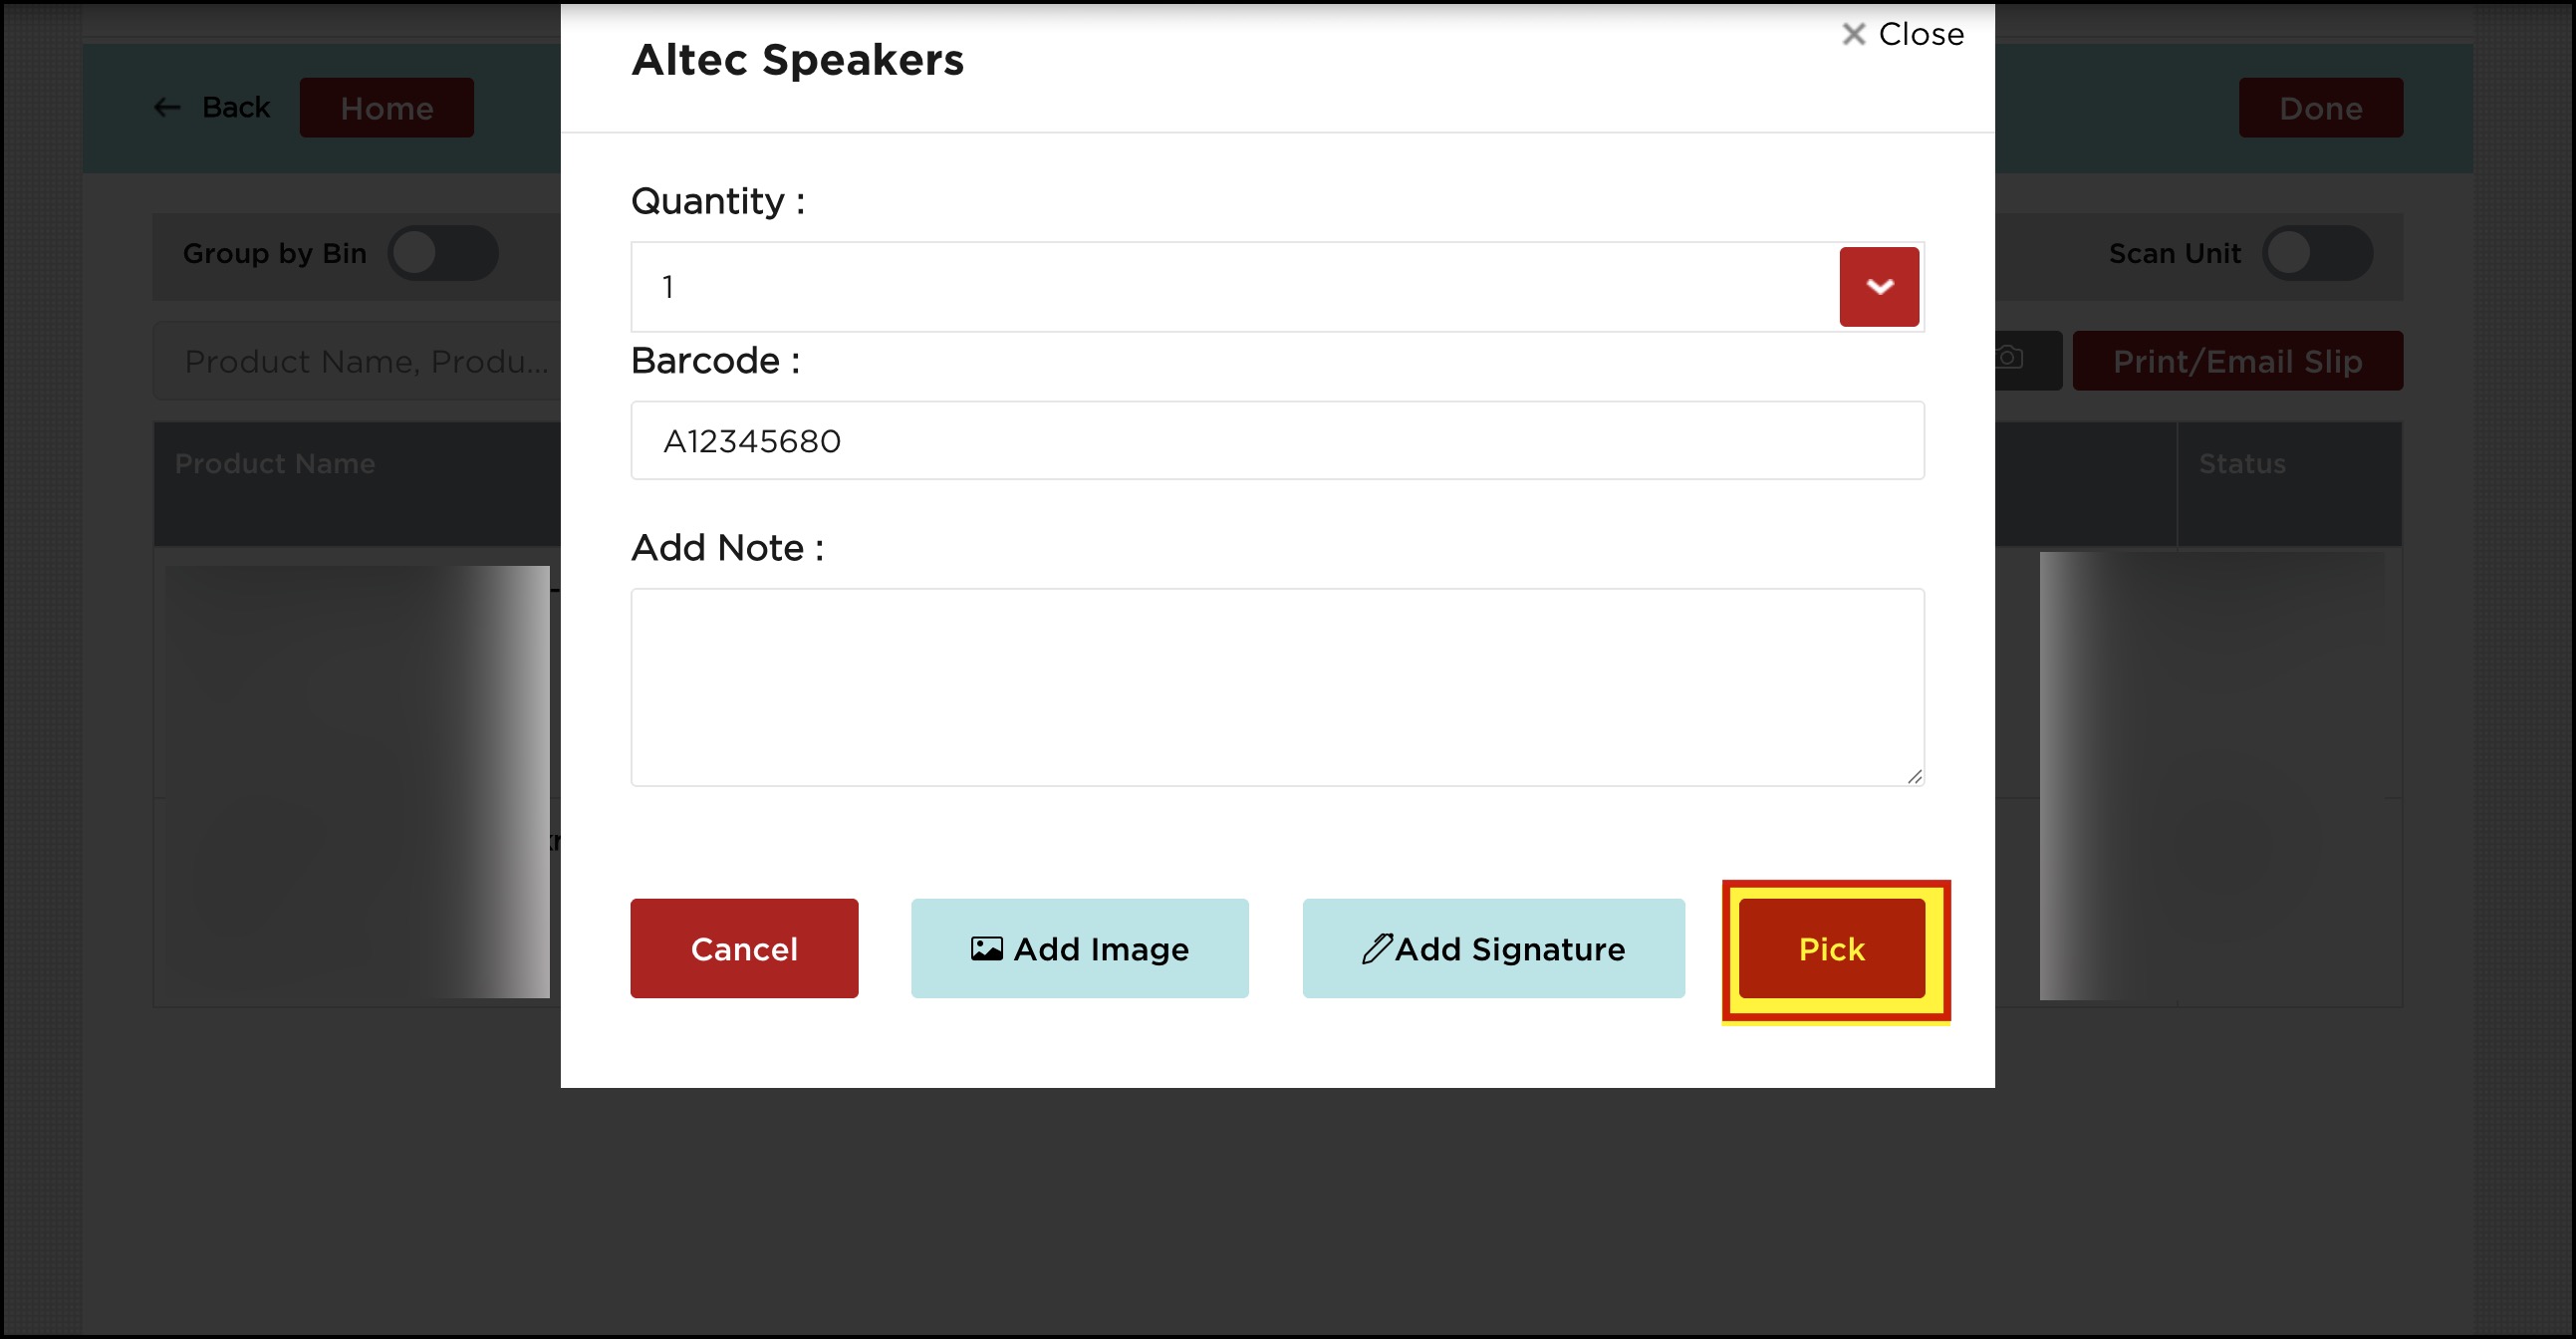
Select a product from the list to begin picking orders. (Here the Scan Unit is disabled).
Select the quantity from the drop-down list. Add Notes, if any. You can also Add images and Signature (Please refer to Add Optional Picture and Add Signature to know the complete process).

For Serialized/Lot Tracked products, enter the Serial/Lot Number when prompted.
- To print or email the Packing Slip, select the Print/Email Slip button.
- The Packing Slip template is picked up from "Settings > Templates" in the back office.

Through the warehouse management app, you can also ship the products.
- When the Scan unit toggle is disabled and you select any product, a Pick button becomes visible.
Once you have finished picking the products, click Done.

Go back to the home page and select "Sync Order & Product Updates to Back-Office" to update all changes.

Updated 6 days ago