Create a New Vendor RFQ
This section demonstrates the process for adding and managing Vendor RFQs, i.e., Request for Quotes, for supplier purchases.
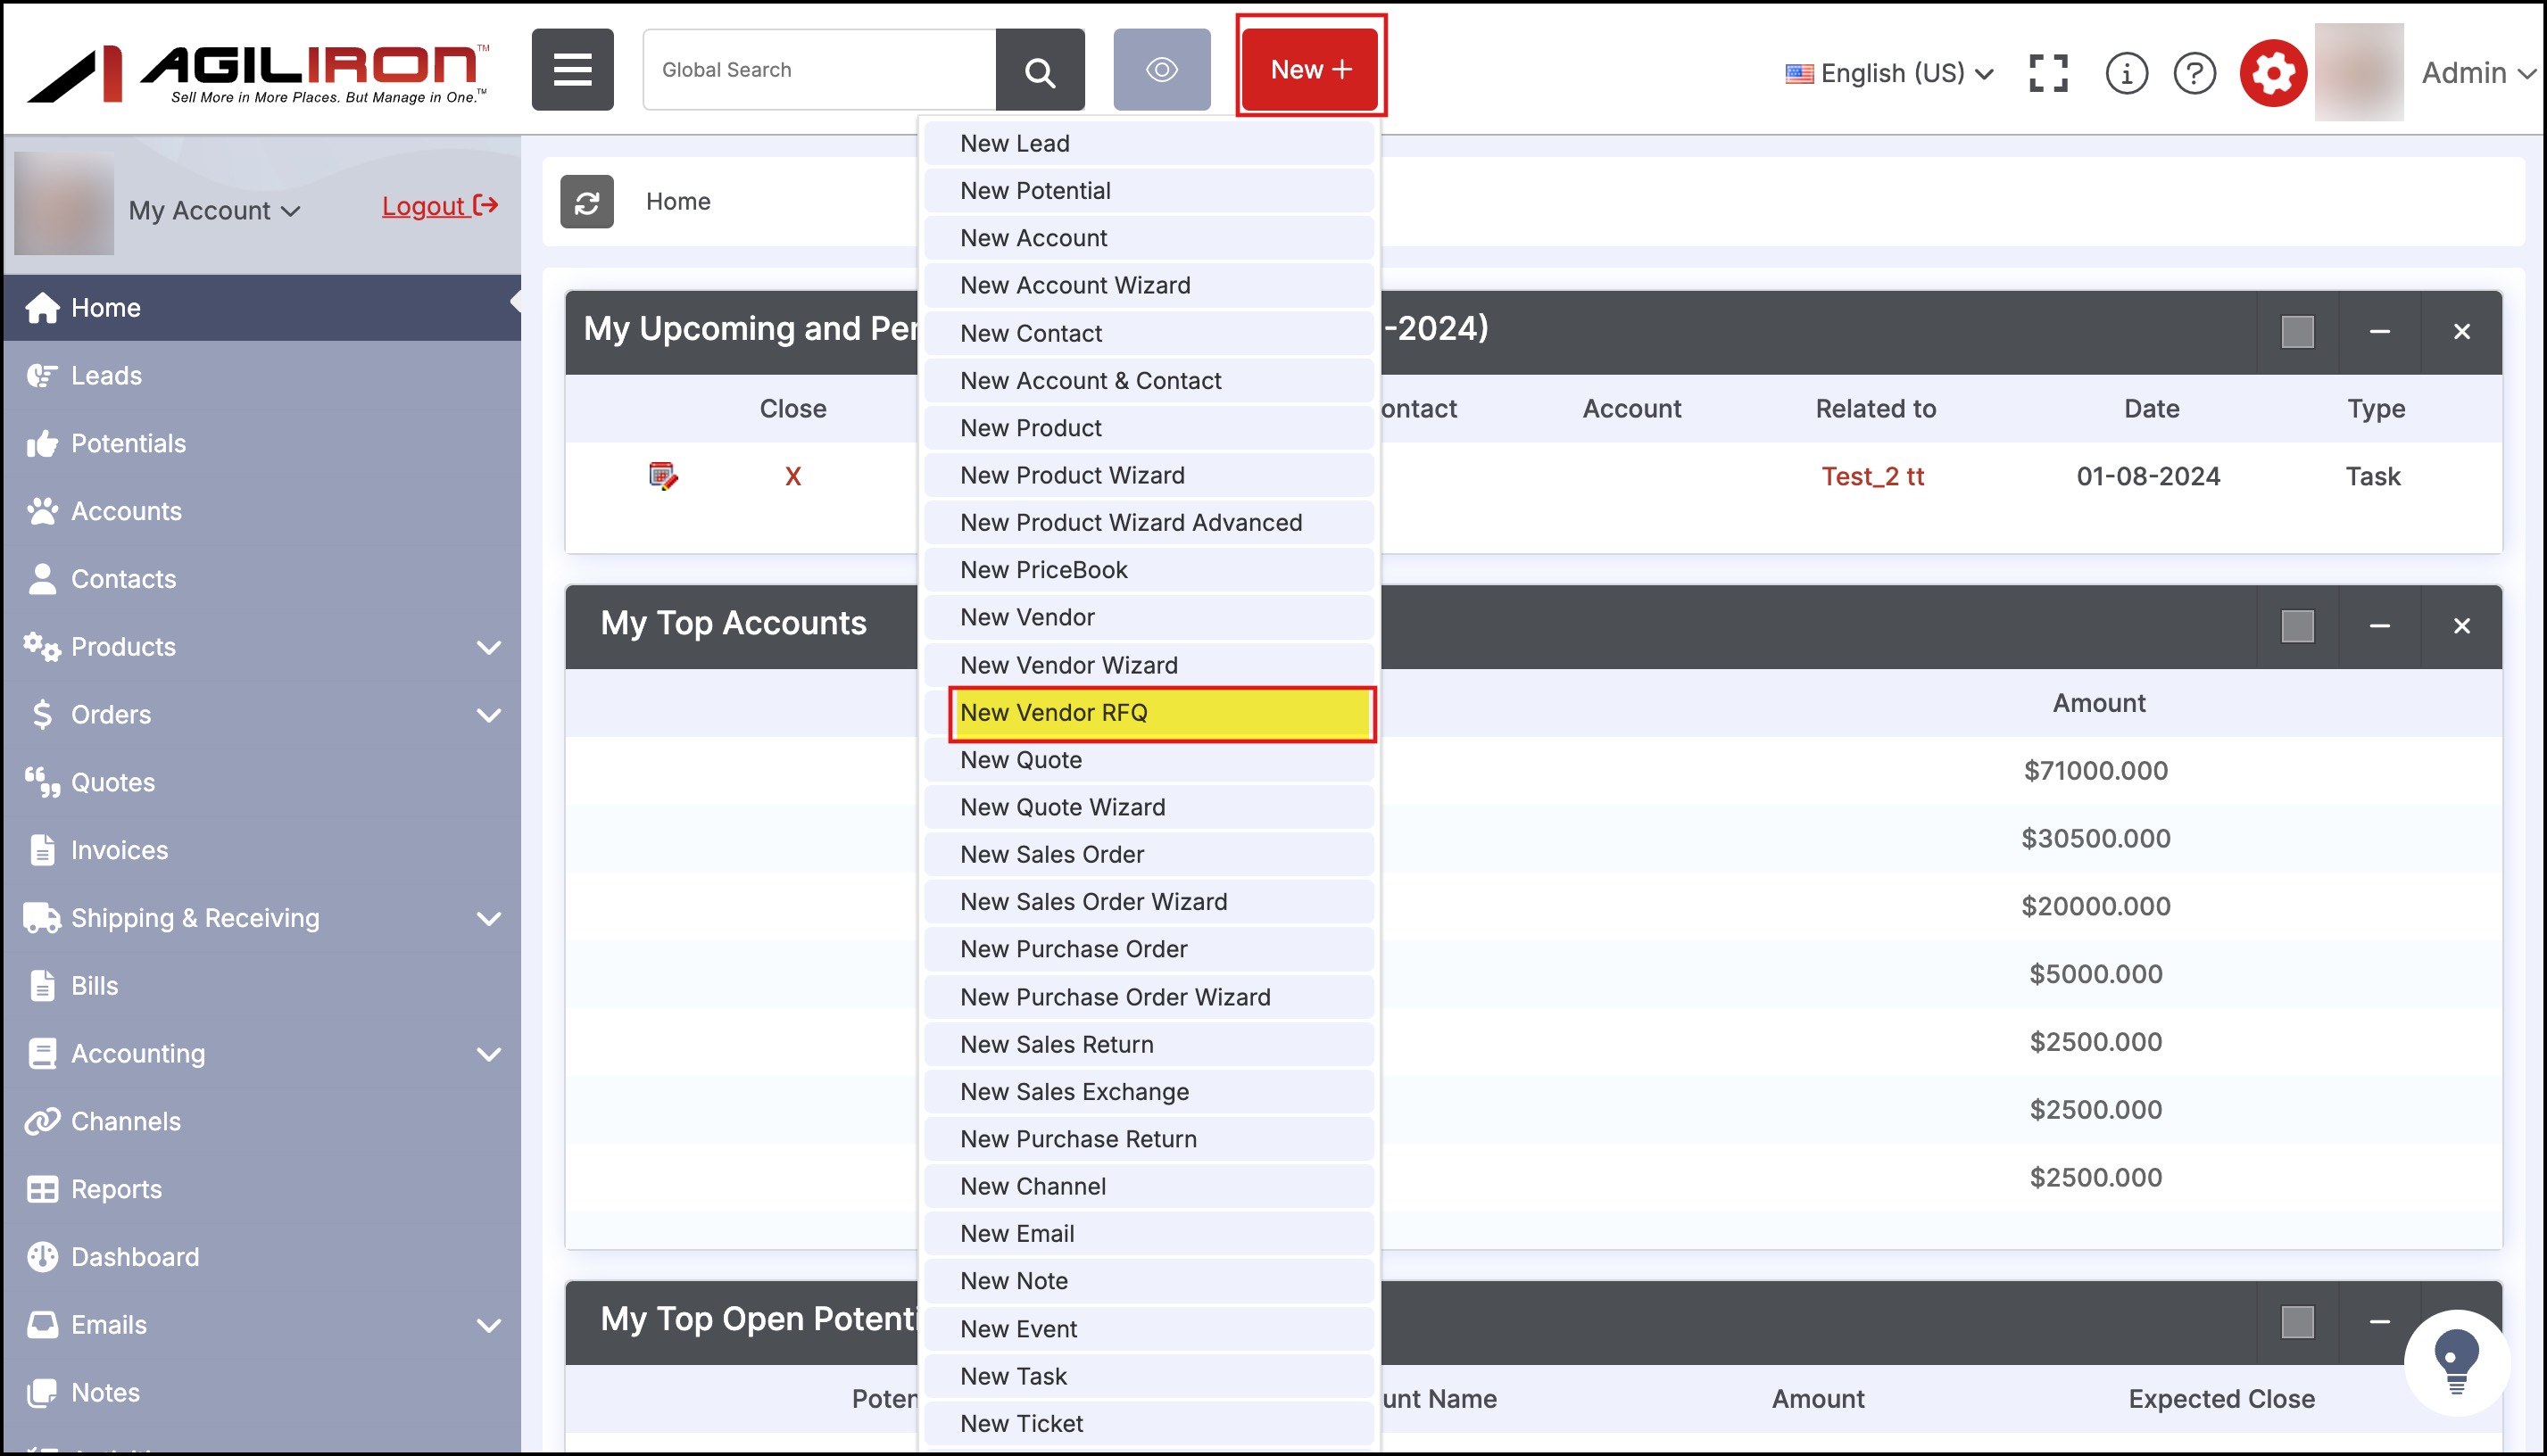
Follow the*"New Vendor RFQ"*link as shown below:
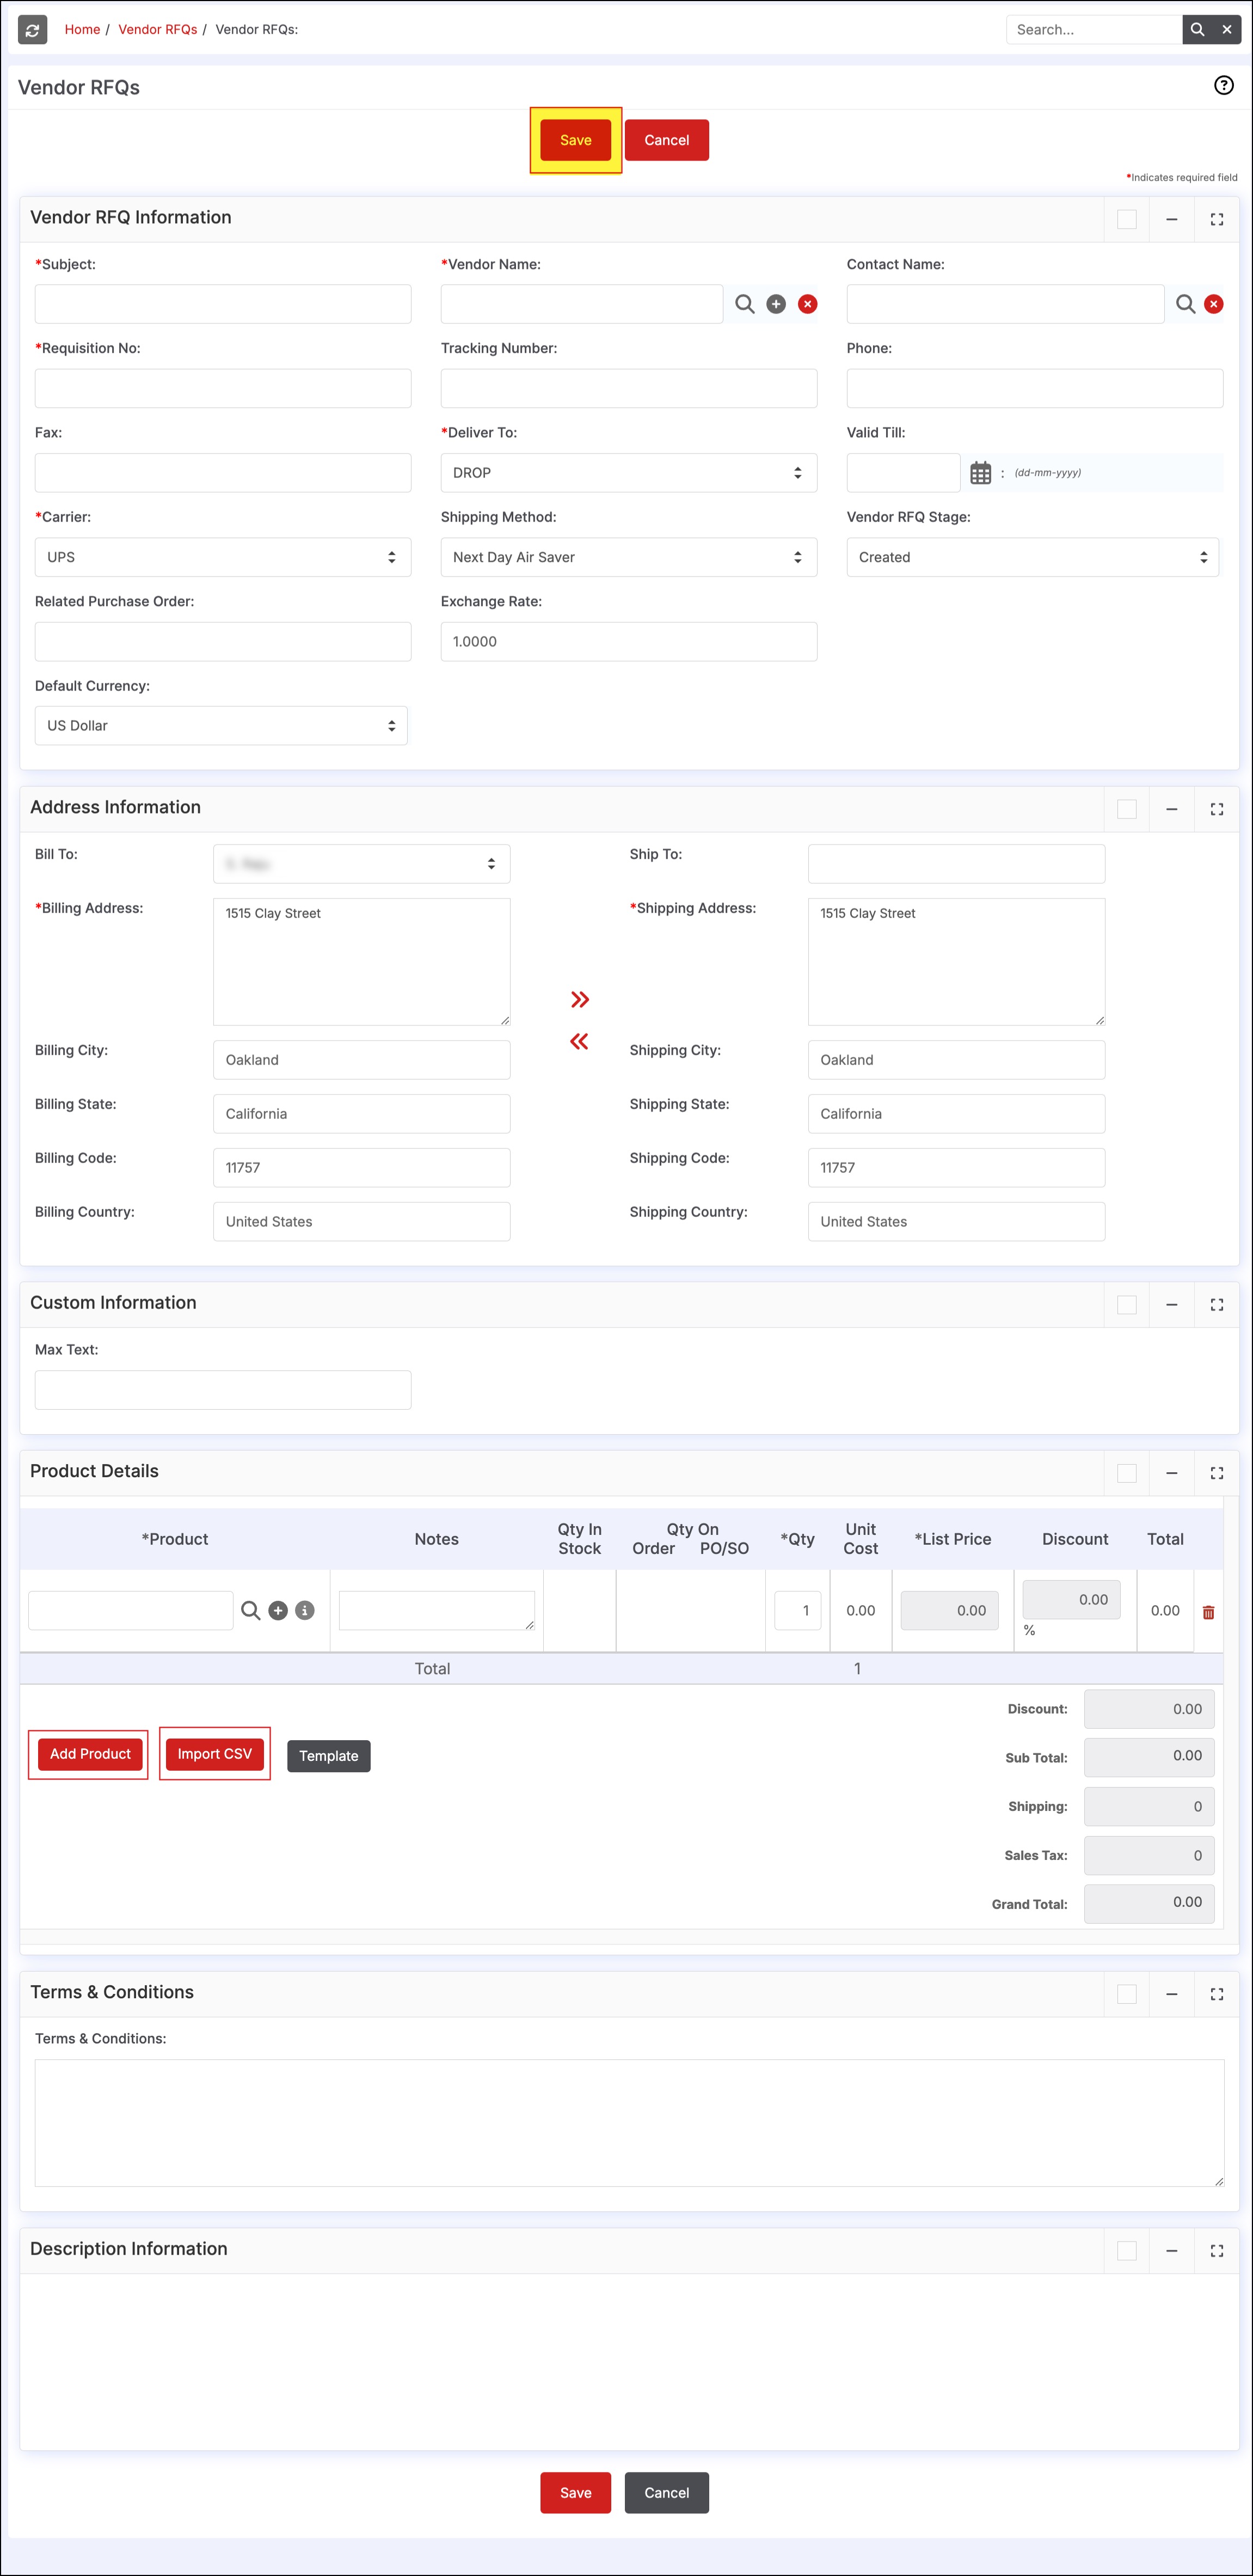
- This brings up the form to enter all the relevant information for the vendor RFQ. Some of the fields auto-populate with default information.
- Products can be added to the vendor RFQ one at a time or in bulk (Click on Import CSV to upload products in bulk).
- Once the information has been entered, click the "Save" button.
- The saved Vendor RFQ can be found under "Products > Vendors RFQ" tab on the left menu panel.
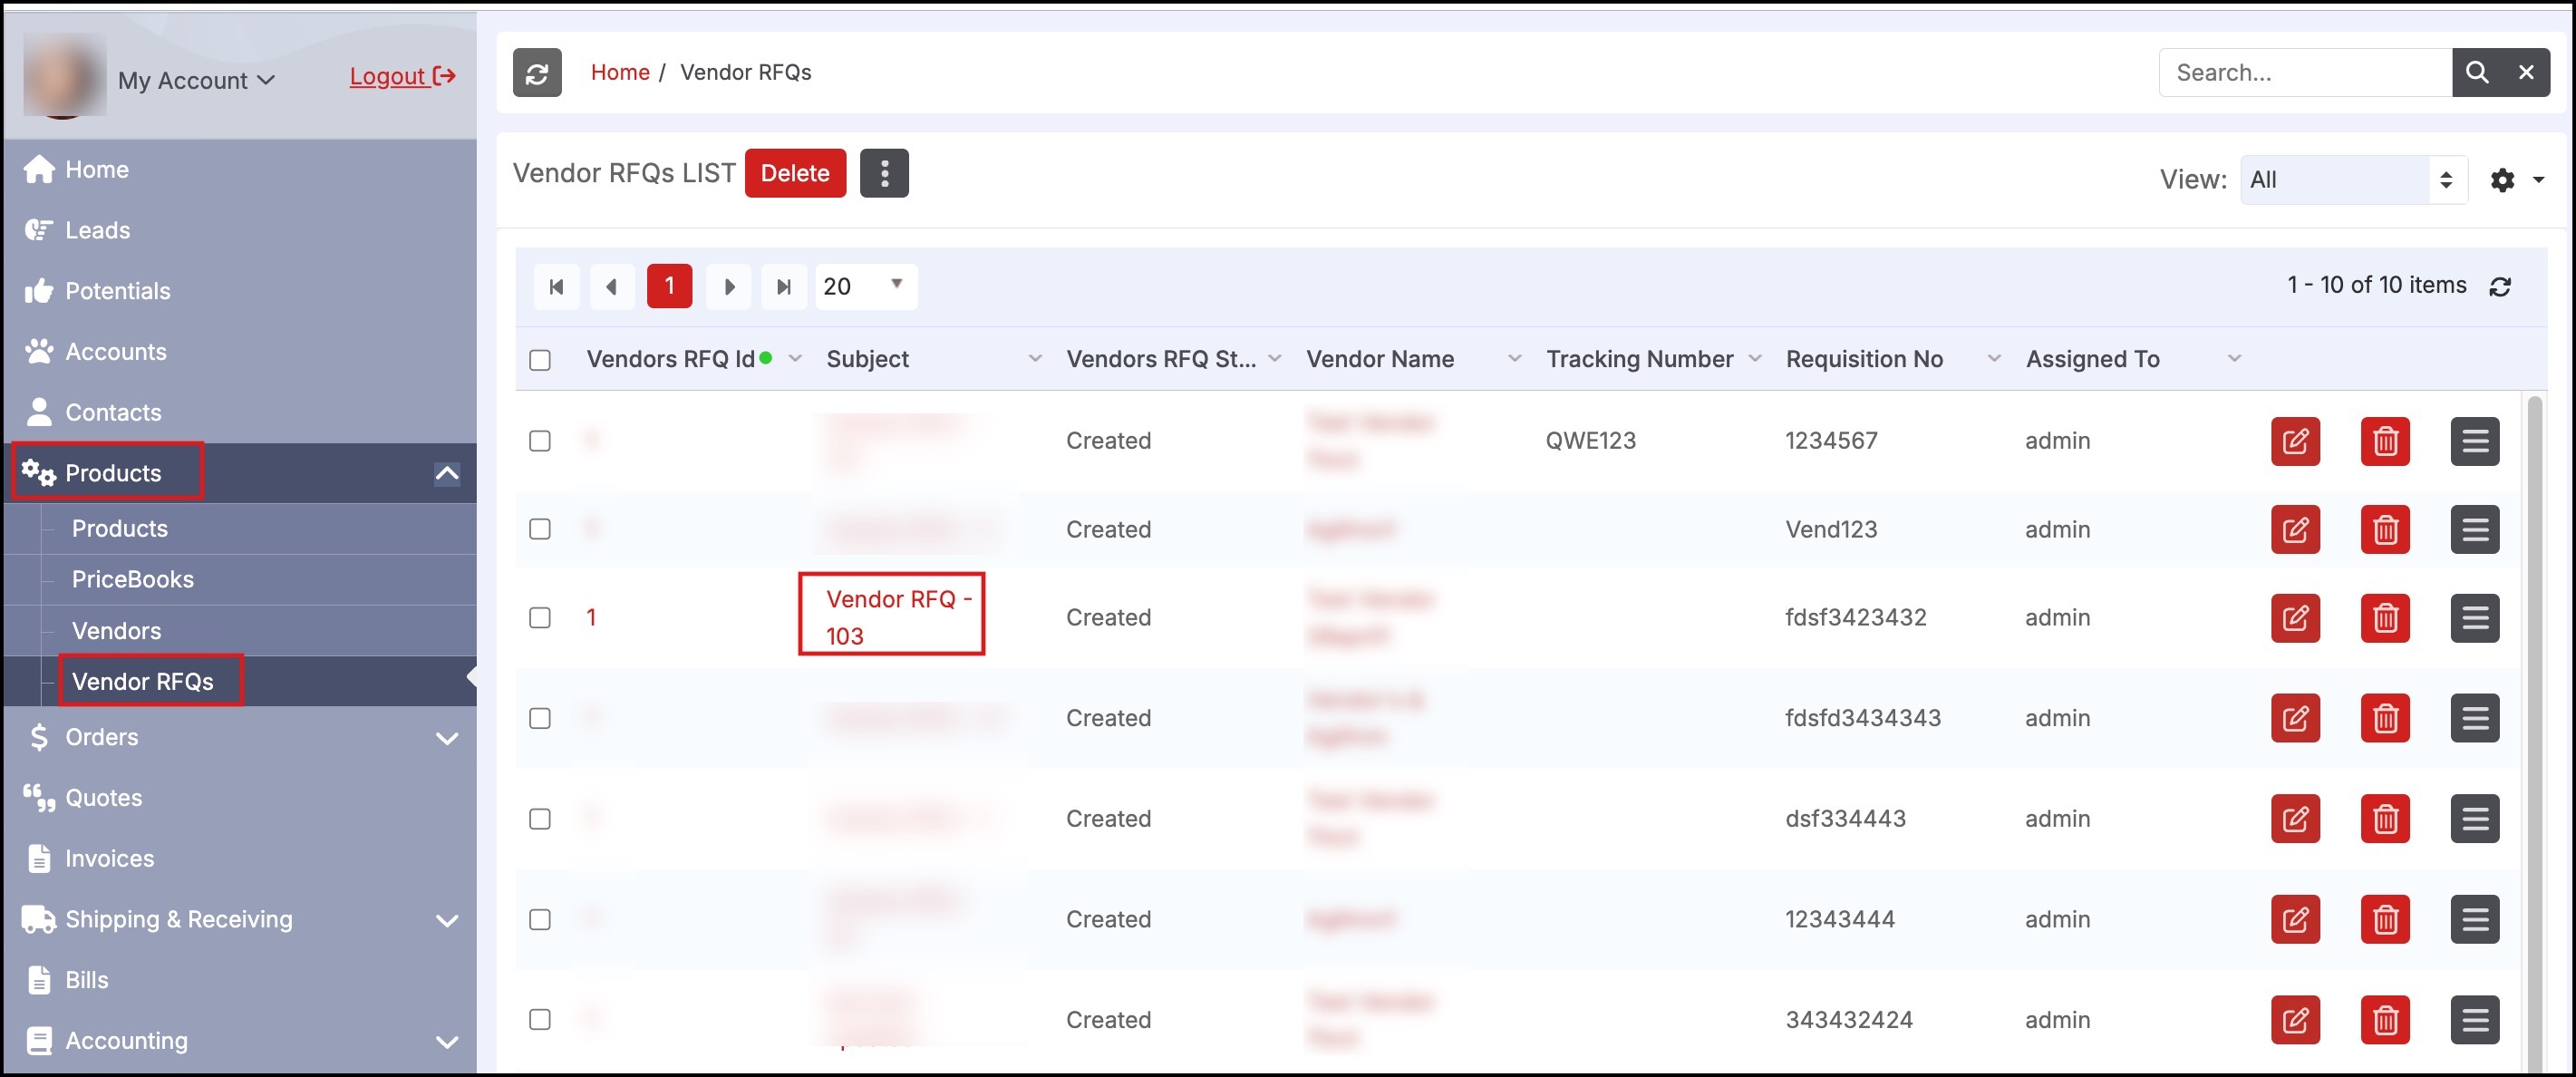
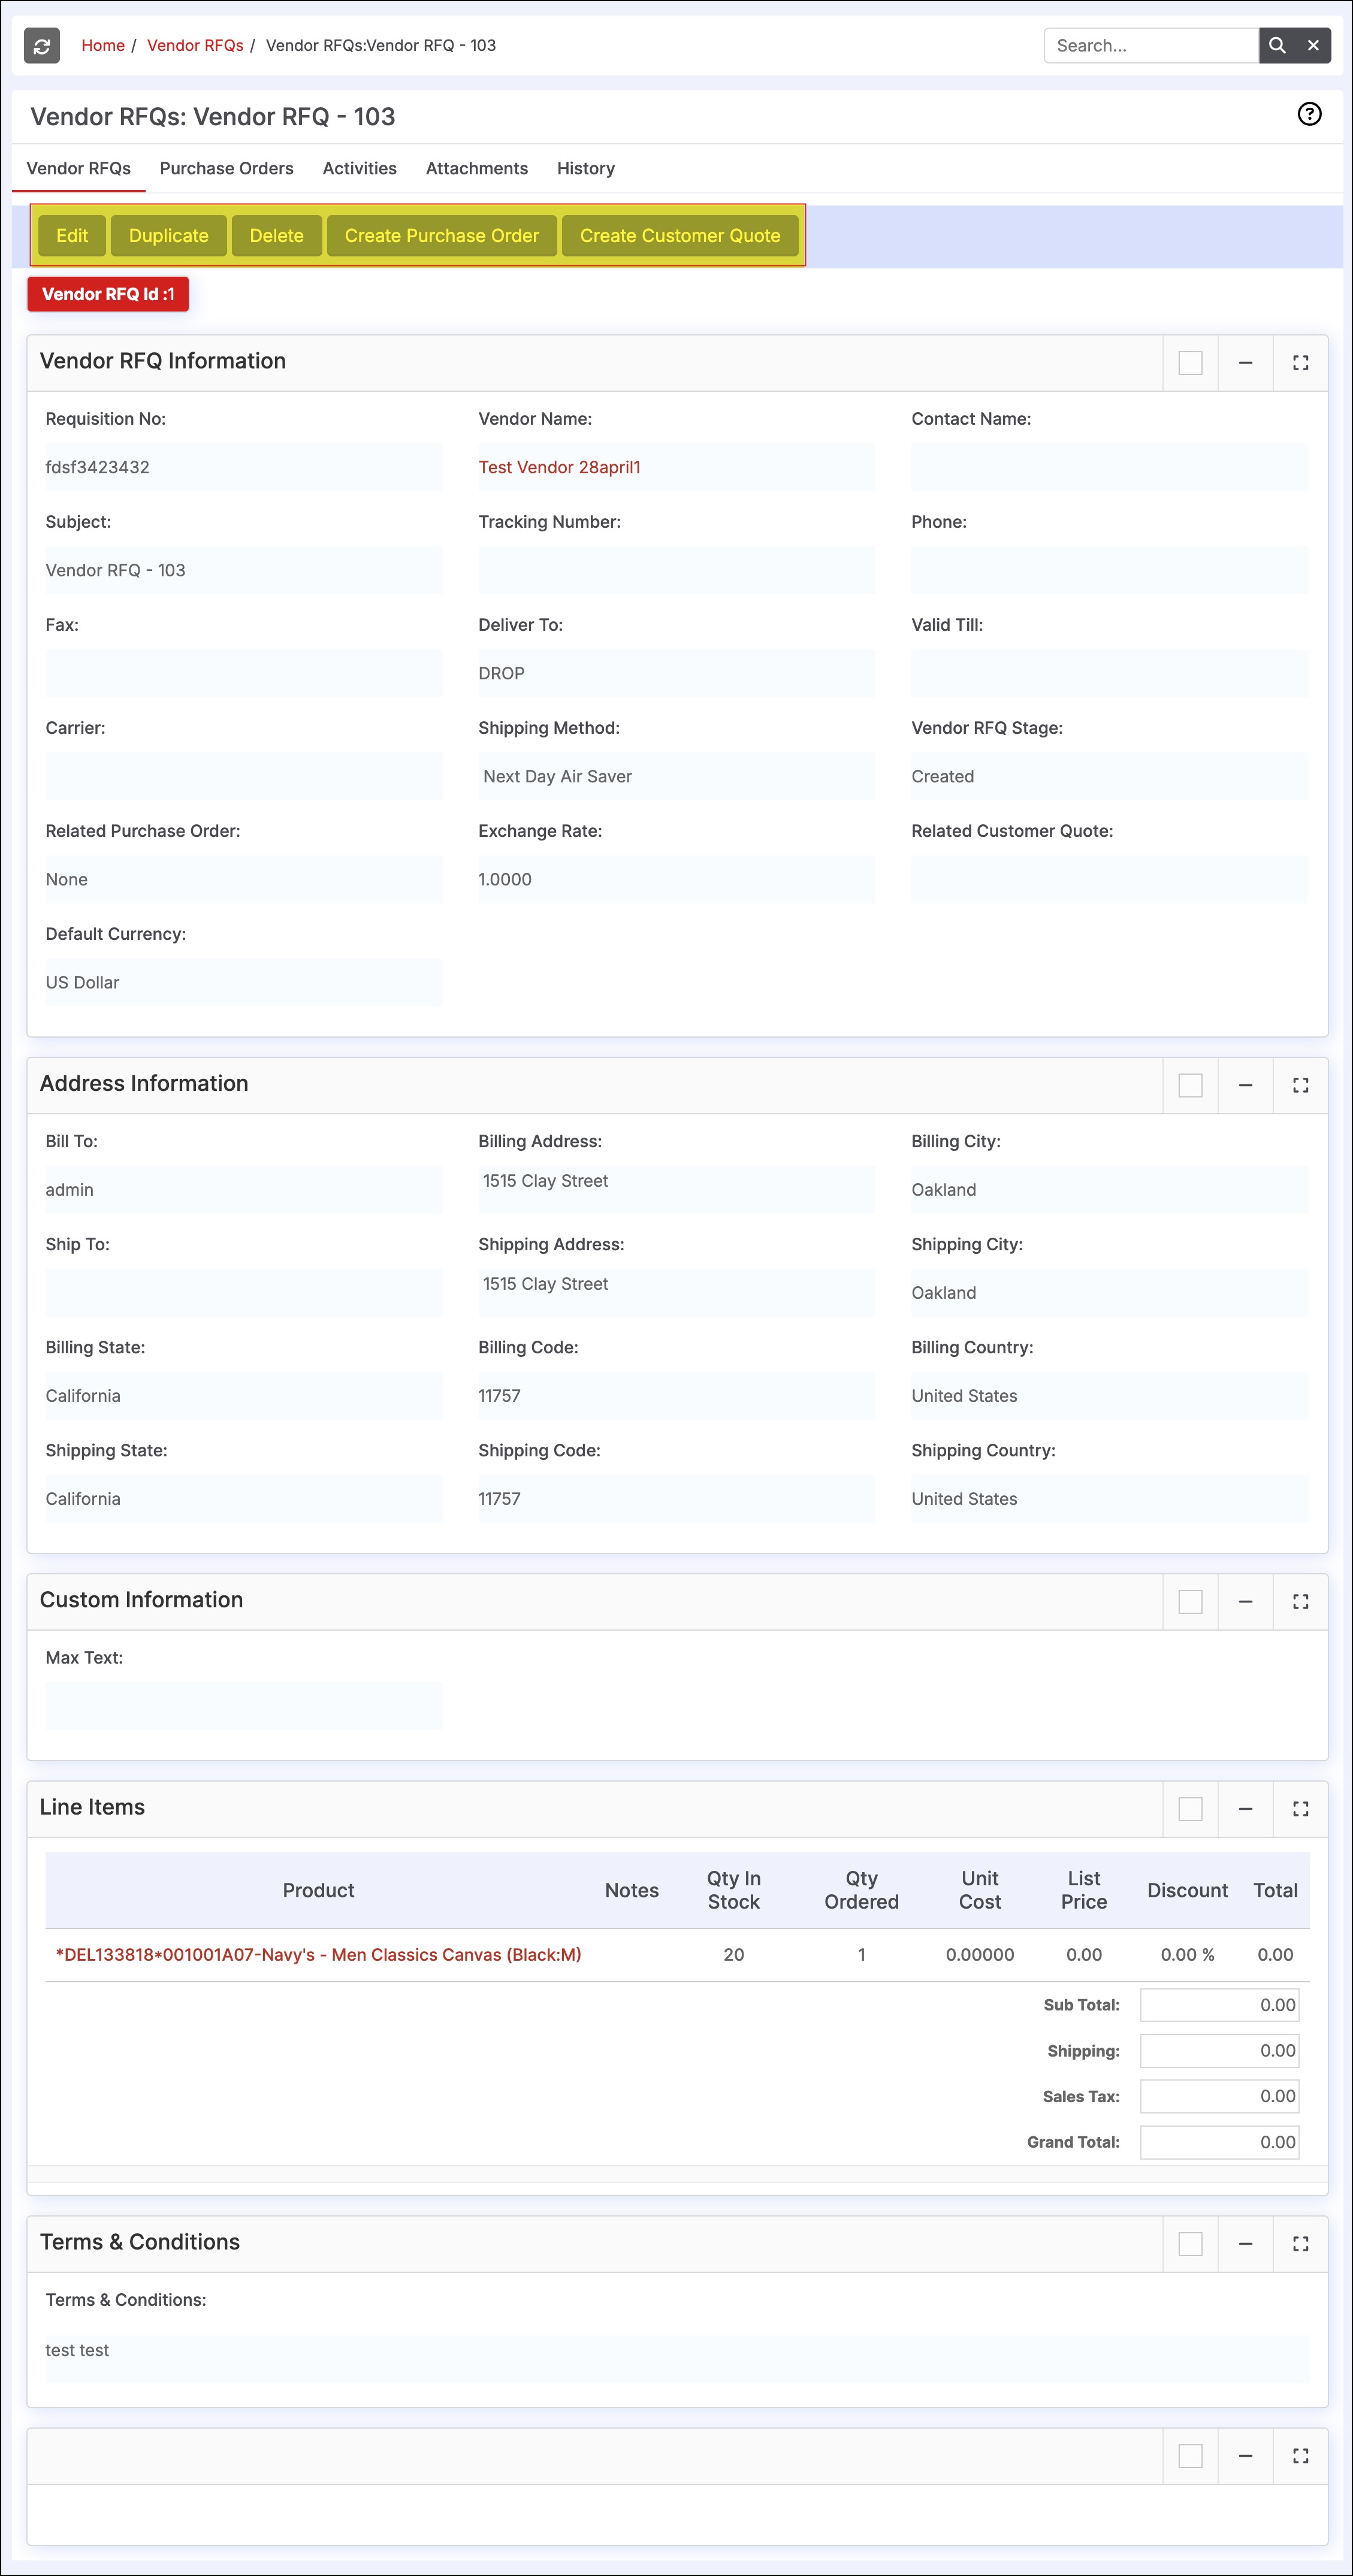
- This will then display the Vendor RFQ in the Detailed View (or Read-Only view) as shown in the image below.
Here you can:
- Edit the Vendor RFQ to make changes.
- Duplicate the Vendor RFQ.
- Delete the Vendor RFQ.
- Create Purchase Order.
- Create Customer Quote
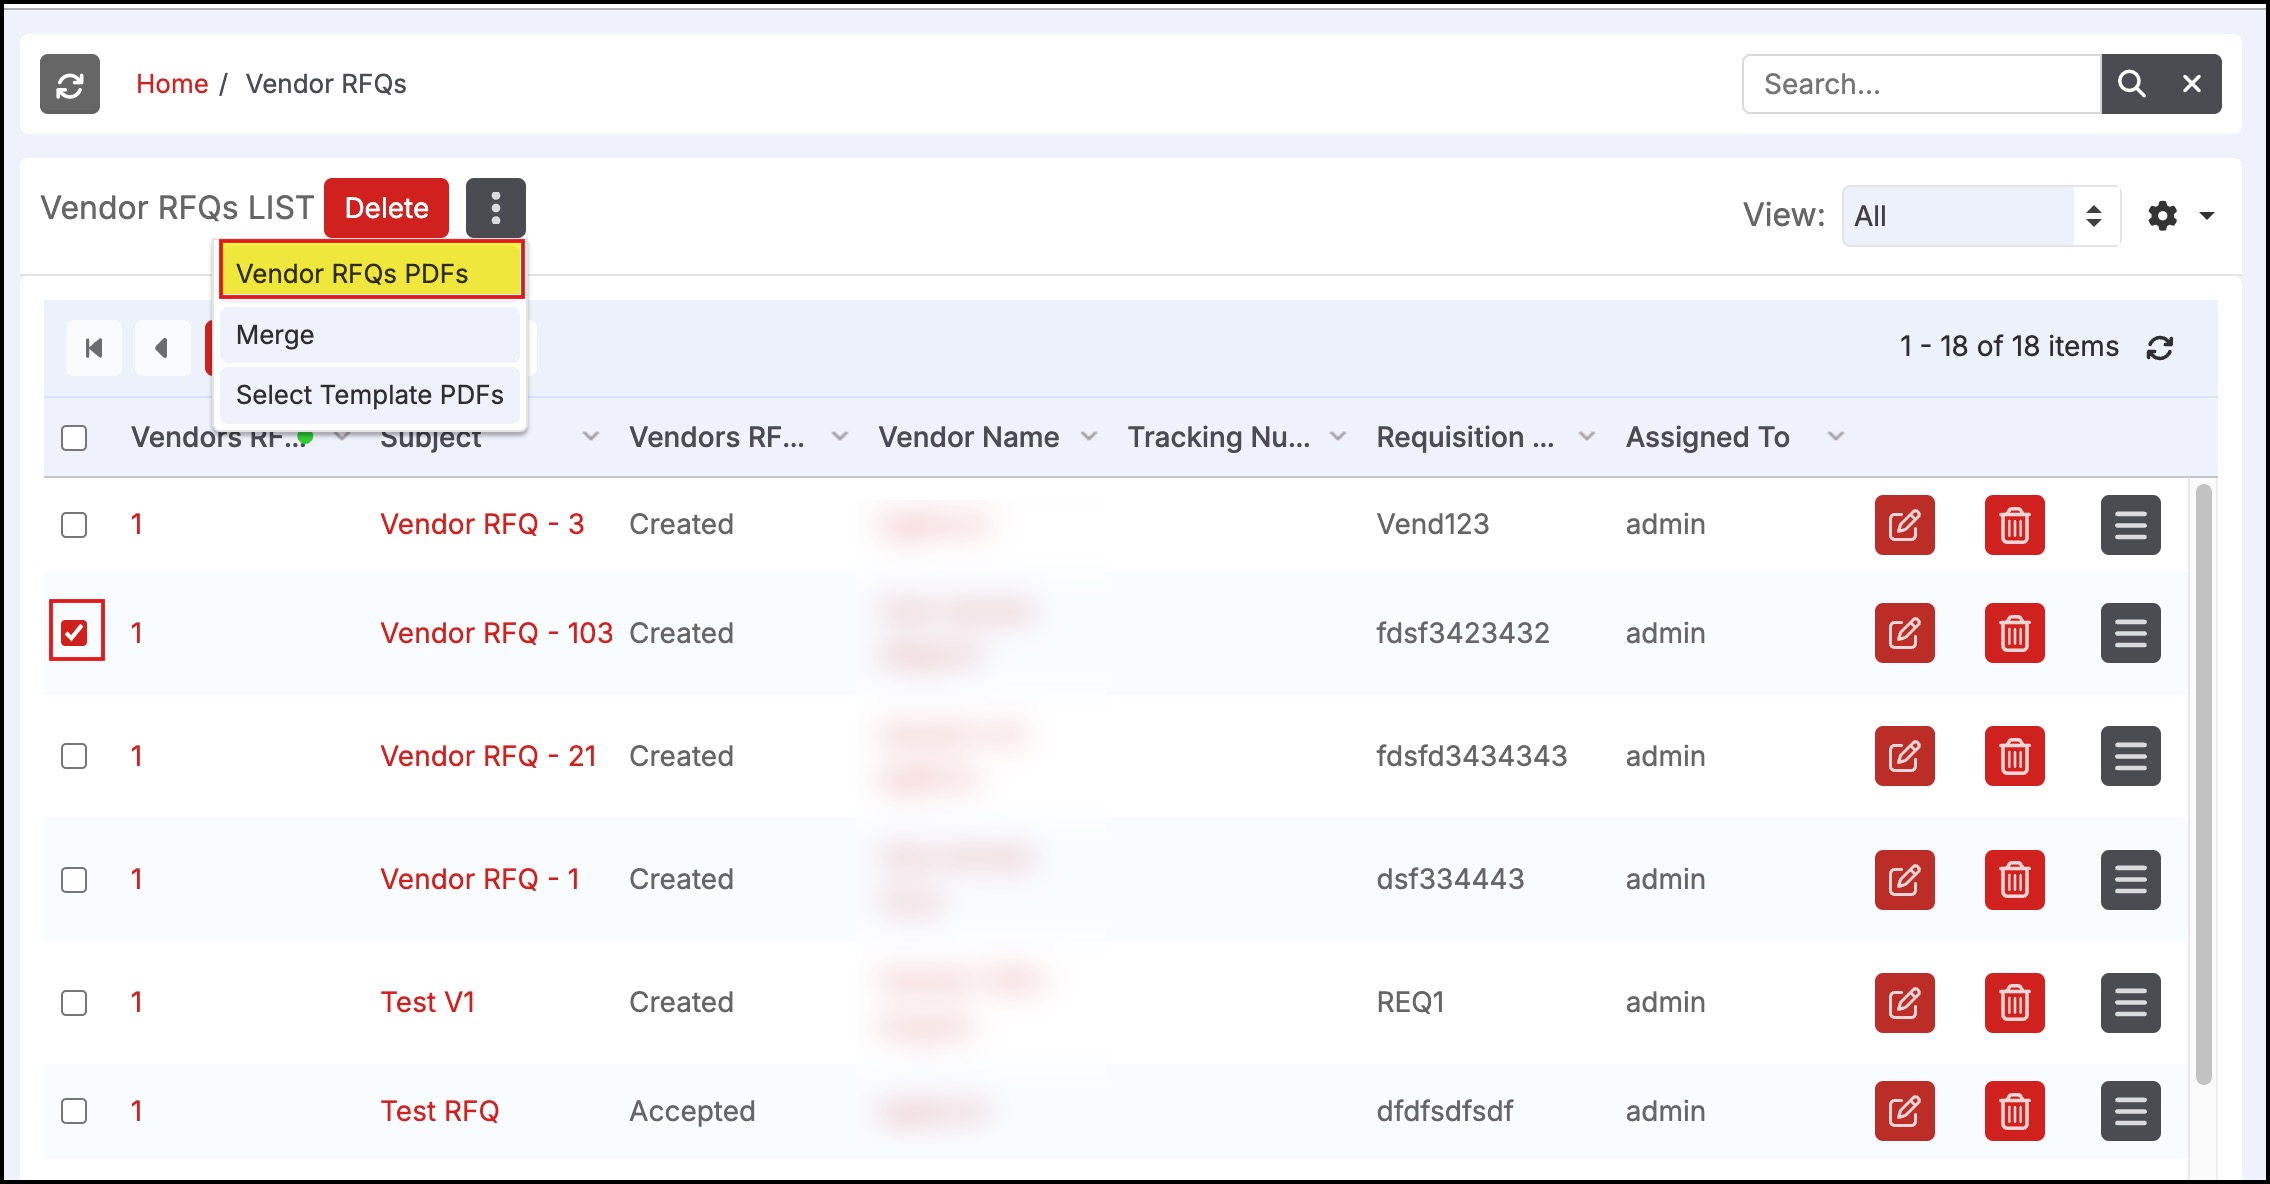
- Generate a PDF of the Vendor RFQ using the "Vendor RFQs PDFs" button that can be emailed directly or saved as a file.

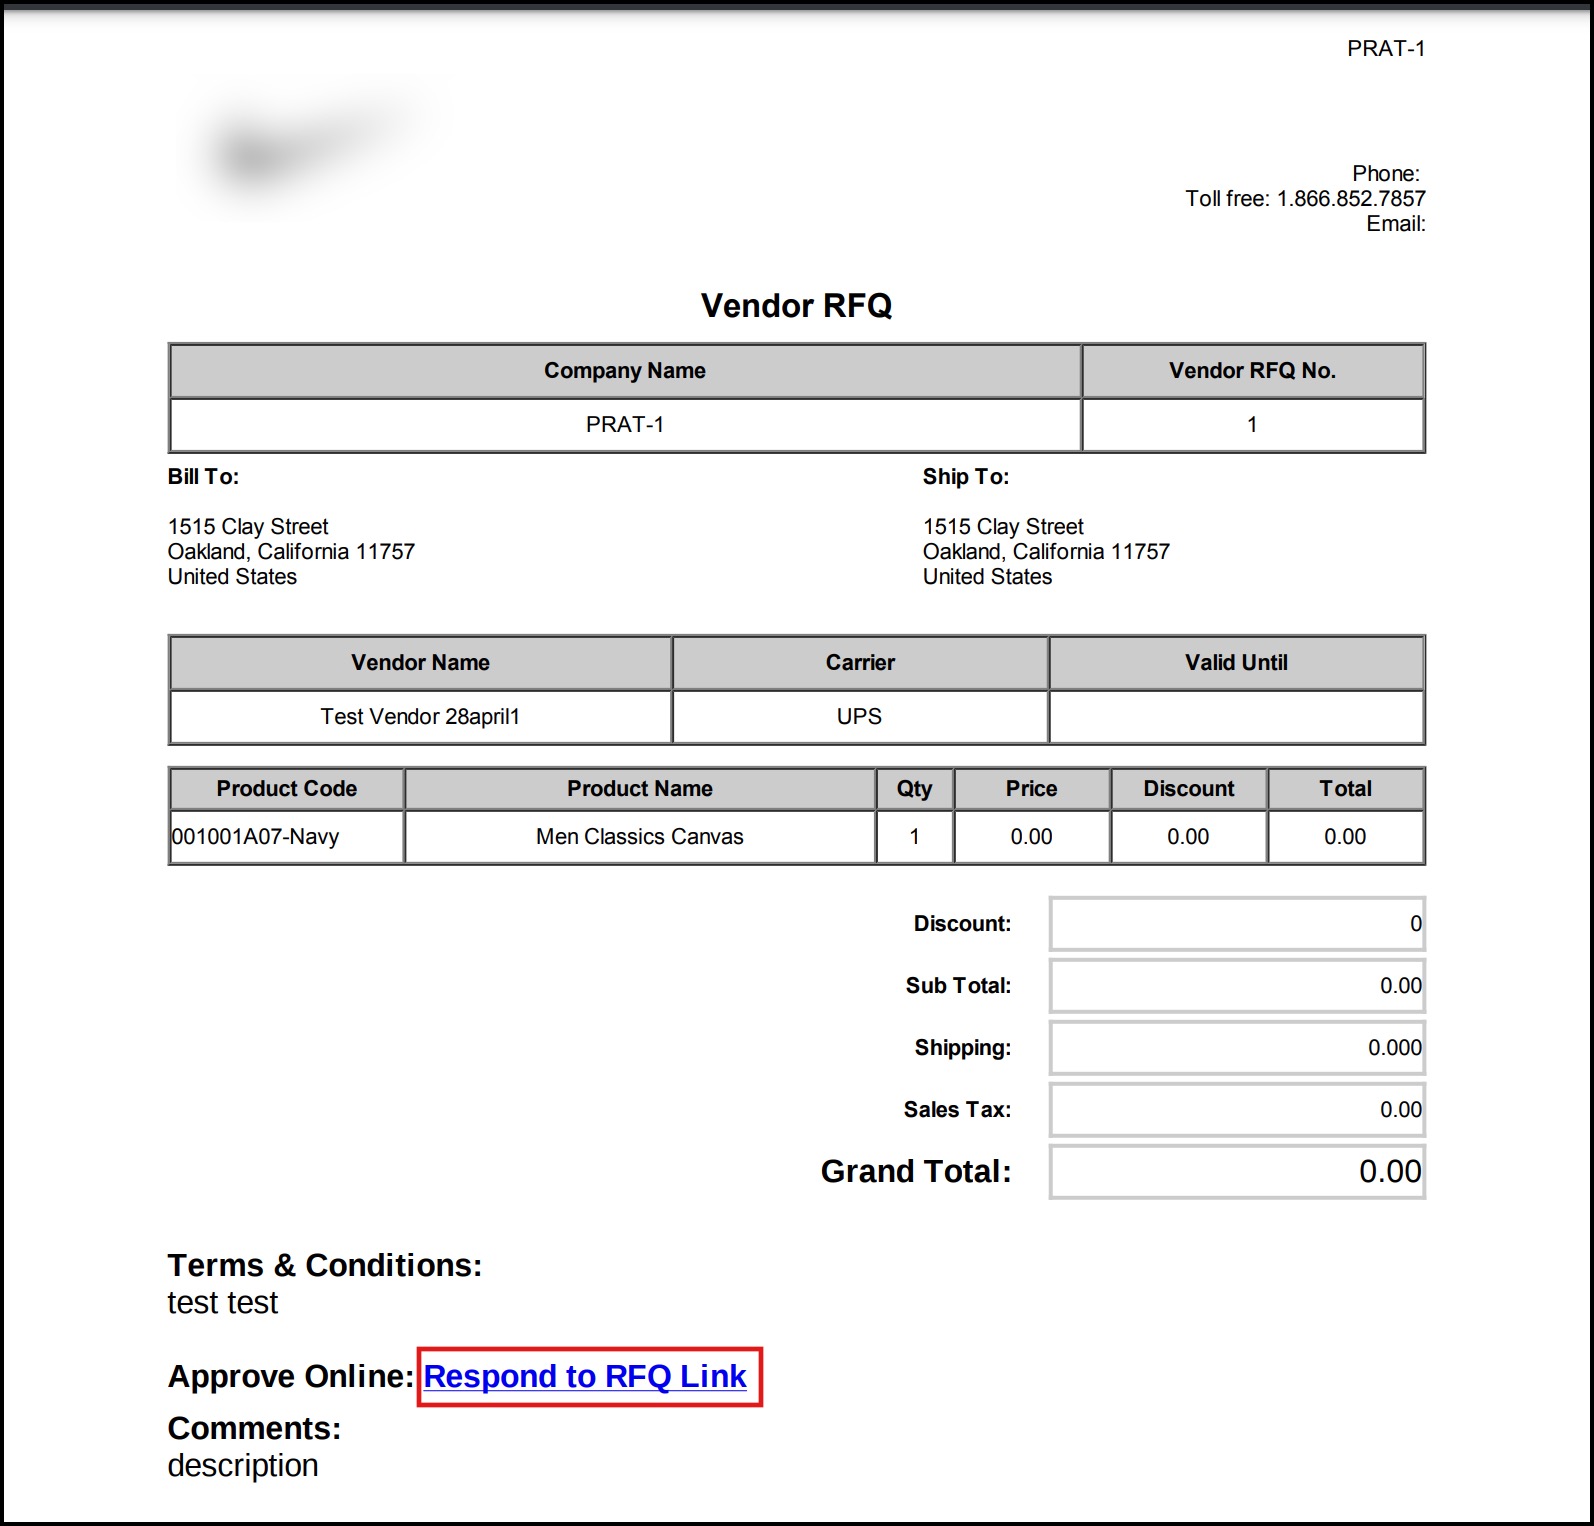
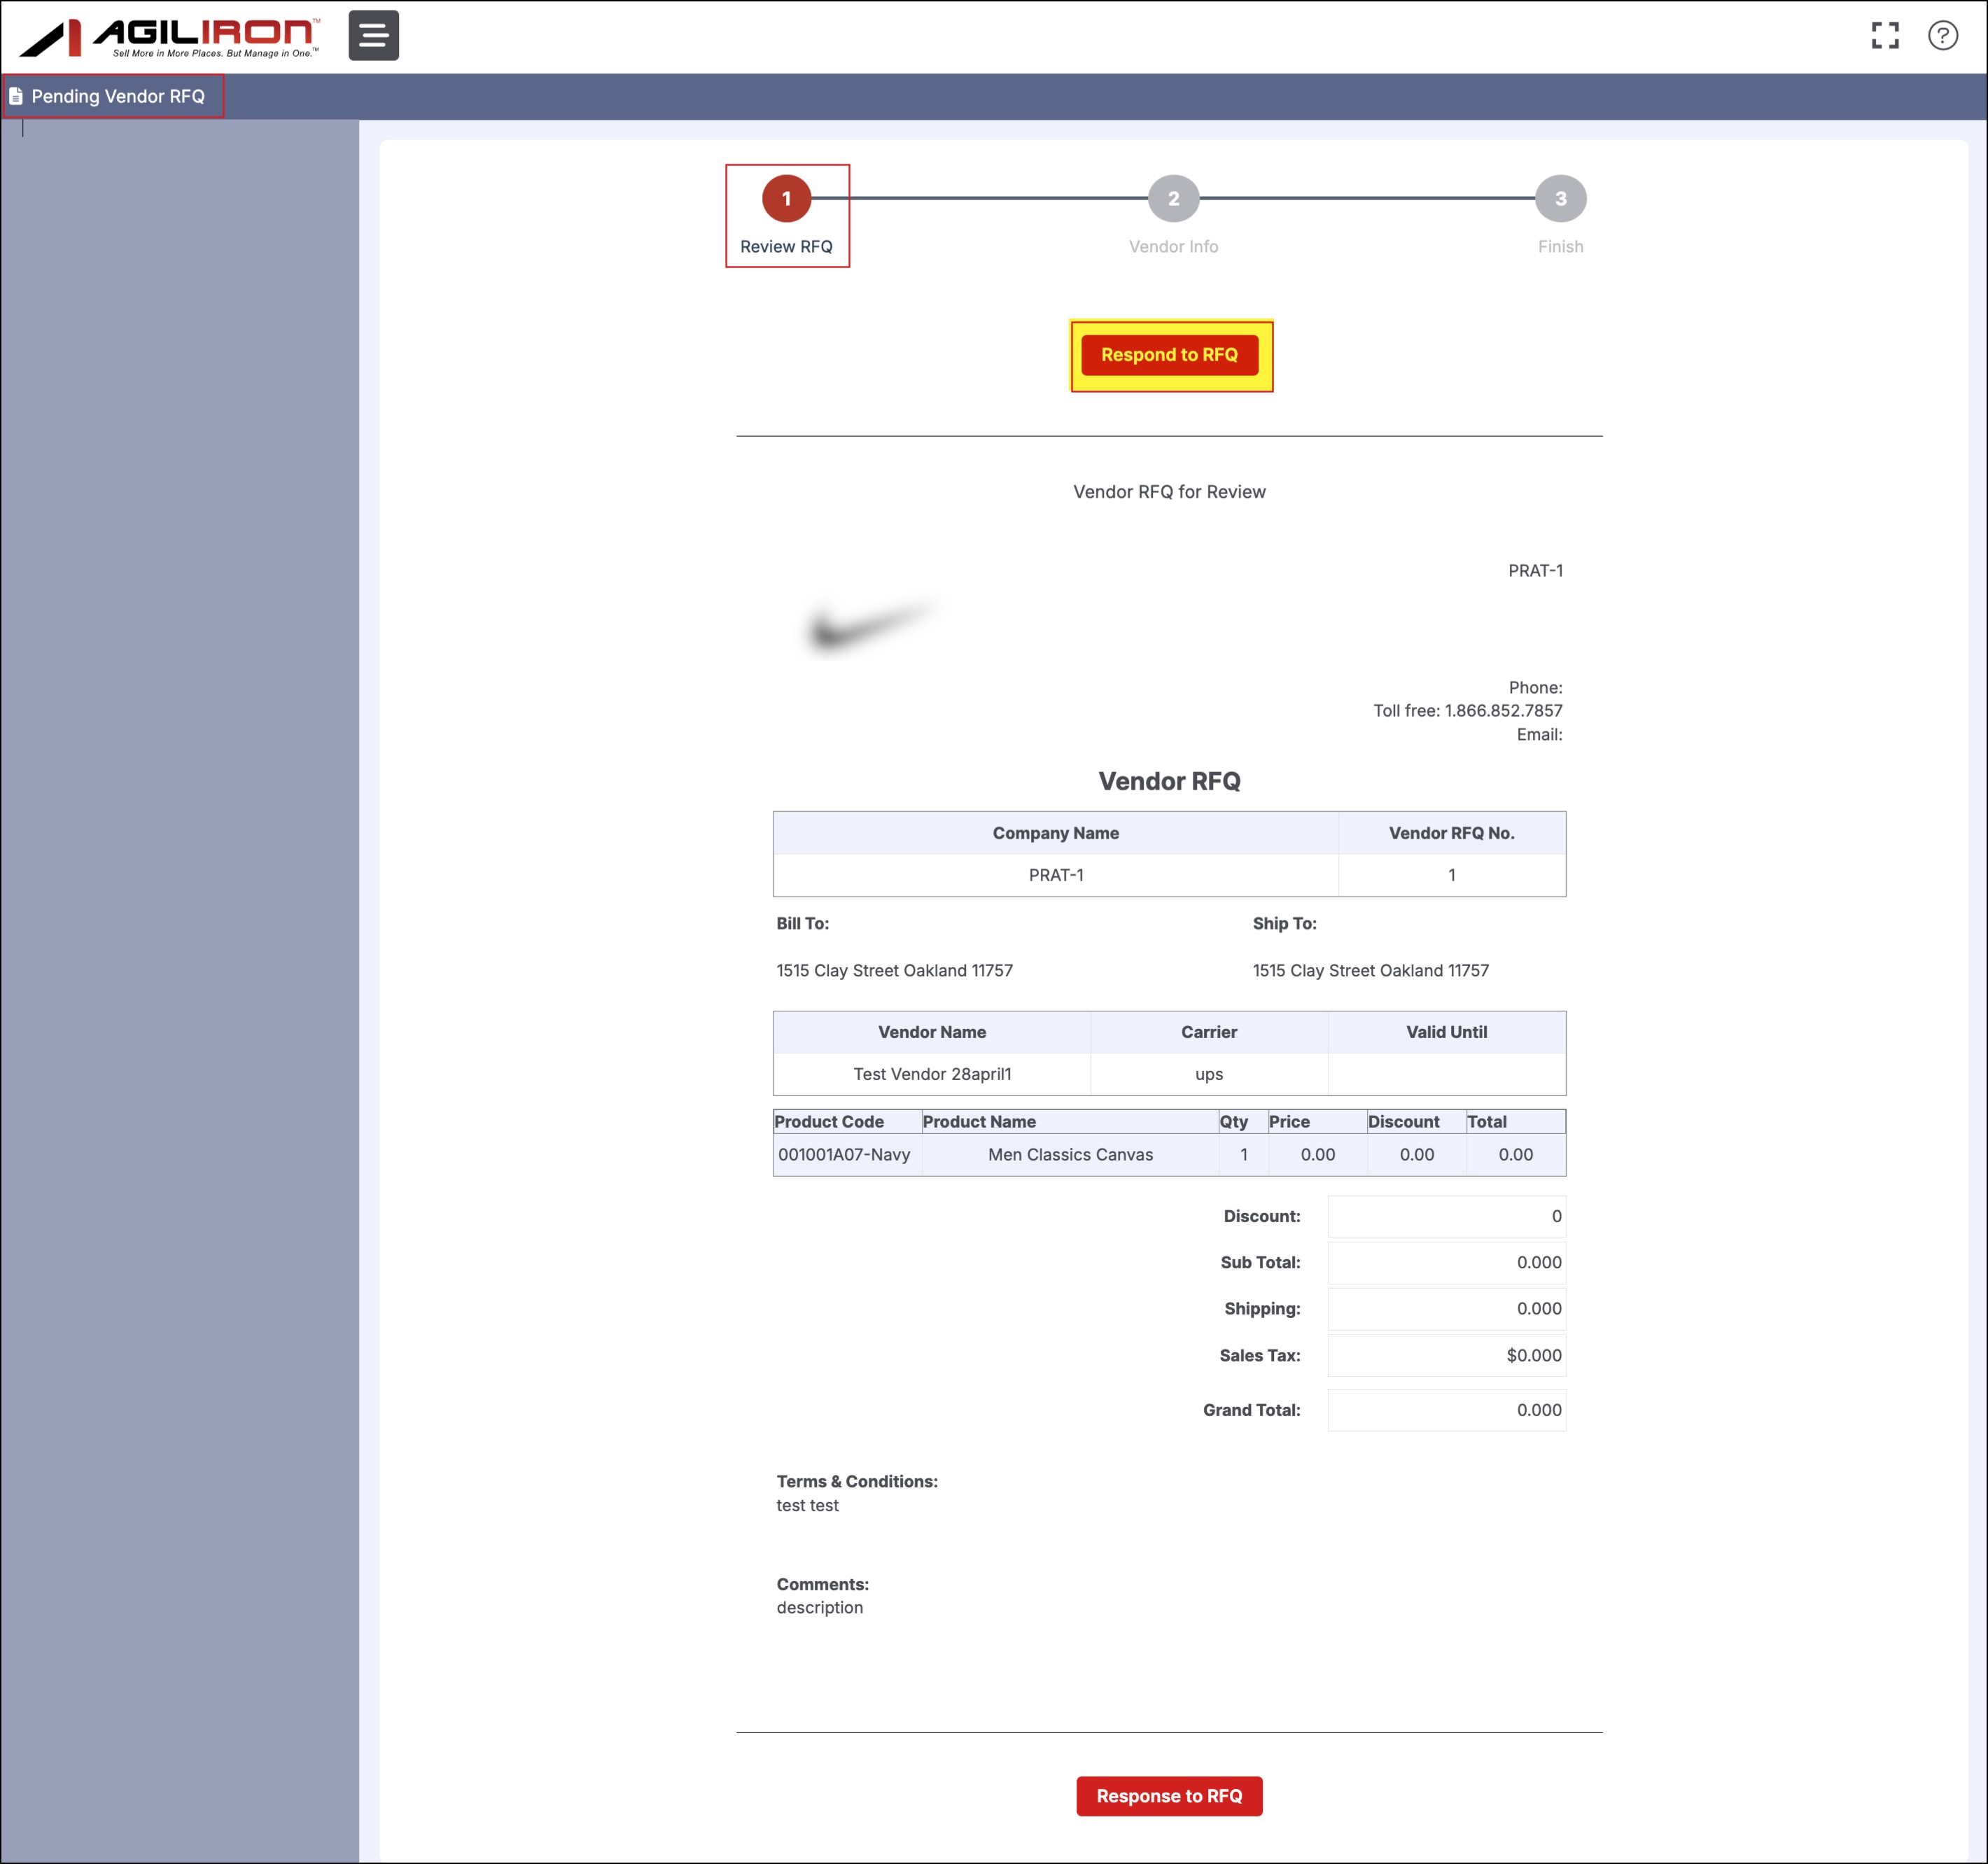
- The vendor can see the following details in the Vendor RFQ PDF along with the Respond to RFQ Link.
After clicking on the Respond to RFQ Link, the vendor will be redirected to the step-by-step process as shown below:
- In the first step, review the RFQ and click on the Respond to RFQ button.
(On the left panel, the list of pending RFQs will appear, if any).
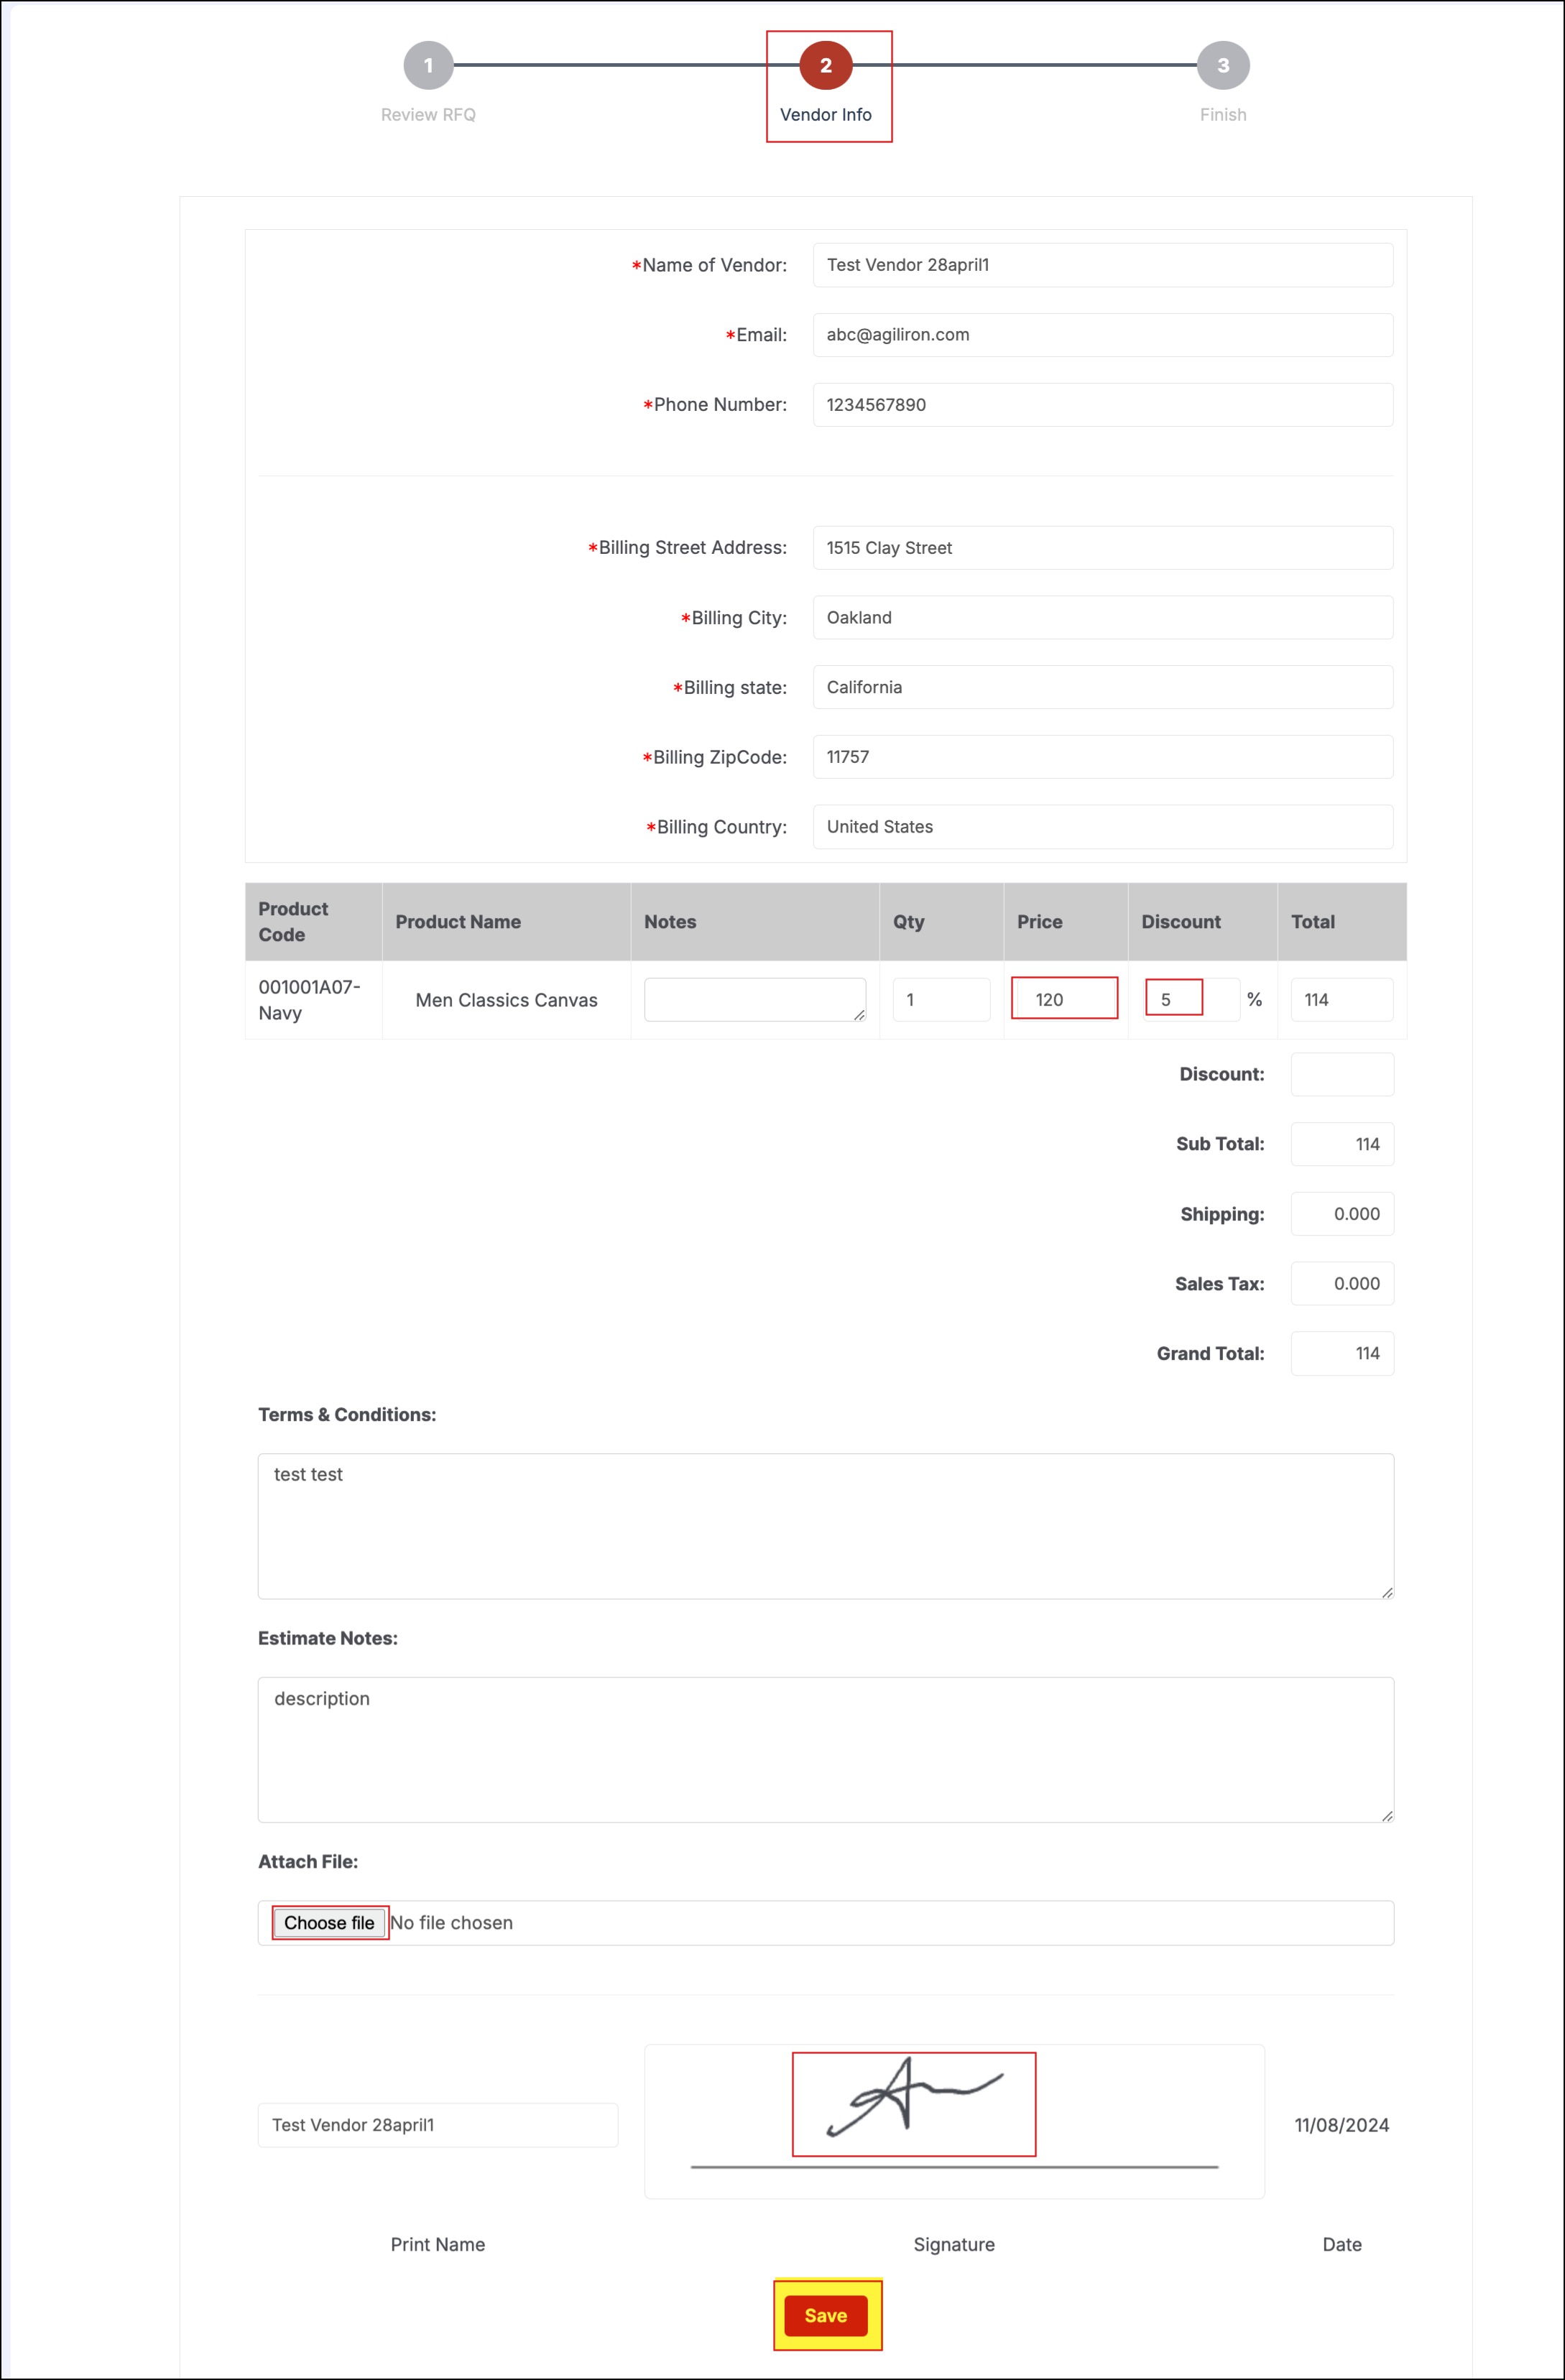
- In the second step, edit, add, or enter vendor info.
- Here, even files can be attached, notes and signature can be added.
- Proceed by clicking on Save.
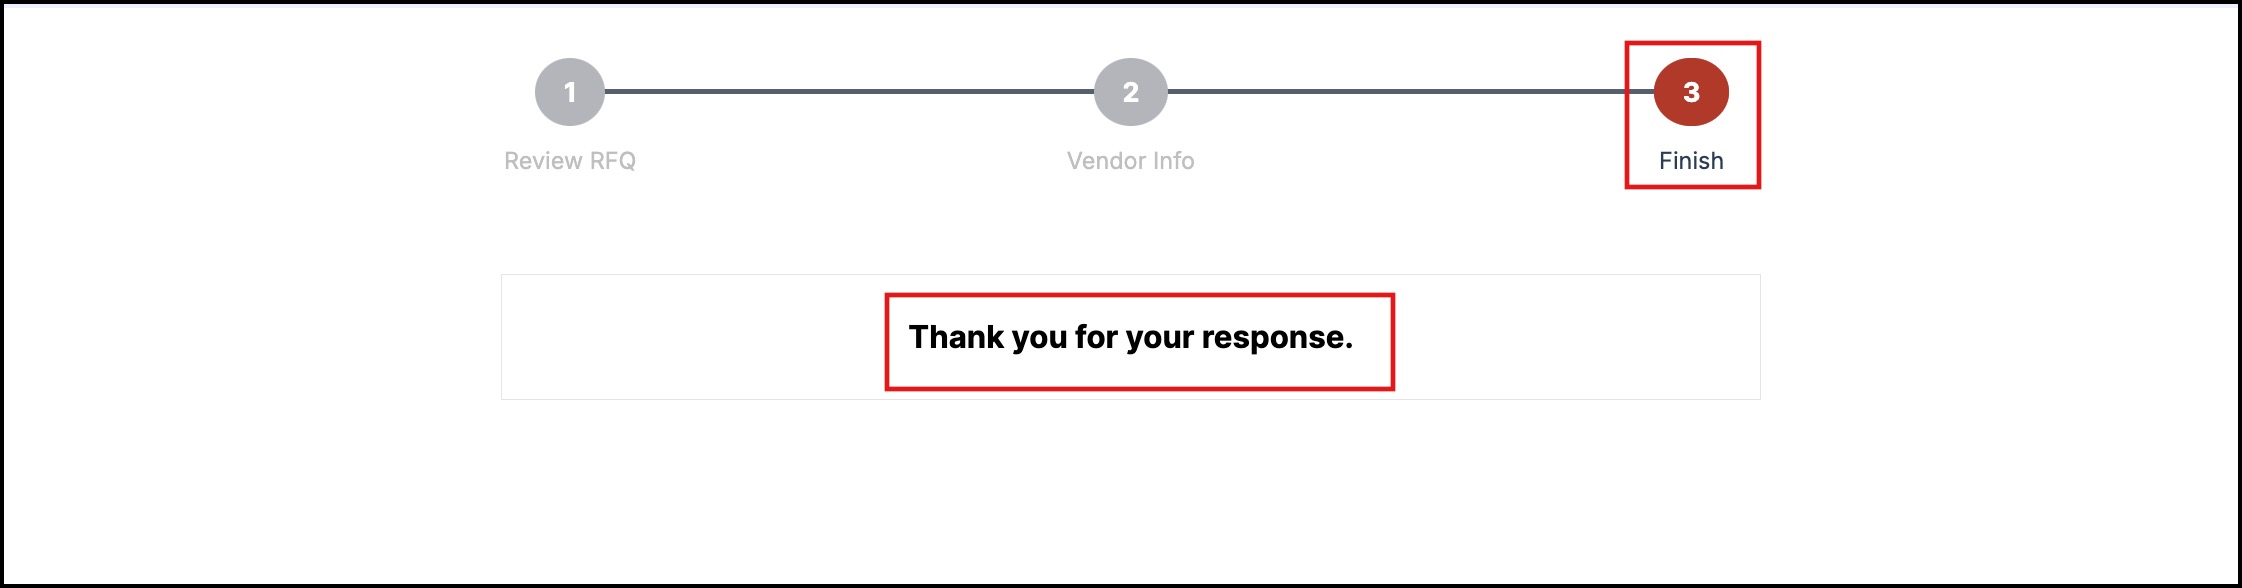
- In the last step, the following message is displayed.
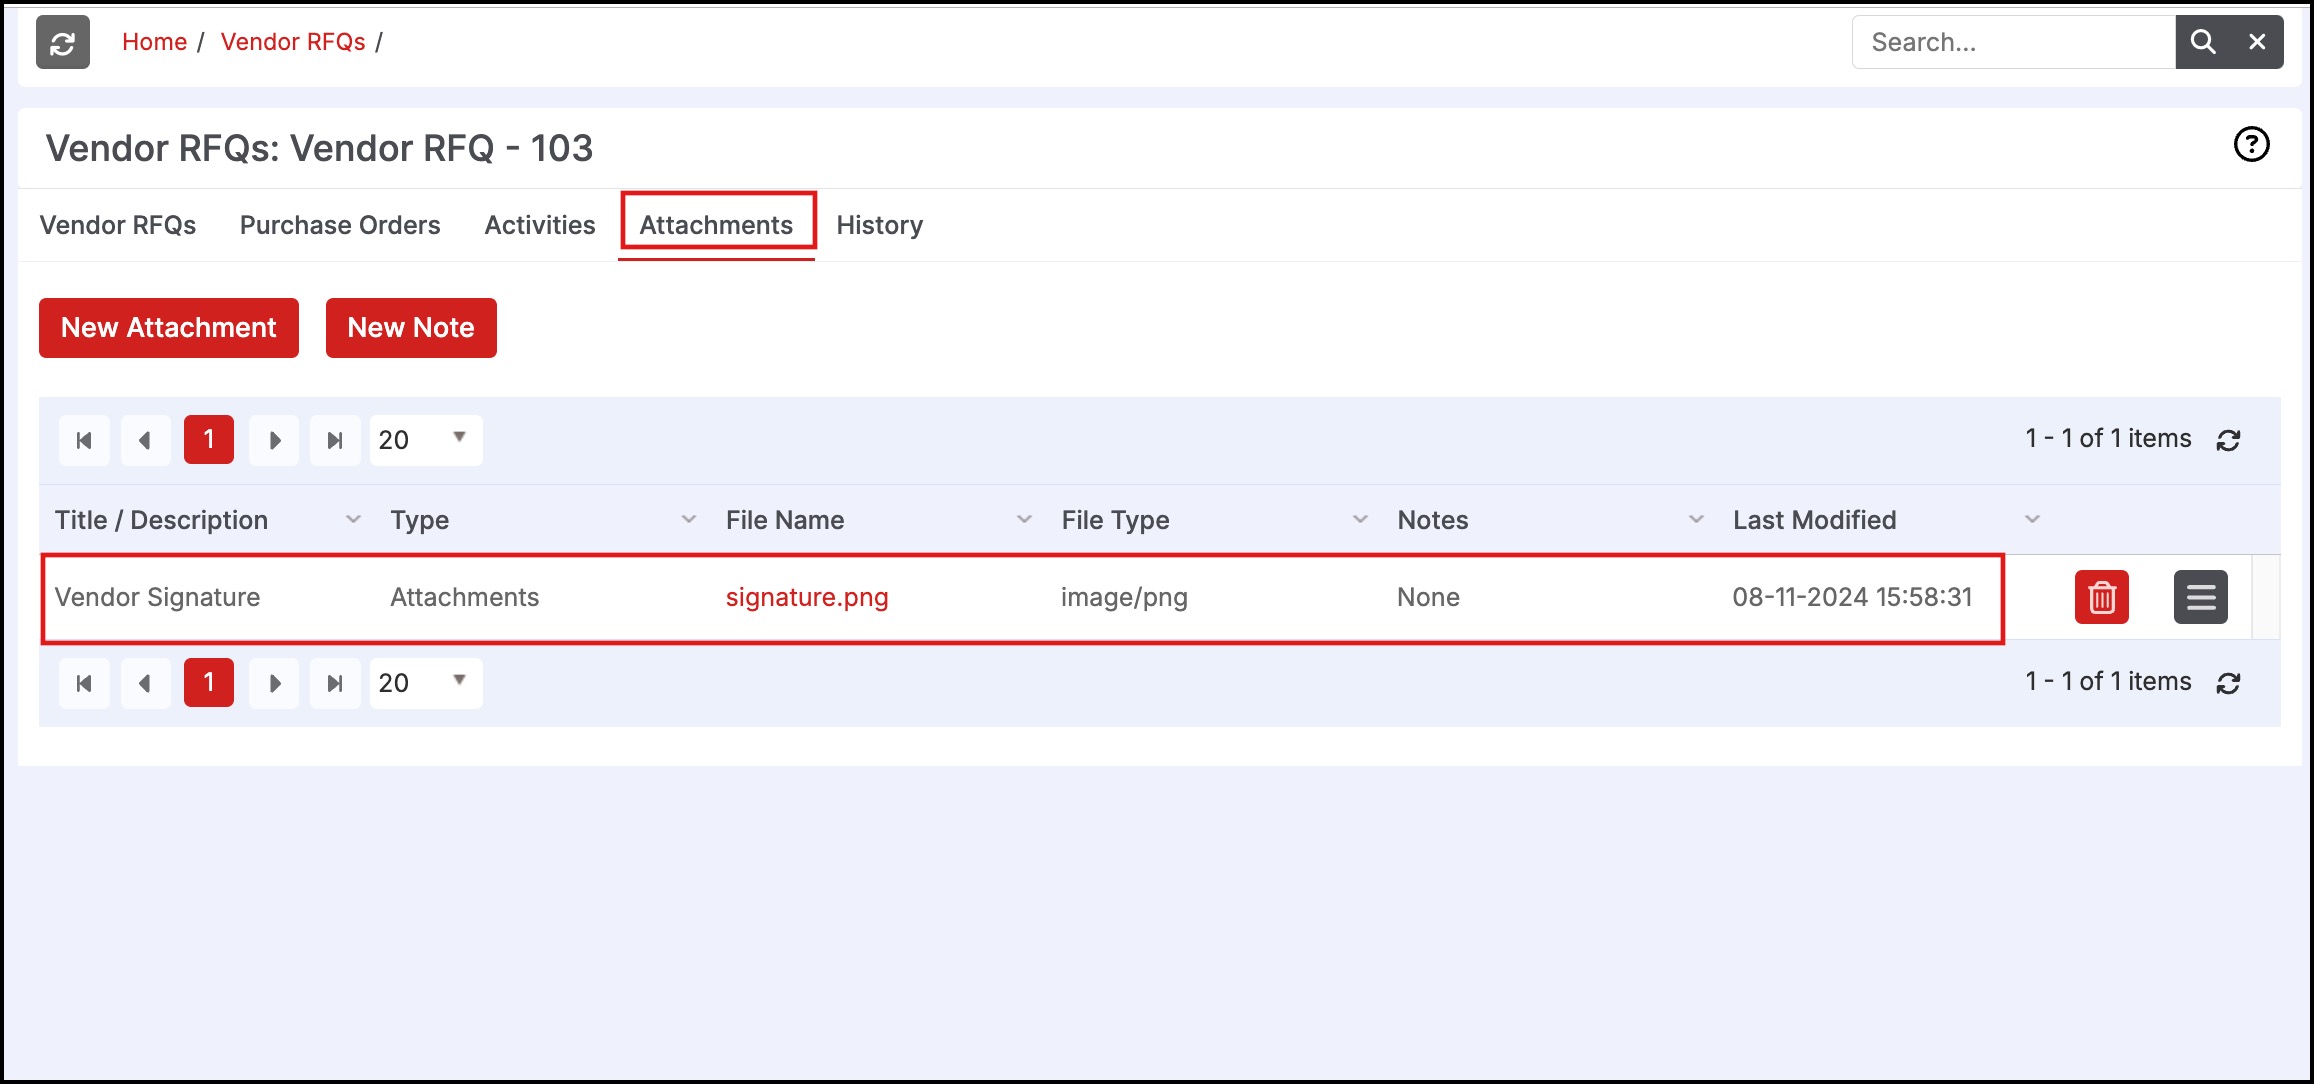
- The same vendor RFQ will now display all the details added/edited.
- Attachments like files, notes, signature can be seen under the Attachments tab.
NOTE:
- If a Purchase Order is created out of a Vendor RFQ then no changes can be made to that particular Vendor RFQ as shown in the above steps.
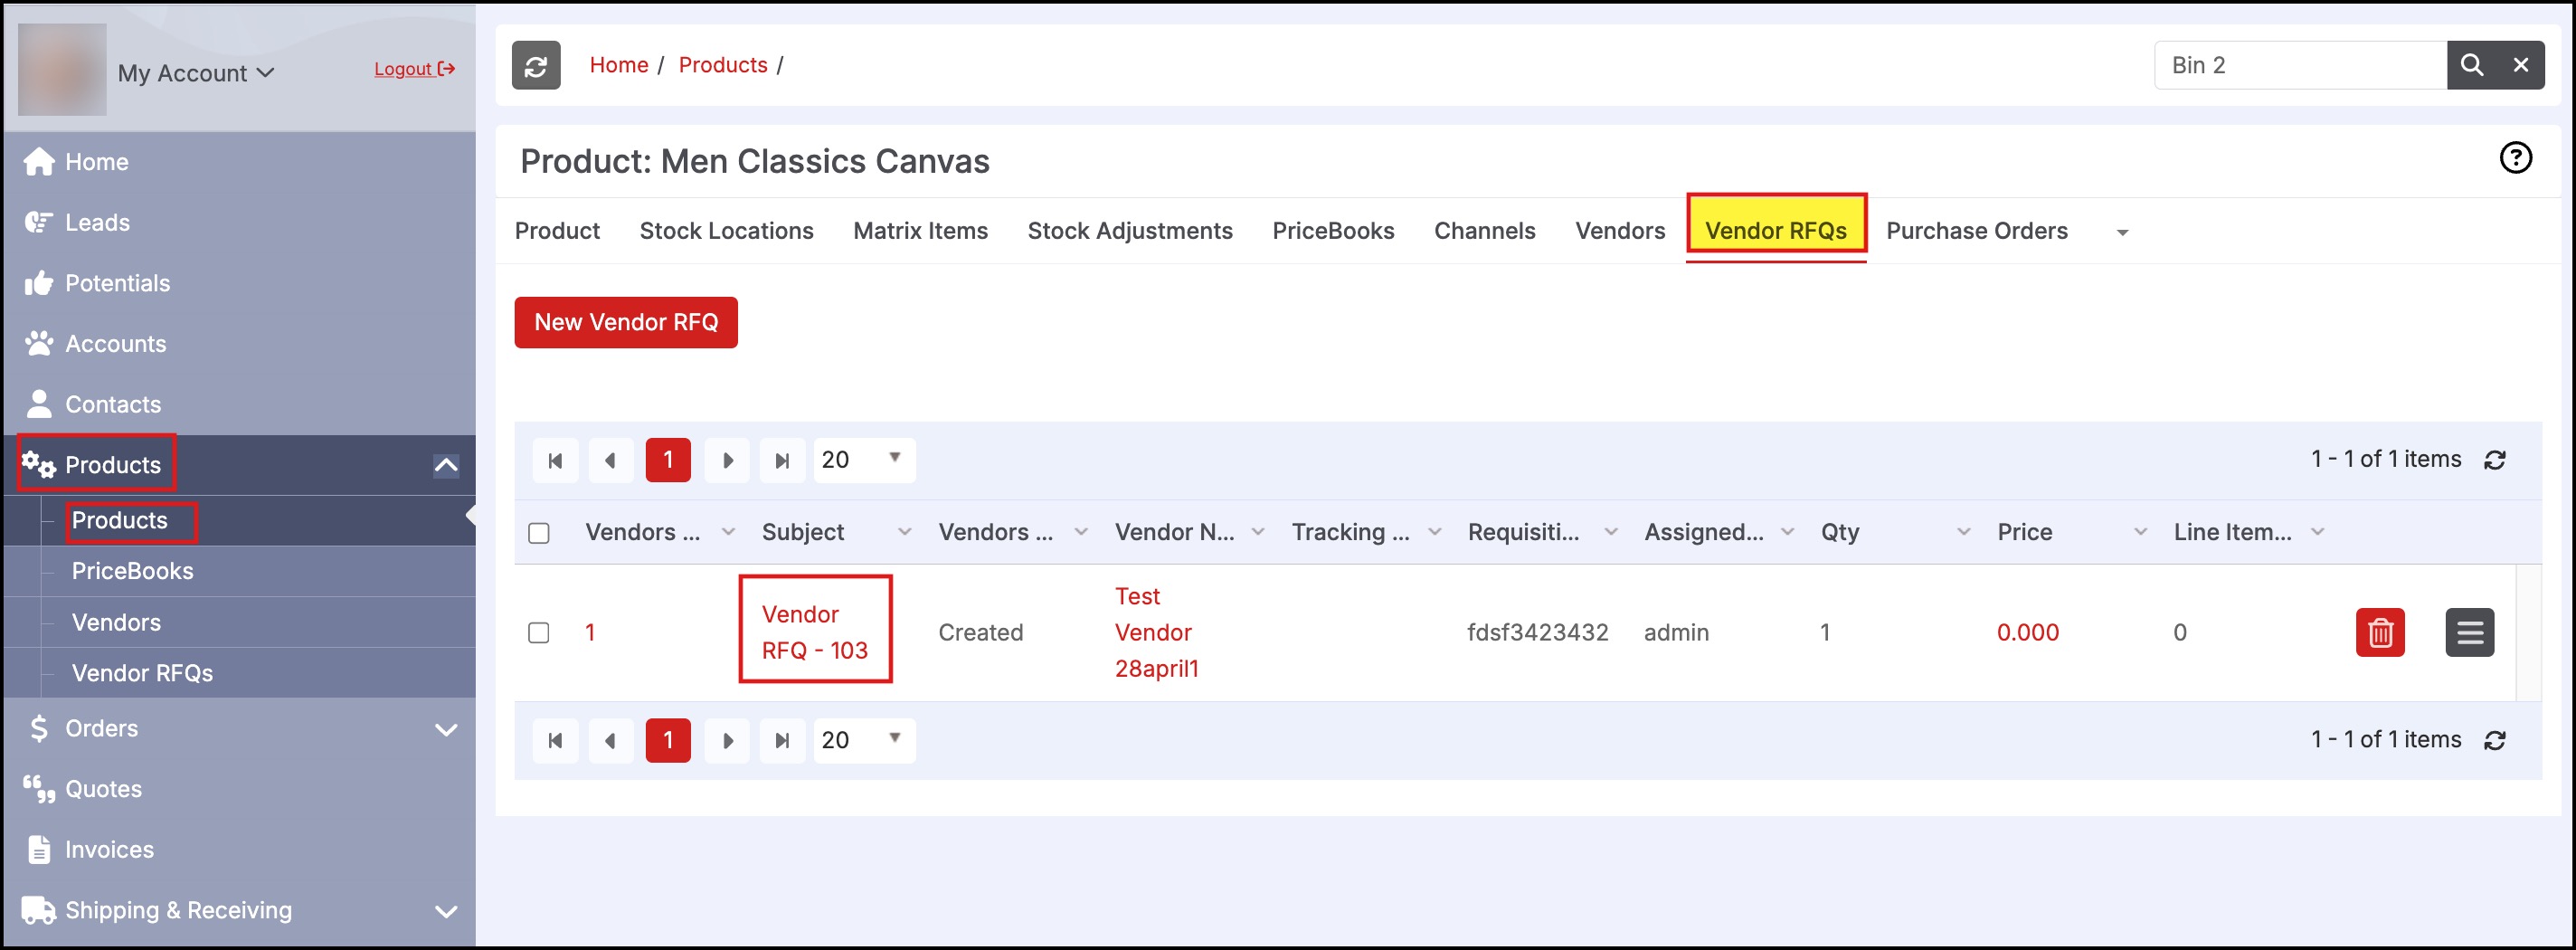
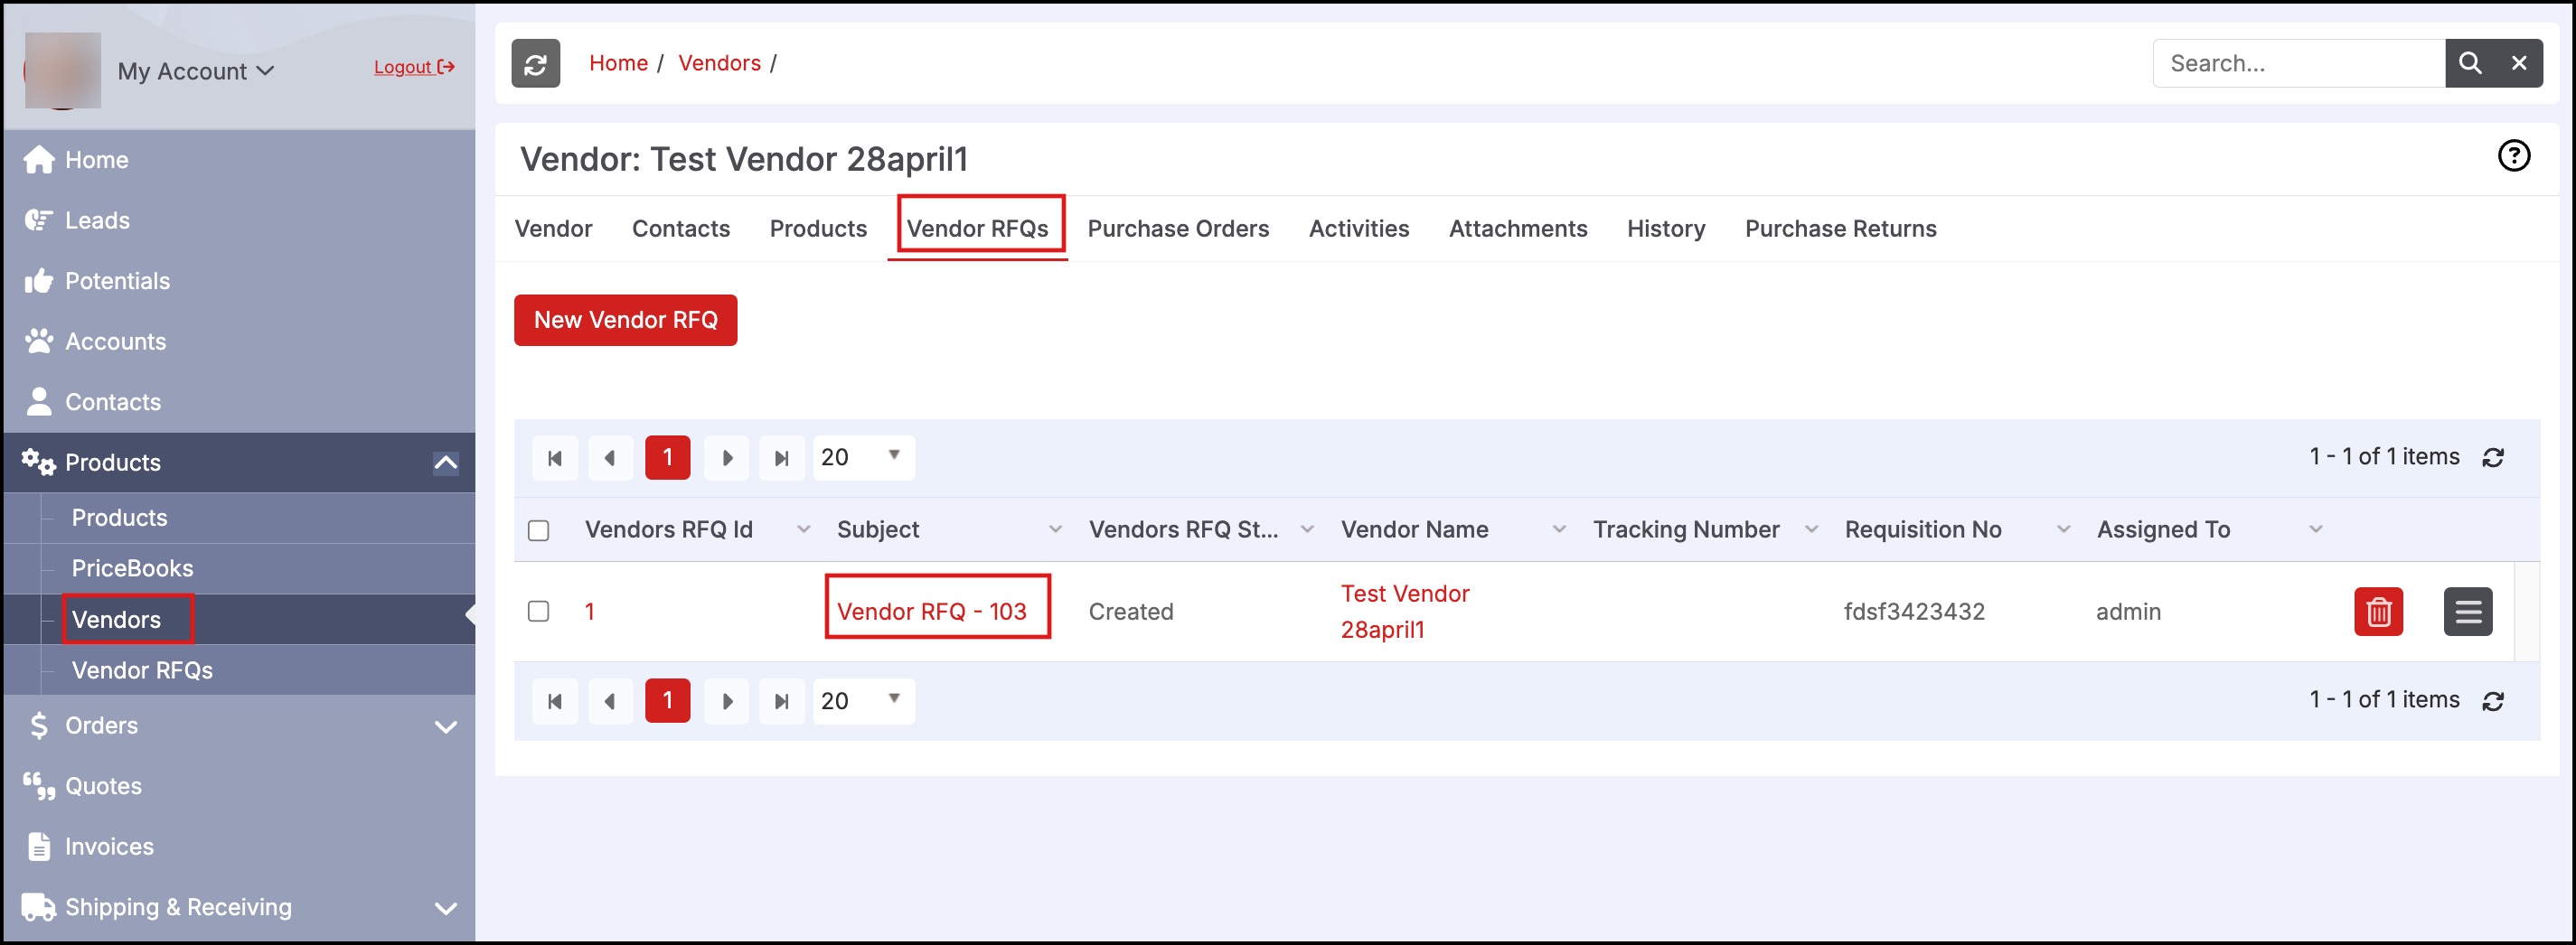
- The Vendor RFQ will also be seen on the related products' and vendor's detail page.