Setting up Agiliron Integration with QuickBooks Desktop
To setup Agiliron to integrate with your QuickBooks Company file, you need an Agiliron Business Instance and User Account.
- If you do not have an Agiliron Business Instance or User Account, please email [email protected]
to signup for a new Agiliron account OR you can signup for a 30-day trial at Agiliron Trial signup page. - If you are already an Agiliron customer OR have a 30-day trial instance of Agiliron, we will walk you through the process of making the connection to your QuickBooks Company File from your existing Agiliron Account below.
Before you begin:
- Please make sure you are using Windows 10 and QuickBooks Desktop (Pro, Premier, or Enterprise) 2015 and higher editions.
- Please make sure you are signed into QuickBooks Desktop as an admin and are in single user mode.
Installing Agiliron Sync Application on your Windows computer:
- The Agiliron Sync Application should be installed on the same Windows computer that you are running QuickBooks Desktop. Please follow the instructions below to install it.
- Download the "MS Visual Basic Power Pack Package" by clicking here.
- Once it is downloaded, click on the "VisualBasicPowerPacksSetup.exe" and following the installation steps to install that on your Windows machine.
- Download the "Agiliron Sync Application Package" by clicking here.
- This will download a .zip file to your computer.
- Extract all the files from the .zip file to a temporary directory (e.g. Desktop).
- Run the "setup.exe" file and follow the installation steps to complete the application installation.
Connecting Agiliron Sync Application to your Agiliron instance:
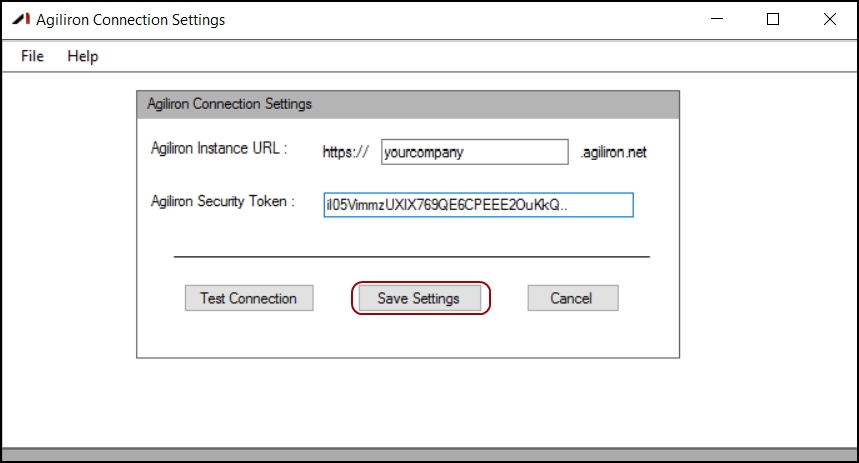
- Once the installation is complete, you will see the screen shown below:
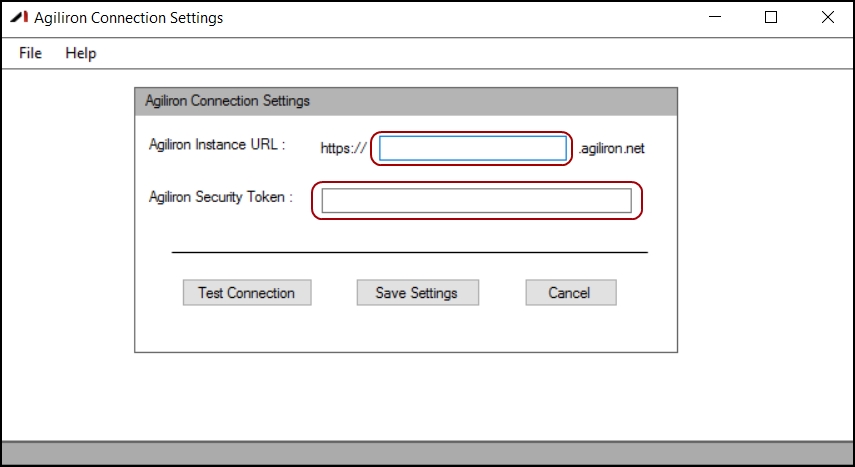
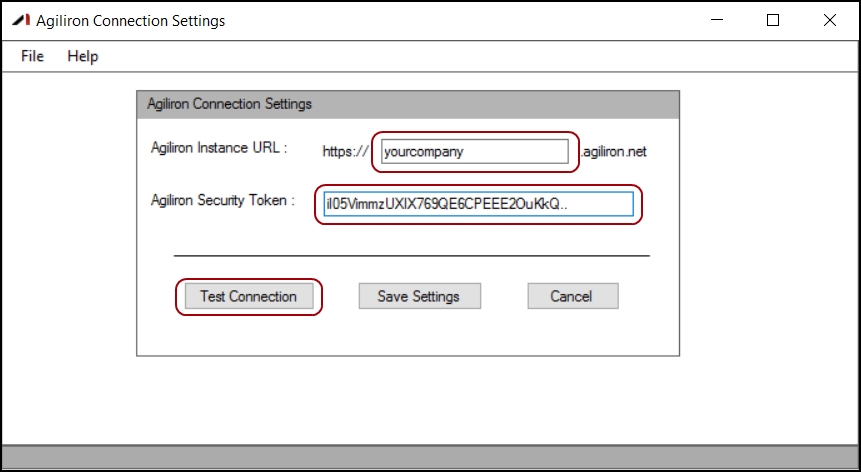
- Enter the Agiliron instance name in the "Agiliron Instance URL" field (e.g. yourcompany) - you do NOT need to enter the leading https:// OR the .agiliron.net suffix
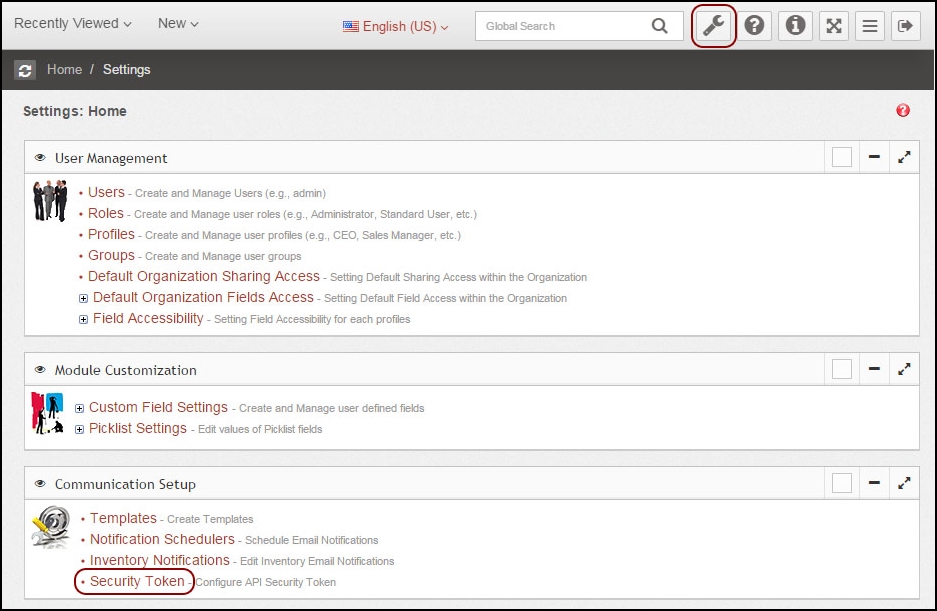
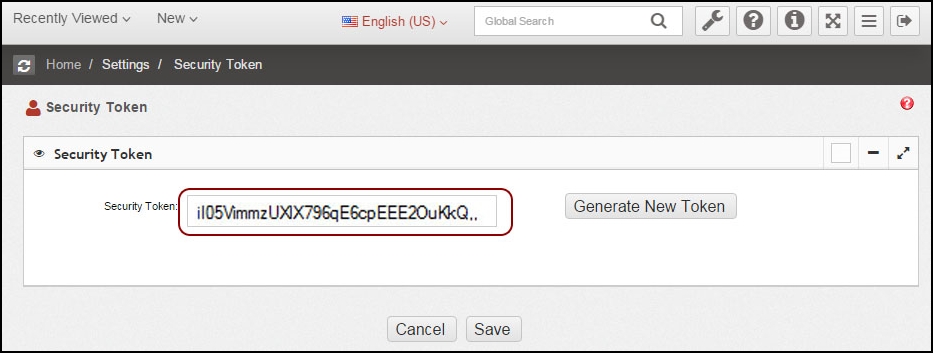
- The "Agiliron Security Token" needs to be obtained from your Agiliron instance, so login to your Agiliron instance and go to "Settings > Security Token" as shown below.
- Copy the "Security Token" string and enter that into the "Agiliron Security Token" field in the Application.
-
Then click "Test Connection" button.
-
If the connection parameters have been entered correctly, you will get a message that the "Connection Successful".
-
If there is a problem with the connection parameters specified, you will get a message that the connection failed...please check the URL and Security Token specified and try again.
-
Then click "Save Settings" to save these settings for future connections. The application will remember these settings so you do not need to enter these the next time the application is started.
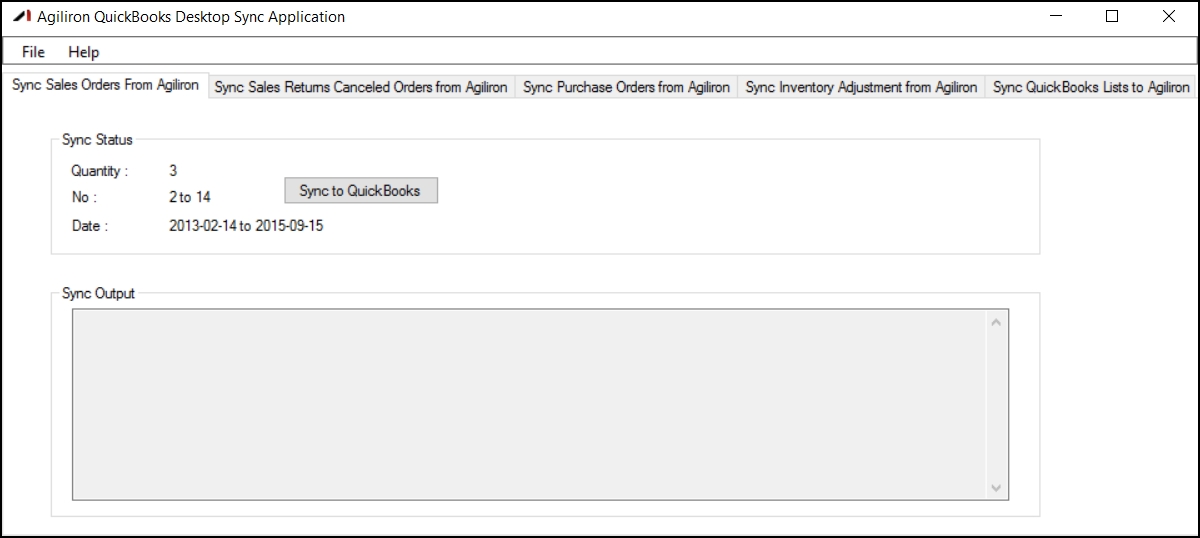
- This will then bring up the Agiliron Sync Application as shown below.
Click the "Sync QuickBooks Lists to Agiliron" tab as shown below and click the "Sync to Agiliron" button.
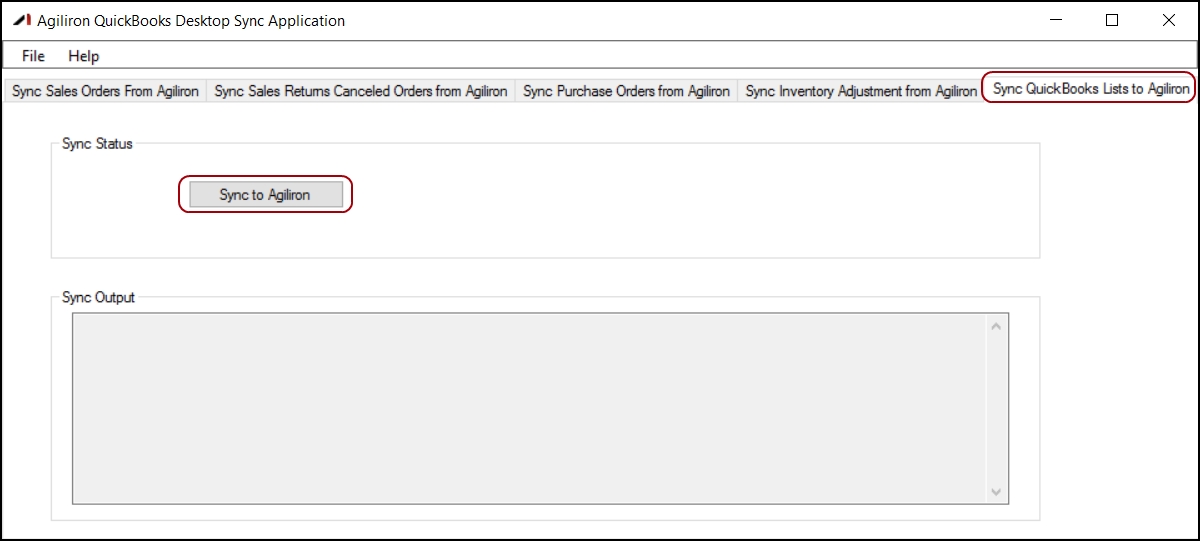
The QuickBooks Company File lists information are synced to Agiliron. The entities that were imported into Agiliron from QuickBooks are listed below:
- Company Information
- Chart of Accounts
- Item List
- Payment Method List
- Shipping Method List
- Sales Tax Authorities
- Sales Tax Categories
You can skip the next IIF File integration section if you are using the Agiliron Sync Application Method described above for the integration with QuickBooks Desktop and pick up on the subsequent sections which cover the setup and mapping of the various imported entities to facilitate the transfer of transactions to QuickBooks from Agiliron.
Updated about 1 year ago
