Creating Custom Views
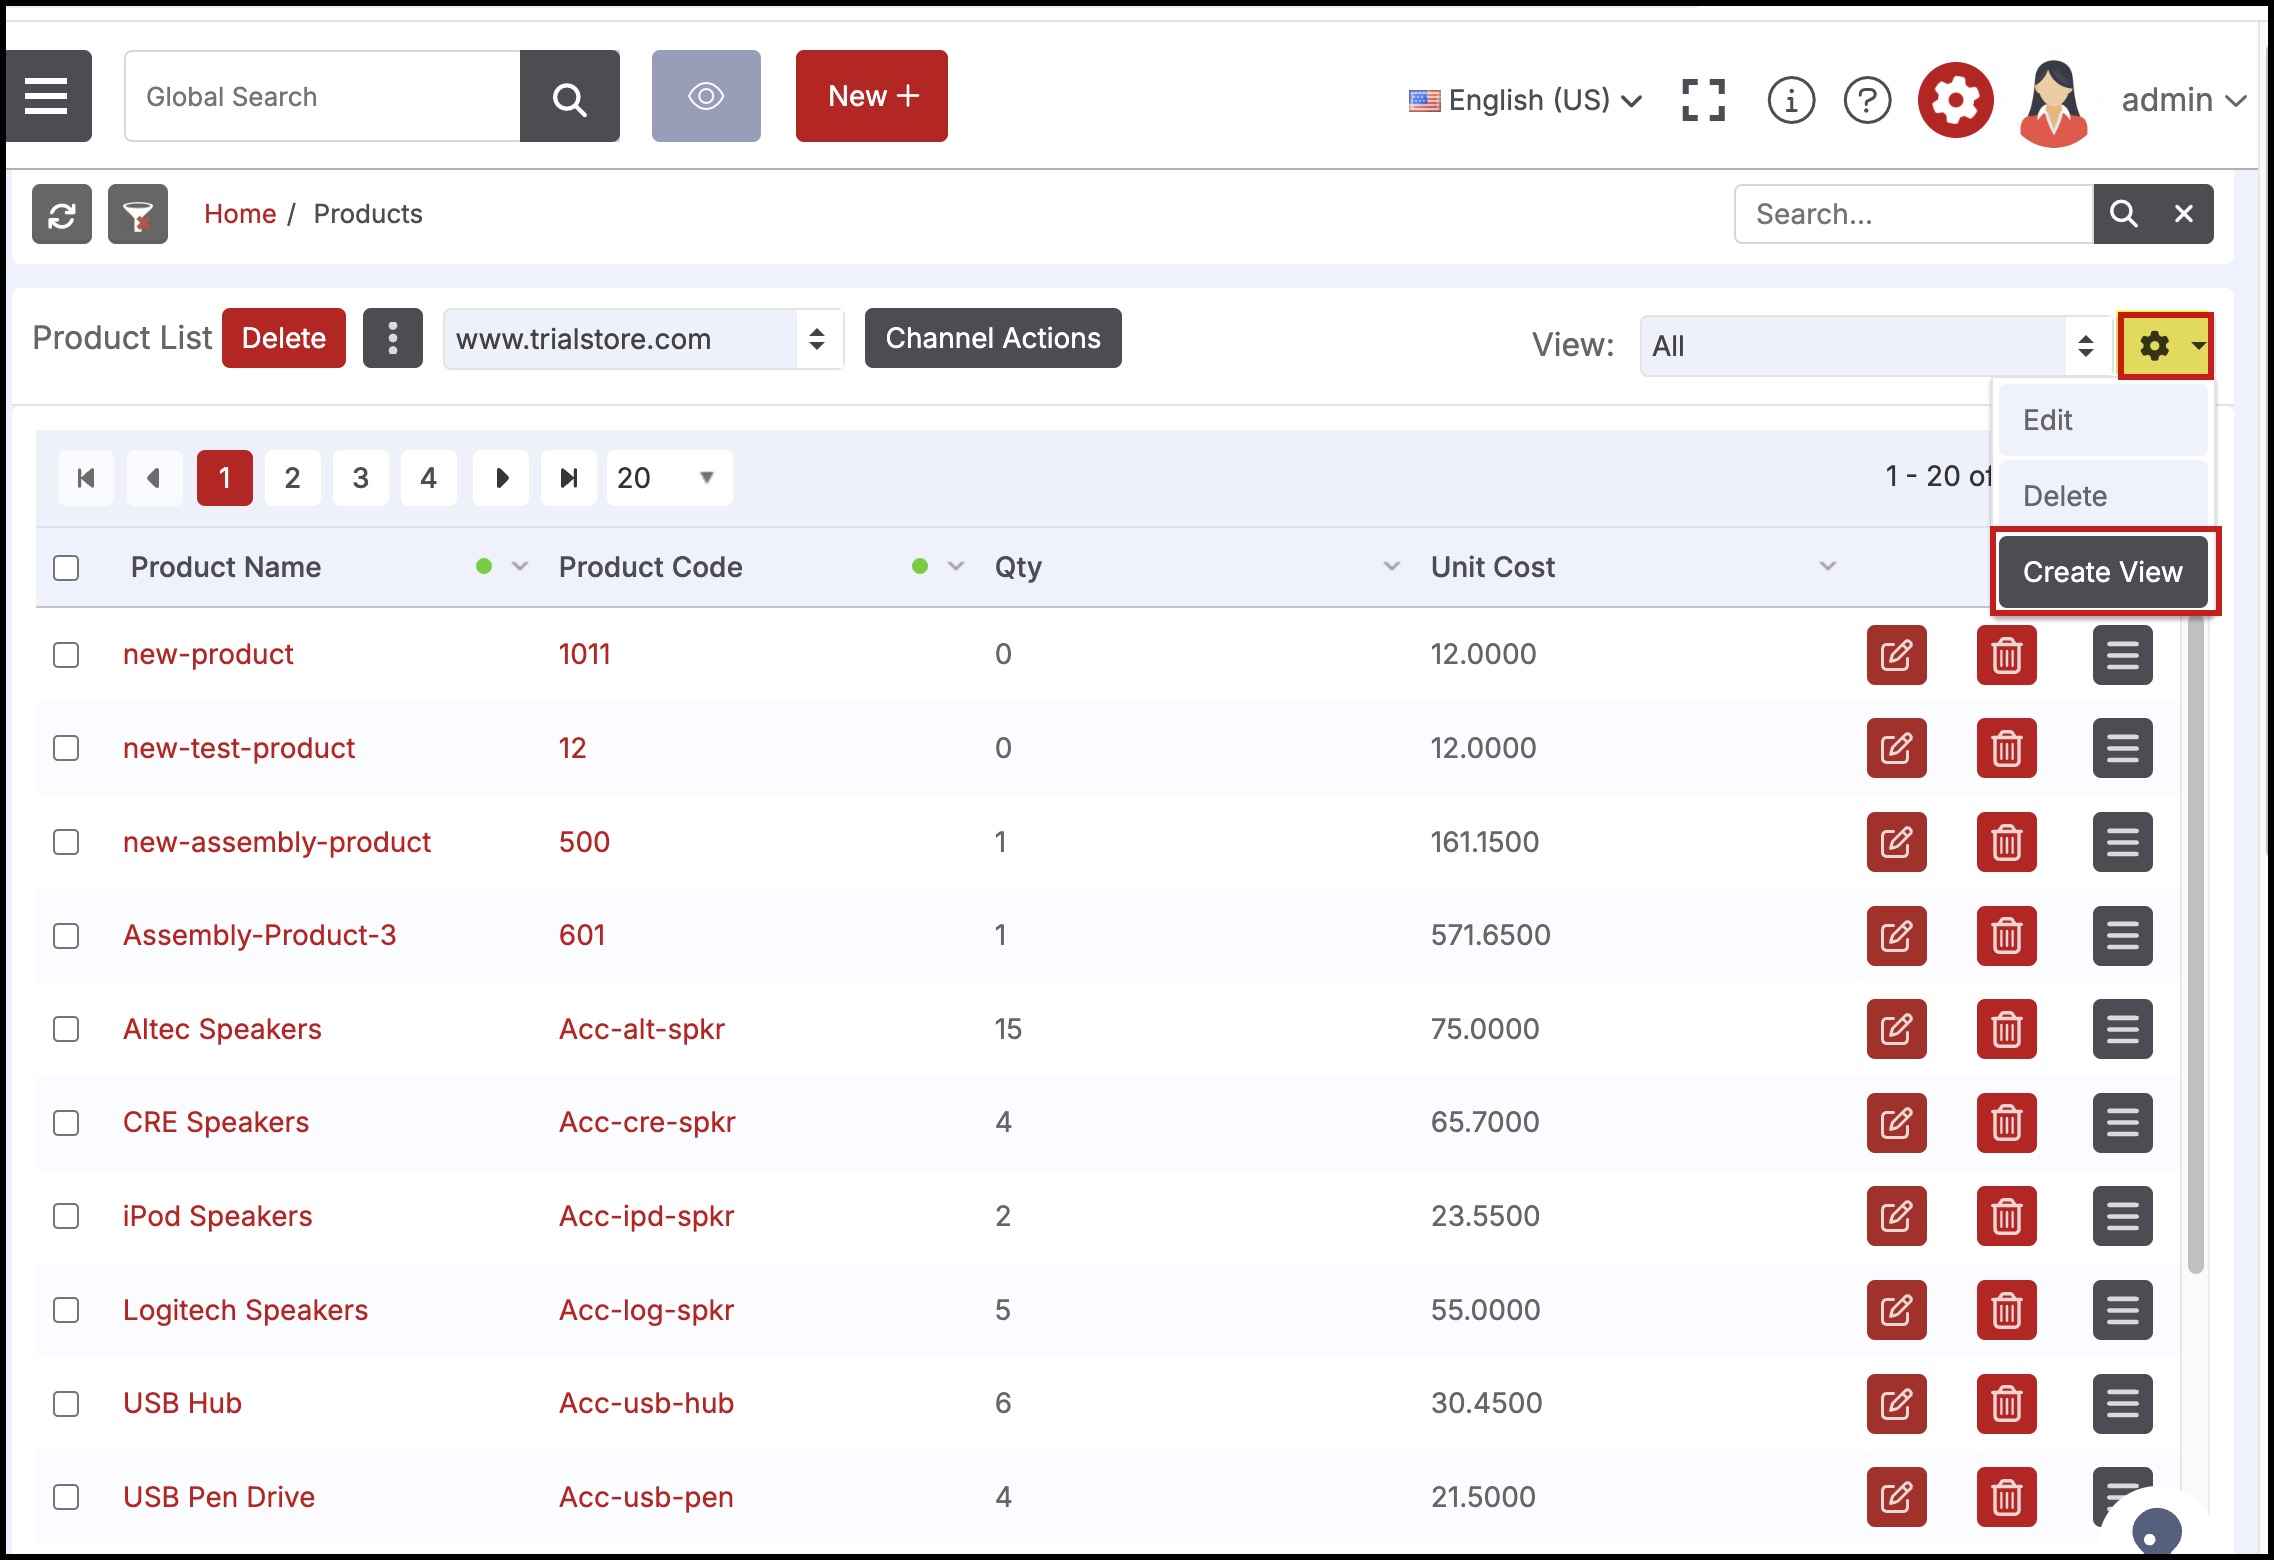
To create a new Custom View, please follow the steps shown below.
The fields are identical to the ones listed in the earlier section Editing Custom Views
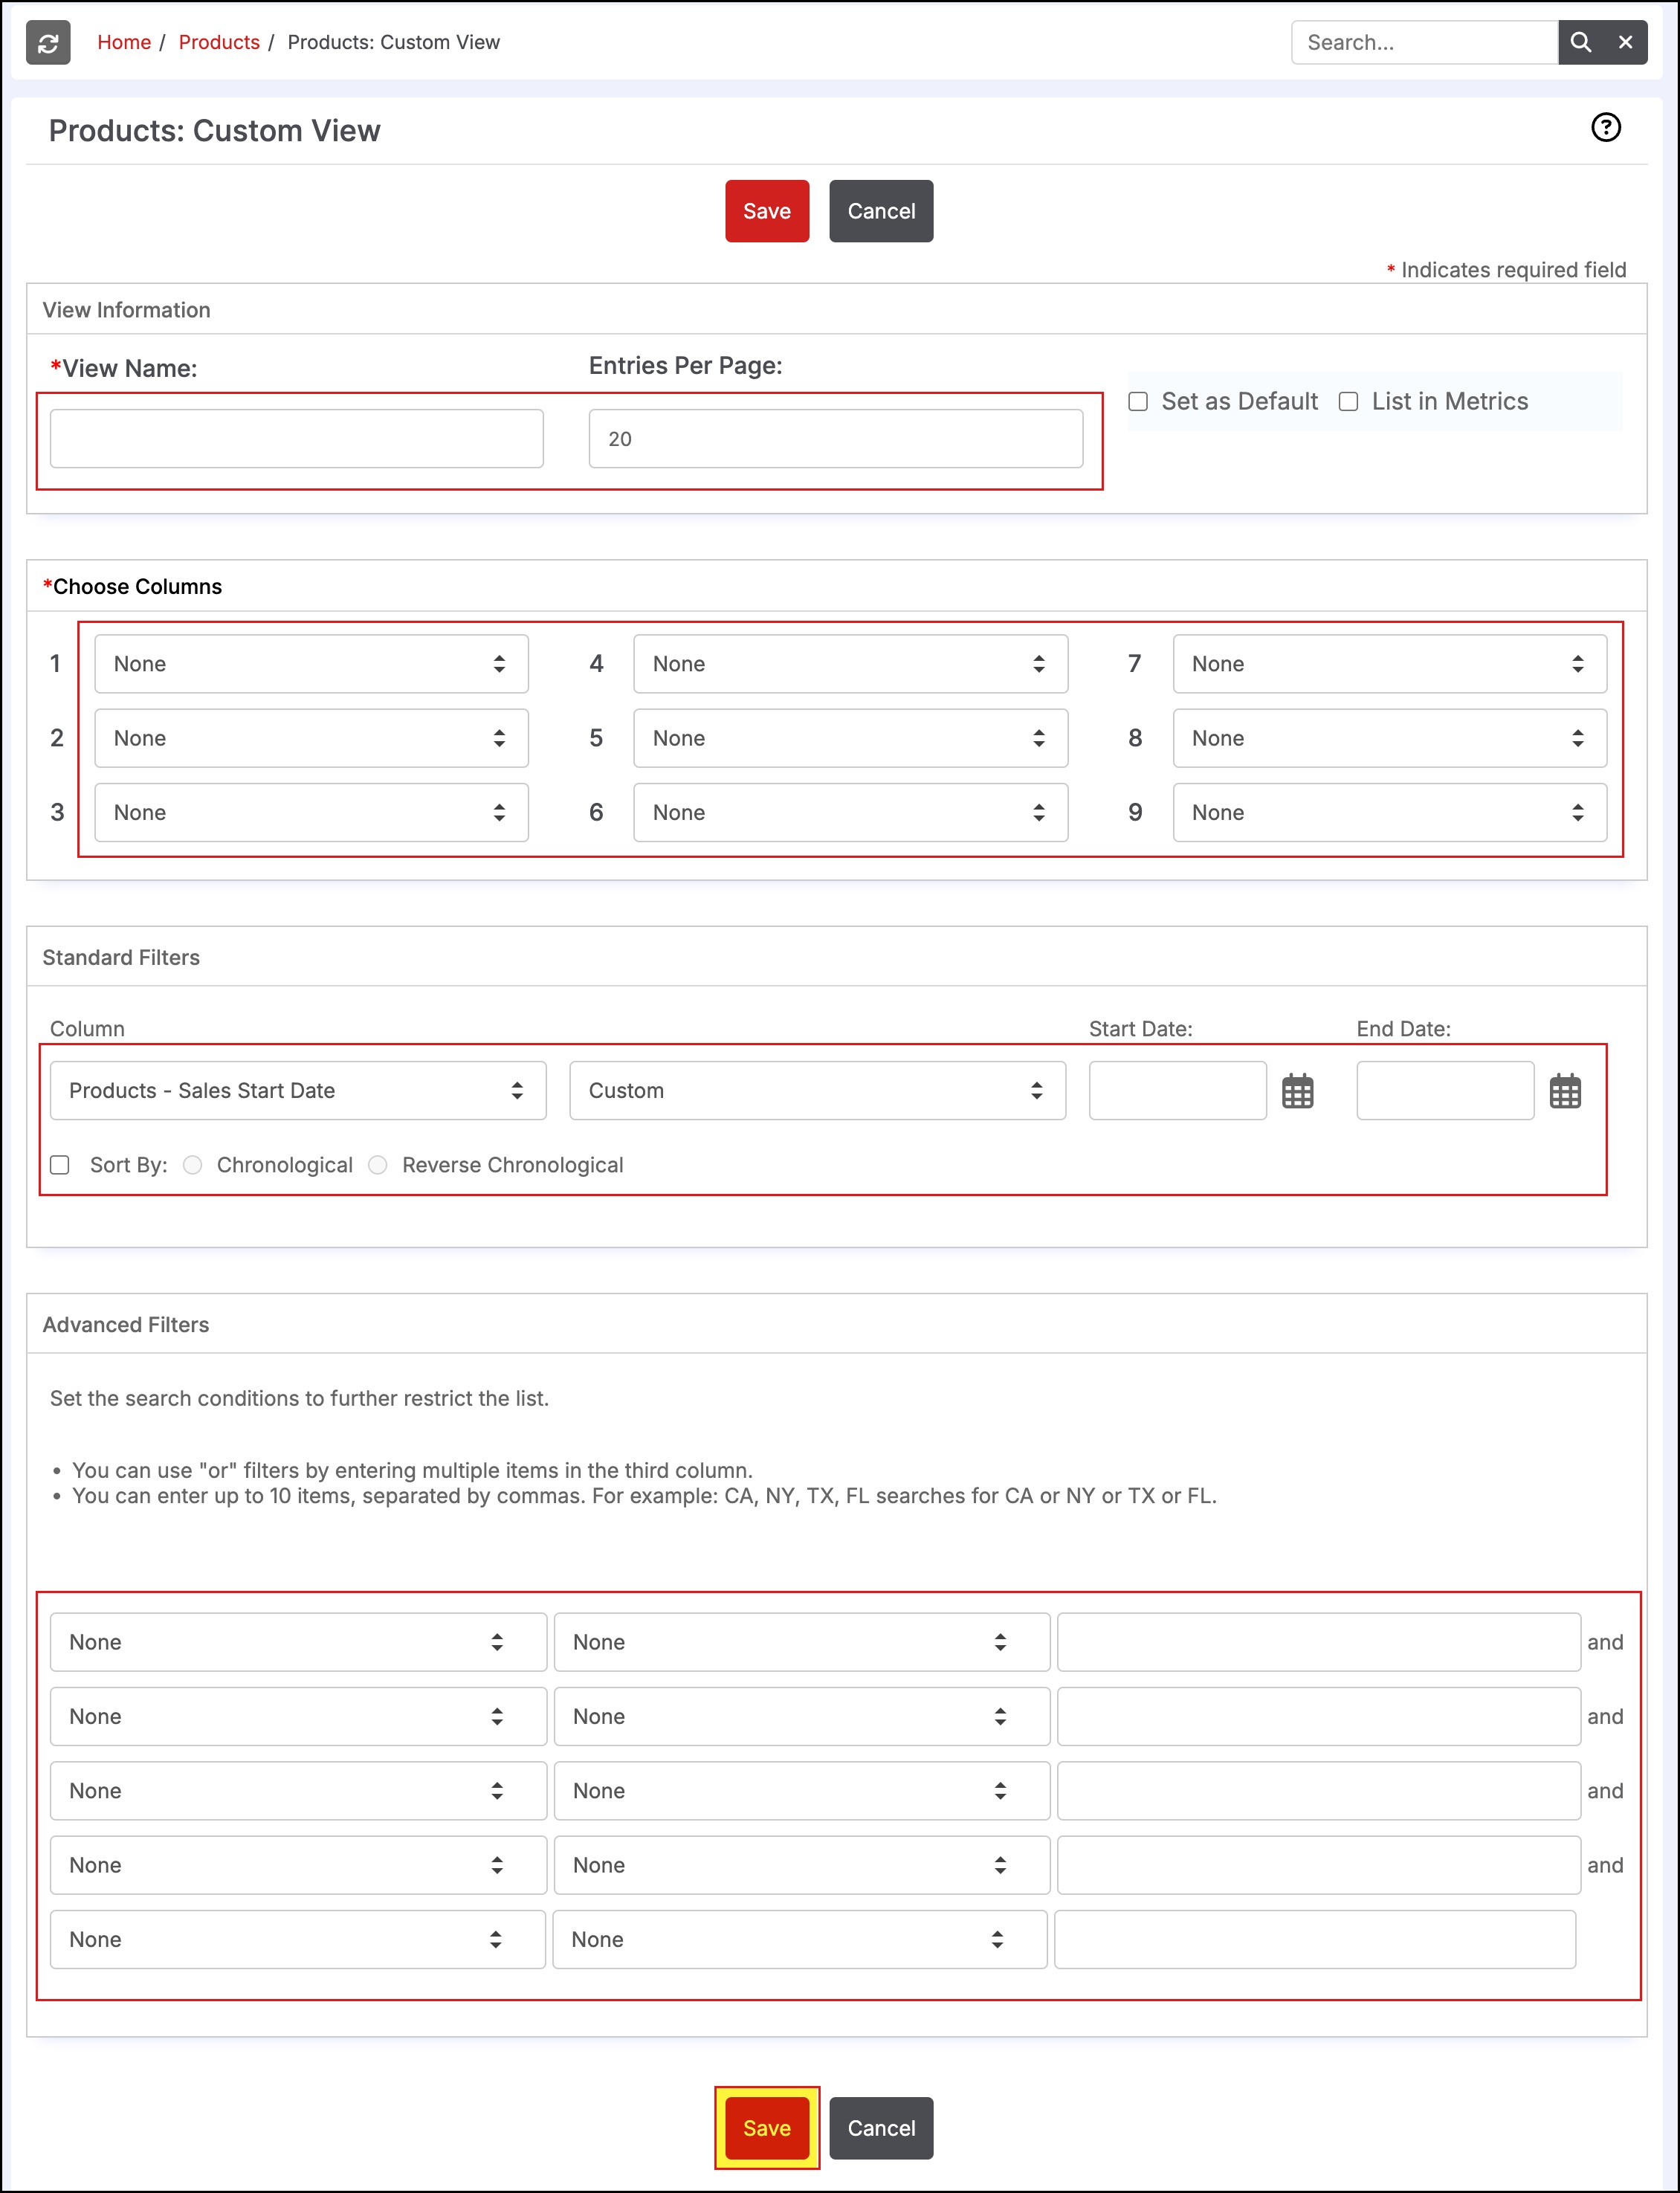
Creating a custom view allows for organization of data by various selections, categories, vendors, locations, and even custom fields. Enter the selections for the report and click save.
- View Name: You can change the name as you see fit.
- Entries Per Page: This field offers the capability to customize how many entities you see in the table list for this Custom View. The default is 20. The maximum about of entries available for display is 1000.
- Note: Increasing the number significantly higher will slow down the page loading time, so use this capability with page performance in mind.
- Set as Default: Enabling this will make this Custom View the default view for that module overriding the "All" view that is the system default.
- List in Metrics: Enabling this will display the results count of this view to be listed under "Key Metrics" on the "Home" page
- Choose Columns: Select the fields to displays as columns in this Custom View. Click on the drop down list to see all available selections that can be added to the custom view.
- Standard Filters: Offers time based filters depending on the time related fields applicable to that module. When filtering by these time based filters, the list view can also be "Sorted Chronologically or Reverse Chronologically" using the respective checkbox and radio buttons in the panel.
- Advanced Filters: Any fields in that module can be accessed here and used as a filter in combination with other fields.
- You can use "or" filters by entering multiple items in the third column.
- You can enter up to 10 items, separated by commas. For example: CA, NY, TX, FL searches for CA or NY or TX or FL.
- Listing additional filters on multiple lines applies them sequentially as an "and" filter.