Add New Product
New Products can be added easily in the Cross-platform Warehouse App. Upon clicking the Add New Product button, a new product wizard will appear similar to the one found in the back office.
- On the home screen in the app, select "Add New Product".
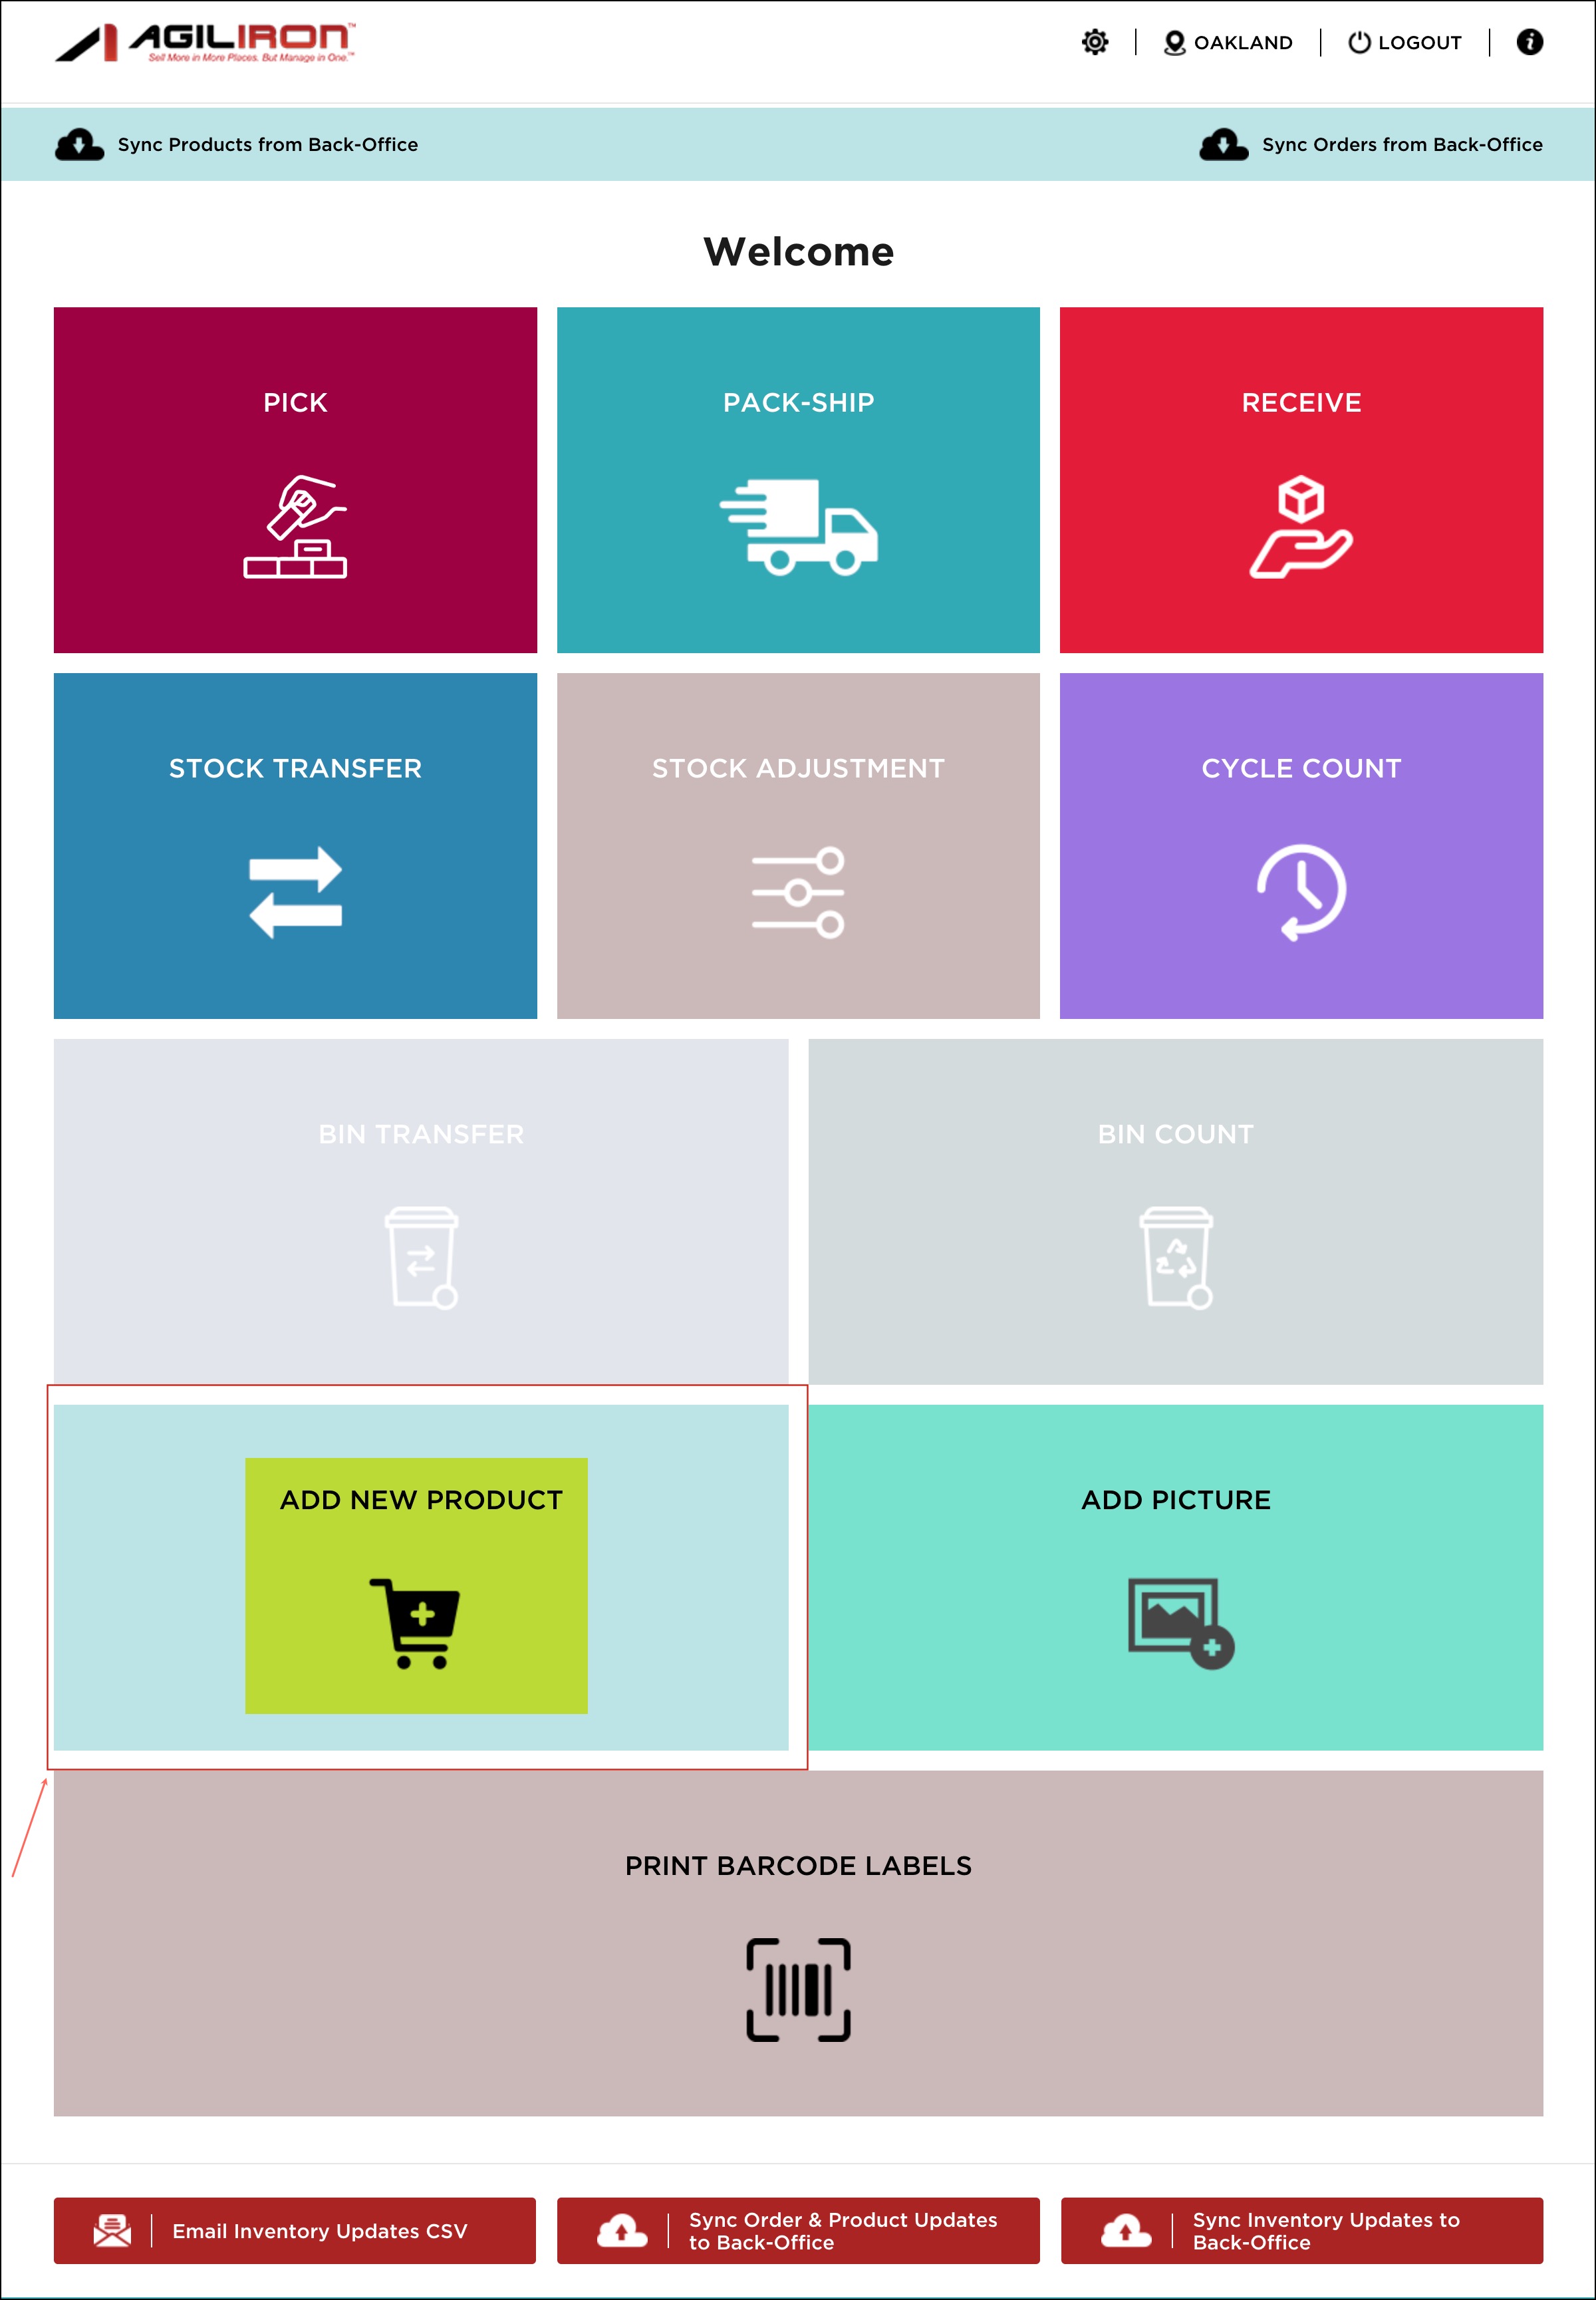
- You will see a step-by-step process to add a new product.
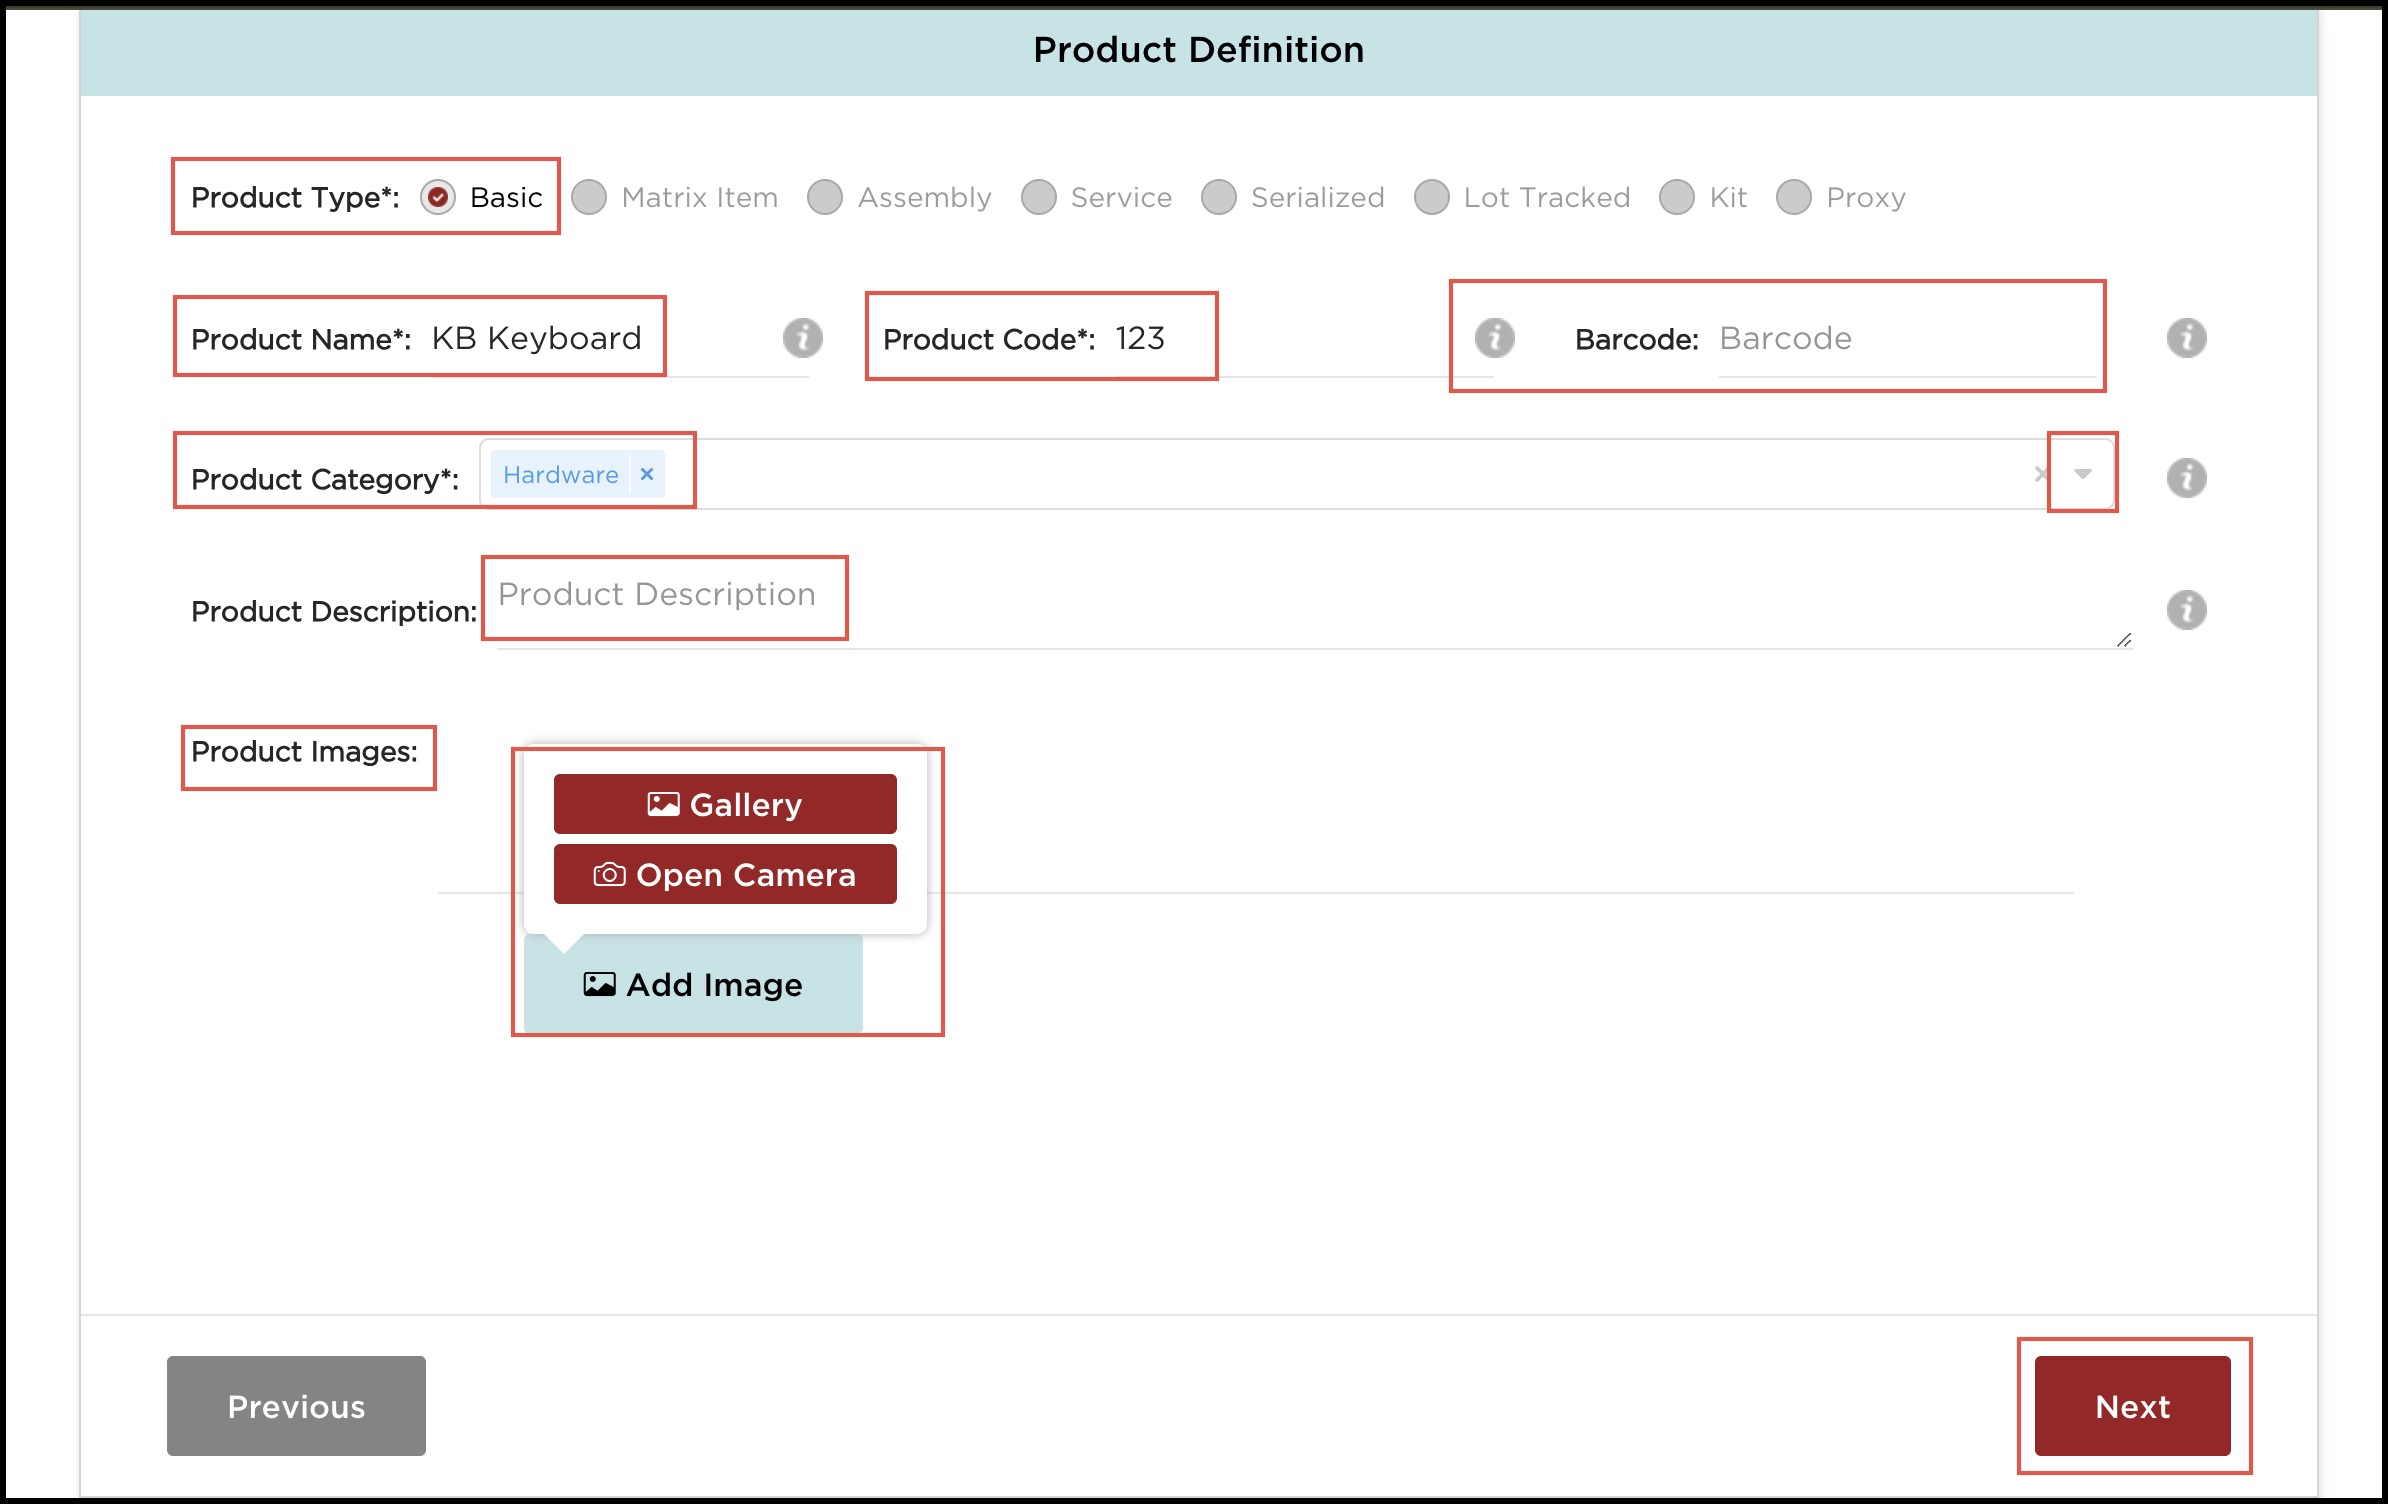
- Enter the Product Definition as shown on the screen below. Fields marked with an * are required.
- You can also add Product Image (or multiple product images) by clicking on the Add Image button. Take a picture with your device or add an image from the Photo Gallery.
- Click "Next" to continue.
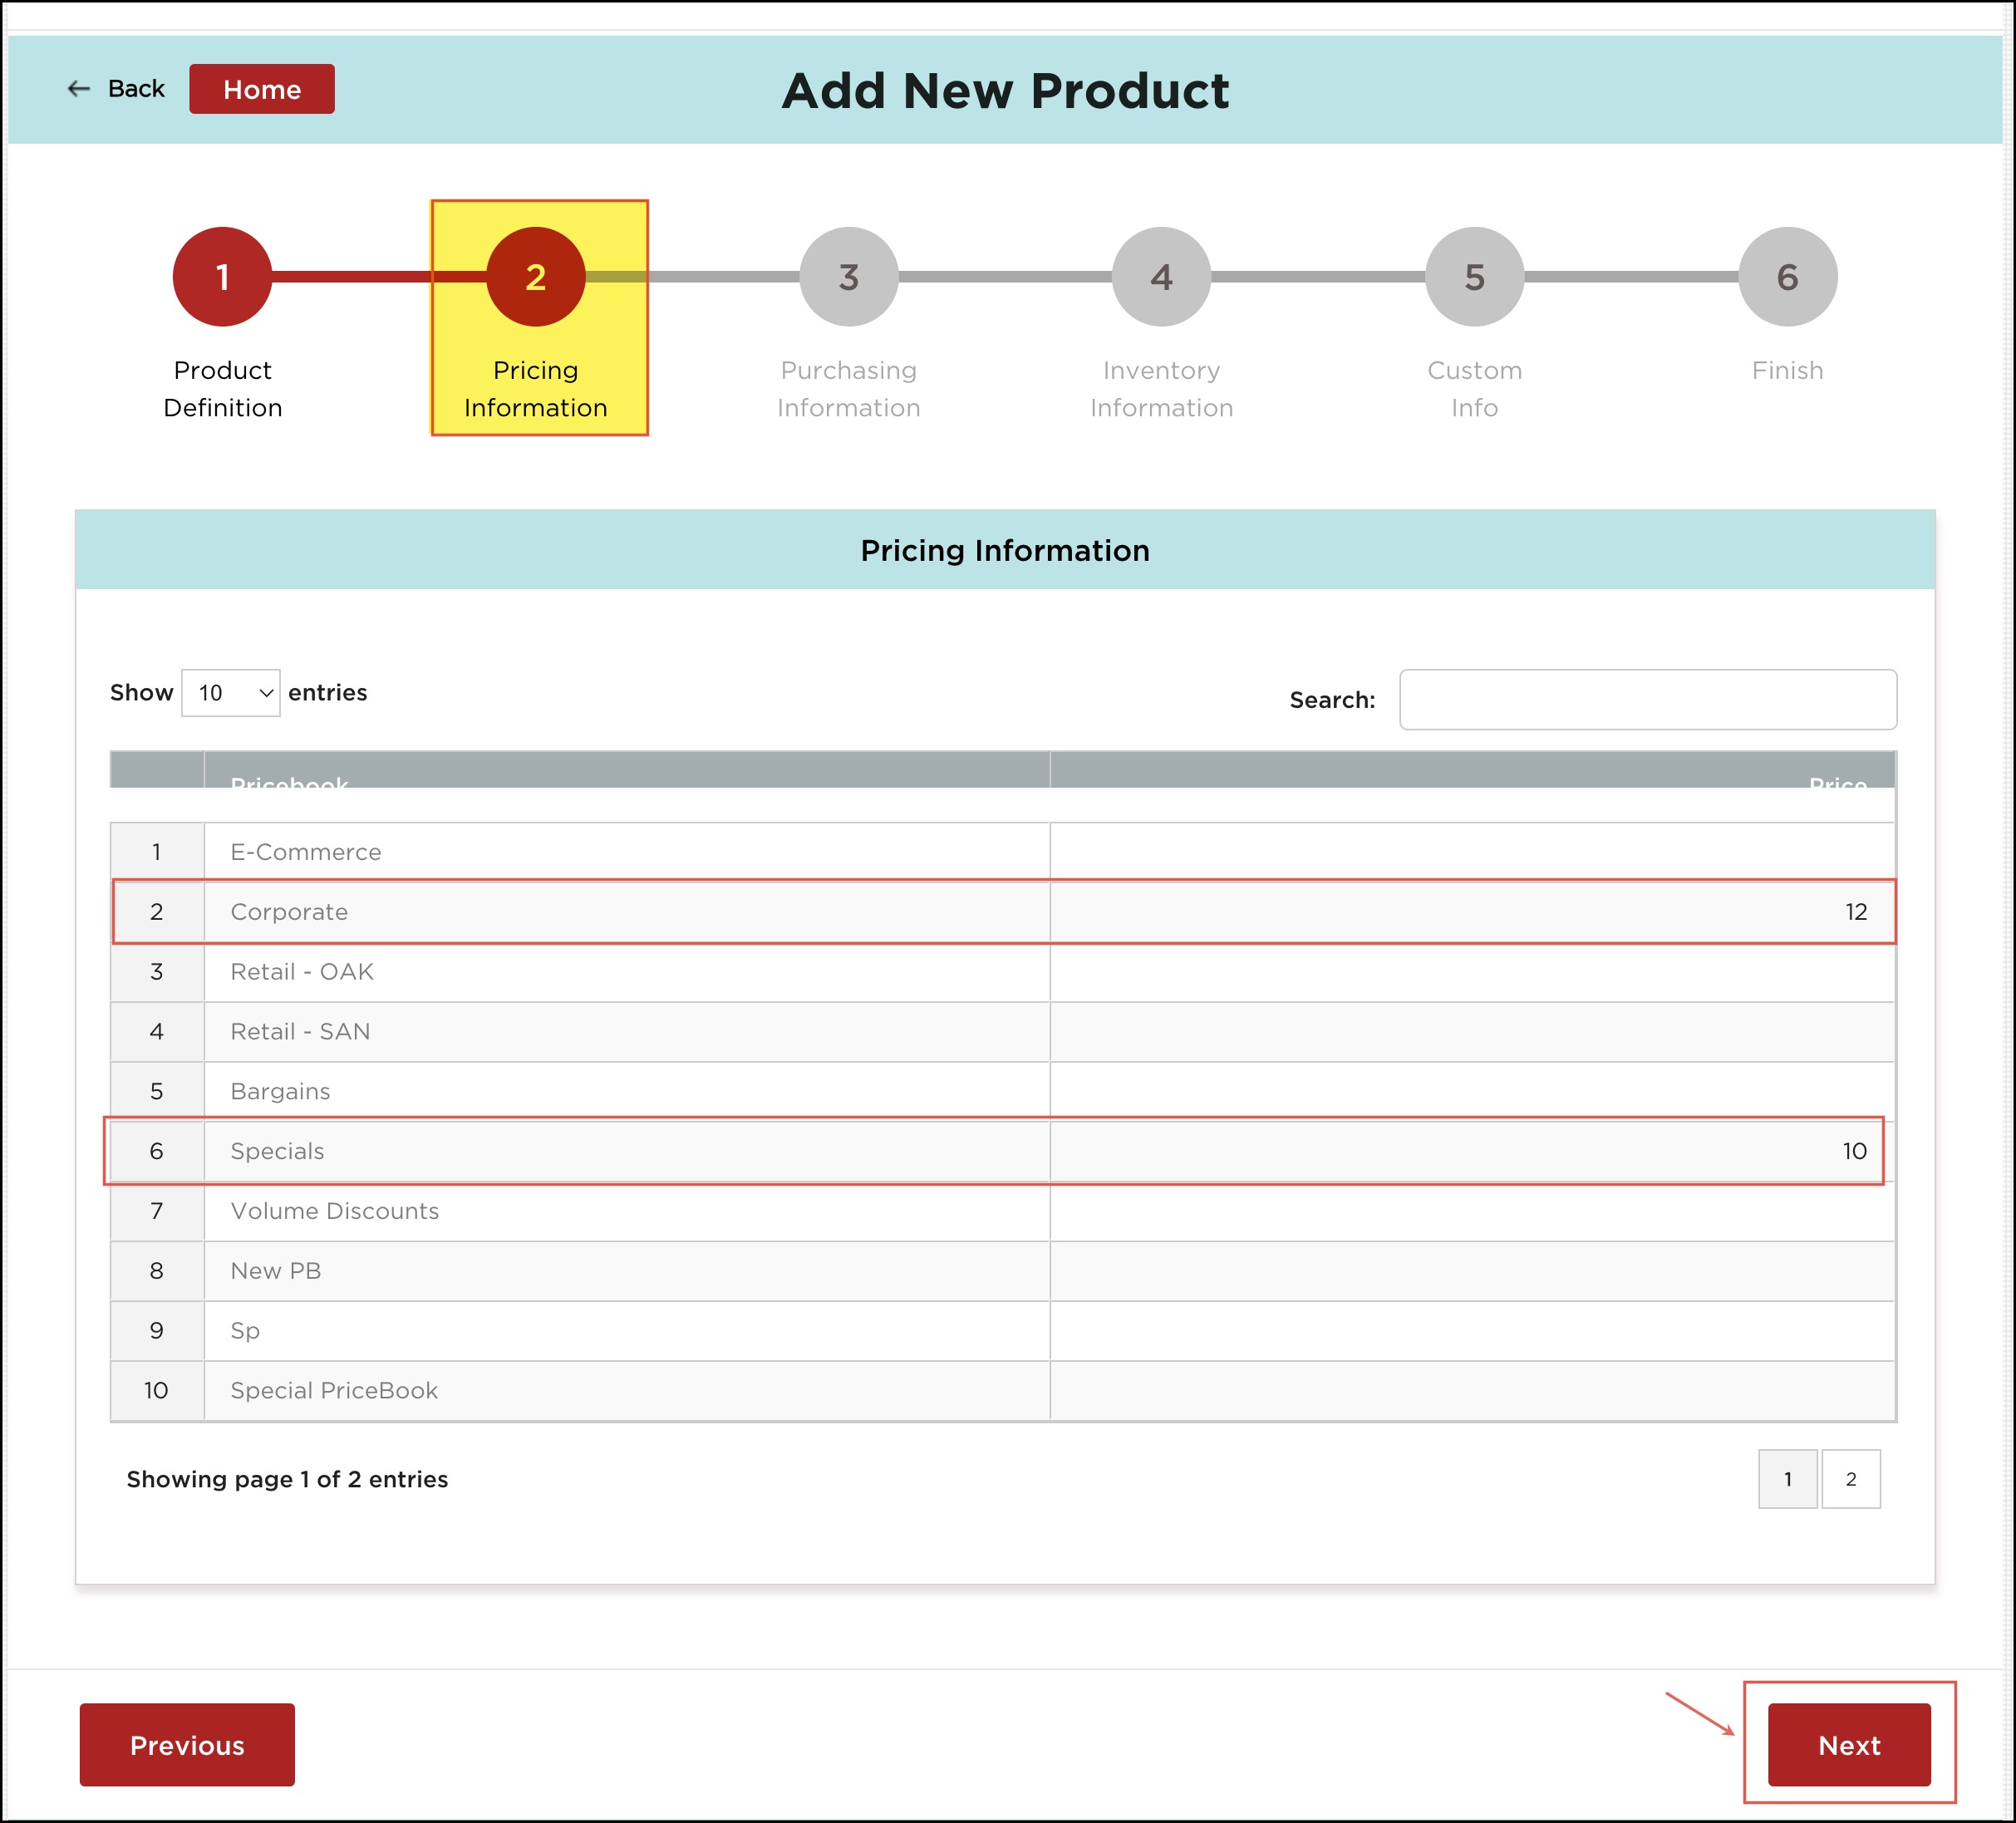
- In the next screen, enter the Pricing Information.
- This screen displays all selling PriceBooks that have been set up in the back office. Tap the screen and scroll up or down to view more pricebooks.
- Click "Next" to continue.
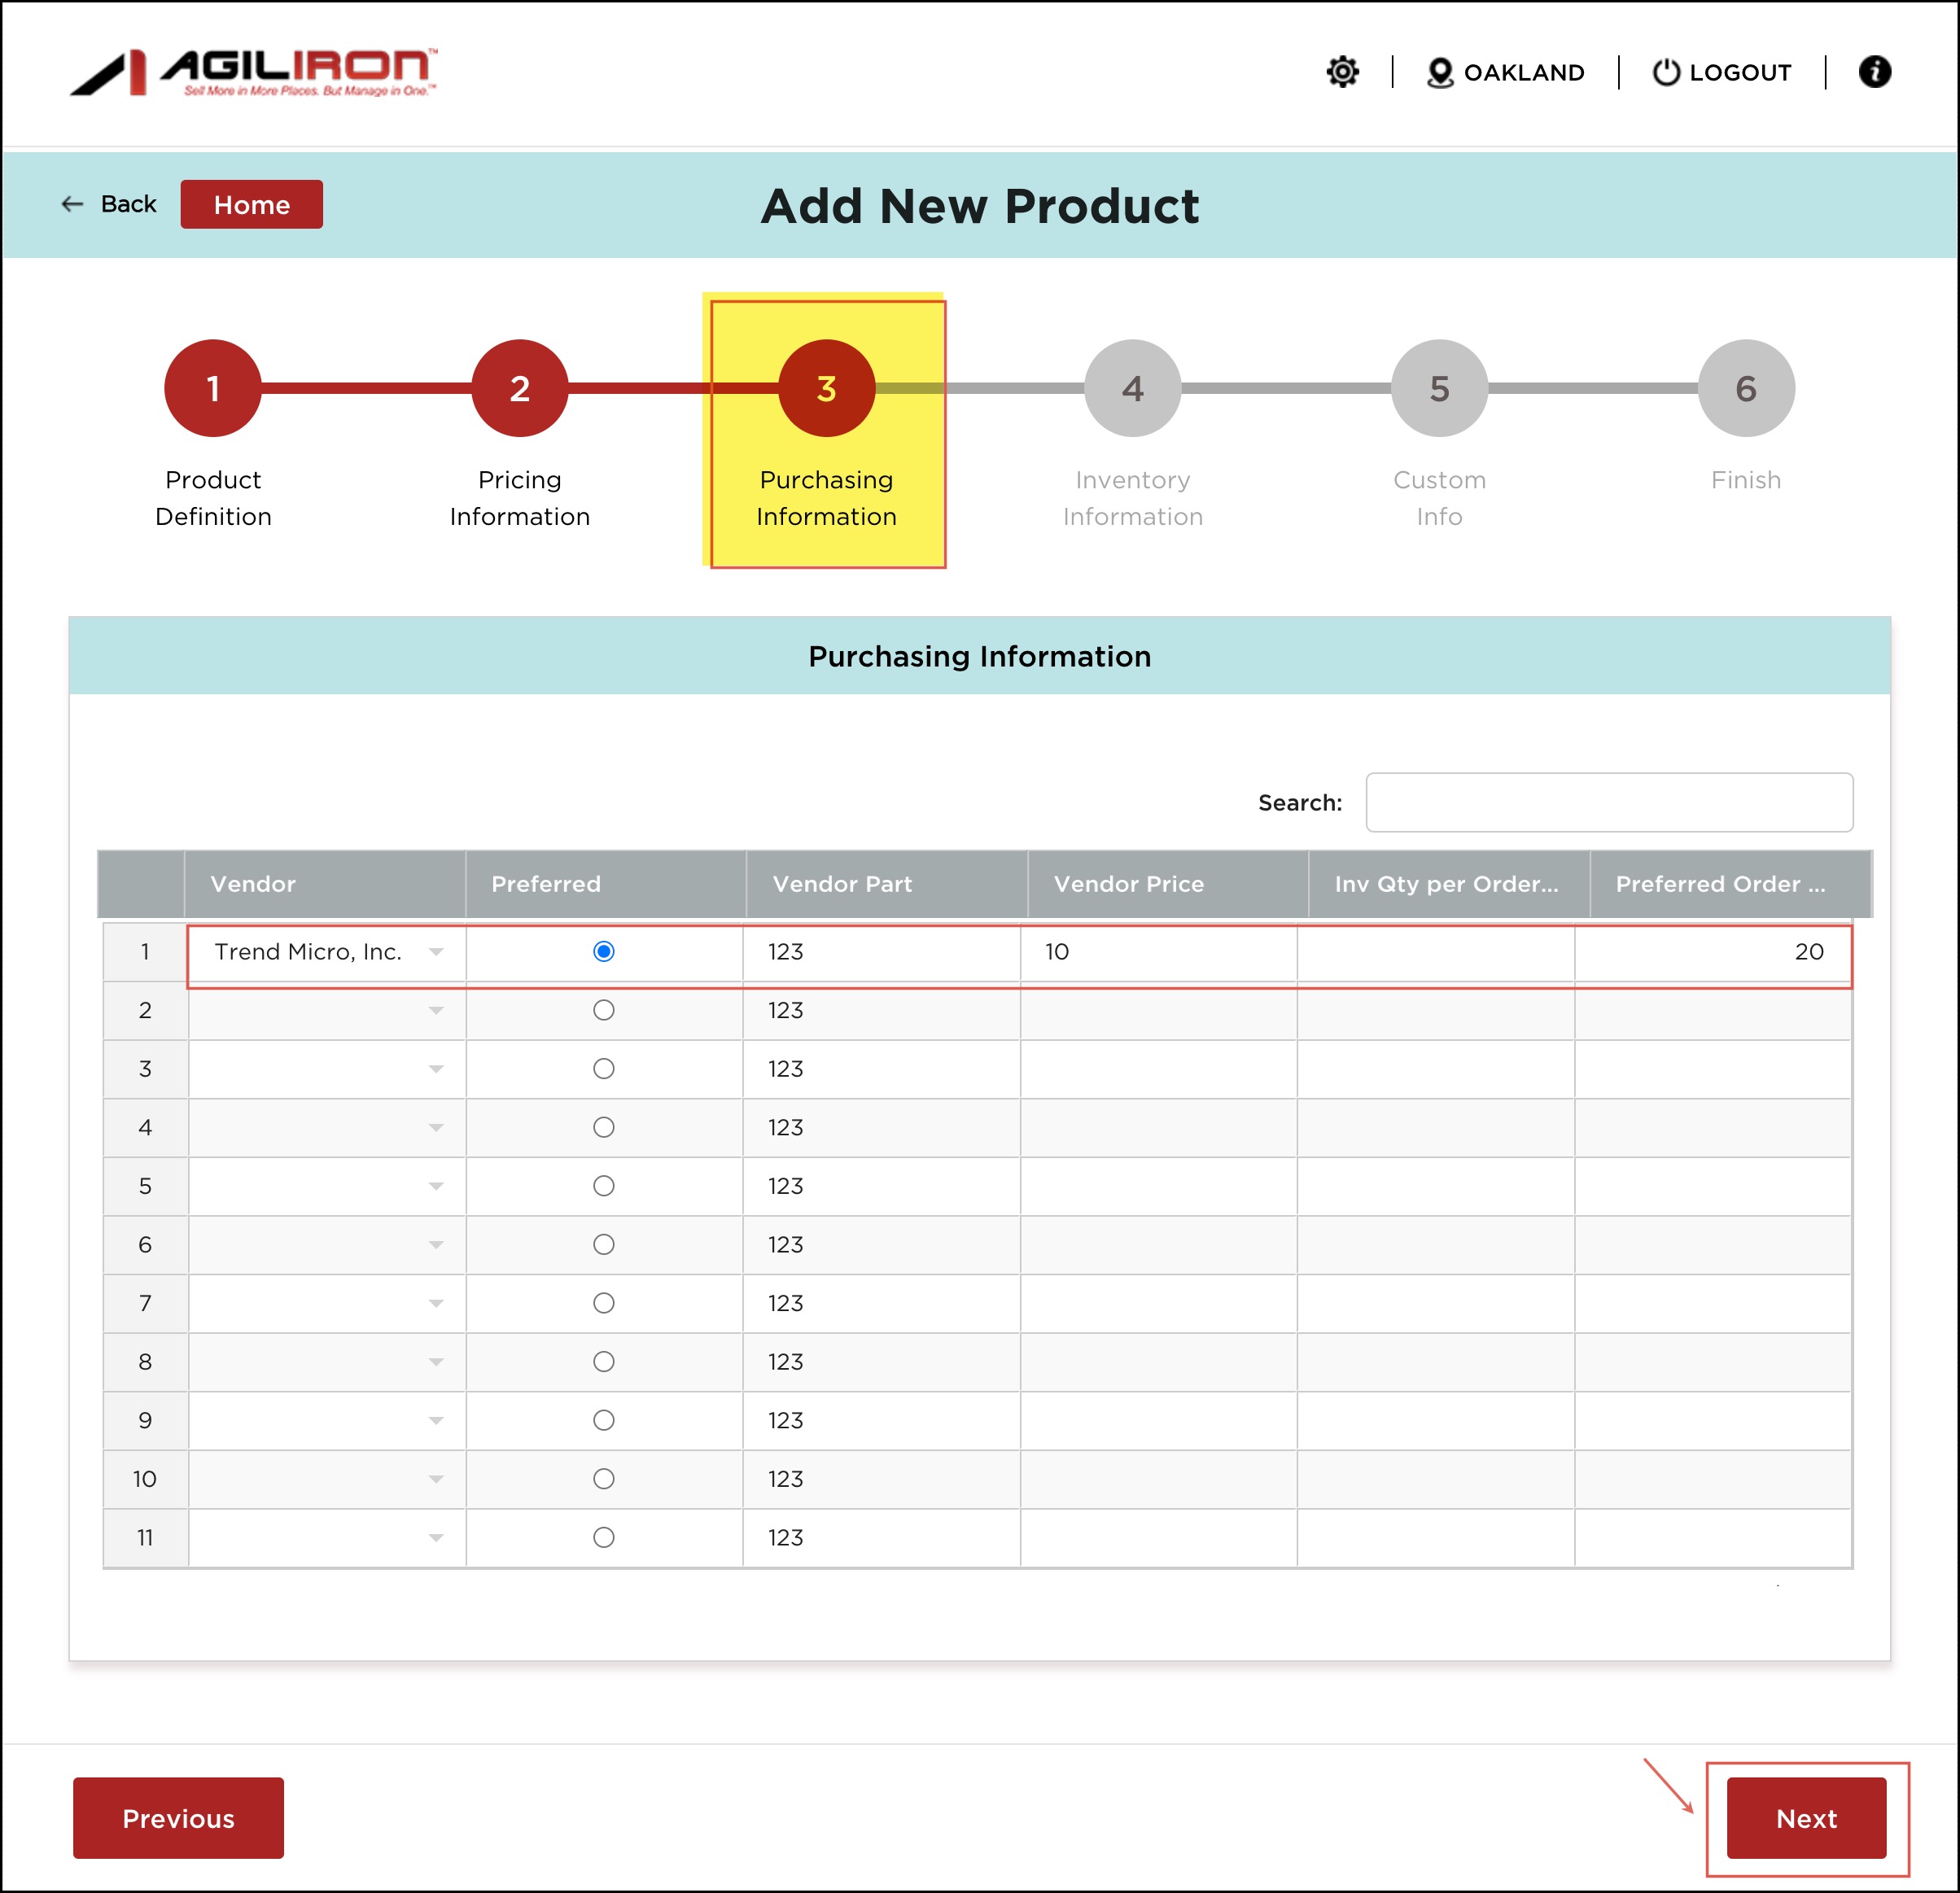
- In the Purchasing Information, enter the Vendor information. The vendor list pulls from the list of vendors under Products > Vendors in the back office.
- Select at least one preferred vendor by tapping the preferred button next to a vendor. Multiple vendors can be added to a product, but only one can be selected as preferred.
- Click "Next" to continue.
- The next step is Inventory Information. You can add bin location and quantity for your preferred stock locations by clicking the Bin Location Selector button.
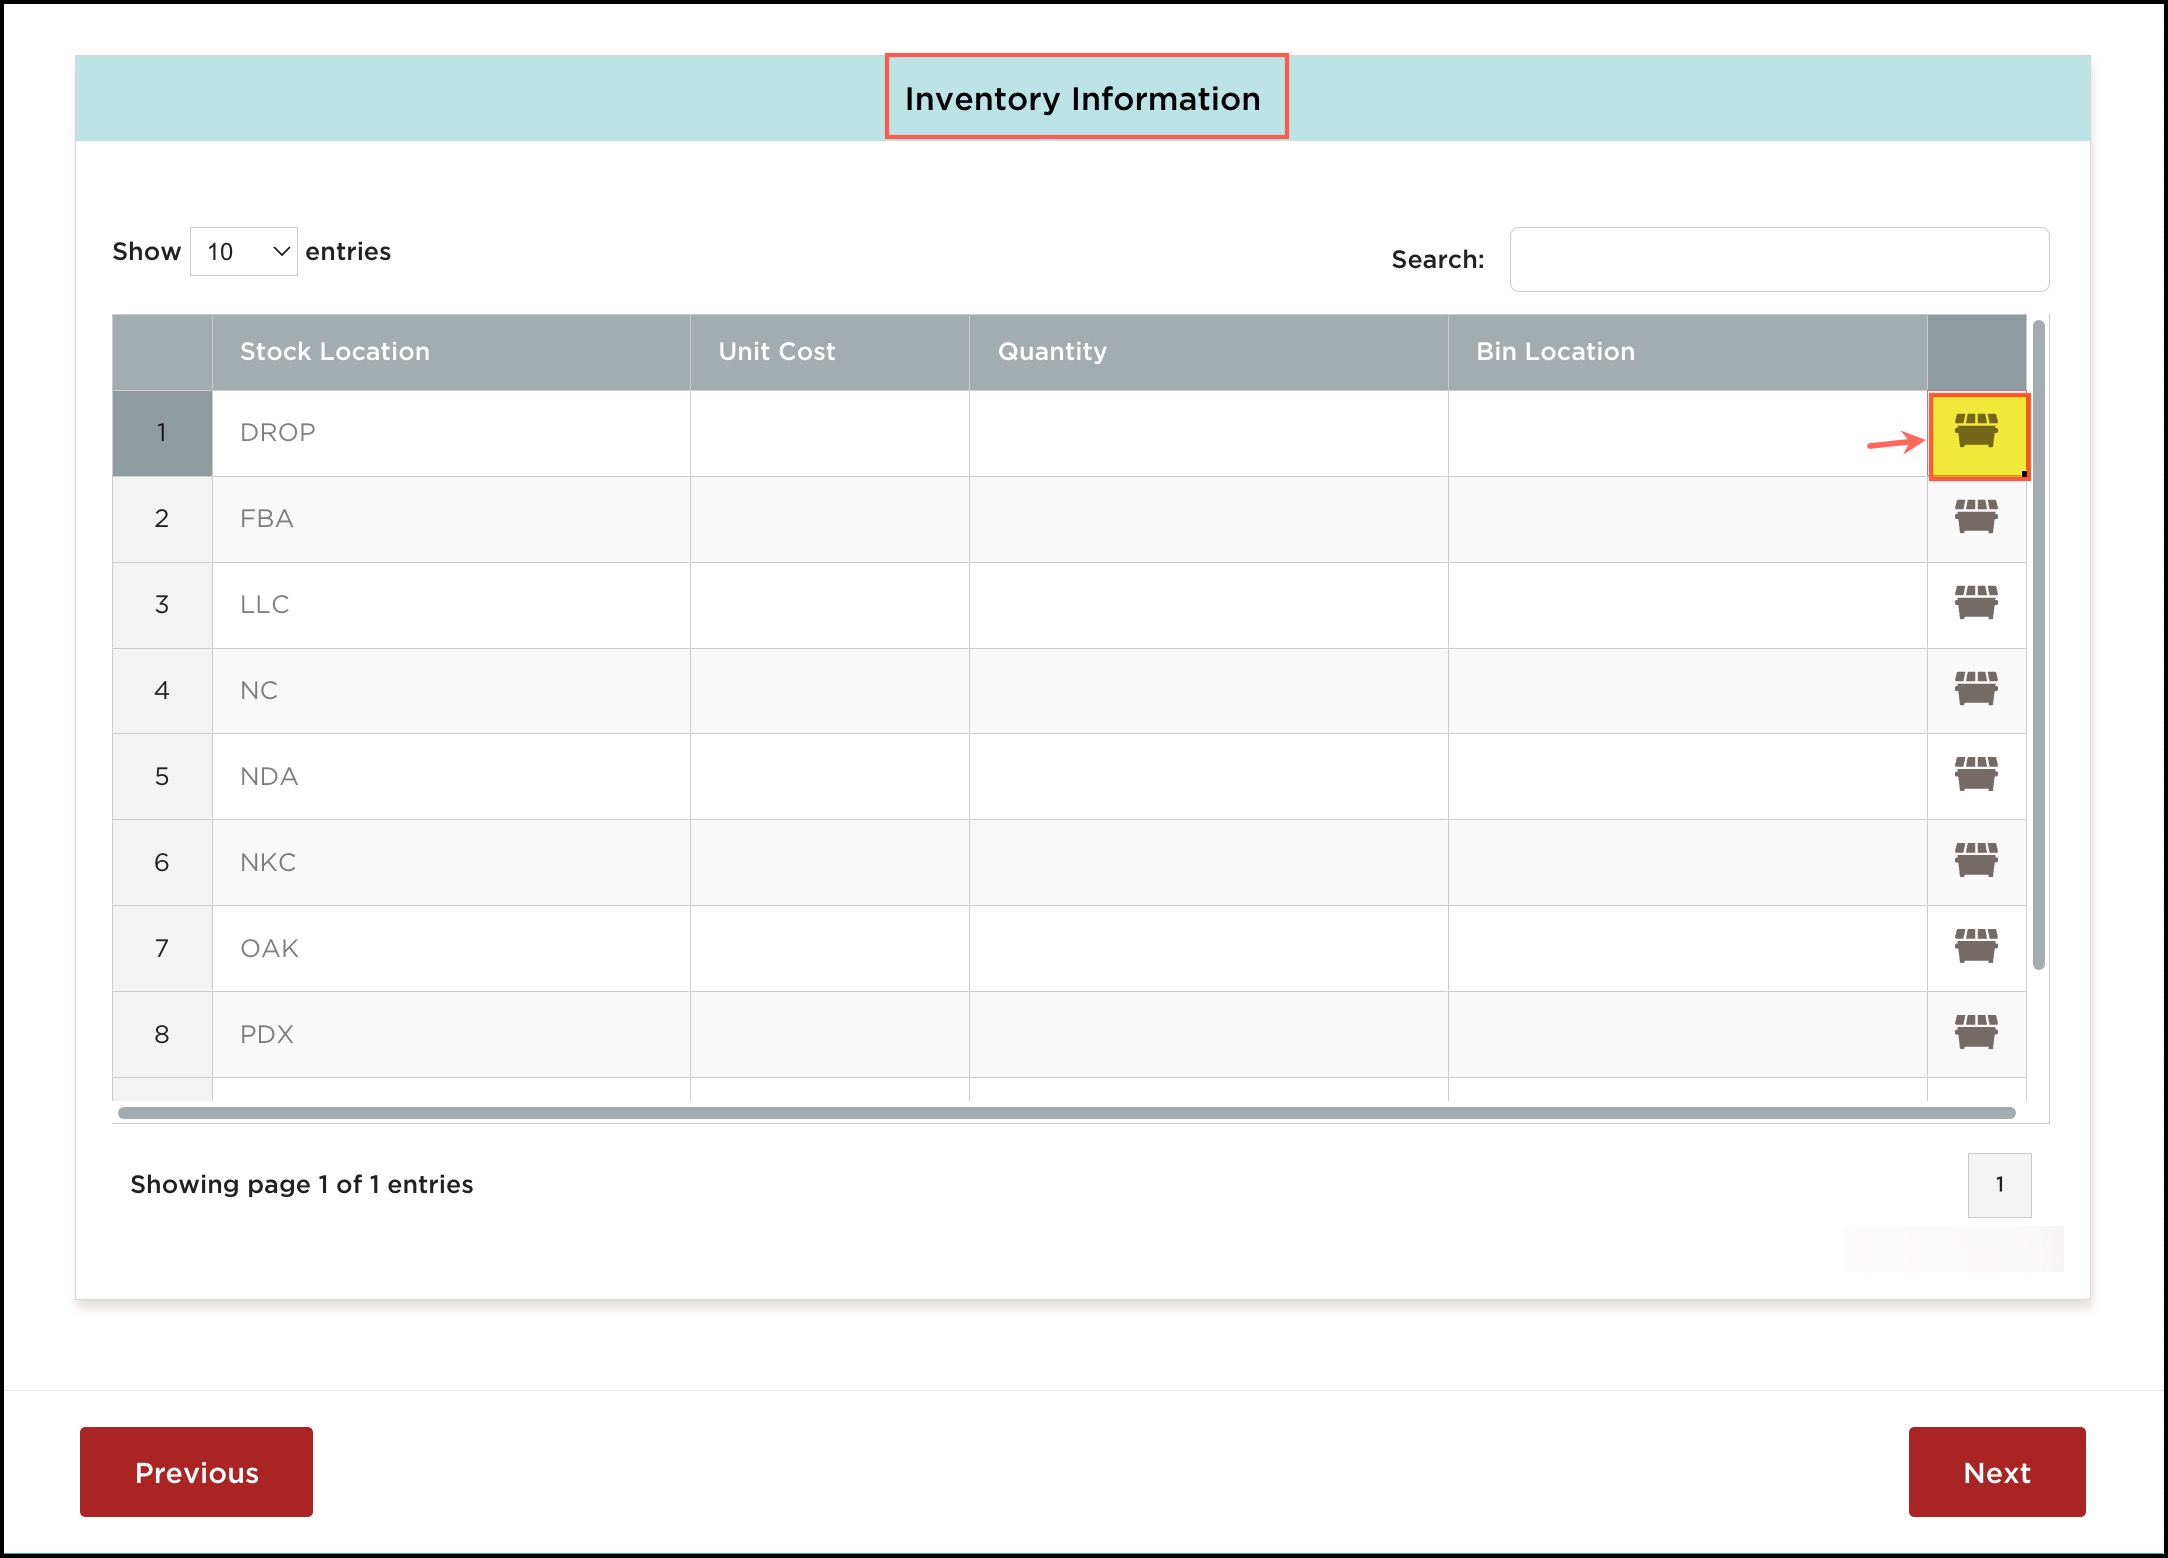
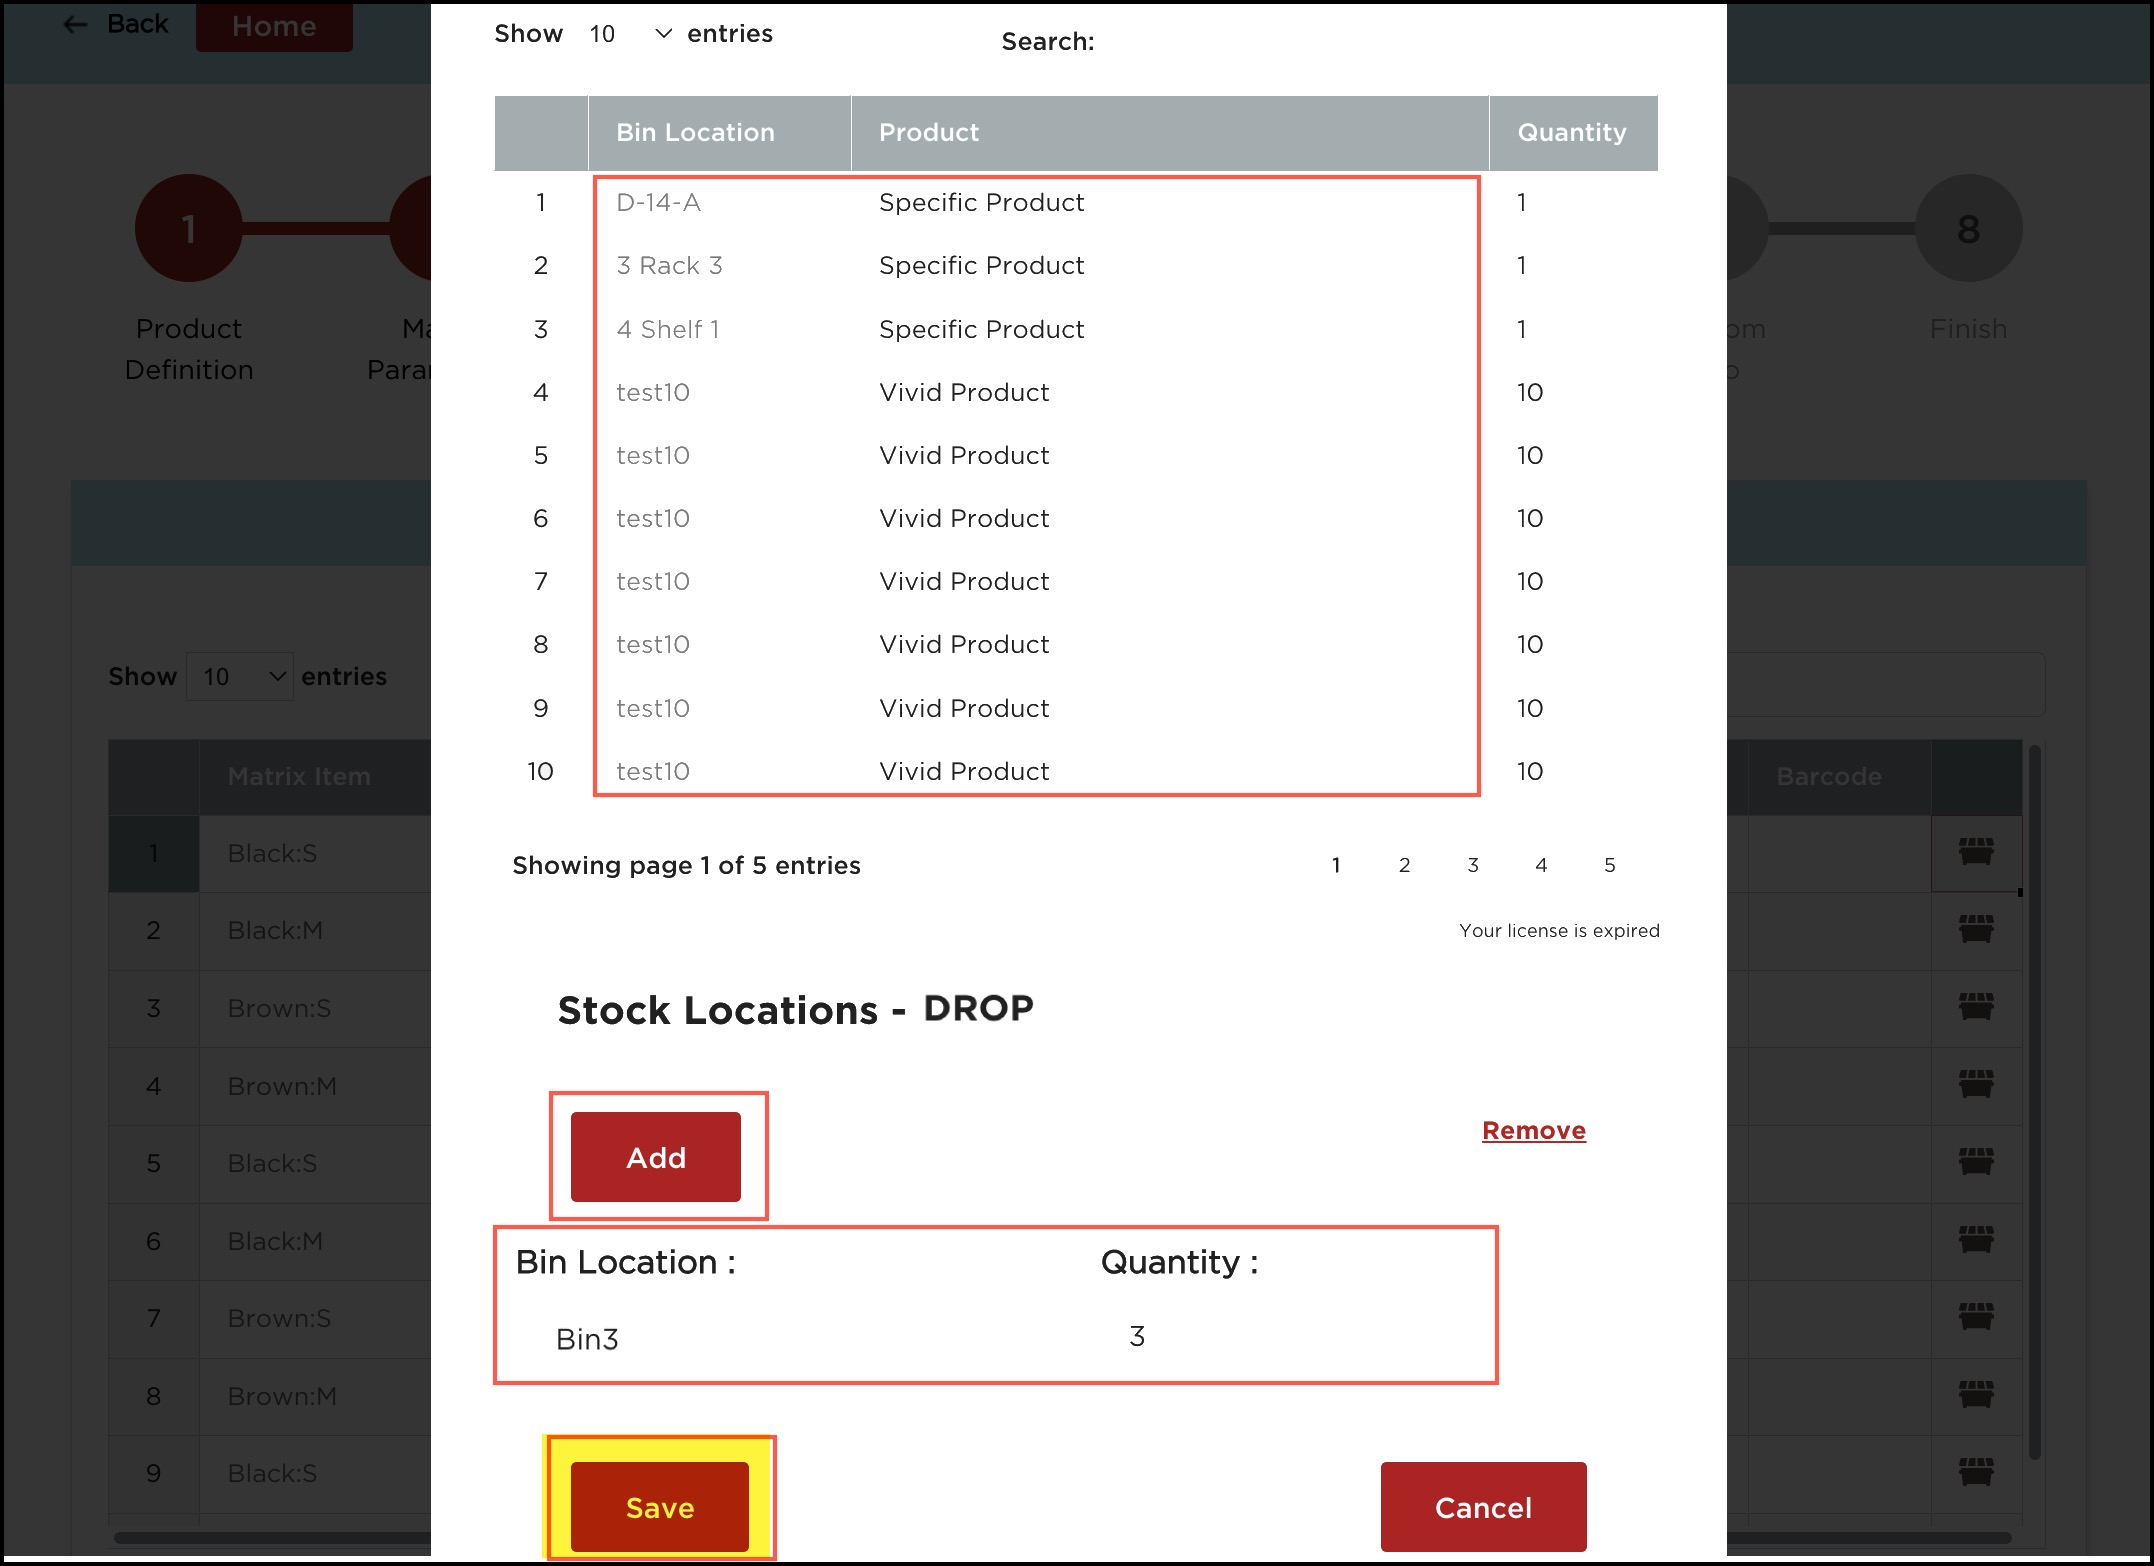
This will bring up a popup with the list of Bin Locations and the Products housed in them.
Multiple bin locations can be added by clicking on the Add button.
- After adding bin locations and quantity, click on Save.
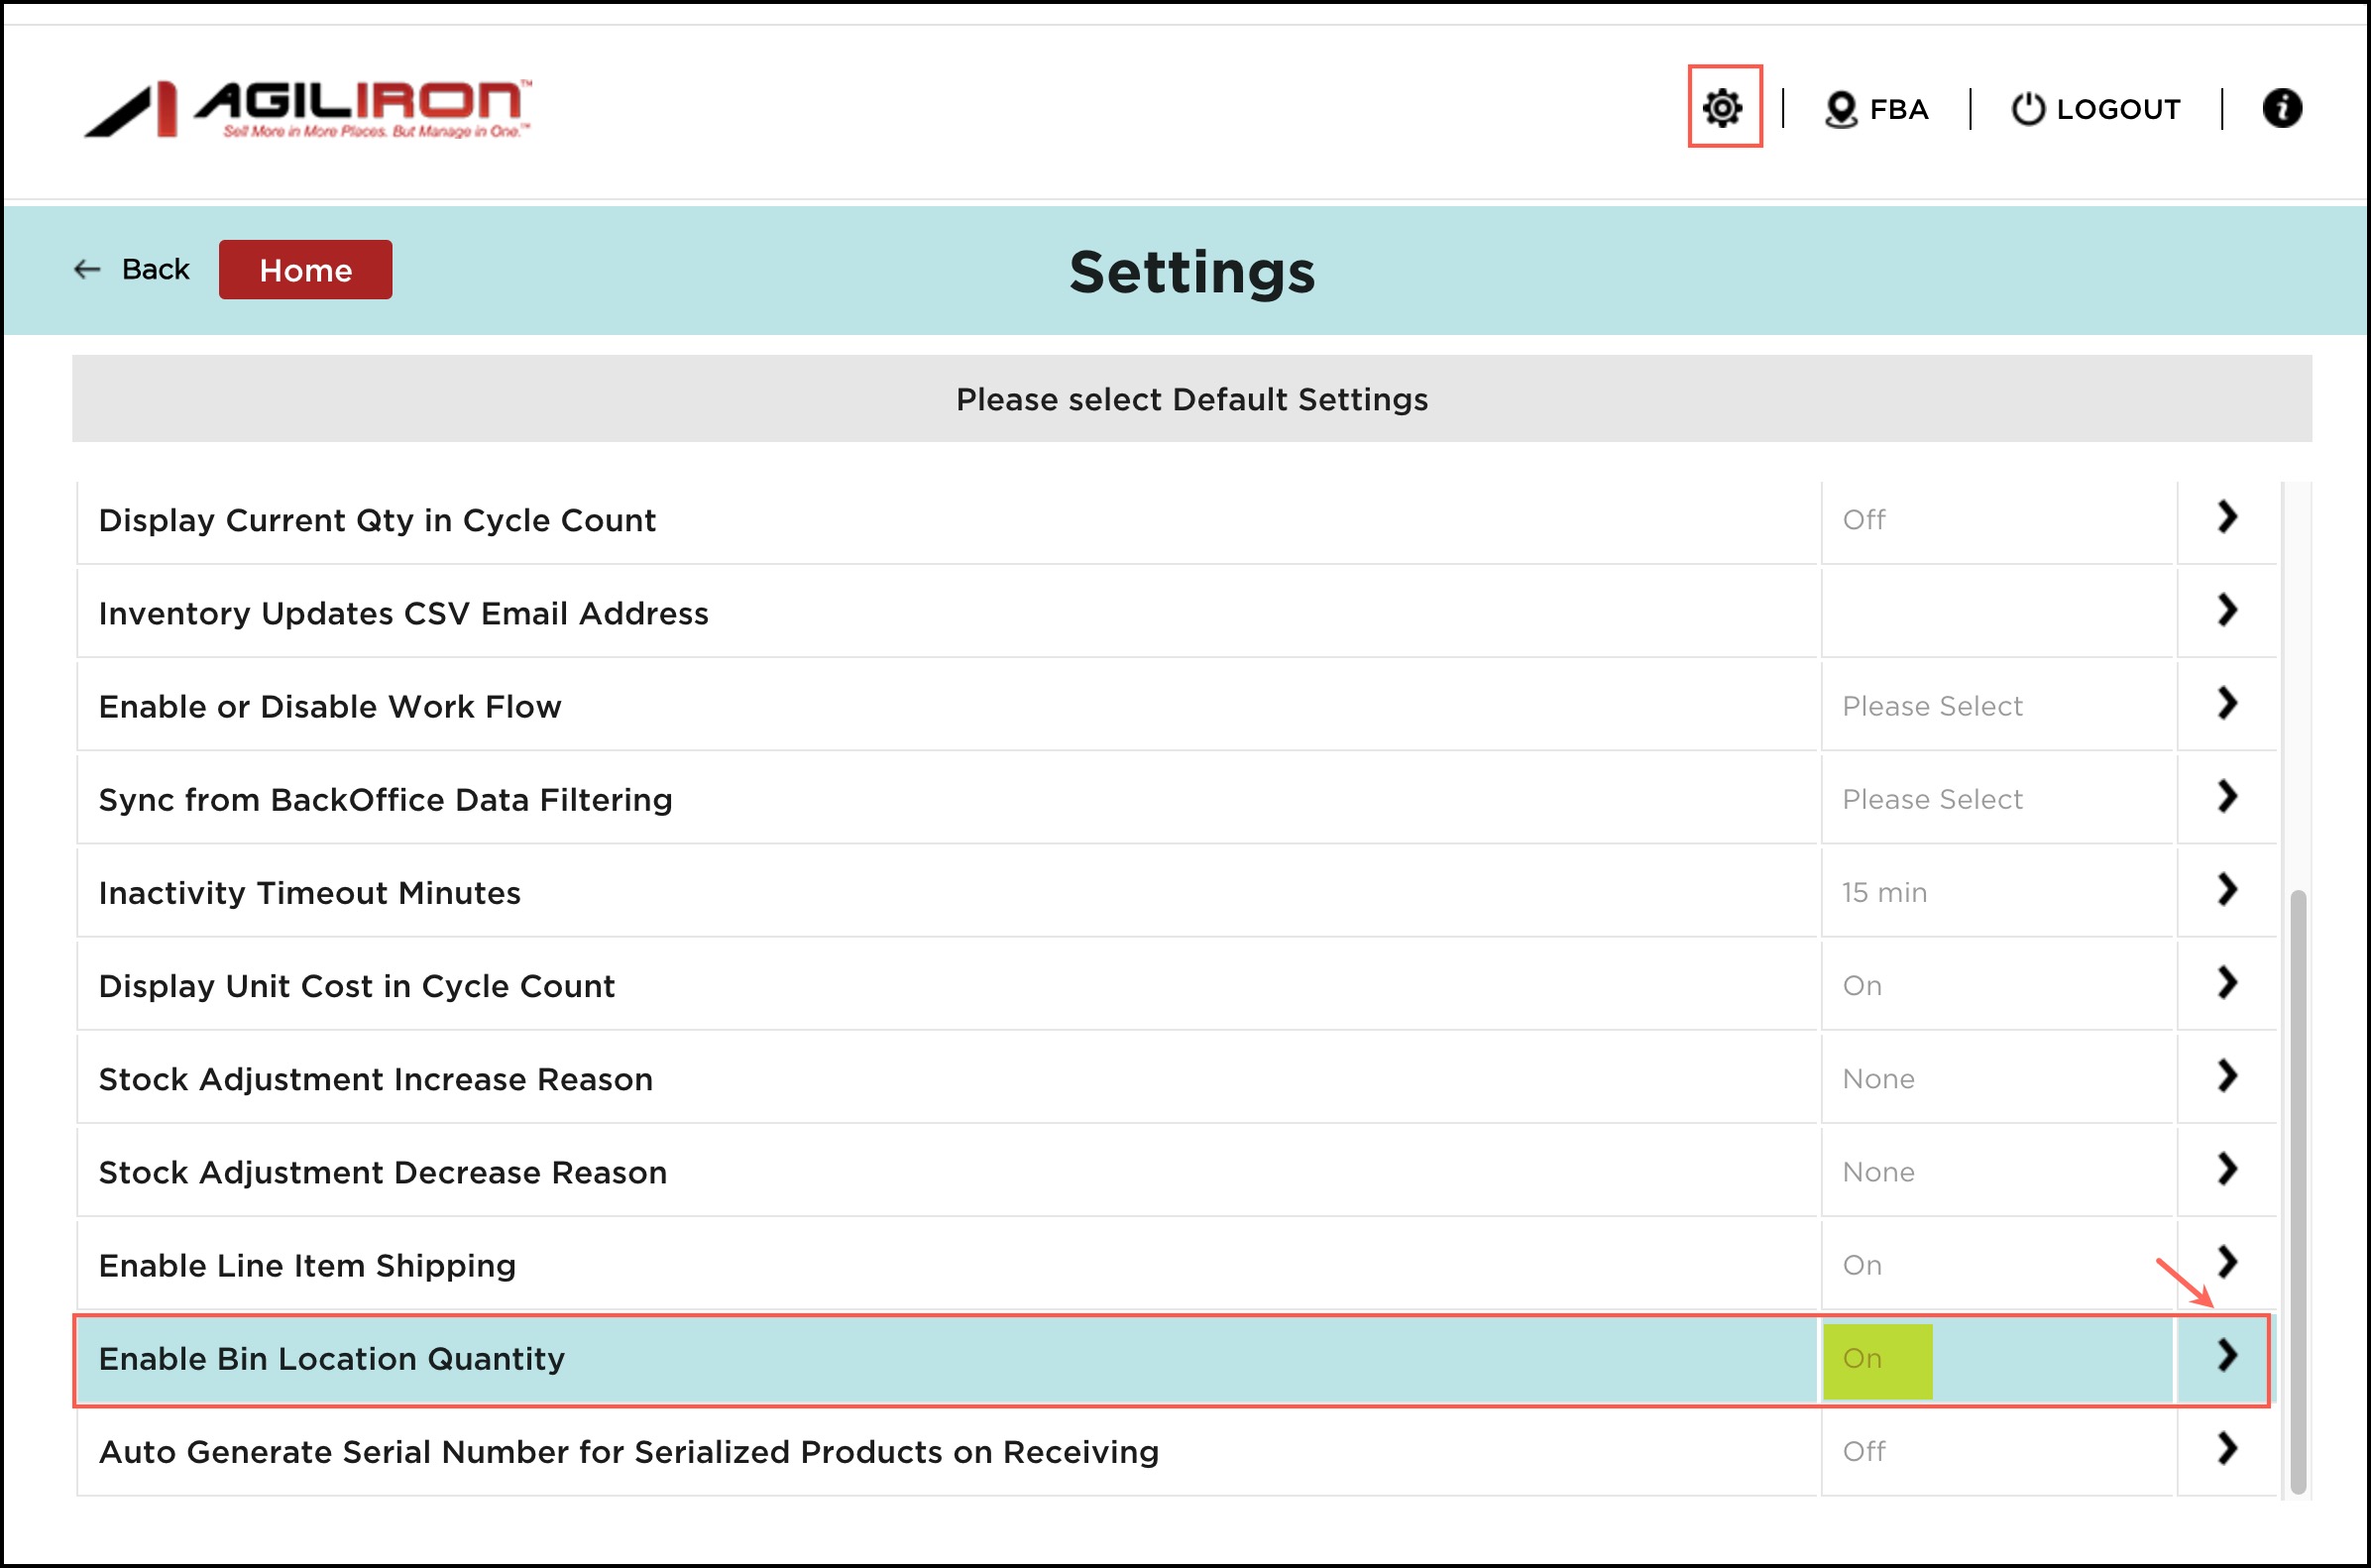
NOTE: Settings -> Enable Bin Location Quantity - if this is On, only then it will display the Quantity field in the Bin Locations pop-up (as seen in the above screenshot).
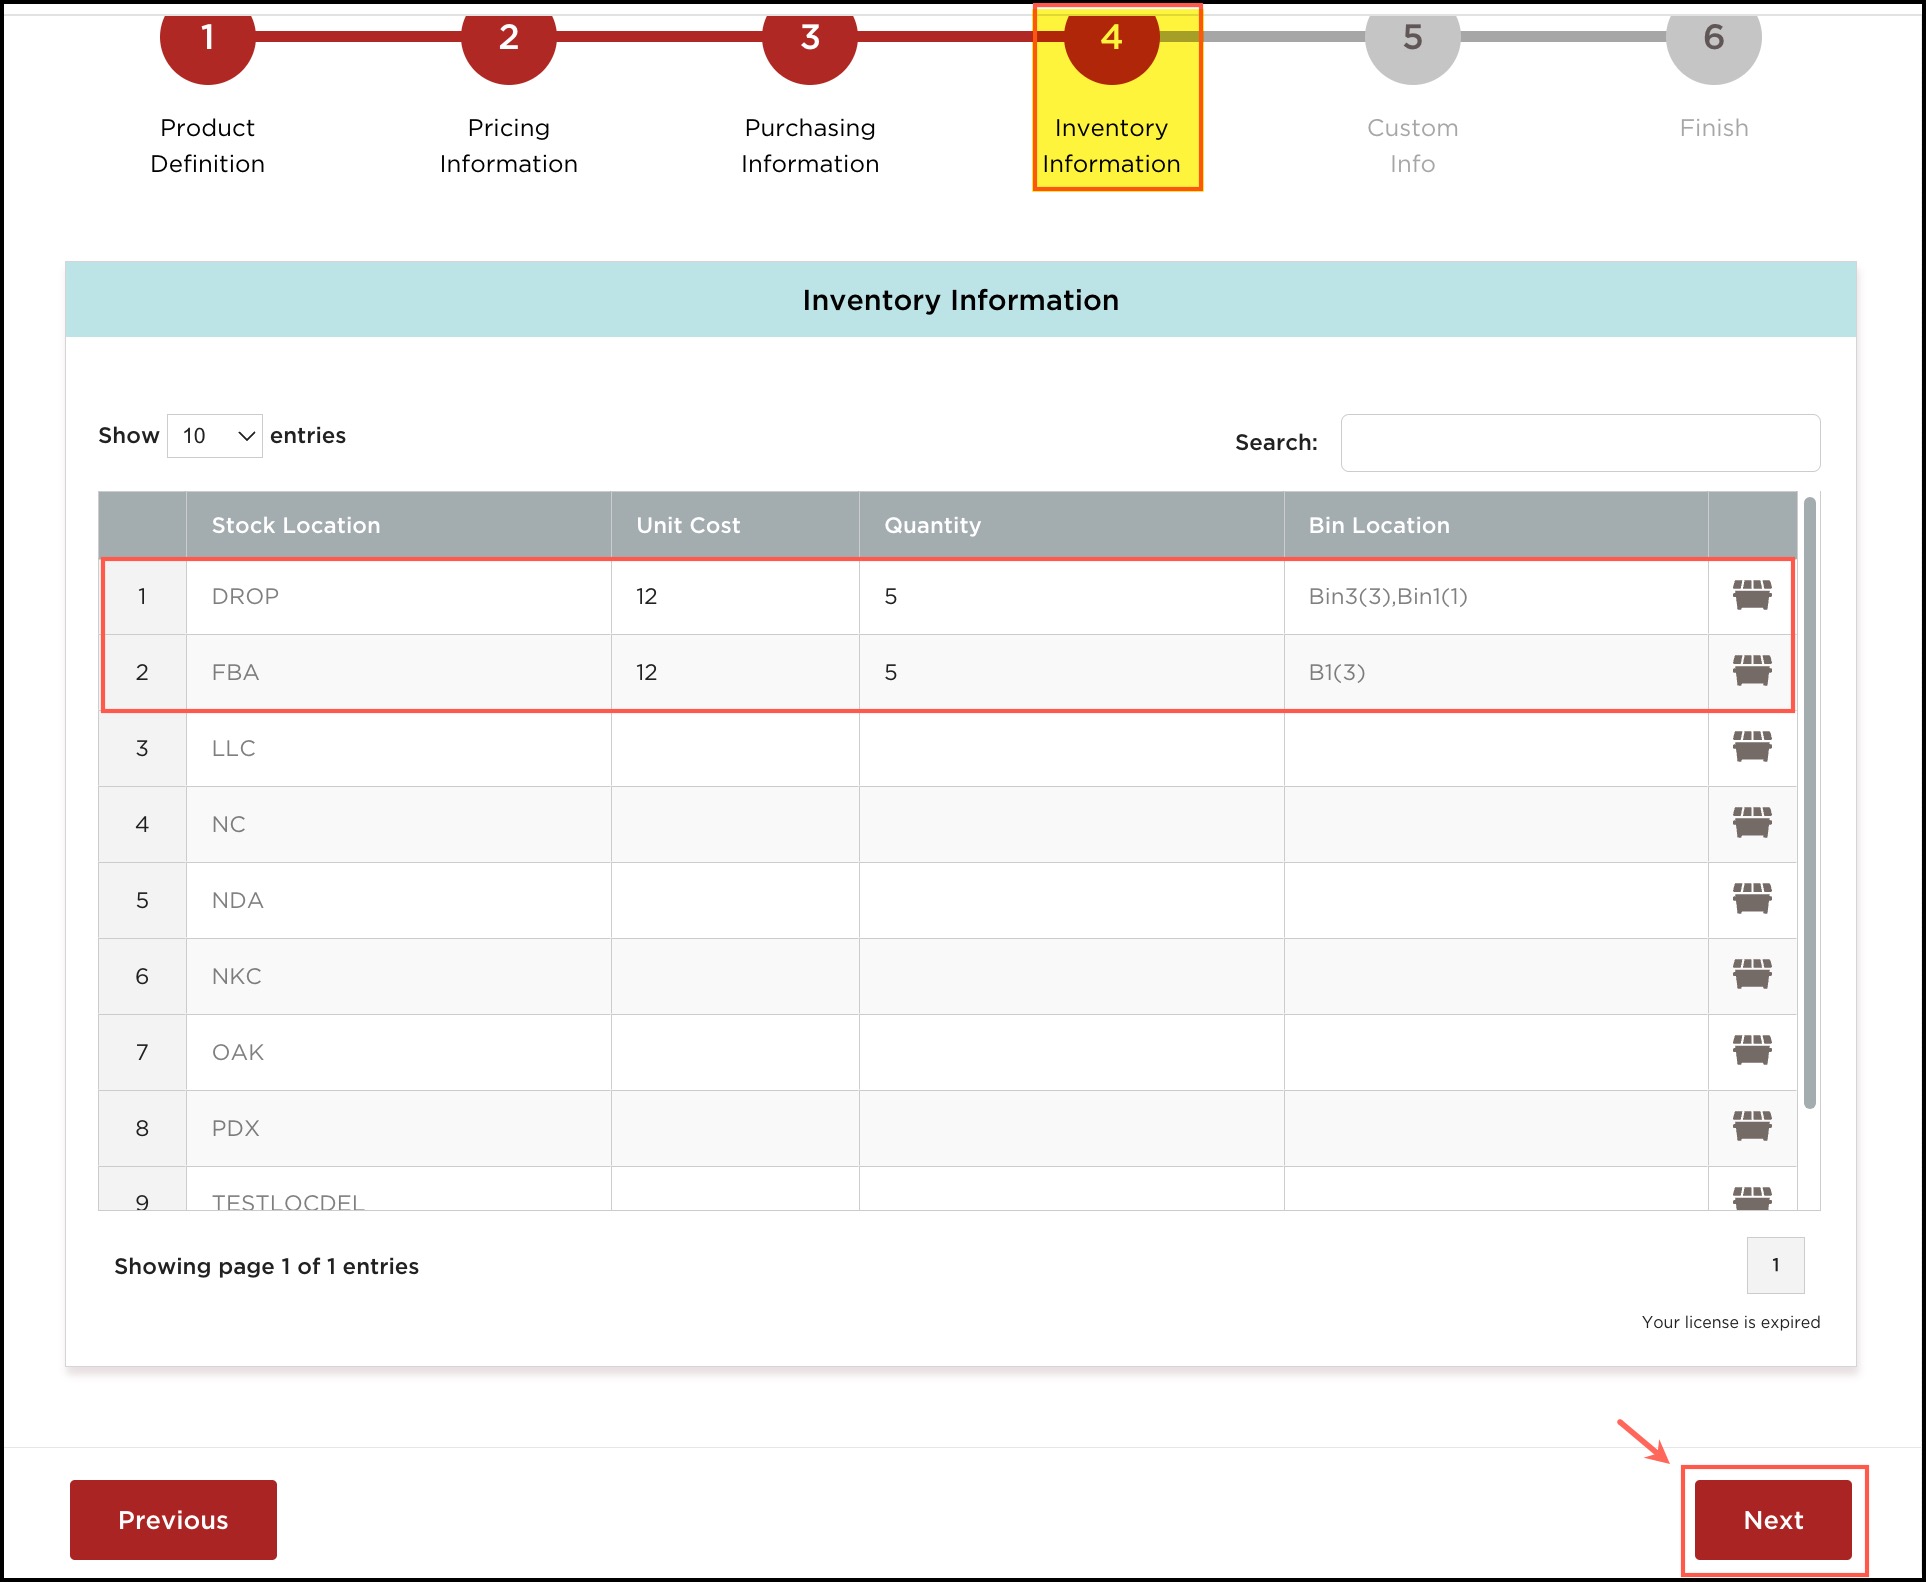
- Enter Unit Cost and Quantity for preferred stock locations.
- Proceed by clicking on Next.
- If you want to enter the Custom Info, you can enter in this step or directly proceed to the last step.
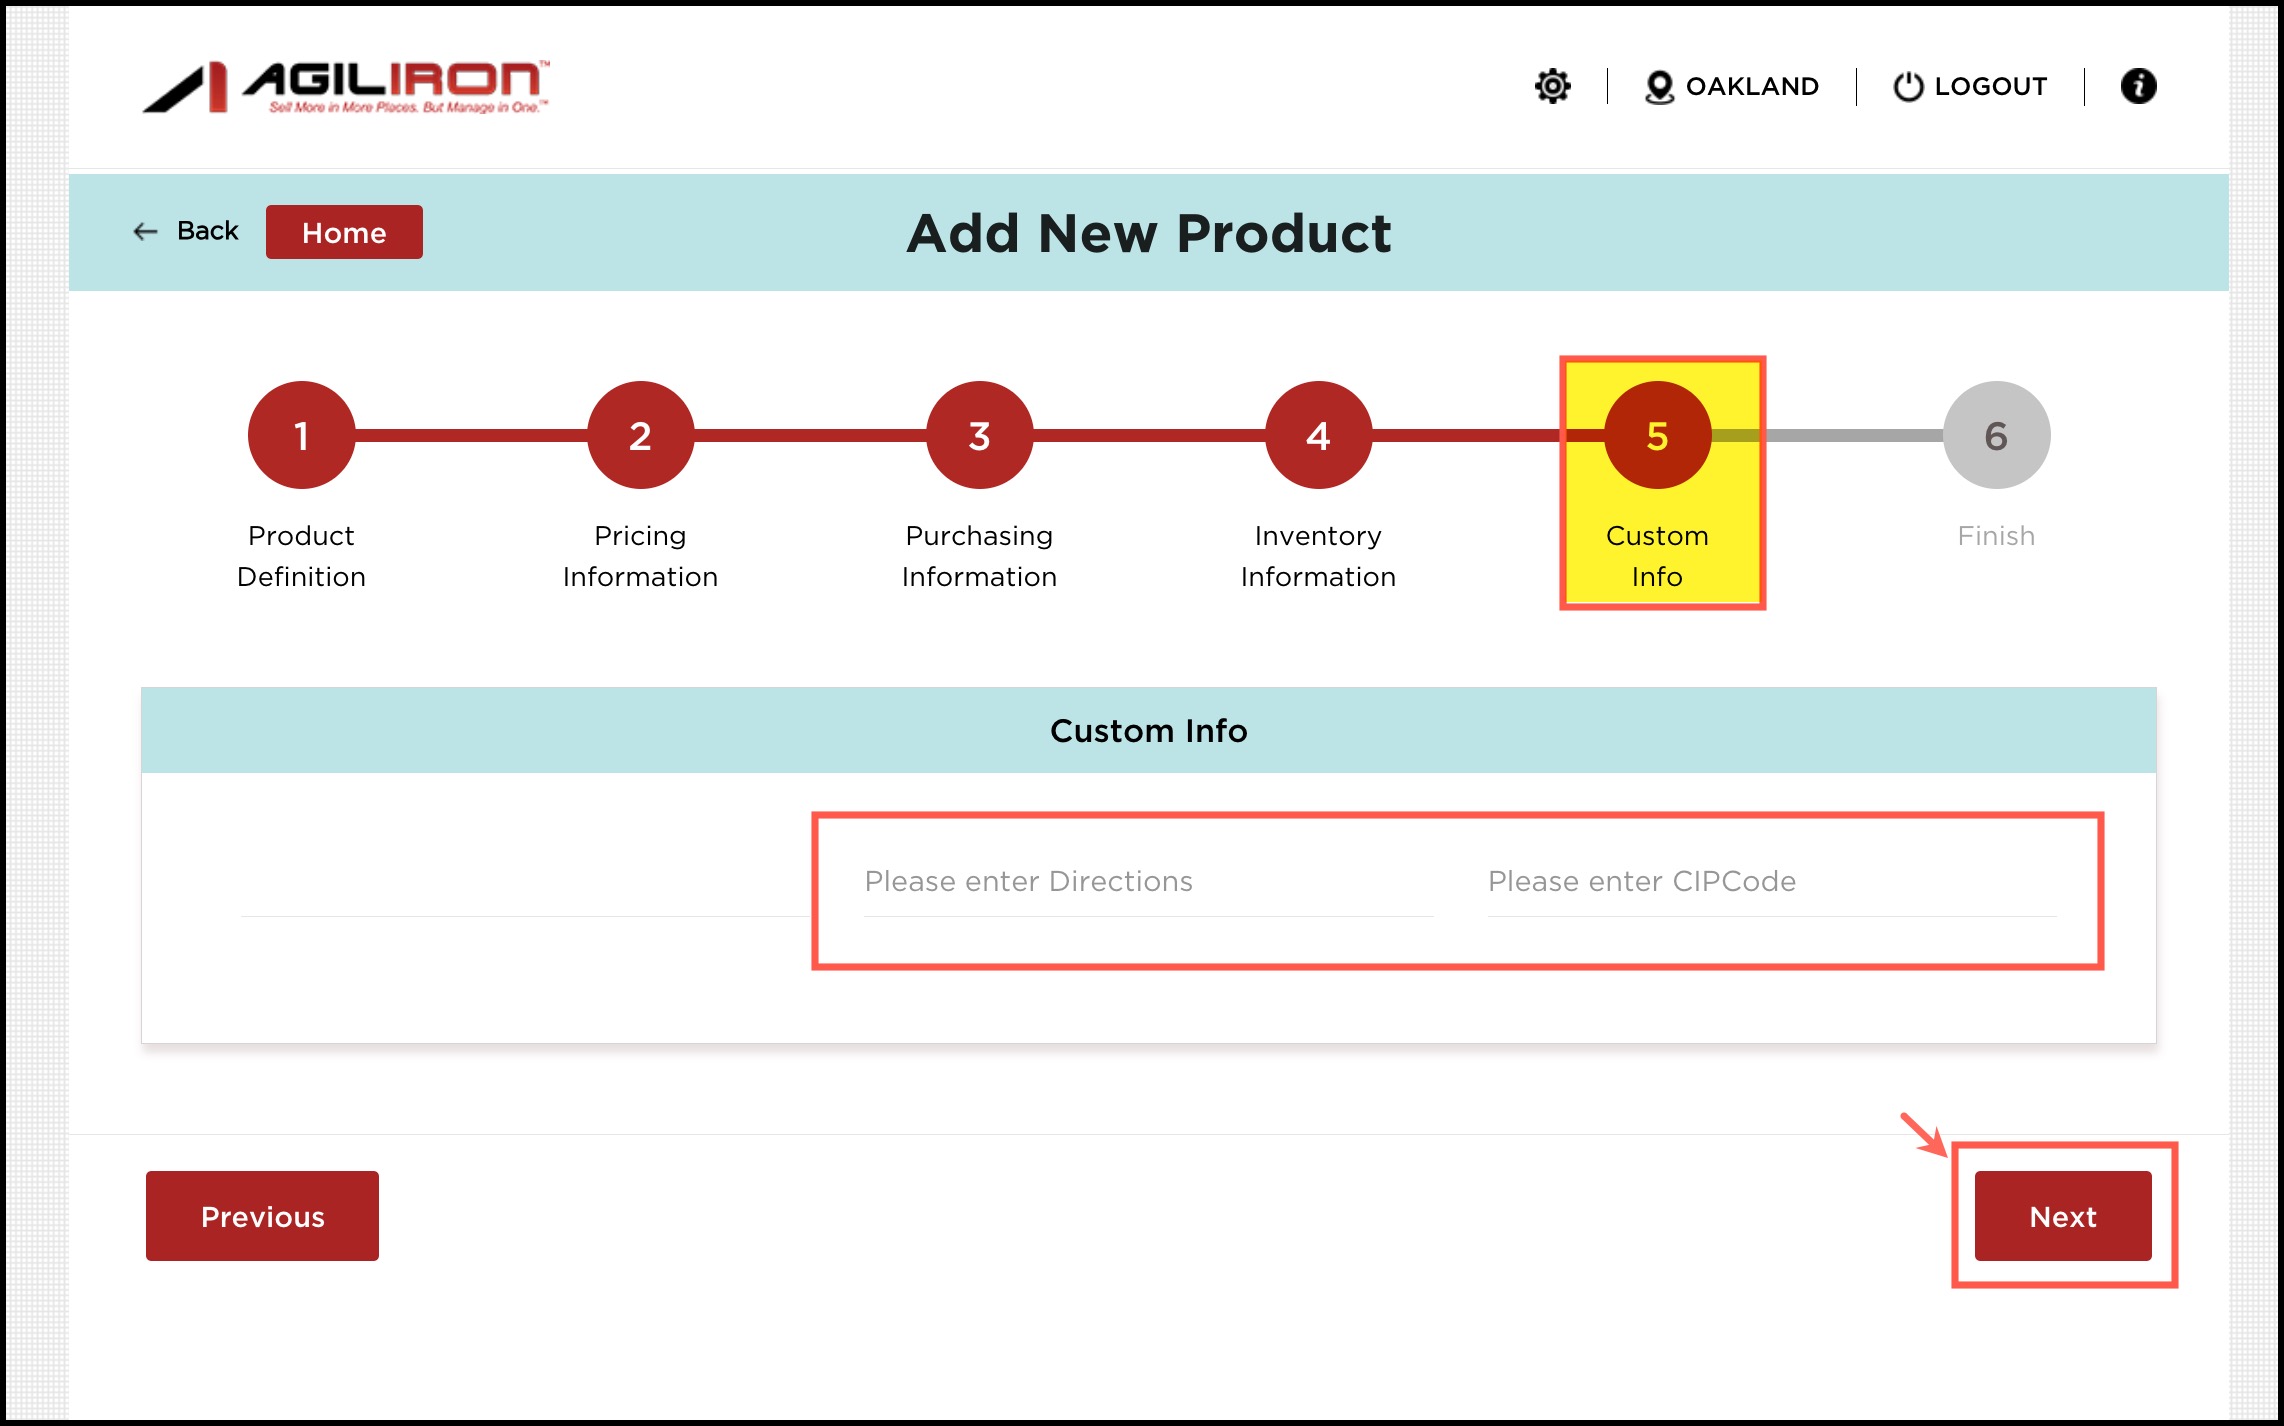
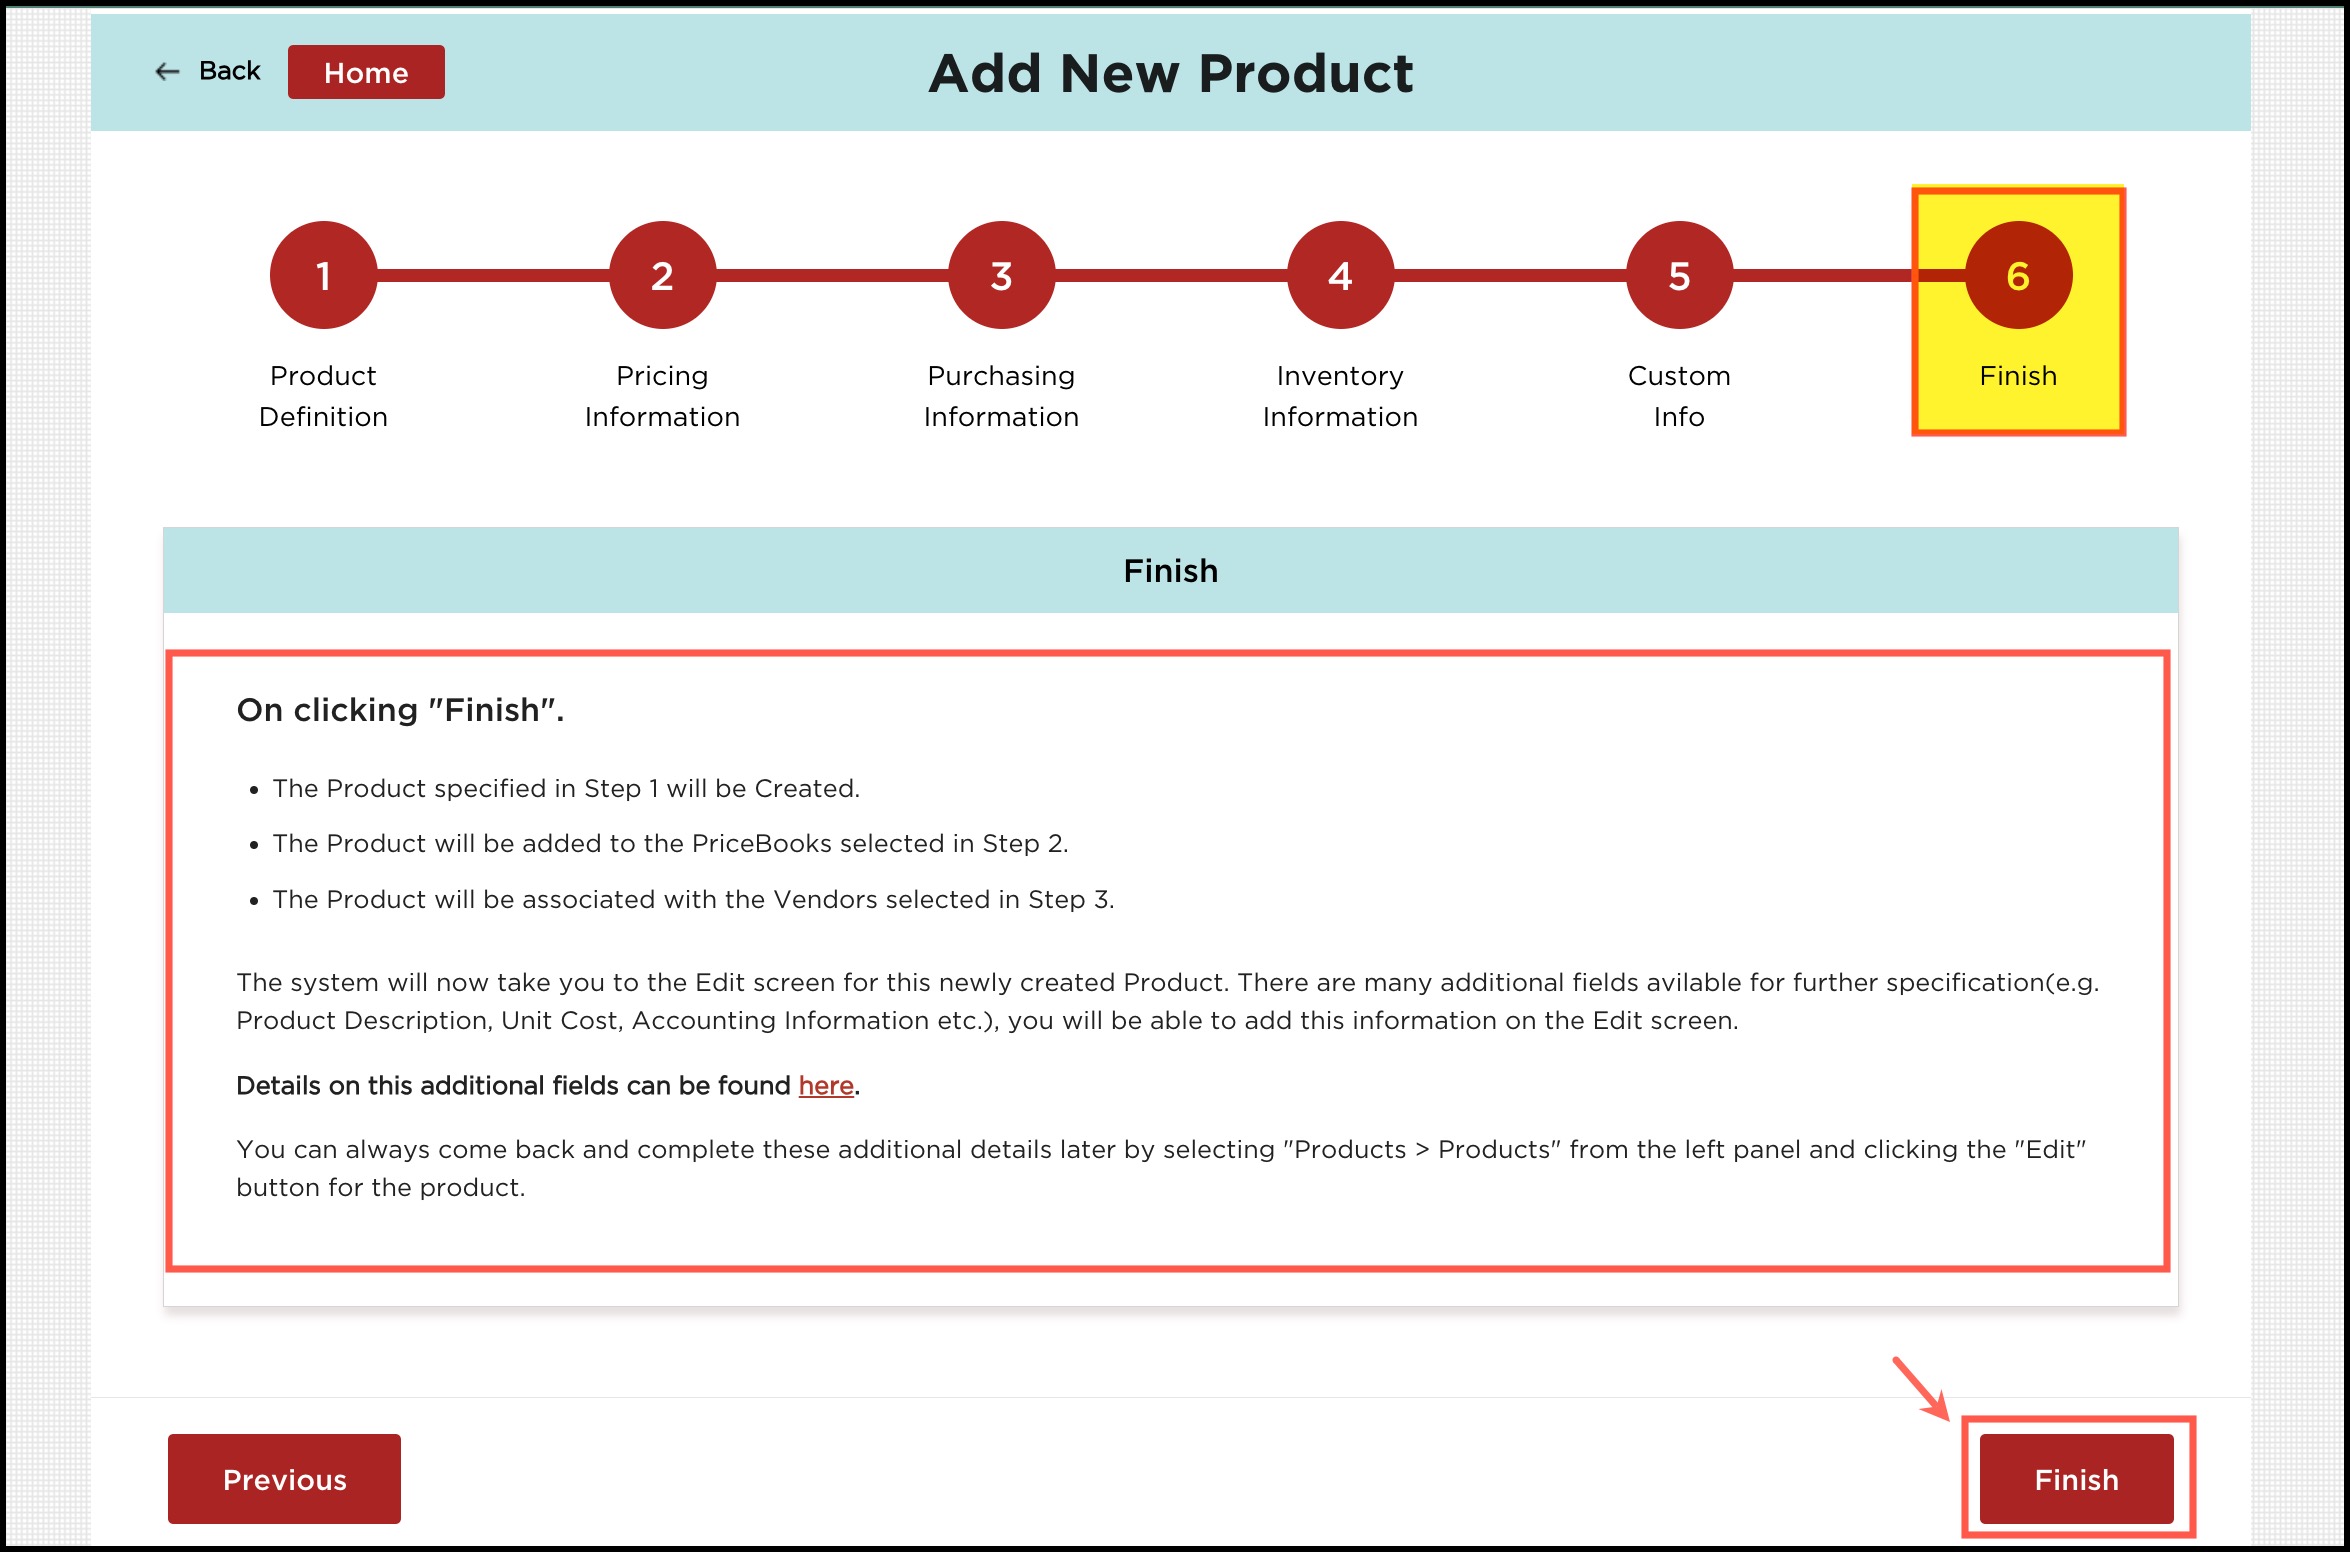
- Click "Finish" on the last screen.
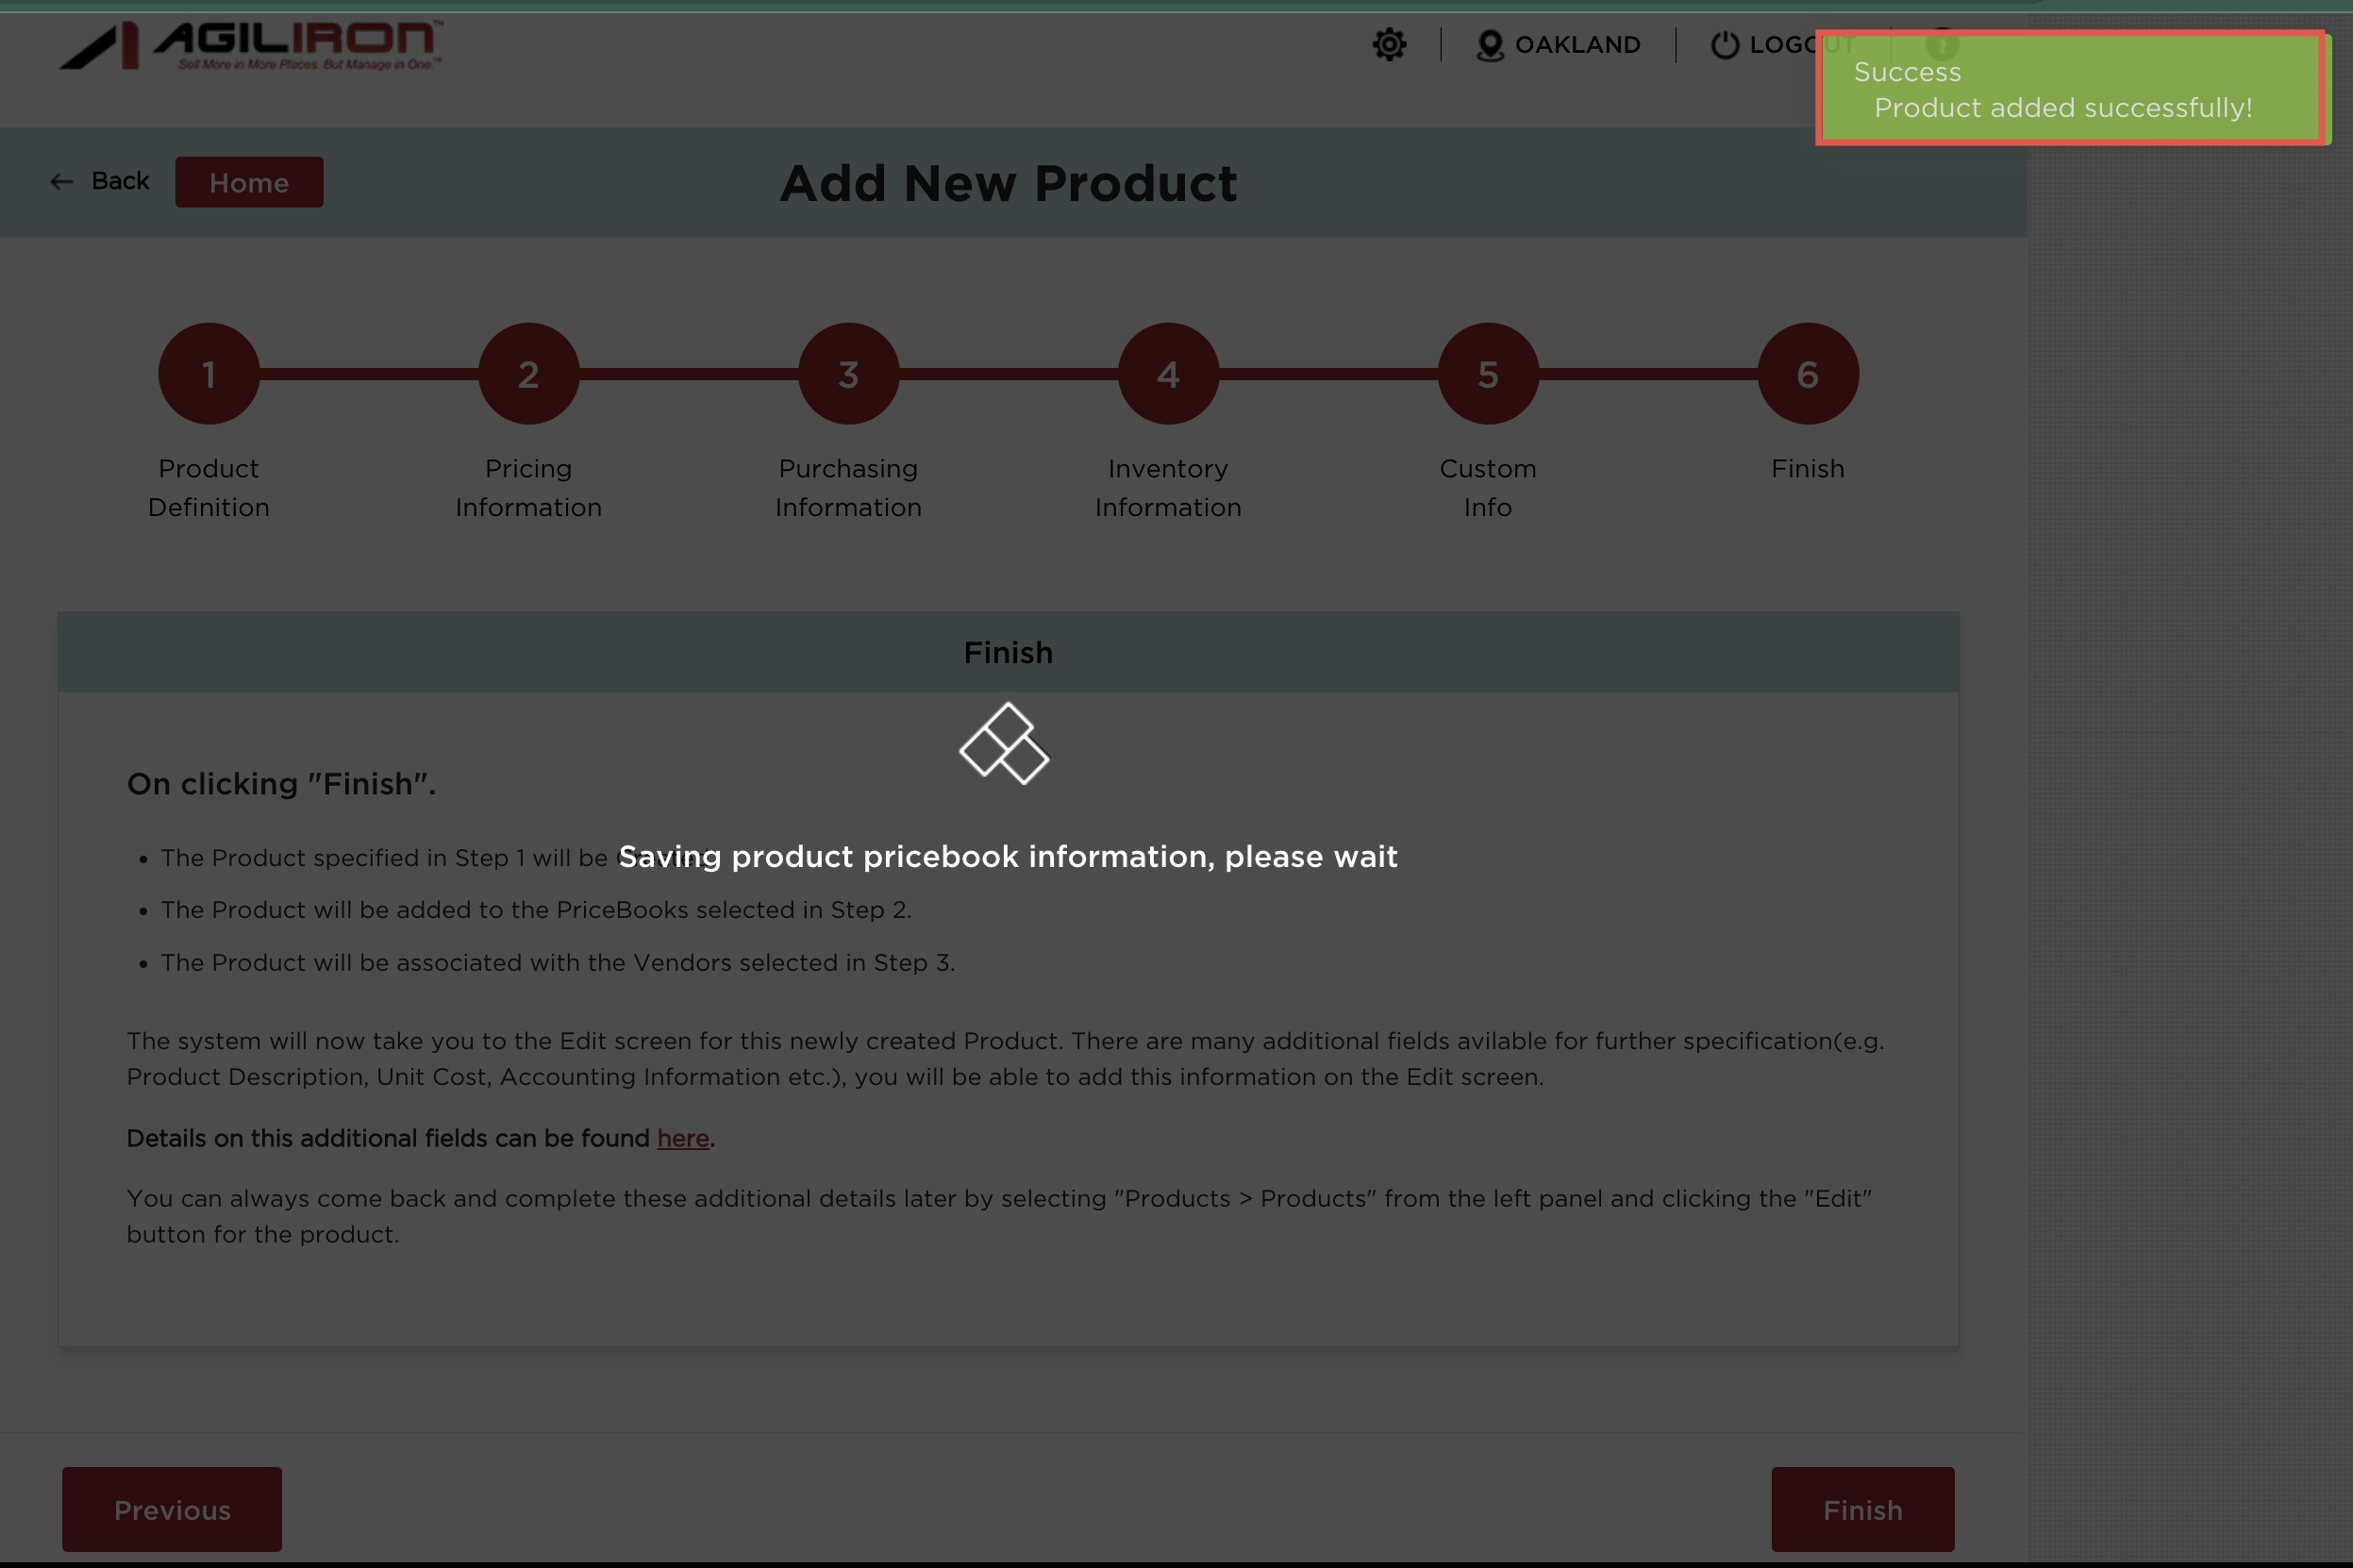
- You can see the Product added successfully message.
- Once the product has been created, you will be returned to the home screen. Click the "Sync Order & Product Updates to Back-Office" to update the back office with the new product. Then, select "Sync Products From Back-Office".
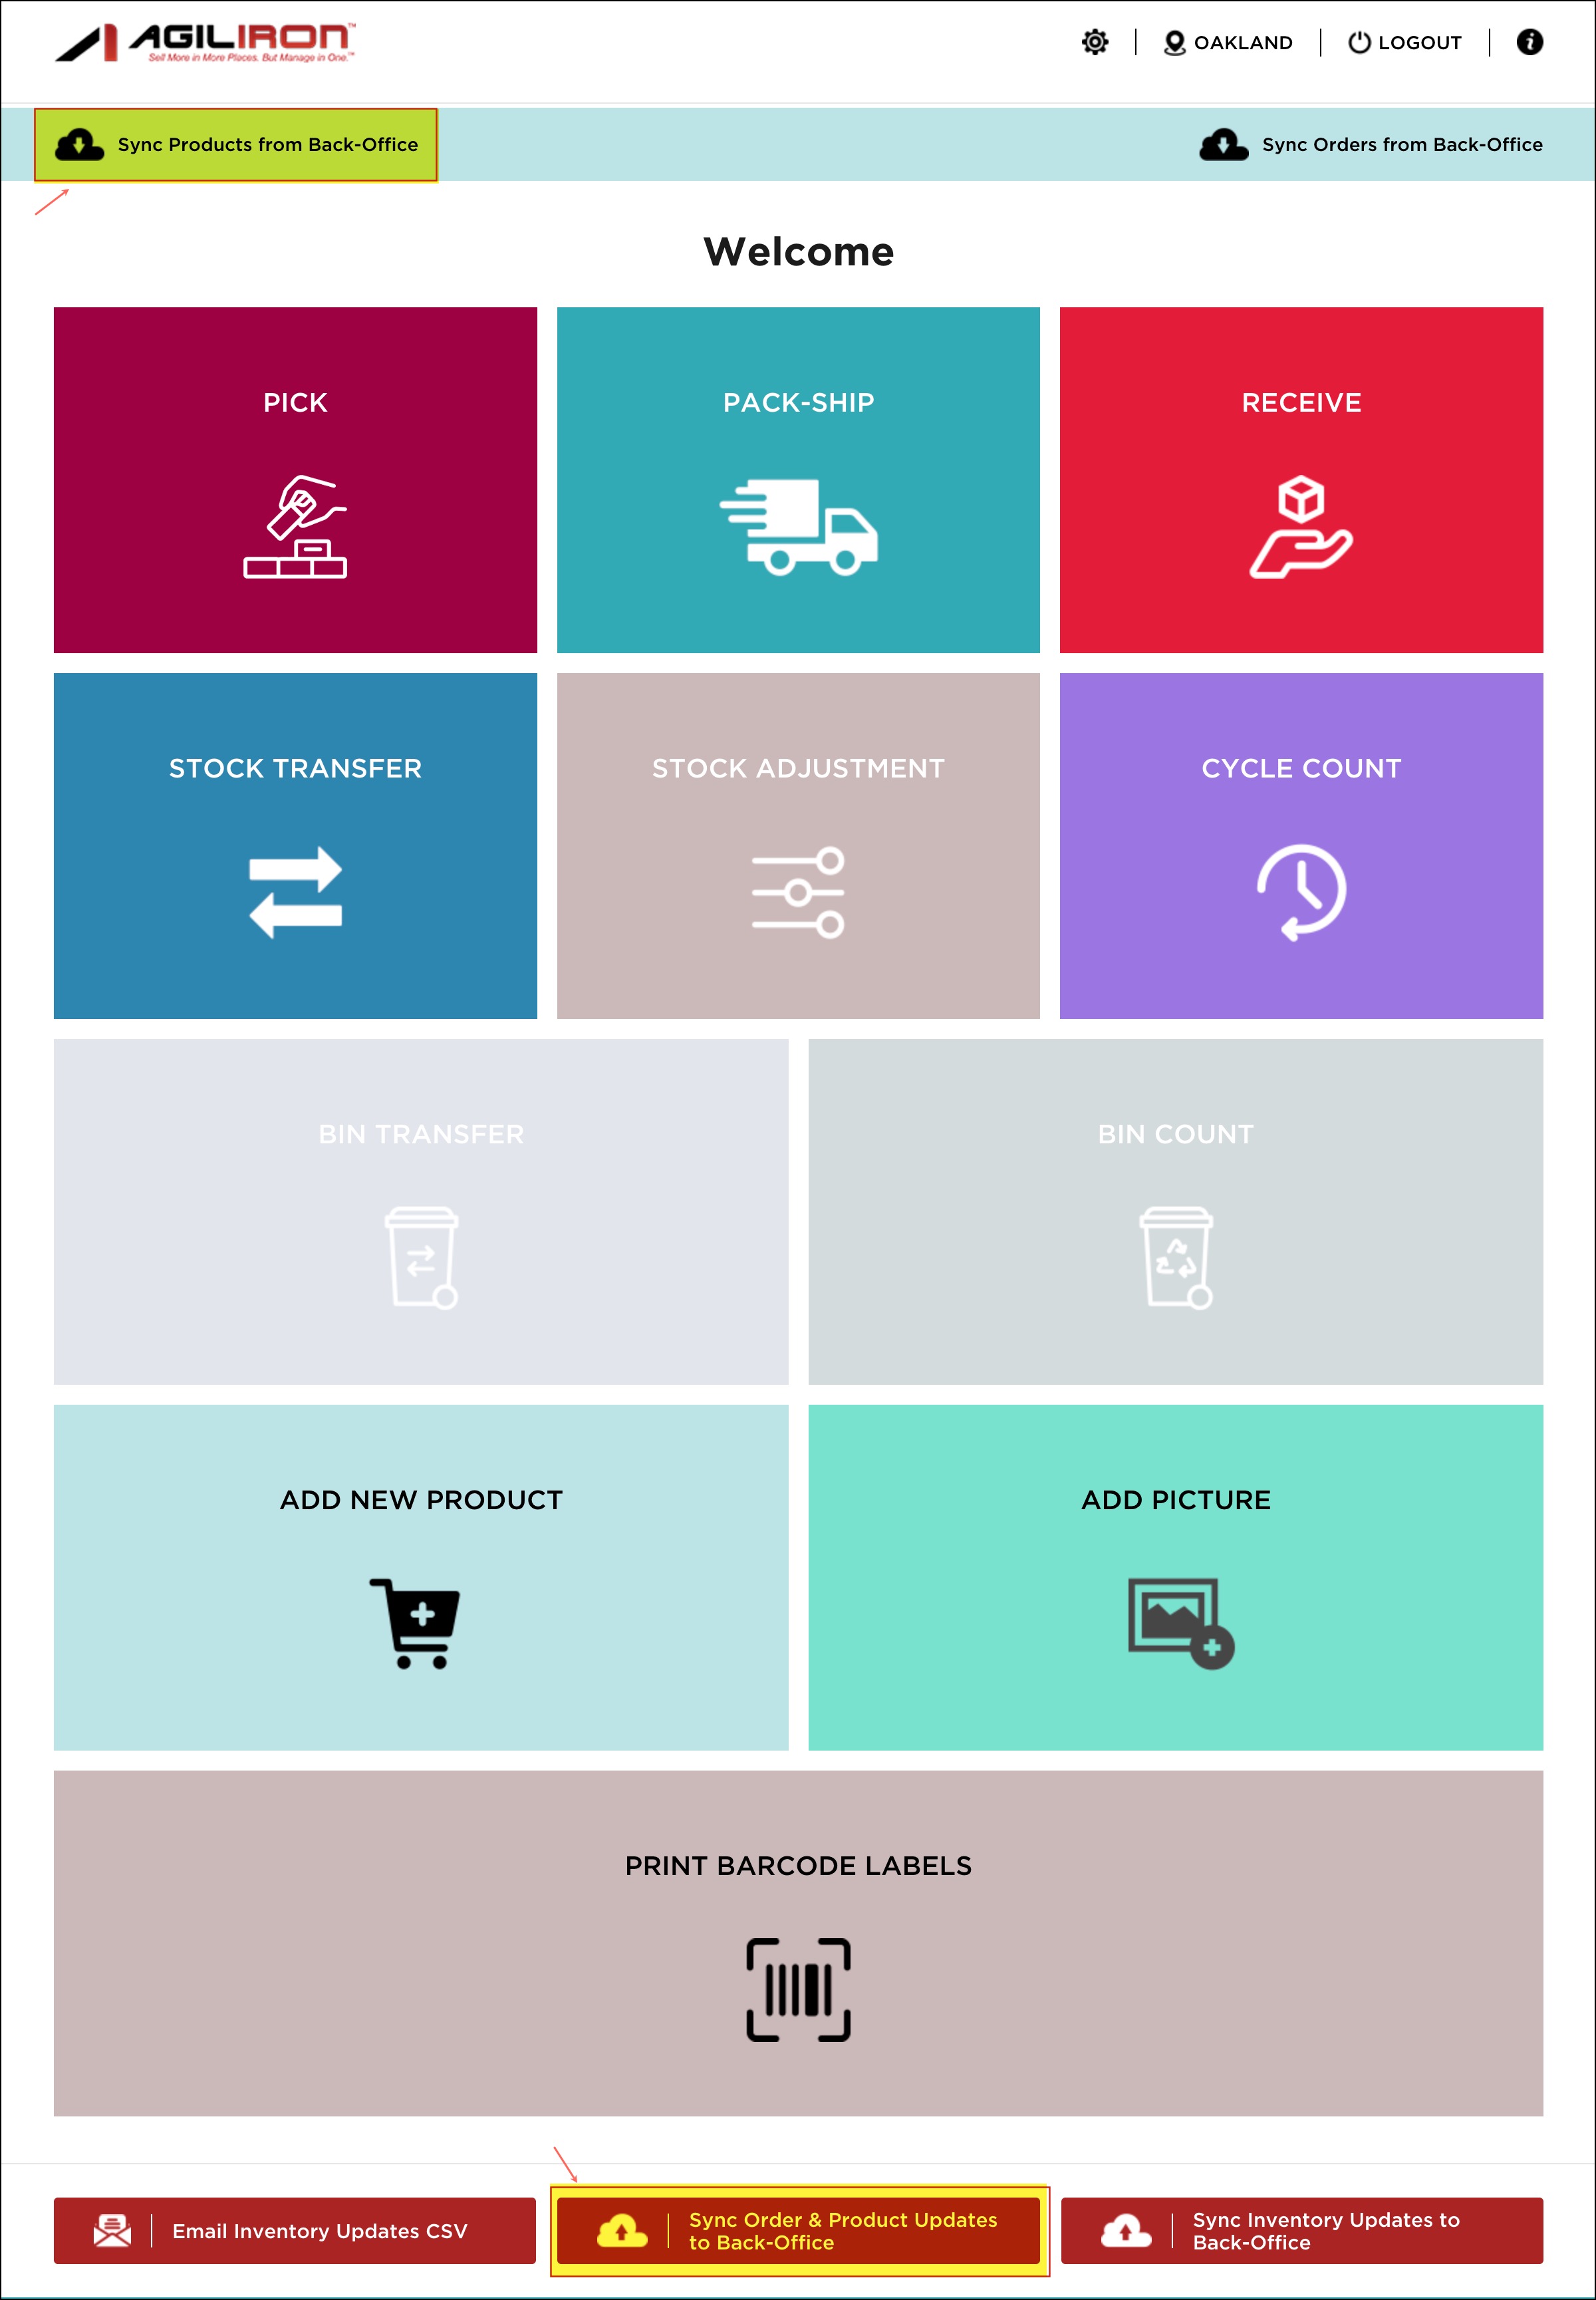
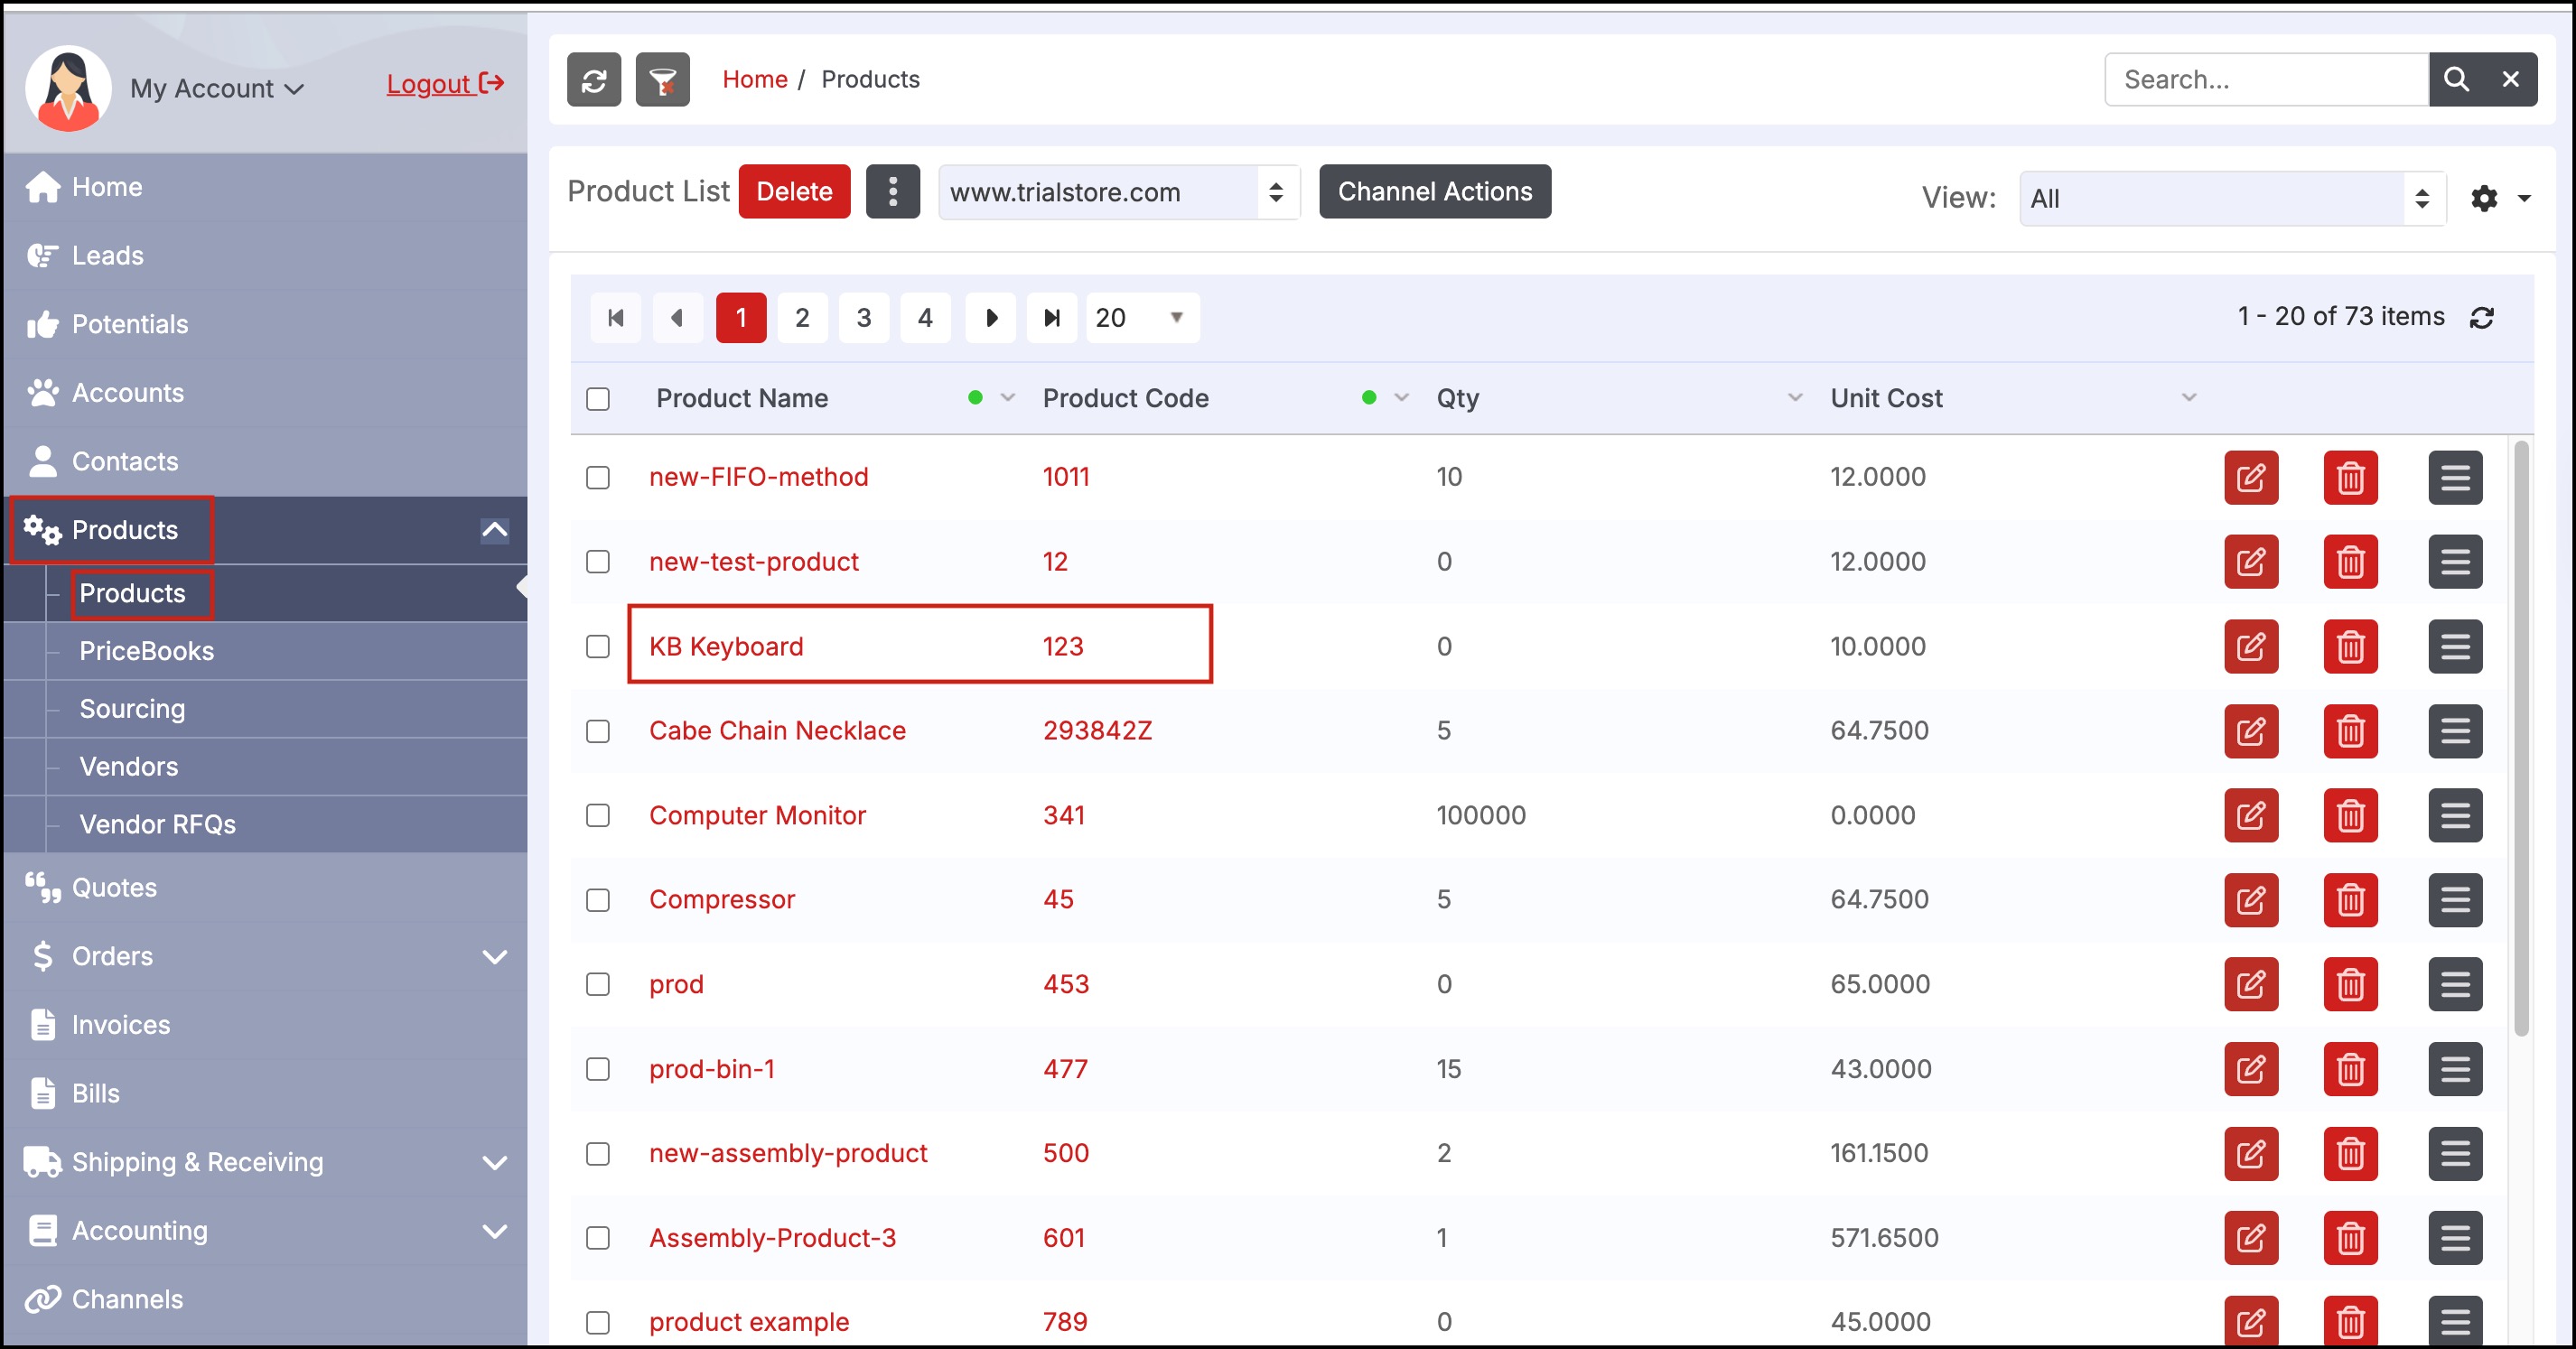
The new product will now be available in the app, and will be visible in the back office's product list.
Note - On the Product's detail page -> go to the Stock Location tab. You'll see the added bin locations to the respective stock locations.
Updated 7 months ago