Add/Update Bin Locations in Stock Adjustment Workflow
Just like in the back office, there is a capability to add a bin location in the Warehouse management app -> Stock Adjustment Workflow.
Let's see how this works:
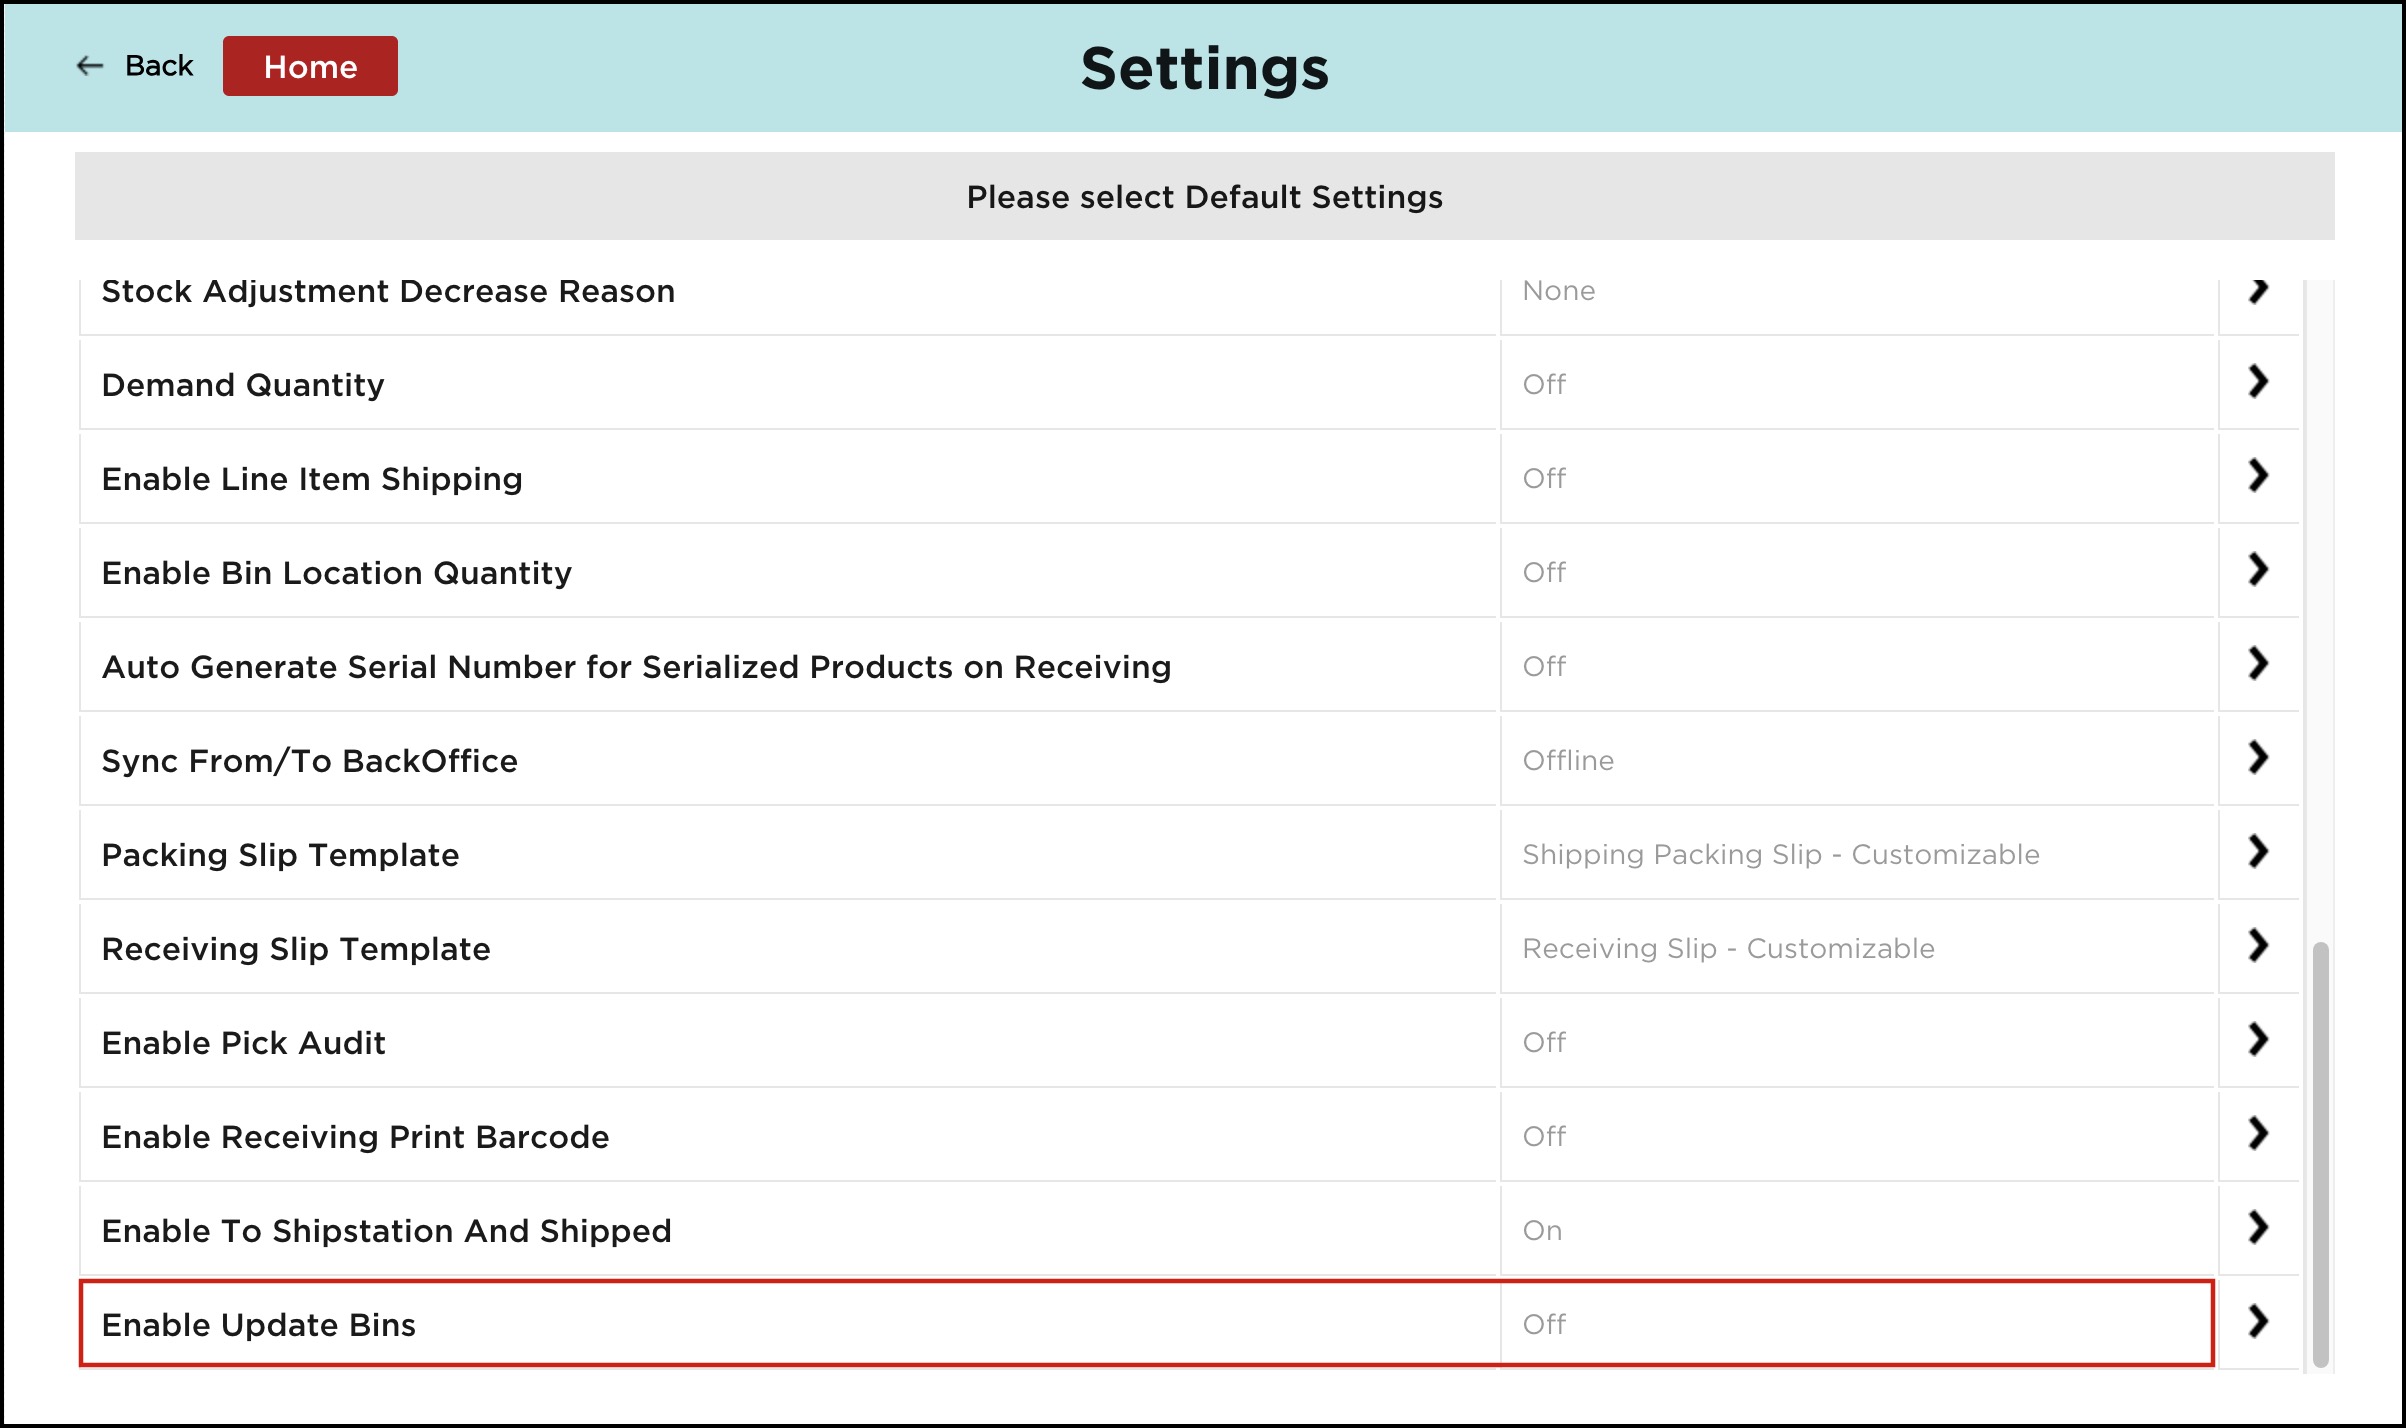
To enable Update Bins, go to Warehouse App Settings and set Enable Update Bins to On.

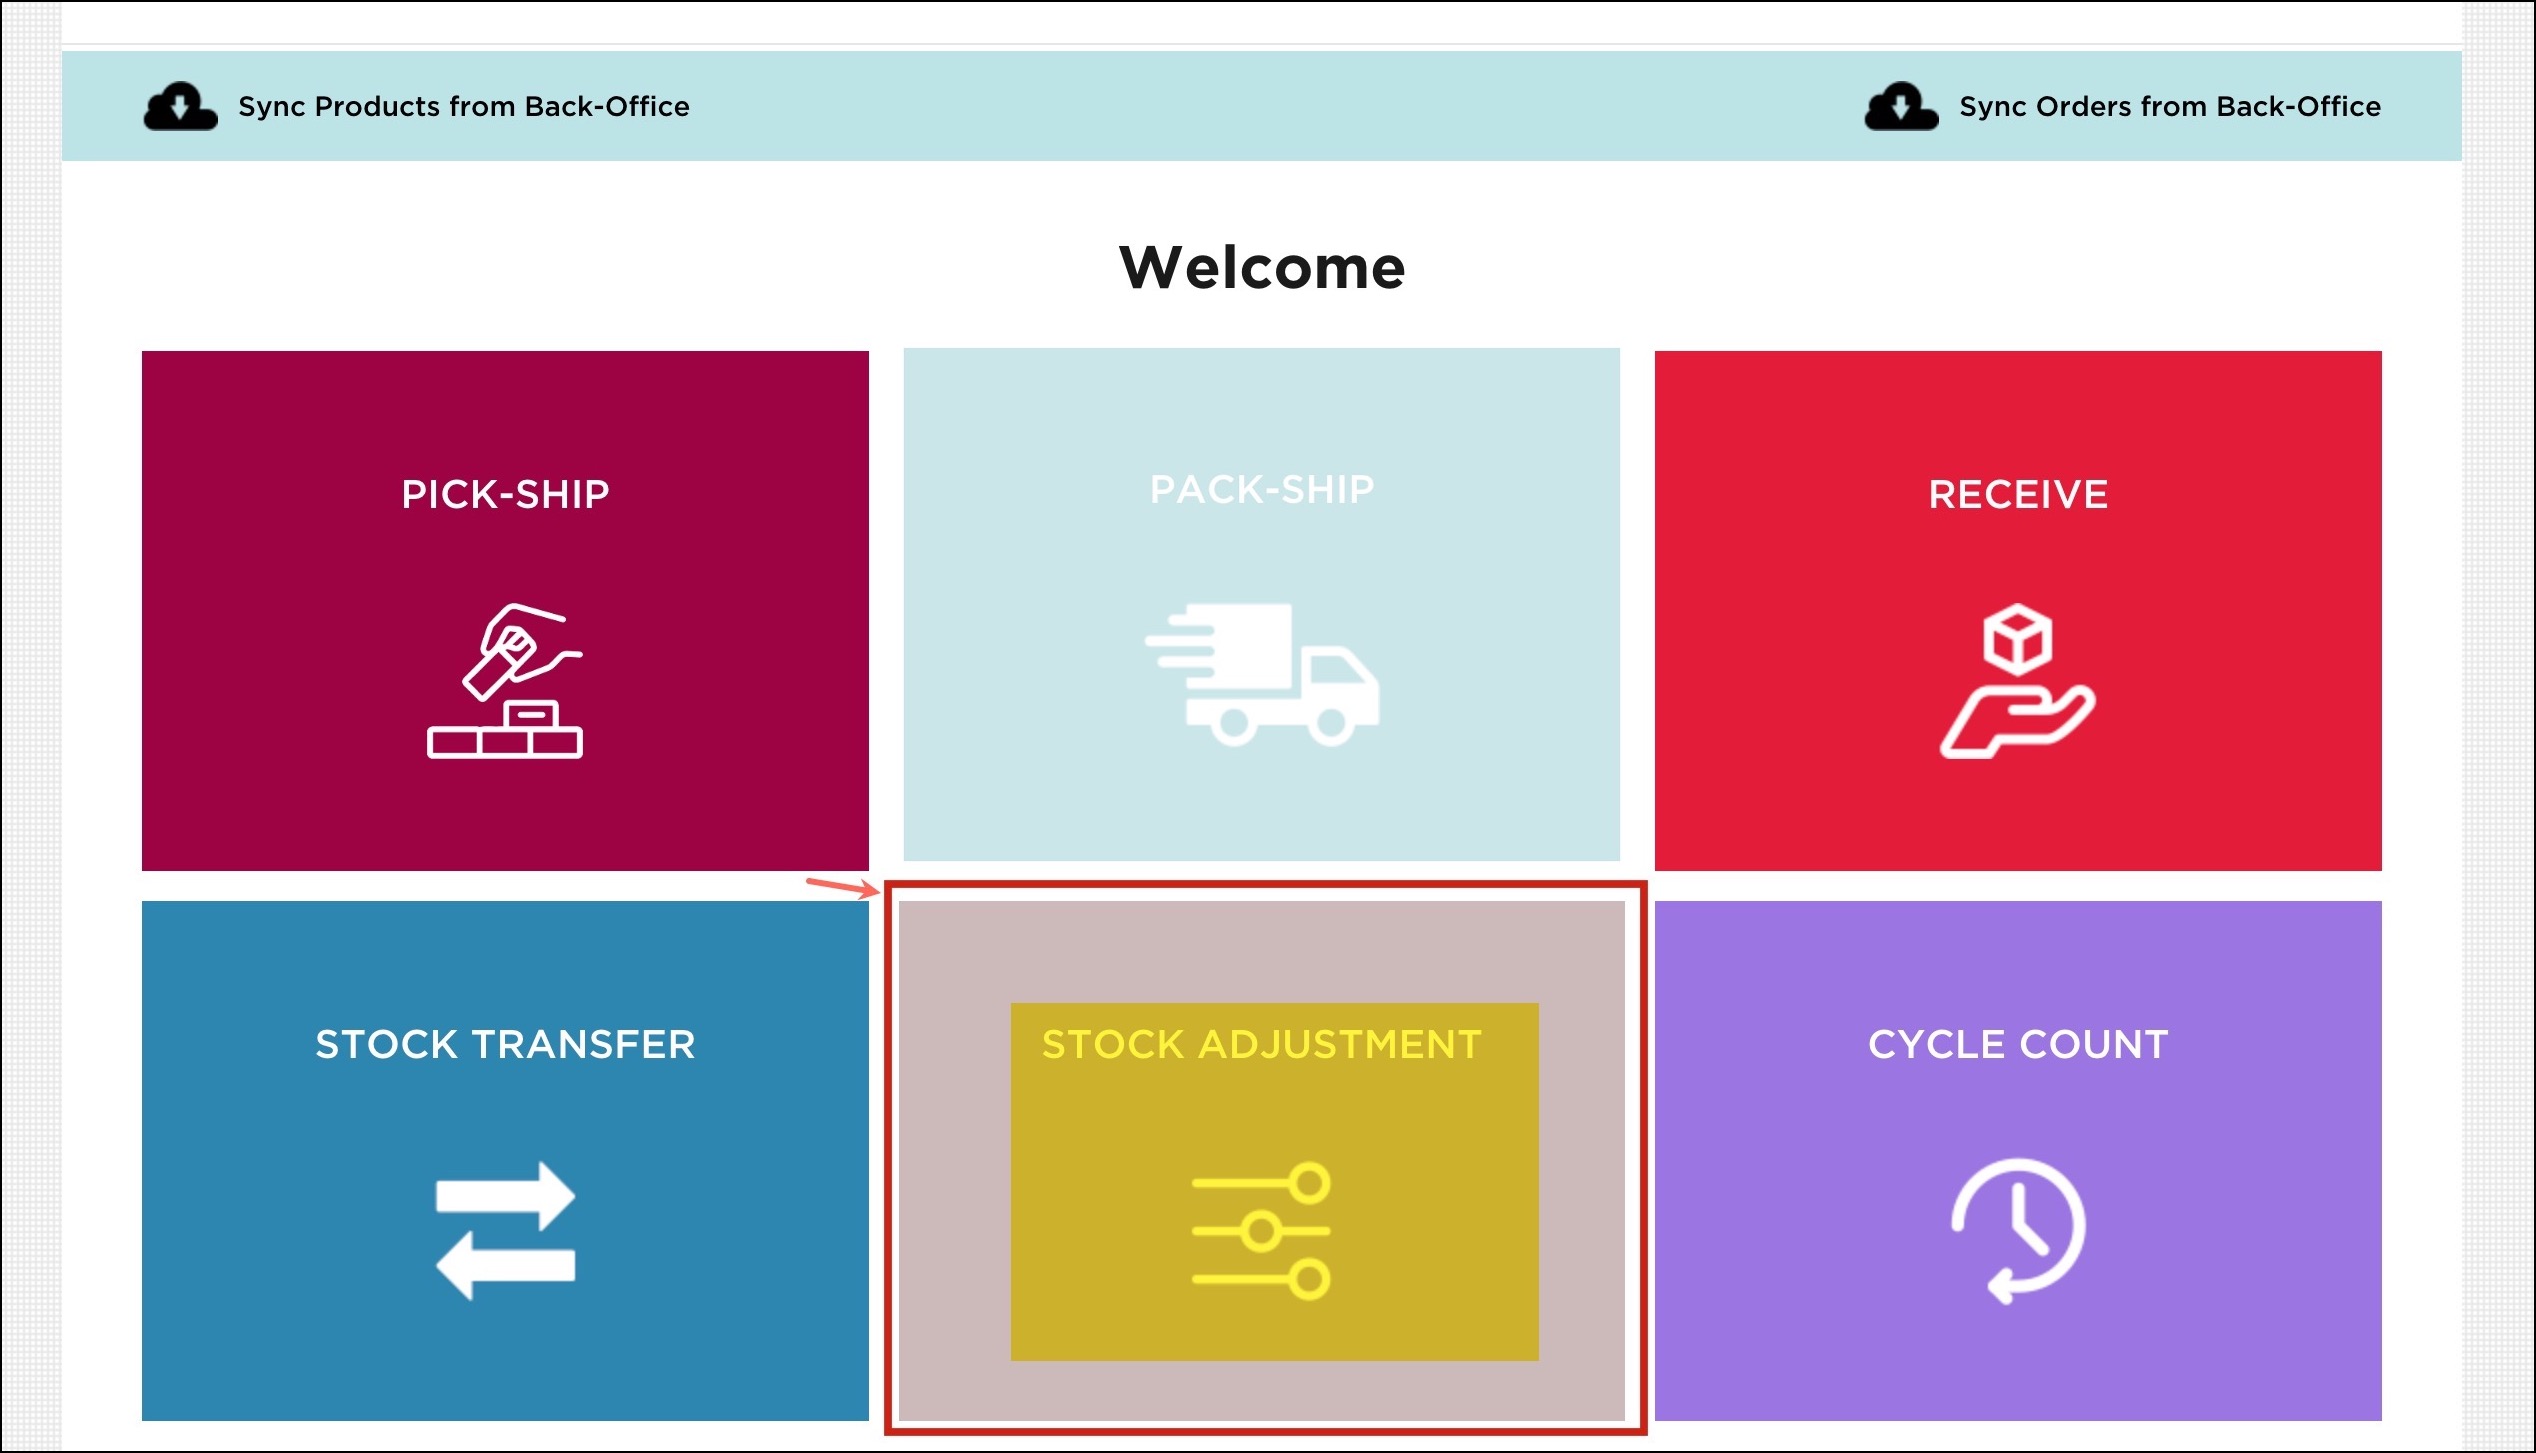
Once this feature is enabled, log in to your warehouse management app and go to the Stock Adjustment workflow.
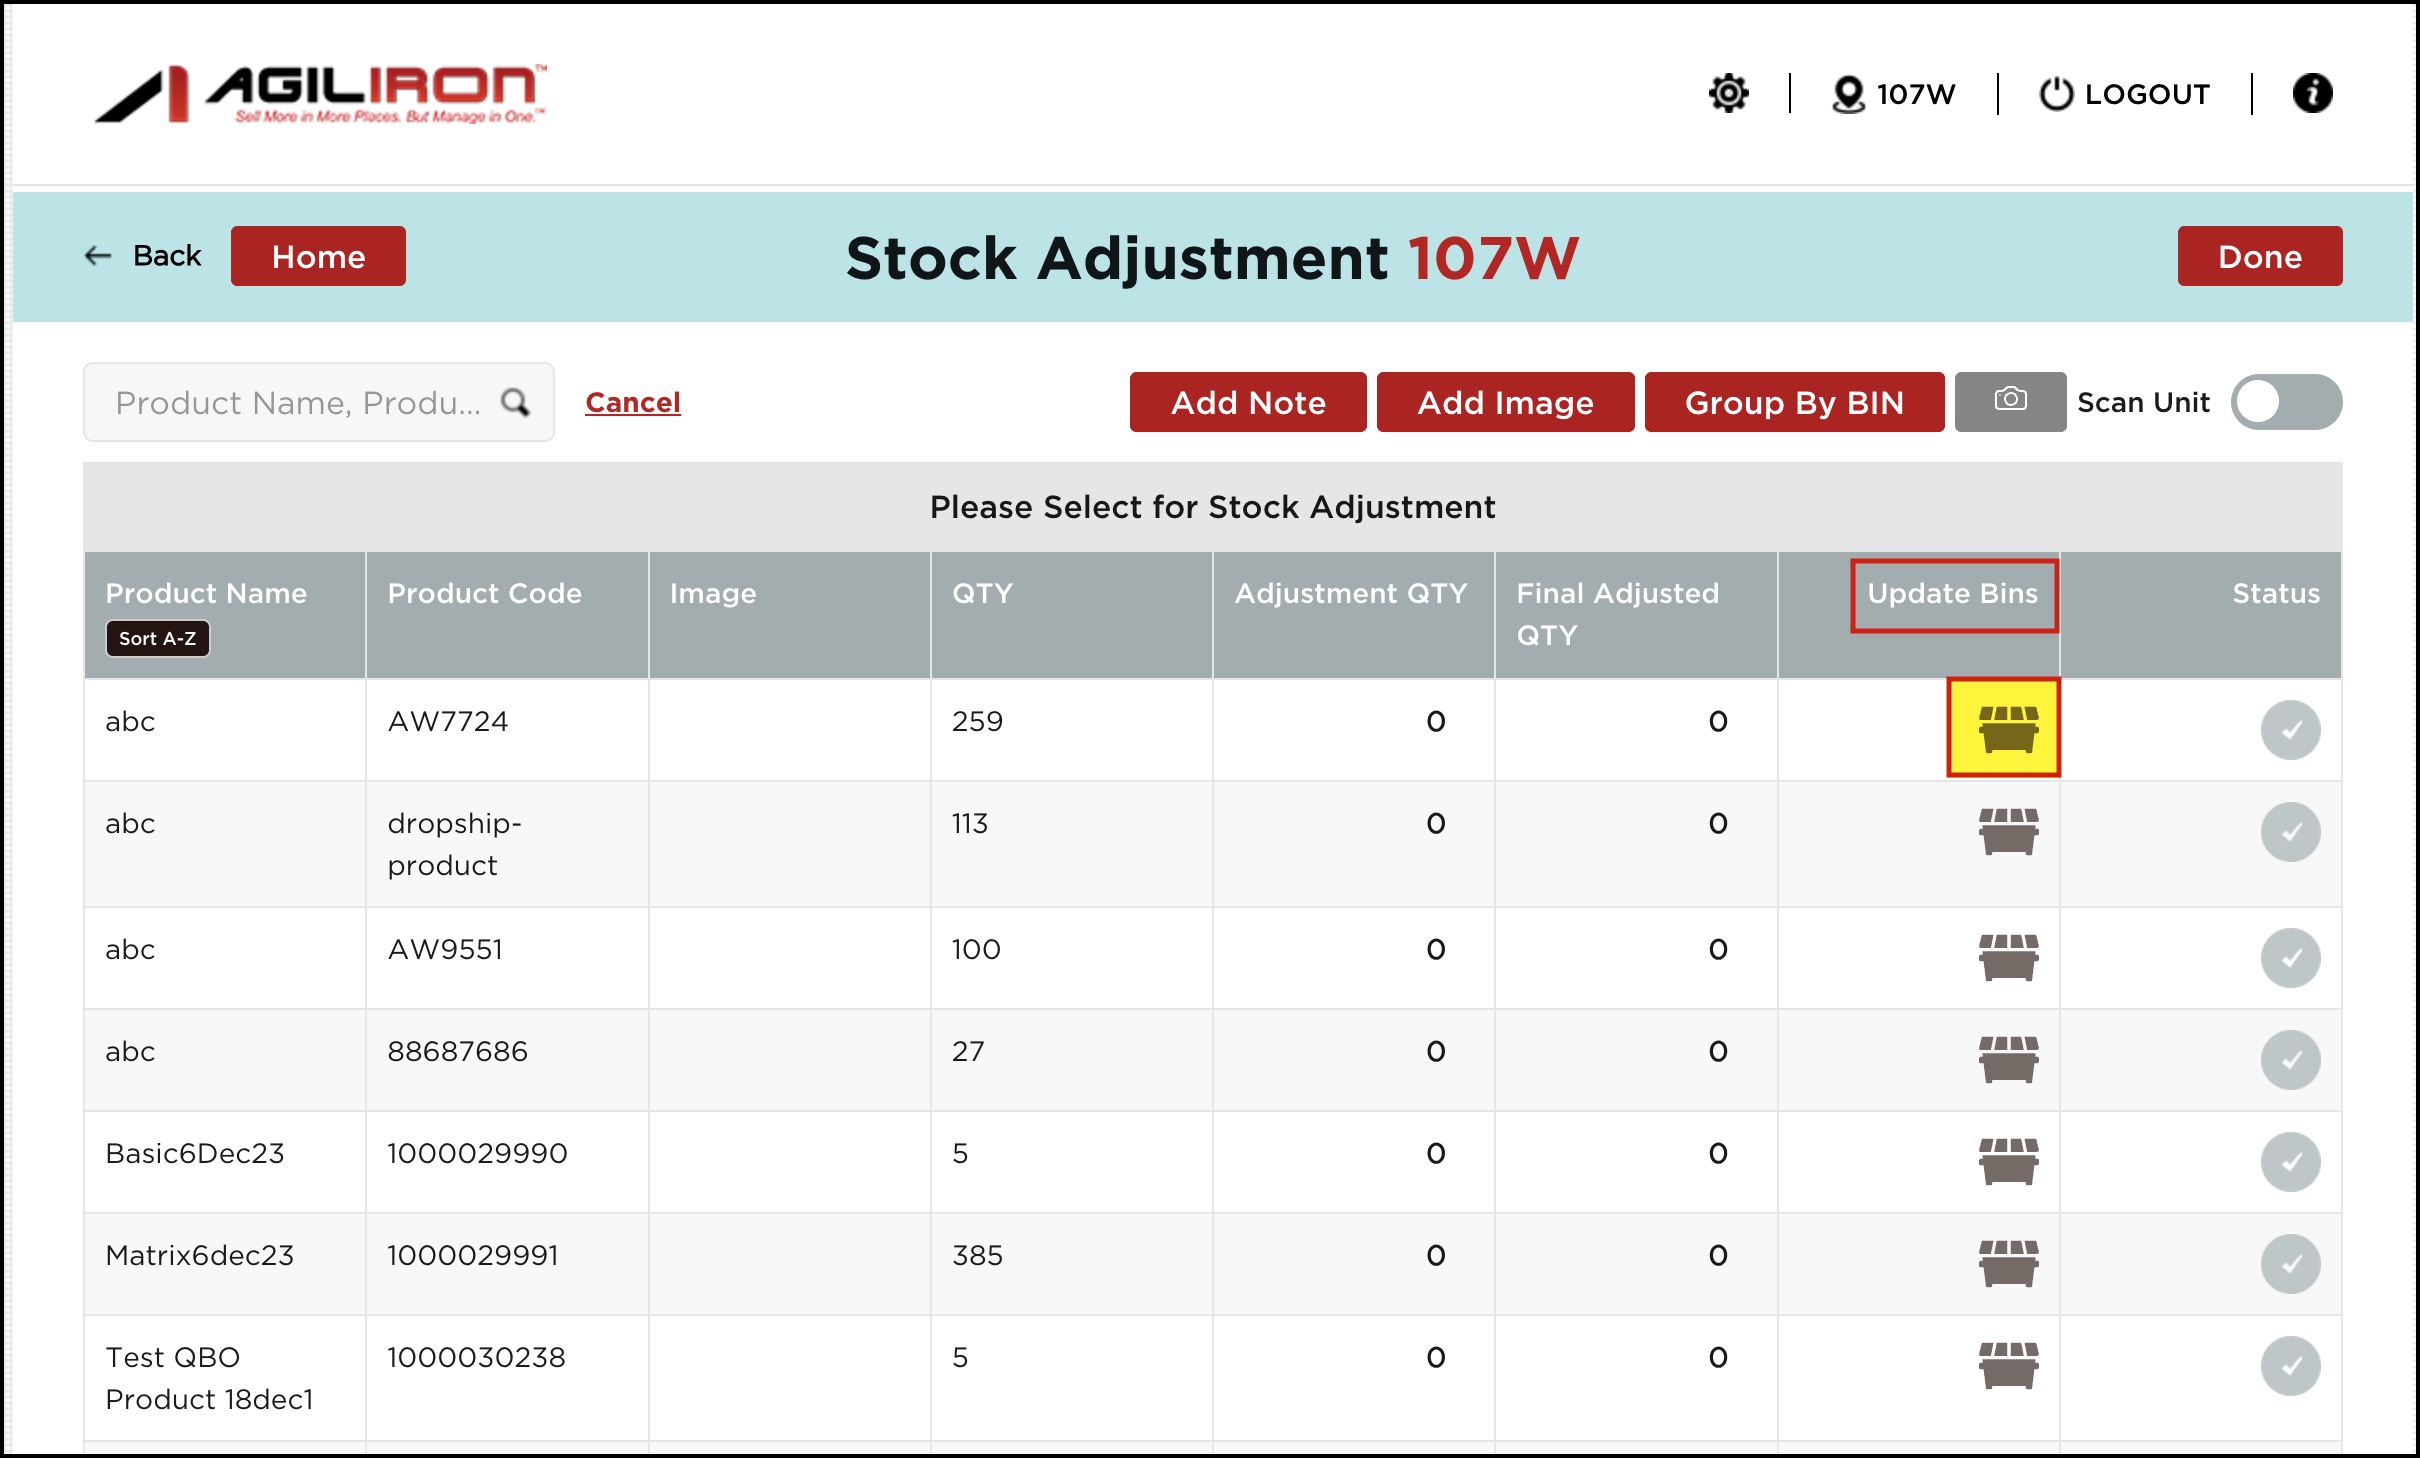
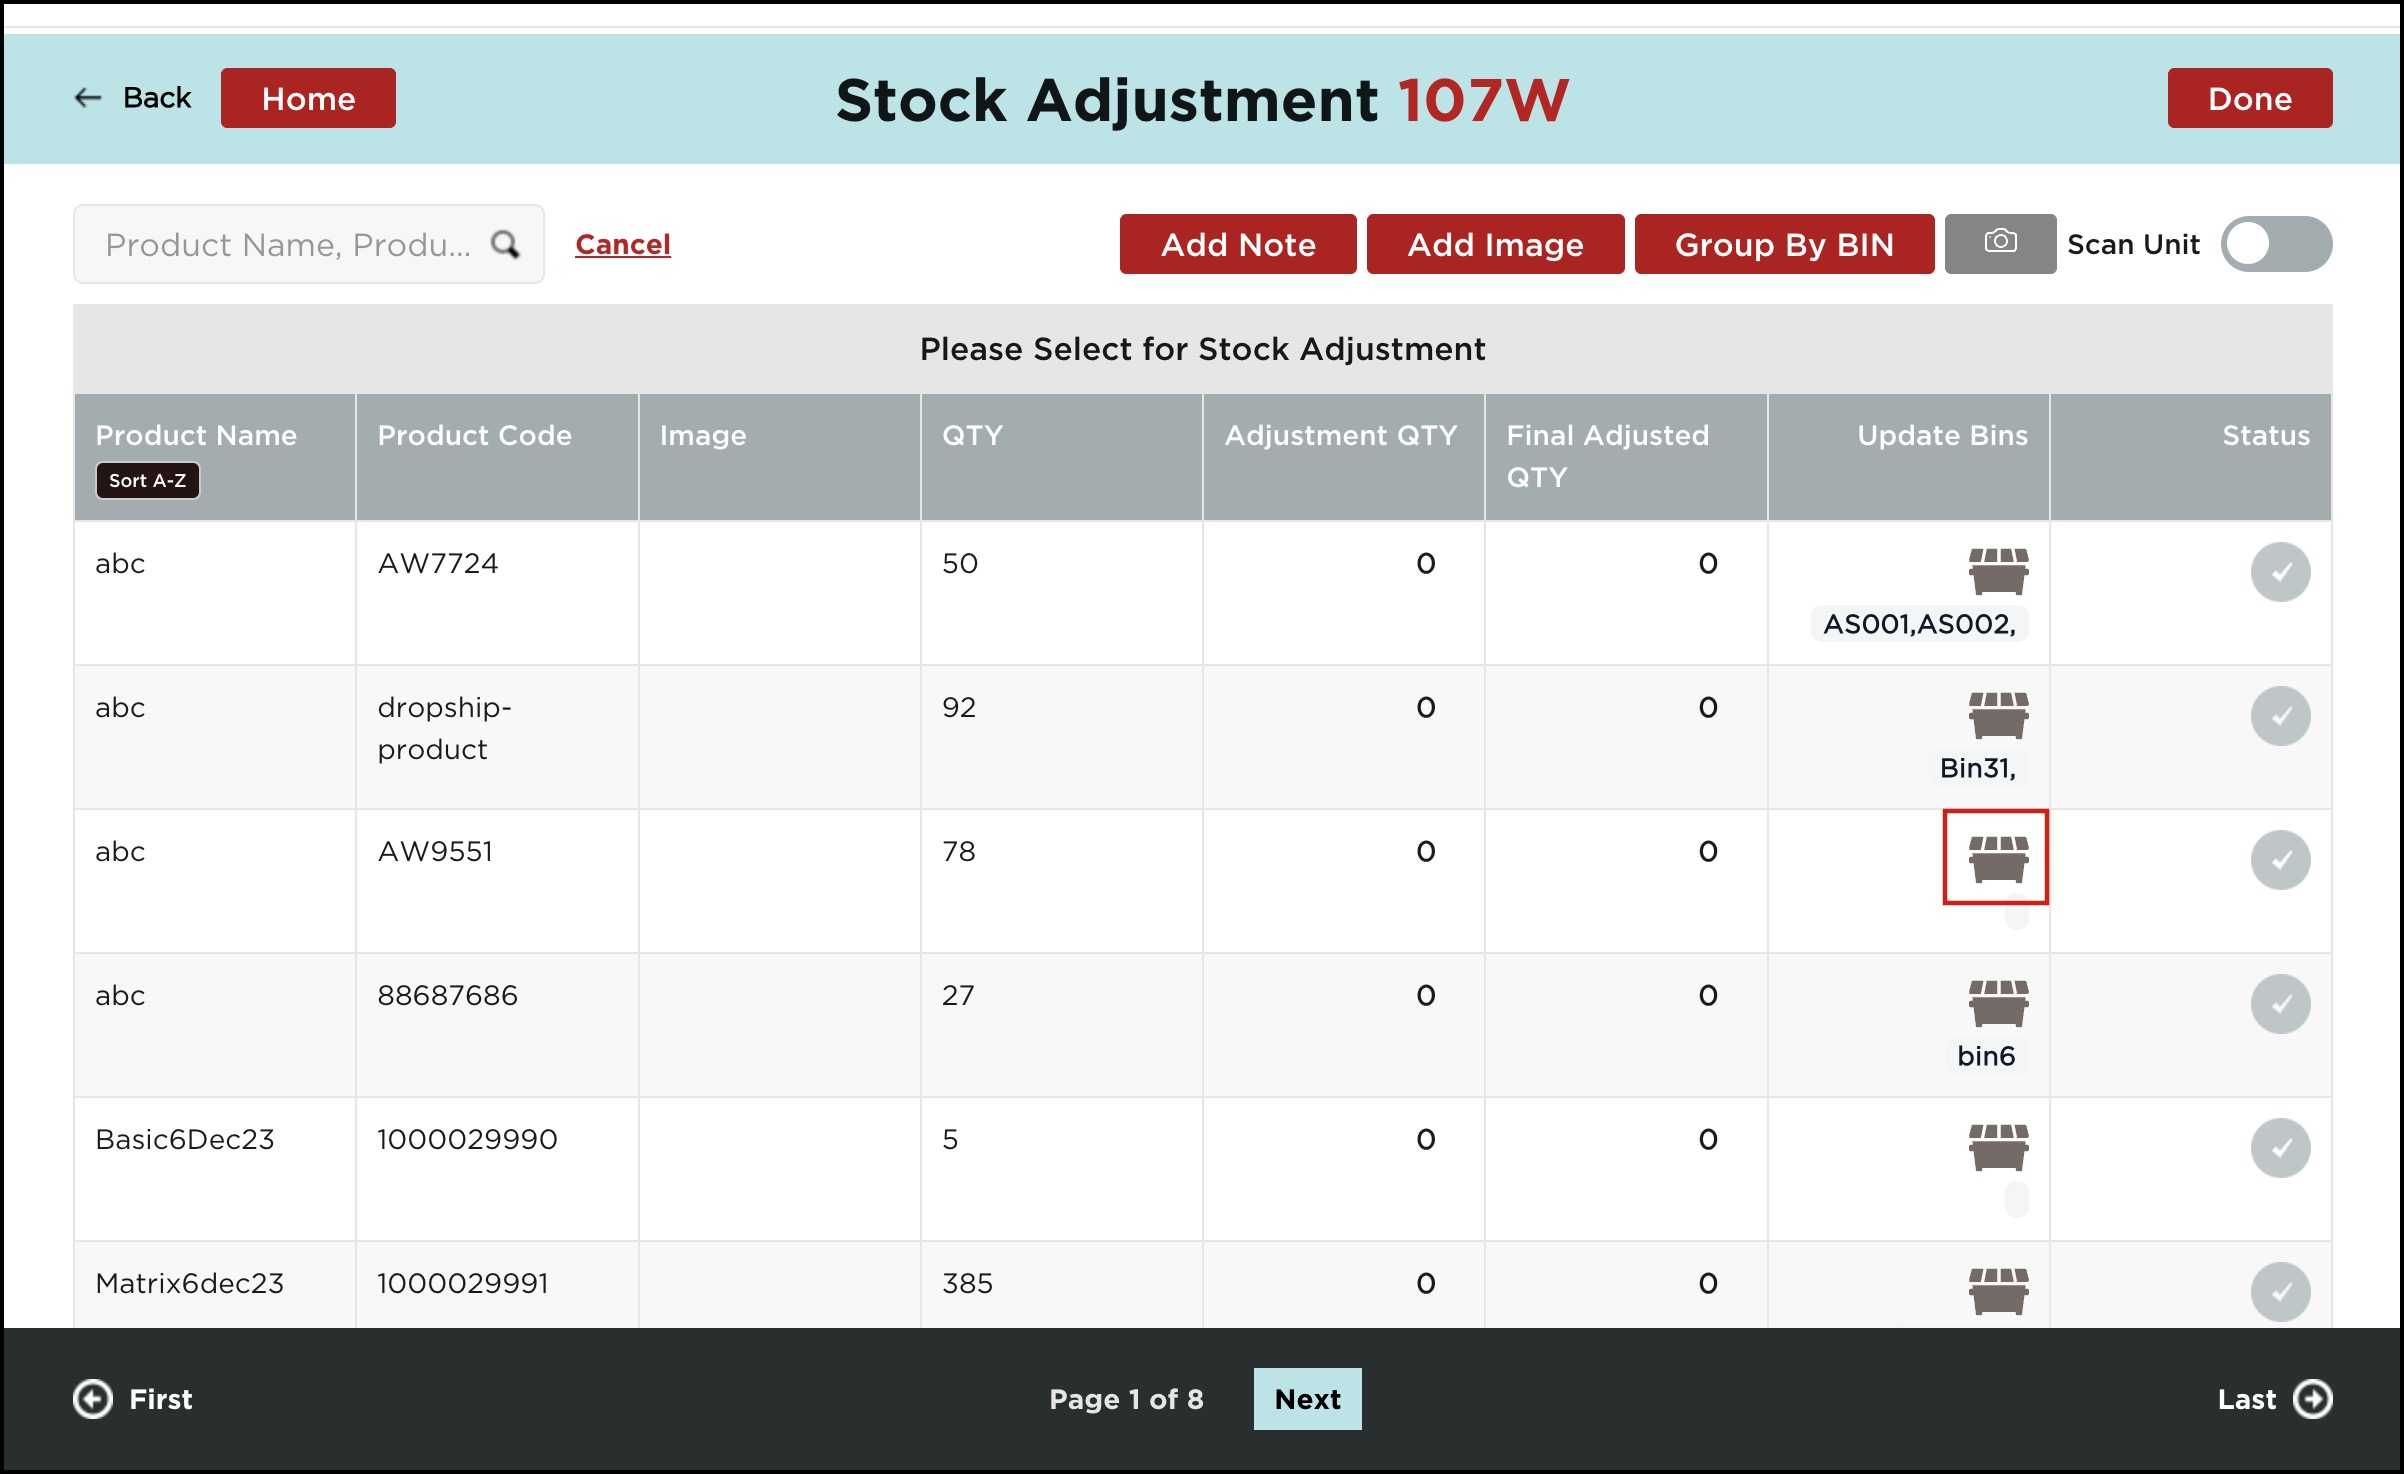
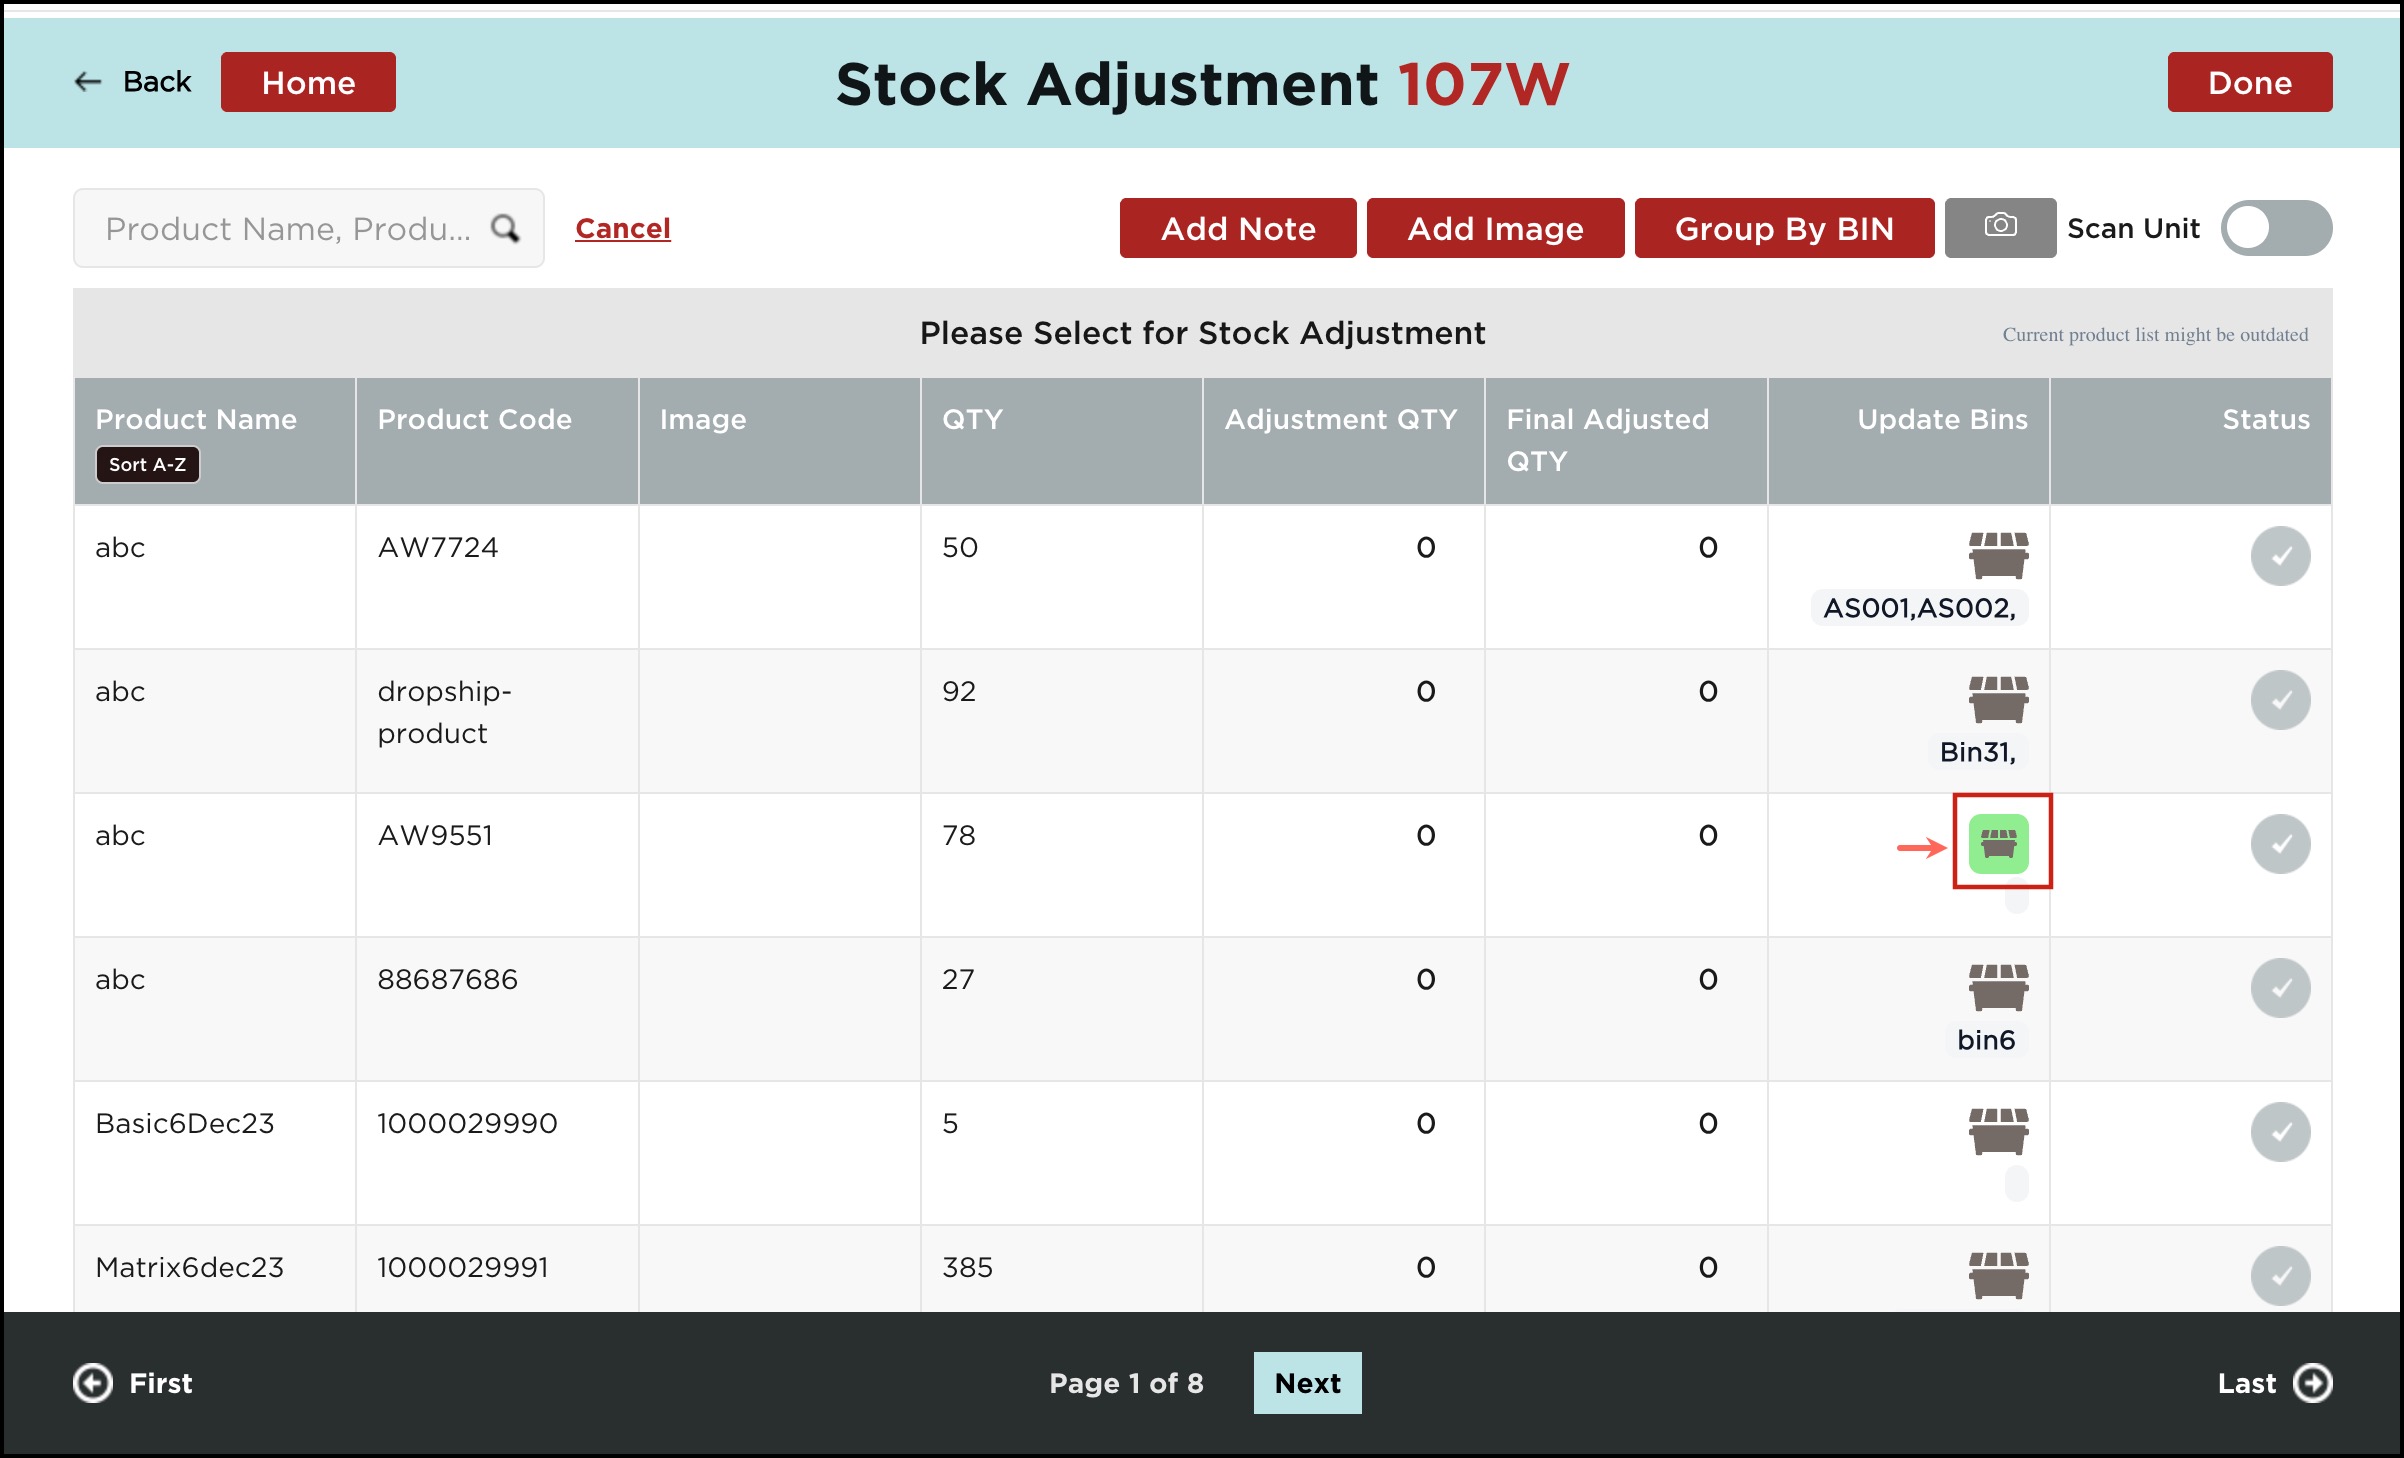
- Here, you can see an additional column called Update Bins
- For each product, you can add a bin location or multiple bins by clicking on the bin icon.
- Let's proceed by clicking on the bin icon.
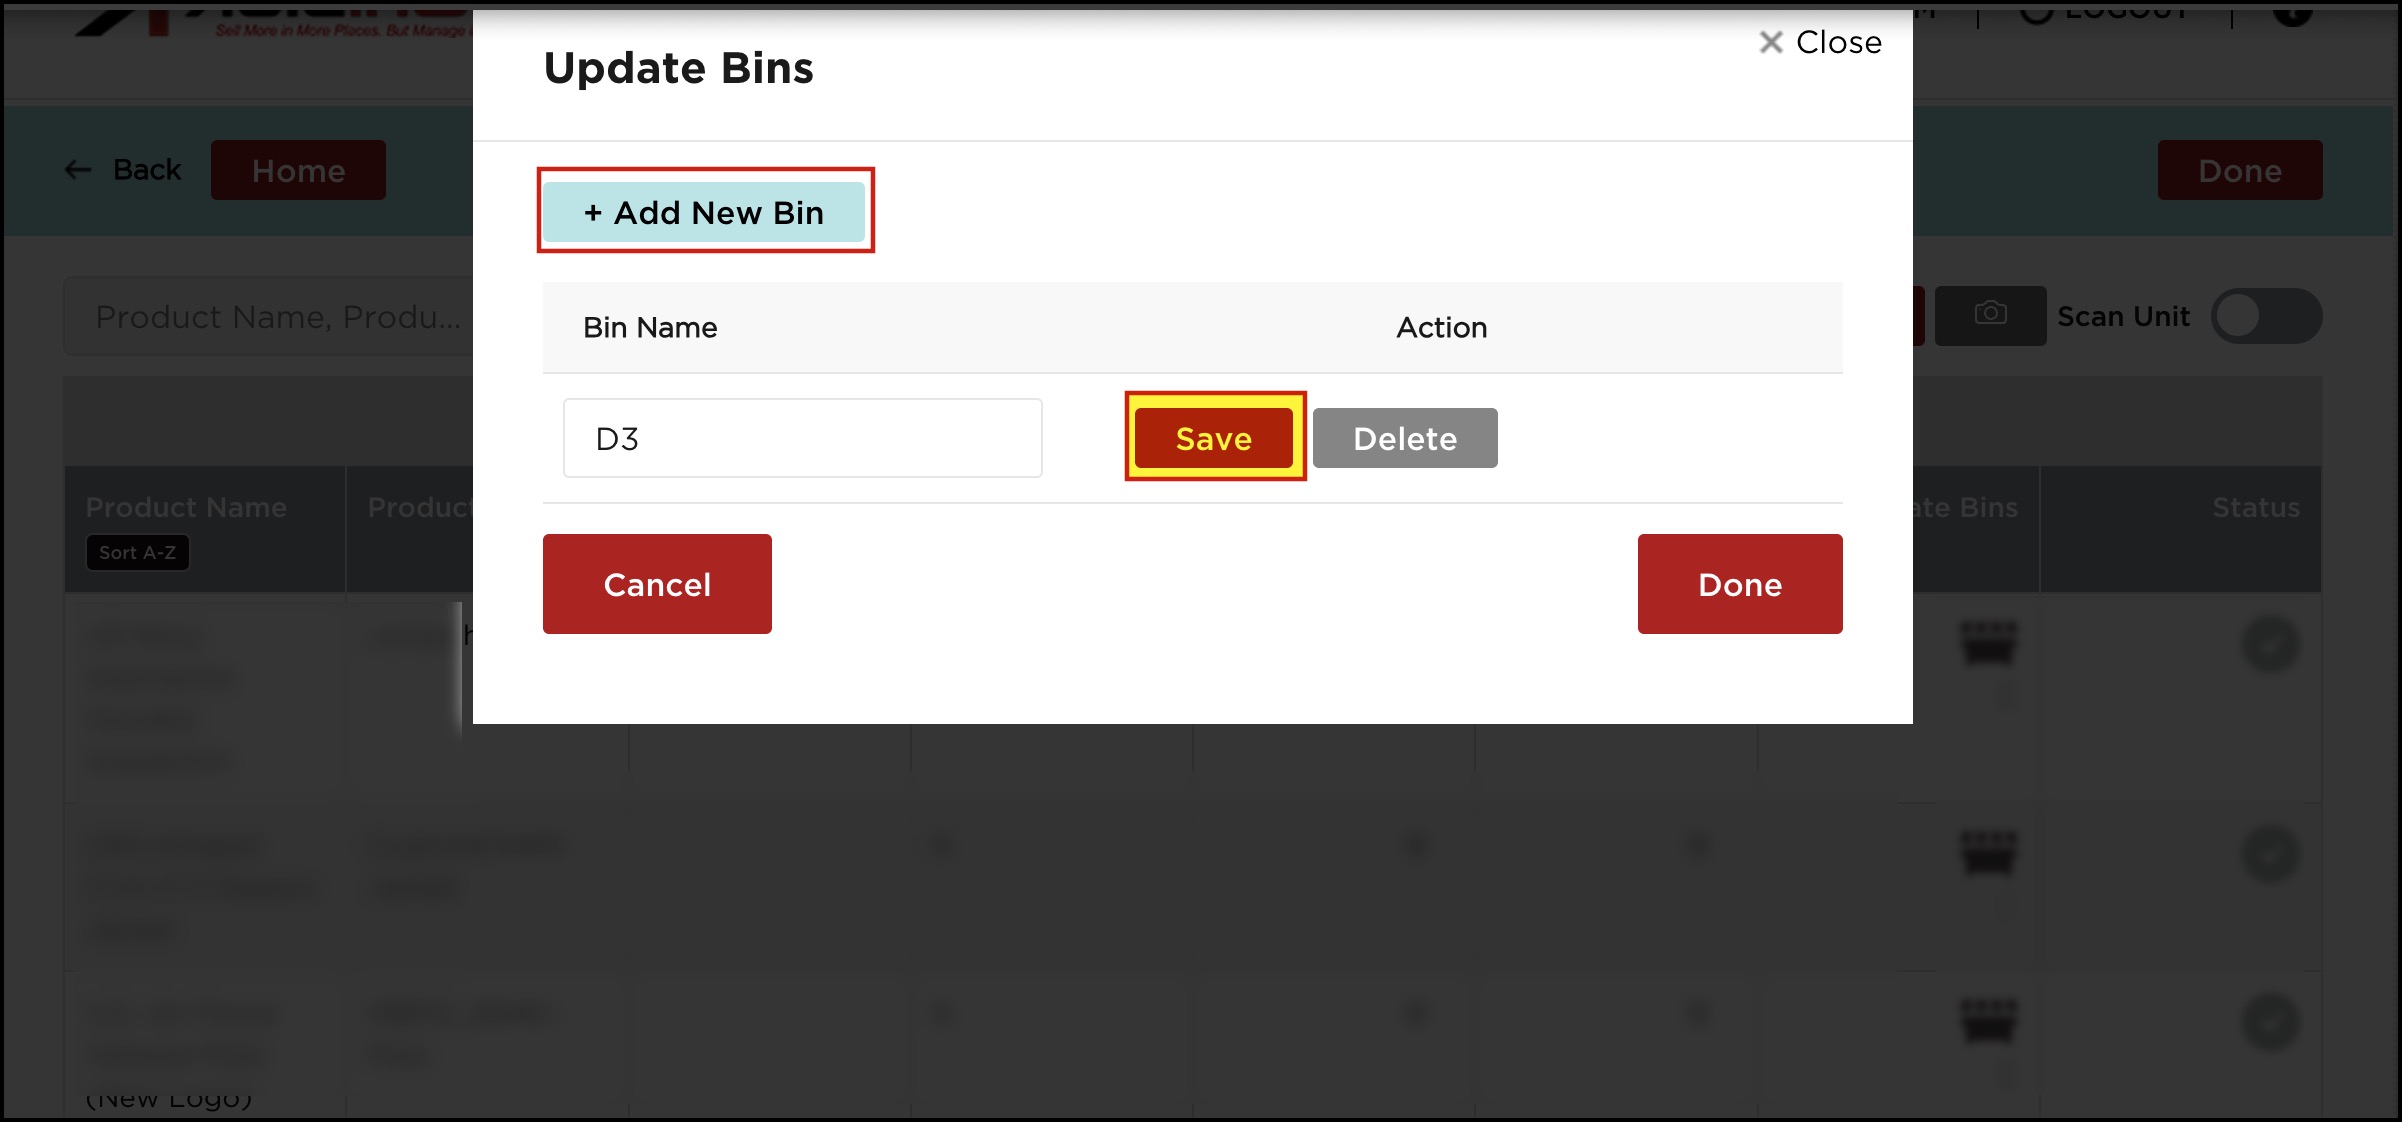
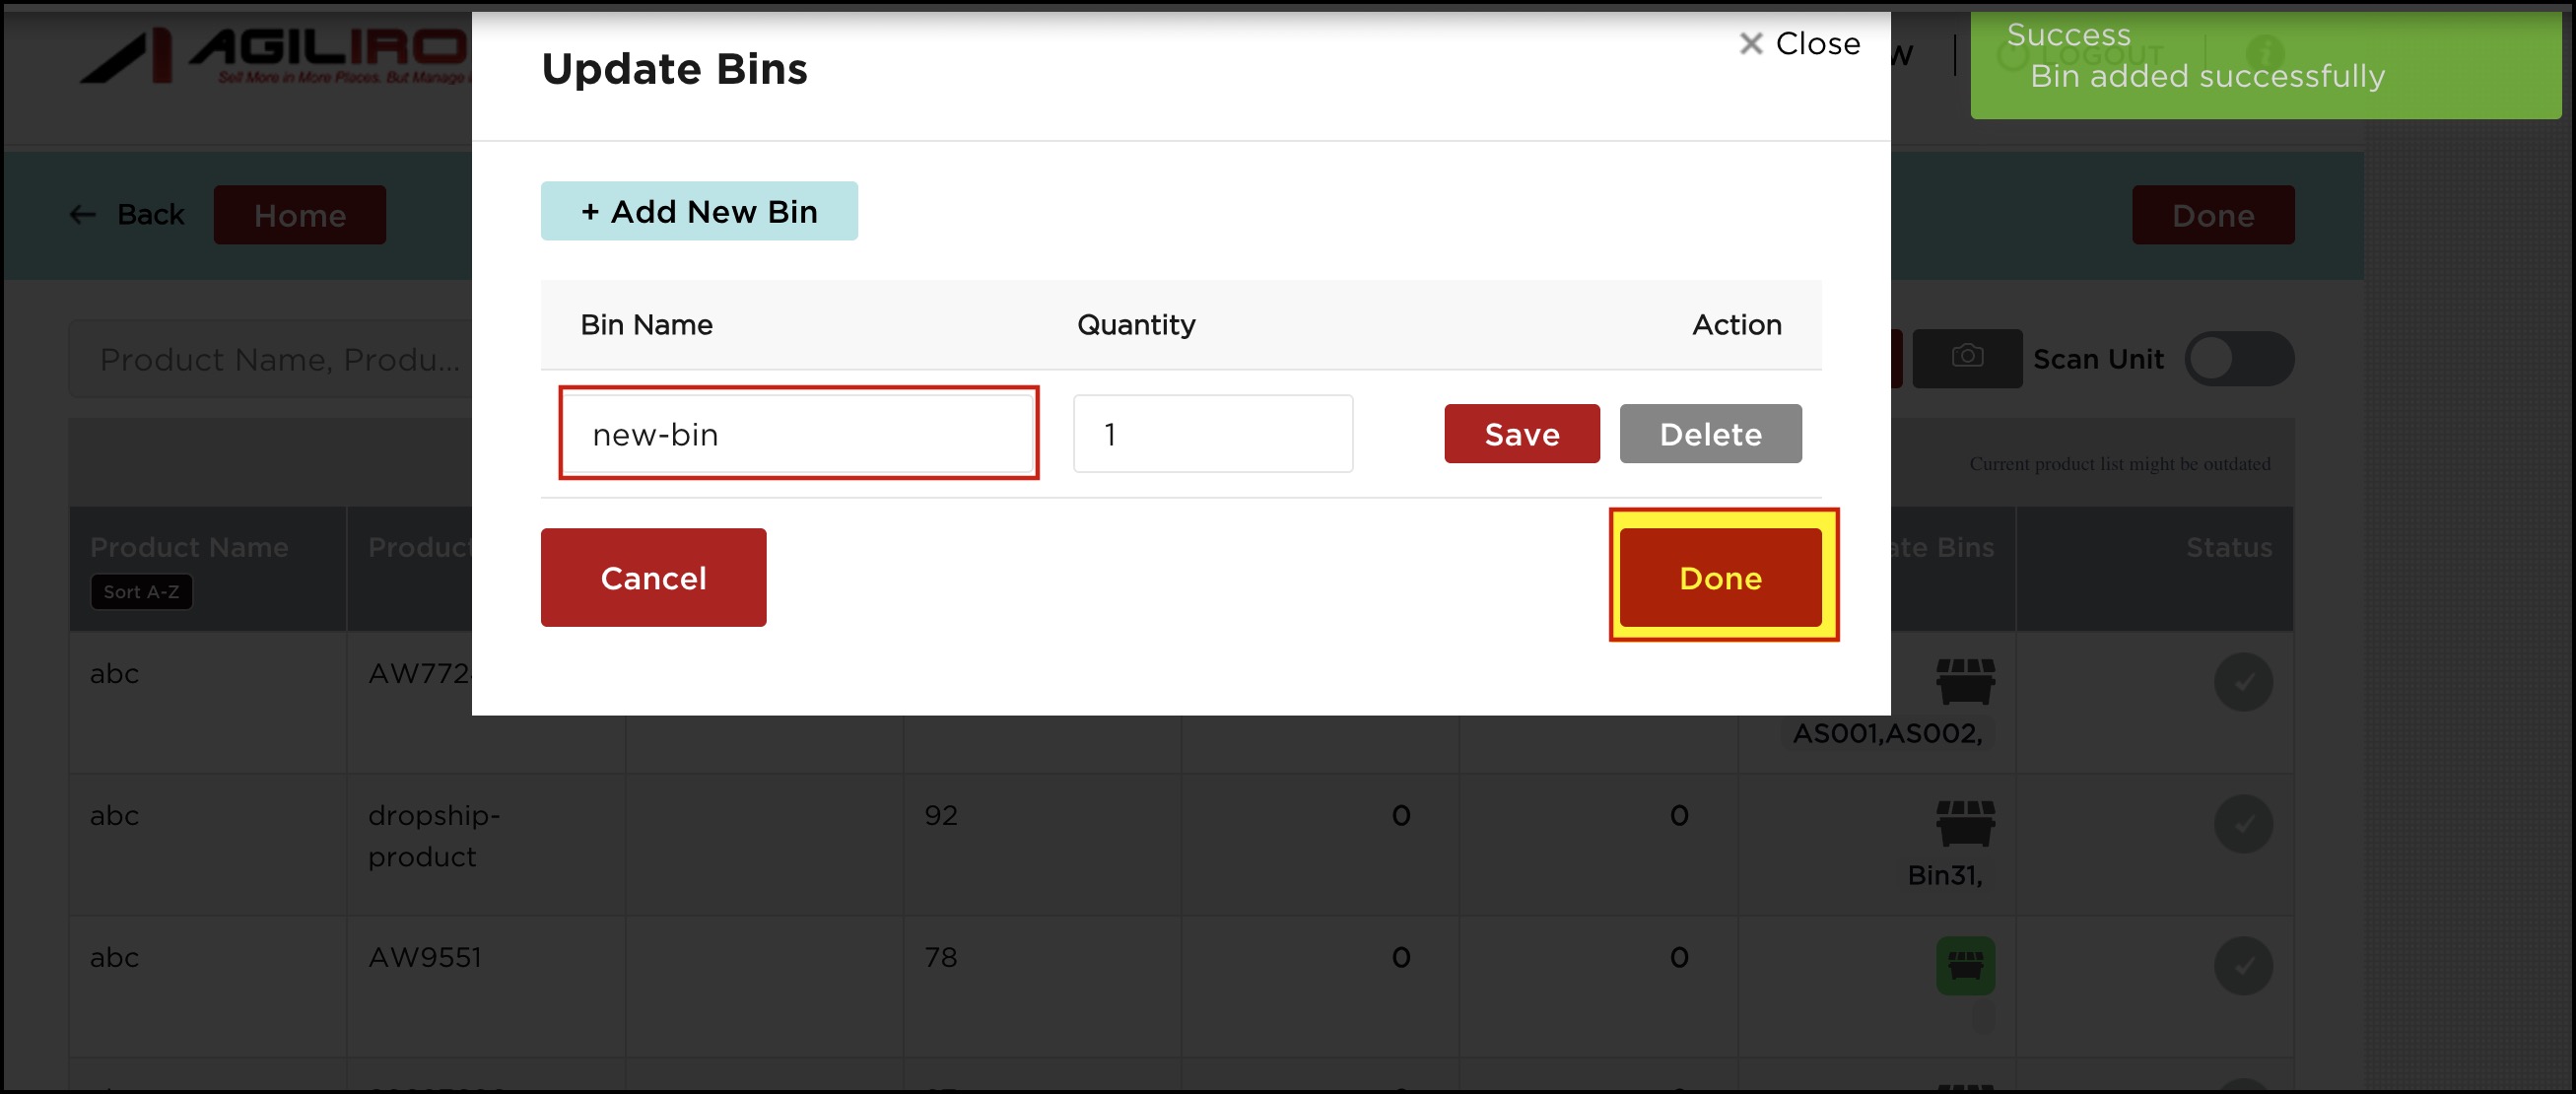
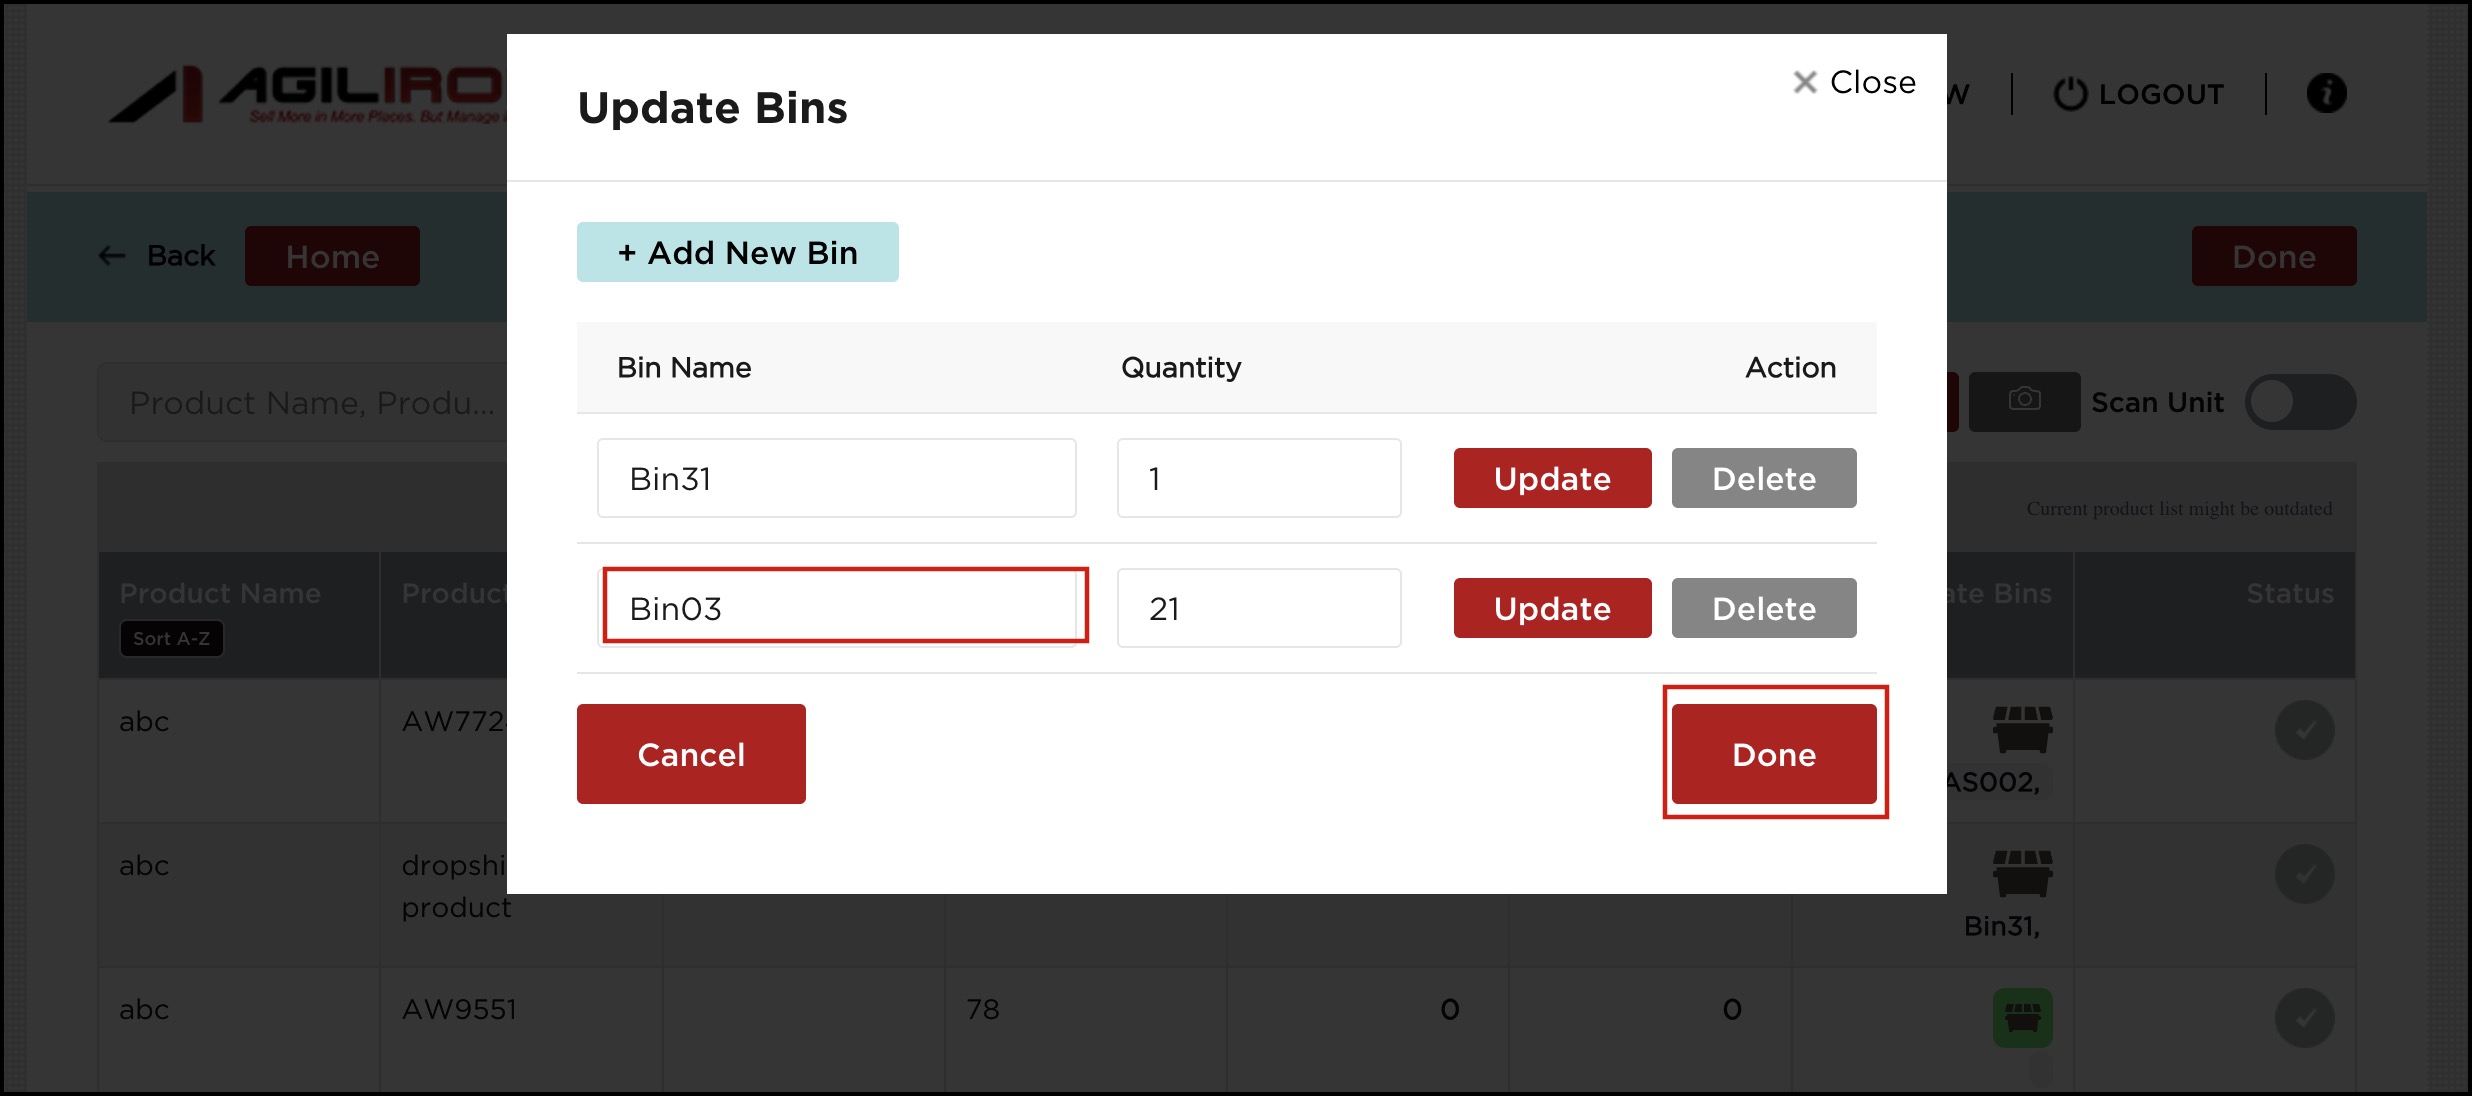
- The Update Bins pop-up screen will appear. Enter the Bin Name you want and click Save.
- You'll see a message saying that the bin was updated successfully.
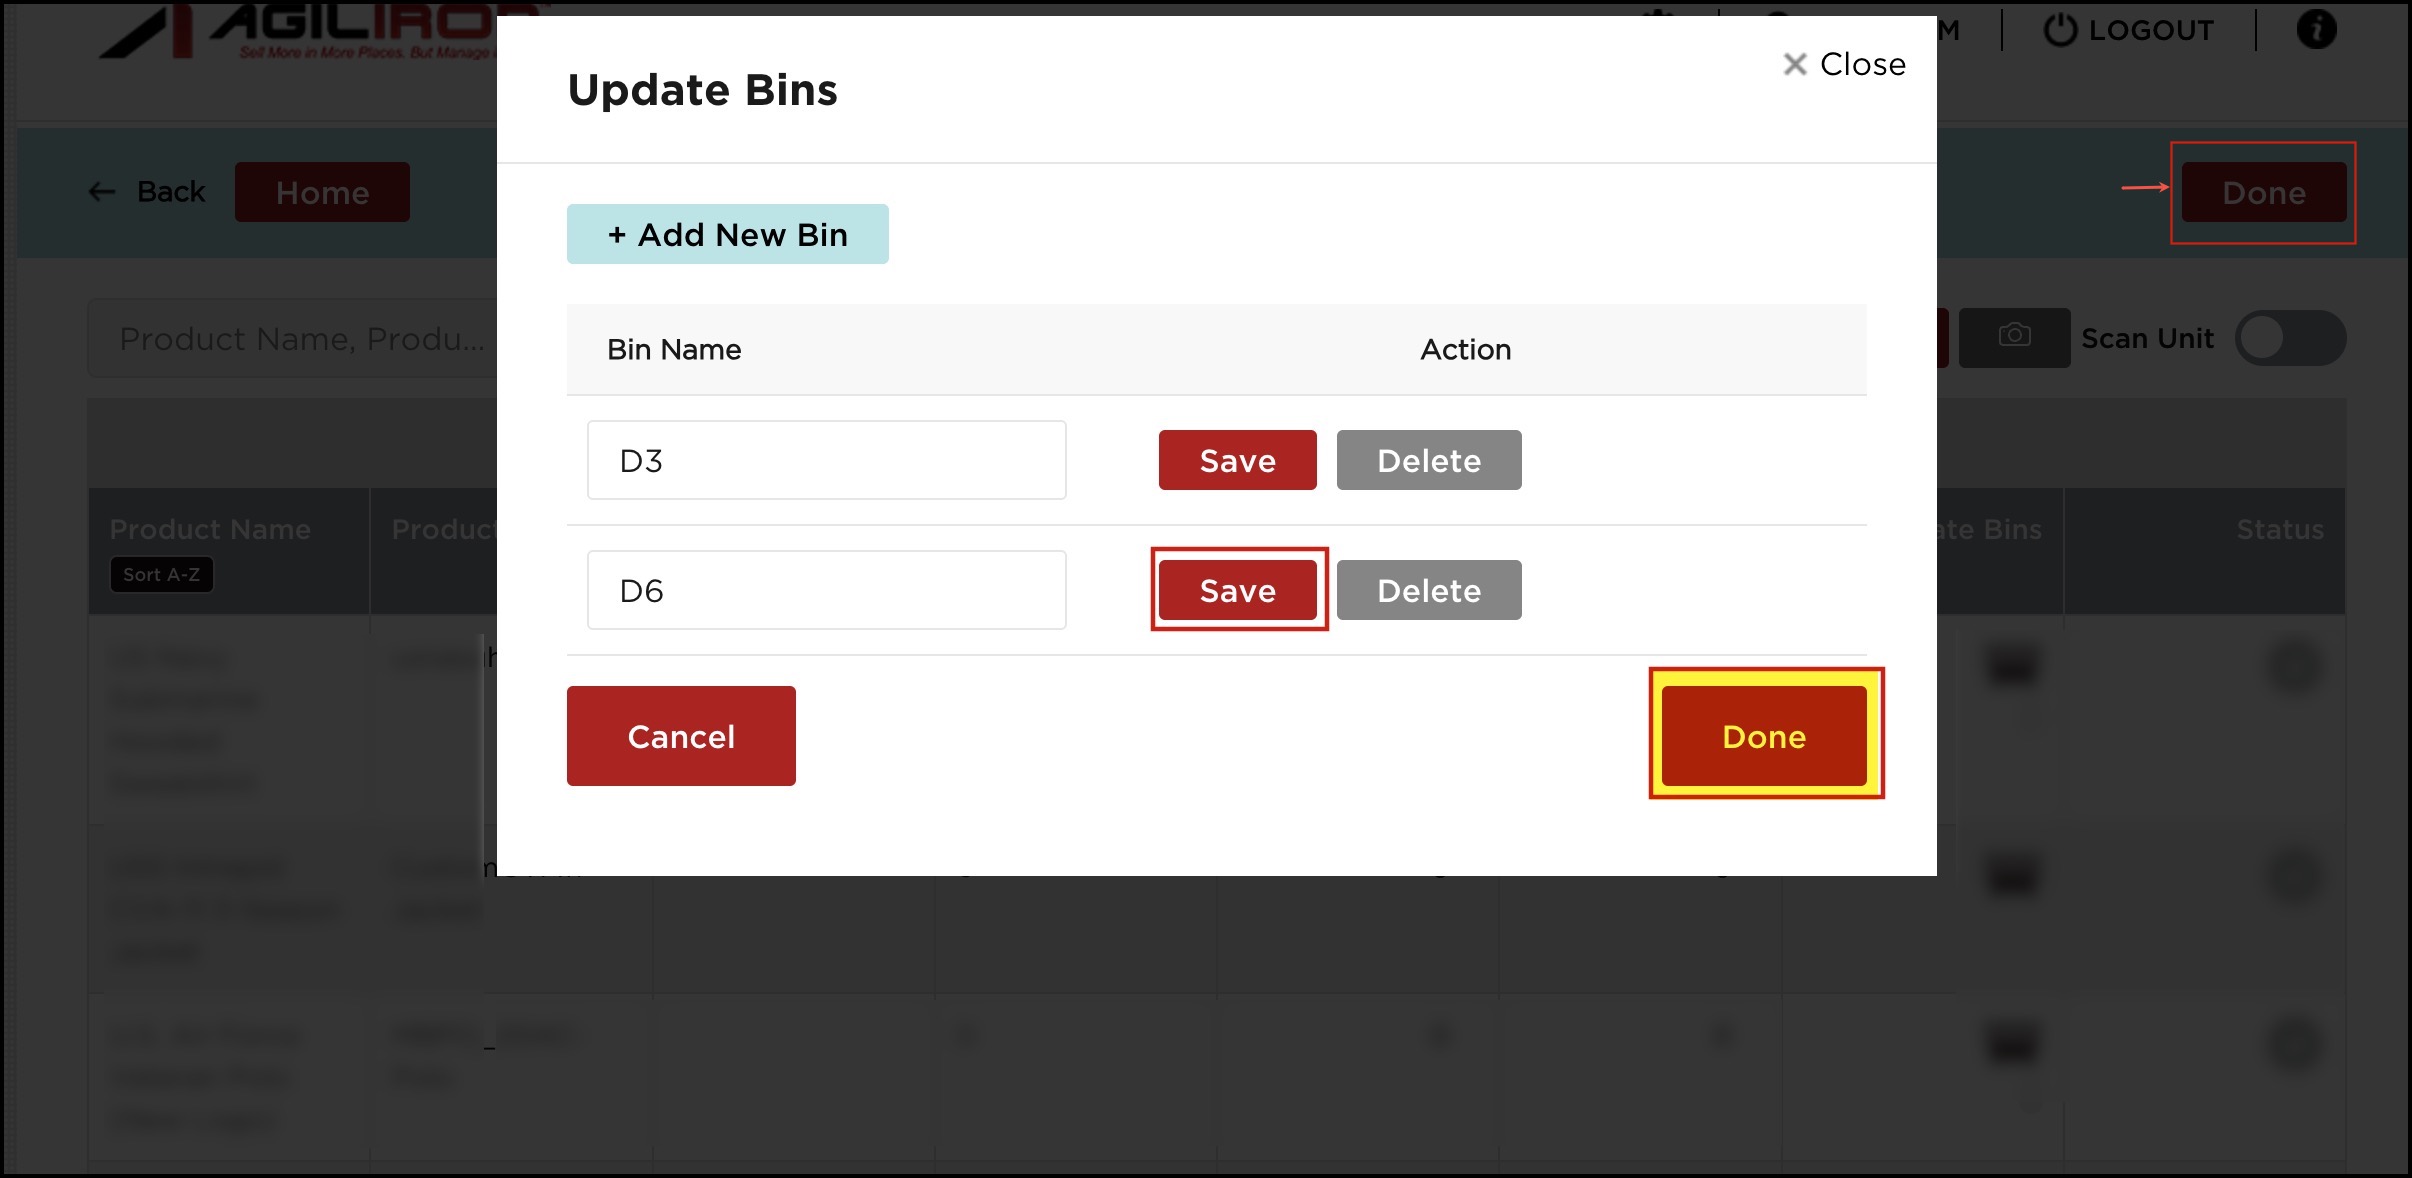
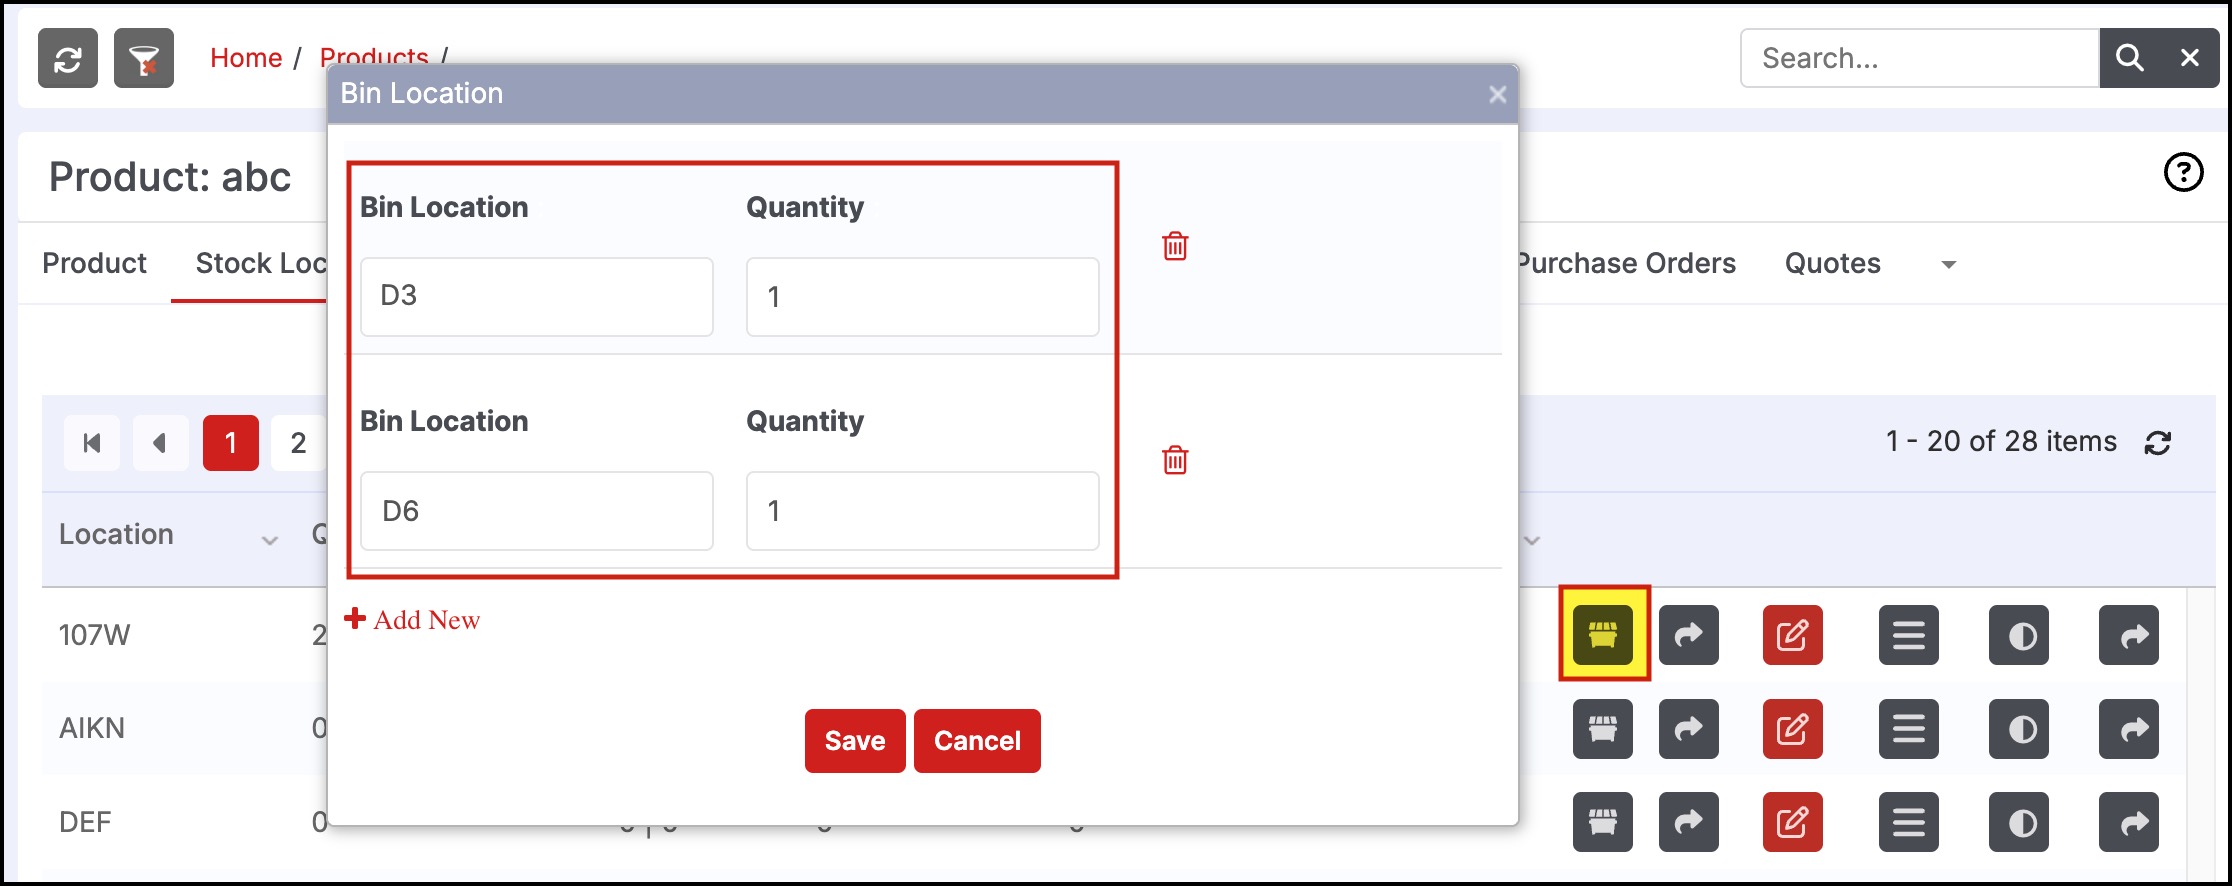
- You can also add multiple bin locations by clicking on the + Add New Bin button.
- We have added 2 bins - D3 and D6. Save each bin.
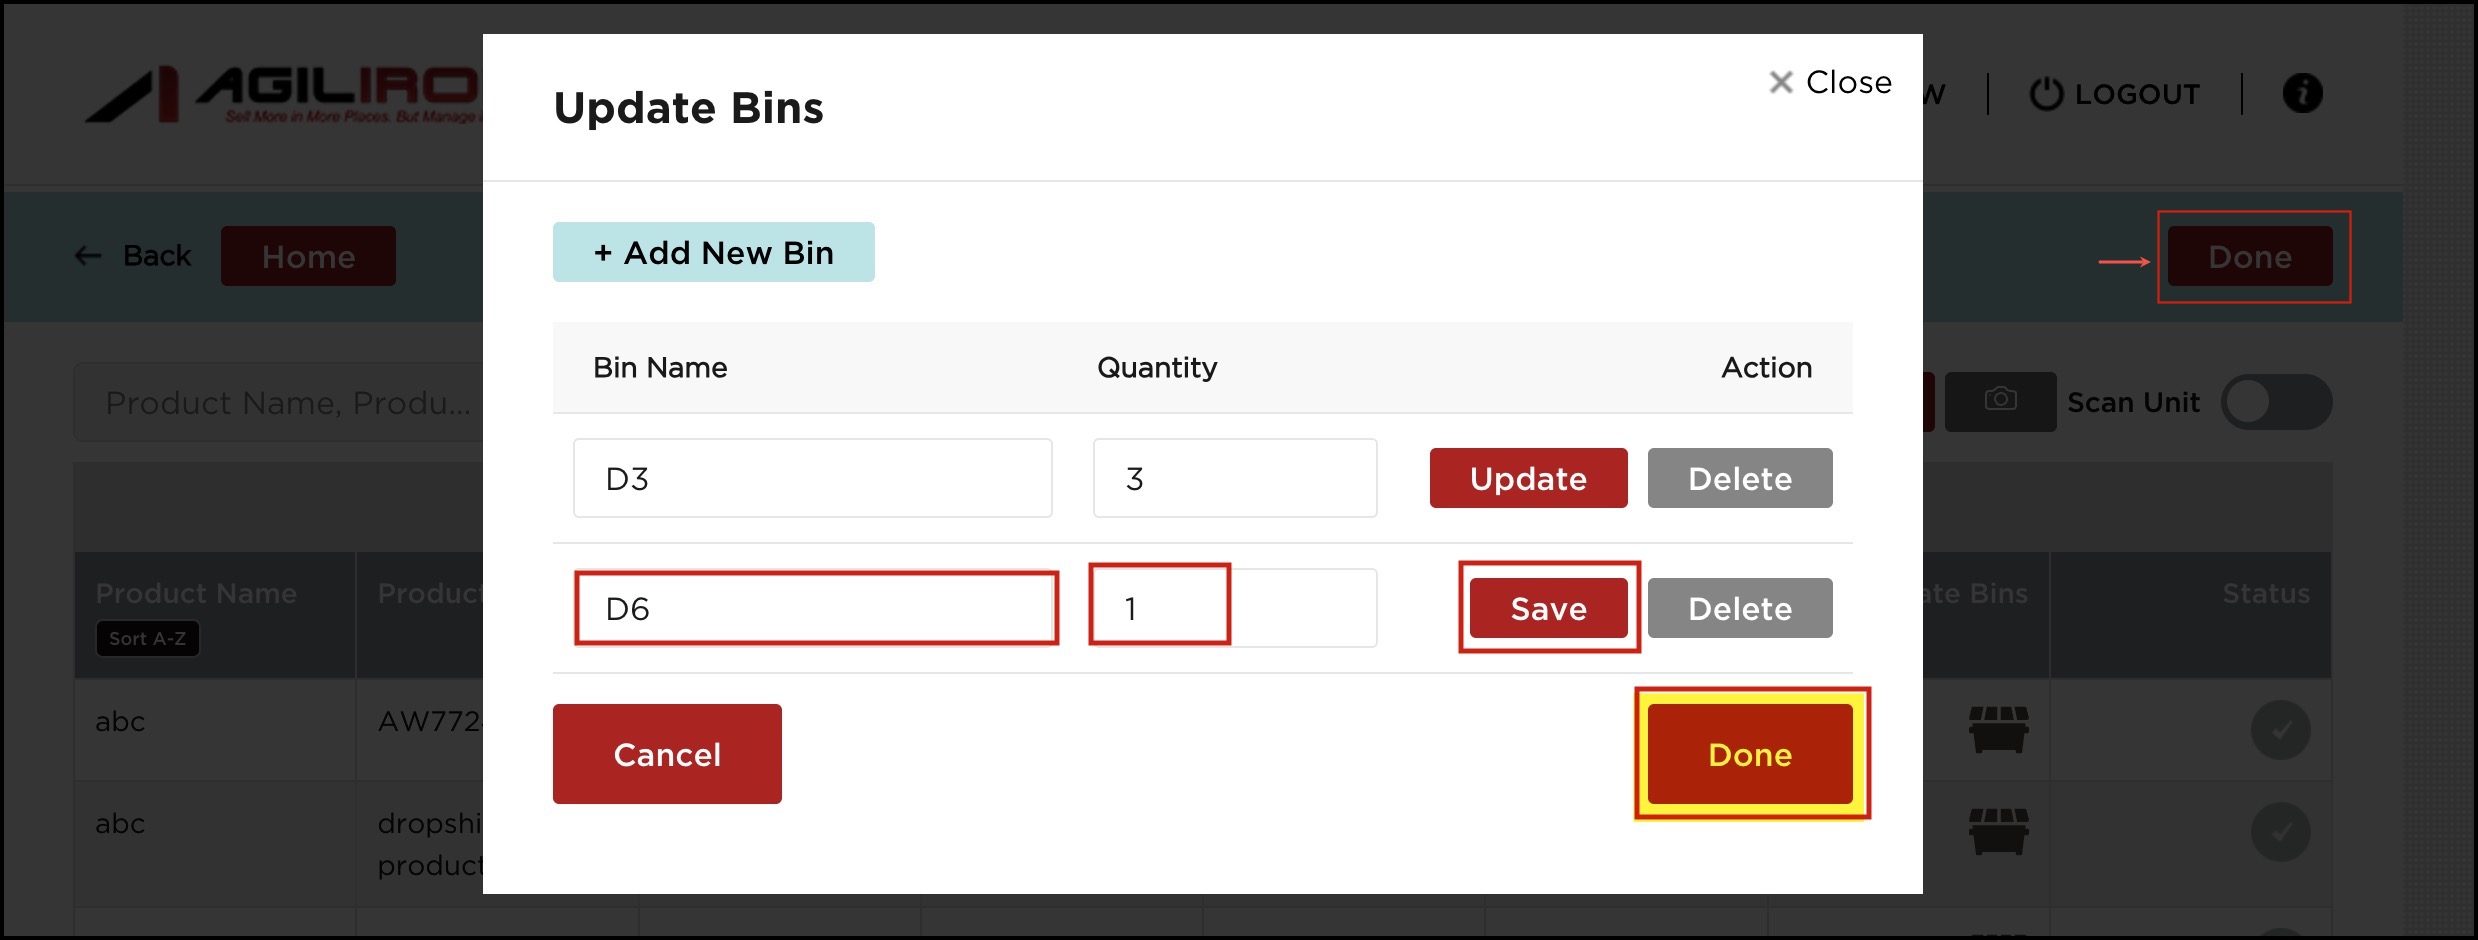
- Once the bins have been added, click on Done.
- Also, click on Done on the Stock Adjustment flow main screen.
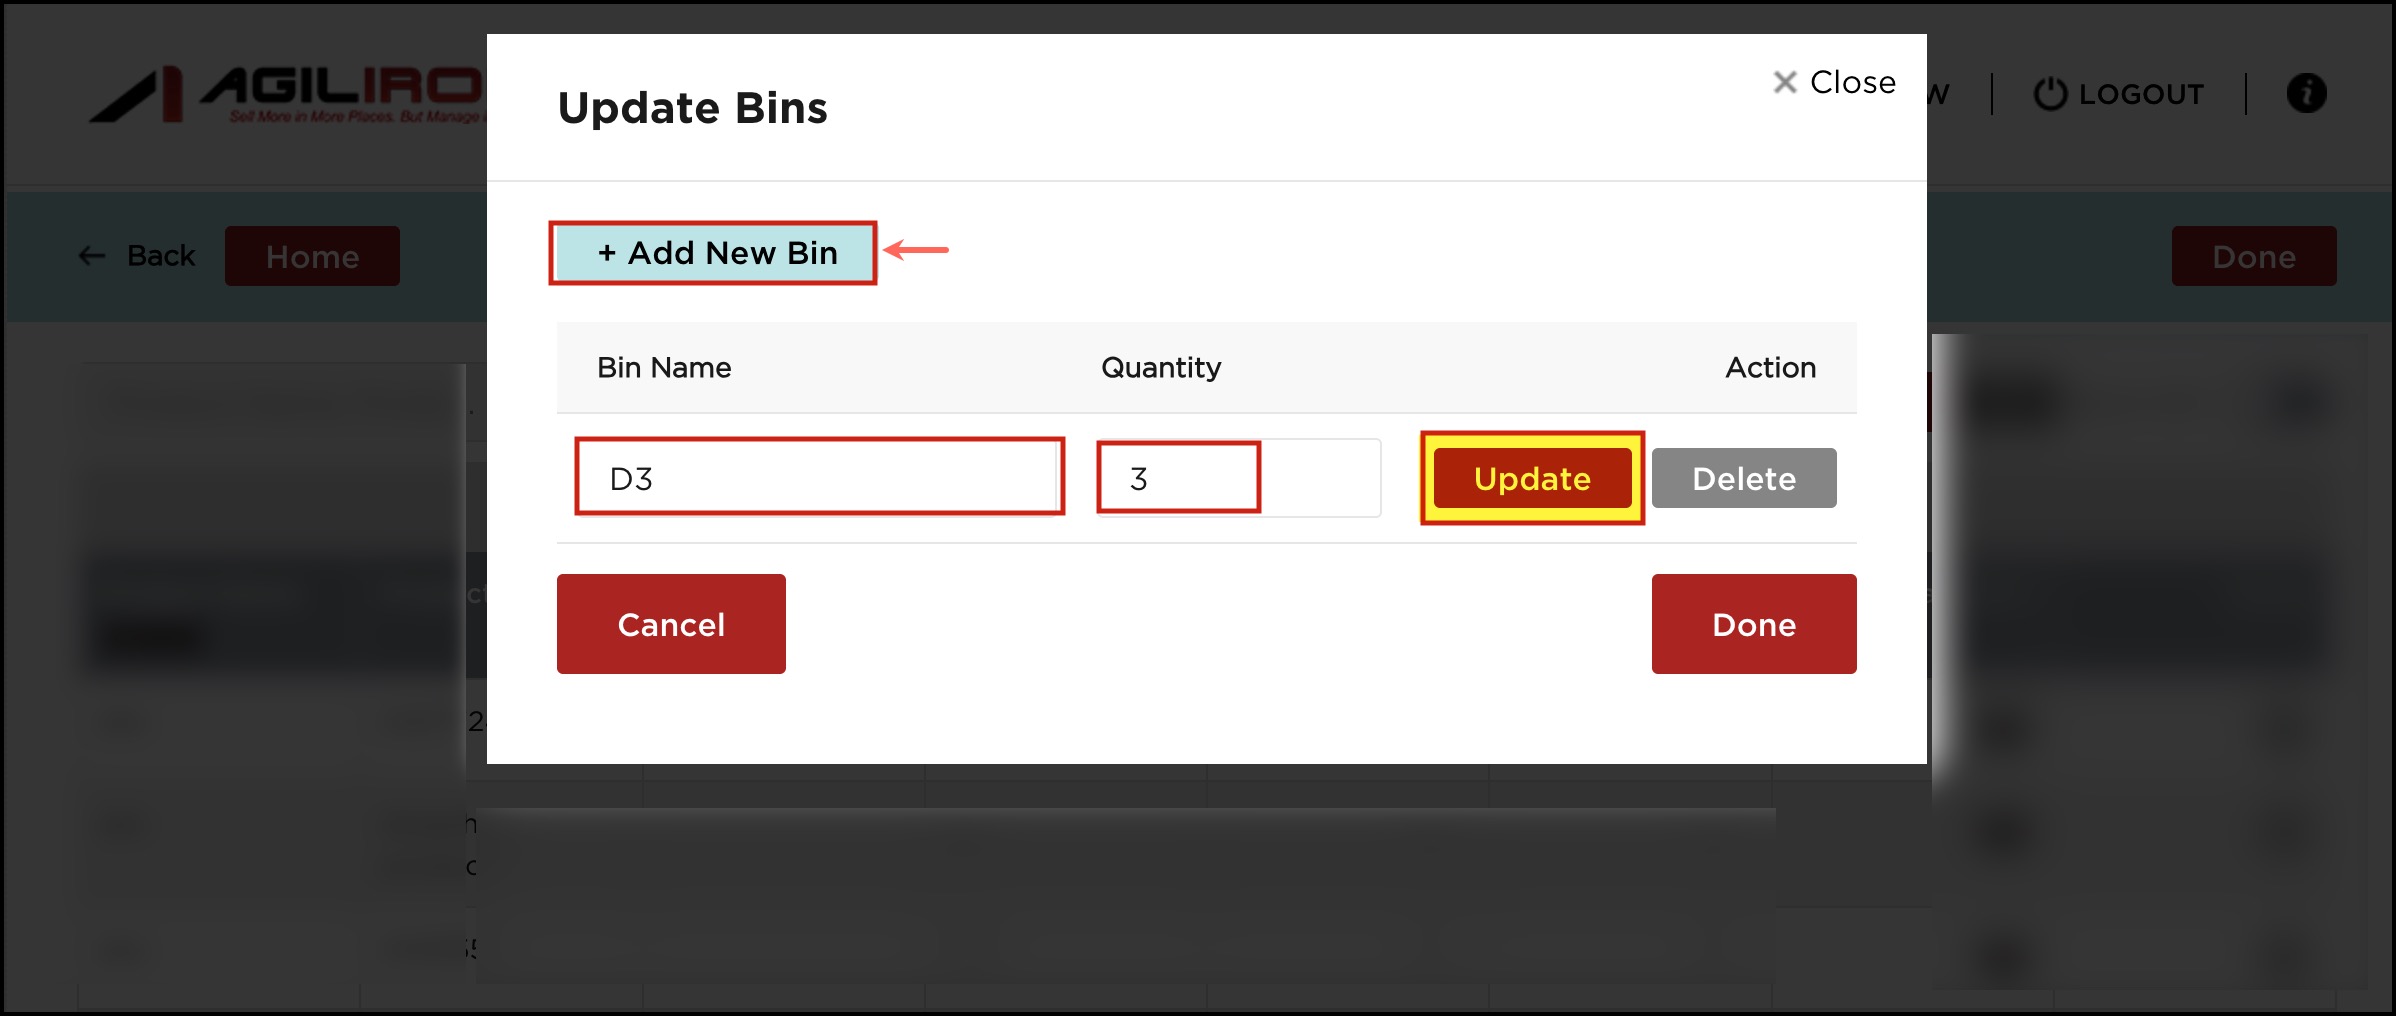
Note - To Enable Bin Location Quantity in the Update Bins feature:
Contact [email protected].
In case this setting is enabled, you can see an additional Quantity column in the Update Bins pop-up screen. Enter the Quantity you want to add to that particular bin location.
Note - Refer to New Enhancement for Updating Multiple Product Bin Locations - All at Once:, the section added in this guide, to understand what happens after you click on Done.
- After the bin locations have been updated for the products, go to the Stock Adjustment workflow and follow the process.
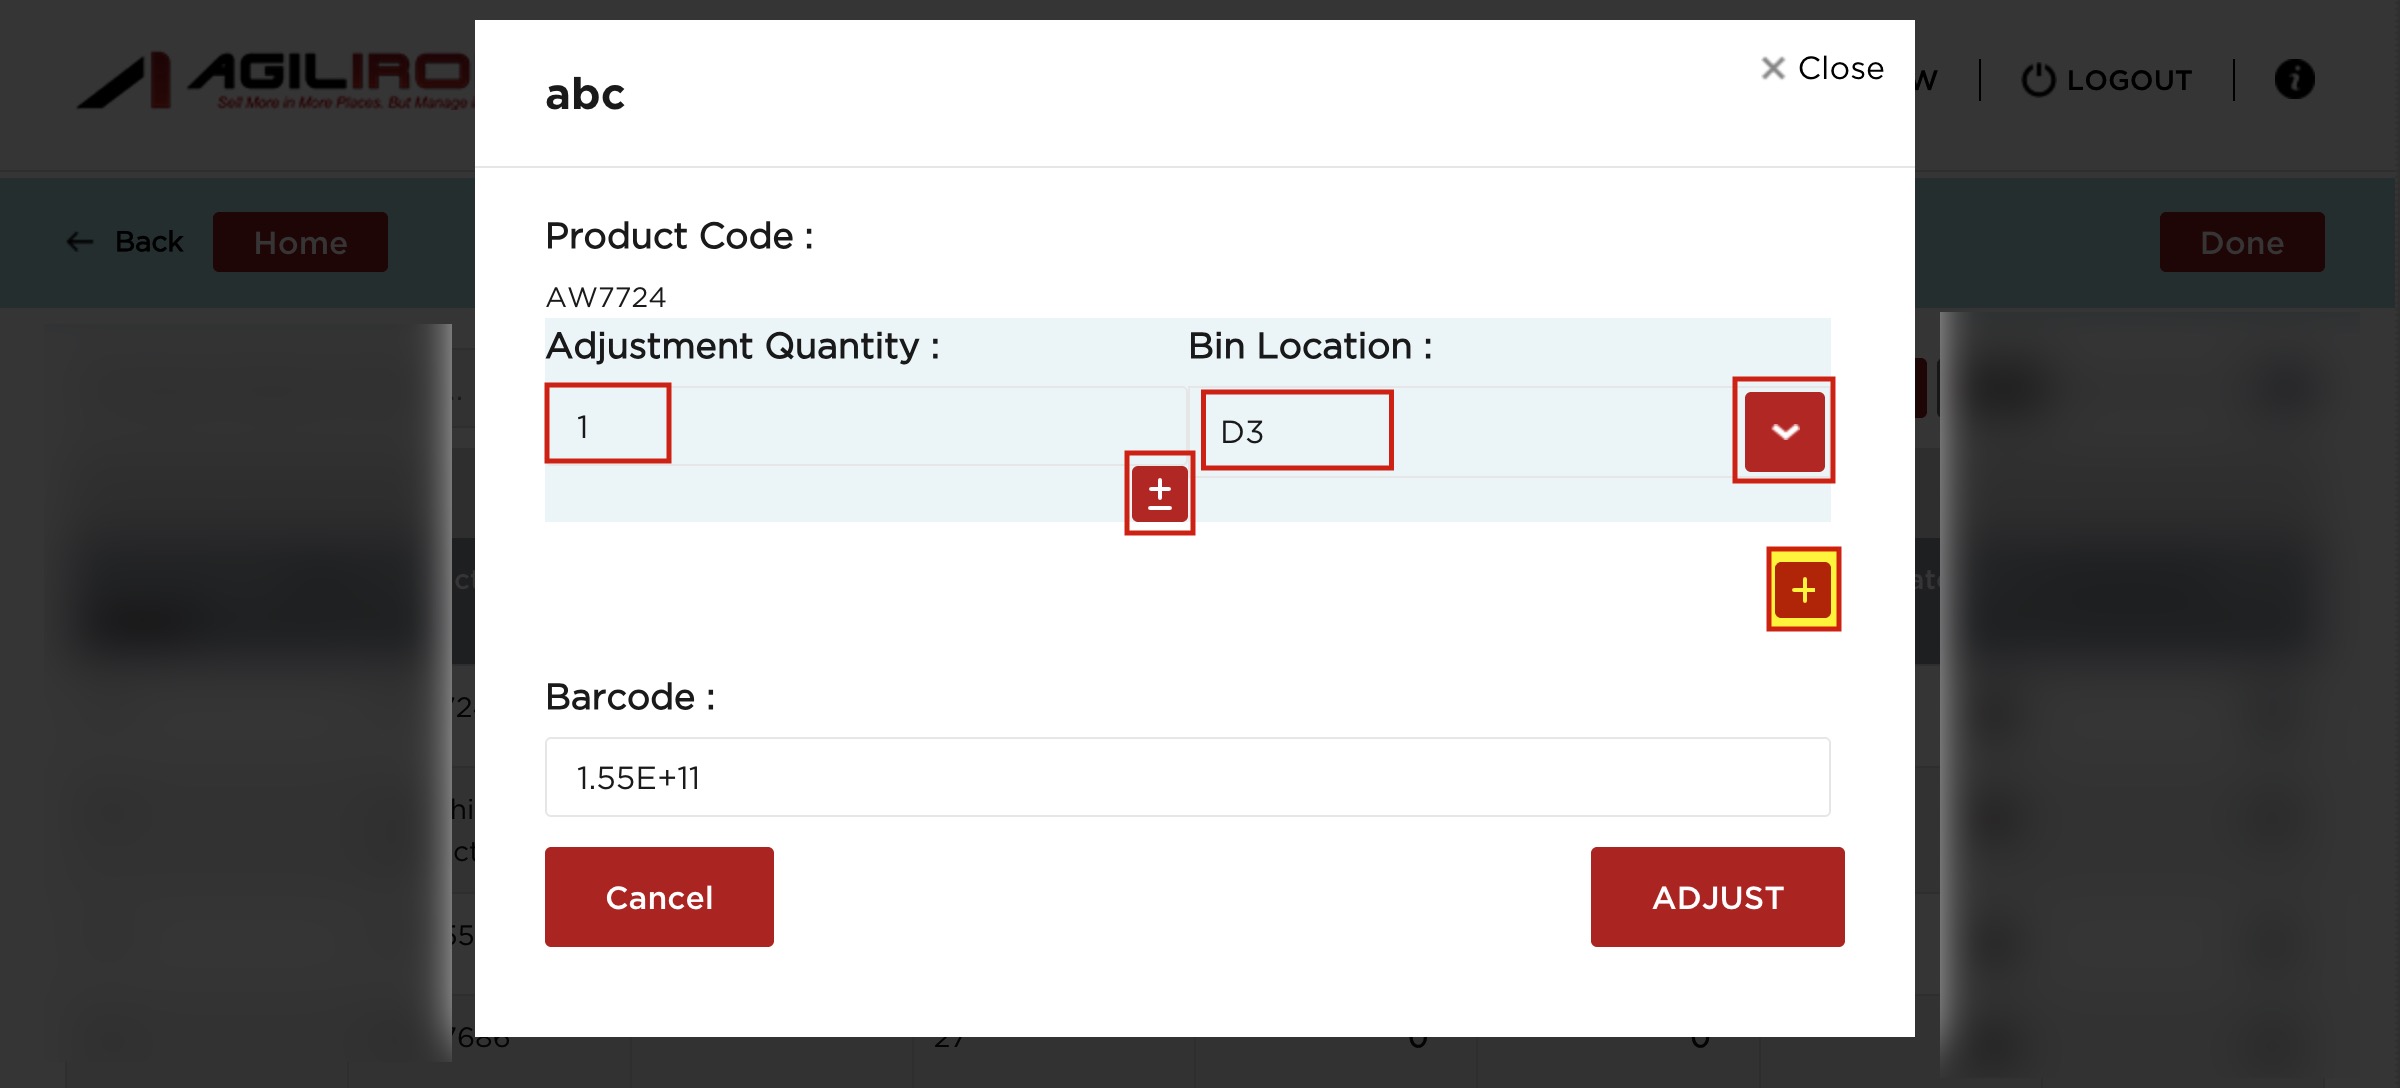
- So when the stock adjustment pop-up screen appears for that particular product, add the Adjustment quantity (increase or decrease). The Bin Location drop-down will list the bins that we have added. Choose the bin.
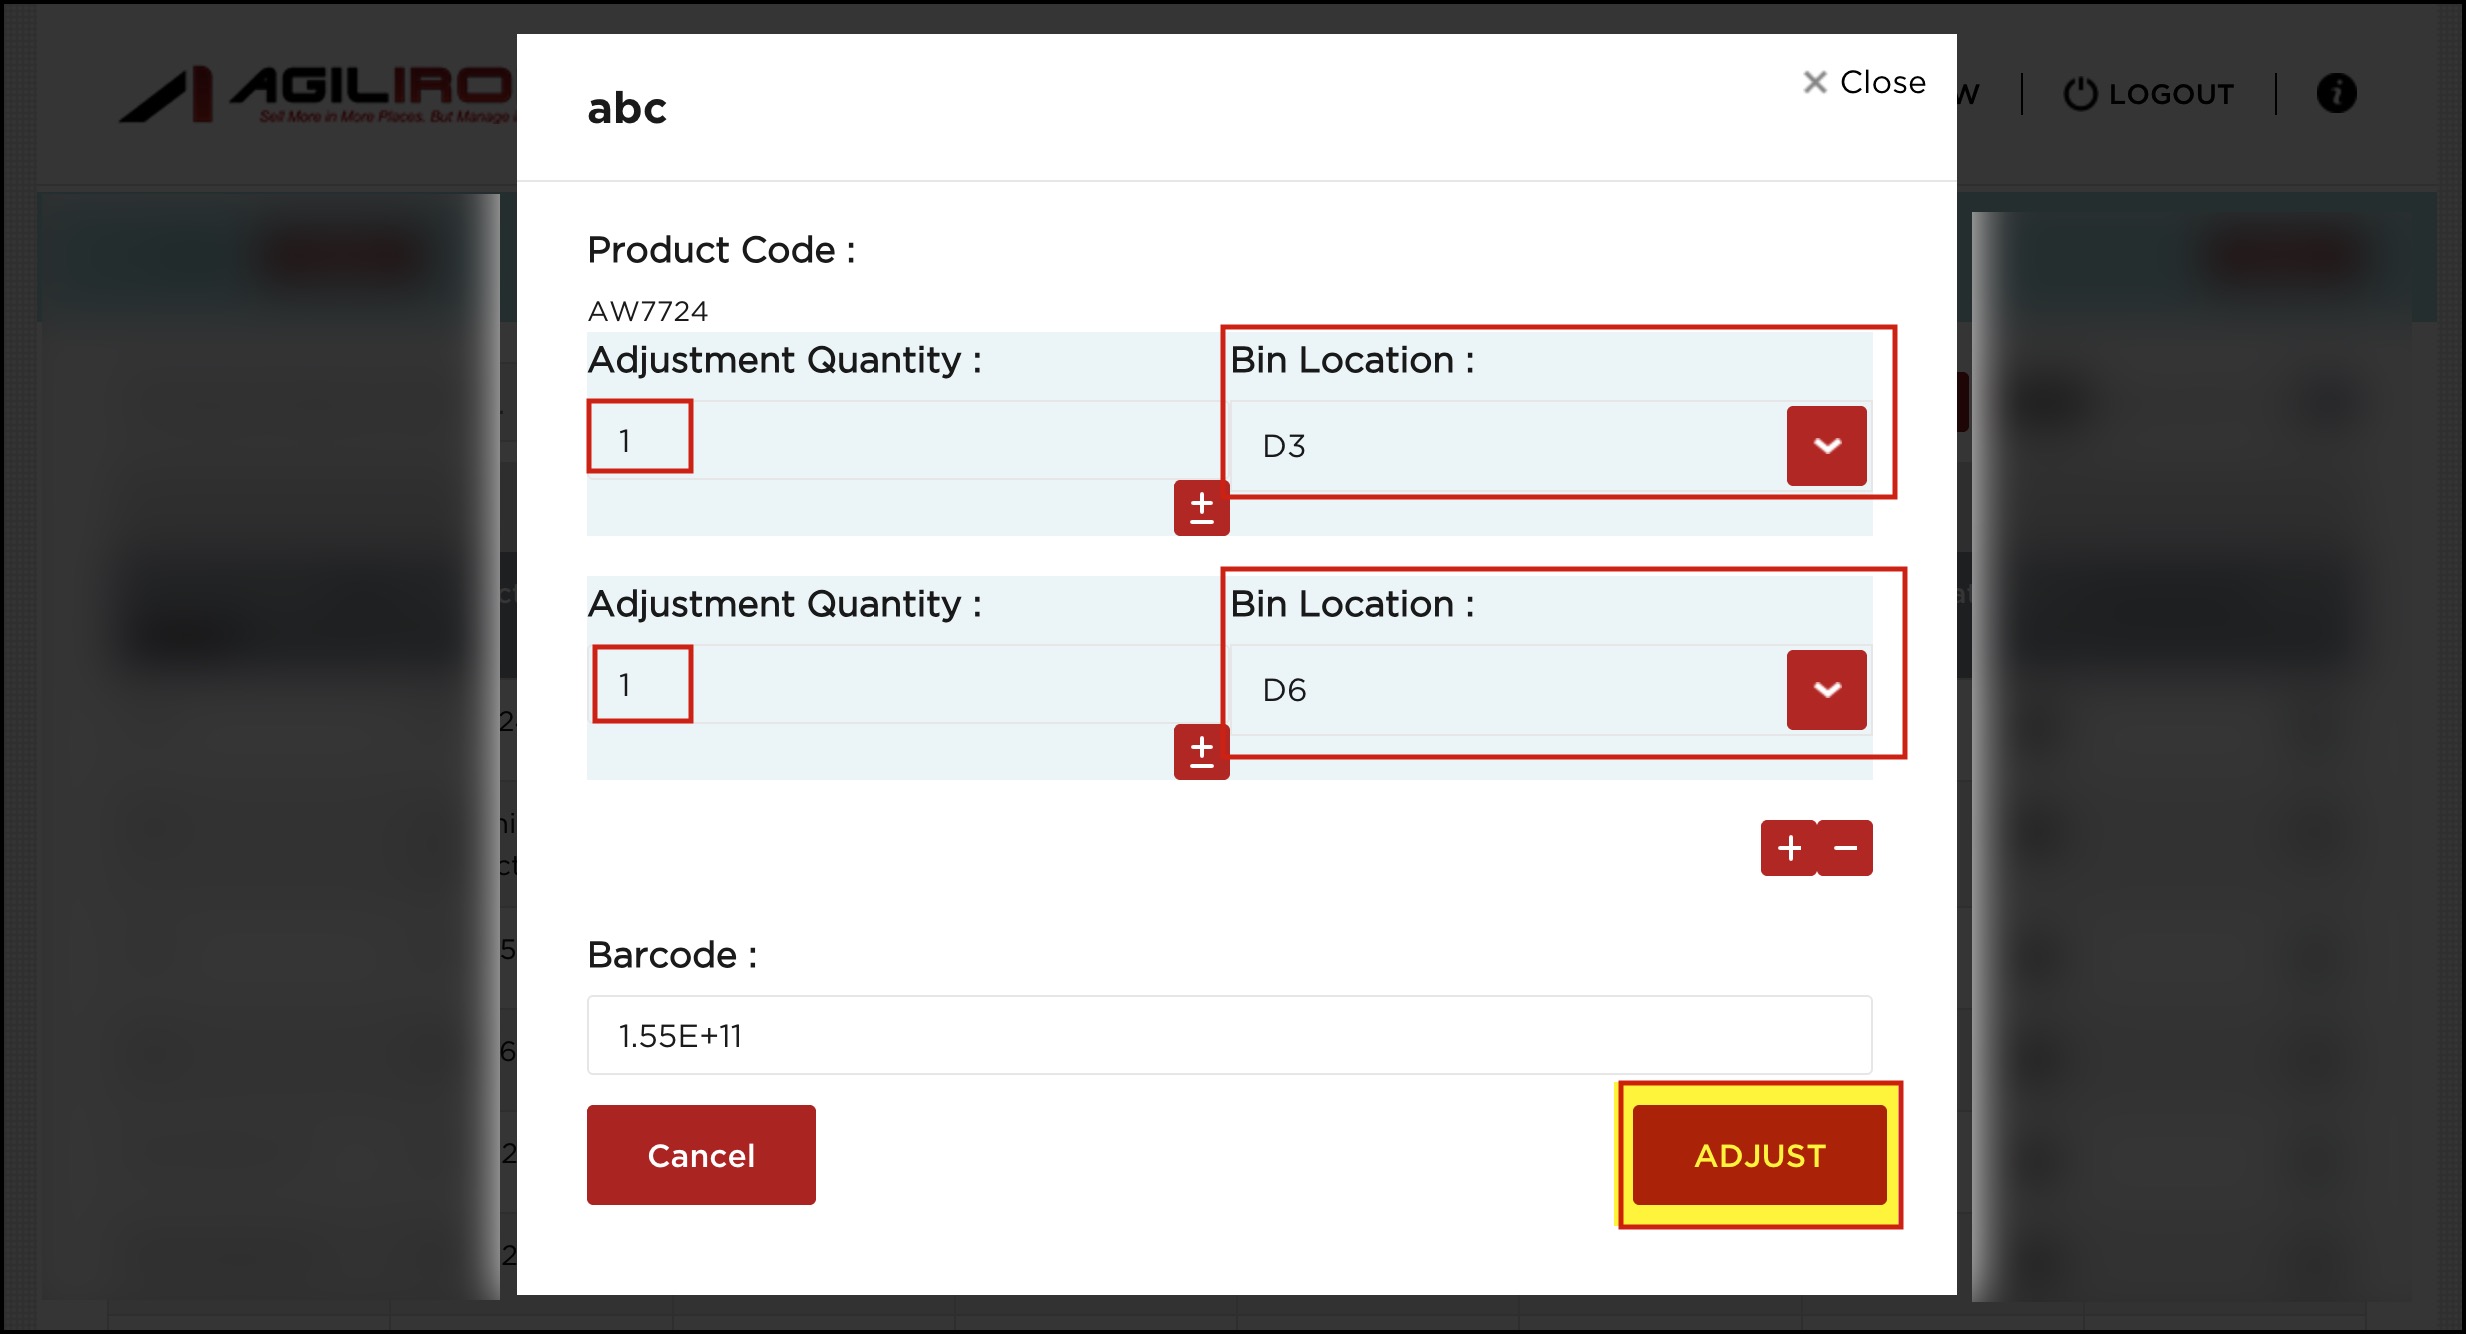
- In case you want to add multiple bins, click on the "+" sign.
- Once done, click on the Adjust button.
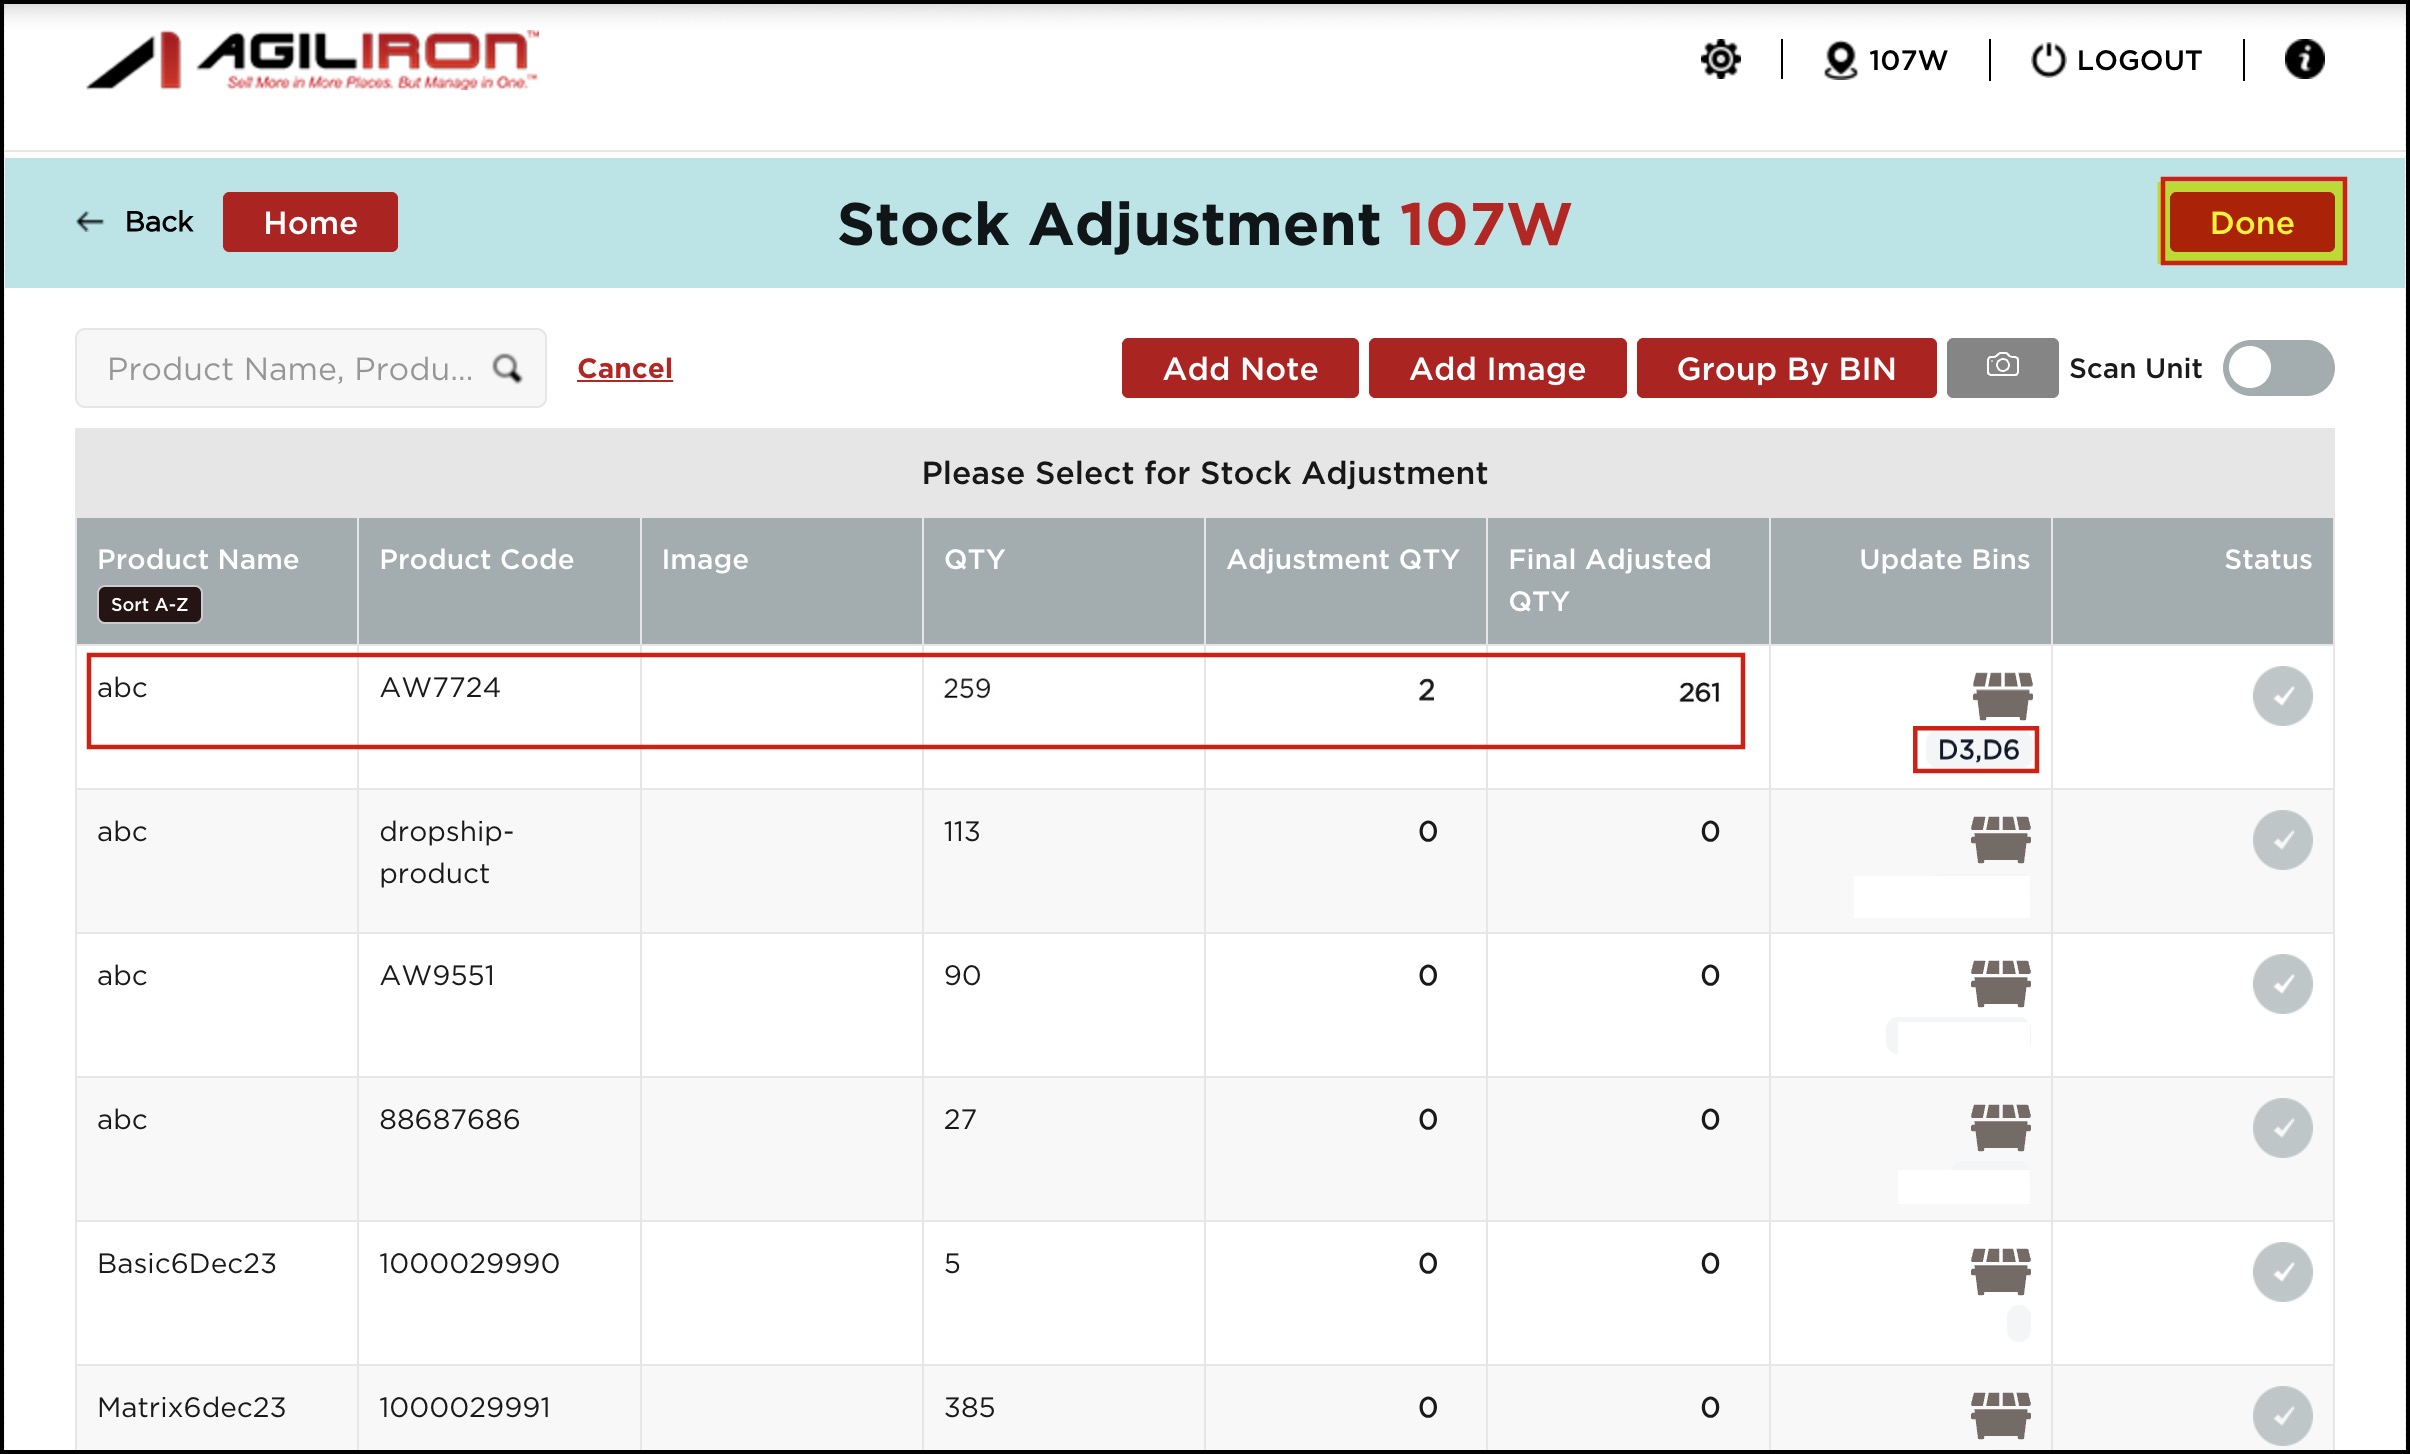
- You'll see the adjusted quantity with the bin names added. Click on Done.
Once you are done updating bins, click the Sync Inventory Updates to Back-Office button on the home page. This will reflect bin location updates in the back office.

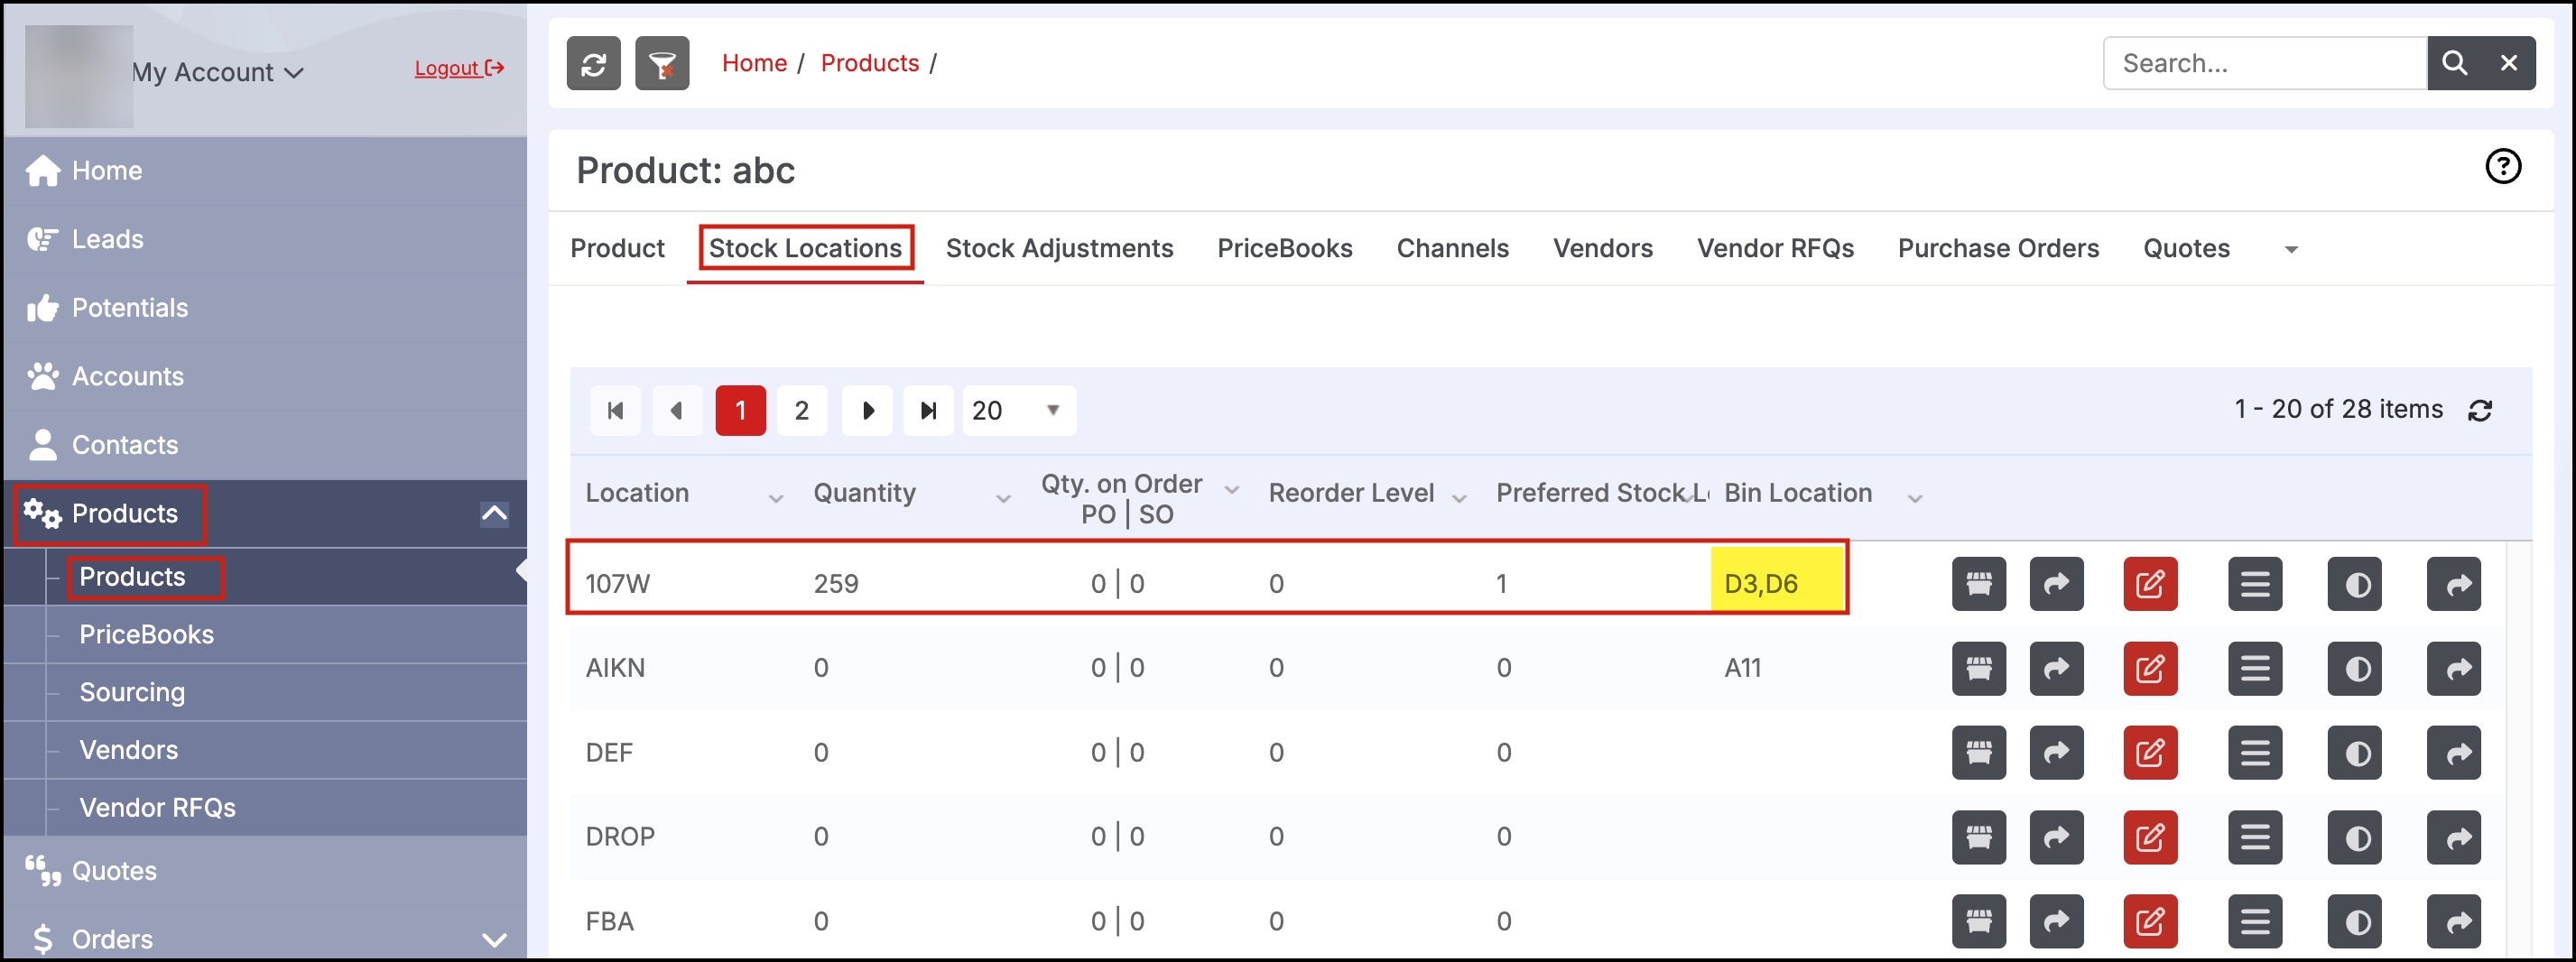
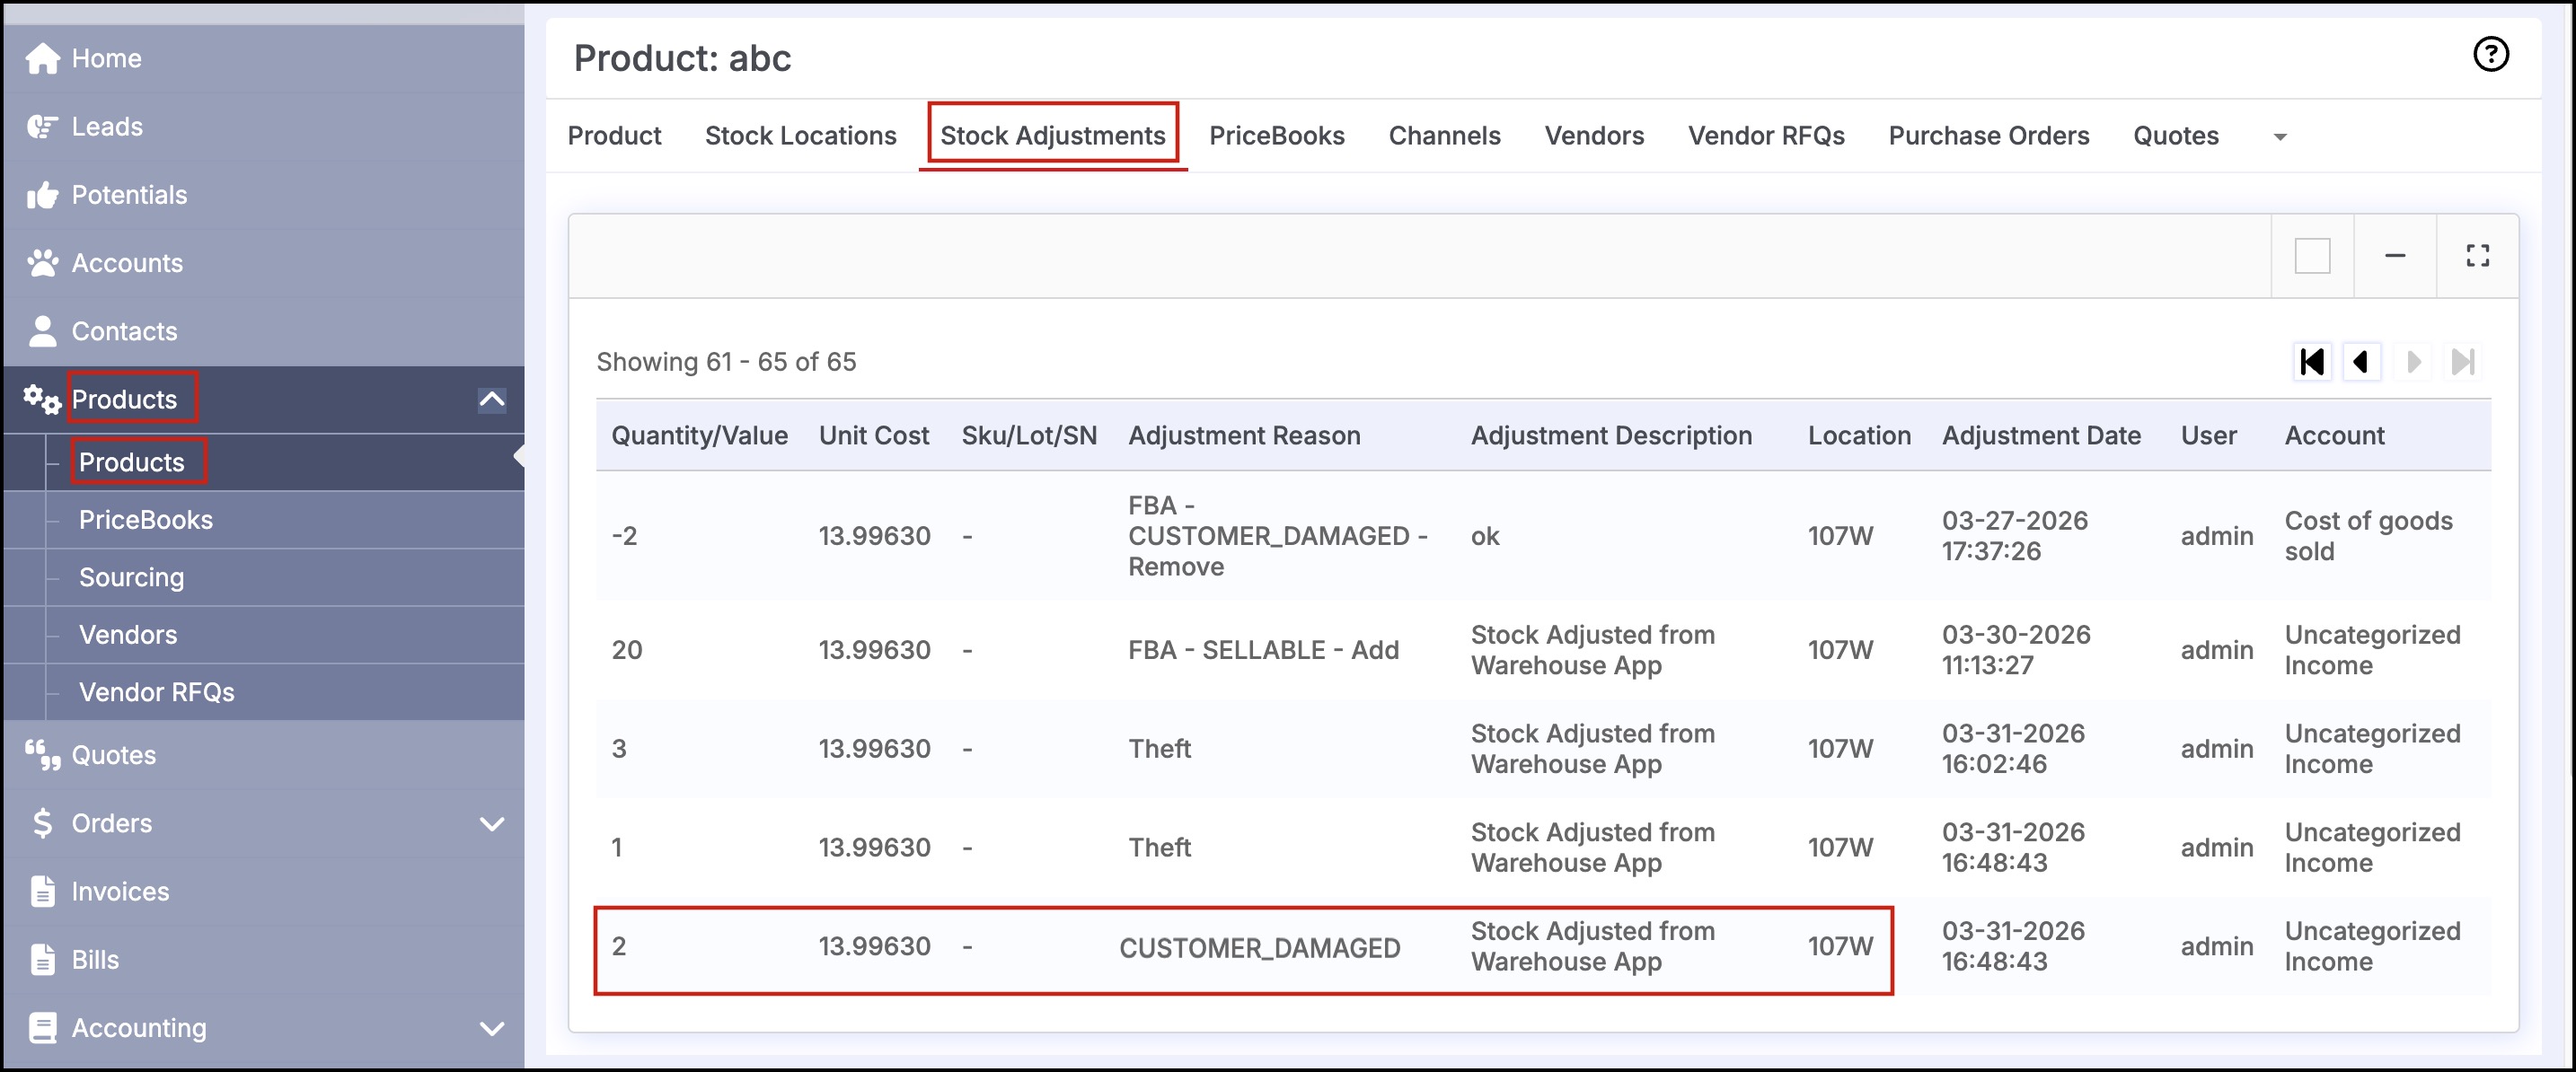
Now, in the back office, when you go to Products -> that particular product -> switch to the Stock Locations tab, you can see the newly added bin locations: D3 and D6.
Also, you can see the Stock Adjustments made.
New Enhancement for Updating Multiple Product Bin Locations - All at Once:
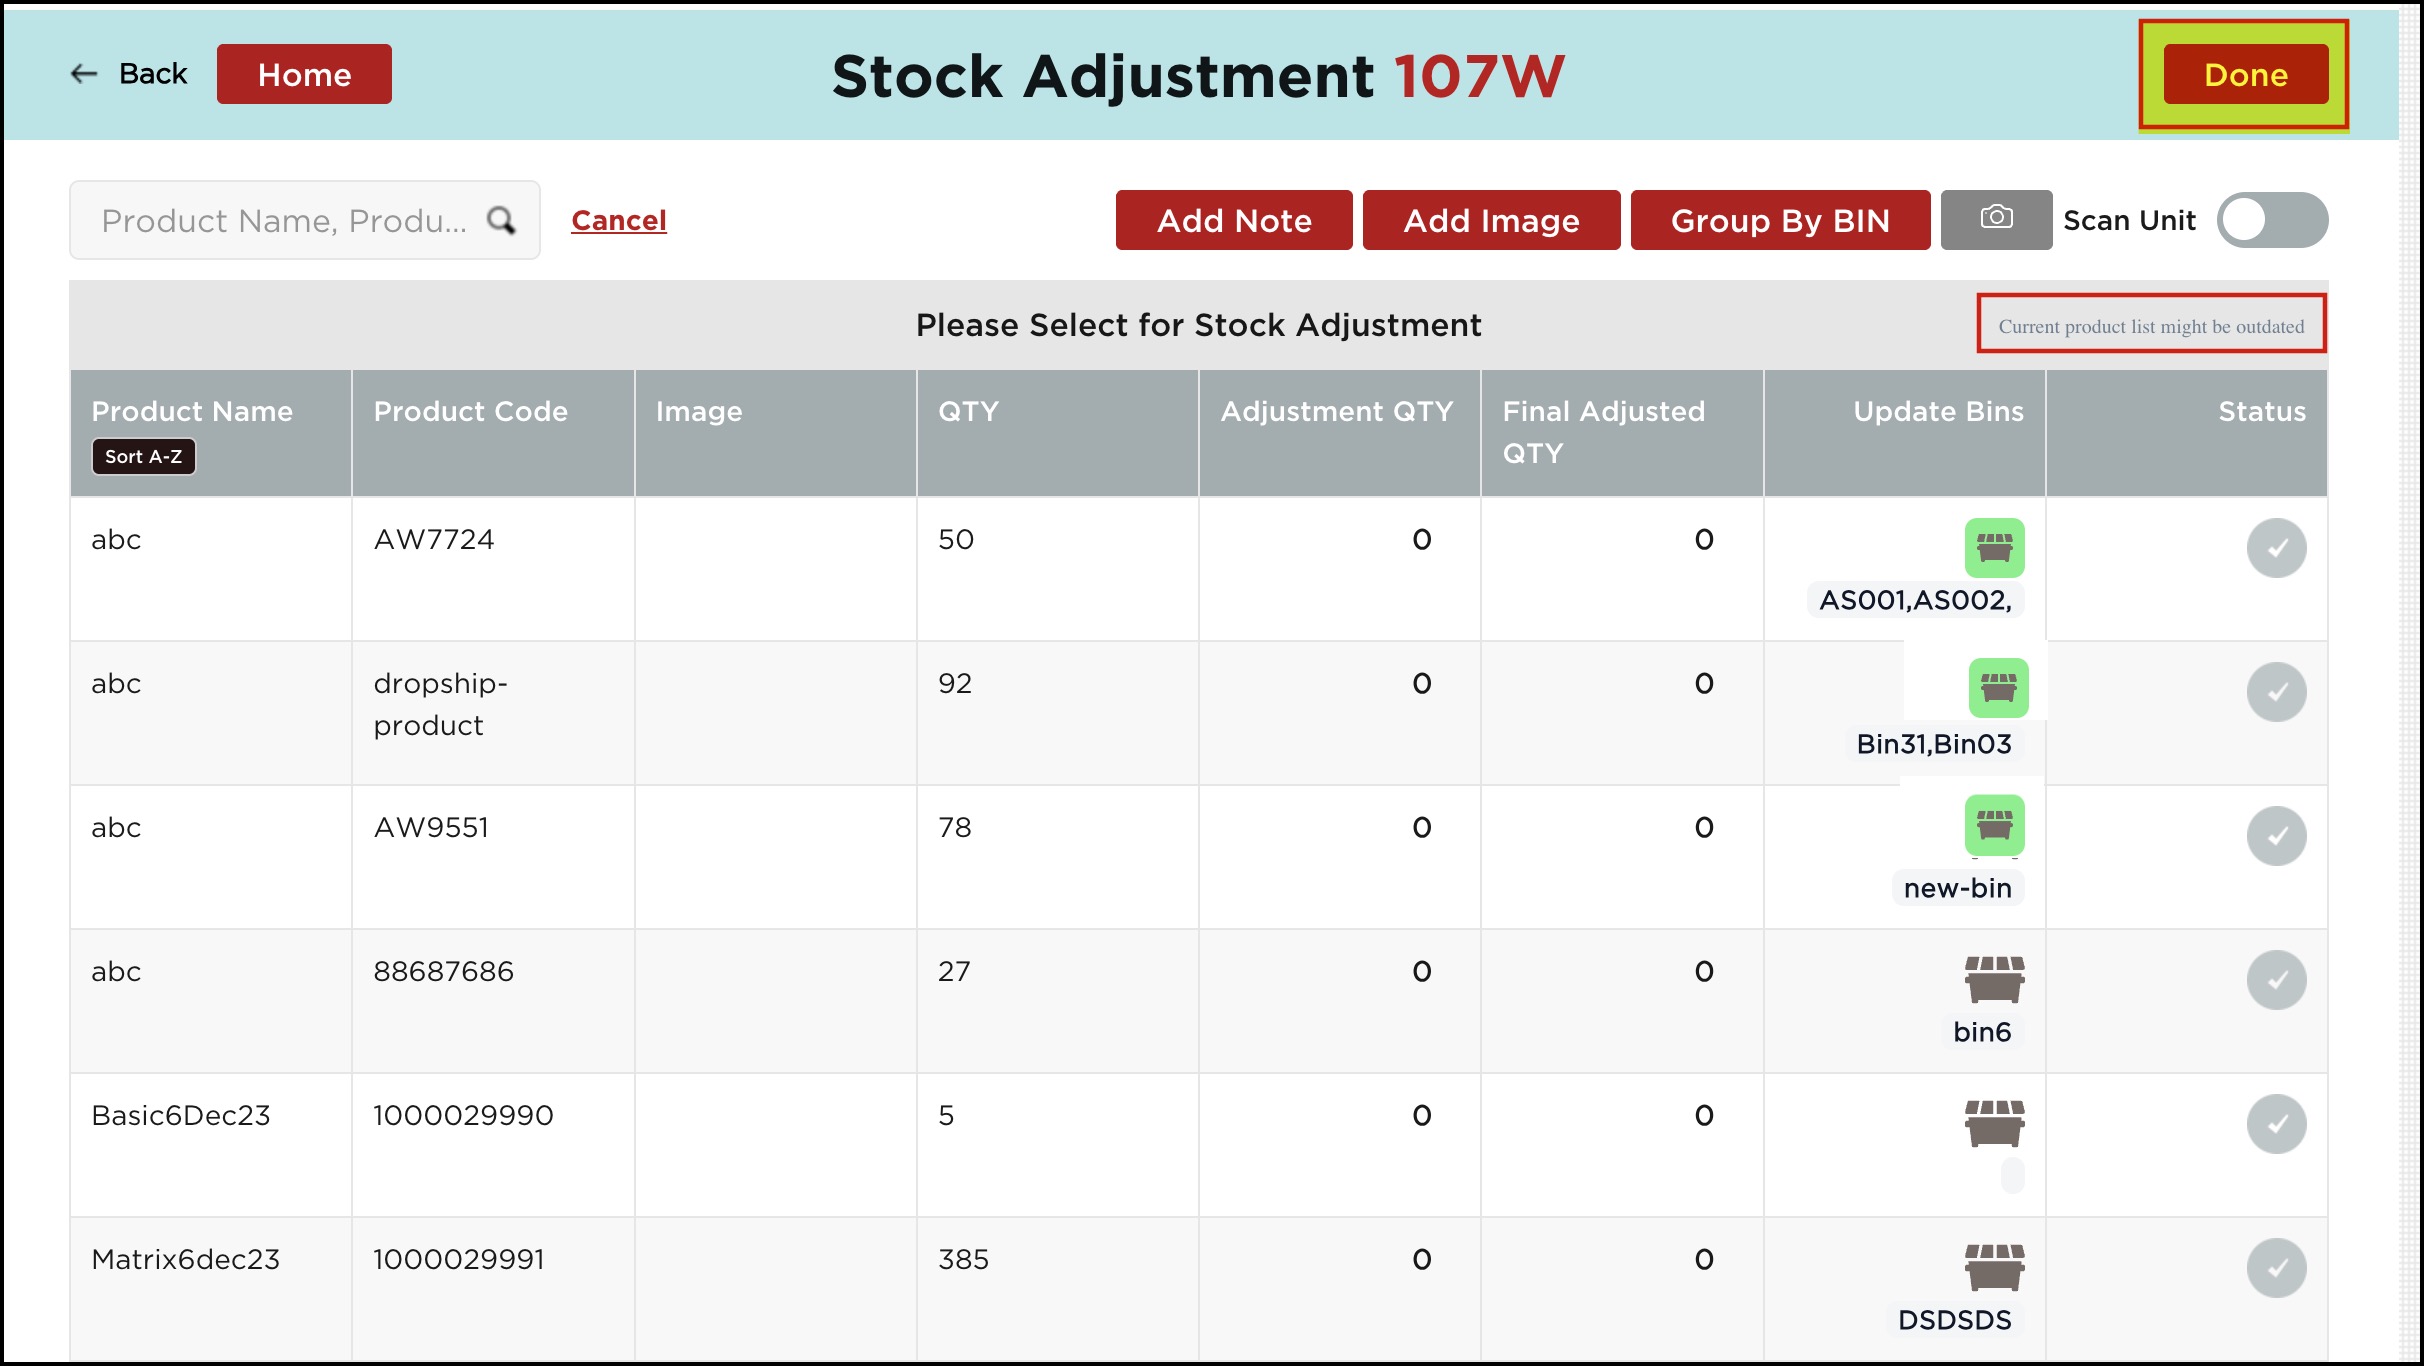
To make the process time-saving and trackable, a new enhancement has been made to the update bin feature. As per the latest upgrade, when a user updates bin locations for multiple products in the list in one session, the bin icon will turn green. This gives an idea about which products' bin locations are updated, and also allows users to apply all bin updates at once.
For example, let's add a bin location for a product.
You'll notice the Bin icon turns green.
Similarly, let's update bin locations for multiple products from the list in one go.
Here is another product that we have updated by changing the bin location name. (You can make any changes, like change bin location name, delete bin, add new bin etc.).
For whichever product you've updated the bin location, the bin icon turns green for it, and you will also notice a message in the top right corner of the screen -"Current product list might be outdated".
- Now you can update all at once. Click on Done.
This will take you to the homescreen, where you will see the following message. Click OK.

The process will start, and eventually, the bin locations for the products will be updated in one go.