Inventory Adjustments - Sync to QuickBooks Online
Finally, let's now walk-through the transfer of data from Agiliron to QuickBooks Online for Inventory Adjustments.
Inventory Adjustments are created in the Stock Locations tab of a selected product in the Products Module. More information about creating Inventory Adjustments can be found here.
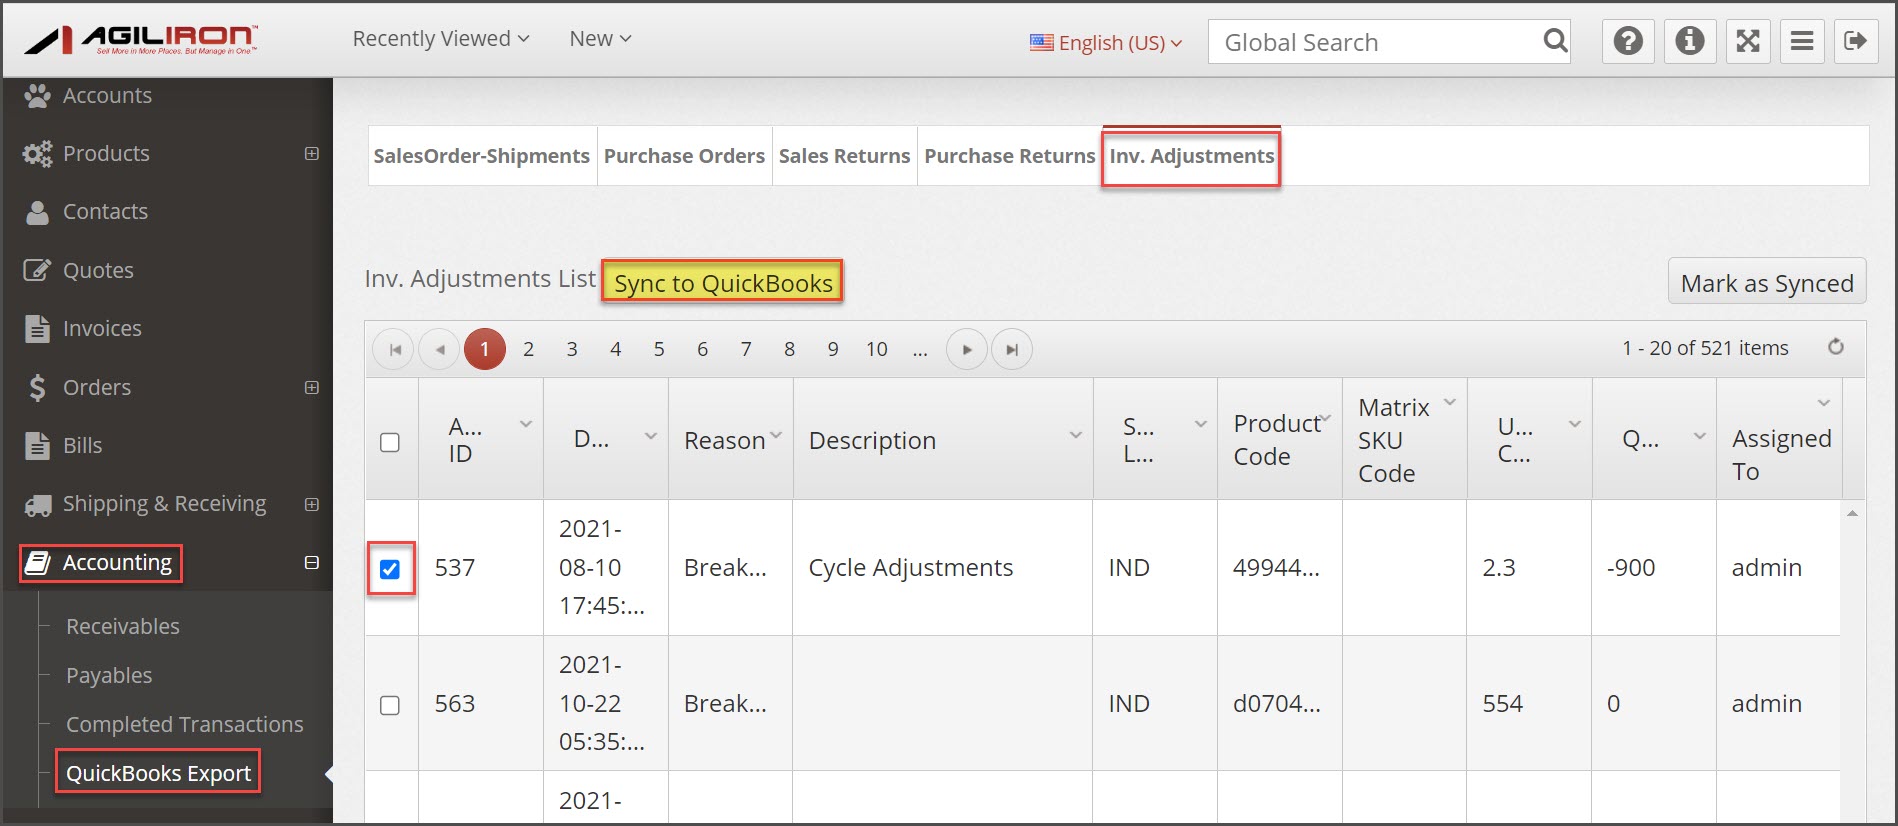
Navigate to "Accounting > QuickBooks Export". The "Advanced View" displays by default, in this tab we have control over the adjustments we sync to QuickBooks.
- The Legacy View tab can be selected and will sync the first 30 adjustments in the list to QuickBooks, no selection can be made in this view.
Select the "Inv. Adjustments" tab to begin.
- Select the "Adjustment ID's" from the list to be synced.
- Click the "Sync to QuickBooks" button.
Note: It is important to note here that you do not need to do this for every adjustment. As the adjustments are created, the system will recognize and keep accumulating them till you initiate the sync.
- Select the "OK" button on the pop-up box that displays.
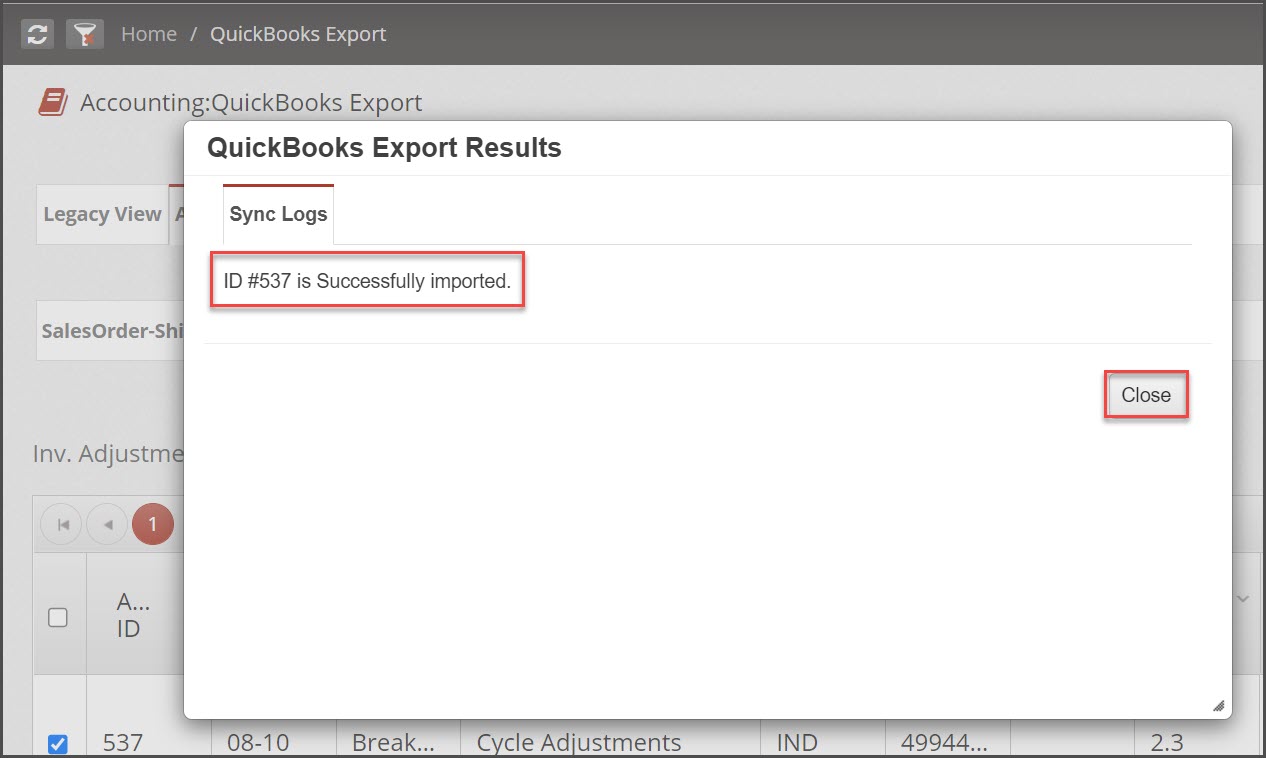
- A status window will appear with results of the export. If no errors are found, the message will display successful results as shown in the image below.
Let's shift now to QuickBooks Online.
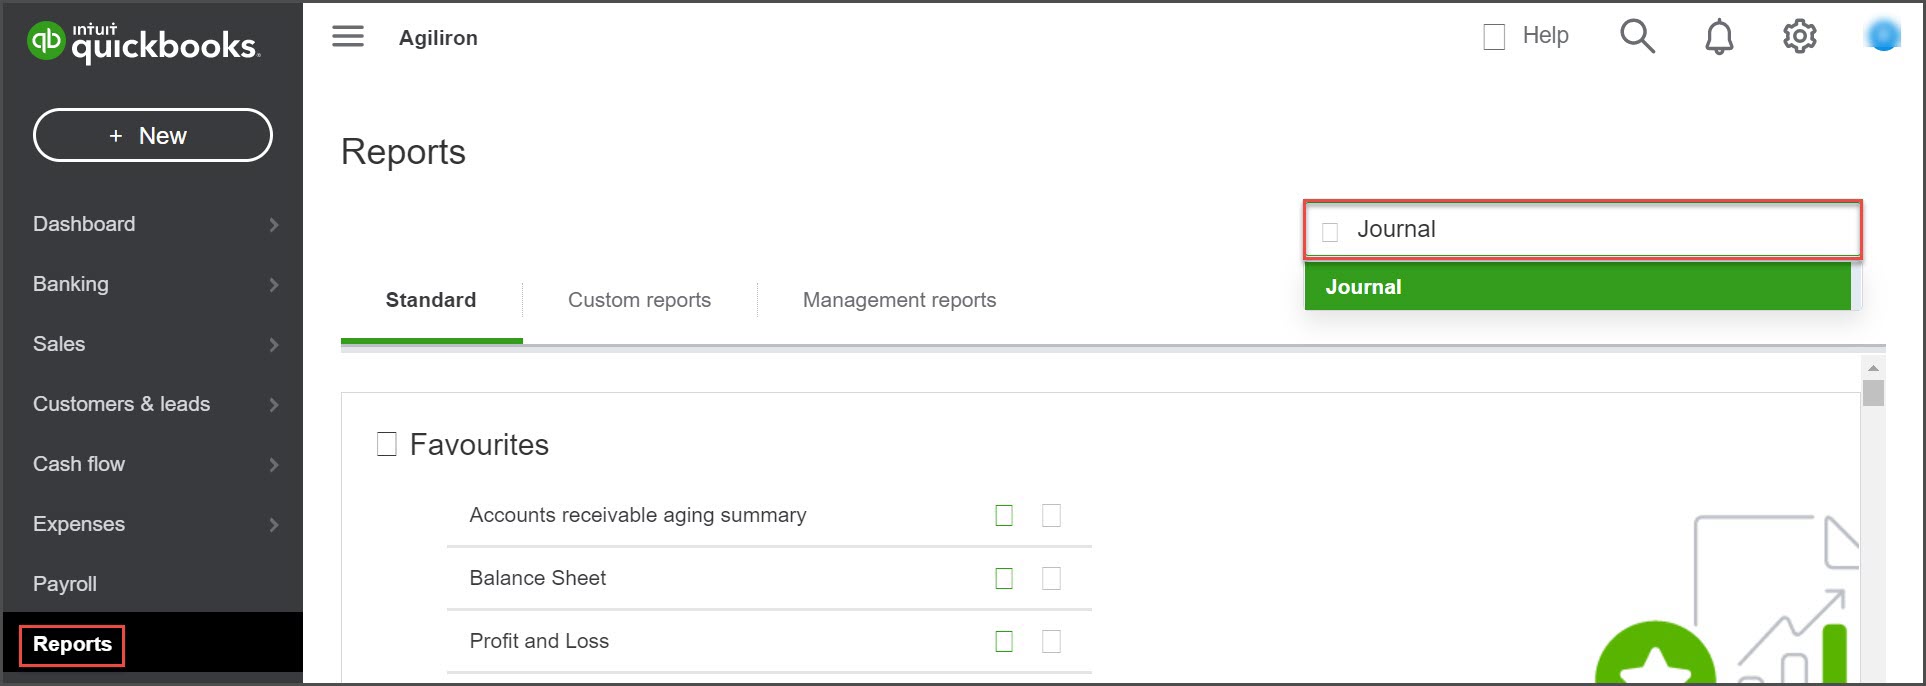
- Navigate to the "Reports".
- Search for Journal
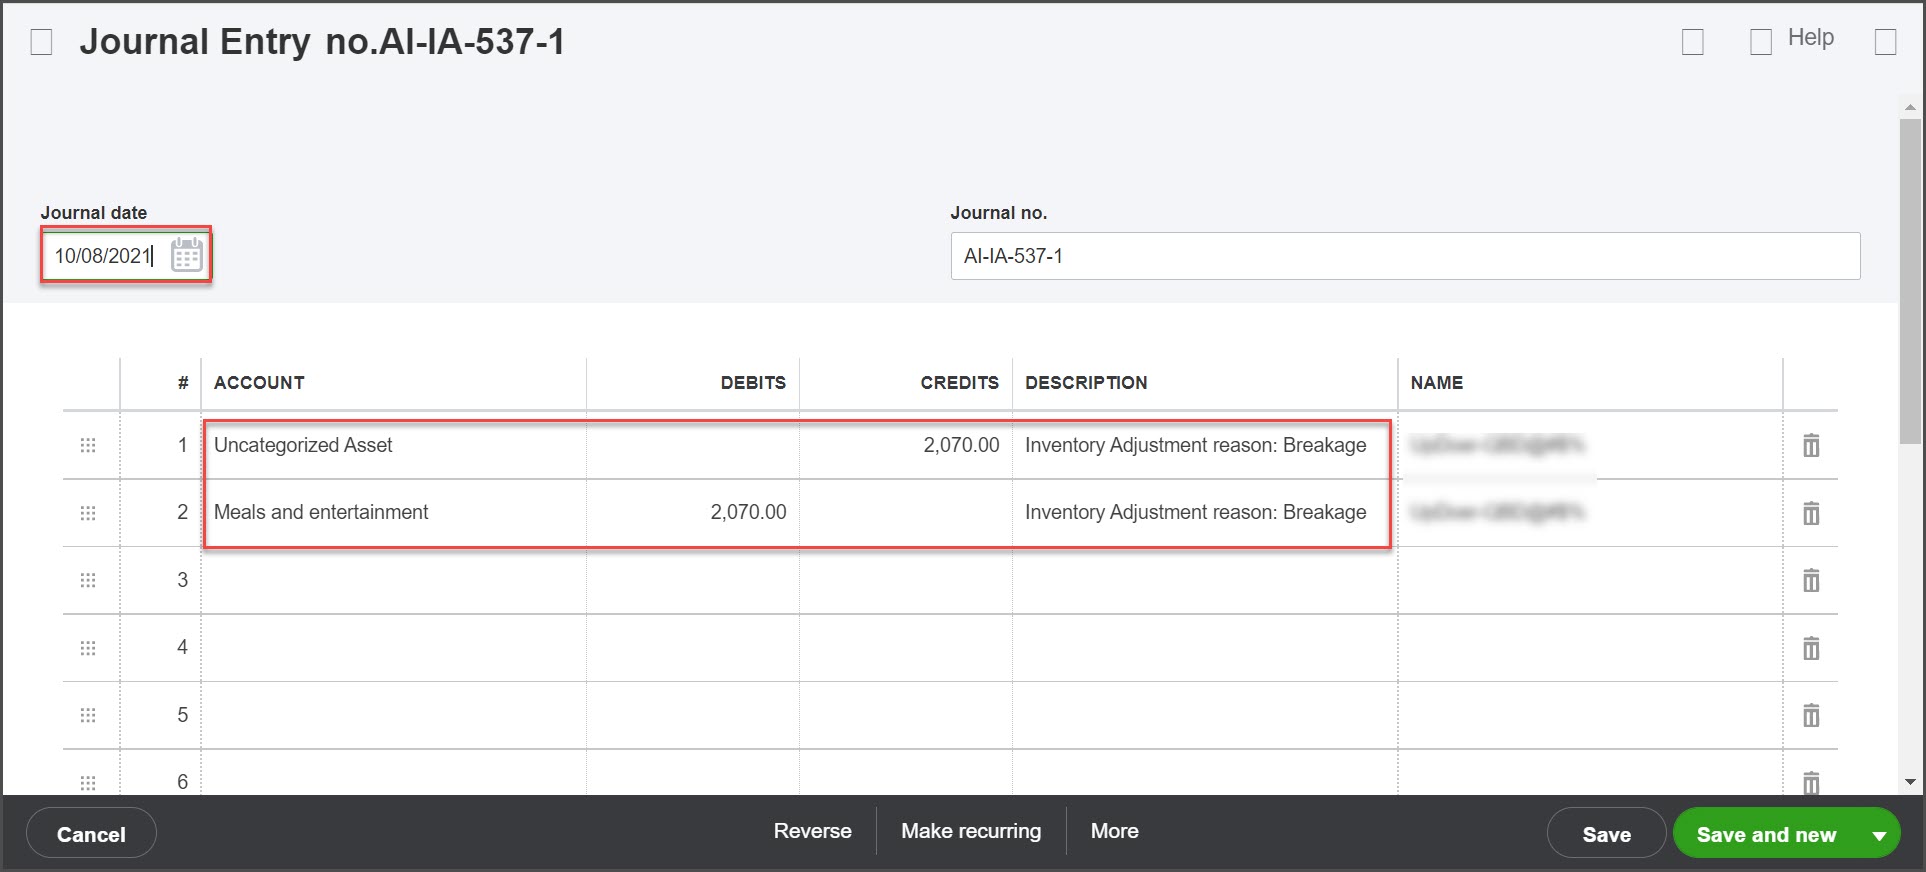
- When an Inventory Adjustment is synced to QuickBooks, a journal entry is created as shown below.
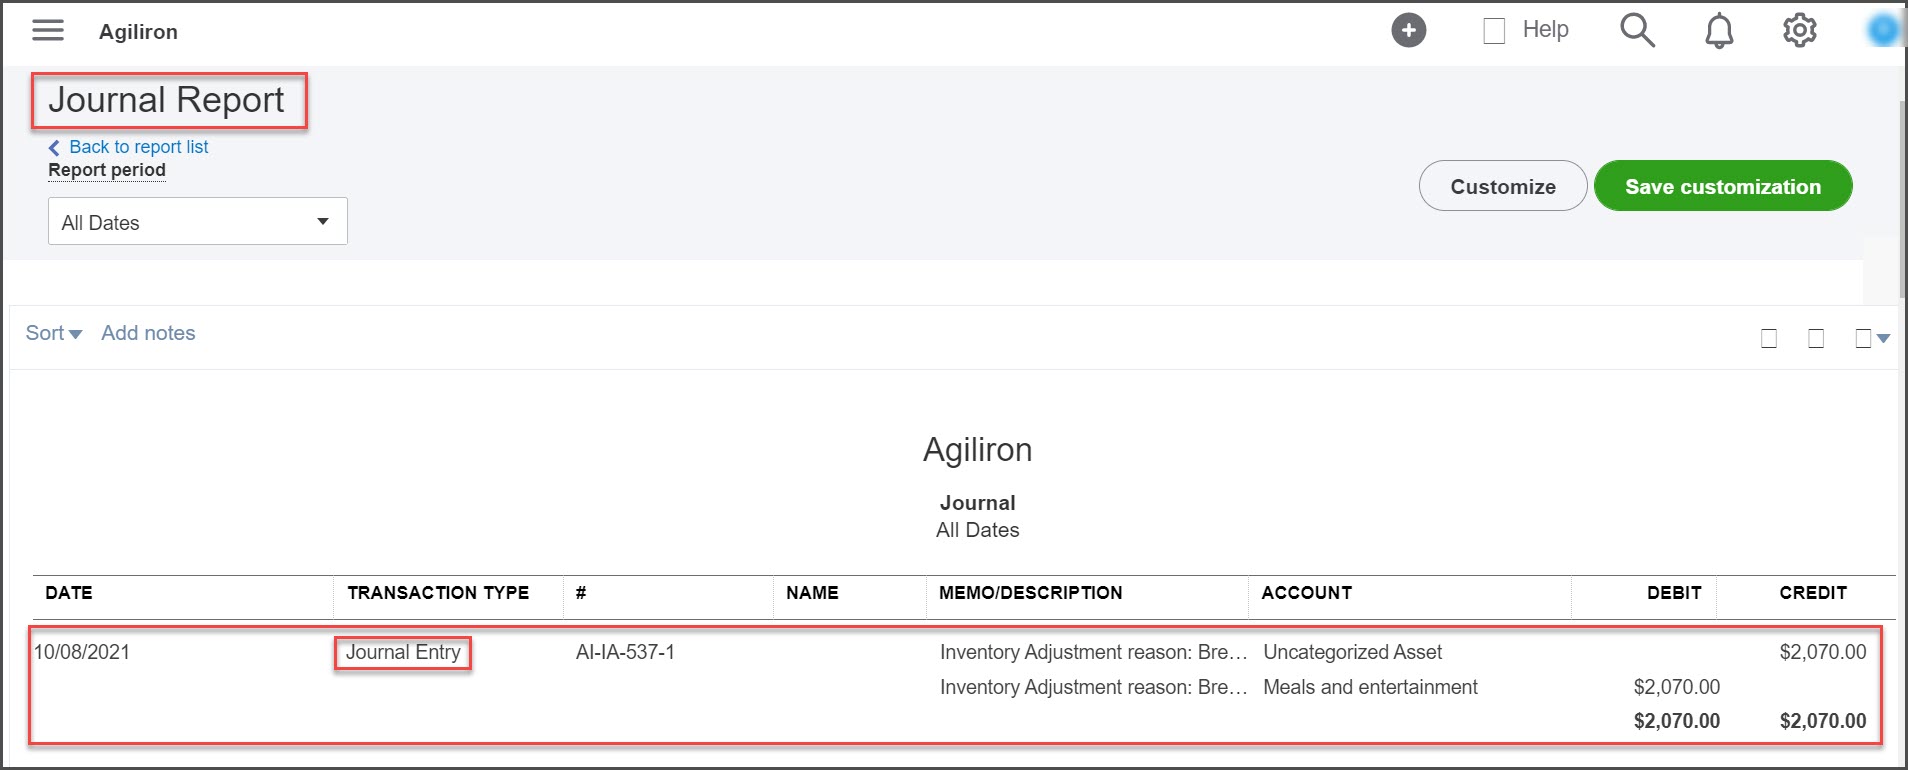
- Select the Journal Entry to display the posting details.
- The journal entry credits the Inventory Asset account for the value of the inventory selected when creating the adjustment, and debits the account we mapped in the Agiliron Settings (Inventory Adjustments).
Updated 5 months ago
